YAMAHA NMAX 2015 Owner's Guide
Manufacturer: YAMAHA, Model Year: 2015, Model line: NMAX, Model: YAMAHA NMAX 2015Pages: 90, PDF Size: 3.56 MB
Page 31 of 90
Instrument and control functions
3-15
3
NOTICE
ECA10702
Use only unlea ded g asoline. The use
of lead ed g asoline will cause unre-
paira ble damag e to the catalytic
converter.
EAU60620
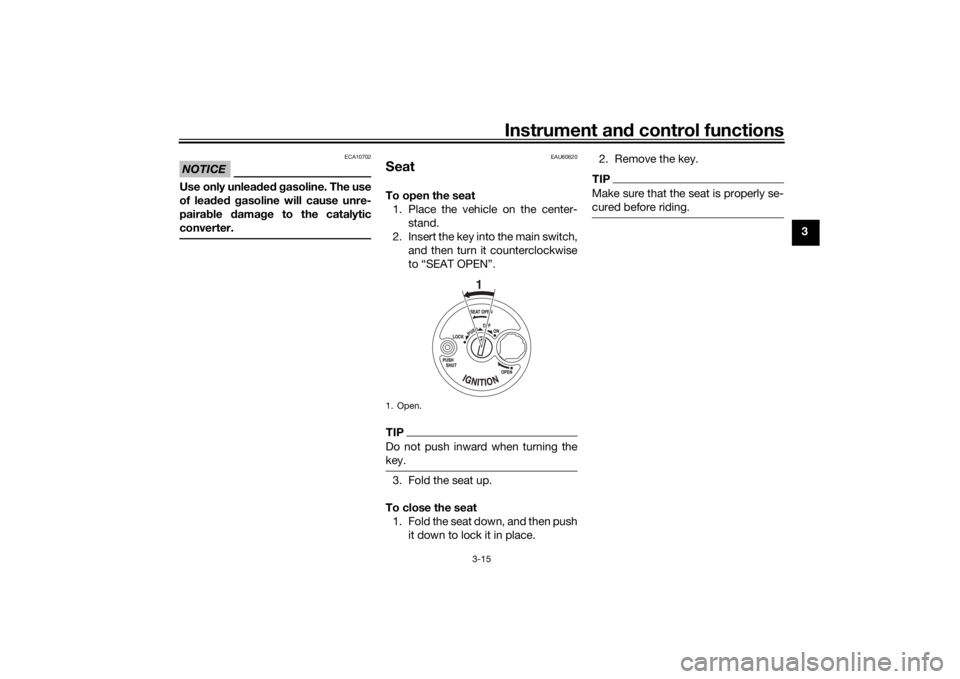
SeatTo open the seat 1. Place the vehicle on the center- stand.
2. Insert the key into the main switch, and then turn it counterclockwise
to “SEAT OPEN”.TIPDo not push inward when turning the
key.3. Fold the seat up.
To close the seat 1. Fold the seat down, and then push it down to lock it in place. 2. Remove the key.
TIPMake sure that the seat is properly se-
cured before riding.
1. Open.
1
U2DSE0E0.book Page 15 Thursday, March 19, 2015 10:34 AM
Page 32 of 90
Instrument and control functions
3-16
3
EAU57081
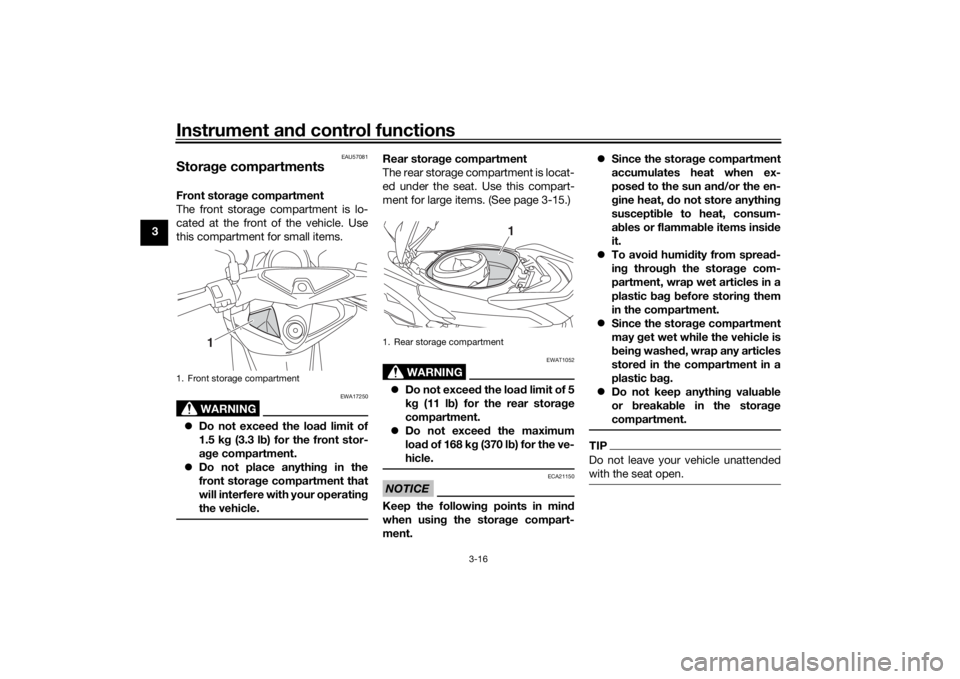
Stora ge compartmentsFront stora ge compartment
The front storage compartment is lo-
cated at the front of the vehicle. Use
this compartment for small items.
WARNING
EWA17250
Do not exceed the load limit of
1.5 k g (3.3 l b) for the front stor-
a g e compartment.
Do not place anythin g in the
front stora ge compartment that
will interfere with your operatin g
the vehicle.
Rear stora ge compartment
The rear storage compartment is locat-
ed under the seat. Use this compart-
ment for large items. (See page 3-15.)
WARNING
EWAT1052
Do not exceed the load limit of 5
k g (11 l b) for the rear stora ge
compartment.
Do not exceed the maximum
loa d of 168 k g (370 l b) for the ve-
hicle.NOTICE
ECA21150
Keep the following points in mind
when usin g the stora ge compart-
ment.
Since the storag e compartment
accumulates heat when ex-
posed to the sun an d/or the en-
g ine heat, do not store anythin g
suscepti ble to heat, consum-
a b les or flamma ble items insi de
it.
To avoi d humi dity from sprea d-
in g throu gh the stora ge com-
partment, wrap wet articles in a
plastic bag b efore storin g them
in the compartment.
Since the storag e compartment
may get wet while the vehicle is
b ein g washe d, wrap any articles
store d in the compartment in a
plastic bag .
Do not keep anythin g valua ble
or breakab le in the stora ge
compartment.
TIPDo not leave your vehicle unattended
with the seat open.
1. Front storage compartment
1
1. Rear storage compartment
1
U2DSE0E0.book Page 16 Thursday, March 19, 2015 10:34 AM
Page 33 of 90

Instrument and control functions
3-17
3
EAU15306
Si destan dThe sidestand is located on the left
side of the frame. Raise the sidestand
or lower it with your foot while holding
the vehicle upright.TIPThe built-in sidestand switch is part of
the ignition circuit cut-off system,
which cuts the ignition in certain situa-
tions. (See the following section for an
explanation of the ignition circuit cut-
off system.)
WARNING
EWA10242
The vehicle must not b e ridden with
the si destan d d own, or if the si de-
stan d cannot b e properly move d up
(or does not stay up), otherwise the
si destan d coul d contact the groun d
an d d istract the operator, resultin g
in a possi ble loss of control.
Yamaha’s i gnition circuit cut-off
system has been desi gne d to assist
the operator in fulfilling the respon-
si bility of raisin g the si destan d b e-
fore startin g off. Therefore, check this system re
gularly an d have a
Yamaha dealer repair it if it does not
function properly.
EAUT1096
I g nition circuit cut-off systemCheck the operation of the sidestand
switch according to the following pro-
cedure.
U2DSE0E0.book Page 17 Thursday, March 19, 2015 10:34 AM
Page 34 of 90

Instrument and control functions
3-18
3
Turn the key on.
Put the sidestand up.Push the start switch while applying
either of the brake levers. The engine will
start.Put the sidestand down.
If the engine stalls:
The sidestand switch is OK.
• The vehicle must be placed on the center-
stand during this inspection.• If a malfunction is noted, have a Yamaha
dealer check the system before riding.
WARNING
U2DSE0E0.book Page 18 Thursday, March 19, 2015 10:34 AM
Page 35 of 90
For your safety – pre-operation checks
4-1
4
EAU15599
Inspect your vehicle each time you use it to make sure the vehicle is in safe operating condition. Always follow the inspection
and maintenance procedures and schedules described in the Owner’s Manual.
WARNING
EWA11152
Failure to inspect or maintain the vehicle properly increases the possibility of an acci dent or equipment damag e.
Do not operate the vehicle if you fin d any pro blem. If a pro blem cannot be corrected b y the proce dures provi ded in
this manual, have the vehicle inspecte d b y a Yamaha dealer.Before using this vehicle, check the following points:
ITEM CHECKS PAGE
Fuel • Check fuel level in fuel tank.
• Refuel if necessary.
• Check fuel line for leakage.
• Check fuel tank overflow hose for obstructions, cracks or damage, and check
hose connection. 3-13, 3-14
En gine oil • Check oil level in engine.
• If necessary, add recommended oil to specified level.
• Check vehicle for oil leakage. 6-10
Final transmission oil • Check vehicle for oil leakage. 6-12
Coolant • Check coolant level in reservoir.
• If necessary, add recommended coolant to specified level.
• Check cooling system for leakage. 6-13
Front brake • Check operation.
• If soft or spongy, have Yamaha dealer bleed hydraulic system.
• Check brake pads for wear.
• Replace if necessary.
• Check fluid level in reservoir.
• If necessary, add specified brake fluid to specified level.
• Check hydraulic system for leakage. 6-21, 6-22, 6-22
U2DSE0E0.book Page 1 Thursday, March 19, 2015 10:34 AM
Page 36 of 90

For your safety – pre-operation checks
4-2
4
Rear brake • Check operation.
• If soft or spongy, have Yamaha dealer bleed hydraulic system.
• Check brake pads for wear.
• Replace if necessary.
• Check fluid level in reservoir.
• If necessary, add specified brake fluid to specified level.
• Check hydraulic system for leakage. 6-21, 6-22, 6-22
Throttle g rip • Make sure that operation is smooth.
• Check throttle grip free play.
• If necessary, have Yamaha dealer adjust throttle grip free play and lubricate ca-
ble and grip housing. 6-18, 6-25
Control ca bles • Make sure that operation is smooth.
• Lubricate if necessary. 6-24
Wheels an d tires •Check for damage.
• Check tire condition and tread depth.
• Check air pressure.
• Correct if necessary. 6-19, 6-21
Brake levers • Make sure that operation is smooth.
• Lubricate lever pivoting points if necessary.
6-25
Centerstan d, si destan d • Make sure that operation is smooth.
• Lubricate pivots if necessary.
6-26
Chassis fasteners • Make sure that all nuts, bolts and screws are properly tightened.
• Tighten if necessary. —
Instruments, li ghts, si gnals
an d switches • Check operation.
• Correct if necessary.
—
Si destan d switch • Check operation of ignition circuit cut-off system.
• If system is not working correctly, have Yamaha dealer check vehicle.
3-17
ITEM
CHECKS PAGE
U2DSE0E0.book Page 2 Thursday, March 19, 2015 10:34 AM
Page 37 of 90
Operation and important ri din g points
5-1
5
EAU15952
Read the Owner’s Manual carefully to
become familiar with all controls. If
there is a control or function you do not
understand, ask your Yamaha dealer.
WARNING
EWA10272
Failure to familiarize yourself with
the controls can lead to loss of con-
trol, which coul d cause an acci dent
or injury.
EAU66720
Startin g the en gineNOTICE
ECA10251
See pag e 5-3 for en gine break-in in-
structions prior to operatin g the ve-
hicle for the first time.In order for the ignition circuit cut-off
system to enable starting, the side-
stand must be up.
See page 3-17 for more information. 1. Turn the key to “ON”. The following warning lights
should come on for a few sec-
onds, then go off. Engine trouble warning light
Coolant temperature warning
lightNOTICE
ECA15485
If a warnin g lig ht does not come on
initially when the key is turne d to
“ON”, or if a warnin g lig ht remains
on, see pa ge 3-2 for the correspon d-
in g warnin g lig ht circuit check.
The ABS warning light should
come on when the main switch is
turned to “ON” and then go off af-
ter traveling at a speed of 10 km/h
(6 mi/h) or higher.
NOTICE
ECA17682
If the ABS warnin g li ght does not
come on an d then g o off as ex-
plained above, see pag e 3-2 for the
warnin g li ght circuit check.2. Close the throttle completely.
3. Start the engine by pushing the
start switch while applying the
front or rear brake.
If the engine does not start, re-
lease the start switch, wait a few
seconds, and then try again. Each
starting attempt should be as
short as possible to preserve the
battery. Do not crank the engine
more than 10 seconds on any one
attempt.NOTICE
ECA11043
For maximum en gine life, never ac-
celerate har d when the en gine is
col d!
U2DSE0E0.book Page 1 Thursday, March 19, 2015 10:34 AM
Page 38 of 90
Operation and important rid ing points
5-2
5
EAU45093
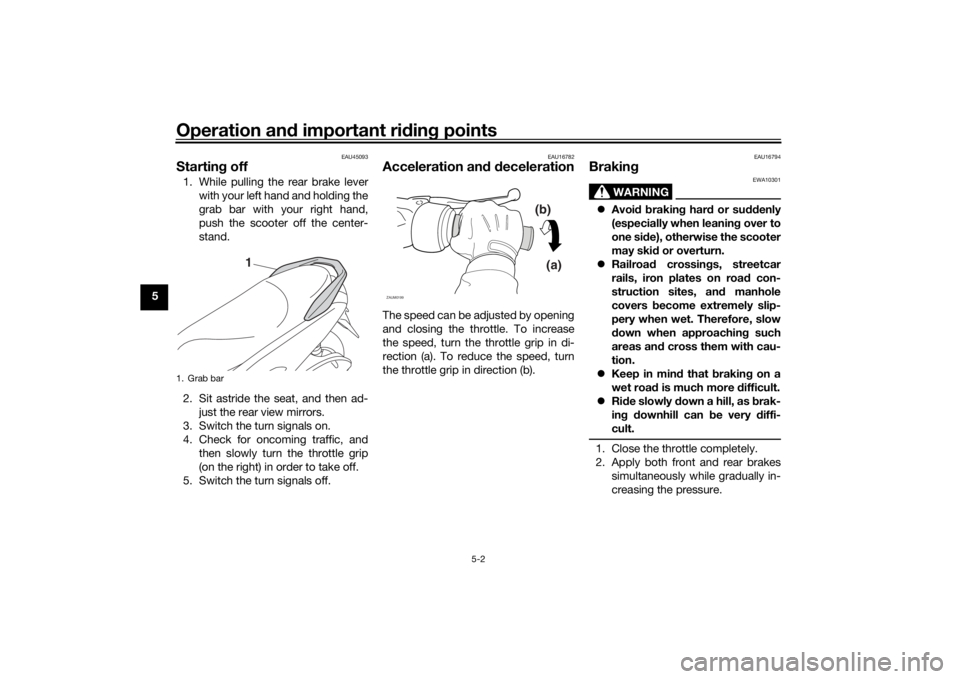
Startin g off1. While pulling the rear brake lever
with your left hand and holding the
grab bar with your right hand,
push the scooter off the center-
stand.
2. Sit astride the seat, and then ad- just the rear view mirrors.
3. Switch the turn signals on.
4. Check for oncoming traffic, and then slowly turn the throttle grip
(on the right) in order to take off.
5. Switch the turn signals off.
EAU16782
Acceleration an d d ecelerationThe speed can be adjusted by opening
and closing the throttle. To increase
the speed, turn the throttle grip in di-
rection (a). To reduce the speed, turn
the throttle grip in direction (b).
EAU16794
Brakin g
WARNING
EWA10301
Avoi d b rakin g har d or su ddenly
(especially when leanin g over to
one si de), otherwise the scooter
may skid or overturn.
Railroa d crossin gs, streetcar
rails, iron plates on roa d con-
struction sites, an d manhole
covers become extremely slip-
pery when wet. Therefore, slow
d own when approachin g such
areas an d cross them with cau-
tion.
Keep in min d that b raking on a
wet road is much more difficult.
Ride slowly d own a hill, as brak-
in g d ownhill can be very d iffi-
cult.1. Close the throttle completely.
2. Apply both front and rear brakes simultaneously while gradually in-
creasing the pressure.
1. Grab bar
1
(b)
(a)
ZAUM0199
U2DSE0E0.book Page 2 Thursday, March 19, 2015 10:34 AM
Page 39 of 90

Operation and important ri din g points
5-3
5
EAU16821
Tips for re ducin g fuel con-
sumptionFuel consumption depends largely on
your riding style. Consider the follow-
ing tips to reduce fuel consumption:
Avoid high engine speeds during
acceleration.
Avoid high engine speeds with no
load on the engine.
Turn the engine off instead of let-
ting it idle for an extended length
of time (e.g., in traffic jams, at traf-
fic lights or at railroad crossings).
EAU16842
Engine break-inThere is never a more important period
in the life of your engine than the period
between 0 and 1600 km (1000 mi). For
this reason, you should read the fol-
lowing material carefully.
Since the engine is brand new, do not
put an excessive load on it for the first
1600 km (1000 mi). The various parts in
the engine wear and polish themselves
to the correct operating clearances.
During this period, prolonged full-throt-
tle operation or any condition that
might result in engine overheating
must be avoided.
EAUM2012
0–1000 km (0–600 mi)
Avoid prolonged operation above 1/3
throttle. NOTICE: After 1000 km (600
mi) of operation, be sure to replace
the en gine oil an d final transmission
oil.
[ECA11662]
1000–1600 km (600–1000 mi)
Avoid prolonged operation above 1/2
throttle. 1600 km (1000 mi) an
d b eyon d
The vehicle can now be operated nor-
mally.
NOTICE
ECA10271
If any en gine trou ble shoul d occur
d urin g the en gine break-in perio d,
imme diately have a Yamaha dealer
check the vehicle.
U2DSE0E0.book Page 3 Thursday, March 19, 2015 10:34 AM
Page 40 of 90

Operation and important rid ing points
5-4
5
EAU17214
Parkin gWhen parking, stop the engine, and
then remove the key from the main
switch.
WARNING
EWA10312
Since the en gine an d exhaust
system can become very hot,
park in a place where pe destri-
ans or chil dren are not likely to
touch them and b e burne d.
Do not park on a slope or on soft
groun d, otherwise the vehicle
may overturn, increasin g the
risk of a fuel leak an d fire.
Do not park near g rass or other
flammab le materials which
mi ght catch fire.
U2DSE0E0.book Page 4 Thursday, March 19, 2015 10:34 AM