warning light YAMAHA TMAX 2021 Owners Manual
[x] Cancel search | Manufacturer: YAMAHA, Model Year: 2021, Model line: TMAX, Model: YAMAHA TMAX 2021Pages: 124, PDF Size: 7.93 MB
Page 8 of 124

Table of contentsSafety information ............................ 1-1
Further safe-riding points ............... 1-5
Description ....................................... 2-1
Left view ......................................... 2-1
Right view ....................................... 2-2
Controls and instruments ............... 2-3
Smart key system ........................... 3-1
Smart key system ........................... 3-1
Operating range of the smart key system......................................... 3-2
Handling of the smart key and mechanical key ........................... 3-3
Smart key ....................................... 3-5
Replacing the smart key battery..... 3-6
Powering on the vehicle ................. 3-7
Powering off the vehicle ................. 3-8
How to lock the steering ................ 3-9
How to lock the centerstand ........ 3-10
Storage compartment and fuel tank access ............................... 3-11
Parking mode ............................... 3-13
Special features ............................... 4-1
Cruise control system..................... 4-1
D-mode (drive mode)...................... 4-3
Traction control system .................. 4-4
Instrument an d control functions ... 5-1
Handlebar switches ........................ 5-1 Indicator lights and warning
lights ............................................ 5-2
Speedometer .................................. 5-4
Tachometer ..................................... 5-5
Multi-function display...................... 5-5
Front brake lever ........................... 5-17
Rear brake lever ............................ 5-18
Rear brake lock lever .................... 5-18
Anti-lock brake system (ABS) ....... 5-19
Fuel tank cap ................................ 5-20
Fuel ............................................... 5-20
Fuel tank overflow hose ................ 5-22
Catalytic converter ........................ 5-22
Storage compartments ................. 5-23
Rear view mirrors .......................... 5-24
Shock absorber assembly ............ 5-25
Auxiliary DC jack ........................... 5-26
Sidestand ...................................... 5-27
Ignition circuit cut-off system ....... 5-28
For your safety – pre-operation
checks ............................................... 6-1
Operation an d important ri din g
points ................................................. 7-1
Engine break-in ............................... 7-1
Starting the engine .......................... 7-2
Starting off ...................................... 7-3
Acceleration and deceleration ........ 7-3
Braking ............................................ 7-3 Tips for reducing fuel
consumption ............................... 7-4
Parking............................................ 7-4
Perio dic maintenance an d
a d justment ........................................ 8-1
Tool kit ............................................ 8-2
Periodic maintenance charts .......... 8-3
Periodic maintenance chart for the emission control system ............. 8-3
General maintenance and
lubrication chart .......................... 8-5
Removing and installing panels ...... 8-9
Checking the spark plugs ............. 8-11
Canister ........................................ 8-12
Engine oil and oil filter cartridge ... 8-12
Why Yamalube.............................. 8-15
Coolant ......................................... 8-15
Replacing the engine air filter element and cleaning the
check hose ................................ 8-17
V-belt air filter elements ................ 8-18
Checking the engine idling speed ........................................ 8-18
Checking the throttle grip free play ............................................ 8-19
Valve clearance............................. 8-19
Tires .............................................. 8-19
Cast wheels .................................. 8-21
Checking the front and rear brake lever free play .................. 8-22UB3TE1E0.book Page 1 Friday, September 11, 2020 8:48 AM
Page 19 of 124

Smart key system
3-1
3
EAU77202
Smart key systemThe smart key system enables the ve-
hicle to be operated without using a
mechanical key.
WARNING
EWA14704
Keep implante d pacemakers or
car diac defi brillators, as well as
other electric med ical devices
away from the vehicle mounte d
antenna (see illustration).
Radio waves transmitte d b y the
antenna may affect the opera-
tion of such devices when close
b y.
If you have an electric me dical
d evice, consult a d octor or the
d evice manufacturer before us-
in g this vehicle.
In addition to the vehicle mounted an-
tenna, the smart key system consists
of the smart key, smart key system in-
dicator light, “ON/ ” switch, and the
“OFF/LOCK” and “ / ” switches.1. Vehicle mounted antenna
1. Smart key
1
1
1. Smart key system indicator light Ž
1. Ž switch
1 1
1
UB3TE1E0.book Page 1 Friday, September 11, 2020 8:48 AM
Page 24 of 124

Smart key system
3-6
3
EAU79071
Replacing the smart key bat-
teryReplace the battery in the following sit-
uations.
The smart key system indicator
light flashes for about 20 seconds
when the power of the vehicle is
turned on.
When the smart key indicator light
does not come on when the
“ON/OFF” switch is pushed.
WARNING
EWA20630
The smart key contains a button cell
b attery.
Keep new an d use d b atteries
away from chil dren.
If the b attery compartment does
not close securely, stop usin g
the smart key an d keep it away
from chil dren.
Explosion Hazar d - d o not mishan-
d le the battery.
Dan ger of explosion if battery is
incorrectly replace d.
Replace only with the same or
equivalent type.
Do not expose smart key to ex-
cessive heat, such as sunshine
or fire.
Chemical Burn Hazar d - do not in-
g est the battery.
If the battery is swallowed , it
can cause severe internal burns
in just 2 hours an d can lea d to
d eath.
If you think batteries mi ght have
b een swallowed or placed in-
si de any part of the body, seek
imme diate me dical attention.
NOTICE
ECA24010
Do not apply excessive force to
the smart key when replacin g
the battery.
Do not use a screw driver or oth-
er har d o bject to force open the
key.
Take precautions to prevent the
waterproof seal from bein g
d amag ed or contaminate d by
d irt.
Do not touch the internal cir-
cuits an d terminals. This may
cause malfunctions.
Make sure the battery is in-
stalle d correctly. Confirm the di-
rection of the positive/“+” si de
of the battery.To replace the smart key battery
1. Gently pry open the smart key case.
1. Smart key system indicator light “ ”
1 1
UB3TE1E0.book Page 6 Friday, September 11, 2020 8:48 AM
Page 28 of 124

Smart key system
3-10
3
WARNING
EWA14742
Do not operate the steering lock
while the vehicle is movin g.
EAU78052
How to lock the centerstan dPark the vehicle on a firm level surface
and then place it on the centerstand.
Press the “OFF/LOCK” switch for one
second.TIPIf the centerstand lock function
locks correctly, the beeper will
sound once.
If the centerstand lock function
does not lock correctly, the beep-
er will sound for three seconds
and the smart key system indica-
tor light will flash. Gently rock the vehicle forward or backward and
press the “OFF/LOCK” switch for
one second.1. “OFF/LOCK” switch
1
UB3TE1E0.book Page 10 Friday, September 11, 2020 8:48 AM
Page 32 of 124

Special features
4-1
4
EAU77264
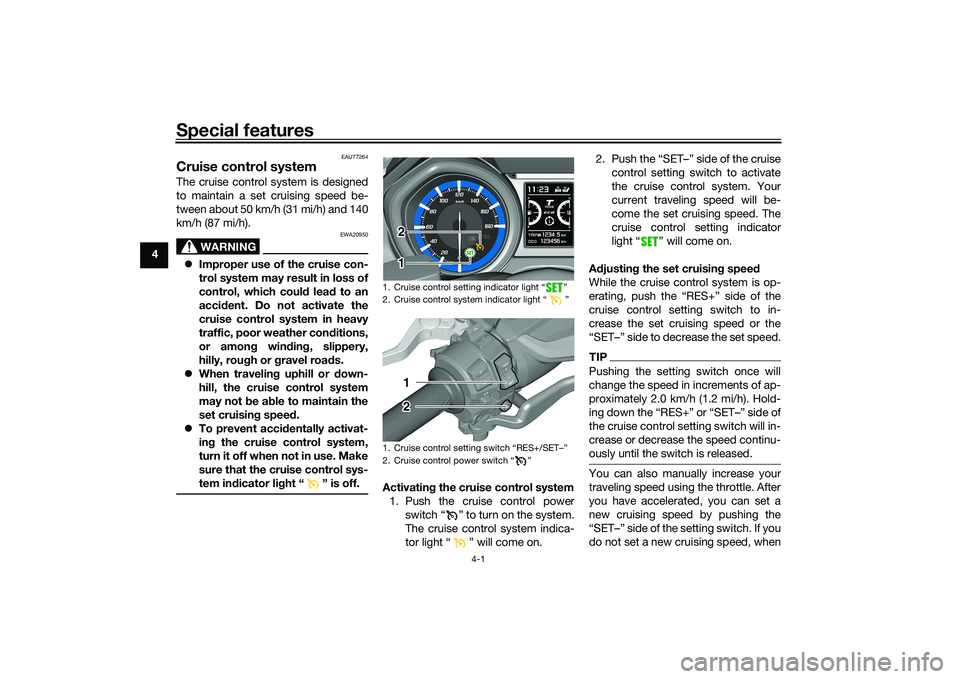
Cruise control systemThe cruise control system is designed
to maintain a set cruising speed be-
tween about 50 km/h (31 mi/h) and 140
km/h (87 mi/h).
WARNING
EWA20950
Improper use of the cruise con-
trol system may result in loss of
control, which coul d lea d to an
acci dent. Do not activate the
cruise control system in heavy
traffic, poor weather con ditions,
or amon g win din g, slippery,
hilly, rou gh or gravel roa ds.
When travelin g uphill or d own-
hill, the cruise control system
may not be ab le to maintain the
set cruisin g speed .
To prevent acci dentally activat-
in g the cruise control system,
turn it off when not in use. Make
sure that the cruise control sys-
tem ind icator light “ ” is off.
Activating the cruise control system
1. Push the cruise control power switch “ ” to turn on the system.
The cruise control system indica-
tor light “ ” will come on. 2. Push the “SET–” side of the cruise
control setting switch to activate
the cruise control system. Your
current traveling speed will be-
come the set cruising speed. The
cruise control setting indicator
light “ ” will come on.
A djustin g the set cruisin g speed
While the cruise control system is op-
erating, push the “RES+” side of the
cruise control setting switch to in-
crease the set cruising speed or the
“SET–” side to decrease the set speed.
TIPPushing the setting switch once will
change the speed in increments of ap-
proximately 2.0 km/h (1.2 mi/h). Hold-
the cruise control setting switch will in-
crease or decrease the speed continu-
ously until the switch is released.You can also manually increase your
traveling speed using the throttle. After
you have accelerated, you can set a
new cruising speed by pushing the
do not set a new cruising speed, when
1. Cruise control setting indicator light Ž
2. Cruise control system indicator light Ž
1.
2. Cruise control power switch Ž
1 2
1 212
UB3TE1E0.book Page 1 Friday, September 11, 2020 8:48 AM
Page 33 of 124

Special features
4-2
4
you return the throttle grip, the vehicle
will decelerate to the previously set
cruising speed.
Deactivatin
g the cruise control sys-
tem
Perform one of the following opera-
tions to cancel the set cruising speed.
The “ ” indicator light will turn off. Turn the throttle grip past the
closed position in the deceleration
direction.
Apply the front or rear brake.
TIPTraveling speed decreases as soon as
the cruise control system is deactivat-
ed; unless the throttle grip is turned.
Usin g the resume function
Push the “RES+” side of the cruise
control setting switch to reactivate the
cruise control system. The traveling
speed will return to the previously set
cruising speed. The “ ” indicator
light will come on.
WARNING
EWA16351
It is d angerous to use the resume
function when the previously set
cruisin g speed is too hi gh for current
con ditions.Turnin g off the cruise control sys-
tem
Push the cruise control power
switch “ ” to turn off the cruise con-
trol system. The “ ” indicator light
and the “ ” indicator light will turn
off.TIPWhenever the cruise control system or
the vehicle power is turned off, the pre-
viously set cruising speed is erased.
You will not be able to use the resume
function until a new cruising speed has
been set.
Automatic deactivation of the cruisecontrol systemThe cruise control system is electroni-
cally controlled and linked with other
control systems. The cruise control
system will automatically deactivate
under the following conditions: The cruise control system is not
able to maintain the set cruising
speed (such as when going up a
steep hill).
Wheel slip or wheel spin is detect-
ed. (If the traction control system
is on, traction control will engage.)
Engine trouble, etc.
If the cruise control system is automat-
ically deactivated, the “ ” indicator
light will turn off and the “ ” indica-
tor light will flash for 4 seconds.
If the cruise control system was auto-
matically deactivated, please stop and
confirm that your vehicle is in good op-
erating condition before continuing on.
When traveling on roads with steep
grades, the cruise control system may
not be able to maintain the set cruising
speed.
1. Deceleration direction
1
UB3TE1E0.book Page 2 Friday, September 11, 2020 8:48 AM
Page 35 of 124

Special features
4-4
4
EAU88851
Traction control systemThe traction control system (TCS)
helps maintain traction when acceler-
ating on slippery surfaces, such as un-
paved or wet roads. If sensors detect
that the rear wheel is starting to slip
(uncontrolled spinning), the traction
control system assists by regulating
engine power as needed until traction
is restored.
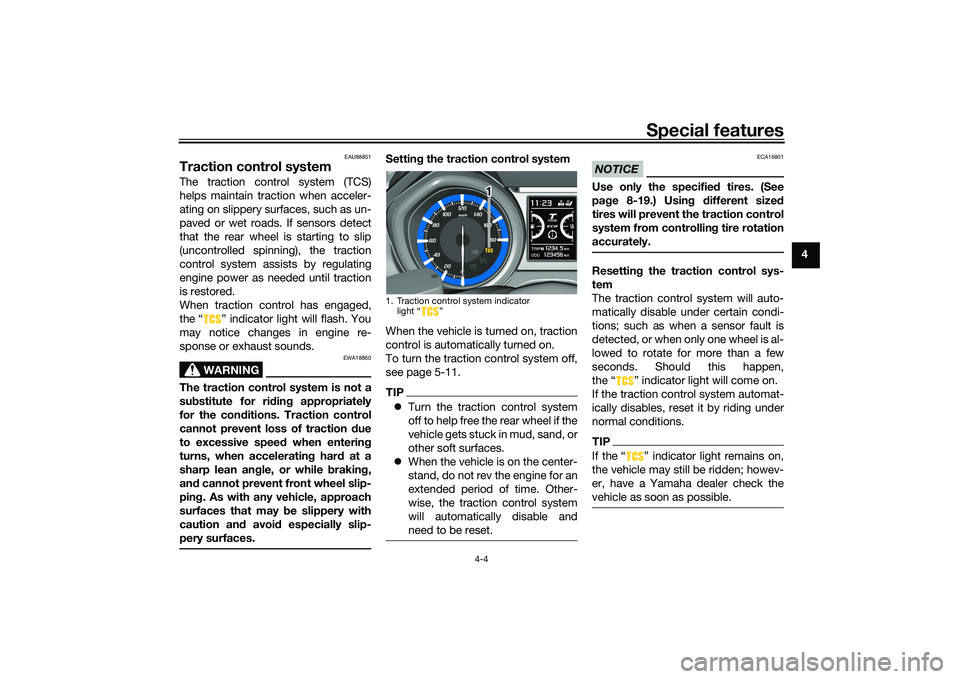
When traction control has engaged,
the “ ” indicator light will flash. You
may notice changes in engine re-
sponse or exhaust sounds.
WARNING
EWA18860
The traction control system is not a
substitute for ri din g appropriately
for the con ditions. Traction control
cannot prevent loss of traction d ue
to excessive spee d when enterin g
turns, when acceleratin g har d at a
sharp lean an gle, or while b raking,
an d cannot prevent front wheel slip-
pin g. As with any vehicle, approach
surfaces that may be slippery with
caution an d avoi d especially slip-
pery surfaces.
Settin g the traction control system
When the vehicle is turned on, traction
control is automatically turned on.
To turn the traction control system off,
see page 5-11.TIP Turn the traction control system
off to help free the rear wheel if the
vehicle gets stuck in mud, sand, or
other soft surfaces.
When the vehicle is on the center-
stand, do not rev the engine for an
extended period of time. Other-
wise, the traction control system
will automatically disable and
need to be reset.
NOTICE
ECA16801
Use only the specifie d tires. (See
pa ge 8-19.) Usin g different size d
tires will prevent the traction control
system from controllin g tire rotation
accurately.Resettin g the traction control sys-
tem
The traction control system will auto-
matically disable under certain condi-
tions; such as when a sensor fault is
detected, or when only one wheel is al-
lowed to rotate for more than a few
seconds. Should this happen,
the “ ” indicator light will come on.
If the traction control system automat-
ically disables, reset it by riding under
normal conditions.TIPIf the Ž indicator light remains on,
the vehicle may still be ridden; howev-
er, have a Yamaha dealer check the
vehicle as soon as possible.
1. Traction control system indicator light Ž
1 1 1
UB3TE1E0.book Page 4 Friday, September 11, 2020 8:48 AM
Page 37 of 124

Instrument and control functions
5-2
5
EAU77450
En gine stop switch “ / ”
Set this switch to “ ” before starting
the engine. Set this switch to “ ” to
stop the engine in case of an emergen-
cy, such as when the vehicle overturns
or when the throttle cable is stuck.
EAU77291
Power on/Starter switch “ON/ ”
With the smart key turned on and with-
in range, press this switch to turn on
the power to the vehicle. Then with the
sidestand up and while applying the
front or rear brake, push this switch to
crank the engine with the starter. See
page 7-2 for starting instructions prior
to starting the engine.
EAU79601
Hazar d switch “ ”
With the vehicle power is on or in park-
ing mode, use this switch to turn on the
hazard lights (simultaneous flashing of
all turn signal lights).
The hazard lights are used in case of an
emergency or to warn other drivers
when your vehicle is stopped where it
might be a traffic hazard.
NOTICE
ECA10062
Do not use the hazar d lig hts for an
exten ded len gth of time with the en-
g ine not runnin g, otherwise the bat-
tery may d ischarge.
EAU73952
Cruise control switches
See page 4-1 for an explanation of the
cruise control system.
EAU77301
Menu switch “MENU”
This switch is used to make setting
changes within the multi-function dis-
play. (See page 5-5.)
EAU77311
Select switch “ / ”
This switch is used to make setting
changes within the multi-function dis-
play. (See page 5-5.)
EAU73931
Drive mo de switch “MODE”
See page 4-3 for an explanation of the
drive mode.
EAU77123
In dicator li ghts an d warnin g
lig hts
EAU88680
Turn si gnal in dicator li ghts “ ”
an d“”
Each indicator light will flash when its
corresponding turn signal lights are
flashing.1. High beam indicator light “ ”
2. Traction control system indicator light “ ”
3. Turn signal indicator lights “ ” and “ ”
4. Smart key system indicator light “ ”
5. ABS warning light “ ”
6. Malfunction indicator light “ ”
7. Cruise control indicator lights
1 2 4 5 6
3
7
12
45 6
3
7
UB3TE1E0.book Page 2 Friday, September 11, 2020 8:48 AM
Page 38 of 124

Instrument and control functions
5-3
5
EAU88690
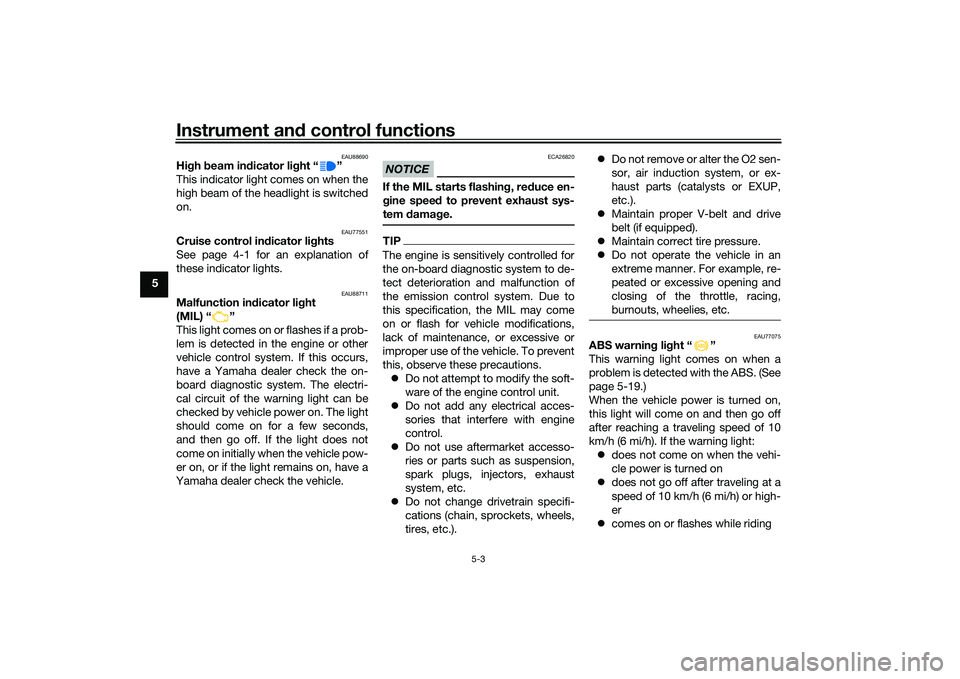
Hi gh beam in dicator li ght “ ”
This indicator light comes on when the
high beam of the headlight is switched
on.
EAU77551
Cruise control in dicator li ghts
See page 4-1 for an explanation of
these indicator lights.
EAU88711
Malfunction in dicator li ght
(MIL) “ ”
This light comes on or flashes if a prob-
lem is detected in the engine or other
vehicle control system. If this occurs,
have a Yamaha dealer check the on-
board diagnostic system. The electri-
cal circuit of the warning light can be
checked by vehicle power on. The light
should come on for a few seconds,
and then go off. If the light does not
come on initially when the vehicle pow-
er on, or if the light remains on, have a
Yamaha dealer check the vehicle.
NOTICE
ECA26820
If the MIL starts flashin g, re duce en-
g ine spee d to prevent exhaust sys-
tem damag e.TIPThe engine is sensitively controlled for
the on-board diagnostic system to de-
tect deterioration and malfunction of
the emission control system. Due to
this specification, the MIL may come
on or flash for vehicle modifications,
lack of maintenance, or excessive or
improper use of the vehicle. To prevent
this, observe these precautions.
Do not attempt to modify the soft-
ware of the engine control unit.
Do not add any electrical acces-
sories that interfere with engine
control.
Do not use aftermarket accesso-
ries or parts such as suspension,
spark plugs, injectors, exhaust
system, etc.
Do not change drivetrain specifi-
cations (chain, sprockets, wheels,
tires, etc.).
Do not remove or alter the O2 sen-
sor, air induction system, or ex-
haust parts (catalysts or EXUP,
etc.).
Maintain proper V-belt and drive
belt (if equipped).
Maintain correct tire pressure.
Do not operate the vehicle in an
extreme manner. For example, re-
peated or excessive opening and
closing of the throttle, racing,
burnouts, wheelies, etc.
EAU77075
ABS warnin g li ght “ ”
This warning light comes on when a
problem is detected with the ABS. (See
page 5-19.)
When the vehicle power is turned on,
this light will come on and then go off
after reaching a traveling speed of 10
km/h (6 mi/h). If the warning light: does not come on when the vehi-
cle power is turned on
does not go off after traveling at a
speed of 10 km/h (6 mi/h) or high-
er
comes on or flashes while riding
UB3TE1E0.book Page 3 Friday, September 11, 2020 8:48 AM
Page 39 of 124

Instrument and control functions
5-4
5
the anti-lock brake system may not
work correctly. Have a Yamaha dealer
check the vehicle as soon as possible.
WARNING
EWA16043
If the ABS warnin
g li ght does not
turn off after reachin g 10 km/h (6
mi/h), or if the warnin g lig ht comes
on while ri din g:
Use extra caution to avoi d pos-
si ble wheel lock durin g emer-
g ency brakin g.
Have a Yamaha dealer check
the vehicle as soon as possi ble.TIPThe ABS warning light may come on
when revving the engine with the
scooter on its centerstand, but this
does not indicate a malfunction.
EAU88700
Traction control system in dicator
lig ht “ ”
This indicator light will flash when trac-
tion control has engaged.
If the traction control system is turned
off, this indicator light will come on.
TIPWhen the vehicle is turned on, the light
should come on for a few seconds and
then go off. If the light does not come
on, or if the light remains on, have a
Yamaha dealer check the vehicle.
EAU78083
Smart key system in dicator
li g ht “ ”
This indicator light will flash when com-
munication between the vehicle and
smart key takes place and when cer-
tain smart key system operations are
carried out.
The indicator light may also flash when
there is an error in the smart key sys-
tem.TIPWhen the vehicle is turned on, the light
should come on for a few seconds and
then go off. If the light does not come
on, or if the light remains on, have a
Yamaha dealer check the vehicle.
EAU77131
Spee dometerThe speedometer shows the vehicle’s
traveling speed.
When the vehicle power is turned on,
the speedometer needle will sweep
across the speed range and return to
zero in order to test the electrical cir-
cuit.1. Speedometer
1 1 1
UB3TE1E0.book Page 4 Friday, September 11, 2020 8:48 AM