Check AUDI Q7 2013 Owner´s Manual
[x] Cancel search | Manufacturer: AUDI, Model Year: 2013, Model line: Q7, Model: AUDI Q7 2013Pages: 348, PDF Size: 87.72 MB
Page 60 of 348
58 Clear vis ion
li g ht sensor checked as soo n as poss ible at an
author ized Audi dealer or qua lified wor kshop .
.&_ WARNING
-Daytime ru nning lights and automatic
headlights are only intended to assist
the driver. They do not relieve the driver
of his respons ib ility to check the head
lights and to turn them on manually ac
co rding to the current light and v is ibi lity
condit ions. For example, fog cannot be
dete cted by the light sensors*. So alw ays
switch on the headlights
io u nder these
weather conditions and when driving in
the dark.
- Crashes can happen when yo u cannot see
the road ahead and when you cannot be seen by other motorists. Always turn on
the headlights so that you can see ahead
and so that others can see yo ur car from
the back.
- Please obey a ll laws when using the
lighting systems described here.
@ Tips
- With the switch in AUTO front fog lights
and rear fog lights cannot be turned on in addition.
- The light senso r for headlight contro l is
l ocated in the rear view m irror mount.
You should therefore not app ly any st ick
ers to the windsh ield in this area in o rder
to preve nt ma lfunctions o r failures.
- Some exterior lighting functions can be
adjusted
c:> page 58.
-When you remove your key from the igni
tion while the vehicle's lights are turned
on, a buzzer sou nds as long as the driv
er's door is open .
- In coo l o r damp weather, t he ins ide of
t h e headlights, turn signa ls and tail
li ghts can fog ove r du e to t he tempera
tu re diffe re n ce between the inside and
outside. They will cle ar sho rtly after
swi tching them on. This does not affect
t h e service li fe of the lighting . -
In the event o f a light sensor malfunc
tion, the driver is notified in the instru
ment cl uster display
c:> page 35 .
Adjusting exterior lighting
The functions are set in the MMI.
• Select: I CAR I func tion button > Systems *
cont ro l but to n > Exterior lighting . Or
.. Select:
!CAR ! function b utton> Car sys
tem s* contro l button > Vehicle setting s >
Exterior lighting.
Coming home (Lights when leaving car ),
Leaving home (Lights when unlock ing car )
T he coming home f unction ill umi nates the
area o utside the vehicle when you tu rn the ig
nition off and open t he driver's door. Depend
ing on vehicle eq uipment, the f unction can be
switched on and off or the length of t ime the
lights remain on* can be adjusted .
The leaving home illum inates the area outside
the vehicle when you unlock the vehicle. This
funct ion can be switched on and off .
The Coming home and Leaving home func
tions only operate when it is dark and the light switch is in the AUTO position.
Daytime running lights
USA models: The daytime r unning lights can
be turned on or off using th is function.
Canad a model s: Th e fu nction ca n no t be
tu rned off .
It is activated automati cally each
time the ignition is t urned on. This menu item
is shown "greyed out" .
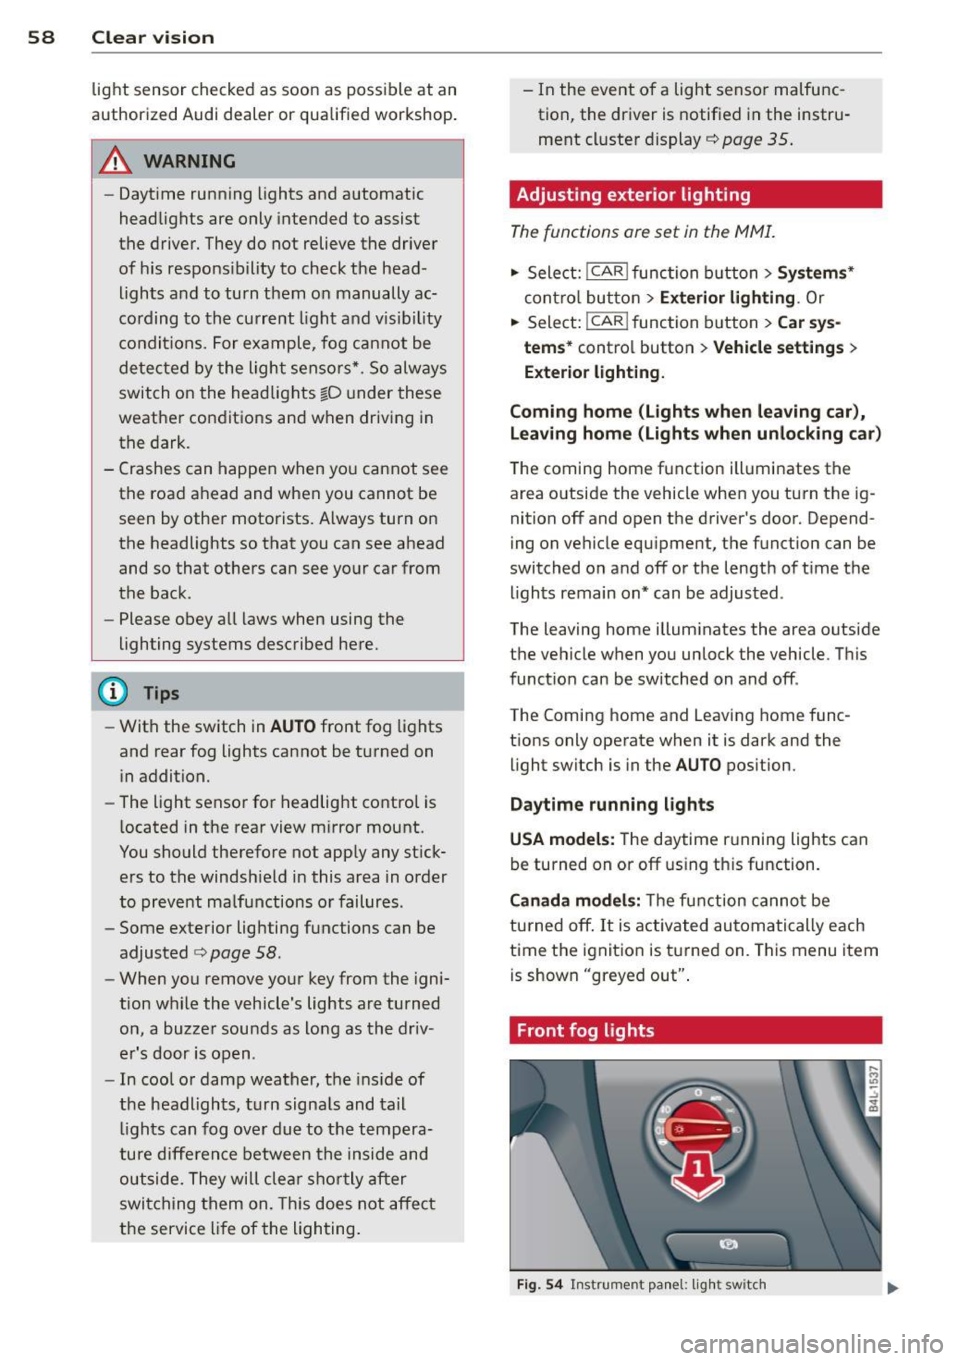
Front fog lights
Fig . 54 Instrument pa nel: light switch
Page 66 of 348
64 Clear vis ion
General information
The winds hield wipers and the w indshield
washer system operate only with the ignition
on.
During a temporary stop , e.g . at a t raff ic sig
na l, the set wipe speed is automatically re
duced by one stage.
The winds hield washer no zzles a re heated at
l ow temperatures when the ignition is on .
Removing w ate r droplet s
About 5 seconds after the wash cycle is com
plete, the wiper system performs a single au
tomatic wipe cycle to remove any water drop
l ets that remain on the windshield whi le dr iv
ing.
If you would like to deactivate this delayed
wipe cycle wh ile driving, you have to pull the
l eve r to pos ition ® again within 10 seconds
after this wipe cy cle.
Water droplet removal is reactivated after the
ignit ion is switched off and then on again .
Winter position
To speed up de -icing of the w indshield w ipers,
t hey move to the winter posi tion when the ig
n ition is switched off and at an outside tem
perature below 39
°F (4 °(). In this posit ion ,
the w indshield wipers are in an area on the
g lass w hich is reached by the a ir vents below
the glass. It is also easier to remove snow and
ice from the wi ndshield wipers in this posi
tion .
The wipe rs leave the w inte r position, when
the ign ition is swi tc h ed on, if the winds hield
wiper lever is operated or the active rain sen
sor reacts to moistu re.
Rain sensor
The rain senso r operates on ly in the inte rva l
wiper position . When it sta rts to ra in , the in
terval wipe r mode is activated automati ca lly.
If the windshie ld w iper lever is in the inte rval
wipe posit ion w ith the ign ition switched off, the ra
in sensor is not activated until ve hicle
sp eed is above 4 mph (6 km/h).
T o red uce the sensi tivi ty of the rain senso r,
the switch @ mus t be moved down . T o in
crease the sensitivity of the rain sensor, the
switch must be moved up.
T he higher the sensit iv ity se tt ing , the sooner
the windshie ld wipers react to moist ure on
the windshie ld . I nc reased sensitivity is sig
naled by the windshie ld wipers making a sin
gle pass over the windshield.
T he rain sensor w iper intervals depend on the
sensitivity setting as well as vehicle speed.
D uring brief stops, wiper motio n will adj ust in
relat ion to the amount o f rain on the w ind
shield .
A WARNING
-W iper blades are crucial for safe driving!
O nl y when they are i n good co ndit io n are
they able to clear the windows prope rly
to p rov ide uncompromised vis ib ility.
Wo rn o r damaged wipe r blades are a
safety ha zard
~ page 66, Replacing
windshield wiper blades!
- T he rain sen so r is only designed to assist
a nd suppor t the driver.
It rem ains enti re
ly the d river 's responsibility to monitor
outside weathe r conditions and to man
ually activate the wipe rs as soon as rain
or driz zle reduces visibility through the
windshie ld.
(D Note
In freezing or near freezing conditions:
- Always check that the w iper b lades are
not frozen to the g lass before you turn
the wipe rs on . Loosen a wiper blade
wh ich is frozen in place before operating
the wipers to prevent damage to the
w iper blade or the wiper motor.
- Do not use the w ipers to clear a frosted
w indow. Us ing the wipers as a conven
ient ice scrape r will destroy the wiper
blades .
Page 67 of 348
-Prior to using a car wash, the windshield
wiper system must be switched
off (lever
i n position 0) . This helps to prevent unin
tentiona l switching on and damage to
the windshie ld w iper system .
@ Tips
-The windshield wipers are switched off
when the ignition is turned off. Activate
the w indshield w ipers after the ignit ion
i s switched back on by moving the wind
sh ield wiper lever to any pos ition.
- Worn or dirty windshield wiper blades
cause smearing which can affect the op
eration of the rain sensor . Check the con
dit ion of yo ur windshield wipe r blades
regularly.
- The rain sensor is part of the interval
wiping system. Turning
off the ignition
will a lso deact ivate the rain sensor. To re
activate the sensor, sw itch
off the inter
va l w iping function, then switch it back
on again.
- Make sure the washer fluid reservoir in
the engine compartment is topped
off
before going on a long trip . Look up
c:> page 2 79 for checking and fi lling the
washer container.
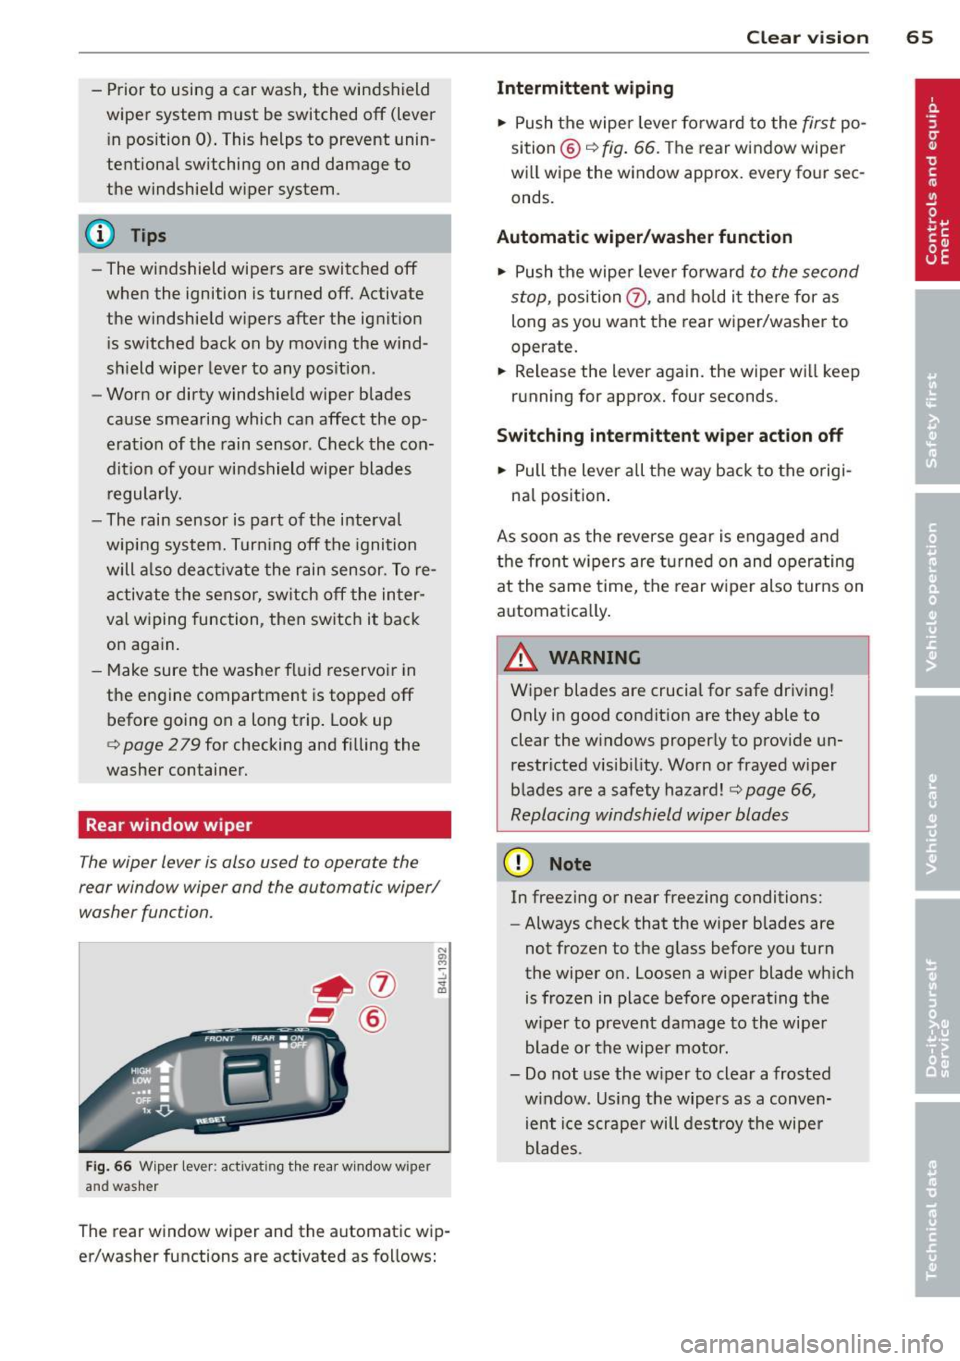
Rear window wiper
The wiper lever is also used to operate the
rear window wiper and the automatic wiper/
washer function.
Fig. 66 Wiper lever: activati ng th e rear window w iper
and washer
The rear window wiper and the automatic wip
er/washer functions are activated as follows:
Clear vision 65
Intermittent wiping
.,. Push the wiper lever forward to the first po
sition @<=:> fig. 66 . Th e rear window wiper
w ill wipe the window approx. every four sec
onds.
Automatic wiper /washer function
.,. Push the wiper lever fo rward to the second
stop, position
(J), and hold it there for as
long as you want the rear wiper/washer to
operate.
.,. Release the lever again. the wiper will keep
running for approx. four seconds.
Switching intermittent wiper action off
.,. Pull the lever all the way back to the origi-
nal position .
As soon as the reverse gear is engaged and
the front w ipers are turned on and operating
at the same time, the rear w iper also turns on
automatically.
A WARNING
Wiper blades are crucial for safe driving!
Only in good condit ion are they able to
clear the w indows properly to provide un
restricted visib ility. Worn or frayed w iper
blades are a safety hazard! <=:>page 66,
Replacing windshield wiper blades
(D Note
In freezing or near freezing conditions:
- Always check that the w iper b lades are
not frozen to the g lass before you turn
the wiper on. Loosen a wiper blade which
is frozen in place before operat ing the
w iper to prevent damage to the wiper
blade or the wiper motor.
- Do not use the w iper to clear a frosted
w indow . Us ing the wipers as a conven
ient ice scrape r will destroy the wiper
blades.
-
Page 68 of 348
66 Clear vis ion
Headlight washer system
Applies to vehicles: with hea dli ght washer system
The headlight washer system cleans the
headlights.
.. Operate the windsh ield wiper/washer sys
tem
c:> page 63, fig. 65 ® with the head
lights turned on by holding the lever for lon
ger than one second.
The washer jets extend forward out of the
fro nt bumper driven by water pressure to
spray the front headlights with water .
You should inspect the headlights regularly
(for example when refueling) and clean off
any solid dirt or insects from the lenses .
To ensure the system works properly in winter,
keep the washer jets free of snow and remove
any ice using a de- ic ing spray.
Service position
The wiper blades can only be changed in the
service position.
.. If the wiper blades are not frozen to the
windshield, bring the windshield wiper lever
to the basic position@c:>
page 63 , fig. 65 .
.. Select: ICARI function button > Systems *
control button> Windshield w ipers > S erv
i c e posit ion.
Or
.. Se lect:
ICARI funct ion button > Car s ys
tems *
control button > Servicing & check s >
Wiper service po sition .
-On -changing the windsh ie ld w iper blades
can on ly be done if you bring the wiper a rms
to the se rv ice position. You w ill also avoid
paint damage to the hood when wo rking on
the wipers in this pos ition.
- Off -the w indshield wipe rs a re moved to
their initial pos ition aga in.
(D Note
Never maneuve r your vehicle with the
fro nt windshield wipe r arms r aised since
they will a utomat ically be moved back to the
ir basic position above a speed of 3
mph
(6 km/h) and can scratch the hood.
(D Tips
- Yo u ca n also use the se rvice posi tion, for
example, if you want to protect the
w indshield from icing by using
a cover .
- T he service posit ion automatically
switches to
Off when you operate the
w indshield wiper lever, o r speed exceeds
3 mph (6 km/h) .
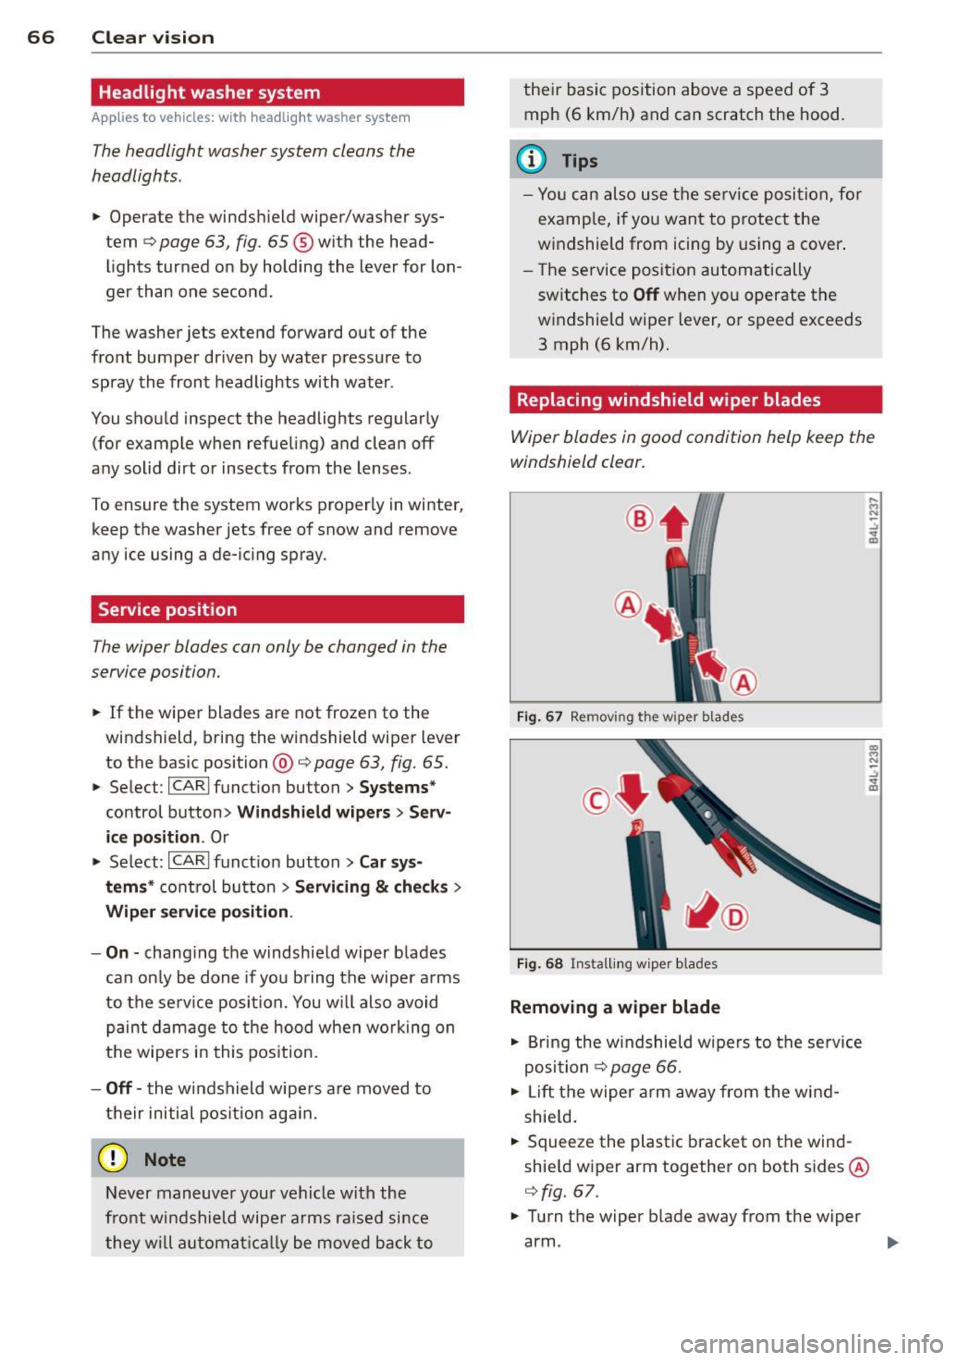
Replacing windshield wiper blades
Wiper blades in good condition help keep the
windshield clear.
®
F ig . 67 Removing the wiper blades
F ig . 68 Instal ling wiper b lades
Removing a wiper blade
.. Bring the w indshield wipe rs to the se rvice
posi tion
c:> page 66.
.. Lift the wiper arm away from the wind
shie ld .
.. Squeeze the plast ic bracket on the wind
shie ld wiper arm together on both sides @
c:>
fig. 67 .
.. Turn the wiper blade away from the wiper
arm . ..,.
Page 78 of 348
76 Seats and storage
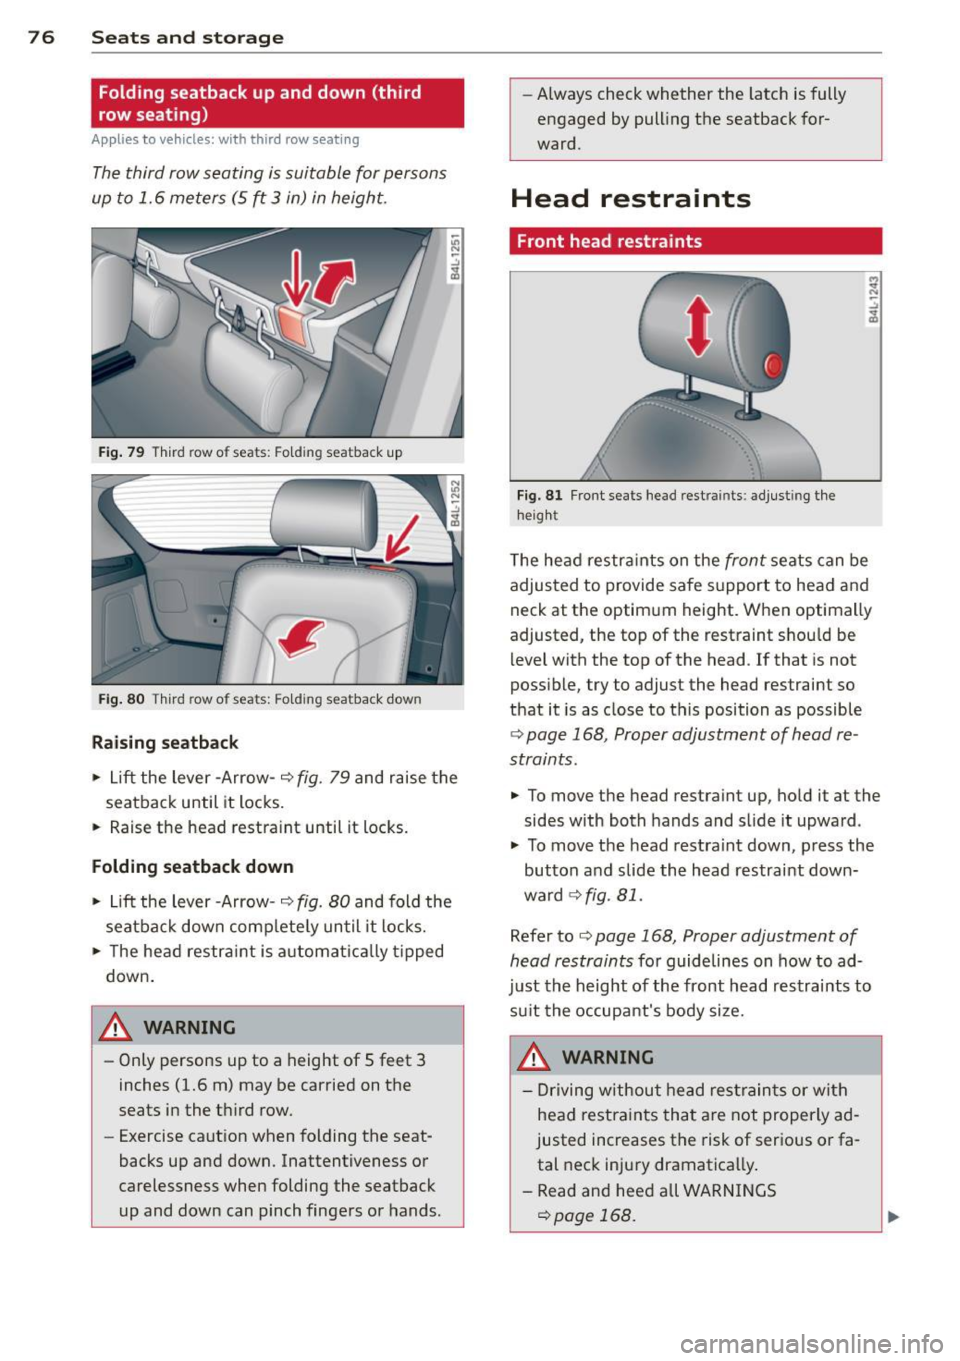
Folding seatback up and down (third
row seating)
Applies to vehicles: with third row seating
The third row s eating i s suitable for p ersons
up to 1.6 meters (5
~ 3 in) in height.
F ig. 79 Thi rd row of seats : F old ing seatba ck up
F ig. 80 T hi rd row of seats: Fold ing seatback dow n
Raising seatback
• Lift the lever -Arrow- ¢ fig. 79 and r aise the
seatback until it loc ks.
• Raise t he head restra int until it locks.
Folding seatback down
• Lift the lever -Arrow- ¢ fig. 80 and fold the
seatba ck down comp lete ly un til it lock s.
• The hea d restra int is a utoma tica lly ti pped
down .
A WARNING
-Only persons up to a height of 5 feet 3
inches (1.6 m) may be carried on the
seats i n the t hird row.
- Exercise caut ion when folding the seat
backs up and down. Inattentiveness o r
carelessness when folding the seatback
up and down can pinch finge rs or hands . -
Always check whether the latc h is fully
engaged by pull ing the seatback for
ward.
Head restraints
Front head restraints
Fi g. 81 Front seats head rest rain ts: a djusting the
h eig ht
T he he ad restr aints on the fr ont sea ts can be
adjus ted to provide safe s upport to he ad and
neck at the optim um height . When optimally
adjusted, the top of the rest raint shou ld be
l evel with the top of the head . If that is not
poss ible, try to adjust the head restraint so
that it is as close to t his position as possible
¢ page 168, Proper adjustment of head re
s traints .
• To move the head restraint up , hold it at the
sides with both hands and s lide it upward .
• To m ove t he head restra int down, press the
button and slide th e head restraint down
wa rd ¢
fig . 81.
Refer to ¢ page 168, Proper adjustment of
head restraints
fo r gu idelines on how to ad
just th e height of the front head r estraints to
s ui t the occupa nt's b ody siz e.
A WARNING
- D riving w ithou t head re str ain ts or wit h
hea d restr aints th at are not pro perly ad
justed increases t he risk of ser ious or fa
tal neck inju ry dramatica lly.
- Read and hee d all W ARNINGS
¢pa ge 16 8.
-
Page 81 of 348
Luggage compartment
Expanding luggage compartment
To expand the luggage compartment, the
seatbacks can be folded forward separately or together .
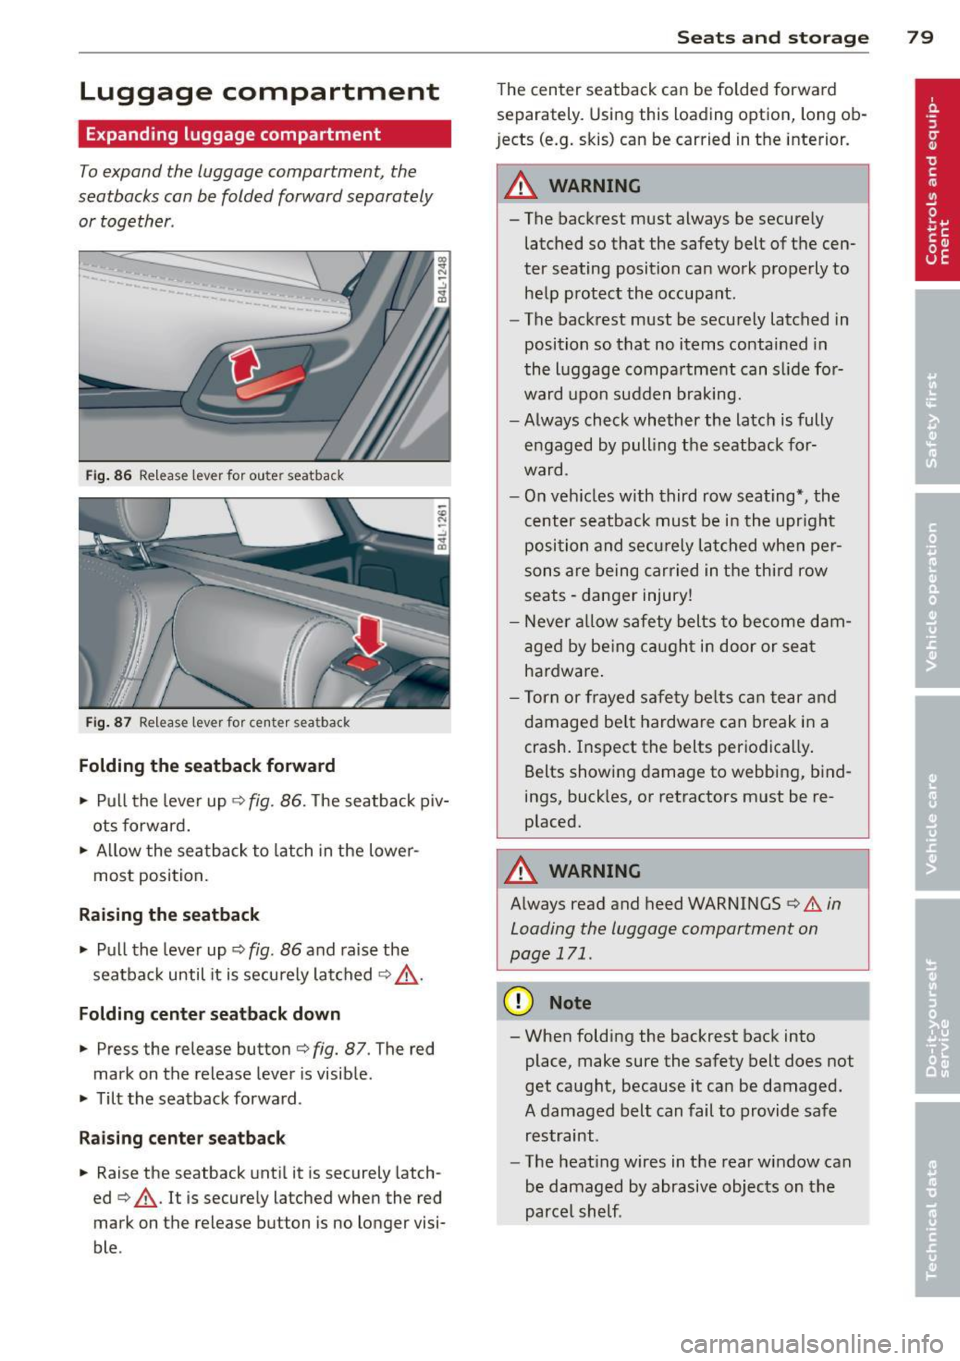
Fig. 86 Release lever for ou ter seatback
Fig. 87 Release leve r fo r cente r seatback
Folding the seatback forward
.. Pu ll the lever up ¢ fig. 86. The seatback piv
ots fo rward .
.. Allow the sea tba ck to latch in the lowe r
most posi tion.
Raising the seatback
.. Pull the lever up ¢ fig. 86 and ra ise the
seatba ck until it is secu rely latched ¢ _&. .
Folding center seatback down
.. Press the release button ¢ fig. 87. The red
mark on the release lever is visib le .
.. Tilt the seatback forward .
Raising c enter seatback
.. Raise the seatback unt il it is securely latch
ed ¢_&. . It is securely latched when the red
mark on the release button is no longer visi
ble .
Seats and storage 79
The cen ter seatback can be folded forwa rd
separately. Using this loading option, long ob
jects (e.g. skis) can be carried in t he interior.
_& WARNING
-
- The backrest must always be secure ly
latched so that the safety belt of t he cen
ter seating position ca n wo rk p roperly to
he lp p rot ect the occupant.
- The back rest must be securely latched in
position so that no items contai ned in
the l uggage compa rtment can s lide fo r
ward upon sudden braking.
- Always check whether the latc h is fully
e ngaged by pull ing t he seatback for
ward .
- On veh icles with third row seating*, the
cent er seatback must be i n the upr ight
posi tion and se curely la tched whe n pe r
sons are being carried in t he thir d ro w
seats -danger injury!
- Never a llow safety belts to become dam
age d by be ing c augh t in door or sea t
ha rdware .
- Tor n or frayed s afety be lts c an t ear and
damage d be lt hardware can break in a
crash. I nsp ect the belts per io d ica lly.
Belts showi ng damage to webbing, b ind
ings, buck les, or retractors m ust be re
placed.
_& WARNING
A lways read and heed WARNINGS ¢.&. in
Loading the luggage compartment on
page
171.
(D Note
- When fold ing the backrest back into
place, make sure the safety belt does not
get ca ught, because it can be damaged .
A damaged belt can fail to provide sa fe
restraint .
- The heat ing wires in the rea r window can
be damaged by abrasive objects on the
parce l shelf .
Page 86 of 348
84 Seats and storage
can cause the roof rack or the items at
tached to it to fall off the roof onto the
road.
- Objects falling from the roof of a vehicle
can cause a crash and personal injury.
- Only mount the system between the
markings shown in~
page 84, fig. 95 .
-The roof rack system must be installed
exactly according to the instructions pro
vided.
(D Note
- Your vehicle warranty does not cover any damages to the vehicle caused by using roof racks or mounting structures not
approved by Audi for your vehicle . The
same applies to damage resulting from incorrect roof rack installation .
- Always check the roof rack mountings
and hardware before each trip and dur
ing a trip to make sure everything is se
curely tightened . If necessary, retighten
the mountings and check the entire sys
tem from time to time.
- After mounting a roof rack system, or
when you transport objects on the roof
of your vehicle, the height of the vehicle
is naturally increased. Be careful when
driving under low bridges or in parking
garages for example. This could cause
damage to the load and even the vehicle
itself.
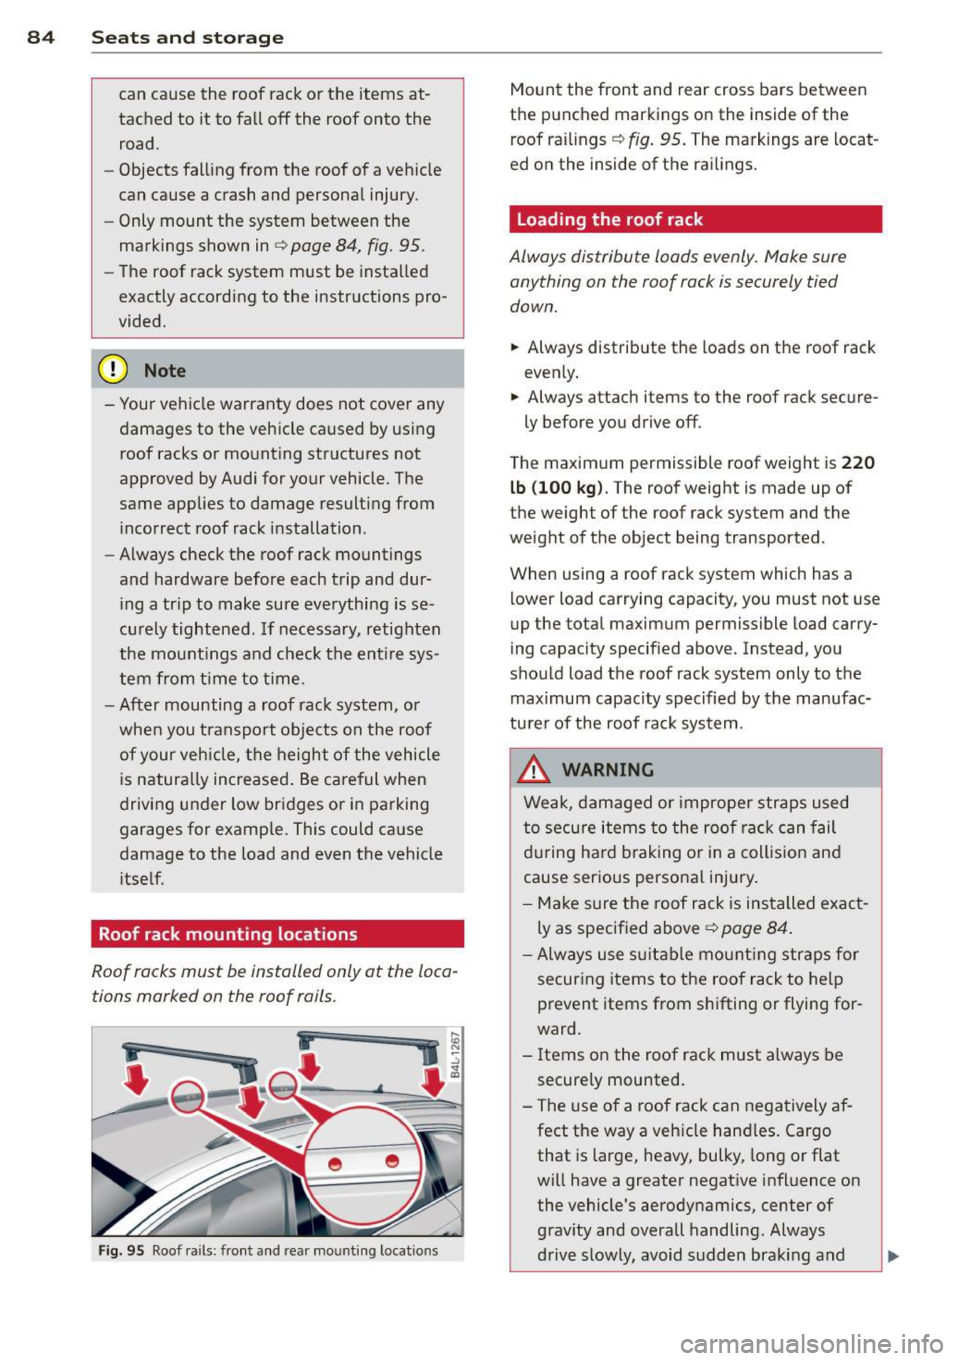
Roof rack mounting locations
Roof racks must be installed only at the loca
tions marked on the roof rails .
i
-
Fig. 95 Roof rails: front and rea r mo unting locatio ns
Mount the front and rear cross bars between
the punched markings on the inside of the
roof railings ~
fig. 95. The markings are locat
ed on the inside of the railings.
Loading the roof rack
Always distribute loads evenly. Make sure
anything on the roof rack is securely tied
down.
.,. Always distribute the loads on the roof rack
evenly .
.,. Always attach items to the roof rack secure -
ly before you drive off .
The max imum permissible roof weight is
220
lb (100 kg).
The roof weight is made up of
the weight of the roof rack system and the
weight of the object being transported .
When using a roof rack system wh ich has a
lower load carrying capacity, you must not use
up the total maximum permissible load carry
ing capacity specified above. Instead, you
should load the roof rack system only to the maximum capacity specified by the manufac
turer of the roof rack system .
.&_ WARNING
Weak, damaged or improper straps used
to secure items to the roof rack can fail
during hard braking or in a collision and
cause serious personal injury.
- Make sure the roof rack is installed exact
ly as specified above~
page 84.
-Always use suitable mounting straps for
securing items to the roof rack to help
prevent items from shifting or flying for
ward .
- Items on the roof rack must always be
securely mounted.
- The use of a roof rack can negatively af
fect the way a vehicle handles. Cargo that is large, heavy, bulky , long or flat
will have a greater negative influence on the vehicle's aerodynamics, center of
gravity and overall handling. Always
drive slowly, avoid sudden braking and .,,.
Page 105 of 348
On the road
Steering
Manually adjustable steering wheel
Applies to vehicles: with manu ally adjustable steering
w hee l
The height and reach of the steering wheel
can be adjusted.
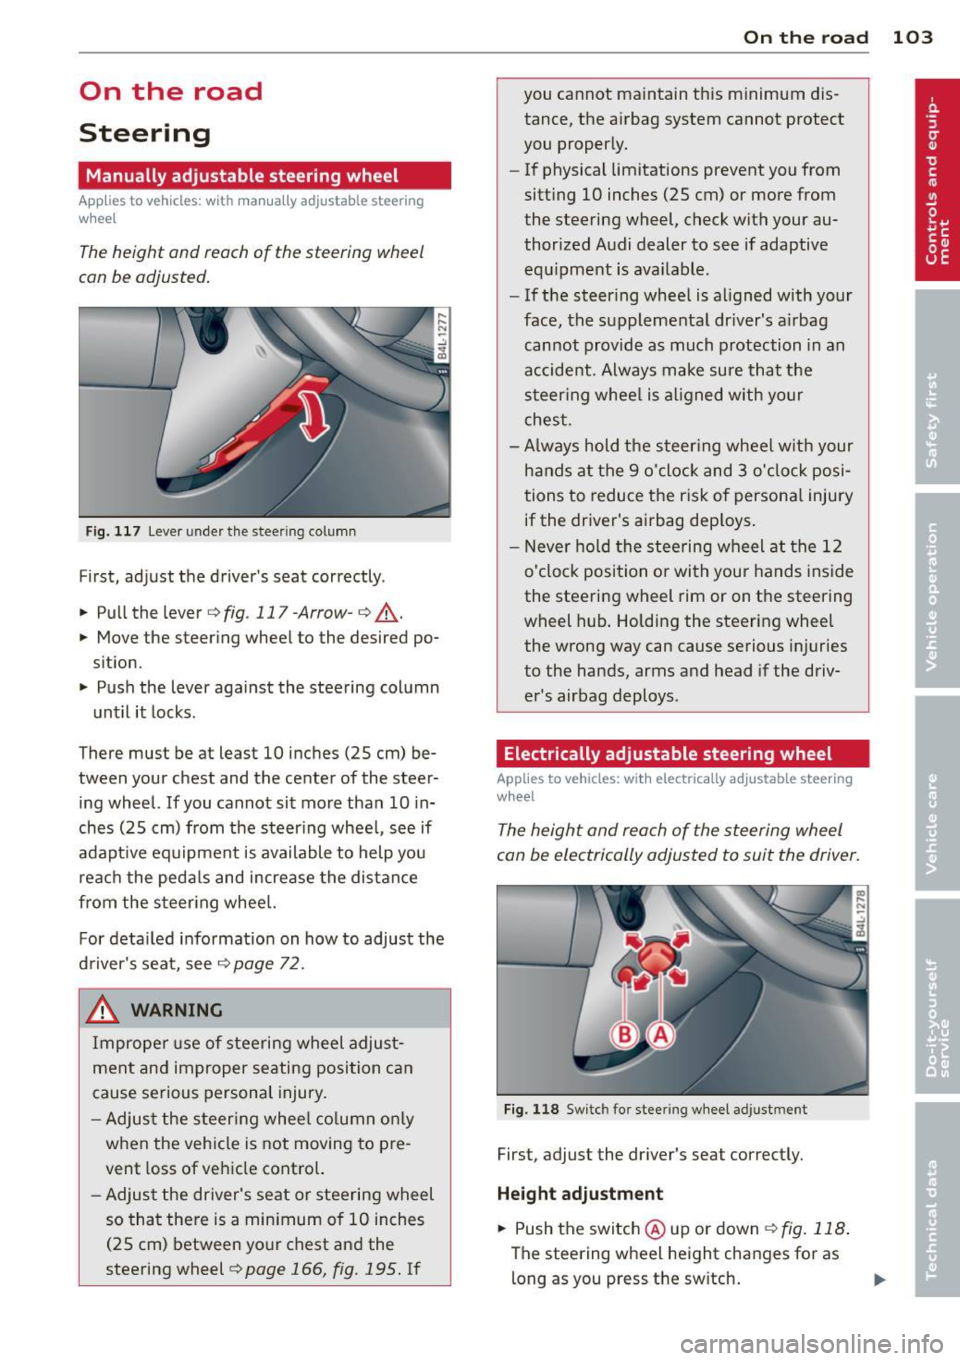
Fig. 117 Lever under the steer ing column
First, adjust the driver's seat correctly .
.. Pull the lever
c:>fig . 117-Arrow-c:> ,A .
.. Move the steering wheel to the desired po
sition.
.. Push the lever against the steering column
unt il it locks.
There must be at least 10 inches (25 cm) be
tween your chest and the center of the steer
ing wheel.
If you cannot sit more than 10 in
ches (25 cm) from the steering wheel, see if
adapt ive equipment is available to help you
reach the pedals and increase the distance
from the steering wheel.
For detailed information on how to adjust the
driver's seat, see
c:> page 72.
& WARNING
Improper use of steering wheel adjust
meht and improper seating position can
cause serious personal injury.
- Adjust the steering wheel column only
when the veh icle is not moving to pre
vent loss of vehicle control.
-
-Adjust the driver's seat or steering wheel
so that there is a minimum of 10 inches
(25 cm) between your chest and the
steering wheel
c:> page 166, fig. 195. If
On the road 103
you cannot maintain this minimum dis
tance, the airbag system cannot protect
you properly.
- If physical limitations prevent you from
sitting 10 inches (25 cm) or more from
the steering wheel, check with your au
thorized Audi dealer to see if adaptive
equipment is available.
- If the steering wheel is aligned with your
face, the supplemental dr iver's a irbag
cannot provide as much protection in an
accident. Always make sure that the
steering wheel is aligned with your
chest.
- Always hold the steer ing wheel w ith your
hands at the 9 o'clock and 3 o'clock posi
tions to reduce the risk of personal injury
if the driver's airbag dep loys .
- Never hold the steering wheel at the 12
o'clock position or with your hands inside
the steering wheel rim or on the steering
wheel hub. Holding the steering wheel
the wrong way can cause serious injuries
to the hands, arms and head if the driv
er's airbag deploys.
Electrically adjustable steering wheel
App lies to vehicles: with electrically adjustable steering
w heel
The height and reach of the steering wheel
can be electrically adjusted to suit the driver.
Fig. 118 Switch for stee ring wheel adjustment
First, adjust the driver's seat correctly.
Height adjustment
.. Push the switch @ up or down c:>fig. 118.
The steering wheel height changes for as
long as you press the sw itch. ..,.
Page 106 of 348
104 On the road
Reach adjustm ent
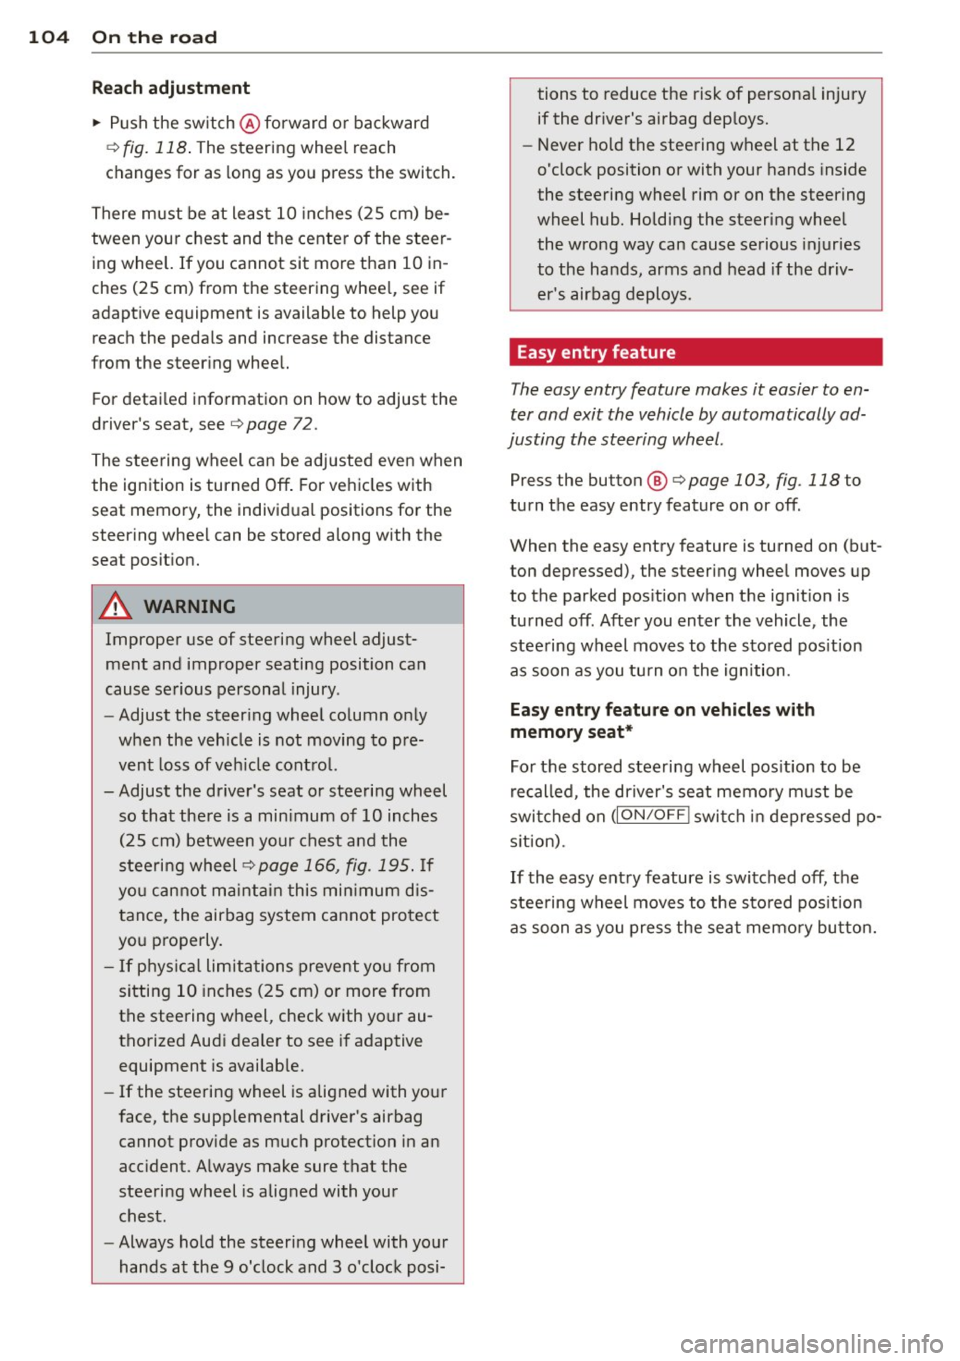
.. Push the sw itch @forward or bac kward
¢
fig. 118 . The steering whee l reach
changes for as long as yo u press the switch.
There must be at least 10 inches (25 cm) be
tween you r chest and the center of the steer
ing wheel. If you cannot sit more than 10 in
ches (25 cm) from the steering whee l, see if
adaptive equipment is available to help you
reach the pedals and increase the distance
from the steer ing wheel.
F or detai led informat ion on how to adjust the
driver's seat, see
¢ page 72.
The stee ring wheel can be adjusted even when
the ignition is turned
Off. For ve hicles with
seat memory, the individ ual positions for the
steering whee l can be stored along with the
seat posit ion.
A WARNING
Improper use of steering wheel adjust
ment and improper seating position can
cause se rious personal injury.
- Adjust the steer ing whee l co lumn on ly
when the veh icle is not moving to pre
vent loss of veh icle cont ro l.
- Adjust the driver's seat or steering wheel
so that the re is a min imum of 10 inches
(25 cm) between your chest and the
steeri ng wheel ¢
page 166, fig . 195. If
yo u ca nnot ma int ain this min imum d is
tan ce, the airbag system c annot pro tect
yo u properly.
- If phys ica l limitations prevent yo u from
sitting 10 inches (25 cm) or more from
the steering wheel, check with yo ur au
tho rized Audi dea le r to see if adaptive
equipment is availab le.
- If the steering wheel is aligned with your
face, the supp lemental driver's airbag
cannot prov ide as much protect ion in an
acc ident. A lways make sure that the
steeri ng wheel is aligned with your
chest.
- Always hold the steering wheel with your
hands at the 9 o'clock and 3 o'clock posi- tions to reduce the risk of persona
l injury
if the dr iver's airbag dep loys .
- Never hold the steering wheel at the 12
o'clock position or with your hands inside
the steering wheel rim or on the steering
wheel hub. Holding the steering wheel
the wrong way can cause serious injuries
to the hands, arms and head if the driv
er's airbag deploys.
Easy entry feature
The easy entry feature makes it easier to en
ter and exit the vehicle by automatically ad
justing the steering wheel.
Press the button @¢ page 103, fig. 118 to
turn the easy entry feature on or
off.
When the easy entry feature is turned on (but
ton depressed), the steering wheel moves up
to the parked pos ition when the ignit ion is
turned
off. After you enter the vehicle, the
stee ring wheel moves to the sto red pos it ion
as soon as you tu rn o n the ignition.
Easy ent ry feature on vehicles w ith
memory seat*
For t he stored steering wheel pos ition to be
re called, the dr iver's seat memory m ust be
swi tched on
(ION/OF F I swi tch in dep ressed po
s it ion).
If the easy ent ry feature is switched
off, t h e
stee ring wheel moves to the sto red pos ition
a s soon as you press the sea t memo ry bu tton.
Page 116 of 348
114 Adapti ve crui se co ntrol
brake and take evasive action to avoid
collisions and other accident situations.
- Never allow the closing speed between
you and other vehicles to be so high that
the adaptive cruise control may not be
able to slow your vehicle safely. If clos
ing speed is too high, you must apply the
brakes yourself to reduce the risk of a
rear-end crash.
- Never rest your foot on the accelerator peda l, especia lly when the adaptive
cruise control is be ing used. Pressu re on
the accelerator w ill override the ACC
braking function and prevent the brakes
from being applied when ACC detects a
situation when the brakes must be ap
plied.
- Never use adaptive cruise contro l when
you cannot drive safe ly at a steady
speed, including on city streets, on wind
ing roads or when road conditions are
poor (for example, on ice, gravel, in fog,
heavy rain or on wet roads that increase
the risk of hydroplaning) .
- The radar sensor's
vision can be reduced
by rain, snow and heavy road spray.
T hese and sim ilar condit ions can prevent
vehicles up a head from being accurately
detected and in some cases they may not
be detected at al l. Do not use ACC when
the radar sensors cannot accurately de
tect vehicles moving ahead of yo u in traf
fic.
- Always turn off adaptive cruise contro l
when entering turn lanes, exit lanes and
construction zones or in similar situa
t ions because the vehicle will automati
cally accelerate to the stored speed when
the road ahead is clear.
- To prevent unintended operation, always
switch ACC off when it is not be ing used.
(D Tips
- For safety reasons, the stored speed is
deleted when the ignition is turned off .
- The E lectronic Stab ilizat ion Control (ESC)
and the Anti-Slip Regulation (ASR) can not be deactivated when the adaptive cruise contro
l is switched on . If the ESC
and the Anti-Slip Regu lation (ASR) has
been deactivated and you then switch on
the adaptive cruise control, the ESC func tion will also be activated automatically.
- Damage caused by accidents and some m inor collisions can affect the radar sen
sor settings and cause the system to
ma lf u nction or switch off completely.
- The radar sensor cover is heated. In win
ter conditions, you should st ill check be
fore dr iv ing to make su re it is free of ice
and snow. If necessary, clean the a rea
nea r the radar sensor ca refully
¢ fig. 126.
- To ensure that the radar sensor is not
bloc ked, foreig n objects (e.g. s tickers,
larger license plate mount s, add -on
par ts) mus t not cover the area near the
radar sensor ¢
fig. 126 . The area near
the radar sensor must not be pa inted, ei
ther.
- For Declaration of Compliance to United
States FCC and Ind ustry Canada reg ula
tions¢
page 328.
How does adaptive cruise control work?
Applies to vehicles : wit h adaptive c ruise contro l
Vehicles traveling ahead are detected with
the aid of a radar sensor .
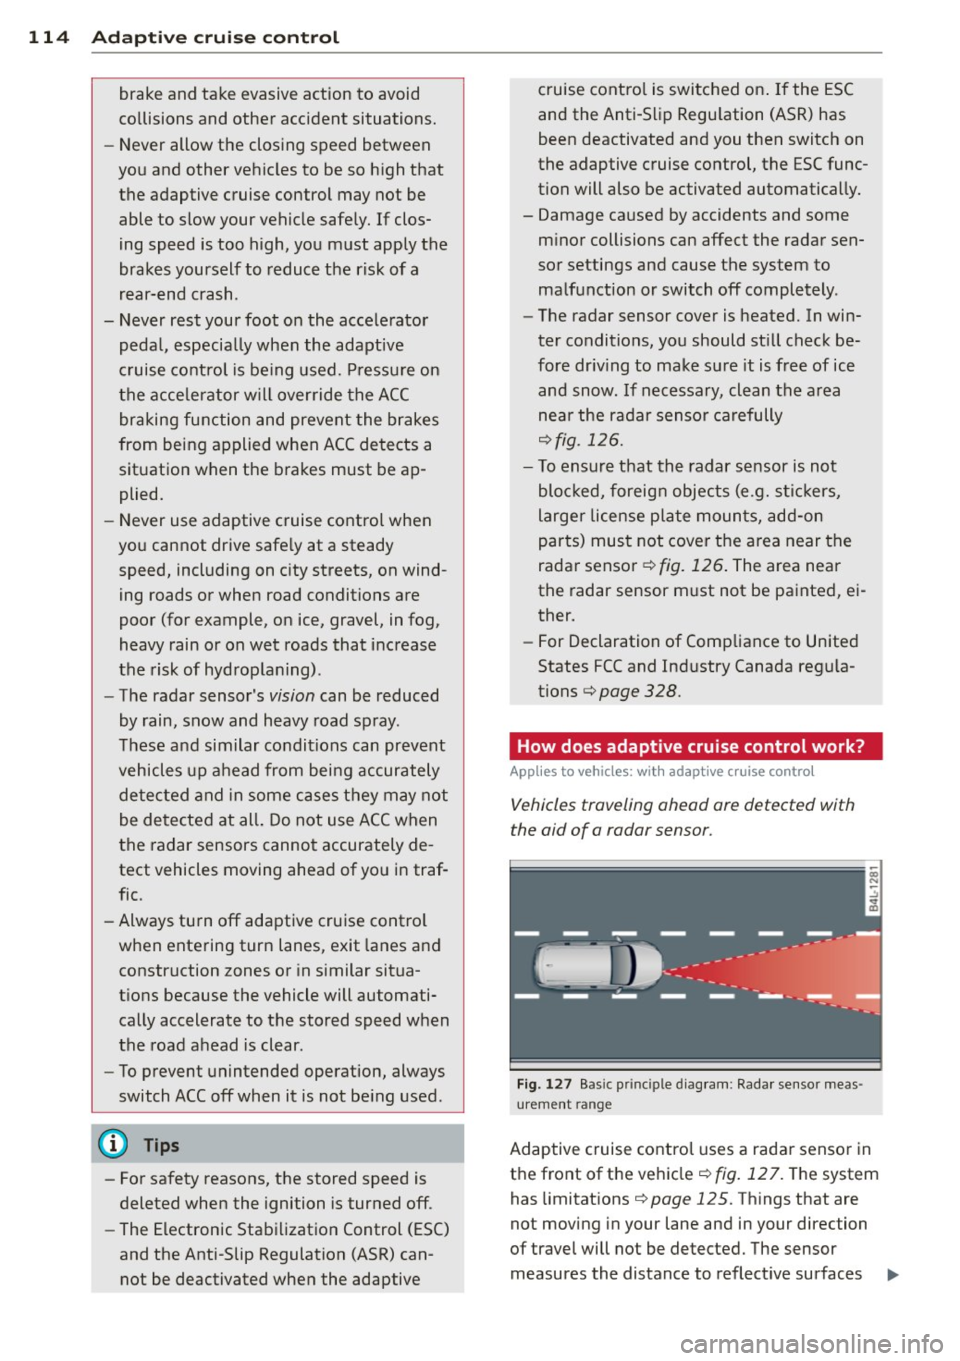
Fig. 1 27 Bas ic pri ncip le d iag ram : Radar sensor meas
urement range
Adaptive cruise control uses a rada r senso r in
t h e front of the vehicle ¢
fig. 12 7. The system
has limitat ions ¢
page 125. Things that are
not moving in your lane and in your direction
of travel will not be detected. The sensor
measures the distance to reflect ive surfaces ..,.