ECU AUDI RS7 SPORTBACK 2015 Service Manual
[x] Cancel search | Manufacturer: AUDI, Model Year: 2015, Model line: RS7 SPORTBACK, Model: AUDI RS7 SPORTBACK 2015Pages: 302, PDF Size: 74.76 MB
Page 277 of 302
"' N
a:: I.J "". rl I.O
"' rl
"' rl
-When connecting jumper cables, make
sure that they cannot get caught in any
moving parts in the eng ine compart
ment .
- Before you check anything in the engine
compartment, always read and heed all
WARNINGS
¢ page 211.
(D Note
Improper hook-up of jumper cables can r u
in the generator.
- Always connect POSITIVE( +) to POSI
TIVE(+), and NEGATIVE(-) to NEGATIVE
( - ) gro und post of the battery manager
control unit .
- Check that all screw plugs on the battery
cells a re screwed in firmly . If not, tighten
pl ugs p rior to connecting clamp on nega
tive battery term inal.
- Please note that the procedure f or con
nect ing a jump er cable as desc ribed
above appl ies spec ifically to the case of
you r vehi cle be ing jump started. When
you are giv ing a jump star t to an othe r ve
hi cle, do
not connec t the negat ive (-) ca
ble to the negat ive (-) terminal on the
discharged battery @¢
fig. 220. In
stead, securely connect the negative( -)
cable to e ithe r a solid metal component
that is firmly bolted to the engine block
or to the e ng ine block itse lf. If the bat
te ry tha t is being charged does not vent
to the outside, escaping batte ry gas
could igni te and exp lode!
Emergency towing
with commercial tow truck
General hints
Your Audi requires special handling for tow
tng.
The follow ing information is to be used by
commercia l tow tr uck operators who know
h ow to ope rate thei r equipme nt safe ly.
Emergenc y situ ation s 2 7 5
- Ne ver tow your Audi. Towing will cau se
damage to the engine and tran smission.
- Never wrap the safety chain s or w inch ca
ble s around the brake lines.
- To prevent unnece ssary damage , your Audi
must be transported with a flat bed tru ck.
- To load the vehicle on to the fl at bed , use
the towing loop found in the vehicle tools
a nd attach to the front or rear anchora ge
¢pag e 275 and ¢ page 276 .
_& WARNING
A vehicle being towed is not safe for pas
sengers. Never allow anyo ne to ride in a
vehicle be ing towed, for any reason.
Front towing loop
Only install the front towing loop when it is
needed.
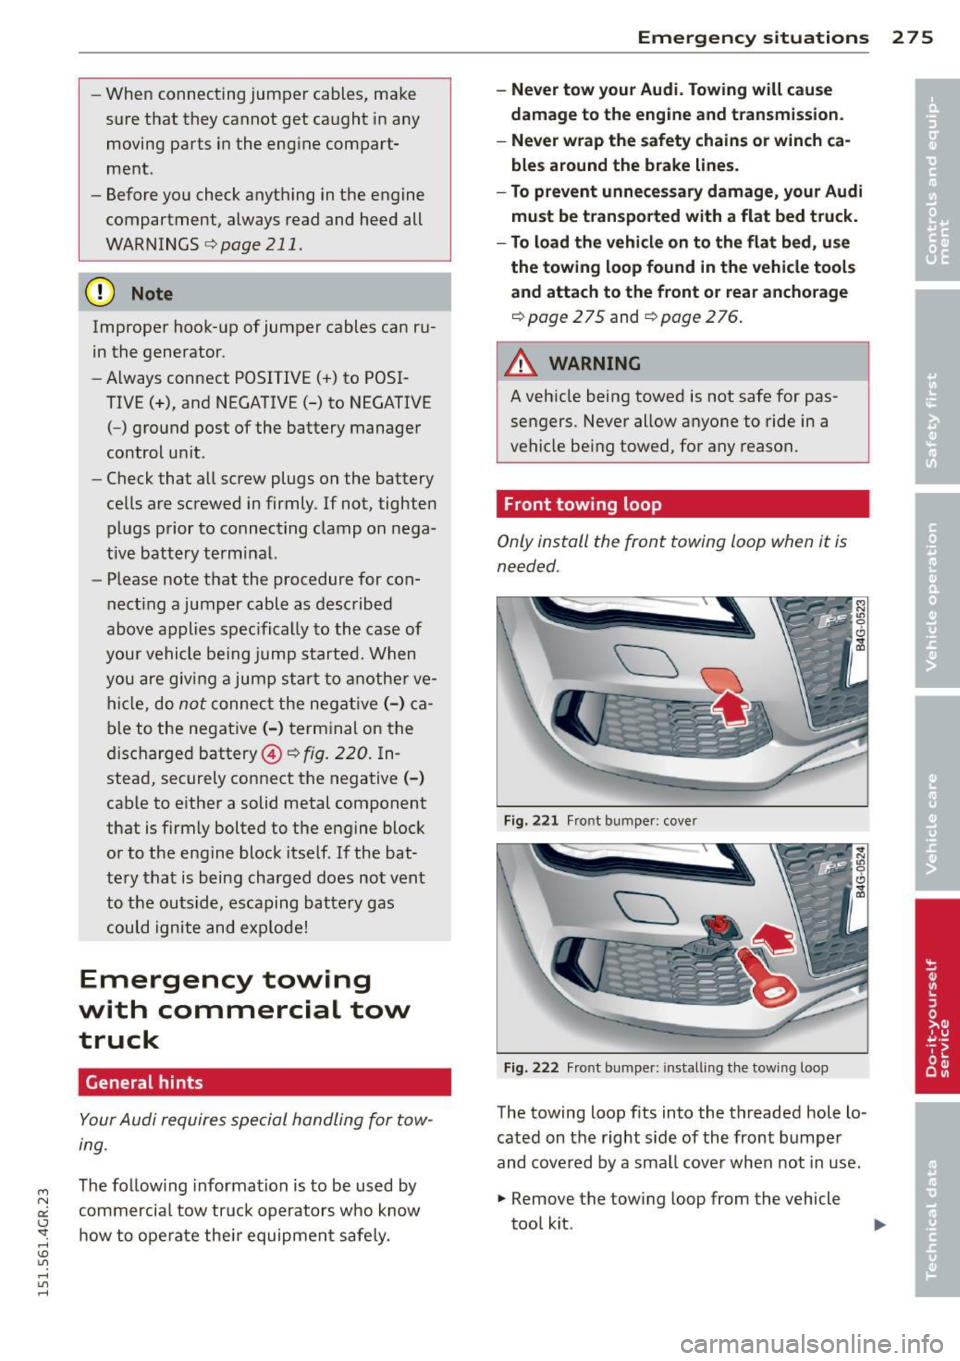
Fig. 22 1 Front bumpe r: cove r
Fig. 222 Front bu mpe r: in stall ing t he tow ing loop
-
The towing loop fits into the threaded hole lo
cated on the right s ide of the front bumpe r
and cove red by a sma ll cover when not in use.
.. Remove the tow ing loop from the vehicle
too l kit .
Page 279 of 302
"' N
a:: I.J "". rl I.O
"'
@ Tips
Check carefully to make sure the hook-up
is secure before moving the car up the flat
bed truck ramp.
Vehicle transport
Whenever you hove your vehicle transported,
be sure to note the following:
(D Note
Mount the tie-down chains/cables over the
running surface (circumference) of the
tires. Never secure the vehicle by the axle,
the suspension struts or the front or rear
towline eye. For technical reasons, the
pressure in the suspension struts may
change du ring the transport and this will
adve rsely affect vehicle handling.
Lifting vehicle
Lifting with workshop hoist and with
floor jack
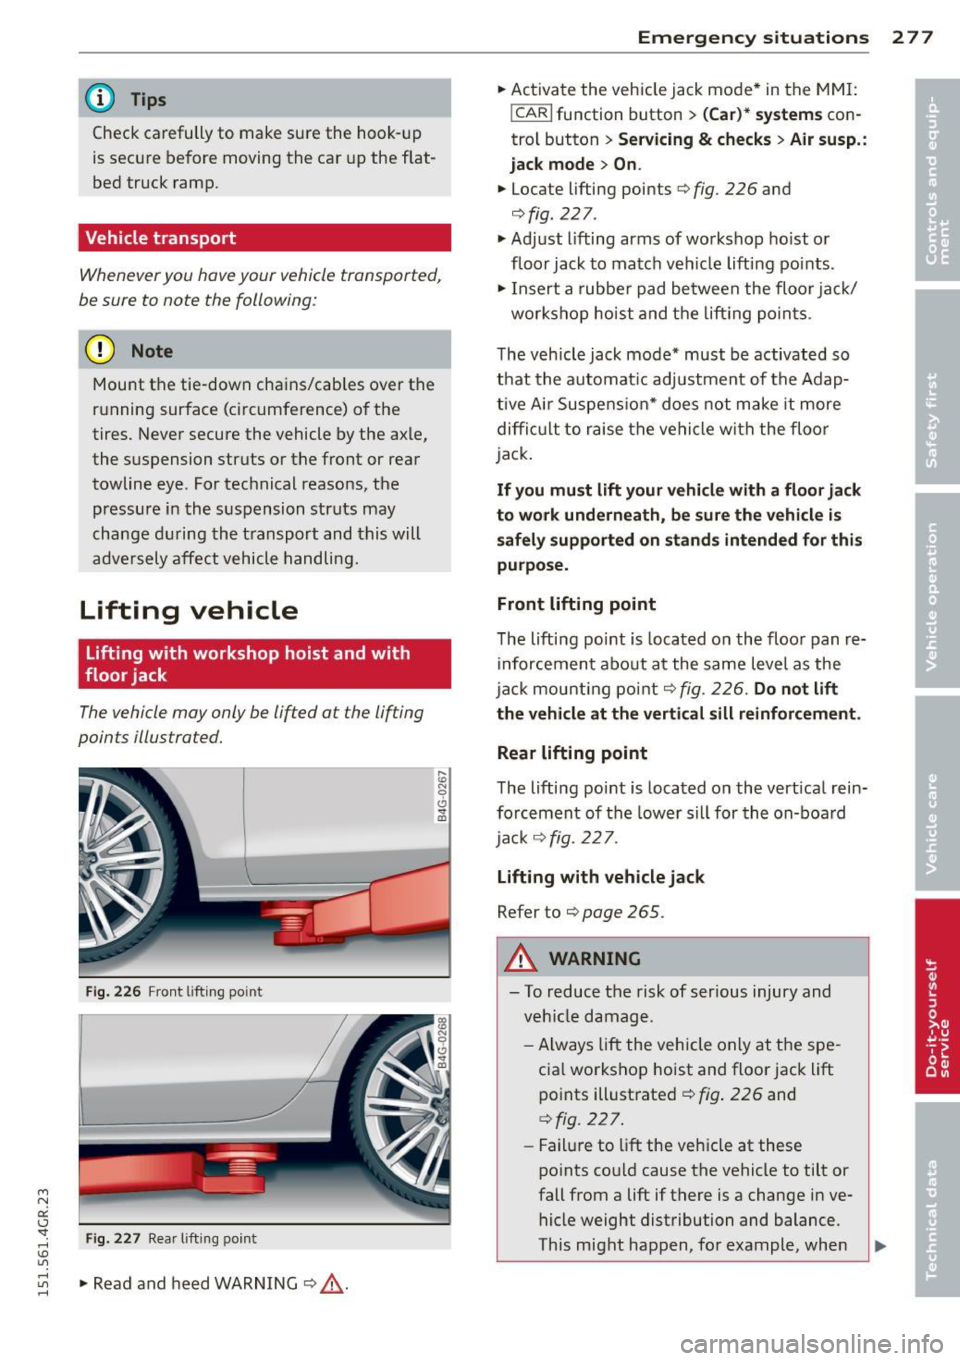
The vehicle may only be li~ed at the lifting
points illustrated.
Fig. 226 Front l ift ing po int
Fig. 22 7 Rea r lifti ng point
:;:; N 0 6 ., a,
5 .. Read and heed WARNING Q ,&..
Emergenc y situ ation s 2 77
.. Activate the vehicle jack mode* in the MM I:
!CARI function button > ( C ar)* s ystem s con
trol button>
S e rv ic ing & check s> Air su sp. :
jac k m od e> On .
.. Locate lifting points Q fig. 226 and
Qfig. 227.
.. Adjust lifting arms of workshop hoist or
floor jack to match veh icle lifting points.
.. Insert a rubber pad be tween the floor jack/
workshop hoist and the lift ing po in ts.
The vehicle jack mode* must be activated so
that the automat ic adjustment of the Adap
tive Ai r Suspens ion* does not make it more
diffi cult to raise the vehicle with the floor
jack.
If yo u must lift your v ehi cle with a floor jack
t o wo rk und ern eath , be sure th e vehicle i s
s af ely s upported on s tands intended for thi s
purpo se.
Front lifting point
The lifting po int is located on the floor pan re
inforcement abo ut at the same leve l as the
jac k mounting point
Q fig. 226. Do n ot lift
t h e ve hicle at th e verti cal sill reinforc em ent .
Re ar lifting point
The lifting point is located on the vert ical rein
forcement of the lower sill for the on-boa rd
ja ck
c::> fig. 22 7 .
Lifting with veh icle j ack
Refer to Q page 265 .
A WARNING
-To reduce the risk of ser ious injury and
veh icle damage.
- Always lift the veh icle only at the spe
cia l workshop hoist and floor jack lift
po ints illust rated
c::> fig . 226 and
<=:> fig. 227.
-Failu re to lift the vehicle at these
po ints could cause the vehicle to tilt or
fall from a lift if there is a change in ve
hicle weight distribution and balance.
This might happen, for example, when
-
Page 285 of 302
M N
0:: <.J 'SI: ,...., \!) 1.1'1 ,...., 1.1'1 ,....,
steadily reduced the scope of maintenance
and repairs which can be carried o ut by vehicle
owners.
Also, safe ty and en vironment al con
cerns p lace very strict limits on the nature of
repairs and adjustments to engine and trans
miss io n parts which an owner can perform .
Maintenance, adjustments and repa irs usua lly
require special tools, testing devices and oth
er equipment availab le to specially trained
workshop personne l in order to assure proper
pe rformance, reliab ility and safety of the vehi
cle and its many systems .
Improper ma intenance, adjustments and re
pa irs can impair the operation and reliability
of your vehicle and even void your vehicle war
ranty. Therefo re, p roof of servic ing in accord
ance w ith the maintenance schedule may be a
condition for upholding a poss ible war ran ty
claim made within the warranty period .
Above all, operational safety can be adversely
affected, creating unnecessary risks for you
and your passengers .
If in do ubt about any serv icing, have it done
by your authorized Audi dealer or any othe r
p roperly equipped and q ualified works hop .
We strong ly urge you to give yo ur auth o rized
Aud i dea ler the opportuni ty to perform all
schedu led maintenance and necessary repairs .
Your dea ler has the facilities, original parts
and tra ined spec ialists to keep your vehicle
running properly.
Performing limit ed ma inten ance yourself
The fo llow ing pages describe a limited num
ber of proced ures which can be pe rformed on
your vehicle with ordina ry too ls, should the
need arise and trained personnel be unavaila
ble. Before performing any of these proce
dures, always th oroughly read all of the appli
cable text and carefully follow the instruc
tions given . Always rigorously obse rve the
WARNINGS provided.
Before you check anything in the engine
c ompartm ent, a lway s re ad and heed all
WARNINGS ~
A and ~ A in Working in the
engine compartment on page 211.
Con sumer In formation 283
_& WARNING
- Ser ious personal injury may occur as a re
sult of improperly performed mainte
nance, ad justments or repa irs .
- Always be extremely ca reful when work
ing on the vehicle . Always follow com
monly accep ted safety pract ices and gen
era l common sense. Never r is k personal
inju ry.
- Do not attempt any of the maintenance,
checks or repairs descr ibed o n the fol
lowing pages if you are not fully familia r
wit h these or othe r procedures with re
spect to the ve hicl e, or are uncertain how
to p roceed .
- Do not do any work without the proper
too ls and equipment. Have the necessa ry
wo rk done by your authorized A udi deal
er or another proper ly equipped and
qualified wor kshop.
- The engine compartment of any motor
veh icle is a potentially hazardous area.
Never reach into t he area around or
touch the rad iator fan. It is temperature
contro lled and can switch on suddenly -
even when the engine is off. The radiato r
fan switches on automat ically when the
coo lant reaches a certain tempera ture
and will cont inue to run until the coo lant
temperature drops .
- Always sw itch o ff the ignition before any
one gets under the vehicle.
- Always support your veh icle with safety
s tands if it is necessary to work under
neath the vehicle. The jack s upplied with
the vehicle is not adequate for this pu r
pose and cou ld collapse causing serio us
personal injury.
- If you m ust wor k unde rneath the vehicle
with the wheels on the g round, a lways
make sure the vehicle is on leve l ground,
that the wheels a re a lways securely
blocked a nd that the engine cannot be
started.
- Always ma ke sure the transmission se
lecto r lever (automatic transmission) is •
•
Page 290 of 302
288 Index
Child restra int system anchors ....... . 179
Ch ild safety .. ................ ... ... 165
Conve rtible locking retracto r .. .. .... . 176
Important safety instructions for u sing
chi ld safety seats ..................
169
Important things to know when driving
with children .... ....... ... .. .... .
165
Tether anchors . . . . . . . . . . . . . . . . . . . . 182
Tether straps . . . . . . . . . . . . . . . . . . . . . 182
Ch ild safety lock
Rear doors ............... ... .... .. 40
Ch ild safety seats ............... ....
17 1
Booster seats . . . . . . . . . . . . . . . . . . . . . 17 4
Conve rtible child seats ............. 172
Convertible locking retractor .. .. .... . 176
How do I properly install a child safety
seat in my vehicle? ......... ... .... .
169
Infant seats .............. ... .... . 171
Installing .... ............. ...... . 176
Installing a child restraint using the
LATCH system .... ..... .... ... ... ..
181
LATCH system ................. .... 181
Lower anchorages ................. 180
Mount ing and releasing the ancho rage
hook .. .. .. ... .......... ...... .. .
181
Safety instructions ............ .... . 169
Unused safety belts on the rear seat .. 171
C igarette lighter . . . . . . . . . . . . . . . . . . . . . 59
C leaning .. ................. .. .... . 201
C limate control (four-zone)
Operation . . . . . . . . . . . . . . . . . . . . . . . . .
70
Clock .. .... ................... ... .. 26
C losing
Rear lid .. ............... ........ ..
37
Sliding/tilting sunroof ....... .. .. .. . . 41
Cold ti re inflation pressure .... ... .... . 233
Com ing home ... .... ...... .. .. .. .. ..
46
Compartments ............ .. .. .. .. .. 60
Compl iance ........................ 285
Consumer Information . . . . . . . . . . 128, 282
Consumption (fue l) ..... ... .. .. .... .. 24
Contact ing NH TSA .................. 128
Controls
Cleaning . .. ..................... . 203 Convenience key
... ... ....... ... ... .. 35
Starting the engine ............ .. .. .
74
Stopping the eng ine (START ENGINE
STOP button) ......................
75
Switching the ignition on ............ 74
Unlocking and locking vehicle ....... .. 35
Convertib le child safety seats . . . . . . . . .
172
Convertib le locking retractor
A ctivating . .... .. ............. ....
178
Deact ivat ing . ................. .. .. 178
Using to secure a child sa fety seat l.76, 178
Coolant
refer to Eng ine coolant ............. 217
Cooling mode (automat ic climate control) 70
Cruise cont ro l
Changing speed .. ... .. ..... ... .. .. . 80
Presetting your speed .. ..... ... .. .. . 80
Switching off ...................... 80
Switching on . . . . . . . . . . . . . . . . . . . . . . .
79
Warning/ind icator lights ............ . 22
(upholder .. .... .. .. ... ..... ... .. .. . 60
Curve light ........ .. .............. .. 96
Cylinder management
refer to Cylinder on demand System .. . 24
Cylinder on demand System . . . . . . . . . . .
24
D
Data recorde r ... .. ............. .... 186
Date d isp lay .. ...... .............. .. 26
Daytime running lights . .. ..... ... .. .. . 44
Declarat ion of compliance
Adaptive cruise control .............
285
Audi side ass ist .. ............. .. .. 285
Cell phone package . . . . . . . . . . . . . . . . 285
Convenience key . ... ... ......... ... 285
E lectronic immobilizer ... .... ... .. .. 285
Garage door opener (Homelink) ...... 285
Remote control key . . . . . . . . . . . . . . . . 285
Tire pressure monitoring system ..... 285
Decorative parts/trim
Cleaning . ..... .. ... .. ..... ... .. .. 203
D EF
What does this mean when it appears in
the tr ip odometer display? ...........
25
Defective light bulb warni ng ......... .. 21
Page 296 of 302
29 4 Index
Rear light
Defective . . . . . . . . . . . . . . . . . . . . . . . . . 21
Rear she lf . . . . . . . . . . . . . . . . . . . . . . . . . . 64
Rear spoiler ................. .. .... . 190
Rear view camera
refer to Parking systems . . . . . . . 110, 111
Rear view mirror .. ...... .... ... .. .. .. 51
Rear window heating (automat ic climate
control) . . . . . . . . . . . . . . . . . . . . . . . . . . . . 71
Recirculation mode (automatic climate
control) . . . . . . . . . . . . . . . . . . . . . . . . . . . . 70
Recuperation . . . . . . . . . . . . . . . . . . . . . . . . 24
Refuelling . .. ............. .. .. .. ... 208
Remote control Un lock ing and locking ... .. .. .... .. . . 34
Repai r manua ls ............. ... .. .. . 282
Repairs Airbag system ............... .... . 155
Replacing Bulbs . ..... .. . .. ..... ... .. .. .... . 272
Fuses . ..... ... ... .... ... .. .. .... . 269
Tires and whee ls ......... .. .. .. .. . 246
W indshield wiper blades ... .. .. .... .. 49
Report ing Safety Defects . ... .. ... ... . 128
Request to wa rm eng ine by driving
Warn ing/ indicato r lights . .. .. .. .. .. .. 20
Reset button . . . . . . . . . . . . . . . . . . . . . . . . 25
Retractor . ... ... ... .... ... .. .. .... . 133
Revers ible mat . .. ...... .... ... .. .. .. 67
Rims Cleaning ................ ........ . 202
Roo f rack .. ... ............ .. .. .. .. .. 62
L oading ..... .. .. ..... ... .. .. .... .. 63
Roof weig ht . . . . . . . . . . . . . . . . . . . . . . . 63
s
SA FE ... .. ... ............ .. .. .. .. .. 25
Safe driving hab its . . . . . . . . . . . . . . . . . . 120
Safety belt position . . . . . . . . . . . . . . . . . 134
Safety belt he ight ad justment .. .. ... 136
Safety belts worn by pregnant women . 135
Safety belt pretens ioner ... .. .. .. .. .. . 13 6
Service and disposal . ... .. .. .. .. ... 13 7
Safety belt pretens ioners
P re sense .... ........... .. .. .. .. . 184 Safety be
lts ..... .. ... .. ..... .... . .. 133
Cleaning . ..... .. .. ... .. ..... ... .. 203
Danger to passengers who do not wear a
safety belt ...... ............. .... 131
Fastening . ...... ............. .... 133
Height ad justment ................ . 136
Improperly worn .... .. .. ... ..... .. 136
Not worn ..... .. .......... ... ... . 131
Safety be lt pos it ion ............ .. .. 134
Safe ty in str uctions ... .......... .. .. 133
Secu ring child safety seats . ... .. .. .. 176
Specia l considerations for pregnant
women ... .... .. .. ... .. ..... ... .. 135
U nfastening ... .. ................. 135
Warning/ind icator light ......... .... 130
Warning light .... ............. ..... 16
WhyYOUMUSTwearthem .......... 130
Worn p roperly ... ... .. .. ... ..... .. 132
Safety be lt tens ioner
drive select .... .. ... .......... .... . 96
Sa fety be lt warning ligh t ......... .. .. 130
Safety comp liance sticker ........... . 279
Safety eq uipment . ... ... ..... ... .. .. 120
Safety featu res for o ccupan t rest ra in t and
pro tection .. .. .. .. ... .......... .... 120
Safety gu idelines
Seat adjustment . . . . . . . . . . . . . . . . . . . . 53
Safety instr uctions
Engine compartment ........... .. .. 211
for side curtain airbags ............. 163
for using child safety seats ....... ... 169
for us ing safe ty belts ... ......... ... 133
Moni to ring the Advanced Airbag Sys-
tem ...... .. .. .. .. ........... .... 15 4
Safety systems Warning/ind icator lights .. ... ..... .. . 18
Saving f uel
Cylinder on demand System . . . . . . . . . . 24
Efficiency program . . . . . . . . . . . . . . . . . . 25
Recuperat ion . . . . . . . . . . . . . . . . . . . . . . 24
Seat adjustment Controls . . . . . . . . . . . . . . . . . . . . . . . . . . 54
Driver's seat . . . . . . . . . . . . . . . . . . . . . . . 53
Front passenger's seat . . . . . . . . . . . . . . . 54
Front seats . . . . . . . . . . . . . . . . . . . . . . . . 53
Head restra ints . . . . . . . . . . . . . . . 56, 124
Safety gu idel ines . ... ........... ... . 53