AUDI TT ROADSTER 2011 Manual Online
Manufacturer: AUDI, Model Year: 2011, Model line: TT ROADSTER, Model: AUDI TT ROADSTER 2011Pages: 260, PDF Size: 64.11 MB
Page 81 of 260
~ If you would like to save fuel, switch the air
conditioning off.
~ If you open the windows wh ile driving,
switch the air conditioning off.
~ If the vehicle is extremely hot due to the
heat of the sun, briefly open doors and win
dows.
@ For the sake of the environment
When you save fuel, you reduce em iss ions
from the vehicle.
Rear window defogger
The rear window defogger clears the rear win
dow of condensation .
~ Press the QiP button c:> page 75, fig. 87 to
turn the rear window defogger on and off.
The rear window defogger works only when
the eng ine is running. The indicator light in
the button illuminates when the rear window
defogger is turned on .
The rear window defogger is switched off au
tomatically after 10 to 20 minutes, depend
ing on the outside temperature.
At very low outside temperatures, the rear
window defogger can be switched on continu
ously by push ing the
QiP button for more than
2 seconds. This remains stored unt il the igni
tion is sw itched off . A rear window defogger
that was switched on a lso remains stored for
15 minutes after the ignition is switched off.
If the engine is restarted within these 15 m i
nutes, the rear window defogger is act ivated
for 10 to 20 minutes, depending on outside
temperature. With a vehicle that is parked for
a short t ime, the rear w indow defogger does
not need to be manually activated again.
@) For the sake of the environment
As soon as the rear window is clear, yo u
should switch the rea r window defogger
off . The reduced power consumption has a
beneficial effect on fuel consumption.
Warm and c old 79
Heated seats
Applies to vehicles: with heated seats
The seat cushion and the seatback of the
front seats can be heated electrically.
~ Press the heated seats button I -.i + I
<=> page 75, fig. 87 to set the level of heating
desired.
The range of contro ls goes from 1 to 3. The
heat setting selected is shown by LEDs above
the button.
(D Note
To avoid damage to the heating e lements
in the seats, do not kneel on the seats or
place heavy loads on a small area of the
seat.
Page 82 of 260
80 On the road
On the road
Steering
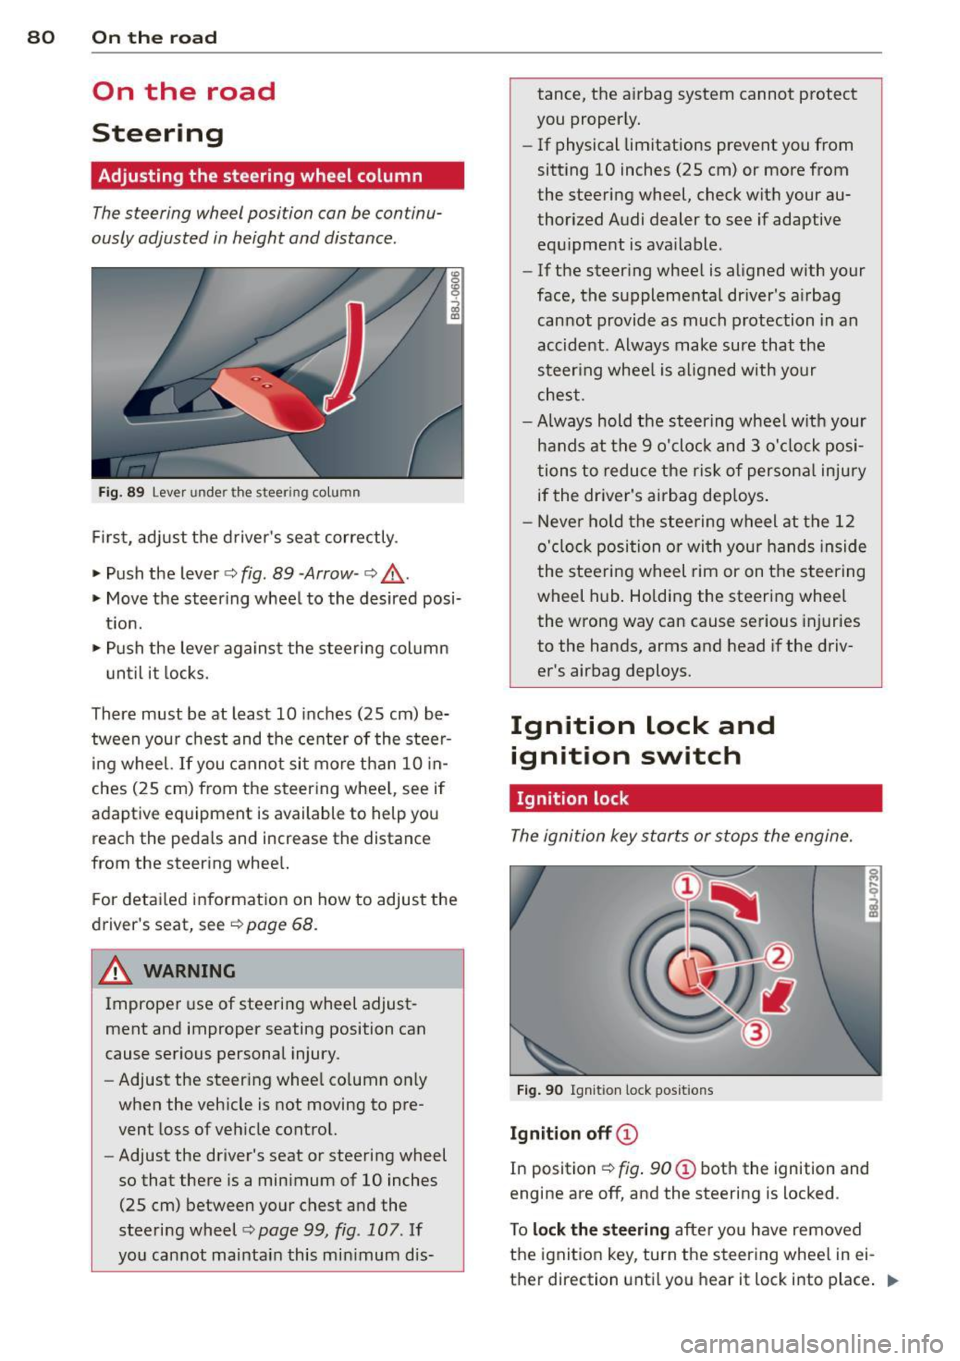
Adjusting the steering wheel column
The steering wheel position can be continu
ously adjusted in height and distance .
Fig. 89 Lever under the steer ing co lu m n
First, adjust the driver's seat correctly .
• Push the lever
c::> fig . 89 -Arrow -c::> ,&.
• Move the steer ing wheel to the desired posi
t ion.
• Push the lever against the steering column
until it locks.
There must be at least 10 inches (25 cm) be
tween your chest and the center of the steer
i ng wheel. If you cannot sit more than 10 in
ches (25 cm) from the steering whee l, see if
adaptive equipment is available to help you reach the pedals and increase the distance
from the steering whee l.
F or detai led information on how to adjust the
driver's seat, see
c::> page 68.
A WARNING
Improper use of steeri ng wheel adjust
ment and improper seating position can
cause serious personal injury.
- Adjust the steer ing whee l co lumn on ly
when the vehicle is not moving to pre
vent loss of veh icle control.
- Adjust the driver's seat or steering wheel
so that there is a minimum of 10 inches
(25 cm) between your chest and the
steering wheel
¢ page 99 , fig. 107. If
yo u cannot maintain this min imum dis- tance, the airbag system cannot protect
you proper ly.
- If physical limitations prevent you from
sitting 10 inches (25 cm) or more from
the steering wheel, check with your au
thorized Audi dealer to see if adaptive equ ipment is ava ilable .
- If the steer ing wheel is aligned with your
face, the supplementa l driver's a irbag
cannot provide as much protection in an
accident . Always make sure that the
steer ing wheel is aligned with your
chest.
- Always hold the steering wheel w ith your
hands at the 9 o'clock and 3 o'clock posi
tions to reduce the risk of persona l injury
if the driver's airbag dep loys .
- Never hold the stee ring wheel at the 12
o'clock position or with your hands inside
the steeri ng wheel rim or on the steering
wheel hub . Holding the steering wheel
the wrong way can cause serious injuries
to the hands, arms and head if the driv
er's airbag deploys.
Ignition lock and
ignition switch
Ignition lock
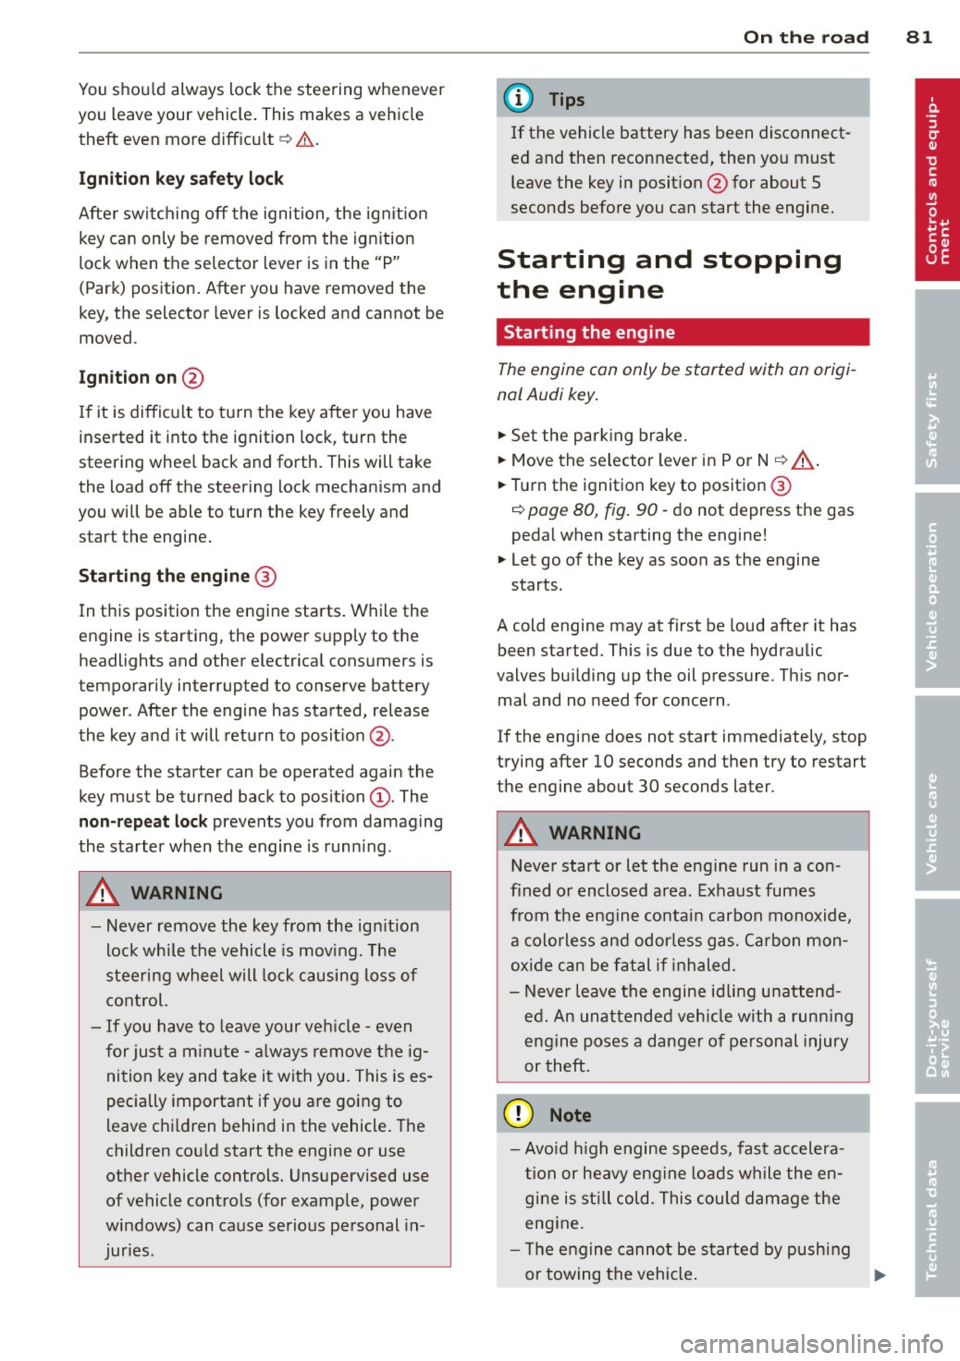
The ignition key starts or stops the engine.
Fig . 90 Ign iti on lock pos it ions
Igniti on off ©
In pos ition c::> fig . 90 @ both the ignition and
engine are off , and the steering is locked .
T o
loc k th e steering after you have removed
the ignition key, turn the steering whee l in ei
ther direction until you hear it lock into place .
1)),-
Page 83 of 260
You should always lock the steering whenever
you leave your vehicle . This makes a vehicle
theft even more difficu lt ¢ & .
Ignition ke y safe ty lock
After switching off the ignition, the ig nit ion
key can only be removed from the ign ition
l ock when the selector lever is in the "P"
(Park) position . After you have removed the
key, the selector lever is locked and cannot be
moved.
Ignition on @
If it is difficult to turn the key after you have
inse rted it into the ignition lock, turn the
steering whee l back and forth. This will take
the load
off the steering lock mechan ism and
you will be able to turn the key freely and start the engine.
Starting the engin e@
In this position the engine starts . While the
engine is starting, the power supply to the headlights and other e lectr ica l consumers is
tempo rarily interrupted to conserve battery
power . After the engine has started, release
the key and it will return to posit io n @ .
Before the starter can be operated again the
key must be turned back to position@. The
non-r epeat lock prevents you from damag ing
the sta rter when the engine is runn ing .
A WARNING
-Never remove the key from the ign ition
lock whi le the vehicle is moving. The
steering wheel will lock causing loss of
control.
- If you have to leave your ve hicle -even
f or just a m in ute -always remove the ig
ni tion key and take it with you. This is es
pecially important if yo u a re going to
leave chi ldren behind in the vehicle. The
children cou ld start the engine or use
other vehicle controls. Unsupervised use
of vehicle controls (for example, power
windows) can cause serious personal in
jur ies .
-
On th e ro ad 81
(D Tips
If the vehicle battery has been disconnect
ed and then reconnected, then yo u must
l eave the key in posit ion @ for about 5
seconds before you can start the engine.
Starting and stopping
the engine
' Starting the engine
The engine can only be started with an origi
nal Audi key .
.,. Se t the par king brake.
.,. Move the selector lever in P or
N q ,& .
.,. Tu rn the ignition key to position ®
~ page 80, fig. 90 -do not depress the gas
peda l when starting the engine!
.,. Let go of the key as soon as the engine
starts.
A cold engine may at first be loud after it has
been started. This is due to the hydraulic
valves bu ild ing up the oil pressure. Th is nor
mal and no need for concern .
If the engine does not start immediately, stop
trying after 10 seconds and then try to restart
the engine about 30 seconds later.
A WARNING
-Never start or let the eng ine run in a con-
fined o r enclosed area . Exhaust fumes
from the engine contain carbon monoxide,
a colorless and odo rless gas. Ca rbon mon
oxide can be f atal if inhaled.
- Never leave the engine id ling unattend
ed. An una ttended veh icle with a runn ing
engine poses a danger o f personal injury
or theft .
(D Note
-Avo id high engine speeds, fast accelera
tion or heavy engine loads while the en
gine is still cold. This could damage the
engine.
- The engine cannot be started by pushing
or towing the vehicle . .,..
Page 84 of 260
82 On the road
@ For the sake of the environment
To avoid unnecessary e ngine wea r and to
reduce exhaust emissions, do not let your
veh icle stand and warm up. Be ready to
drive off immediately after start ing your
veh icle . Maintain moderate speed until the
engine is comp letely warm . Remember,
the engine performs best at operating
temperature .
Stopping the engine
• Turn the ig nition key to position ©
<=> page 80, fig. 90.
&_ WARNING
- Never turn off the eng ine unti l th e vehi
cle has come to a complete stop.
- The brake booster and servotronic on ly
work when the engine is running . With
the ignition turned off, yo u have to apply
more force when steering or braking.
S ince you cannot steer and stop norma l
ly, this can lead to accidents and ser ious
injuries .
-The radiator fan can continue to run for up to 10 min utes eve n after yo u have
turned off the eng ine and rem oved the
ign iti on key. The r ad iator fa n can also
t u rn on again if th e e ngine coola nt hea ts
up because of inte nse sunlight or hea t
build -up in t he engine compartment.
(D Note
Do not stop the engi ne immed iate ly afte r
hard or extended driving . K eep the eng ine
r u nning for app rox imately two minu tes to
prevent e xcessive heat build-up .
Parking brake
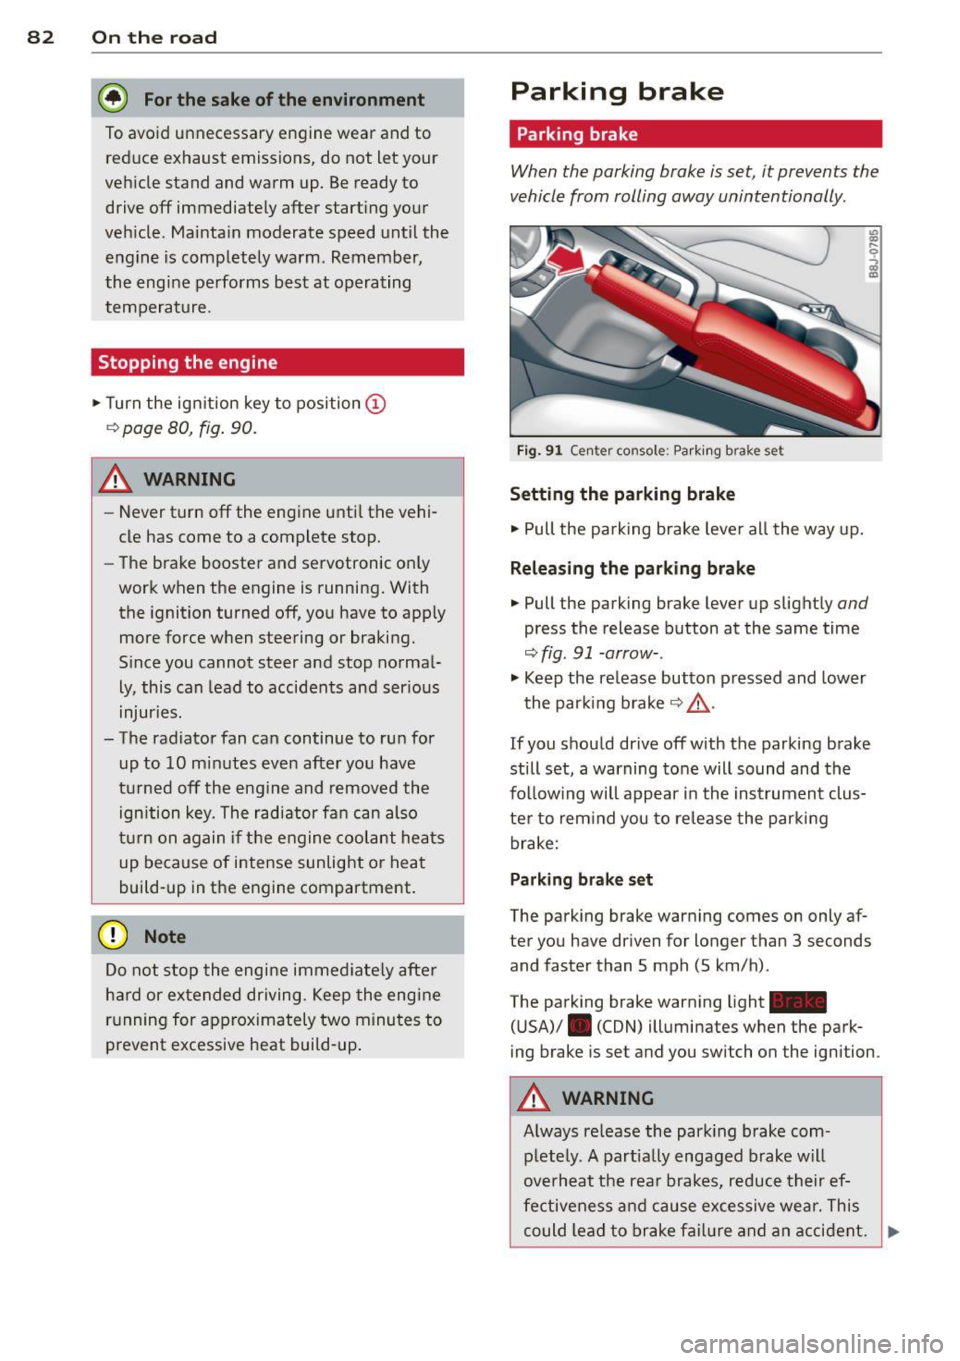
Parking brake
When the parking brake is set , it prevents the
vehicle from rolling away unintentionally .
Fig. 9 1 Ce nte r co nso le: P ark ing b rak e s et
Setting the parking brake
• Pull the pa rking brake leve r all the way up.
Releasing the parking brake
• Pull the p arking brake lever up slight ly and
press the release button at the same time
<=> fig. 91 -arrow- .
• Keep the re lease button p ressed and lower
the par kin g brake <=>.&, .
If you should drive off with the parking brake
still set, a warning tone will sound and the
fol low ing will appear in the instrument clus
te r to rem ind you to re lease the par kin g
brake:
Parking brake set
The parking brake war ning comes on only af
ter you have dr iven for longer than 3 seconds
and faster than S mph (5 km/h) .
The parking brake warning light -
( U SA)/ . (CON) illuminates when the park
ing brake is set and you switch on the igni tion .
&_ WARNING
Always re lease the park ing b rake com -
plete ly. A part ially engaged brake w ill
overheat the rea r brakes, reduce their ef
fe ctive ne ss and cau se excessive wea r. This
could lead to brake f ailur e and an accident. .,..
Page 85 of 260
(D Note
Only after the vehi cle has come to com
plete stop, should you f irm ly set the park
ing brake and either move the selector lev
er into "P".
Parking
To prevent a parked vehicle from rolling
away, there are a few things you should do.
When you park your vehicle, do the following:
.,. Stop the vehicle using the brake pedal.
... Set the parking b ra ke firmly .
... Switch
off the engine.
... Move the selector lever into the P position
¢ A .
... Remove the ign it ion key from the ignit ion
lock.
What else you should do when pa rking
your vehicle on an incline or decline
Turn the steering wheel so that if the vehicle
should start to roll, it will roll into the curb.
If you are parking on a decl ine (the front of
your vehicle facing downhill), turn the front
wheels to the right so that they point
toward
the curb.
If you are parking on an incline (the font of
your vehicle facing uph ill), turn the front
wheels to the left so that they po int
away
from the curb.
A WARNING
Th is is how you can reduce the risk of in
jury when leaving your veh icle.
- Never park the vehicle where it can come
in contact with d ry grass, sp illed fuel or
any othe r flammable mater ials .
- Never allow anyone -especially small
children -to remain in the vehicle whe n
it is locked . Locked doors ma ke it more
difficult for rescuers to access the pas
senge r compartmen t in the event of an
eme rgency. Danger to life!
- Never leave c hildren unsupervised in the
vehicle. Children co uld re lease the par k-
-
On th e ro ad 83
ing brake or move the gearsh ift leve r out
of gear. The vehicle could start to ro ll
away and cause an acc ident.
- No matter what the season is, the tem
perature in a parked ve hicle can reach
dangerous leve ls.
Acoustic parking
system
' Rear acoustic park assist
Applies to vehicles: with 4-channel acoust ic park assist
Acoustic park assist gives a warning about
obstacles behind the vehicle .
Description
The rea r acoustic pa rk ass ist (4-channel
a coustic park ass ist) de termines the dista nce
of the vehicle from an obstacle using ult ra
son ic sensors. The sensors are in the rear
bumper. The volume and the pitch of the
c hi mes can be adjusted throug h the men u dis
play¢
page 21.
T he range at wh ich the sensors start to meas
u re is
about :
To the side
Activation
2 feet (0.60 m)
5 feet (1.60 m)
T he park ing ass ist is activated when
rever se
g ear
is engaged. A br ief tone confirms th at
the sys tem is activated .
Backing up
Distance warning whe n backing up sta rts
whe n an obstacle is detected in the range of
t he pa rk ass ist system. As the distance de
c reases, the t ime inte rva l between the audible
tones becomes shorte r.
When the distance is less than 1 foot (0.30
m), the tone becomes continuous. At this
po in t you sho uld s top bac king up .
Please note that low objects already signalled
by a war ning ca n disappear from the system's
de te ction range and will not continue to be
s ignalled . .,._
Page 86 of 260
84 On the road
Potenti al malfunction s
If a warn ing buzzer sounds for a few seconds
when the ignition is switched on, there is a
system malf unction with the acoustic park as
sist. If the malfunction persists until the igni
tion is switched off, there will be no acoustic
warning at the next attempt to activate the
system. Have the problem corrected.
There is no confirmation tone when reverse
gear is engaged if there is a system malfunc
tion.
For the parking assist to operate, the sensors
must be kept clean and free of ice .
A WARNING
-Sensors have blind spots in which objects
cannot be detected. Pay special attention
to sma ll children and animals. They can
not always be detected by the sensors -
danger of an accident!
- The parking assist cannot replace the dr iver's attention. The d river alone is re
sponsible for parking and s imilar driving
maneuvers. A lways watc h where you a re
dr iv ing.
(D Note
Low obstacles al ready signalled by a warn
ing can disappear from the system's det ec
t ion range as they are approached and will
no t continue to be sign alled. Objects such
as barrier cha ins, trailer draw ba rs, thin
pa inted vertical poles, or fences may not
be detected by the system -risk of dam
age .
For the parking ass ist to operate, the sen
sors must be kept clea n and free of snow
and ice.
Cruise control
Switching the system on
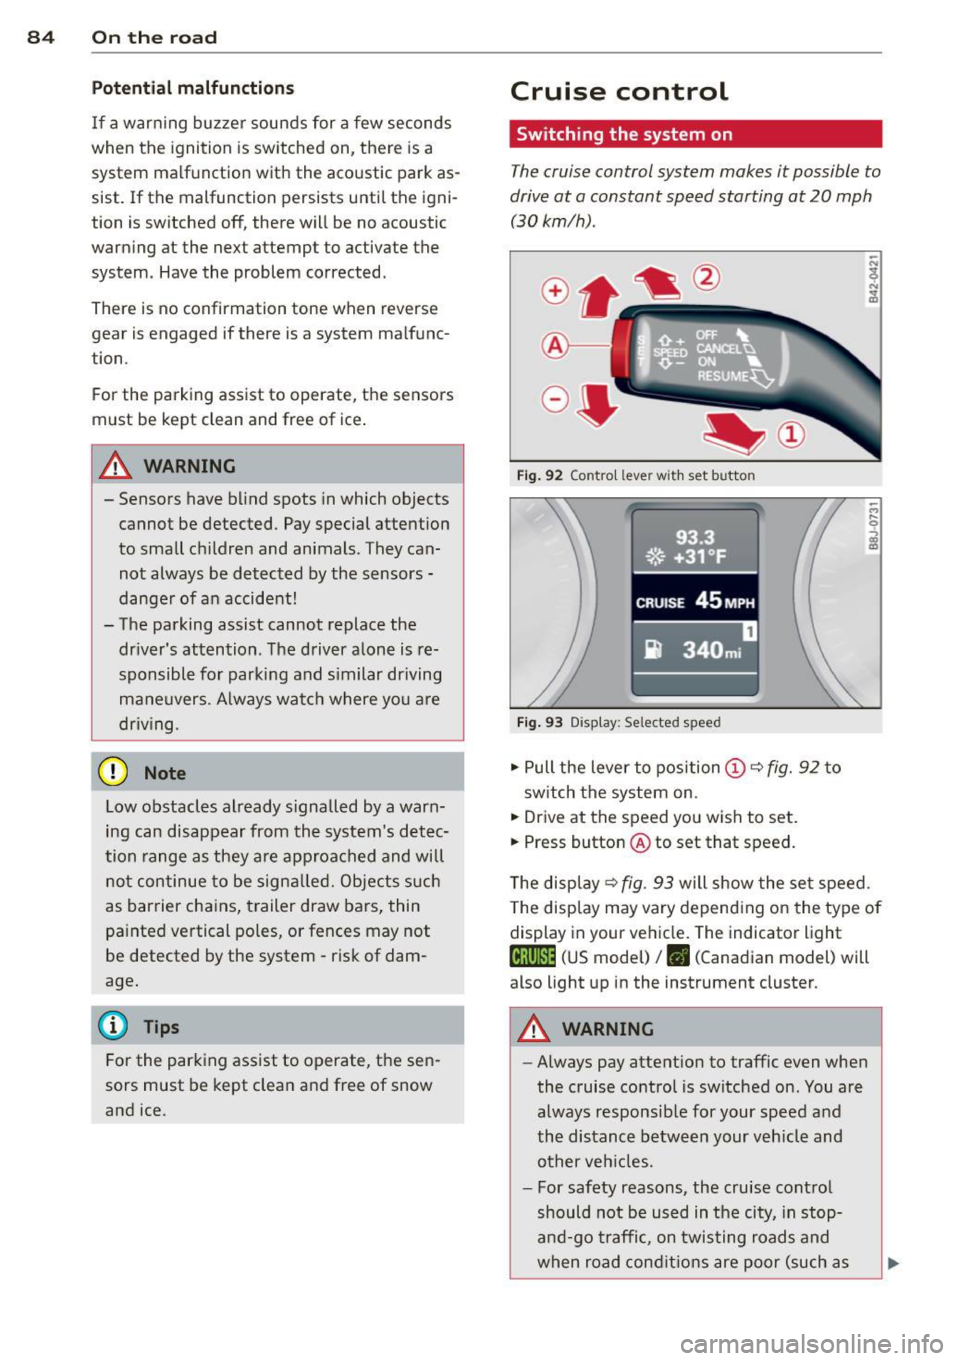
The cruise control system makes it possible to
drive at a constant speed starting at 20 mph
(30kmlh).
®-
Fig . 9 2 Contro l lever wit h set button
93.3
. ®' ~.+31, ~F; ,
II .~~ .. . • , -,.::.._-.--~.I-~-
CRUISE 45 MPH
iR 340m i
Fig. 9 3 Display: Selected speed
.,. Pull the lever to position (D c::> fig. 92 to
sw itch the system on.
.,. Drive at the speed you wish to set.
.,. Press button @ to set that speed.
T he disp lay
c::> fig . 93 will show the se t speed.
T he disp lay may vary depend ing on the type of
display in your ve hicle. The indicator light
te;(Q~i~ (US model) /. (Canadian model) will
also light up in the instrument cluster.
A WARNING
--Always pay attention to traffic even whe n
the cruise contro l is switched on. You are
always respons ib le for your speed and
the distance between your veh icle and
other ve hicles.
- For safety reasons, the cru ise cont ro l
should not be used in the city, in stop
an d-go t raffic, on twis ting road s and
when road cond itio ns are poor (such as
Page 87 of 260
ice, fog, gravel, heavy rain and hydro
planing) -risk of accident.
- Turn off the cruise control tempo rari ly
when entering turn lanes, highway exit
lanes or in construction zones.
- Please note that inadvertent ly "rest ing"
yo ur foot on the accelerator peda l causes
the cruise control not to brake. Th is is
because the cru ise control is overridden
by the d river's acce le rat ion .
(D Tips
The cruise control cannot mainta in a con
stant speed when driving downhill. The ve
hicle will acce lerate under its own weight.
Downshift to a lower gear or use the
brakes to slow down.
Changing speed
.,. Press leve r in the 0 or O direction
¢ page 84, fig. 92 to increase or decrease
your speed.
... Re lease the lever to save that speed .
Change speed in incremen ts of 1 mph (1 km/
h) by light ly pressing the lever.
If you keep the
l ever pressed down, yo u will alter yo ur speed
in 5 mph ( 10 km/h) increments .
You ca n also press the acceler ator peda l down
to inc rease your speed, e .g. if yo u want to
pass someone. The speed yo u saved earlier
will resume as soon as you release the acceler
ator peda l.
I f, however, yo u exceed your saved speed by
S mph ( 10 km/h) for longer than 5 mi nutes,
the cruise contro l will turn off tempora rily.
T he symbol will go o ut but the saved speed
will be retained.
Presetting your speed
You can preset your desired speed while the
vehicle is not moving .
... Turn on the ignition .
... Pull lever into position
(D ~ page 84,
fig. 92.
On th e ro ad 85
... Press the lever in the 0 or O direction to
increase or decrease your speed .
... Release the lever to save that speed.
T his function makes it possib le, for e xamp le,
to save the speed you want before driving on
the highway . Once on the highway, activate
the cr uise control by pulling the lever toward
(D .
Switching the system off
Temporary deacti vation
... Press the brake pedal, or
... Press the lever into position @(not clicked
into place)
¢ page 84, fig . 92, or
... Dr ive fo r longe r than 5 m inutes at mo re
than 5 mph (10 km/h) above the stored
speed.
Switching off completely
... Press lever into position @(clicked into
place), or
... Switch the ignit ion off .
The system retains the saved speed if you de activate the cruise control temporar ily. To re
sume the saved speed, re lease the brake ped
al and pu ll th e leve r to pos it ion
(D .
Switc hing the ignit ion off erases the saved
speed .
A WARNING
You shou ld only ret urn to the saved speed
i f it is not too fast for the cu rrent traffic
conditions -ris k of an accident!
Page 88 of 260
86 On the road
Audi magnetic ride
Applies to vehicles: wit h magnet ic ride
Damping can be adjusted to the driver's pref
erence and it adapts automatically to the cur
rent driving situation.
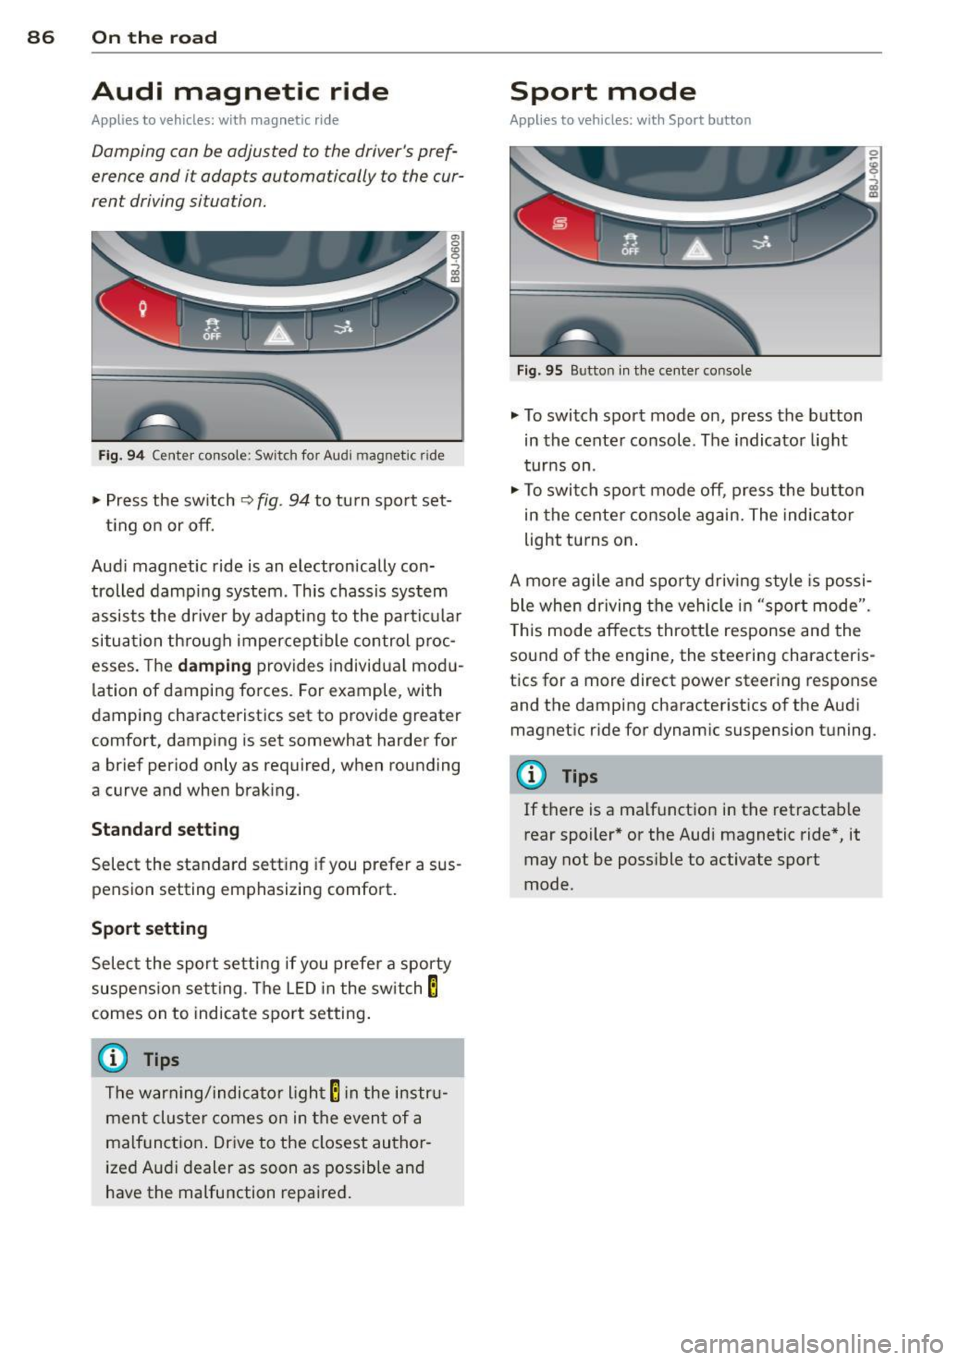
Fig. 94 Cente r console: Switch for Audi magnetic r ide
" Press the sw itch r=) fig. 94 to tu rn spo rt set-
t ing o n or off.
Aud i magnetic ride is an electron ically con
trolled damp ing system . Th is chassis system
assists the driver by adapti ng to the par ticular
situatio n th rough imper cep tible con trol p roc
esses. The
damping provides individual mod u
l ation of damping forces. For example, with
dampi ng characterist ics set to p rovide greater
comfort, damping is set somewhat harder for
a brief period only as required, when rounding
a curve and when braking.
Standard setting
Select the standard sett ing if you prefer a sus
pension setting emphasizing comfort.
Sport setting
Select the sport setti ng if you prefe r a sporty
suspe nsio n setting . The LED in the sw itch
E
comes on to indicate spo rt setting .
@ Tips
The warning/indicator light E in the instru
men t clus ter comes on in the even t of a
malf unction . Drive to the closest au thor
ized Audi dealer as soon as possible and
have the malfunction repaired.
Sport mode
Applies to veh icles: w ith Sport bu tton
Fig . 95 Button in t he ce nter console
.,. To switch sport mode on, press the button
in the center console. The indicator light
t ur ns on .
" To swit ch spor t mode off, press the but ton
in the center console again. The indicator
light turns on .
A mo re agile and spo rty d riv ing style is possi
ble when driving the vehicle in "sport mode".
T his mode affec ts thrott le response and the
sound of the engine, the steering characteris
t ics for a more direct power steering response
and the damping characteristics of the Audi
magnetic ride for dynam ic suspension tu ning.
(D Tips
If there is a malfunction in the retractable
rear spoiler* or the Aud i magnetic ride *, it
may not be poss ible to activate sport
mode.
Page 89 of 260
Transmission S tronic transmission
Introduction
Your vehicle is equipped with a S tronic trans miss ion, also called a double-clutch system/
transmission.
Power is transferred between the engine and
the transm ission by means of two i ndepend
ent clutches. They replace the to rque convert
e r of conventional automat ic transm iss ions
and a llow the vehicle to acce lerate without a
noticeable break in the power flow .
W it h the aid
of tiptroni c, the gears can op
tionally be sh ifted
manually¢ page 90.
Selector lever positions
All the selector lever positions are explained
in this section.
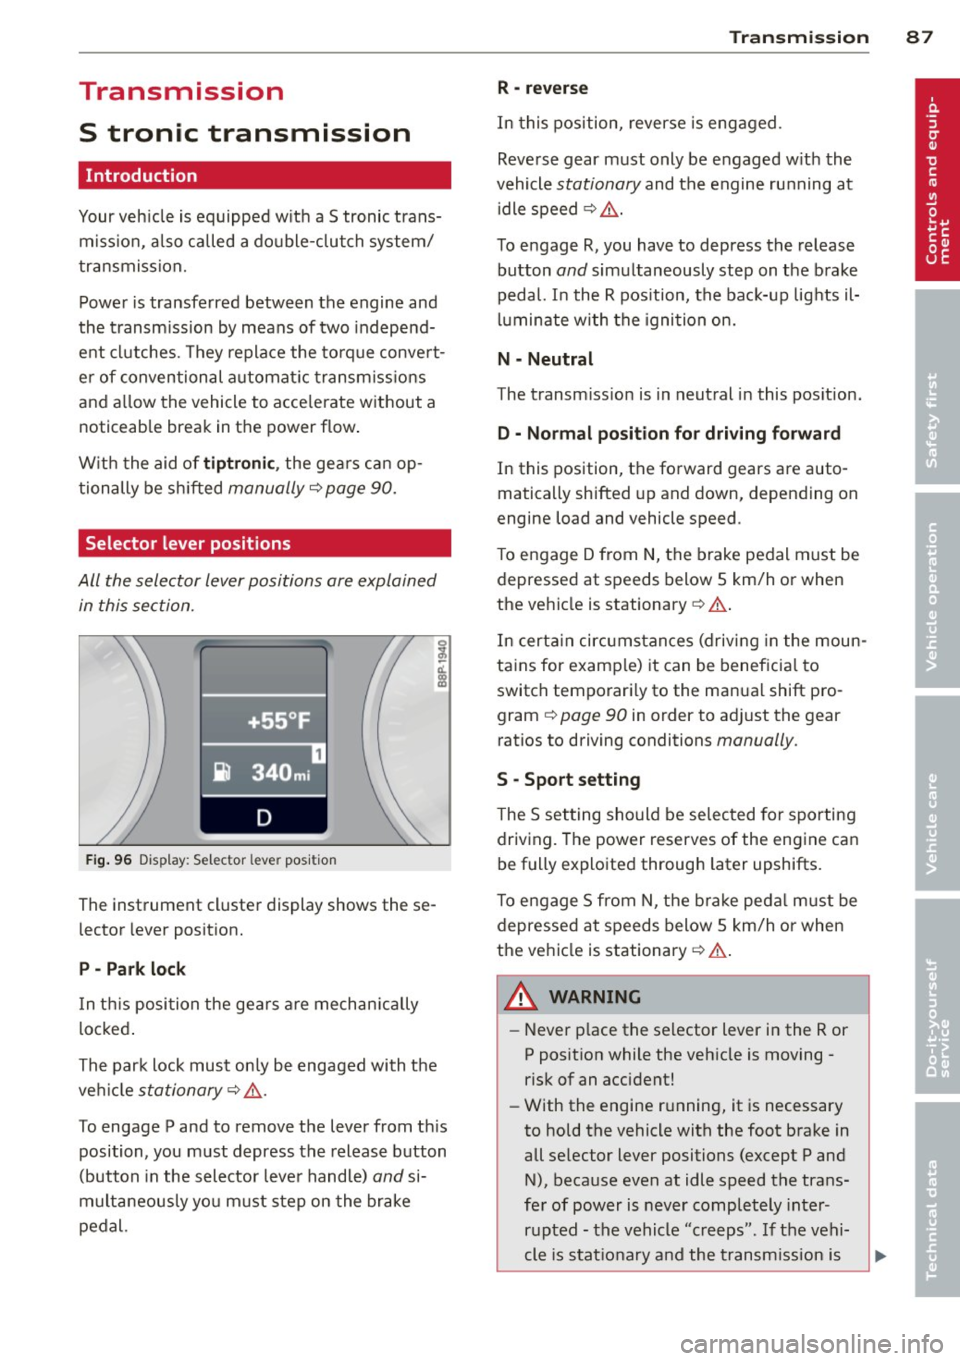
F ig . 96 Display: Selector lever position
The instrument cluster display shows these
l ector lever position.
P -Park lock
In th is posi tion the gea rs are mechan ically
l ocked .
The park lock must on ly be engaged with the
ve hicl e
stationary¢ /1..
To engage P and to remove the lever from th is
position, you must depress the release button
(button in the selector lever handle)
and si
multaneously yo u must step on the brake
pedal.
Tran sm iss ion 87
R -re ver se
In this position, reverse is eng aged.
Reverse gear must only be engaged w ith the
vehicle
stationary and the engine ru nning at
idle speed ¢
/1..
To engage R, you have to depress the release
button
and simultaneously step on the brake
pedal. I n the R pos ition, the bac k-up lights il
luminate w ith the ignition on.
N -Neutral
The transm iss ion is in neutral in this pos ition.
D -Normal po sition fo r dri ving forward
In this position, the forward gears are auto
matically shifted up and down, depending on
engine load and vehicle speed.
T o engage D from
N, the brake pedal must be
depressed at speeds below S km/h or when
the vehicle is stationary¢&. .
In certa in circ umstances (driving in the moun
tains for examp le) it can be beneficia l to
switch temporari ly to the man ual shift pro
gram ¢
page 90 in order to adjust the gear
ratios to driving conditions
manually .
S -Sport s etting
T he S set ting should be se lected for sporting
driving. The power reserves of the engine ca n
be fully explo ited through later upshifts.
T o e ngage S from N, the b ra ke peda l must be
depressed at speeds below 5 km/h or when
the ve hicle is stationary ¢&. .
A WARNING
-Never p lace the selector lever i n the R or
P posit ion while the veh icle is moving -
risk of an accident!
- With the engine r unning, it is necessary
to hold the vehicle with the foot brake in
all se lector lever positions (except P and
N), because even at idle speed the trans
fe r of power is never completely inter
r u pted -the vehicle "creeps". If t he vehi
cle is stat ionary and the t ransm ission is
Page 90 of 260
88 Transmi ssion
engaged, the engine shou ld never be
speeded up unintentionally (e.g. manual ly from under the hood). Otherwise the
vehicle will immediately start to move -
sometimes even if the parking brake is
firmly applied -risk of an accident!
- Before yo u or other persons open the
hood and work on a running eng ine, the
selector lever must be move d to P and
t h e parking bra ke applie d firm ly -ris k of
an a cciden t! Fo llow the w arning stickers
¢ page 17 2, Engine compartment.
@ Tips
If you have inadvertently shifting into N
while the veh icle is moving, yo u should re
move your foo t from the accelerato r and
wait until t he engine speed has dropped to
id le before shifting back to Dor S.
Selector lever lock
The selec tor lever lo ck prevent s a gear from
being engaged accidentally and unintention
ally setting the vehicle in motion .
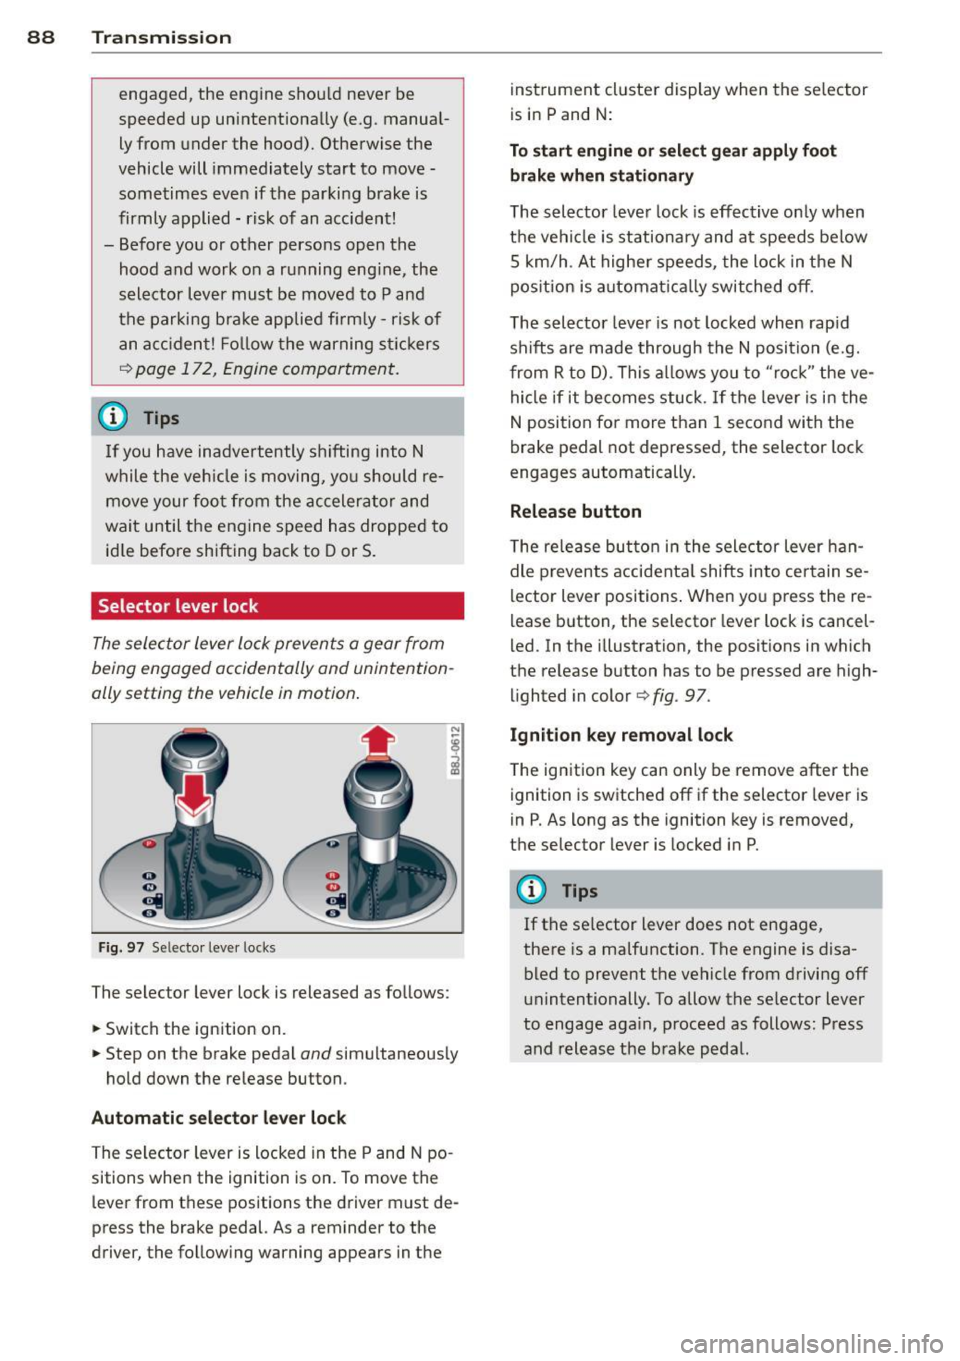
Fig . 97 Se lecto r leve r locks
The selector lever lock is released as follows:
• Switch the ignition on.
• Step on the brake pedal
and simultaneous ly
hold down the re lease button .
Automatic selector lever lock
The selector lever is locked in the P and N po
sitions when the ignition is on. To move the
l ever from t hese positions the driver m ust de
press the brake pedal. As a reminder to the
driver, the follow ing warning appears in t he inst
rument cluste r display when the se lector
is in P and N:
To start engine or select gear apply foot brake when stationary
The selector leve r lock is eff ective o nly when
t h e vehi cle is stationary and at speeds be low
5 km/h . At hig he r sp eeds, the lock in the N
pos ition is a utomat ica lly switched off.
The selector leve r is not locked when rap id
sh ifts are made through the N posi tion (e.g.
from R to D) . This a llows you to "ro ck" the ve
hi cle if it becomes stuck. If the leve r is i n the
N position fo r more than 1 second with the
brake pedal not depressed, the selector lock
engages automatically.
Release button
T he re lease bu tton in t he sele ctor lever han
dle p revents acci dent al shifts into cer tain se
lector lever positions . When yo u press the re
l ease b utton , the selector lever lock is cancel
led. In the illustration , the posit ions in which
the re lease button has to be p ressed are high
li ghted in color
¢ fig . 97 .
Ignition key removal lock
The ign ition key can only be remove after the
ignit ion is switched off if the selector lever is
i n P. As long as the ignition key is removed,
the selector lever is locked i n P.
(D Tips
If t he se lector lever does not engage,
the re is a malfuncti on. The engine is disa
bled to prevent the vehicle from driving off
unintentionally. To allow the se lector lever
to engage aga in, p roceed as follows: P ress
and release the b ra ke pedal.