wheel BMW MOTORRAD G 650 XCHALLENGE 2007 Rider's Manual (in English)
[x] Cancel search | Manufacturer: BMW MOTORRAD, Model Year: 2007, Model line: G 650 XCHALLENGE, Model: BMW MOTORRAD G 650 XCHALLENGE 2007Pages: 138, PDF Size: 2.23 MB
Page 4 of 138
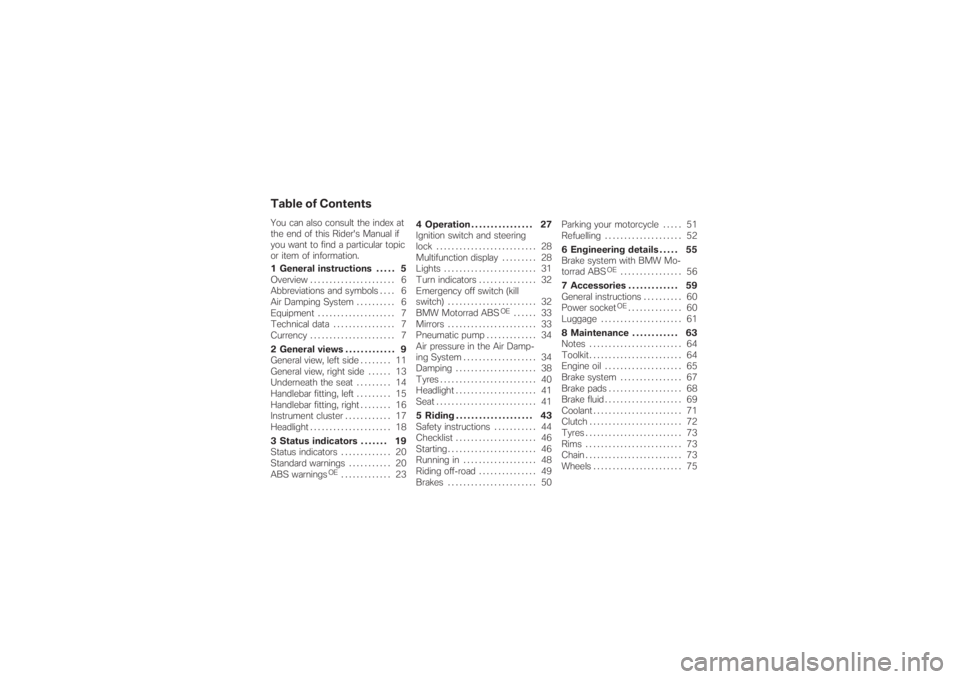
Table of ContentsYou can also consult the index at
the end of this Rider's Manual if
you want to find a particular topic
or item of information.
1 General instructions . . . . . 5
Overview ...................... 6
Abbreviations and symbols . . . . 6
Air Damping System.......... 6
Equipment . . . . . ............... 7
Technical data . ............... 7
Currency ...................... 7
2 General views . . . . . . . . . . . . . 9
General view, left side . . . . . . . . 11
General view, right side . . . . . . 13
Underneath the seat......... 14
Handlebar fitting, left......... 15
Handlebar fitting, right . . . . . . . . 16
Instrument cluster . . .......... 17
Headlight ..................... 18
3 Status indicators . . . . . . . 19
Status indicators............. 20
Standard warnings . .......... 20
ABS warnings
OE
............. 234 Operation . . . . . . . . . . . . . . . . 27
Ignition switch and steering
lock . . . . . ..................... 28
Multifunction display......... 28
Lights . . . ..................... 31
Turn indicators . .............. 32
Emergency off switch (kill
switch) . . ..................... 32
BMW Motorrad ABS
OE
...... 33
Mirrors . . ..................... 33
Pneumatic pump............. 34
Air pressure in the Air Damp-
ing System . . . . . .............. 34
Damping ..................... 38
Tyres . . . . ..................... 40
Headlight ..................... 41
Seat . . . . . ..................... 41
5 Riding . . . . . . . . . . . . . . . . . . . . 43
Safety instructions . .......... 44
Checklist ..................... 46
Starting . . ..................... 46
Running in . . . . . .............. 48
Riding off-road . .............. 49
Brakes . . ..................... 50Parking your motorcycle . . . . . 51
Refuelling.................... 52
6 Engineering details . . . . . 55
Brake system with BMW Mo-
torrad ABS
OE
................ 56
7 Accessories . . . . . . . . . . . . . 59
General instructions .......... 60
Power socketOE.............. 60
Luggage ..................... 61
8 Maintenance . . . . . . . . . . . . 63
Notes........................ 64
Toolkit........................ 64
Engine oil.................... 65
Brake system . . .............. 67
Brake pads . . . . . .............. 68
Brake fluid.................... 69
Coolant . . ..................... 71
Clutch . . . ..................... 72
Tyres . . . . ..................... 73
Rims ......................... 73
Chain . . . . ..................... 73
Wheels . . ..................... 75
Page 5 of 138

BMW Motorrad auxiliary
stand ......................... 81
BMW Motorrad front-wheel
stand ......................... 82
Fuses........................ 84
Bulbs ......................... 86
Air filter . . . . . .................. 92
Jump starting . . .............. 95
Battery . . . . . .................. 96
Number-plate carrier . . ..... 100
9 Care . . . . . ................ 103
Care products . . ............ 104
Washing motorcycle . . . ..... 104
Cleaning easily damaged
components ................ 104
Paint care . . ................ 105
Protective wax coating ..... 106
Laying up motorcycle . ..... 106
Restoring motorcycle to
use......................... 106
10 Technical data . . . . . . . 107
Troubleshooting chart . ..... 108
Threaded fasteners . . . ..... 109
Engine . . . . . ................ 110
Fuel . ....................... 111Engine oil . . ................ 111
Clutch...................... 112
Transmission............... 112
Rear-wheel drive........... 113
Running gear............... 113
Brakes . . . . . ................ 114
Wheels and tyres........... 115
Electrics . . . . ................ 117
Frame...................... 118
Dimensions ................ 119
Weights . . . . ................ 119
Riding specifications . . ..... 120
11 Service . . . . . . . . . . . . . . . . 121
BMW Motorrad service ..... 122
BMW Motorrad service
quality...................... 122
BMW Motorrad Service
Card: on-the-spot break-
down assistance........... 122
BMW Motorrad service net-
work . ....................... 123
Maintenance work . . . . . ..... 123
Confirmation of mainten-
ance work . . ................ 124
Confirmation of service ..... 129
Page 27 of 138
Self-diagnosis not completed
ABS warning light flashes.
The ABS function is not
available, because self-
diagnosis did not complete. The
motorcycle has to move forward
a few metres for the wheel
sensors to be tested.
Pull away slowly. Bear in mind
that the ABS function is not
available until self-diagnosis has
completed.
ABS deactivated
ABS warning light shows.
The rider has switched off the
ABS system.
with OE BMW Motorrad ABS:
Activate the ABS function
( 33)ABS fault
ABS warning light shows.
The ABS control unit has detec-
ted a fault. The ABS function is
not available.
You can continue to ride. Bear
in mind that the ABS function
is not available. Bear in mind
the more detailed information
on situations that can lead to
an ABS fault ( 57).
Have the fault rectified as
quickly as possible by a
specialist workshop, preferably
an authorised BMW Motorrad
dealer.
325zStatus indicators
Page 34 of 138
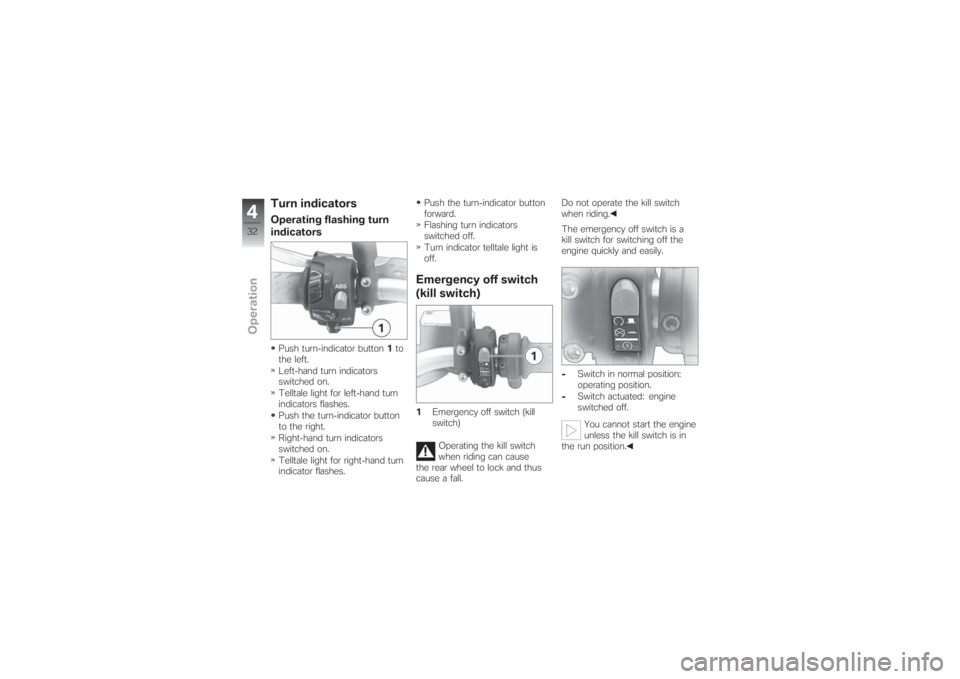
Turn indicatorsOperating flashing turn
indicatorsPush turn-indicator button1to
the left.
Left-hand turn indicators
switched on.
Telltale light for left-hand turn
indicators flashes.
Push the turn-indicator button
to the right.
Right-hand turn indicators
switched on.
Telltale light for right-hand turn
indicator flashes.Push the turn-indicator button
forward.
Flashing turn indicators
switched off.
Turn indicator telltale light is
off.
Emergency off switch
(kill switch)1Emergency off switch (kill
switch)
Operating the kill switch
when riding can cause
the rear wheel to lock and thus
cause a fall.Do not operate the kill switch
when riding.
The emergency off switch is a
kill switch for switching off the
engine quickly and easily.
-Switch in normal position:
operating position.
-Switch actuated: engine
switched off.
You cannot start the engine
unless the kill switch is in
the run position.
432zOperation
Page 37 of 138
shocks transmitted by the wheel
to the suspension.
Spring preload of the Air Damp-
ing System is adjusted to suit
total weight (motorcycle plus
rider, plus luggage) by changing
the air pressure in this system.
You can use the valve on the Air
Damping System to reduce pres-
sure, or you can increase pres-
sure by connecting the pump to
this valve.Fore-and-aft tilt indicatorThe fore-and aft tilt indicator on
the motorcycle has much the
same function as a spirit level,
and indeed it is very similar in ap-
pearance to an ordinary bubble
level. The air-pressure setting is
ideal when the fore-and-aft tilt
indicator shows that the motor-
cycle carrying rider and load is
horizontal.
Always check the air pressure
before riding off.
Adjusting air pressureIt is essential to set the pressure
in the Air Damping System to
suit the load carried on the mo-
torcycle. Increase air pressure
when the motorcycle is heavily
loaded and reduce air pressure
accordingly when the motorcycle
is lightly loaded.
You read the fore-and-aft tilt in-
dicator by sitting on the seat in
such a way that you can keep
the motorcycle balanced with
your feet, but the motorcycle
is supporting as much of your
weight as possible.
BMW Motorrad recommends
setting the air pressure in the Air
Damping System marginally high-
er than would be necessary for
the weight of the rider plus the
expected weight of the load. You
can then reduce the air pressure
while sitting on the motorcycle.
Air pressure and
temperatureWhen the Air Damping System is
working hard to absorb shocks,
the air inside the system be-
comes warmer. This causes the
air to expand with the result that
ride height increases, a welcome
effect for off-roading. In order
to ensure that air pressure is set
correctly, you must always check
and adjust the air pressure when
the Air Damping System is cold,
in other words not immediately
after the motorcycle has been
used for off-roading.
If extreme loads are imposed on
the system the increase in tem-
perature can be severe, and un-
der these conditions the effects
of the increase in ride height can
be perceived as uncomfortable.
Under these exceptional circum-
stances it is a good idea to let
air out of the system, using the
level gauge to correct the motor-
435zOperation
Page 38 of 138
cycle's fore-and-aft tilt ( 35).
Remember to readjust accord-
ingly once the system has cooled
down again.Lengthy periods of disuseIf it is going to be out of use for
more than two months, support
the motorcycle in such a way
that the wheels are not taking
any weight, for example by lifting
it BMW Motorrad auxiliary stand.
Check the air pressures before
removing the motorcycle from
the auxiliary stand. You can use
the pressure gauge on the pneu-
matic pump for this check.Adjusting air pressure in
Air Damping SystemRemove the pneumatic pump
( 34)
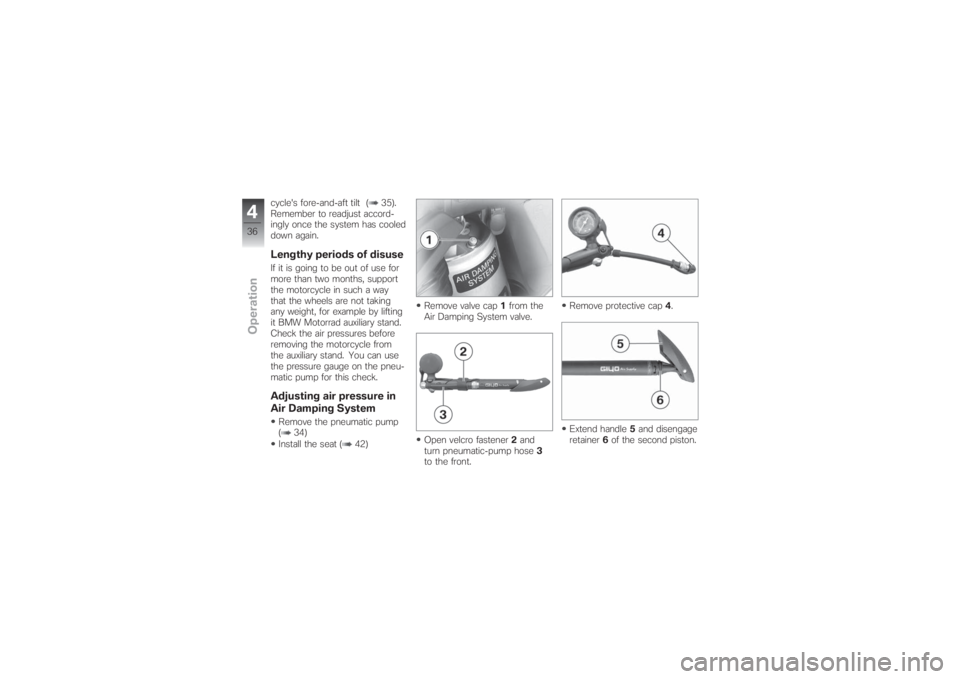
Install the seat ( 42)Remove valve cap1from the
Air Damping System valve.
Open velcro fastener2and
turn pneumatic-pump hose3
to the front.Remove protective cap4.
Extend handle5and disengage
retainer6of the second piston.
436zOperation
Page 40 of 138
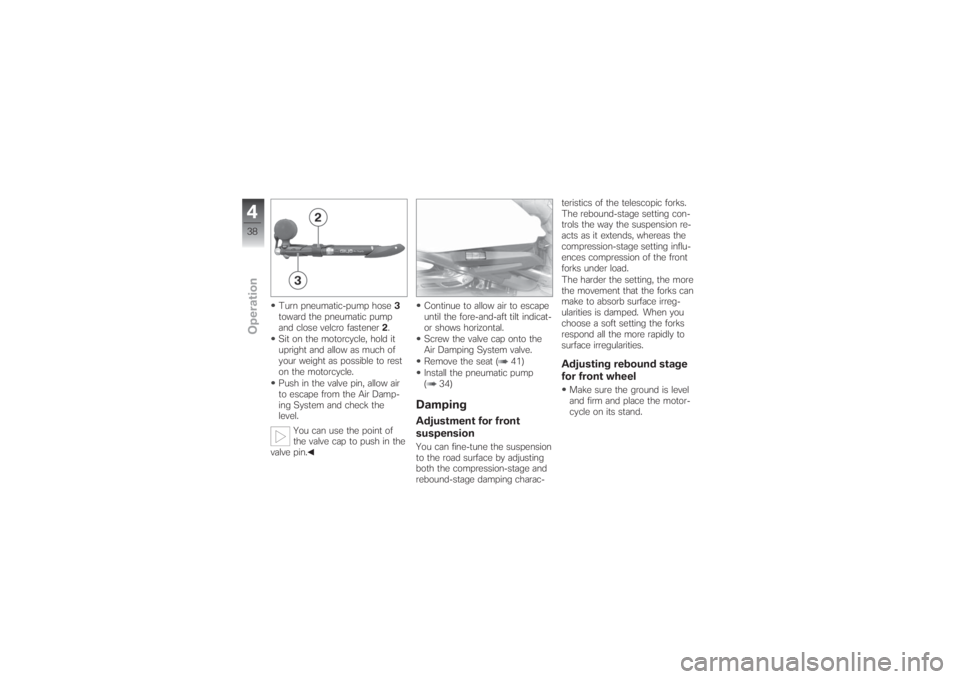
Turn pneumatic-pump hose3
toward the pneumatic pump
and close velcro fastener2.
Sit on the motorcycle, hold it
upright and allow as much of
your weight as possible to rest
on the motorcycle.
Push in the valve pin, allow air
to escape from the Air Damp-
ing System and check the
level.
You can use the point of
the valve cap to push in the
valve pin.Continue to allow air to escape
until the fore-and-aft tilt indicat-
or shows horizontal.
Screw the valve cap onto the
Air Damping System valve.
Remove the seat ( 41)
Install the pneumatic pump
( 34)
DampingAdjustment for front
suspensionYou can fine-tune the suspension
to the road surface by adjusting
both the compression-stage and
rebound-stage damping charac-teristics of the telescopic forks.
The rebound-stage setting con-
trols the way the suspension re-
acts as it extends, whereas the
compression-stage setting influ-
ences compression of the front
forks under load.
The harder the setting, the more
the movement that the forks can
make to absorb surface irreg-
ularities is damped. When you
choose a soft setting the forks
respond all the more rapidly to
surface irregularities.
Adjusting rebound stage
for front wheelMake sure the ground is level
and firm and place the motor-
cycle on its stand.
438zOperation
Page 41 of 138
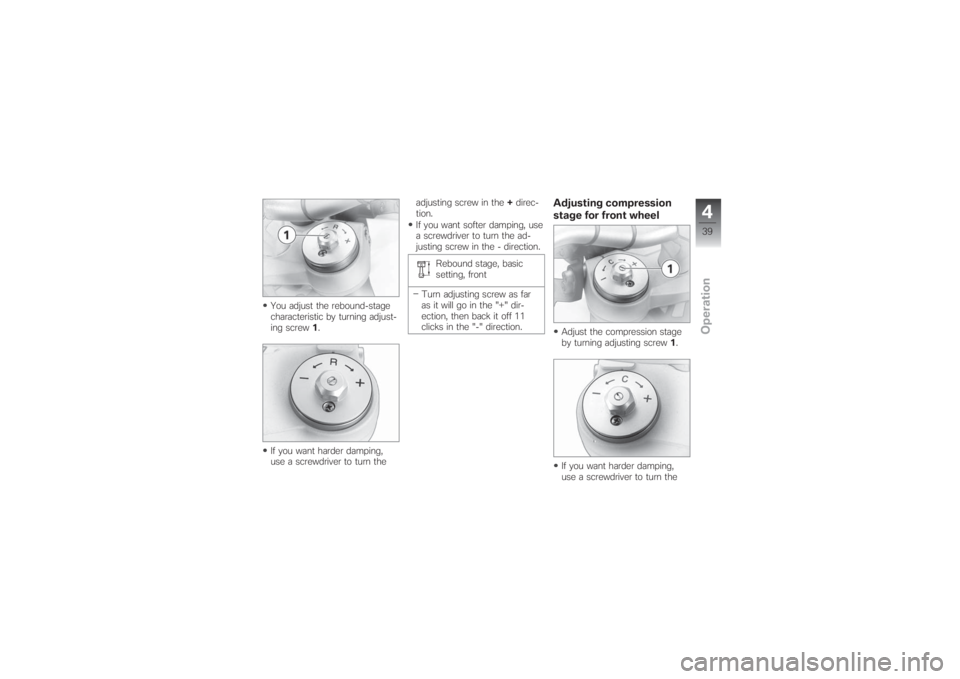
You adjust the rebound-stage
characteristic by turning adjust-
ing screw1.
If you want harder damping,
use a screwdriver to turn theadjusting screw in the+direc-
tion.
If you want softer damping, use
a screwdriver to turn the ad-
justing screw in the - direction.
Rebound stage, basic
setting, front
Turn adjusting screw as far
as it will go in the "+" dir-
ection, then back it off 11
clicks in the "-" direction.
Adjusting compression
stage for front wheelAdjust the compression stage
by turning adjusting screw1.
If you want harder damping,
use a screwdriver to turn the
439zOperation
Page 42 of 138
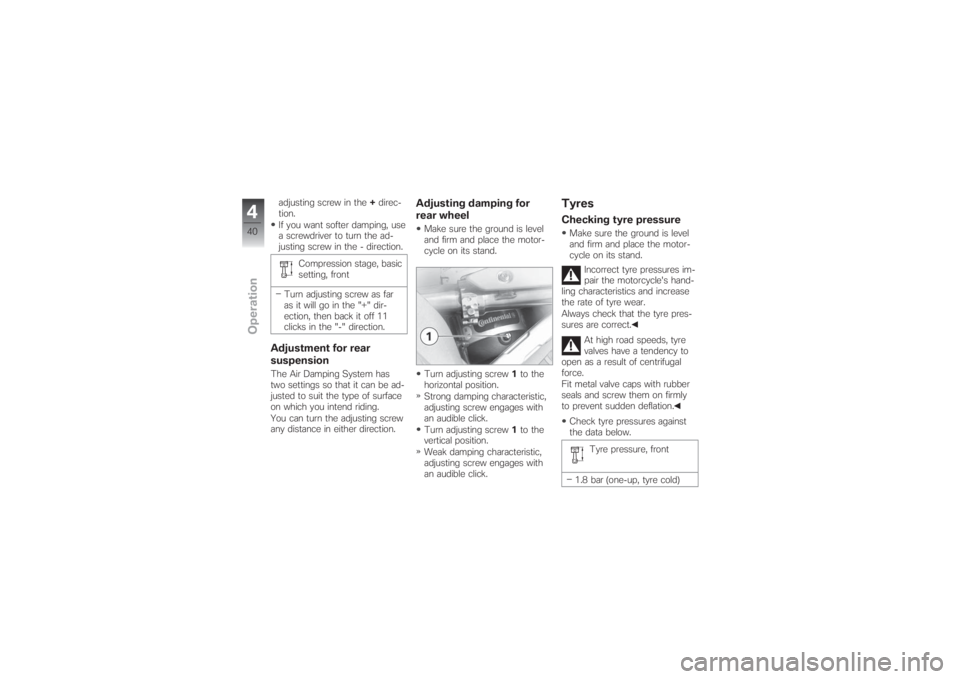
adjusting screw in the+direc-
tion.
If you want softer damping, use
a screwdriver to turn the ad-
justing screw in the - direction.
Compression stage, basic
setting, front
Turn adjusting screw as far
as it will go in the "+" dir-
ection, then back it off 11
clicks in the "-" direction.Adjustment for rear
suspensionThe Air Damping System has
two settings so that it can be ad-
justed to suit the type of surface
on which you intend riding.
You can turn the adjusting screw
any distance in either direction.
Adjusting damping for
rear wheelMake sure the ground is level
and firm and place the motor-
cycle on its stand.
Turn adjusting screw1to the
horizontal position.
Strong damping characteristic,
adjusting screw engages with
an audible click.
Turn adjusting screw1to the
vertical position.
Weak damping characteristic,
adjusting screw engages with
an audible click.
TyresChecking tyre pressureMake sure the ground is level
and firm and place the motor-
cycle on its stand.
Incorrect tyre pressures im-
pair the motorcycle's hand-
ling characteristics and increase
the rate of tyre wear.
Always check that the tyre pres-
sures are correct.
At high road speeds, tyre
valves have a tendency to
open as a result of centrifugal
force.
Fit metal valve caps with rubber
seals and screw them on firmly
to prevent sudden deflation.
Check tyre pressures against
the data below.
Tyre pressure, front
1.8 bar (one-up, tyre cold)
440zOperation
Page 50 of 138
If a warning light or telltale light
did not show as specified above
or if a segment or segments of
the multifunction display failed to
light up:
Some malfunctions cannot
be indicated if one of the
warning lights fails to show.
Make sure that all the warning
and telltale lights come on in the
pre-ride check.
Have the fault rectified as
quickly as possible by a
specialist workshop, preferably
an authorised BMW Motorrad
dealer.ABS self-diagnosis
OE
BMW Motorrad ABS performs
self-diagnosis to ensure its op-
erability. Self-diagnosis is per-
formed automatically when you
switch on the ignition. The mo-
torcycle has to move forward afew metres for the wheel sensors
to be tested.
Phase 1
Test of the diagnosis-compat-
ible system components with
the motorcycle at a standstill.
ABS warning light flashes.
Phase 2
Test of the wheel sensors as
the motorcycle pulls away from
rest.
ABS warning light flashes.
ABS self-diagnosis
completed
The ABS warning light goes
out.
If an indicator showing an ABS
fault appears when ABS self-dia-
gnosis completes:You can continue to ride. Bear
in mind that the ABS function
is not available.
Have the fault rectified as
quickly as possible by a
specialist workshop, preferably
an authorised BMW Motorrad
dealer.
Running inThe first 1000 kmWhile running in the motor-
cycle, vary the throttle opening
and engine-speed range fre-
quently.
Try to do most of your rid-
ing during this initial period on
twisting, fairly hilly roads, avoid-
ing high-speed main roads and
highways if possible.
Exceeding the specified en-
gine speeds while running
in will lead to increased engine
wear.
548zRiding