Mode CADILLAC CT6 2018 1.G Owners Manual
[x] Cancel search | Manufacturer: CADILLAC, Model Year: 2018, Model line: CT6, Model: CADILLAC CT6 2018 1.GPages: 445, PDF Size: 7.7 MB
Page 3 of 445
Cadillac CT6 Owner Manual (GMNA-Localizing-U.S./Canada-11292458) -
2018 - crc - 2/14/17
2 INTRODUCTION
Introduction
The names, logos, emblems, slogans,
vehicle model names, and vehicle
body designs appearing in this manual
including, but not limited to, GM, the
GM logo, CADILLAC, the CADILLAC
Emblem, and CT6are trademarks and/
or service marks of General Motors
LLC, its subsidiaries, affiliates,
or licensors.
For vehicles first sold in Canada,
substitute the name “General Motors
of Canada Company ”for Cadillac
Motor Car Division wherever it
appears in this manual. This manual describes features that
may or may not be on the vehicle
because of optional equipment that
was not purchased on the vehicle,
model variants, country specifications,
features/applications that may not be
available in your region, or changes
subsequent to the printing of this
owner’s manual.
Refer to the purchase documentation
relating to your specific vehicle to
confirm the features.
Keep this manual in the vehicle for
quick reference.
Canadian Vehicle Owners
A French language manual can be
obtained from your dealer, at
www.helminc.com, or from:
Propriétaires Canadiens
On peut obtenir un exemplaire de ce
guide en français auprès du
concessionnaire ou à l'adresse
suivante:Helm, Incorporated
Attention: Customer Service
47911 Halyard Drive
Plymouth, MI 48170
USA
Using this Manual
To quickly locate information about
the vehicle, use the Index in the back
of the manual. It is an alphabetical
list of what is in the manual and the
page number where it can be found.
Danger, Warning, and
Caution
Warning messages found on vehicle
labels and in this manual describe
hazards and what to do to avoid or
reduce them.
{Danger
Danger indicates a hazard with a
high level of risk which will result
in serious injury or death.
Litho in U.S.A.
Part No. 23390323 A First Printing©2017 General Motors LLC. All Rights Reserved.
Page 8 of 445

Cadillac CT6 Owner Manual (GMNA-Localizing-U.S./Canada-11292458) -
2018 - crc - 2/14/17
IN BRIEF 7
1.Air Vents 0203.
2. Exterior Lamp Controls 0183.
Turn Signal Lever. See Turn and
Lane-Change Signals 0186.
3. Tap Shift Paddles (If Equipped). See Manual Mode (Gasoline Only)
0 233.
Regen On Demand (If Equipped).
See Regenerative Braking
(PLUG-IN Only) 0237.
4. Instrument Cluster (Base Level)
0127 orInstrument Cluster
(Uplevel) 0130.
Driver Information Center (DIC)
Display. See Driver Information
Center (DIC) 0162.
5. Windshield Wiper/Washer 0120.
6. ENGINE START/STOP Button. See Ignition Positions 0217.
7. Parking Assist Button. See Assistance Systems for Parking or
Backing 0254.
Automatic Parking Assist (APA)
Button (If Equipped). See
Assistance Systems for Parking or
Backing 0254. Automatic Engine Stop/Start
Disable Switch (If Equipped).
See
Starting the Engine (PLUG-IN
Only) 0218 orStarting the Engine
(Gasoline Only) 0221.
8. Light Sensor. See Automatic
Headlamp System 0185.
9. Hazard Warning Flashers 0186.
Glove Box Button. See Glove Box
0 115.
10. Infotainment 0190.
11. Heated and Ventilated Front Seats
072 (If Equipped).
12. Infotainment Touch Pad. See the infotainment manual.
13. Automatic Climate Control System
(Quad Zone - Gasoline Only) 0197
or Automatic Climate Control
System (Dual Zone - Gasoline and
PLUG-IN) 0191.
14. Automatic Vehicle Hold (AVH)
0237 (If Equipped).
MODE Button. See Driver Mode
Control (Gasoline Only) 0241.
Traction Control/Electronic
Stability Control 0239. 15. Shift Lever. See
Automatic
Transmission 0231.
16. Driver Information Center (DIC) Controls. See Driver Information
Center (DIC) 0162.
17. Steering Wheel Controls. See the infotainment manual.
18. Horn 0120.
19. Steering Wheel Adjustment 0119
(Out of View).
20. Forward Collision Alert (FCA)
System 0260 (If Equipped).
Lane Keep Assist (LKA) 0271 (If
Equipped).
Heated Steering Wheel 0119 (If
Equipped).
21. Cruise Control 0242.
Adaptive Cruise Control 0245 (If
Equipped).
Phone Button. See “Steering
Wheel Controls ”in the
infotainment manual.
22. Data Link Connector (DLC) (Out of View). See Malfunction
Indicator Lamp (Check Engine
Light) 0143.
Page 19 of 445
Cadillac CT6 Owner Manual (GMNA-Localizing-U.S./Canada-11292458) -
2018 - crc - 2/14/17
18 IN BRIEF
Turn the control to the following
positions:
O:Turns off the exterior lamps. The
knob returns to the AUTO position
after it is released. Turn to
Oagain to
reactivate the AUTO mode.
AUTO : Automatically turns the
exterior lamps on and off, depending
on outside lighting.
;: Turns on the parking lamps
including all lamps, except the
headlamps.
5: Turns on the headlamps together
with the parking lamps and
instrument panel lights.
See:
. Exterior Lamp Controls 0183.
. Turn and Lane-Change Signals
0186.
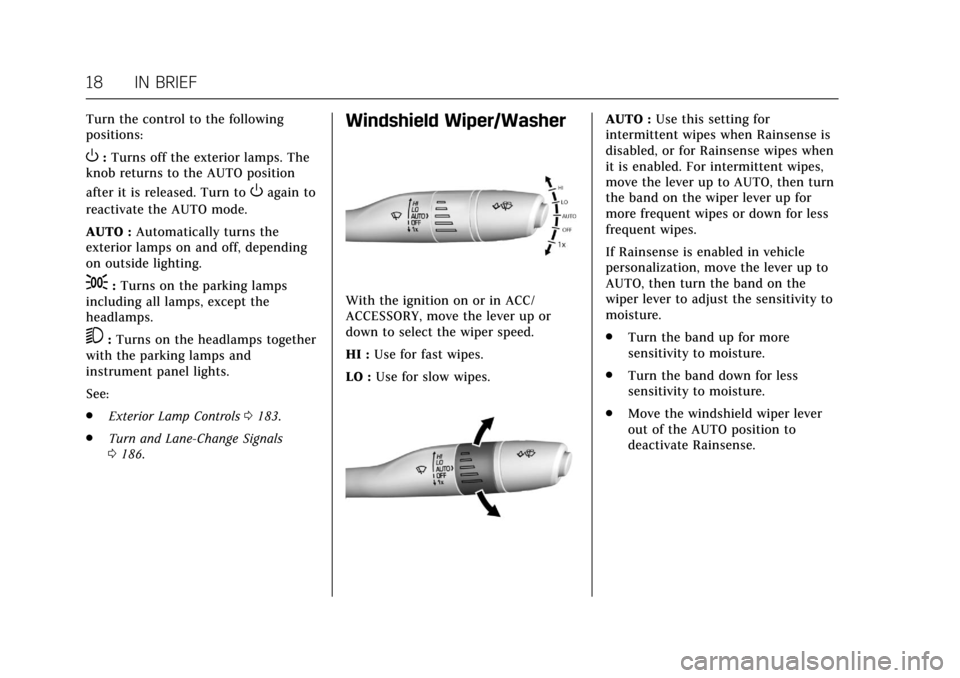
Windshield Wiper/Washer
With the ignition on or in ACC/
ACCESSORY, move the lever up or
down to select the wiper speed.
HI : Use for fast wipes.
LO : Use for slow wipes.
AUTO : Use this setting for
intermittent wipes when Rainsense is
disabled, or for Rainsense wipes when
it is enabled. For intermittent wipes,
move the lever up to AUTO, then turn
the band on the wiper lever up for
more frequent wipes or down for less
frequent wipes.
If Rainsense is enabled in vehicle
personalization, move the lever up to
AUTO, then turn the band on the
wiper lever to adjust the sensitivity to
moisture.
. Turn the band up for more
sensitivity to moisture.
. Turn the band down for less
sensitivity to moisture.
. Move the windshield wiper lever
out of the AUTO position to
deactivate Rainsense.
Page 21 of 445
Cadillac CT6 Owner Manual (GMNA-Localizing-U.S./Canada-11292458) -
2018 - crc - 2/14/17
20 IN BRIEF
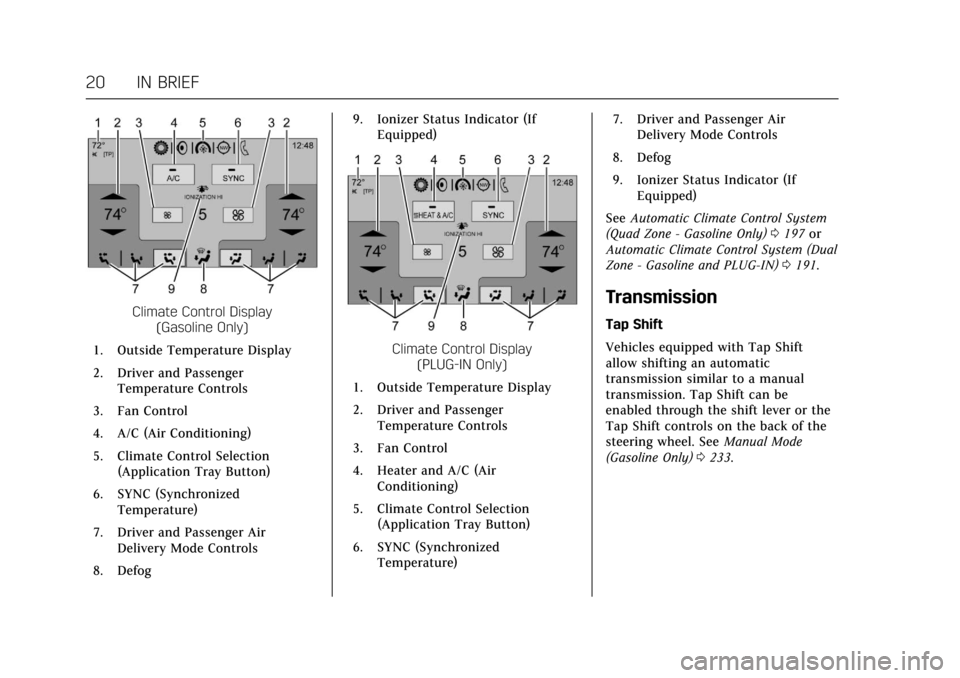
Climate Control Display(Gasoline Only)
1. Outside Temperature Display
2. Driver and Passenger Temperature Controls
3. Fan Control
4. A/C (Air Conditioning)
5. Climate Control Selection (Application Tray Button)
6. SYNC (Synchronized Temperature)
7. Driver and Passenger Air Delivery Mode Controls
8. Defog 9. Ionizer Status Indicator (If
Equipped)
Climate Control Display (PLUG-IN Only)
1. Outside Temperature Display
2. Driver and Passenger Temperature Controls
3. Fan Control
4. Heater and A/C (Air Conditioning)
5. Climate Control Selection (Application Tray Button)
6. SYNC (Synchronized Temperature) 7. Driver and Passenger Air
Delivery Mode Controls
8. Defog
9. Ionizer Status Indicator (If Equipped)
See Automatic Climate Control System
(Quad Zone - Gasoline Only) 0197 or
Automatic Climate Control System (Dual
Zone - Gasoline and PLUG-IN) 0191.
Transmission
Tap Shift
Vehicles equipped with Tap Shift
allow shifting an automatic
transmission similar to a manual
transmission. Tap Shift can be
enabled through the shift lever or the
Tap Shift controls on the back of the
steering wheel. See Manual Mode
(Gasoline Only) 0233.
Page 26 of 445
Cadillac CT6 Owner Manual (GMNA-Localizing-U.S./Canada-11292458) -
2018 - crc - 2/14/17
IN BRIEF 25
2. Power Outlet 12-Volt DirectCurrent
Lift the cover to access the power
outlet.
See Power Outlets 0123.
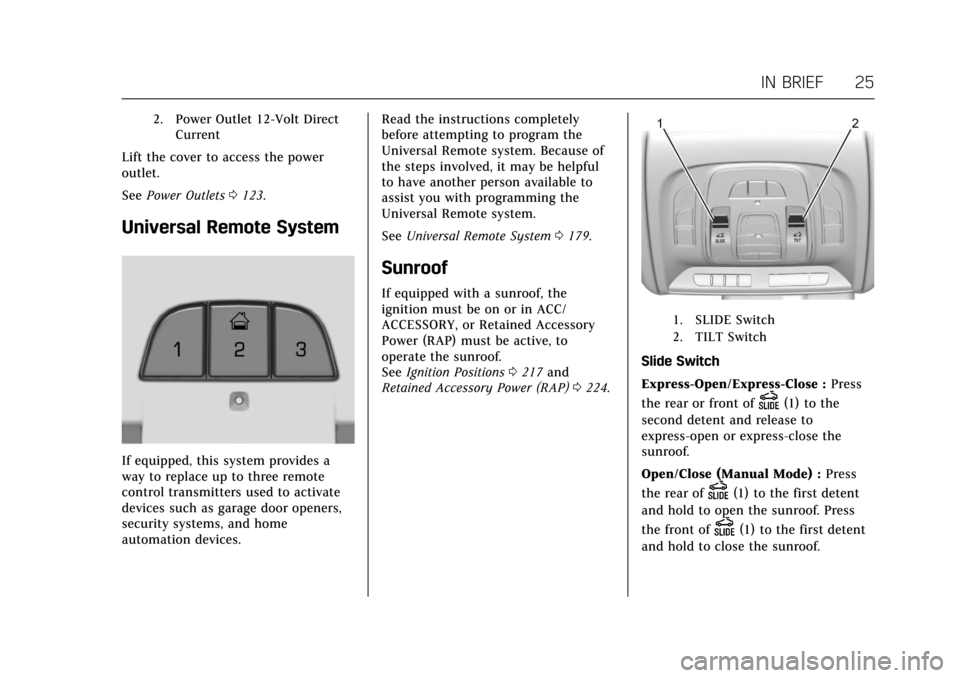
Universal Remote System
If equipped, this system provides a
way to replace up to three remote
control transmitters used to activate
devices such as garage door openers,
security systems, and home
automation devices. Read the instructions completely
before attempting to program the
Universal Remote system. Because of
the steps involved, it may be helpful
to have another person available to
assist you with programming the
Universal Remote system.
See
Universal Remote System 0179.
Sunroof
If equipped with a sunroof, the
ignition must be on or in ACC/
ACCESSORY, or Retained Accessory
Power (RAP) must be active, to
operate the sunroof.
See Ignition Positions 0217 and
Retained Accessory Power (RAP) 0224.
1. SLIDE Switch
2. TILT Switch
Slide Switch
Express-Open/Express-Close : Press
the rear or front of
D(1) to the
second detent and release to
express-open or express-close the
sunroof.
Open/Close (Manual Mode) : Press
the rear of
D(1) to the first detent
and hold to open the sunroof. Press
the front of
D(1) to the first detent
and hold to close the sunroof.
Page 27 of 445
Cadillac CT6 Owner Manual (GMNA-Localizing-U.S./Canada-11292458) -
2018 - crc - 2/14/17
26 IN BRIEF
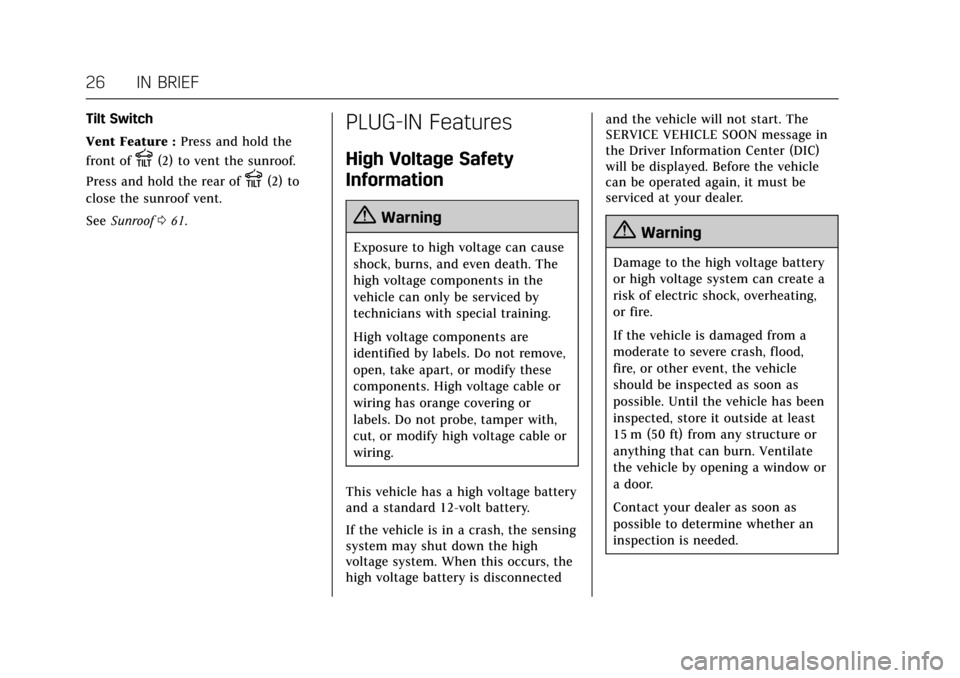
Tilt Switch
Vent Feature :Press and hold the
front of
E(2) to vent the sunroof.
Press and hold the rear of
E(2) to
close the sunroof vent.
See Sunroof 061.
PLUG-IN Features
High Voltage Safety
Information
{Warning
Exposure to high voltage can cause
shock, burns, and even death. The
high voltage components in the
vehicle can only be serviced by
technicians with special training.
High voltage components are
identified by labels. Do not remove,
open, take apart, or modify these
components. High voltage cable or
wiring has orange covering or
labels. Do not probe, tamper with,
cut, or modify high voltage cable or
wiring.
This vehicle has a high voltage battery
and a standard 12-volt battery.
If the vehicle is in a crash, the sensing
system may shut down the high
voltage system. When this occurs, the
high voltage battery is disconnected and the vehicle will not start. The
SERVICE VEHICLE SOON message in
the Driver Information Center (DIC)
will be displayed. Before the vehicle
can be operated again, it must be
serviced at your dealer.{Warning
Damage to the high voltage battery
or high voltage system can create a
risk of electric shock, overheating,
or fire.
If the vehicle is damaged from a
moderate to severe crash, flood,
fire, or other event, the vehicle
should be inspected as soon as
possible. Until the vehicle has been
inspected, store it outside at least
15 m (50 ft) from any structure or
anything that can burn. Ventilate
the vehicle by opening a window or
a door.
Contact your dealer as soon as
possible to determine whether an
inspection is needed.
Page 31 of 445
Cadillac CT6 Owner Manual (GMNA-Localizing-U.S./Canada-11292458) -
2018 - crc - 2/14/17
30 IN BRIEF
Performance and
Maintenance
Traction Control/Electronic
Stability Control
The Traction Control System (TCS)
limits wheel spin. The system is on
when the vehicle is started.
The StabiliTrak system assists with
directional control of the vehicle in
difficult driving conditions. The
system is on when the vehicle is
started.
.To turn off TCS, press and release
Yon the center console.iilluminates in the instrument
cluster and the appropriate DIC
message displays.
. Press and release
Yagain to turn
TCS back on.
. To turn off both TCS and
StabiliTrak, press and hold
Yon
the center console until
gandi
illuminate in the instrument
cluster. The appropriate DIC
message displays. .
Press and release
Yagain to turn
on both systems.
See Traction Control/Electronic Stability
Control 0239.
The vehicle has Driver Mode Control.
See Driver Mode Control (Gasoline Only)
0 241.
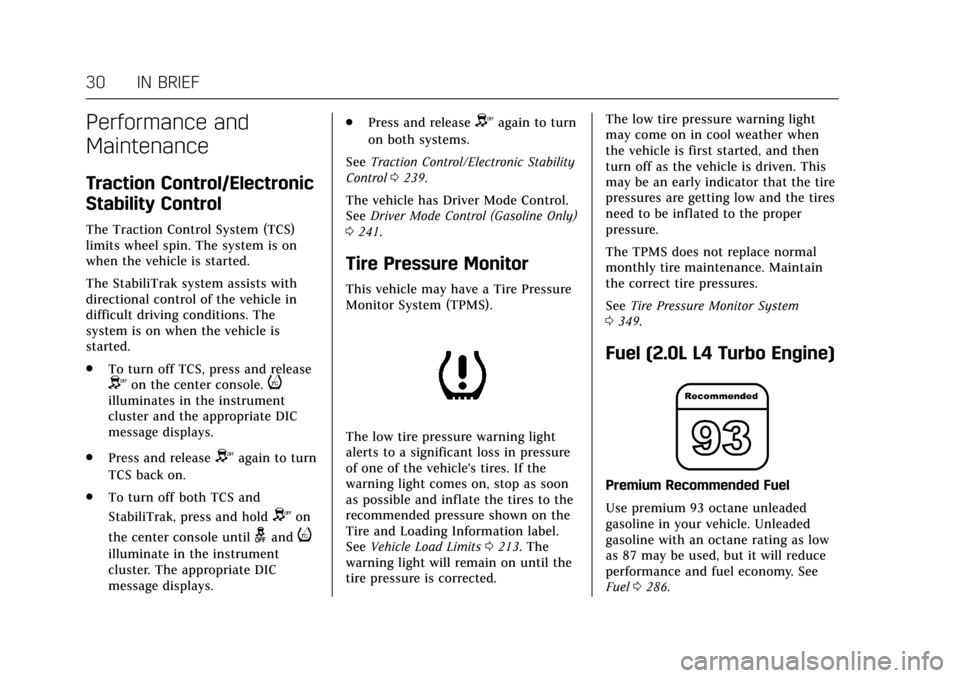
Tire Pressure Monitor
This vehicle may have a Tire Pressure
Monitor System (TPMS).
The low tire pressure warning light
alerts to a significant loss in pressure
of one of the vehicle's tires. If the
warning light comes on, stop as soon
as possible and inflate the tires to the
recommended pressure shown on the
Tire and Loading Information label.
See Vehicle Load Limits 0213. The
warning light will remain on until the
tire pressure is corrected. The low tire pressure warning light
may come on in cool weather when
the vehicle is first started, and then
turn off as the vehicle is driven. This
may be an early indicator that the tire
pressures are getting low and the tires
need to be inflated to the proper
pressure.
The TPMS does not replace normal
monthly tire maintenance. Maintain
the correct tire pressures.
See
Tire Pressure Monitor System
0 349.
Fuel (2.0L L4 Turbo Engine)
Premium Recommended Fuel
Use premium 93 octane unleaded
gasoline in your vehicle. Unleaded
gasoline with an octane rating as low
as 87 may be used, but it will reduce
performance and fuel economy. See
Fuel 0286.
Page 33 of 445
Cadillac CT6 Owner Manual (GMNA-Localizing-U.S./Canada-11292458) -
2018 - crc - 2/14/17
32 IN BRIEF
If the CHANGE ENGINE OIL
SOON message is not on, the
system is reset.
See Engine Oil Life System 0309.
Driving for Better Fuel
Economy (Gasoline Only)
Driving habits can affect fuel mileage.
Here are some driving tips to get the
best fuel economy possible.
.
Avoid fast starts and accelerate
smoothly.
. Brake gradually and avoid abrupt
stops.
. Avoid idling the engine for long
periods of time.
. When road and weather
conditions are appropriate, use
cruise control.
. Always follow posted speed limits
or drive more slowly when
conditions require.
. Keep vehicle tires properly
inflated.
. Combine several trips into a
single trip. .
Replace the vehicle's tires with the
same TPC Spec number molded
into the tire's sidewall near
the size.
. Follow recommended scheduled
maintenance.Driving for Better Energy
Efficiency (PLUG-IN Only)
Use the following tips to help
maximize energy efficiency and range.
In colder temperatures, while these
efficiency tips will help, the electric
vehicle driving range may be lower
due to higher energy usage.
Driving Style
Acceleration/Braking/Coasting
Avoid unnecessary rapid accelerations
and decelerations.
Electric range is maximized at
80 km/h (50 mph) and below. Higher
speeds use more energy and can
significantly reduce electric range.
Use cruise control when appropriate. Plan ahead for decelerations and coast
whenever possible. For example, do
not rush to traffic signals.
Do not shift to N (Neutral) to coast.
The vehicle recovers energy while
coasting and braking in D (Drive) or M
(Manual Mode).
Drive Mode and PRNDM Selection
Use Tour Mode when possible.
Sport Mode provides more responsive
acceleration than Tour Mode but can
reduce efficiency.
Use Hold Mode on a trip where it is
expected that all of the electric charge
will be depleted. Use Hold Mode
mainly during highway or high speed
driving to maximize both EV miles
and fuel efficiency.
Use M (Manual Model) in heavy
stop-and-go traffic or when traveling
downhill. M (Manual Mode) requires
less brake pedal application and
provides a controlled, efficient way to
slow the vehicle down.
Page 40 of 445
Cadillac CT6 Owner Manual (GMNA-Localizing-U.S./Canada-11292458) -
2018 - crc - 2/14/17
KEYS, DOORS, AND WINDOWS 39
vehicle key into the key lock
cylinder on the driver door
handle, then turn the key
counterclockwise to the unlock
position five times within
10 seconds.
The Driver Information Center
(DIC) displays READY FOR
REMOTE #2, 3, 4, ETC.
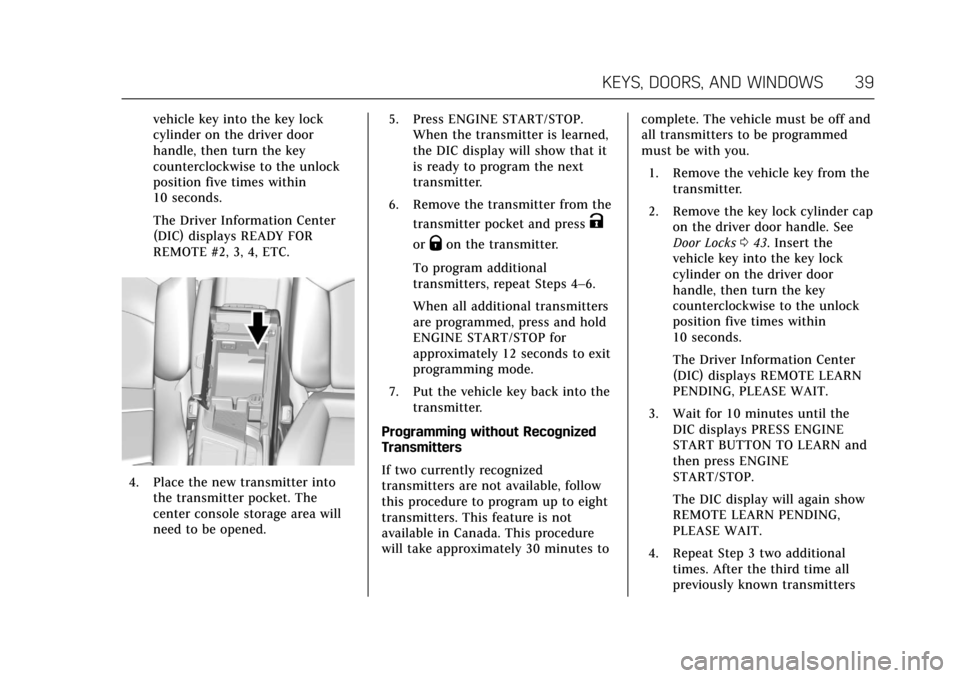
4. Place the new transmitter intothe transmitter pocket. The
center console storage area will
need to be opened. 5. Press ENGINE START/STOP.
When the transmitter is learned,
the DIC display will show that it
is ready to program the next
transmitter.
6. Remove the transmitter from the transmitter pocket and press
K
orQon the transmitter.
To program additional
transmitters, repeat Steps 4–6.
When all additional transmitters
are programmed, press and hold
ENGINE START/STOP for
approximately 12 seconds to exit
programming mode.
7. Put the vehicle key back into the transmitter.
Programming without Recognized
Transmitters
If two currently recognized
transmitters are not available, follow
this procedure to program up to eight
transmitters. This feature is not
available in Canada. This procedure
will take approximately 30 minutes to complete. The vehicle must be off and
all transmitters to be programmed
must be with you.
1. Remove the vehicle key from the transmitter.
2. Remove the key lock cylinder cap on the driver door handle. See
Door Locks 043. Insert the
vehicle key into the key lock
cylinder on the driver door
handle, then turn the key
counterclockwise to the unlock
position five times within
10 seconds.
The Driver Information Center
(DIC) displays REMOTE LEARN
PENDING, PLEASE WAIT.
3. Wait for 10 minutes until the DIC displays PRESS ENGINE
START BUTTON TO LEARN and
then press ENGINE
START/STOP.
The DIC display will again show
REMOTE LEARN PENDING,
PLEASE WAIT.
4. Repeat Step 3 two additional times. After the third time all
previously known transmitters
Page 41 of 445
Cadillac CT6 Owner Manual (GMNA-Localizing-U.S./Canada-11292458) -
2018 - crc - 2/14/17
40 KEYS, DOORS, AND WINDOWS
will no longer work with the
vehicle. Remaining transmitters
can be relearned during the next
steps.
The DIC display should now
show READY FOR REMOTE # 1.
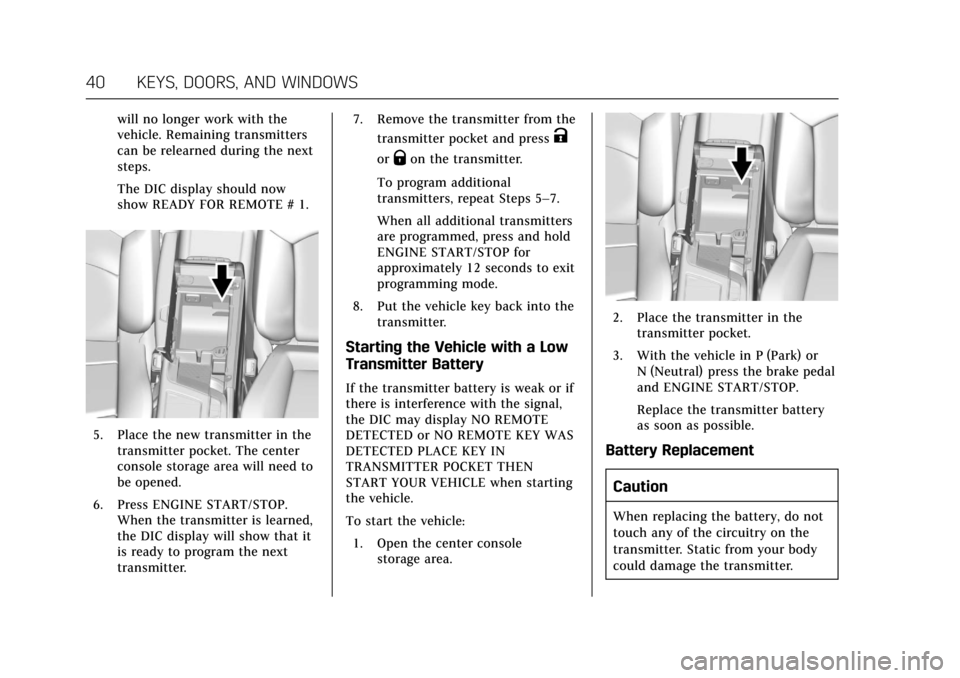
5. Place the new transmitter in thetransmitter pocket. The center
console storage area will need to
be opened.
6. Press ENGINE START/STOP. When the transmitter is learned,
the DIC display will show that it
is ready to program the next
transmitter. 7. Remove the transmitter from the
transmitter pocket and press
K
orQon the transmitter.
To program additional
transmitters, repeat Steps 5–7.
When all additional transmitters
are programmed, press and hold
ENGINE START/STOP for
approximately 12 seconds to exit
programming mode.
8. Put the vehicle key back into the transmitter.
Starting the Vehicle with a Low
Transmitter Battery
If the transmitter battery is weak or if
there is interference with the signal,
the DIC may display NO REMOTE
DETECTED or NO REMOTE KEY WAS
DETECTED PLACE KEY IN
TRANSMITTER POCKET THEN
START YOUR VEHICLE when starting
the vehicle.
To start the vehicle:
1. Open the center console storage area.
2. Place the transmitter in thetransmitter pocket.
3. With the vehicle in P (Park) or N (Neutral) press the brake pedal
and ENGINE START/STOP.
Replace the transmitter battery
as soon as possible.
Battery Replacement
Caution
When replacing the battery, do not
touch any of the circuitry on the
transmitter. Static from your body
could damage the transmitter.