ECO mode CADILLAC CTS 2011 2.G Owners Manual
[x] Cancel search | Manufacturer: CADILLAC, Model Year: 2011, Model line: CTS, Model: CADILLAC CTS 2011 2.GPages: 496, PDF Size: 7.71 MB
Page 41 of 496
Black plate (9,1)Cadillac CTS/CTS-V Owner Manual - 2011
Keys, Doors and Windows 2-9
Programming with a Recognized
Transmitter
A new transmitter can be
programmed to the vehicle when
there is one recognized transmitter.
For vehicles sold in Canada, two
recognized transmitters are required
to program a new transmitter.
1. The vehicle must be off.
2. Place the recognizedtransmitter(s) in the cupholder.
Have the new transmitter
available with you.
3. Insert the vehicle key into the key lock cylinder located on the
outside of the driver door.
4. Turn the key to the unlock position five times within
five seconds.
5. The Driver Information Center (DIC) displays Ready To Learn
Electronic Key #2, 3 or 4.
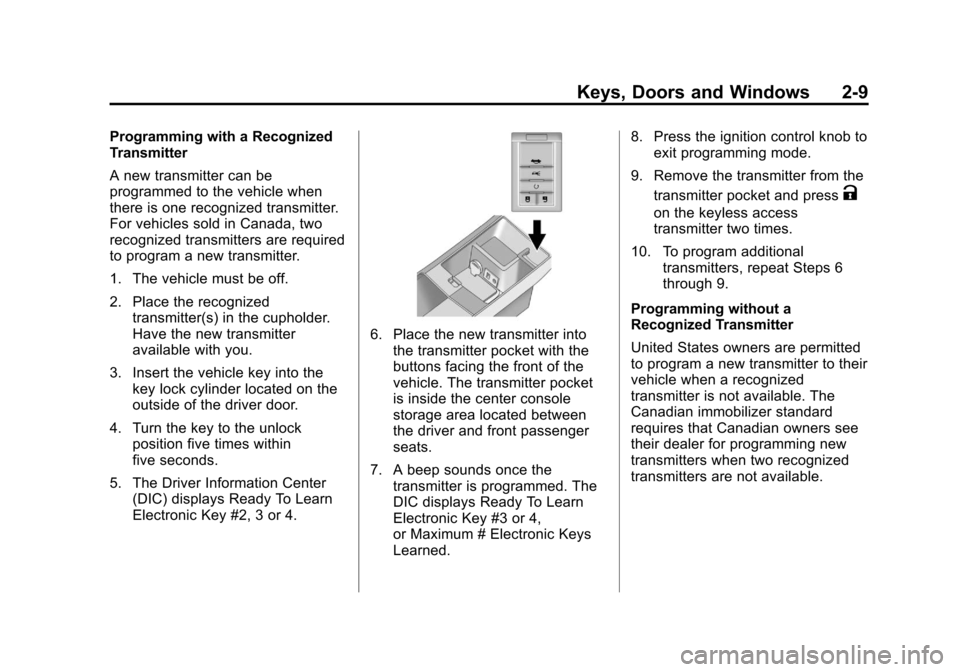
6. Place the new transmitter intothe transmitter pocket with the
buttons facing the front of the
vehicle. The transmitter pocket
is inside the center console
storage area located between
the driver and front passenger
seats.
7. A beep sounds once the transmitter is programmed. The
DIC displays Ready To Learn
Electronic Key #3 or 4,
or Maximum # Electronic Keys
Learned. 8. Press the ignition control knob to
exit programming mode.
9. Remove the transmitter from the transmitter pocket and press
K
on the keyless access
transmitter two times.
10. To program additional transmitters, repeat Steps 6
through 9.
Programming without a
Recognized Transmitter
United States owners are permitted
to program a new transmitter to their
vehicle when a recognized
transmitter is not available. The
Canadian immobilizer standard
requires that Canadian owners see
their dealer for programming new
transmitters when two recognized
transmitters are not available.
Page 42 of 496
Black plate (10,1)Cadillac CTS/CTS-V Owner Manual - 2011
2-10 Keys, Doors and Windows
The procedure requires three,
ten minute cycles to complete the
matching process.
1. The vehicle must be off.
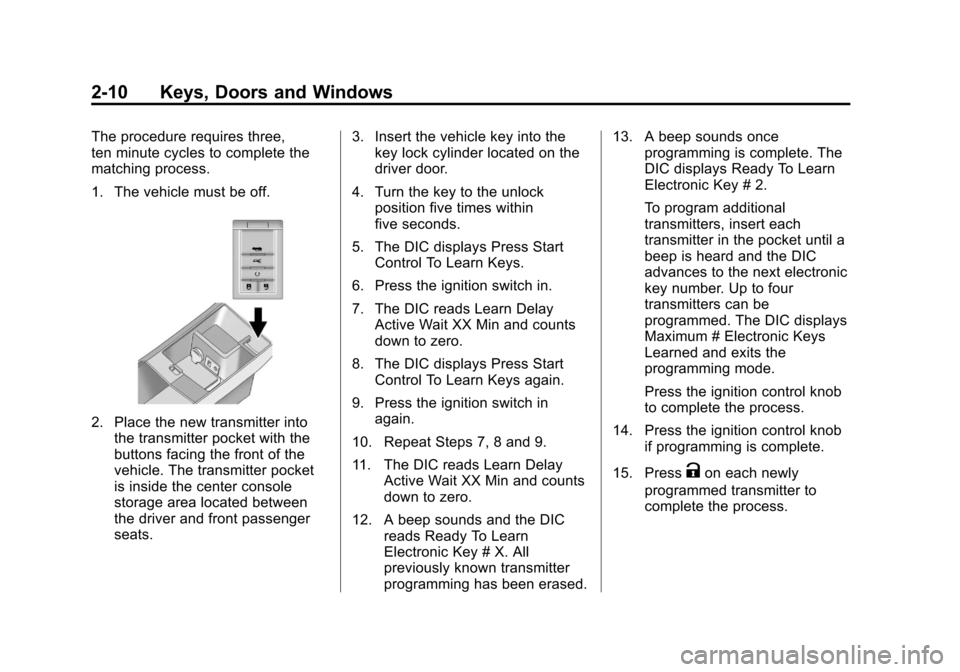
2. Place the new transmitter intothe transmitter pocket with the
buttons facing the front of the
vehicle. The transmitter pocket
is inside the center console
storage area located between
the driver and front passenger
seats. 3. Insert the vehicle key into the
key lock cylinder located on the
driver door.
4. Turn the key to the unlock position five times within
five seconds.
5. The DIC displays Press Start Control To Learn Keys.
6. Press the ignition switch in.
7. The DIC reads Learn Delay Active Wait XX Min and counts
down to zero.
8. The DIC displays Press Start Control To Learn Keys again.
9. Press the ignition switch in again.
10. Repeat Steps 7, 8 and 9.
11. The DIC reads Learn Delay Active Wait XX Min and counts
down to zero.
12. A beep sounds and the DIC reads Ready To Learn
Electronic Key # X. All
previously known transmitter
programming has been erased. 13. A beep sounds once
programming is complete. The
DIC displays Ready To Learn
Electronic Key # 2.
To program additional
transmitters, insert each
transmitter in the pocket until a
beep is heard and the DIC
advances to the next electronic
key number. Up to four
transmitters can be
programmed. The DIC displays
Maximum # Electronic Keys
Learned and exits the
programming mode.
Press the ignition control knob
to complete the process.
14. Press the ignition control knob if programming is complete.
15. Press
Kon each newly
programmed transmitter to
complete the process.
Page 50 of 496

Black plate (18,1)Cadillac CTS/CTS-V Owner Manual - 2011
2-18 Keys, Doors and Windows
Trunk Lock Release
The remote trunk release button is
on the driver door.
For vehicles with an automatic
transmission, the shift lever must be
in P (Park) or N (Neutral). For
vehicles with a manual
transmission, the shift lever must be
in N (Neutral), and the parking
brake set.
Press the button to open the trunk
or press the button with the trunk
symbol on the Remote Keyless
Entry (RKE) transmitter.With the Keyless Access System,
when you have the transmitter, the
trunk can be opened by the trunk
release button located above the
license plate. The vehicle must be in
P (Park) and the valet mode
turned off.
If the vehicle is locked, the keyless
access transmitter must be within
1 m (3 ft) of the trunk opening for it
to be recognized.
If the vehicle is ever without power,
the trunk area can still be accessed.
On vehicles with a rear seat
pass-through door:
1. Fold the rear armrest down and
open the pass-through door. See
“Rear-Seat Pass Through”
following for more information. 2. Reach upward through the
opening to locate the emergency
trunk release handle. See
“Emergency Trunk Release
Handle” following for more
information.
3. Pull forward on the trunk release handle to open the trunk lid.
On vehicles with a split folding
rear seat:
1. Fold down the rear seatback. See Rear Seats
on page 3‑13for more information.
2. Reach upward through the opening to locate the trunk
release handle.
3. Pull forward on the trunk release handle to open the trunk lid.
Close the trunk by pulling on the
handle. Do not use the handle as a
tie-down.
Page 54 of 496
Black plate (22,1)Cadillac CTS/CTS-V Owner Manual - 2011
2-22 Keys, Doors and Windows
If the transmission is shifted out of
P (Park) and accelerate before the
power liftgate latch is closed, the
liftgate may reverse to the open
position. Cargo could fall out of the
vehicle. Close and latch the power
liftgate before driving.
If the liftgate is powered open and
the liftgate support struts have lost
pressure, the turn signals will flash
and a chime will sound. The liftgate
will stay open, and then slowly
close. See your dealer for service
before using the liftgate.
Obstacle Detection Features
If the liftgate encounters an obstacle
during a power open or close cycle,
a warning chime will sound and the
liftgate will automatically reverse
direction to the full closed or open
position. After removing the
obstacle, the power liftgate
operation can be used again. If the
liftgate encounters multiple
obstacles on the same power cycle,
the power function will deactivate.After removing the obstacles, the
liftgate will resume normal power
operation.
The vehicle has pinch sensors
located on the side edges of the
liftgate. If an object is caught
between the liftgate and the body
and presses against this sensor, the
liftgate will reverse direction and
open fully. The liftgate will remain
open until it is activated again or
closed manually.
Setting the Power Liftgate
Intermediate Mode
To change the liftgate stop position:
1. Turn the liftgate switch to either
the MAX, or the ¾ mode position
and power open the liftgate.
2. Stop the liftgate movement at the desired height by pressing
any button that operates the
power liftgate, or the touchpad.
Manually adjust the liftgate
position if required. 3. Press and hold the button on the
liftgate adjacent to the latch until
the turn signals flash and a beep
sounds to indicate that the new
setting is recorded.
When power opened with the
¾ mode selected, the liftgate stops
at the new set position.
If an audible and visual response is
not received when setting the
intermediate stop position, the
liftgate height is below the ¾ open
height minimum, approximately
5 feet at the edge of the liftgate.Manual Operation of Power
Liftgate
To change the liftgate to manual
operation, turn the mode selector
switch to OFF.
With the power liftgate disabled and
all of the doors unlocked, the liftgate
can be manually opened and
closed. Manual operation of a
vehicle with a power liftgate requires
more effort than a standard
non-power liftgate.
Page 62 of 496

Black plate (30,1)Cadillac CTS/CTS-V Owner Manual - 2011
2-30 Keys, Doors and Windows
Press the switch to lower the
window to the desired level. Pull the
switch up to raise the window.
Retained Accessory Power (RAP)
allows the use of the power
windows after the ignition has been
turned off. SeeRetained Accessory
Power (RAP) on page 9‑19.
Express-Down/Up Windows
Windows with the express feature
allow the windows to be raised and
lowered all the way without holding
the switch.
Press or pull the switch fully and
release it to activate the express
feature.
The express mode can be canceled
by briefly pressing or pulling the
switch.
Express Window Anti-Pinch
Feature
If any object is in the path of the
window when the express‐up is
active, the window will stop at the
obstruction and auto‐reverse to a
preset factory position. Weather
conditions such as severe icing may
also cause the window to auto‐
reverse. The window will return to
normal operation after the
obstruction or condition is removed.
Express Window Anti‐Pinch
Override
{WARNING
If express override is activated,
the window will not reverse
automatically. You or others could
be injured and the window could
be damaged. Before you use
express override, make sure that
all people and obstructions are
clear of the window path.
The anti‐pinch feature can be
overridden. Hold the window switch
all the way up to the second
position. The window will rise for as
long as the switch is held. Once the
switch is released, the express
mode is re‐activated.
In this mode, the window can close
on an object in its path. Use care
when using the override mode.
Page 101 of 496
Black plate (33,1)Cadillac CTS/CTS-V Owner Manual - 2011
Seats and Restraints 3-33
Driver Side shown, PassengerSide similar
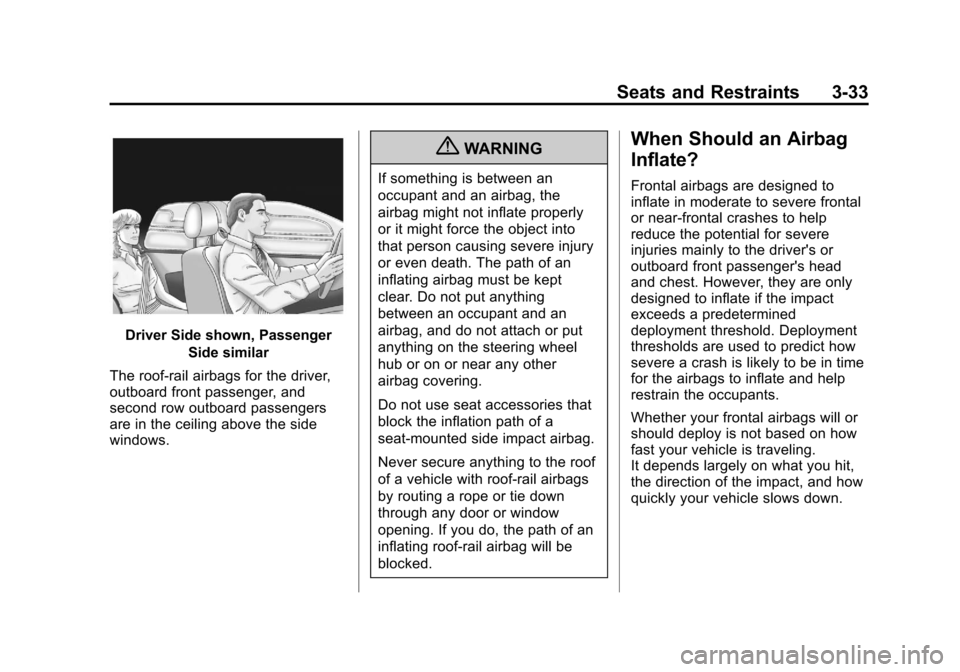
The roof-rail airbags for the driver,
outboard front passenger, and
second row outboard passengers
are in the ceiling above the side
windows.
{WARNING
If something is between an
occupant and an airbag, the
airbag might not inflate properly
or it might force the object into
that person causing severe injury
or even death. The path of an
inflating airbag must be kept
clear. Do not put anything
between an occupant and an
airbag, and do not attach or put
anything on the steering wheel
hub or on or near any other
airbag covering.
Do not use seat accessories that
block the inflation path of a
seat-mounted side impact airbag.
Never secure anything to the roof
of a vehicle with roof-rail airbags
by routing a rope or tie down
through any door or window
opening. If you do, the path of an
inflating roof-rail airbag will be
blocked.
When Should an Airbag
Inflate?
Frontal airbags are designed to
inflate in moderate to severe frontal
or near-frontal crashes to help
reduce the potential for severe
injuries mainly to the driver's or
outboard front passenger's head
and chest. However, they are only
designed to inflate if the impact
exceeds a predetermined
deployment threshold. Deployment
thresholds are used to predict how
severe a crash is likely to be in time
for the airbags to inflate and help
restrain the occupants.
Whether your frontal airbags will or
should deploy is not based on how
fast your vehicle is traveling.
It depends largely on what you hit,
the direction of the impact, and how
quickly your vehicle slows down.
Page 103 of 496
Black plate (35,1)Cadillac CTS/CTS-V Owner Manual - 2011
Seats and Restraints 3-35
In a rollover event, roof‐rail airbag
deployment is determined by the
direction of the roll.
What Makes an Airbag
Inflate?
In a deployment event, the sensing
system sends an electrical signal
triggering a release of gas from the
inflator. Gas from the inflator fills the
airbag causing the bag to break out
of the cover and deploy. The inflator,
the airbag, and related hardware are
all part of the airbag module.
Frontal airbag modules are located
inside the steering wheel and
instrument panel. For vehicles with
seat-mounted side impact airbags,
there are airbag modules in the side
of the front seatbacks closest to the
door. For vehicles with roof-rail
airbags, there are airbag modules in
the ceiling of the vehicle, near the
side windows that have occupant
seating positions.
How Does an Airbag
Restrain?
In moderate to severe frontal or
near frontal collisions, even belted
occupants can contact the steering
wheel or the instrument panel. In
moderate to severe side collisions,
even belted occupants can contact
the inside of the vehicle.
Airbags supplement the protection
provided by safety belts. Frontal
airbags distribute the force of the
impact more evenly over the
occupant's upper body, stopping
the occupant more gradually.
Seat‐mounted side impact and
roof-rail airbags distribute the force
of the impact more evenly over the
occupant's upper body.Rollover capable roof-rail airbags
are designed to help contain the
head and chest of occupants in the
outboard seating positions in the
first and second rows. The rollover
capable roof-rail airbags are
designed to help reduce the risk of
full or partial ejection in rollover
events, although no system can
prevent all such ejections.
But airbags would not help in many
types of collisions, primarily
because the occupant's motion is
not toward those airbags. See
When
Should an Airbag Inflate?
on
page 3‑33for more information.
Airbags should never be regarded
as anything more than a supplement
to safety belts.
Page 145 of 496
Black plate (5,1)Cadillac CTS/CTS-V Owner Manual - 2011
Instruments and Controls 5-5
6(Adjustable Interval Wiper
Band): Turn the band up for more
frequent wipes or down for less
frequent wipes.
1 : Slow wipes.
2 : Fast wipes.
If the windshield wipers are in use
for about six seconds while you are
driving, the exterior lamps come on
automatically if the exterior lamp
control is in AUTO. See “Wiper
Activated Headlamps” for more
information.
Clear snow and ice from the wiper
blades before using them. If frozen
to the windshield, carefully loosen or
thaw them. Damaged wiper blades
should be replaced. For more
information, see Wiper Blade
Replacement on page 10‑34.
Heavy snow or ice can overload the
wiper motor. A circuit breaker will
stop the motor until it cools down. Wiper Arm Assembly Protection
When using an automatic car wash,
move the windshield wiper lever to
the OFF position. This disables the
windshield wipers and/or rear
wipers, if equipped.
Windshield Washer
{WARNING
In freezing weather, do not use
your washer until the windshield
is warmed. Otherwise the washer
fluid can form ice on the
windshield, blocking your vision.
Sedan/Coupe Model
K(Washer Fluid): Press the
button with this symbol, on the end
of the windshield washer lever, to
wash the windshield. The washer
fluid sprays onto the windshield and
the wipers run for a few cycles to
clear the windshield. Press and hold
Kfor more wash cycles. Wagon Model
Pull the lever to spray washer fluid
on the windshield. The spray
continues until the lever is released.
The wipers will run a few times.
Washer Fluid Low Add Fluid
displays on the Driver Information
Center (DIC) when the washer fluid
is low. See
Driver Information
Center (DIC) on page 5‑27.
See Washer Fluid
on page 10‑26for
information on filling the windshield
washer fluid reservoir.
If the headlamps are on while the
windshield is being washed, the
headlamp washers, if the vehicle
has them, will also turn on. See
“Headlamp Washer” following for
more information.
Page 175 of 496
Black plate (35,1)Cadillac CTS/CTS-V Owner Manual - 2011
Instruments and Controls 5-35
Engine Cooling System
Messages
Engine Hot A/C (Air
Conditioning) Off
This message displays when the
engine coolant becomes hotter than
the normal operating temperature.
SeeEngine Coolant Temperature
Gauge
on page 5‑16. To avoid
added strain on a hot engine, the air
conditioning compressor
automatically turns off. When the
coolant temperature returns to
normal, the air conditioning
compressor turns back on. You can
continue to drive the vehicle.
If this message continues to appear,
have the system repaired by your
dealer as soon as possible to avoid
damage to the engine.
Engine Overheated Idle Engine
Notice: If you drive your vehicle
while the engine is overheating,
severe engine damage may
occur. If an overheat warning
appears on the instrument panel
cluster and/or DIC, stop the
vehicle as soon as possible. Do
not increase the engine speed
above normal idling speed. See
Engine Overheating
on page 10‑24for more information.
This message displays when the
engine coolant temperature is too
hot. Stop and allow the vehicle to
idle until it cools down. If the
message does not clear in a
few minutes or if the overheat light
stays on, shut the vehicle off and
have it serviced before driving
again. See Engine Coolant
Temperature Warning Light
on
page 5‑25.
See Overheated Engine Protection
Operating Mode
on page 10‑25for
information on driving to a safe
place in an emergency.
Engine Oil Messages
Change Engine Oil Soon
When this message displays, it
means that service is required for
the vehicle. See your dealer. See
Scheduled Maintenance
on
page 11‑3and Engine Oilon
page 10‑11for more information.
When you reset the Change Engine
Oil Soon message by clearing it
from the display, you still must reset
the engine oil life system separately.
For more information on resetting
the engine oil life system, see
Engine Oil Life System
on
page 10‑14.
Engine Oil Low Add Oil
If the vehicle has an oil level sensor,
this message displays if the oil level
in the vehicle is low. Check the oil
level and correct it as necessary.
You may need to let the vehicle cool
or warm up and cycle the ignition to
be sure this message clears.
Page 176 of 496

Black plate (36,1)Cadillac CTS/CTS-V Owner Manual - 2011
5-36 Instruments and Controls
This message clears itself after
10 seconds, until the next ignition
cycle. SeeEngine Oil
on page 10‑11for additional information.
Oil Pressure Low Stop Engine
Notice:If you drive your vehicle
while the engine oil pressure is
low, severe engine damage may
occur. If a low oil pressure
warning appears on the
instrument panel cluster and/or
DIC, stop the vehicle as soon as
possible. Do not drive the vehicle
until the cause of the low oil
pressure is corrected. See Engine
Oil
on page 10‑11for more
information.
This message displays when the
vehicle's engine oil pressure is low.
The oil pressure light may also
appear on the instrument panel
cluster. See Engine Oil Pressure
Light
on page 5‑26. See Engine Oilon page 10‑11for more information.
Stop the vehicle immediately, as
engine damage can result from
driving a vehicle with low oil pressure. Have the vehicle serviced
by your dealer as soon as possible
when this message is displayed.
Engine Power Messages
Engine Power Is Reduced
This message displays when the
engine power is being reduced to
protect the engine from damage.
There could be several malfunctions
that might cause this message.
Reduced engine power can affect
the vehicle's ability to accelerate.
If this message is on, but there is no
reduction in performance, proceed
to your destination. The
performance may be reduced the
next time the vehicle is driven. The
vehicle may be driven at a reduced
speed while this message is on, but
acceleration and speed may be
reduced. Anytime this message
stays on, the vehicle should be
taken to your dealer for service as
soon as possible.
Fuel System Messages
Fuel Level Low
This message displays when the
vehicle is low on fuel. Refill the fuel
tank as soon as possible. A chime
may sound when this message
displays. See
Filling the Tank
on
page 9‑50.
Tighten Gas Cap
This message displays when the
fuel cap has not been fully
tightened. Recheck the fuel cap to
ensure that it is on and tightened
properly.
Key and Lock Messages
Accessory Mode Active
If the vehicle has the keyless
access system, this message
displays when the accessory mode
is active. See Ignition Positions (Key
Access)
on page 9‑16or Ignition
Positions (Keyless Access)on
page 9‑18for more information.