display CADILLAC ESCALADE ESV 2009 Owners Manual
[x] Cancel search | Manufacturer: CADILLAC, Model Year: 2009, Model line: ESCALADE ESV, Model: CADILLAC ESCALADE ESV 2009Pages: 602, PDF Size: 5.18 MB
Page 327 of 602

To add a stopover:
1. Press the DEST hard key.
2. Select the Add Stopover screen button. This button
only appears if a route has been calculated.
3. Using the desired method of entering a destination,
enter the stopover. See “Destination” previously for
more information.
4. Select the route preference (Fastest, Shortest,
or Other). The system calculates and highlights
the route.
5. Select the Start Guidance screen button. The route
is now ready to be started.
6. To add the second and third stopovers, press the
DEST hard key, then select the Add screen button,
where the next waypoint should appear on the
route.
7. Select the route preference (Fastest, Shortest, or
Other). The system calculates and highlights the
route.
8. Select the Start Guidance screen button. The route
is now ready to be started. To delete a stopover from the current route:
1. Press the DEST hard key.
2. Select the Delete screen button for the desired
stopover to delete.
3. The system displays a pop-up con�rmation
message. Touch Yes to delete the stopover;
touch No to cancel this operation.
4. Select the route preference (Fastest, Shortest, or
Other). The system calculates and highlights the
route.
5. Select the Start Guidance screen button. The route
is now ready to be started.
Suspend Guidance Press this screen button, from the Route screen, to put
the current route on hold.
Resume Guidance Press this screen button, from the Route screen, to
resume guidance on the current route.
Cancel Guidance Press this screen button, from the Route screen, to
cancel the current route.
4-41
Page 328 of 602

Adding Destinations to the
Address Book There are two ways to add a destination to the
address book:
To add the current vehicle position to the
address book, press the Mark screen button
from the map screen. The system automatically
saves the current vehicle information in the address
book. When scrolling on the map the Mark screen
button automatically adds the current scrolled
position information in the address book.
Press the Add to Address Book screen button
when available on POI information screens,
Destination Entry screens, or POI screens.
The system automatically saves this information
in the address book.
See “Nav” under Configure Menu on page 4-43 for
information on editing address book entries. Adding or Changing Preset
Destinations This feature allows additions or changes one of �ve
preset destinations. When a destination has been added
as a preset destination, it is available to select from
the Destination Entry screen. See “Preset Destination”
previously for information on how to select a preset
destination as a �nal destination.
To store the current vehicle position as a preset
destination:
1. Select the Mark screen button from the map screen
to add the current vehicle position to the address
book. The Address Book screen appears.
2. Select the Name screen button. An alpha-keyboard
displays. Enter the name. Press the OK screen
button then the Back screen button to return to
the address book information screen.
3. Press and hold one of the buttons at the bottom of
the screen until the name appears in that preset
destination screen button. It is now available
to select from the Destination Entry screen.
4-42
Page 329 of 602

To store an address book entry as a preset destination:
1. Select the CONFIG hard key.
2. Select the Nav screen button or press the CONFIG
key until Nav is selected or touch the Nav screen
button.
3. Select the Edit/View screen button.
4. Select the address book entry to be stored as the
preset destination. Select the Name screen button
to add a name, if needed.
5. Press and hold one of the buttons at the bottom of
the screen until the name appears in that preset
destination screen button. It is now available
to select from the Destination Entry screen. Con�gure Menu
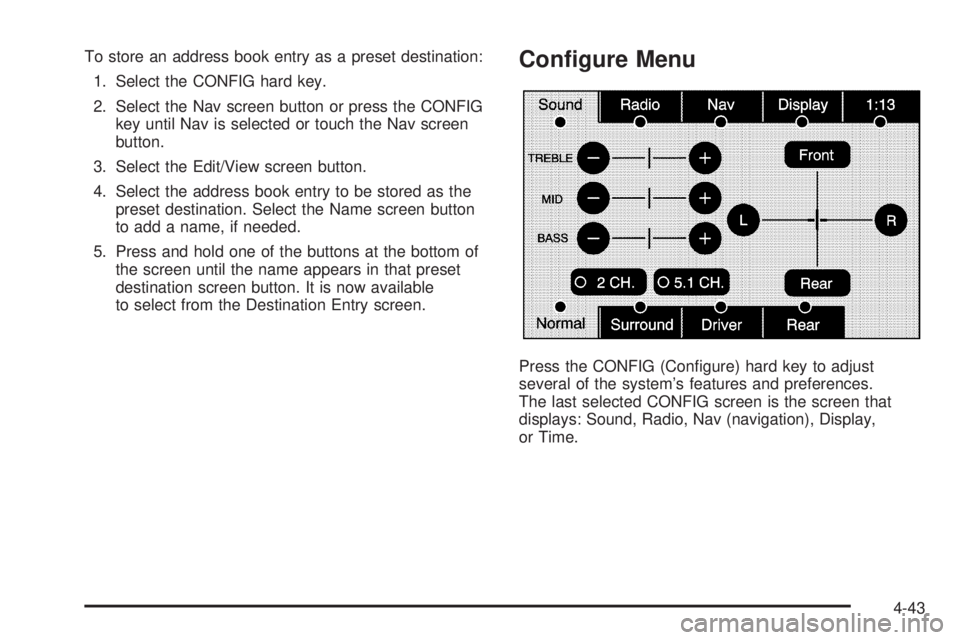
Press the CONFIG (Con�gure) hard key to adjust
several of the system’s features and preferences.
The last selected CONFIG screen is the screen that
displays: Sound, Radio, Nav (navigation), Display,
or Time.
4-43
Page 330 of 602

Sound Press the CONFIG key to enter the con�gure menu
options, then press the CONFIG key repeatedly
until Sound is selected or touch the Sound screen
button to make speaker and DSP (Digital Signal
Processing) adjustments. See “Sound Menu” under,
Navigation Audio System on page 4-62 for more
information.
Radio Press the CONFIG key to enter the con�gure menu
options, then press the CONFIG key repeatedly
until Radio is selected or touch the Radio screen
button to make changes for radio information displayed,
preset pages, XM™ categories, and Bose ®
AudioPilot ®
.
See “Radio Menu” under, Navigation Audio System
on page 4-62 for more information. Nav (Navigation)
Press the CONFIG key to enter the con�gure menu
options, then press the CONFIG key repeatedly
until Nav is selected or touch the Nav screen button.
4-44
Page 333 of 602

4. Select the Add Voice Tag screen button.
5. The system will ask for you to state the name.
You will have four seconds to state the name.
The system will respond back with the name and
prompt you to repeat the name for con�rmation.
To delete an address book entry:
1. Select the CONFIG hard key.
2. Select the NAV screen button.
3. Select the Edit/View Address Book screen button.
4. Select the address book entry to delete.
5. Press the Delete screen button to delete the
address book entry.
6. A con�rmation pop-up will display. Select Ok to
delete; select Cancel to cancel the operation.
To delete the entire address book:
1. Select the CONFIG hard key.
2. Select the NAV screen button.
3. Select the Edit/View Address Book screen button.
4. A list of all the address book entries will display.
Press and hold the Clear All screen button.
5. A con�rmation pop-up will display. Select Ok to
delete; select Cancel to cancel the operation. Map Database Information
Touch the Map Database Information screen button to
view the coverage areas of the map DVD.
4-47
Page 334 of 602

Off-Road Mode To turn the Off-road mode on or off, do the following:
1. Press the CONFIG hard key.
2. Press the Nav screen button.
3. Press the Off-Road mode screen button. The button
will be highlighted when the feature is on.
When the off-road mode is turned on, the navigation
system will show the path being traveled by the vehicle
when not on a marked road. This path will be a simulation
since the map database coverage will not have these
roads on the DVD. This path will be stored in the
navigation system’s memory, see “Previous Destination”
under Destination on page 4-25 for more information.
See “Off-Road Driving” in the Index of your vehicle’s
owner manual for more information about off-road
driving. Traffic Options Read the following Options descriptions to understand
how the XM NavTraffic™ operates.
XM NavTraffic™ (USA and Canada) Vehicles with the navigation system have an
XM NavTraffic™ receiver. XM NavTraffic™ is a
subscription service provided via XM™ Satellite
Radio. XM NavTraffic™ provides real-time traffic
information fully integrated to the navigation system
to display current traffic conditions for a driver’s chosen
route. XM NavTraffic™ allows drivers to make the most
informed, timesaving routing decisions.
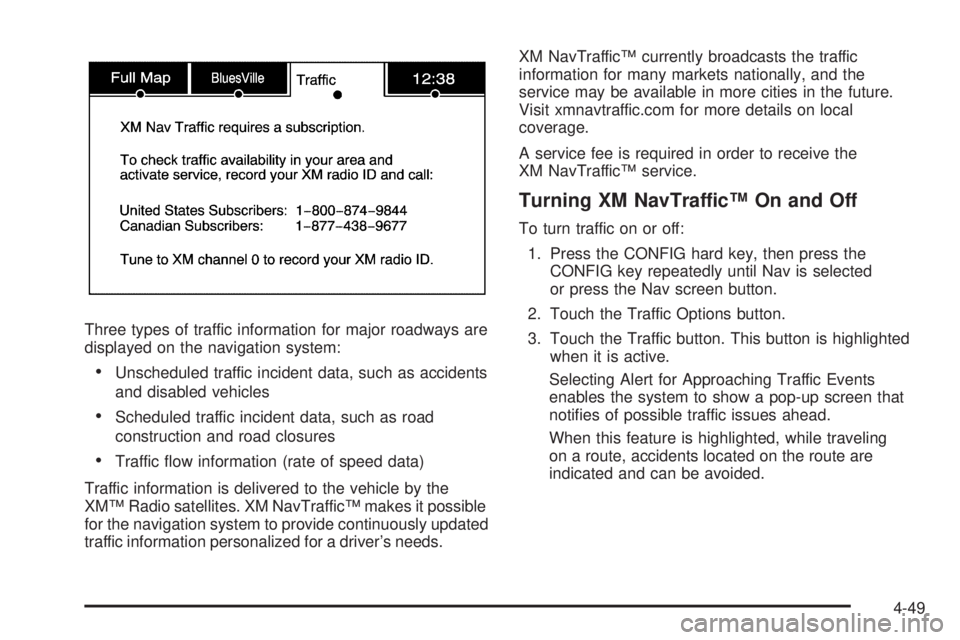
If the Traffic touch screen button is pressed or if
an attempt is made to turn on the traffic display in the
Navigation Setup Menu without a subscription, a Caution
screen displays indicating that XM traffic is not activated.
4-48
Page 335 of 602

Three types of traffic information for major roadways are
displayed on the navigation system:
Unscheduled traffic incident data, such as accidents
and disabled vehicles
Scheduled traffic incident data, such as road
construction and road closures
Traffic �ow information (rate of speed data)
Traffic information is delivered to the vehicle by the
XM™ Radio satellites. XM NavTraffic™ makes it possible
for the navigation system to provide continuously updated
traffic information personalized for a driver’s needs. XM NavTraffic™ currently broadcasts the traffic
information for many markets nationally, and the
service may be available in more cities in the future.
Visit xmnavtraffic.com for more details on local
coverage.
A service fee is required in order to receive the
XM NavTraffic™ service.
Turning XM NavTraffic™ On and Off To turn traffic on or off:
1. Press the CONFIG hard key, then press the
CONFIG key repeatedly until Nav is selected
or press the Nav screen button.
2. Touch the Traffic Options button.
3. Touch the Traffic button. This button is highlighted
when it is active.
Selecting Alert for Approaching Traffic Events
enables the system to show a pop-up screen that
noti�es of possible traffic issues ahead.
When this feature is highlighted, while traveling
on a route, accidents located on the route are
indicated and can be avoided.
4-49
Page 336 of 602

Traffic Icon The Traffic Icon appears on the Traffic Tab, next to the
word Traffic, when traffic is found in the local area.
The Traffic Icon has three different condition displays.
These are:
Condition Traffic Status Icon
No XM NavTraffic™
subscription.
No Traffic is found in
the local area.
The Traffic Feature is
turned off. Condition Traffic Status Icon
Traffic events are in the
area, but none are on
route.
Traffic events are on route.
4-50
Page 337 of 602

Locations and Information of Traffic
Conditions The system may take some time to sort the
information. The list of traffic conditions display
in the order of distance from the vehicle, up to
approximately 75 mi (125 km). With a route planned,
the system defaults to list traffic events on your route.
Without a route planned, if travelling on a major
interstate, the system lists events immediately ahead
on the interstate �rst. Then all other traffic events follow.
Not all traffic conditions may be listed. To view the traffic condition location and information on
the map:
1. Press the NAV key, then press the NAV key
repeatedly until Traffic is selected, or touch the
Traffic screen button. A list of traffic conditions with
distance from the vehicle’s current position displays.
An arrow may appear before the distance.
The arrow indicates the distance is a straight line
distance and it shows the direction of the event
from the current vehicle’s position. If no arrow
appears, the distance indicates how far the event
is ahead on current Interstate highway or route.
4-51
Page 338 of 602

While the vehicle is moving, the traffic list up or down,
scroll arrows are limited to a maximum of four pages.
No more than four pages of traffic events may be
viewed while the vehicle is moving.
2. Select a traffic condition to get more detailed
information of the event. Options
Select the Options screen button. A Traffic Options
menu displays. Select the desired traffic related option.
Traffic: Select to enable or disable the traffic function.
Show Traffic ICONS: Select to display traffic icons
on the map screen. This function allows which traffic
information displays.
4-52