CADILLAC XLR V 2007 1.G Owners Manual
Manufacturer: CADILLAC, Model Year: 2007, Model line: XLR V, Model: CADILLAC XLR V 2007 1.GPages: 512, PDF Size: 3.84 MB
Page 271 of 512
Display Whole Route
This feature allows you to display your entire
planned route. Total mileage and time to
destination for the planned route will be displayed
on the map screen. Touch Return to go back
to the previous menu.
Calculate Route
This feature allows you to begin route calculation
for the selected destination.
Cancel Route
If you are traveling on a planned route and would
like to cancel it, touch Cancel Route. The
system will ask you to con�rm by touching YES.
Touch YES to con�rm cancellation of your planned
route or touch Return to keep your planned
route.
Maps
This section includes basic information you need
to know about the map database.
Regional Maps
The maps are stored on a DVD-ROM. The
48 contiguous United States and portions of
Canada are contained on one disc. The U.S. map
database includes interstate freeways, state
highways, country roads, and major and general
streets.
Refer to the “Navigation System Map Disc”
manual to view the explanation of map coverage
and detailed city lists in each region. The map
disc manual will be in your map DVD case when
the vehicle is delivered from the factory.
Installing the DVD Map Disc
When your vehicle is delivered from the factory,
the dealer may have installed the map DVD. If the
map DVD was not installed in your vehicle
when �rst purchased, do the following:
1. Turn the ignition on.
2. With the vehicle in PARK (P), press and hold
the TILT key until a beep is heard. The
system’s faceplate will open.
3. If already loaded, the map DVD or a CD will
eject from the slot.
271
Page 272 of 512
4. Load the map DVD into the slot by inserting it
partway. The system will pull it in.
5. Press and release the TILT key to close the
faceplate.
Notice:Shifting out of PARK (P) with the
system’s faceplate open will cause the
faceplate to close automatically. This could
cause damage to a CD, DVD or the system if it
is partially loaded. Before shifting out of
PARK (P), make sure that the DVD or CD is
loaded properly. The vehicle must be shifted
back into PARK (P) to close the faceplate.
Once the map DVD is inserted correctly, you will
have the following two choices:
LANGUAGE
I AGREE
You can change the language at this time. See
“Language” underNavigation Audio System
on page 285for more information on choosing a
language. Once a language has been selected,
touch I AGREE to plan a route. The map will
appear showing your current vehicle position.
Ejecting the DVD Map Disc
When the DVD map disc is not loaded, you will
not be able to use the navigation portion of
the system.
1. Turn the ignition on.
2. With the vehicle in PARK (P), press and hold
the TILT key until a beep is heard. The
system’s faceplate will open.
3. The map DVD will eject from the slot. Pull the
disc out.
4. Press and release the TILT key to close the
faceplate.
Notice:Shifting out of PARK (P) with the
system’s faceplate open will cause the
faceplate to close automatically. This could
cause damage to a CD, DVD or the system if it
is partially loaded. Before shifting out of
PARK (P), make sure that the DVD or CD is
loaded properly. The vehicle must be shifted
back into PARK (P) to close the faceplate.
272
Page 273 of 512
Setting the Search Area
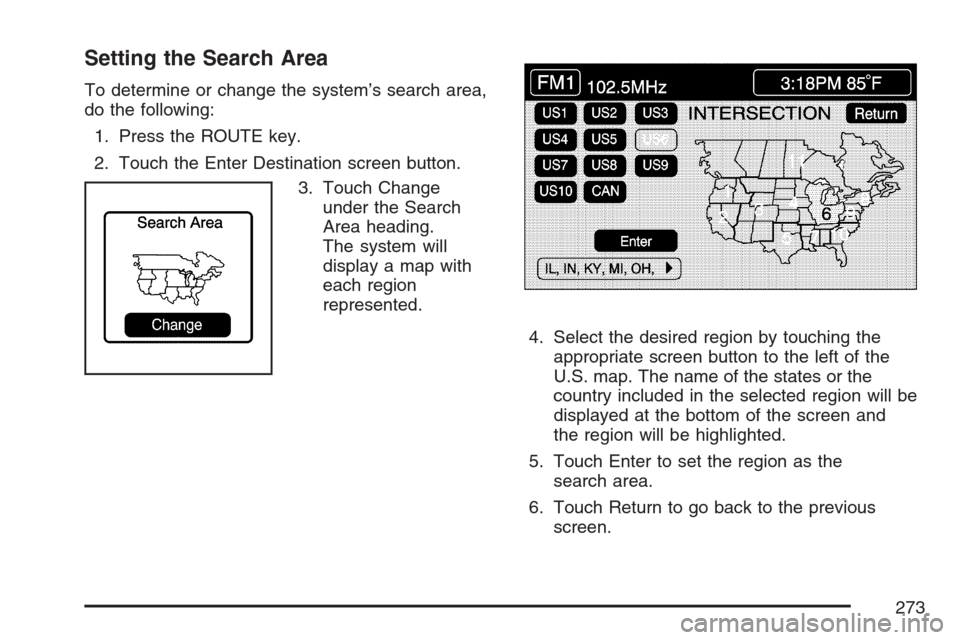
To determine or change the system’s search area,
do the following:
1. Press the ROUTE key.
2. Touch the Enter Destination screen button.
3. Touch Change
under the Search
Area heading.
The system will
display a map with
each region
represented.
4. Select the desired region by touching the
appropriate screen button to the left of the
U.S. map. The name of the states or the
country included in the selected region will be
displayed at the bottom of the screen and
the region will be highlighted.
5. Touch Enter to set the region as the
search area.
6. Touch Return to go back to the previous
screen.
273
Page 274 of 512
Map Adjustments
The system allows you to adjust the scale of view
on the map. The map will scroll automatically
based on the direction you are traveling.
Map Scales
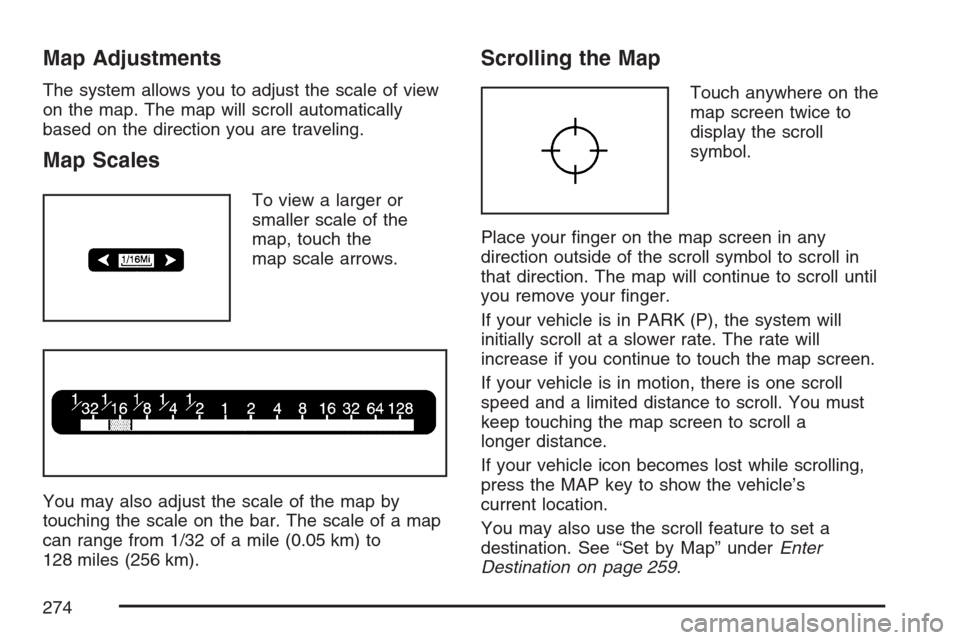
To view a larger or
smaller scale of the
map, touch the
map scale arrows.
You may also adjust the scale of the map by
touching the scale on the bar. The scale of a map
can range from 1/32 of a mile (0.05 km) to
128 miles (256 km).
Scrolling the Map
Touch anywhere on the
map screen twice to
display the scroll
symbol.
Place your �nger on the map screen in any
direction outside of the scroll symbol to scroll in
that direction. The map will continue to scroll until
you remove your �nger.
If your vehicle is in PARK (P), the system will
initially scroll at a slower rate. The rate will
increase if you continue to touch the map screen.
If your vehicle is in motion, there is one scroll
speed and a limited distance to scroll. You must
keep touching the map screen to scroll a
longer distance.
If your vehicle icon becomes lost while scrolling,
press the MAP key to show the vehicle’s
current location.
You may also use the scroll feature to set a
destination. See “Set by Map” underEnter
Destination on page 259.
274
Page 275 of 512
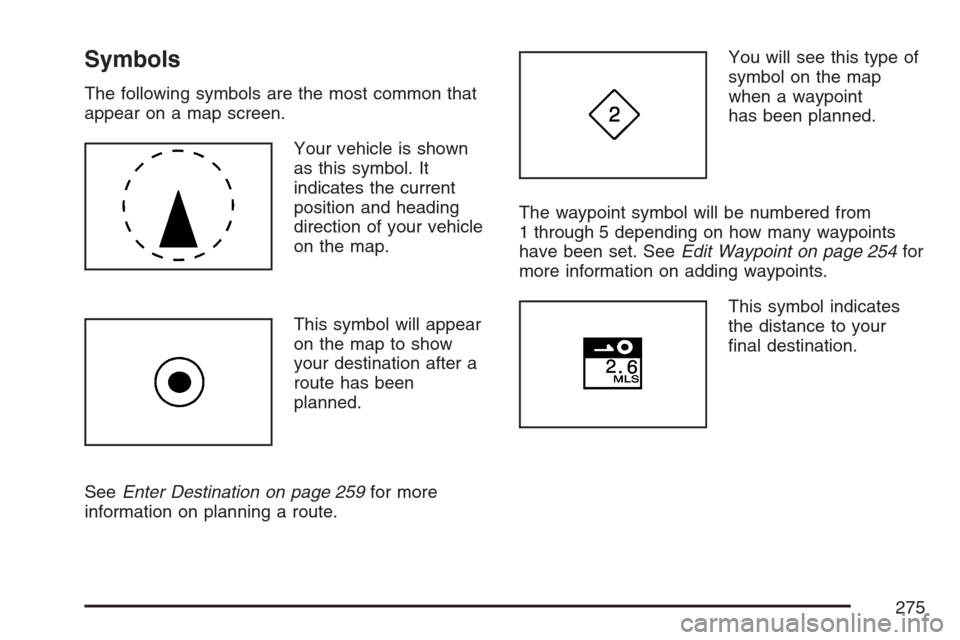
Symbols
The following symbols are the most common that
appear on a map screen.
Your vehicle is shown
as this symbol. It
indicates the current
position and heading
direction of your vehicle
on the map.
This symbol will appear
on the map to show
your destination after a
route has been
planned.
SeeEnter Destination on page 259for more
information on planning a route.You will see this type of
symbol on the map
when a waypoint
has been planned.
The waypoint symbol will be numbered from
1 through 5 depending on how many waypoints
have been set. SeeEdit Waypoint on page 254for
more information on adding waypoints.
This symbol indicates
the distance to your
�nal destination.
275
Page 276 of 512

This symbol indicates
the distance and
estimated travel time to
your �nal destination.
The Estimated
Travel Time feature
must be on for
estimated travel time to
be displayed.
This symbol indicates
the distance to your
�nal destination
in a straight line.
This symbol will appear before route guidance
begins or if you are on a road where route
guidance is not available.This symbol indicates
the map with North up.
While in North up mode, North will always be at
the top of the map screen regardless of which
direction the vehicle is traveling.
This symbol indicates
the map with the vehicle
travel direction up, or
Heading up.
The shaded triangle indicates North. While in
Heading up mode, the direction your vehicle is
traveling will always be at the top of the map
screen.
Touch either the North Up heading symbol or the
vehicle Heading Up symbol to alternate between
settings.
276
Page 277 of 512

This symbol will appear
when the navigation
system is unable
to receive the GPS
signal.
SeeGlobal Positioning System (GPS) on page 281
for more information.
When a point of interest
(POI) or street address
name is too long to
be displayed, an arrow
will appear.
Touch the right or left arrow to scroll through the
entire name.This symbol indicates
the position of the next
turn instruction.
While on a planned
route, touch this symbol
to display the DEST
MAP, WHOLE,
and TURN LIST options.
277
Page 278 of 512

With these options, you can do the following:
Dest (Destination) Map:This option allows you
to view the �nal destination location. The
destination’s name or address will be displayed on
the map screen. Touch Return when �nished.Whole:This option allows you to view the entire
planned route. The distance to destination will
be displayed on the map screen. Touch Return
when �nished.
278
Page 279 of 512

Turn List:This option allows you to view a
step-by-step listing of upcoming street names, the
distance that you will travel on the road, and
turns you will need to make during your planned
route.
After touching Turn List, the system may take
some time to create the list. The length of time will
vary depending on the length of your route and
the planning methods you have selected.
The turn list will read from bottom to top. The
bottom street name is the street you are currently
on. The system automatically updates thisscreen as you make each turn. You may also
touch the scroll up and down arrows providing
scroll is available. Touching the down arrow
will bring you to your current location. Touching
the up arrow will give you upcoming streets.
At times, there may not be names available for
entrance or exit ramps.
To avoid a turn, touch AVOID next to the turn you
want to avoid. You can use REDUCE or
ENLARGE to edit the avoided point. Touch
Reroute or press the MAP key to calculate your
new route.
Touch Return to view your current position and to
turn the turn list screen off.
Touch REROUTE or press the MAP key to
calculate a new route.
Auto Reroute
When your destination is set and you travel off of
the planned route, the system will automatically
begin to reroute you. You will see the new
route highlighted on the screen.
279
Page 280 of 512

Traveling Across Regions
If you plan to drive across several states, you may
have to change the selected region to represent
the area you are traveling to.
There are two ways you can plan a destination
when traveling across regions.
The following method is suggested and provides
the most route guidance and map display
functions:
1. Change the selected search area region when
you get closer to the area you are traveling to.
See “Setting the Search Area” underMaps
on page 271.
2. Enter your destination and route settings. See
Enter Destination on page 259for more
information.
If you do not want to use the �rst method, keep
your currently selected search area region
and enter your destination. This method allows
you only to select a destination from the easy
planning route method or from the All Points of
Interest (POI) categories with the “All Search
Areas” comment for US Only. For example, Touristis a category that features this comment. See
Enter Destination on page 259for more
information.
If you are traveling in or to Canada and you cross
the regional border, the only map scale views
available are 4 mi, 8 mi, 31 mi, and 128 mi (8 km,
16 km, 64 km and 256 km). Change the selected
search area region when you get closer to the area
you are traveling to. See “Setting the Search
Area” underMaps on page 271for more
information.
Keyless Access System
When the engine is started, Driver 1 or Driver 2
will display on the screen. A message will not
appear on the screen if the driver is unknown. The
number on the back of the transmitter corresponds
to driver 1 or driver 2. The navigation system
can store memory points for drivers 1 and
2 individually. SeeKeyless Access System on
page 67for more information.
280