CHEVROLET CAMARO 1982 Repair Guide
CAMARO 1982
CHEVROLET
CHEVROLET
https://www.carmanualsonline.info/img/24/56854/w960_56854-0.png
CHEVROLET CAMARO 1982 Repair Guide
Trending: engine coolant, oil capacity, oil level, odometer, park assist, power steering fluid, check engine
Page 81 of 875
GM – CAMARO 1982-1992 – Repair Guide (Checked by WxMax) 81
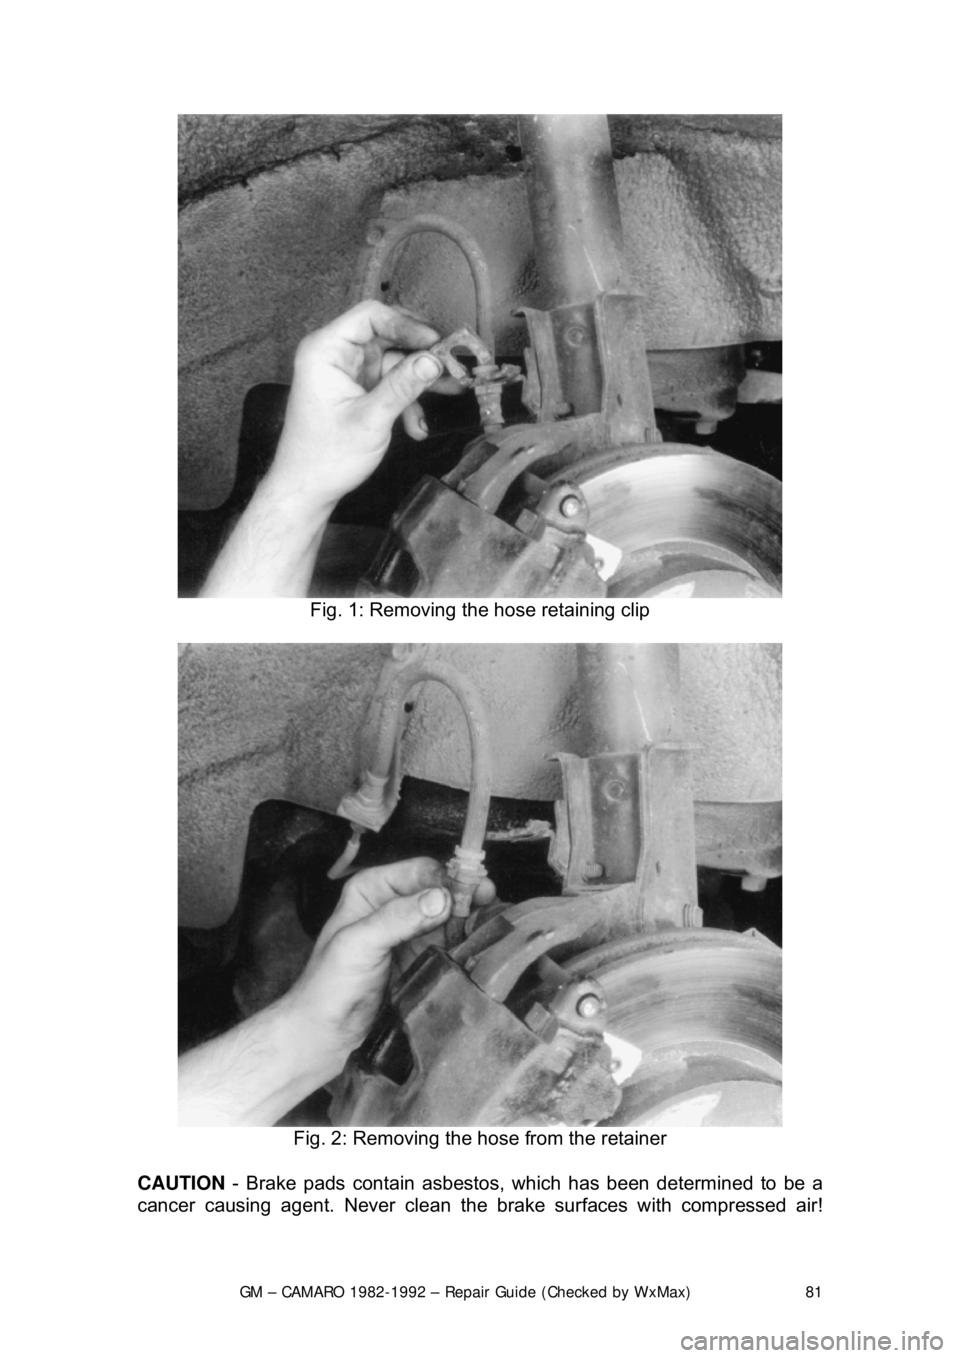
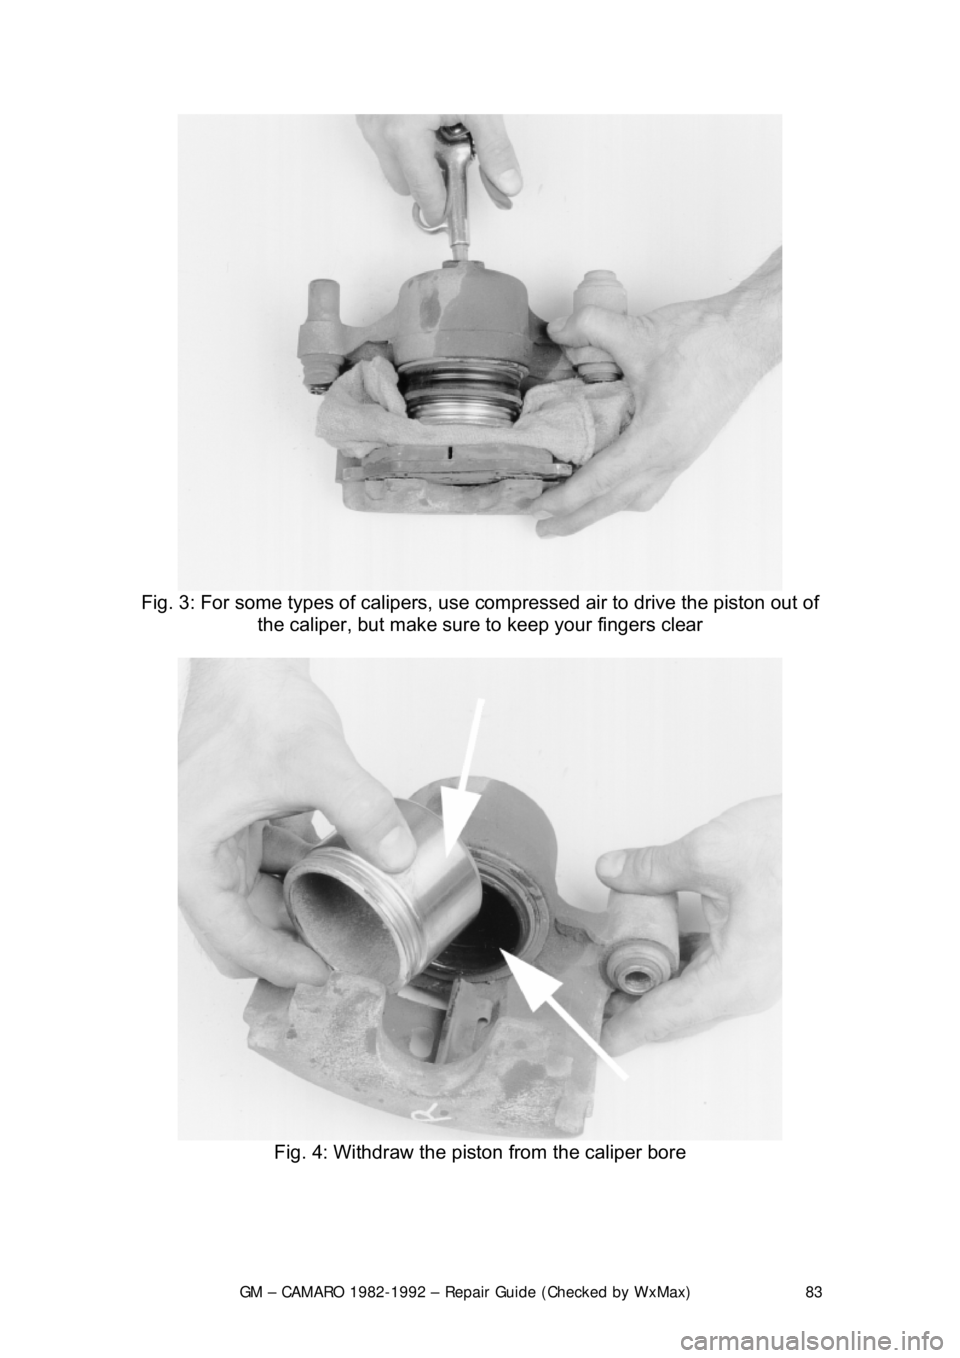
Fig. 1: Removing the hose retaining clip
Fig. 2: Removing the hose from the retainer
CAUTION - Brake pads contain asbestos, which has been determined to be a
cancer causing agent. Never clean the brake surfaces with compressed air!
Page 82 of 875

GM – CAMARO 1982-1992 – Repair Guide (Checked by WxMax) 82
Avoid inhaling any dust from
any brake surface! When cleaning brake surfaces,
use a commercially available brake cleaning fluid.
1. Remove
2/3 of the brake fluid from the mast er cylinder. Raise the vehicle and
remove the wheel.
2. Place a C-clamp across the caliper, positioned on the brake pads. Tighten it
until the piston is forced into its bore.
3. Remove the C-clamp. Remove the bolt holding the brake hose to the caliper.
4. Remove the Allen head caliper mounting bolts. Inspect them for corrosion
and replace them if necessary. Remove the caliper.
To install:
5. Position the caliper with the brake pad installed and install Allen head caliper
mounting bolts. Mounting bo lt torque is 21-35 ft. lbs. (28-47 Nm.) for the
caliper.
6. Install the bolt holding the brake hos e to the caliper and tighten to 18-30 ft.
lbs. (24-40 Nm.).
7. Fill the master cylinder with brake fluid.
8. Install the wheels and lower the vehicle.
CAUTION - Before moving the vehicle, pump the brakes several times to seat
the brake pad against the rotor
OVERHAUL
Some vehicles may be equipped dual piston calipers. The procedure to
overhaul the caliper is e ssentially the same with t he exception of multiple
pistons, O-rings and dust boots.
1. Remove the caliper from the ve hicle and place on a clean workbench.
CAUTION - NEVER place your finger s in front of the pistons in an attempt to
catch or protect the pistons when applying compressed air. This could result in
personal injury!
Depending upon the vehicle, there are two different ways to remove the piston
from the caliper. Refer to the brake pad replacement procedure to make sure
you have the correct procedure for your vehicle.
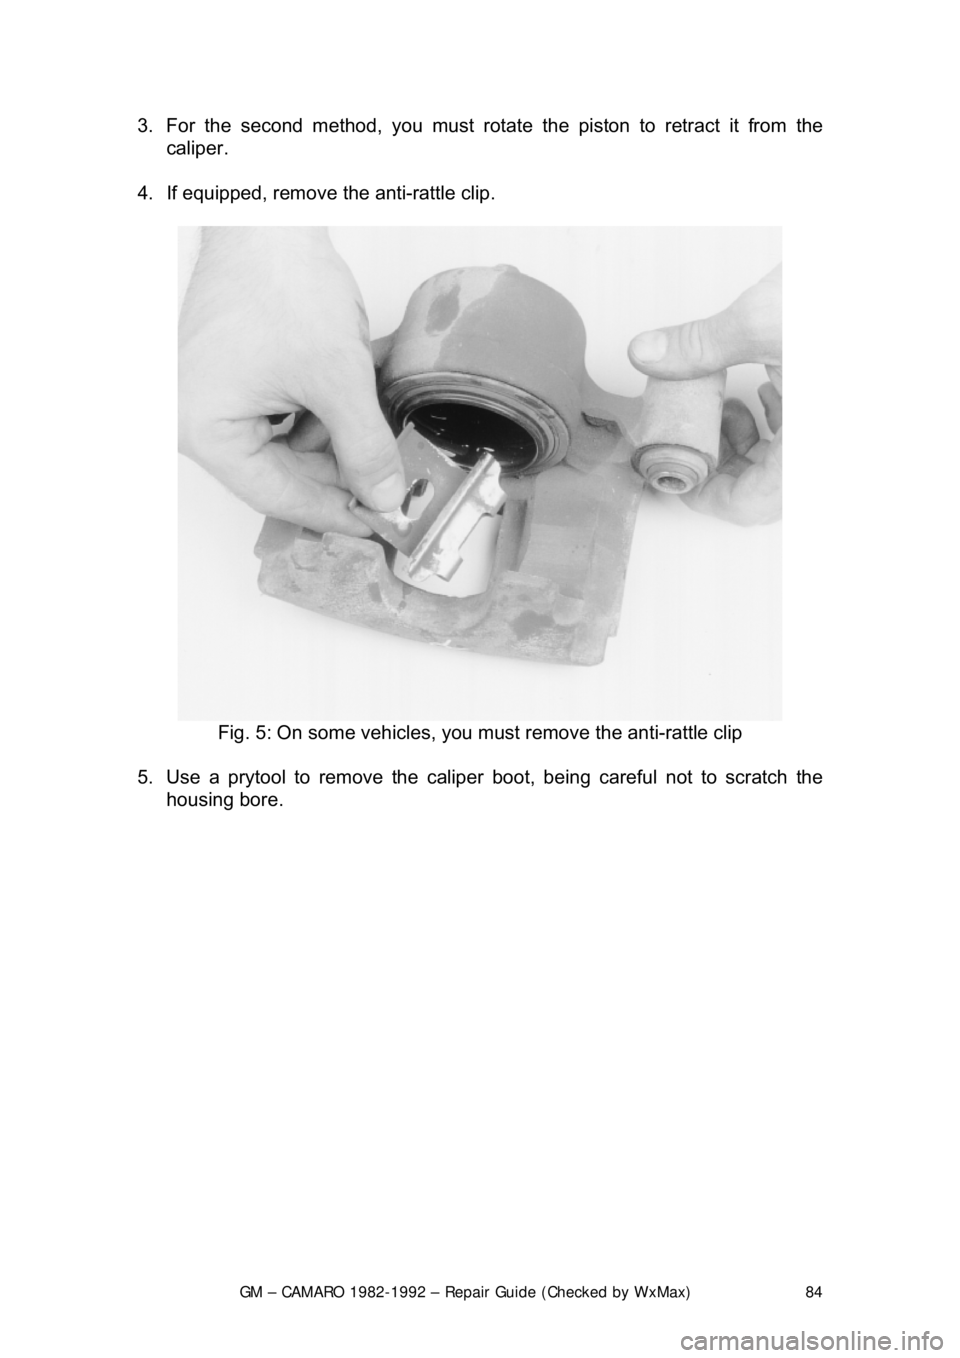
2. The first method is as follows: a. Stuff a shop towel or a block of wood into the caliper to catch the piston.
b. Remove the caliper piston using co mpressed air applied into the caliper
inlet hole. Inspect the piston for scor ing, nicks, corrosion and/or worn or
damaged chrome plating. The piston mu st be replaced if any of these
conditions are found.
Page 83 of 875
GM – CAMARO 1982-1992 – Repair Guide (Checked by WxMax) 83
Fig. 3: For some types of calipers, use compressed air to drive the piston out of
the caliper, but make sure to keep your fingers clear
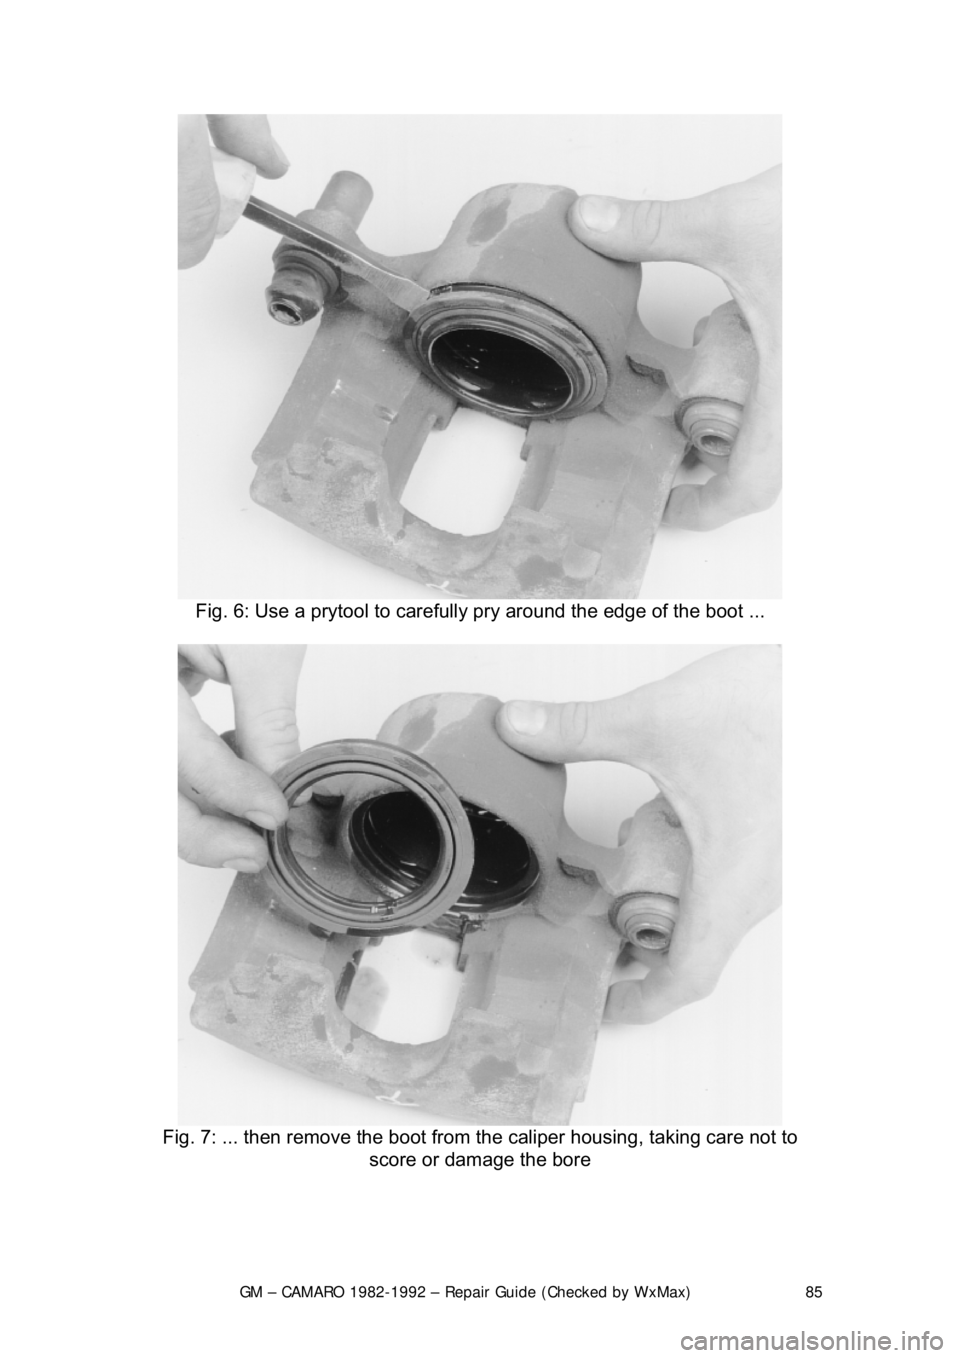
Fig. 4: Withdraw the pi ston from the caliper bore
Page 84 of 875
GM – CAMARO 1982-1992 – Repair Guide (Checked by WxMax) 84
3. For the second method, you must rota
te the piston to retract it from the
caliper.
4. If equipped, remove th e anti-rattle clip.
Fig. 5: On some vehicles, you must remove the anti-rattle clip
5. Use a prytool to remove the caliper boot, being careful not to scratch the
housing bore.
Page 85 of 875
GM – CAMARO 1982-1992 – Repair Guide (Checked by WxMax) 85
Fig. 6: Use a prytool to carefully pry around the edge of the boot ...
Fig. 7: ... then remo ve the boot from the caliper housing, taking care not to
score or damage the bore
Page 86 of 875
GM – CAMARO 1982-1992 – Repair Guide (Checked by WxMax) 86
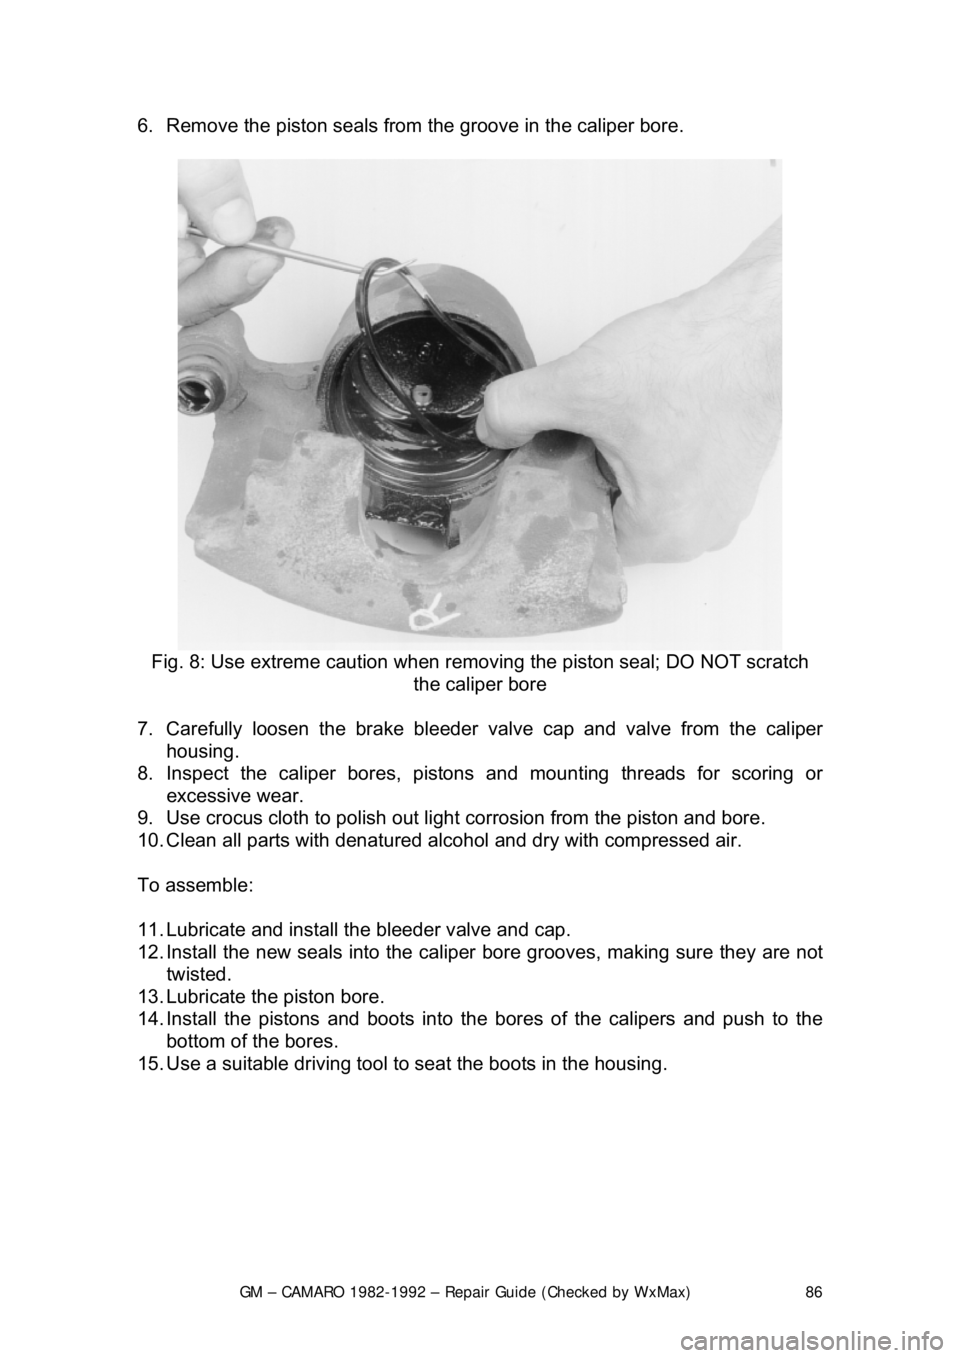
6. Remove the piston seals from
the groove in the caliper bore.
Fig. 8: Use extreme caution when remo ving the piston seal; DO NOT scratch
the caliper bore
7. Carefully loosen the br ake bleeder valve cap and valve from the caliper
housing.
8. Inspect the caliper bores, pistons and mounting threads for scoring or excessive wear.
9. Use crocus cloth to polish out light corrosion from the piston and bore.
10. Clean all parts with denatured alcohol and dry with compressed air.
To assemble:
11. Lubricate and install th e bleeder valve and cap.
12. Install the new seals into the caliper bore grooves, making sure they are not
twisted.
13. Lubricate the piston bore.
14. Install the pistons and boots into the bores of the calipers and push to the
bottom of the bores.
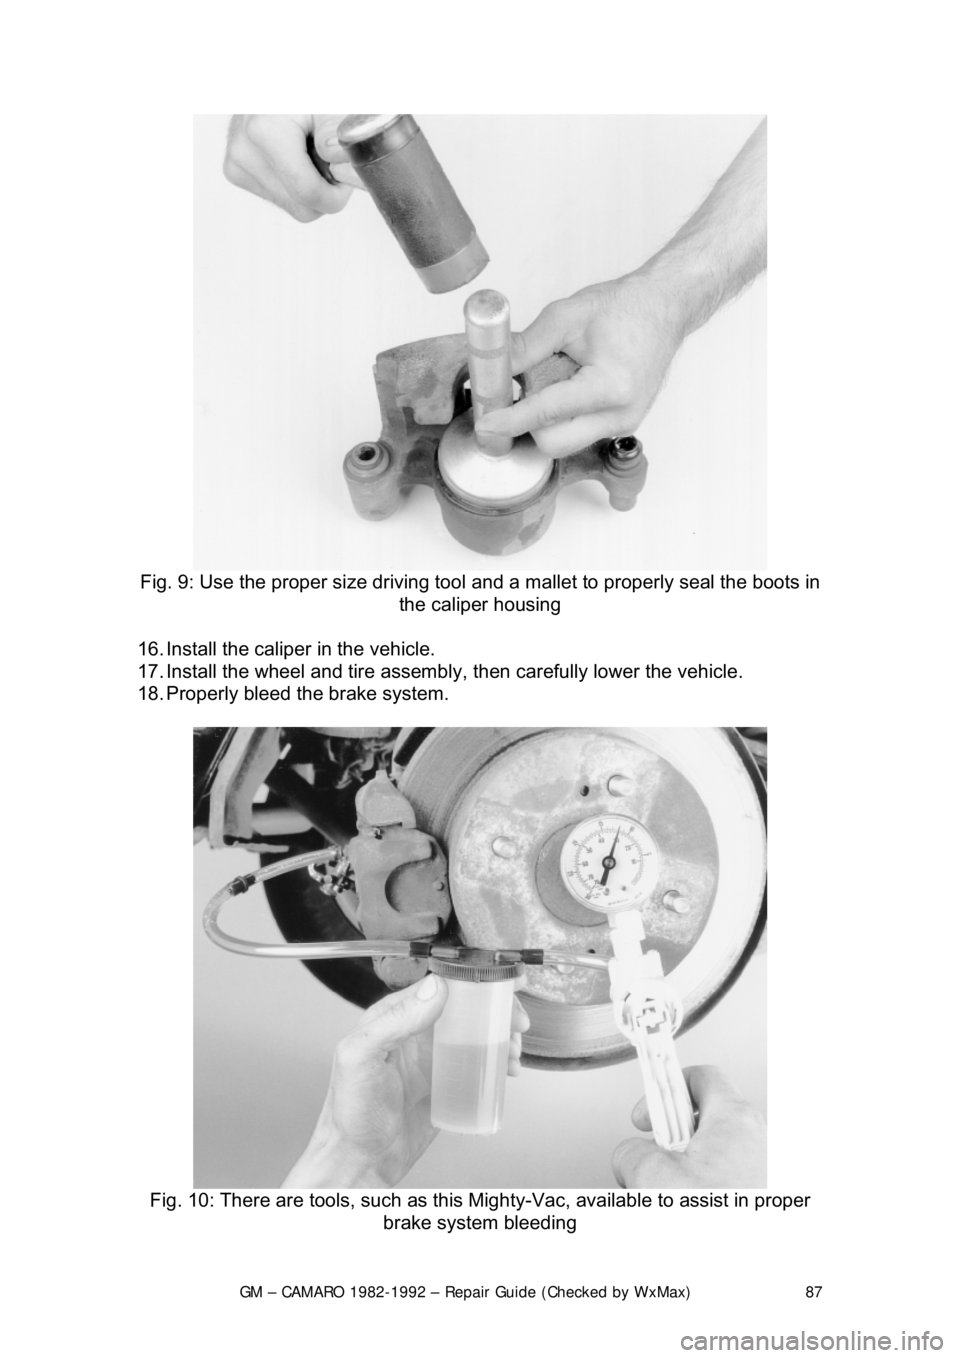
15. Use a suitable driving tool to seat the boots in the housing.
Page 87 of 875
GM – CAMARO 1982-1992 – Repair Guide (Checked by WxMax) 87
Fig. 9: Use the proper size driving tool and a mallet to properly seal the boots in
the caliper housing
16. Install the caliper in the vehicle.
17. Install the wheel and tire assembly , then carefully lower the vehicle.
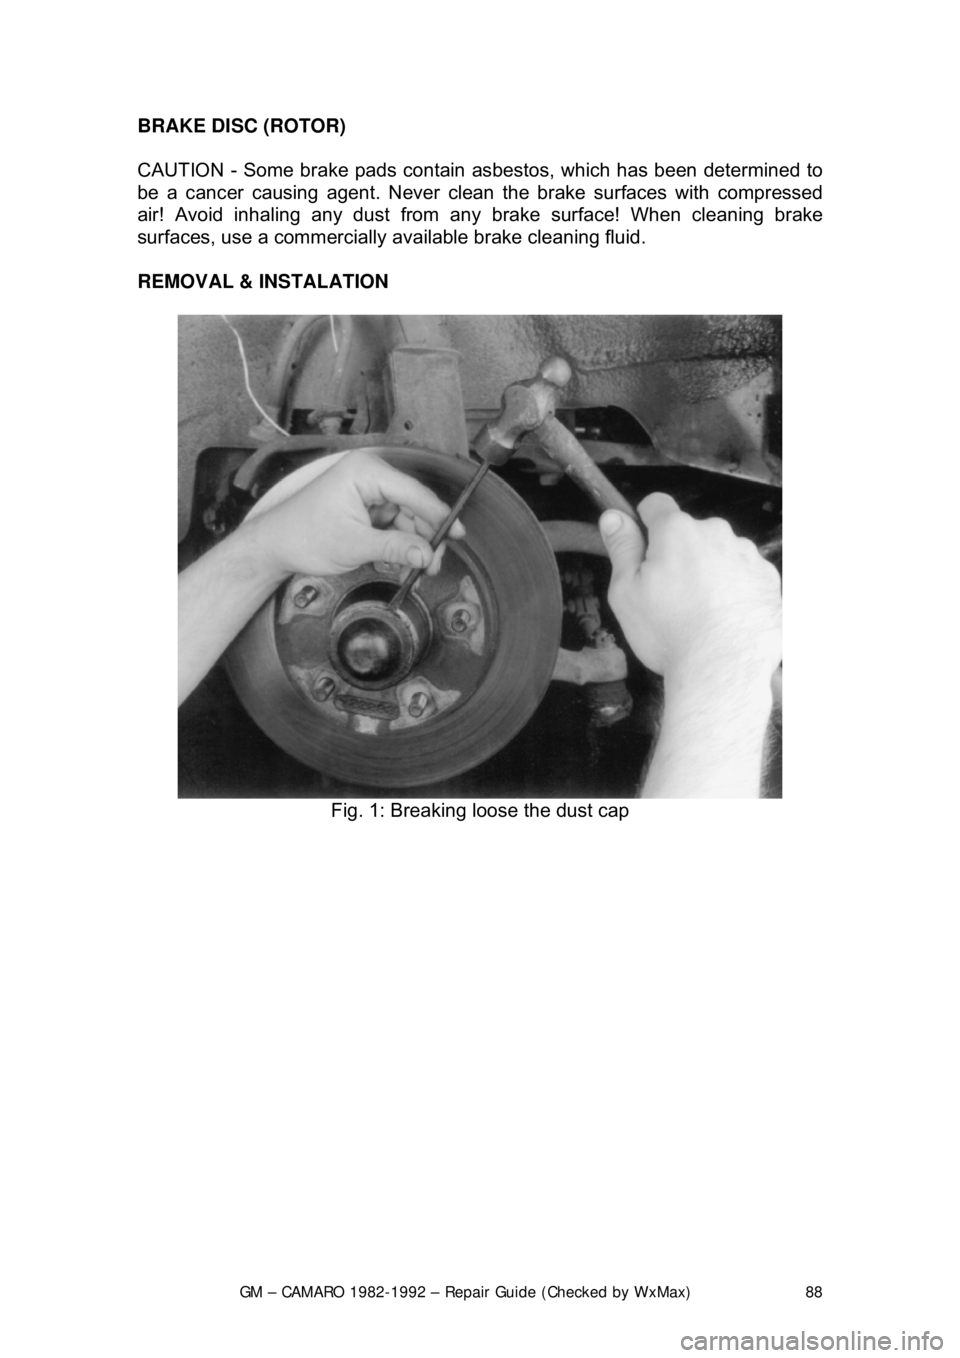
18. Properly bleed t he brake system.
Fig. 10: There are tools, such as this Mighty-Vac, available to assist in proper
brake system bleeding
Page 88 of 875
GM – CAMARO 1982-1992 – Repair Guide (Checked by WxMax) 88
BRAKE DISC (ROTOR)
CAUTION - Some brake pads contain as
bestos, which has been determined to
be a cancer causing agent. Never clean the brake surfaces with compressed
air! Avoid inhaling any dust from any brake surface! When cleaning brake
surfaces, use a commercially available brake cleaning fluid.
REMOVAL & INSTALATION
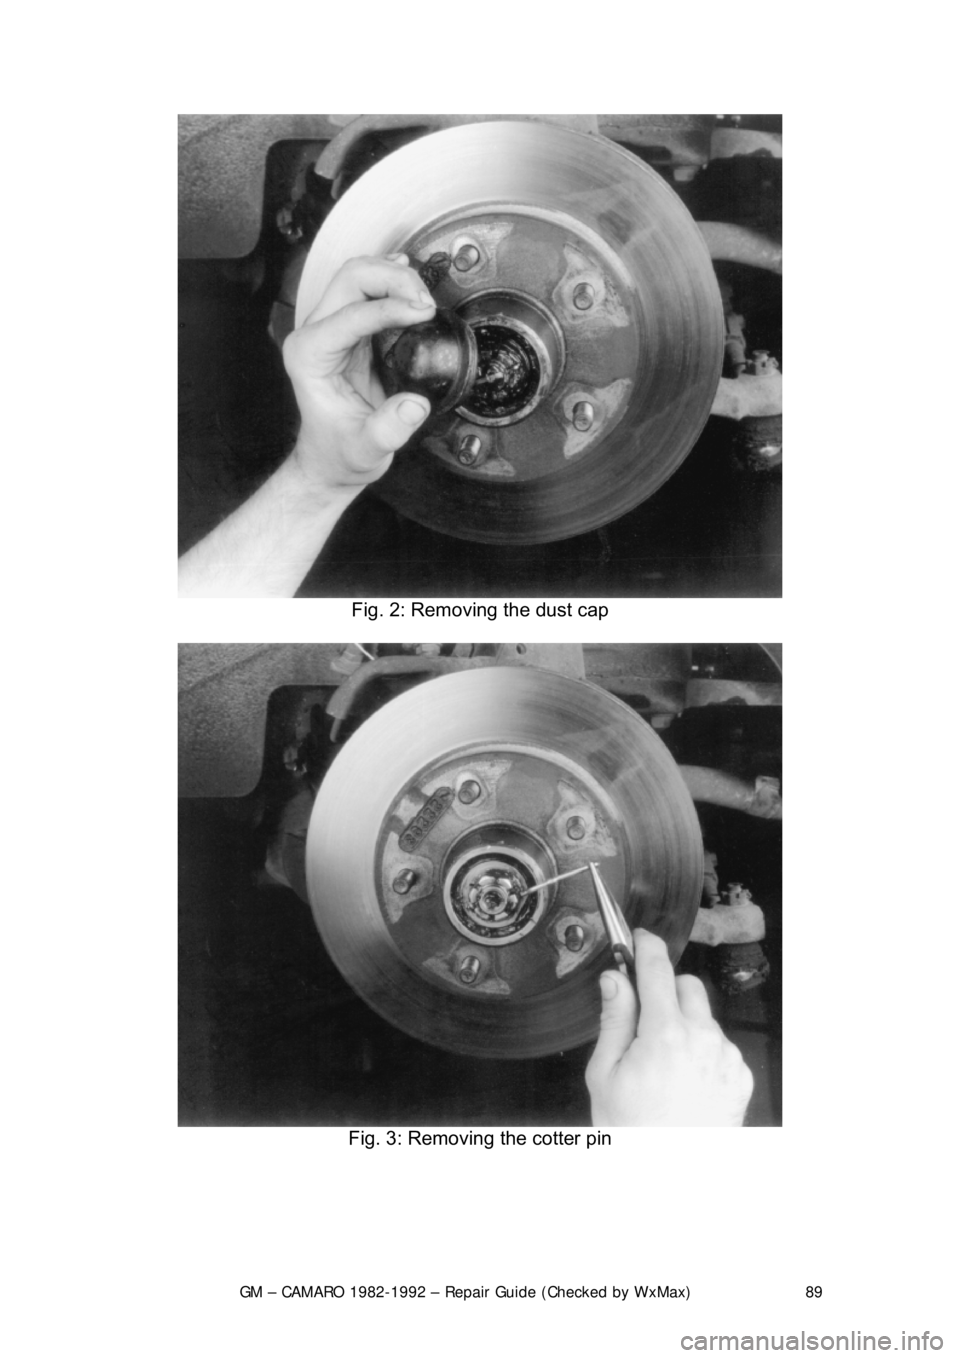
Fig. 1: Breaking loose the dust cap
Page 89 of 875
GM – CAMARO 1982-1992 – Repair Guide (Checked by WxMax) 89
Fig. 2: Removing the dust cap
Fig. 3: Removing the cotter pin
Page 90 of 875
GM – CAMARO 1982-1992 – Repair Guide (Checked by WxMax) 90
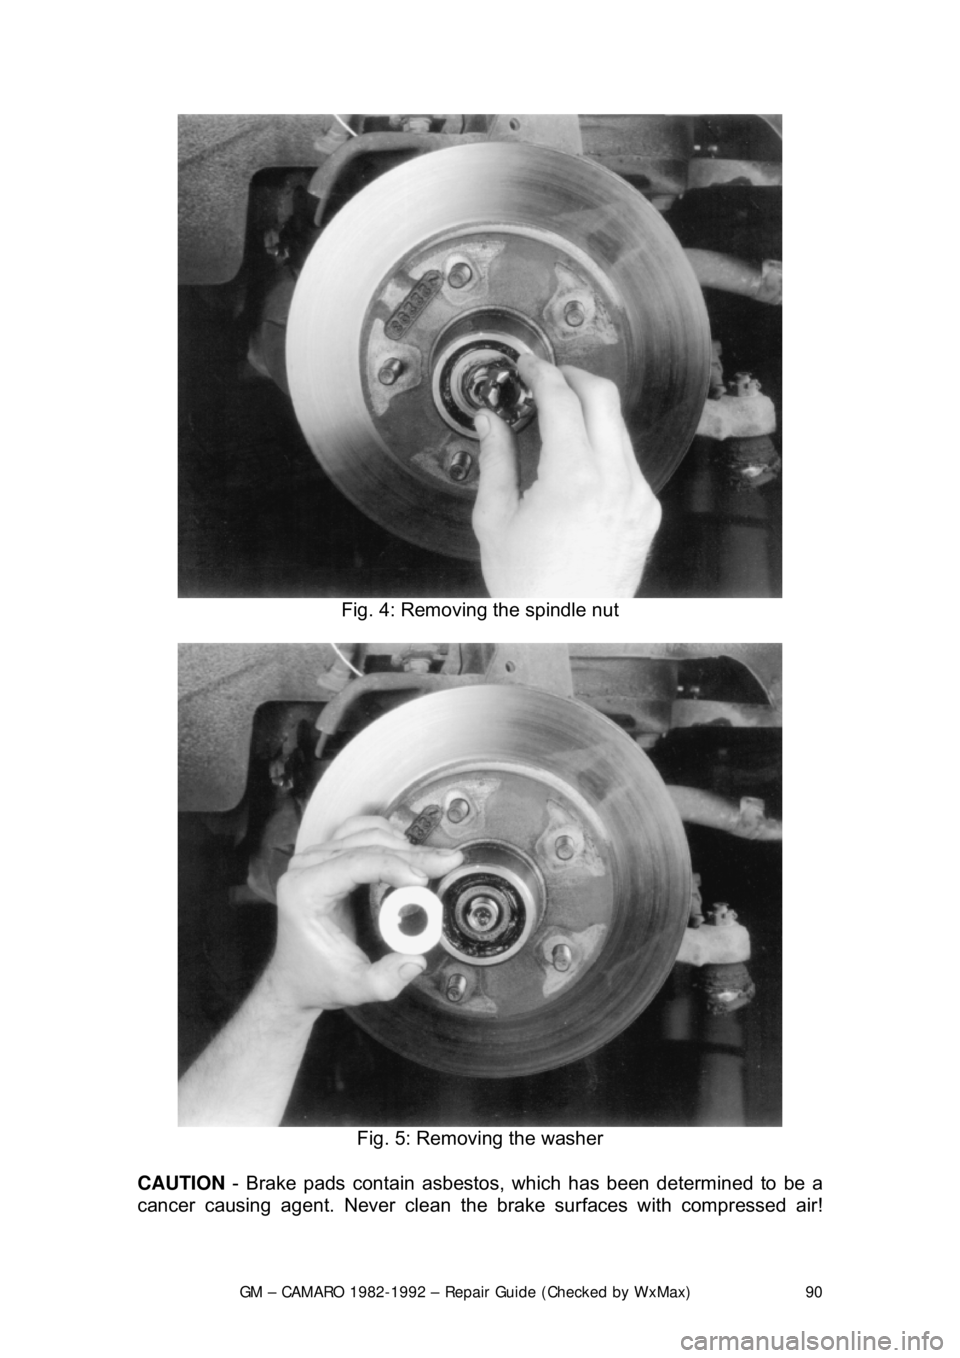
Fig. 4: Removing the spindle nut
Fig. 5: Removing the washer
CAUTION - Brake pads contain asbestos, which has been determined to be a
cancer causing agent. Never clean the brake surfaces with compressed air!
Trending: dead battery, brake pads, low oil pressure, automatic transmission, seat adjustment, fuel consumption, reset
