CHEVROLET CAMARO 1982 Repair Guide
CAMARO 1982
CHEVROLET
CHEVROLET
https://www.carmanualsonline.info/img/24/56854/w960_56854-0.png
CHEVROLET CAMARO 1982 Repair Guide
Trending: Oil change, engine diagram, gearbox, oil pressure, roof rack, gas type, service
Page 101 of 875
GM – CAMARO 1982-1992 – Repair Guide (Checked by WxMax) 101
WHEEL CYLINDERS
REMOVAL & INSTALLATION
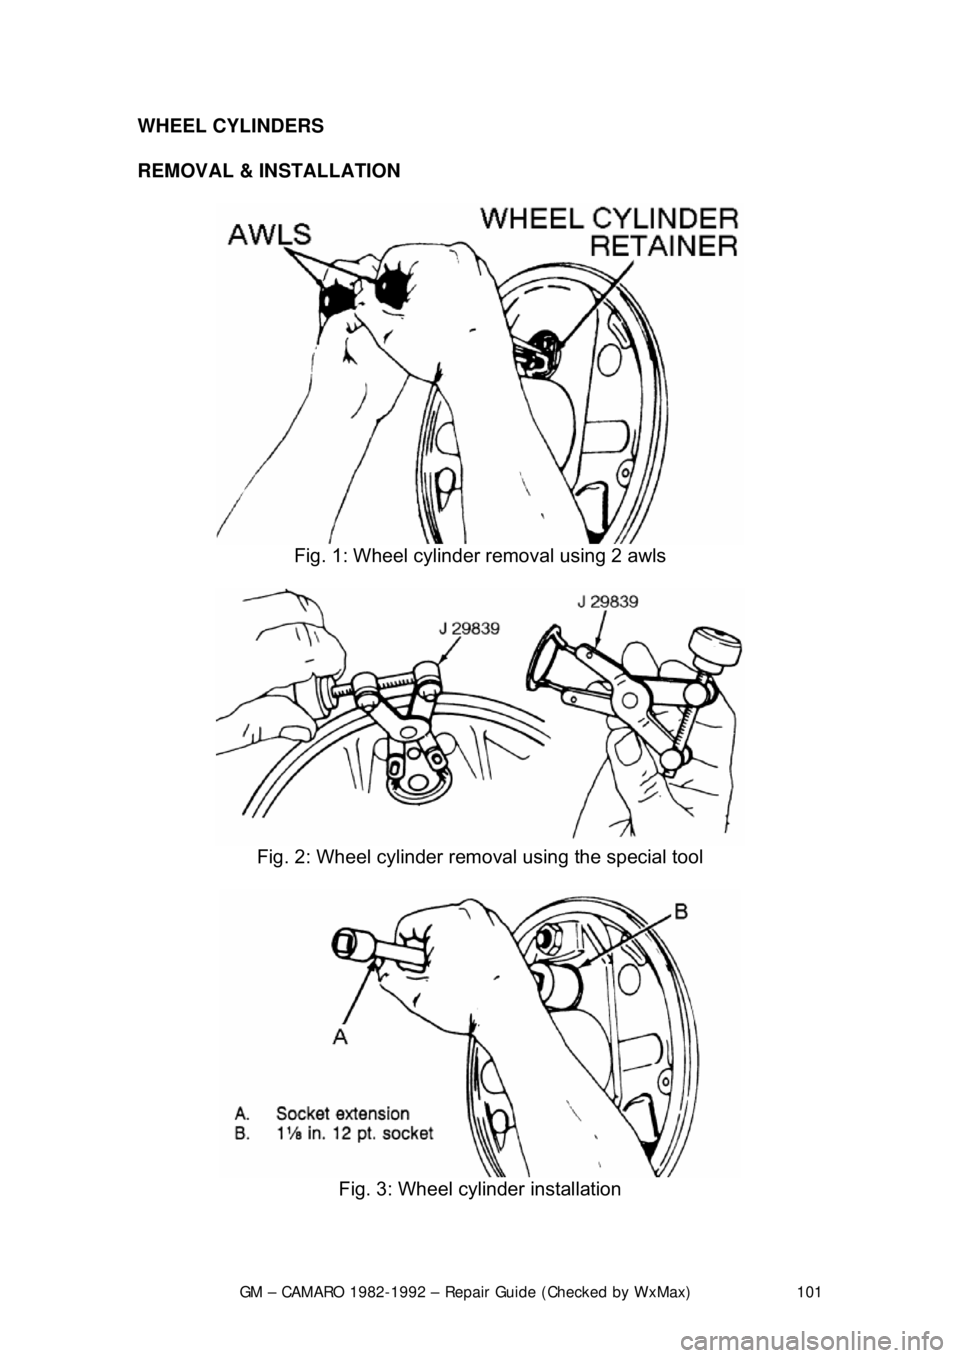
Fig. 1: Wheel cylinder removal using 2 awls
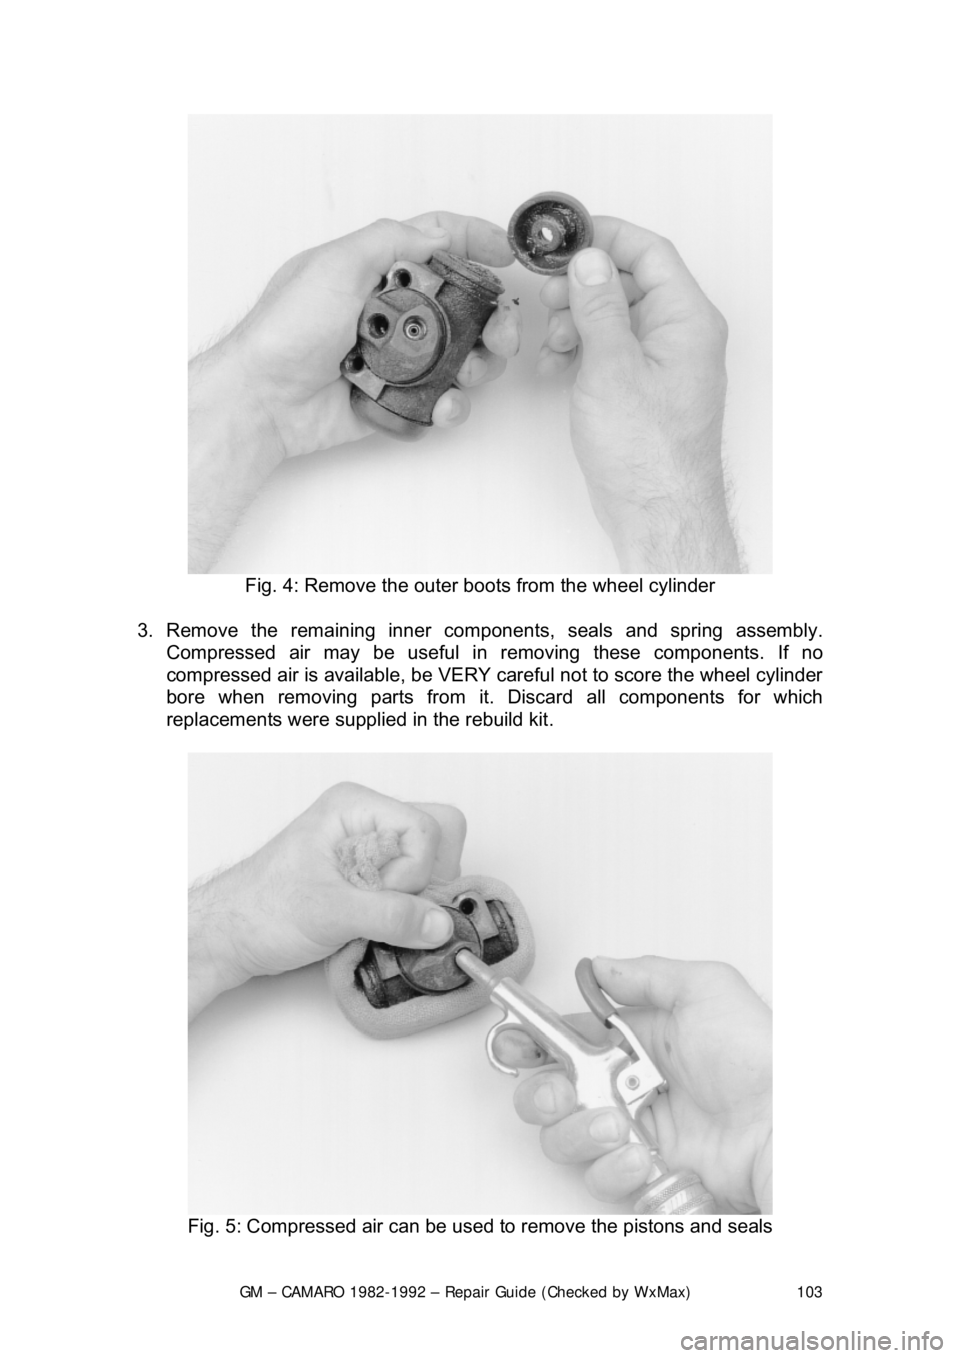
Fig. 2: Wheel cylinder remo val using the special tool
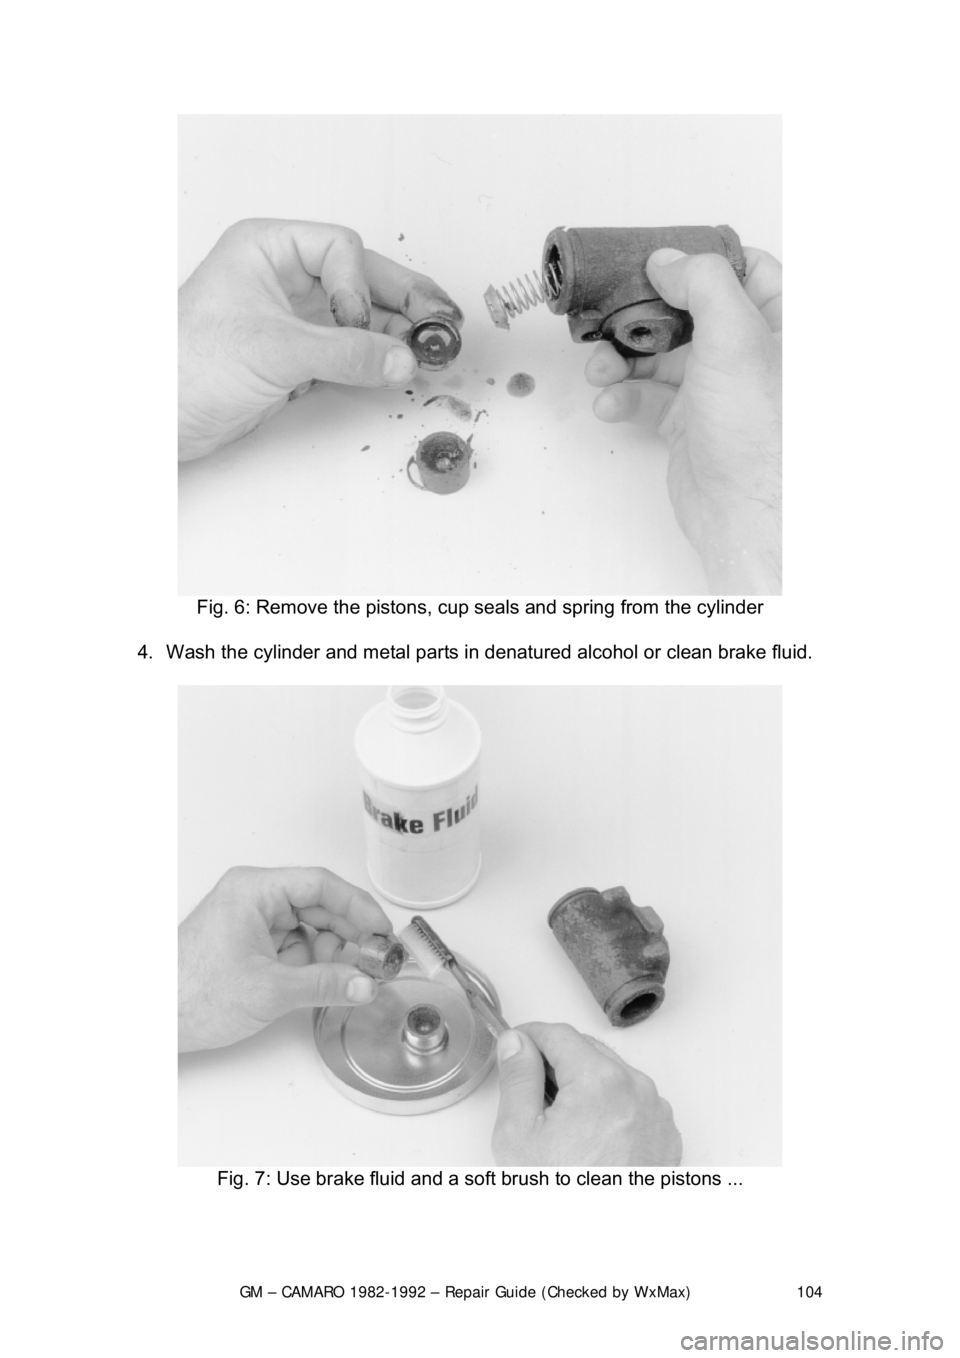
Fig. 3: Wheel cylinder installation
Page 102 of 875

GM – CAMARO 1982-1992 – Repair Guide (Checked by WxMax) 102
CAUTION
- Brake shoes may contain asbest os, which has been determined to
be a cancer causing agent. Never clean the brake surfaces with compressed
air! Avoid inhaling any dust from any brake surface! When cleaning brake
surfaces, use a commercially available brake cleaning fluid.
1. Raise and support the car. Remove t he wheel. Remove the brake shoes by
following the Brake Shoe R eplacement procedure.
2. Remove dirt from ar ound the wheel cylinder inle t and pilot. Disconnect the
inlet tube.
3. Using 2 awls,
1/8 in. (3mm) in diameter, or J29839, remove the wheel
cylinder retainer. Insert the awls in to the access slots between the wheel
cylinder pilot and retainer. Simultaneous ly, bend both tabs away from each
other. Remove the wheel cylinder.
To install:
4. Place wheel cylinder into position and place a block of wood between it and
the axle flange. Install a new retainer over the end of the wheel cylinder.
Using a 1
1/8 in. 12-point socket with an extensi on, drive the new retainer into
position.
5. Connect the inlet tube and torque 120-280 inch lbs. (13.6-20 Nm). Complete
installation by reversing the remova l procedure. Bleed the brakes.
OVERHAUL
Wheel cylinder overhaul kits may be available, but often at little or no savings
over a reconditioned wheel cylinder. It often makes sense with these
components to substitute a new or re conditioned part instead of attempting an
overhaul.
If no replacement is availabl e, or you would prefer to overhaul your wheel
cylinders, the following procedure may be used. When rebuilding and installing
wheel cylinders, avoid getting any cont aminants into the system. Always use
clean, new, high quality brake fluid. If di rty or improper fluid has been used, it
will be necessary to drain the entire syst em, flush the system with proper brake
fluid, replace all rubber components , then refill and bleed the system.
1. Remove the wheel cylinder from the vehicle and place on a clean
workbench.
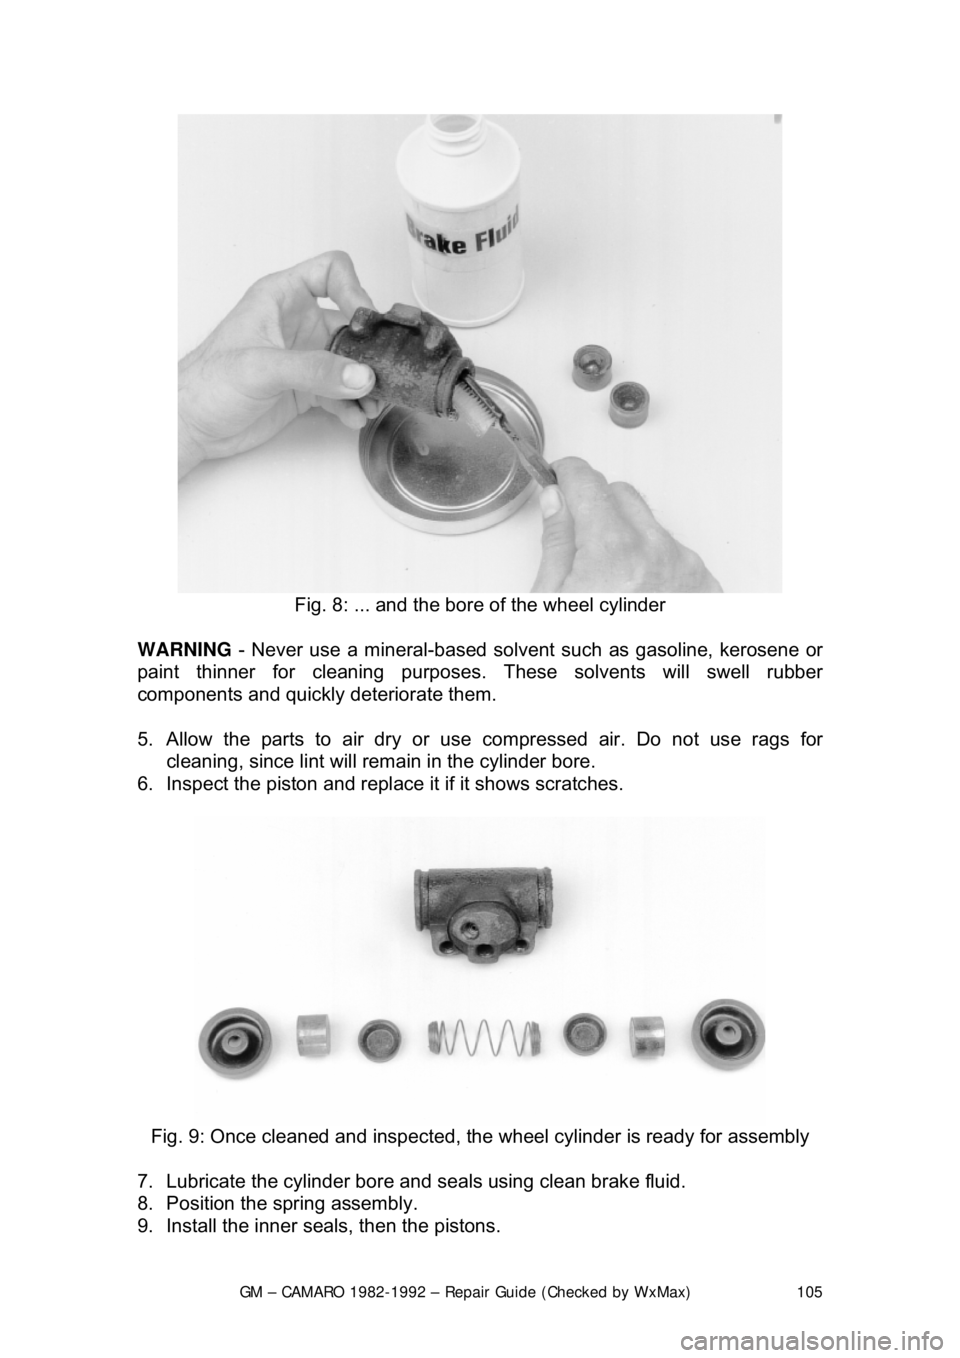
2. First remove and discard the old r ubber boots, then withdraw the pistons.
Piston cylinders are equipped with seals and a spring assembly, all located
behind the pistons in the cylinder bore.
Page 103 of 875
GM – CAMARO 1982-1992 – Repair Guide (Checked by WxMax) 103
Fig. 4: Remove the outer boots from the wheel cylinder
3. Remove the remaining inner com ponents, seals and spring assembly.
Compressed air may be useful in removing these components. If no
compressed air is available, be VERY careful not to score the wheel cylinder
bore when removing parts from i t. Discard all components for which
replacements were supplied in the rebuild kit.
Fig. 5: Compressed air can be used to remove the pistons and seals
Page 104 of 875
GM – CAMARO 1982-1992 – Repair Guide (Checked by WxMax) 104
Fig. 6: Remove the pistons, cup seals and spring from the cylinder
4. Wash the cylinder and metal parts in denatured alcohol or clean brake fluid.
Fig. 7: Use brake fluid and a so ft brush to clean the pistons ...
Page 105 of 875
GM – CAMARO 1982-1992 – Repair Guide (Checked by WxMax) 105
Fig. 8: ... and the bor e of the wheel cylinder
WARNING - Never use a mineral-based solvent such as gasoline, kerosene or
paint thinner for cleaning purposes . These solvents will swell rubber
components and quickly deteriorate them.
5. Allow the parts to air dry or use compressed air. Do not use rags for
cleaning, since lint will rema in in the cylinder bore.
6. Inspect the piston and replace it if it shows scratches.
Fig. 9: Once cleaned and inspected, the wheel cylinder is ready for assembly
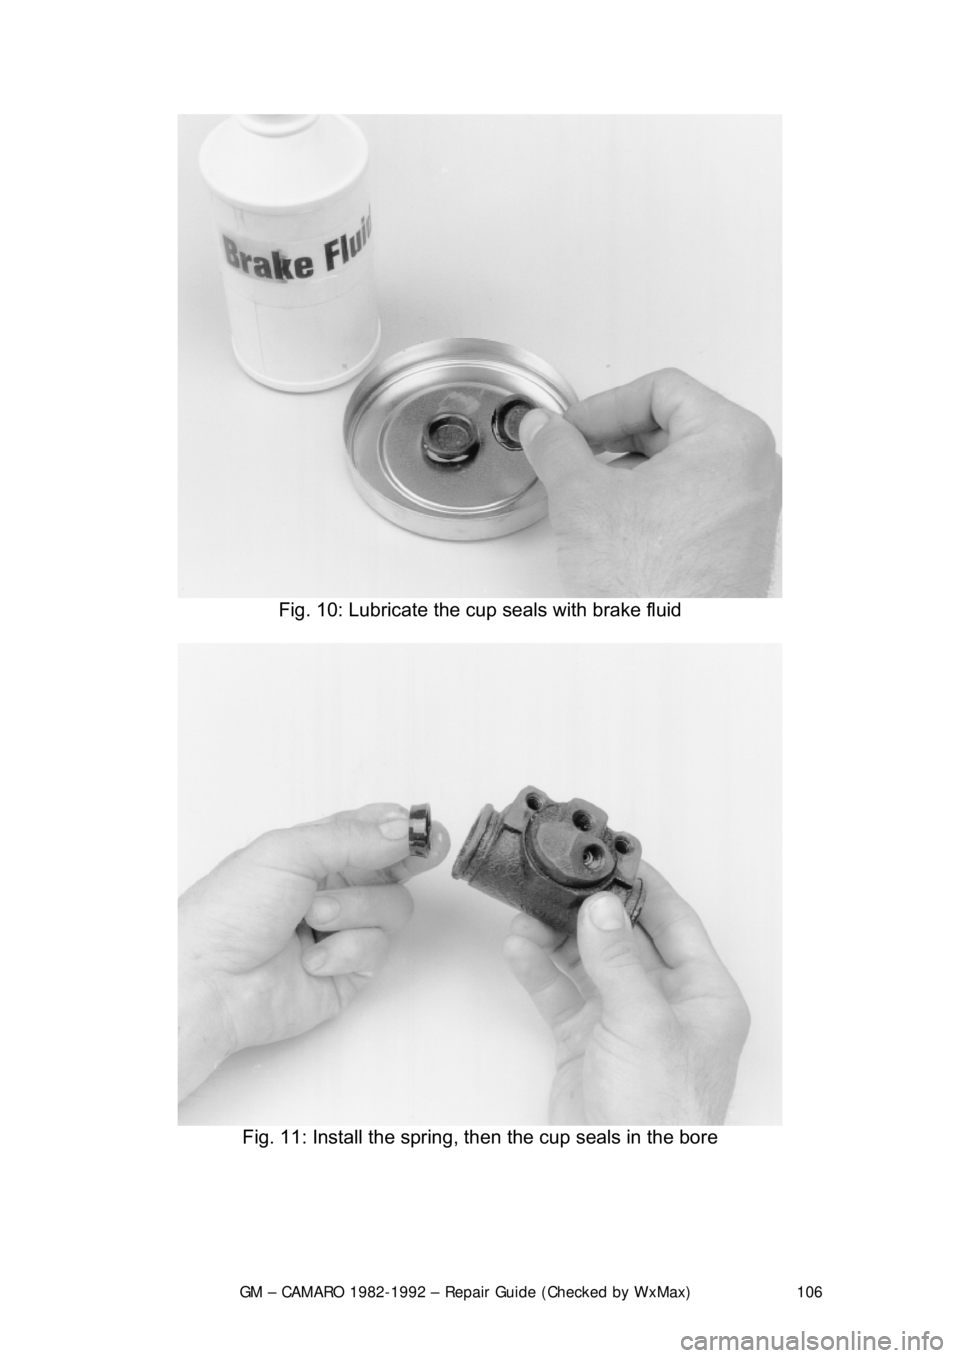
7. Lubricate the cylinder bore and s eals using clean brake fluid.
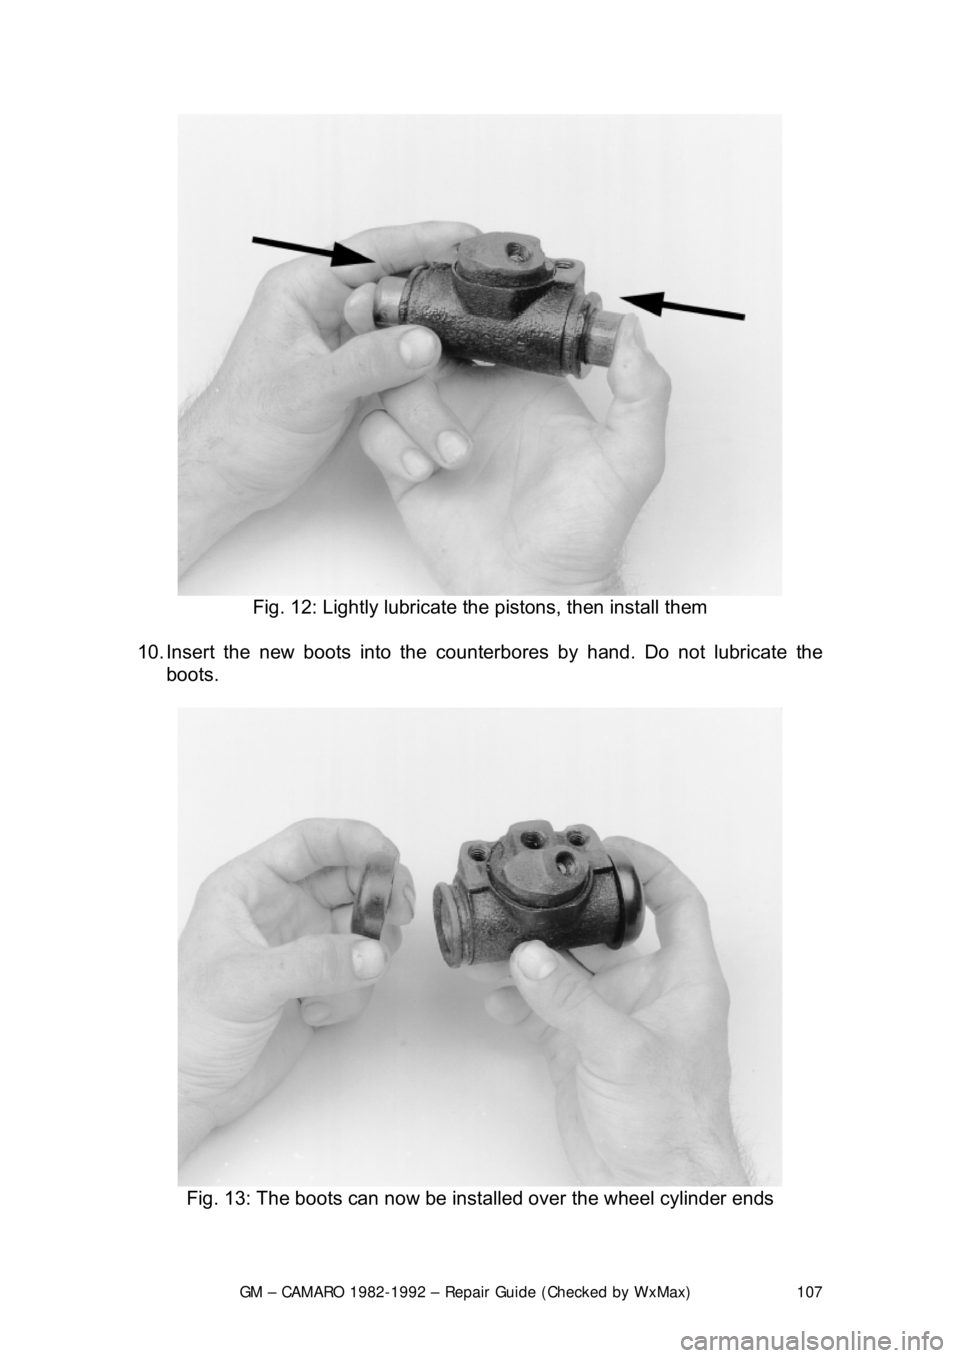
8. Position the spring assembly.
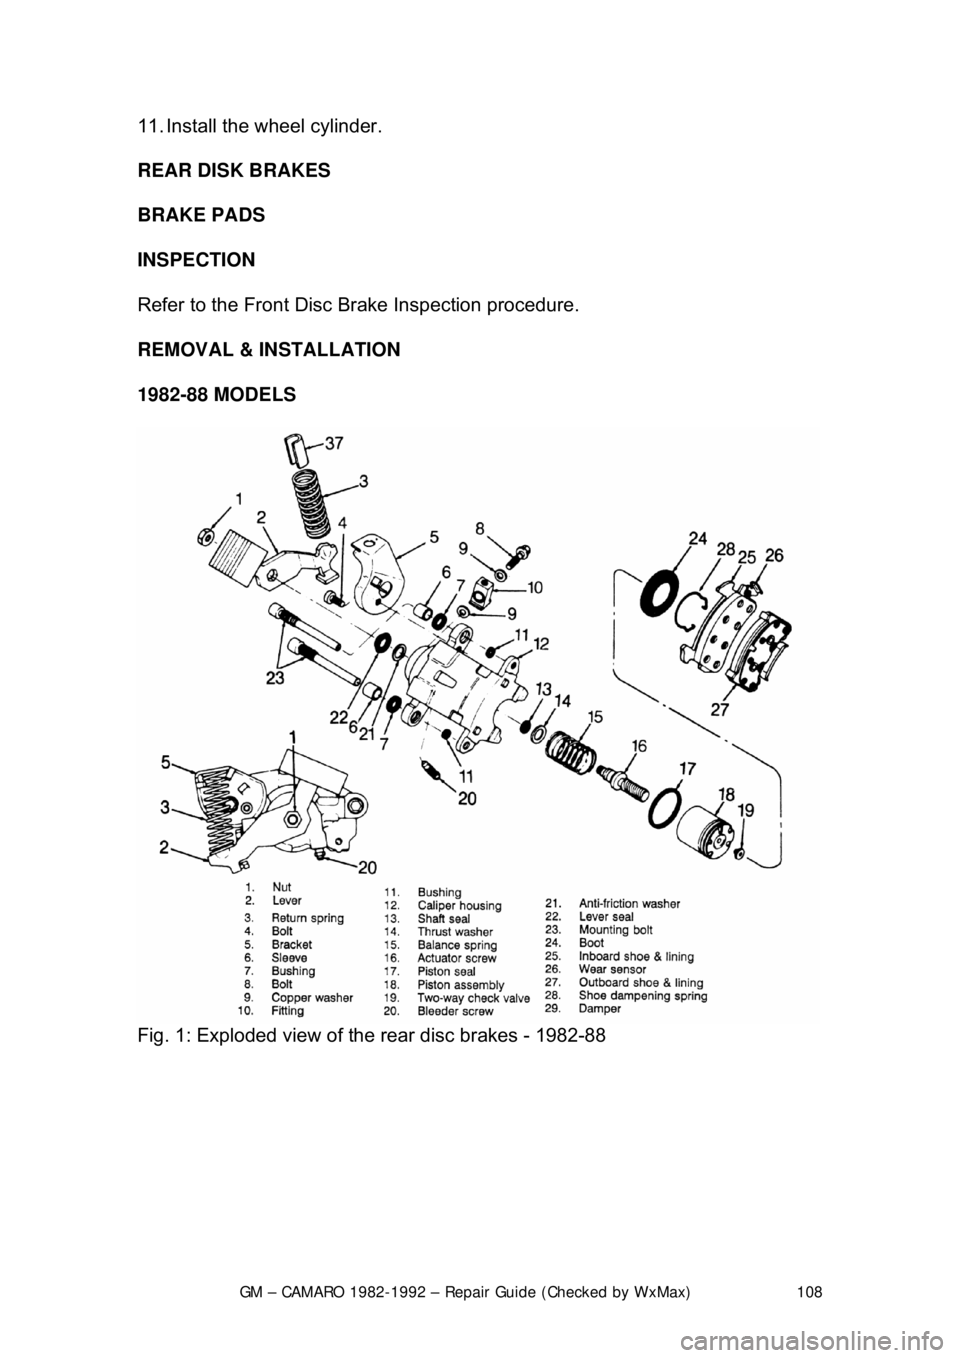
9. Install the inner seals, then the pistons.
Page 106 of 875
GM – CAMARO 1982-1992 – Repair Guide (Checked by WxMax) 106
Fig. 10: Lubricate the c up seals with brake fluid
Fig. 11: Install the spring, then the cup seals in the bore
Page 107 of 875
GM – CAMARO 1982-1992 – Repair Guide (Checked by WxMax) 107
Fig. 12: Lightly lubricate t he pistons, then install them
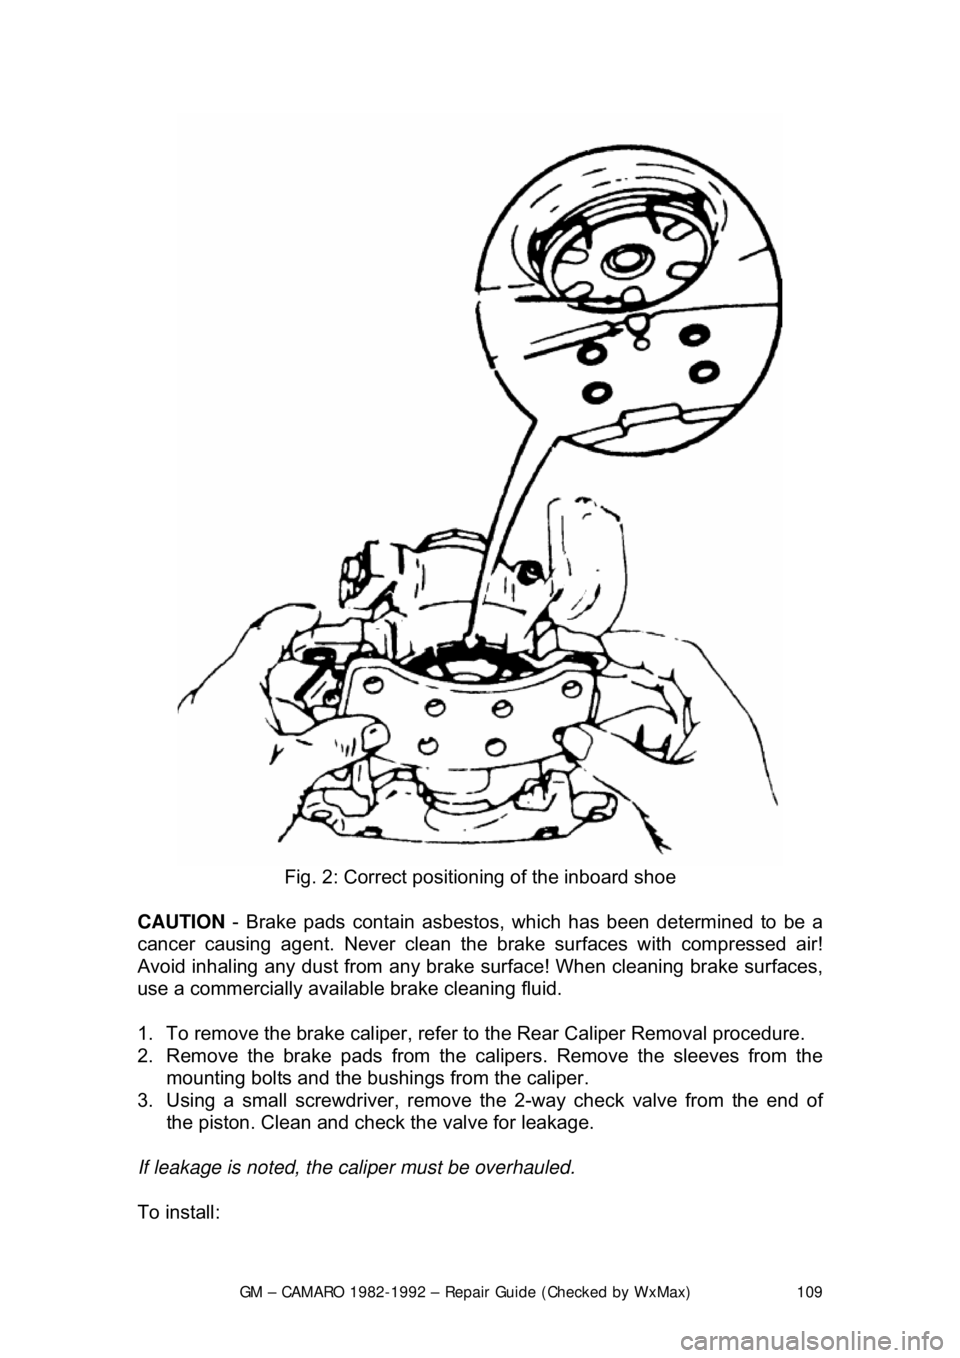
10. Insert the new boots in to the counterbores by hand. Do not lubricate the
boots.
Fig. 13: The boots can now be installed over the wheel cylinder ends
Page 108 of 875
GM – CAMARO 1982-1992 – Repair Guide (Checked by WxMax) 108
11. Install the wheel cylinder.
REAR DISK BRAKES
BRAKE PADS
INSPECTION
Refer to the Front Disc Brake Inspection procedure.
REMOVAL & INSTALLATION
1982-88 MODELS
Fig. 1: Exploded view of t he rear disc brakes - 1982-88
Page 109 of 875
GM – CAMARO 1982-1992 – Repair Guide (Checked by WxMax) 109
Fig. 2: Correct positioning of the inboard shoe
CAUTION - Brake pads contain asbestos, which has been determined to be a
cancer causing agent. Never clean the brake surfaces with compressed air!
Avoid inhaling any dust from any brake surface! When cleaning brake surfaces,
use a commercially available brake cleaning fluid.
1. To remove the brake caliper, refer to the Rear Caliper Removal procedure.
2. Remove the brake pads from the calipers. Remove the sleeves from the
mounting bolts and the bushi ngs from the caliper.
3. Using a small screwdriver, remove the 2-way check valve from the end of
the piston. Clean and check the valve for leakage.
If leakage is noted, the caliper must be overhauled.
To install:
Page 110 of 875
GM – CAMARO 1982-1992 – Repair Guide (Checked by WxMax) 110
4. Position the brake pads
into the caliper. Lubricate and install new bushings,
sleeves and check valve.
5. When installing the inner brake pad, make sure that the D-shaped tab of the
pad engages with the D-shaped notch of the piston, as illustrated.
6. Upon installation of the inner pad, make sure that the wear sensor of the pad
is at the leading edge of the shoe during forward wheel rotation. Slide the
metal edge of the pad under the ends of the dampening spring and snap the
pad into position against the piston.
7. Install the outer pad and caliper. Afte r installing the caliper, apply the brakes,
then bend the ears of the out er pad against the caliper and ensure that there
is no excessive clearance.
Trending: catalytic, headlights, wiring diagram, spare tire, coolant temperature, airbag, torque
