CHEVROLET CAMARO 1996 4.G Owners Manual
Manufacturer: CHEVROLET, Model Year: 1996, Model line: CAMARO, Model: CHEVROLET CAMARO 1996 4.GPages: 402, PDF Size: 21.38 MB
Page 121 of 402
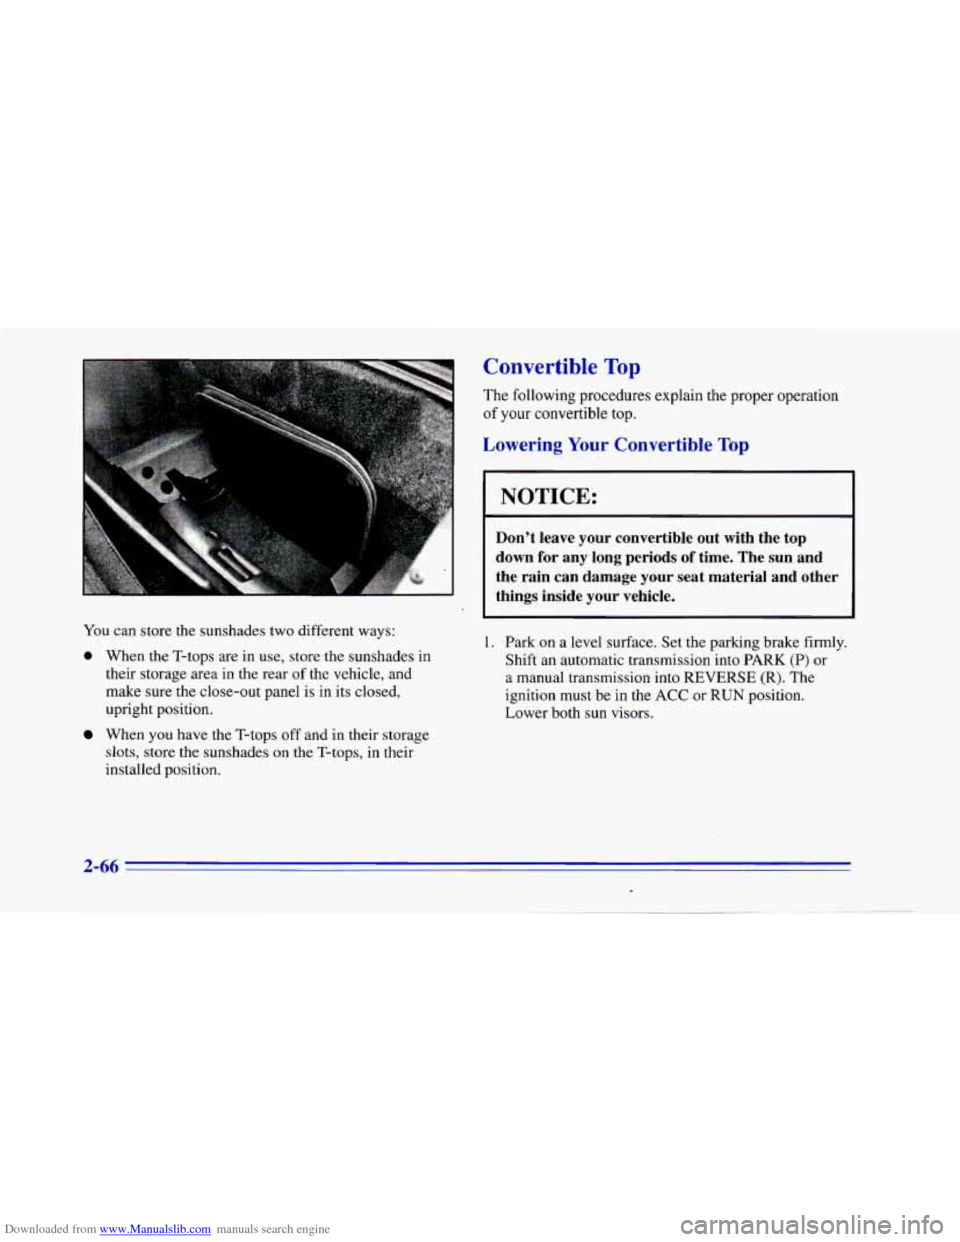
Downloaded from www.Manualslib.com manuals search engine You can store the sunshades two different ways:
0 When the T-tops are in use, store the sunshades in
their storage area in the rear
of the vehicle, and
make sure the close-out panel is in its closed,
upright position.
When you have the T-tops off and in their storage
slots, store the sunshades on the T-tops, in their
installed position.
Convertible Top
The following procedures explain the proper operation
of your convertible top.
Lowering Your Convertible Top
NOTICE:
Don’t leave your convertible out with the top
down for any long periods of time. The sun and
the rain can damage your seat material and other
things inside your vehicle.
1. Park on a level surface. Set the parking brake firmly.
Shift an automatic transmission into PARK (P) or
a manual transmission into
REVERSE (R). The
ignition must be in the
ACC or RUN position.
Lower both sun visors.
2-66
*
Page 122 of 402
Downloaded from www.Manualslib.com manuals search engine NOTICE:
Don’t lower the top if it is damp or wet. When
the top is down, trapped water can cause stains,
mildew and damage to the inside of your vehicle.
Be sure to dry off the top before you lower it.
NOTICE:
It is not recommended to lower the top if the
vehicle is out in cold weather,
0°F (-18OC) or
lower. Or you may damage top components.
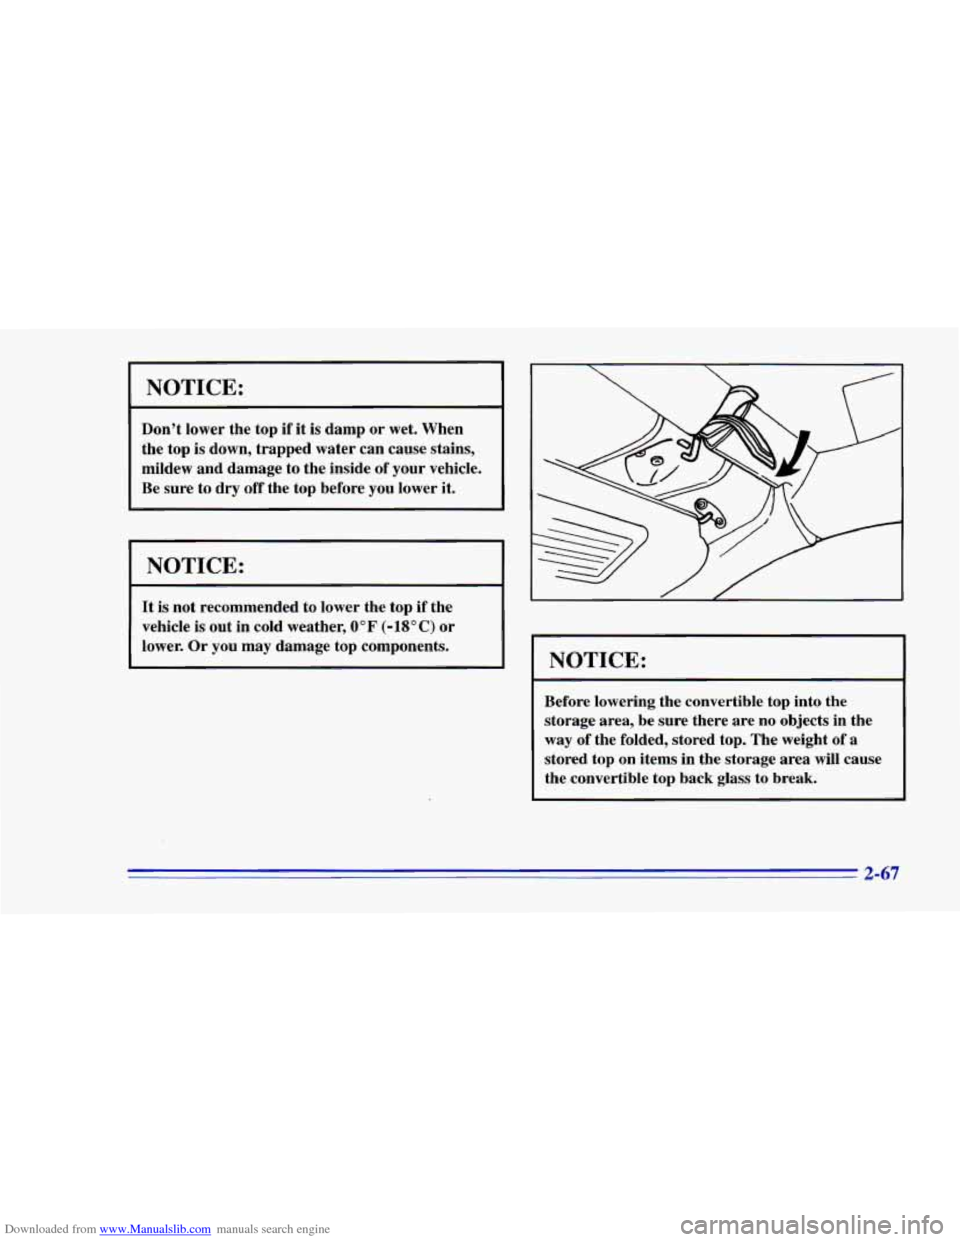
NOTICE:
Before lowering the convertible top into the
storage area, be sure there are no objects in the
way of the folded, stored top. The weight
of a
stored top on items in the storage area will cause
the convertible top back glass
to break.
2-67
Page 123 of 402
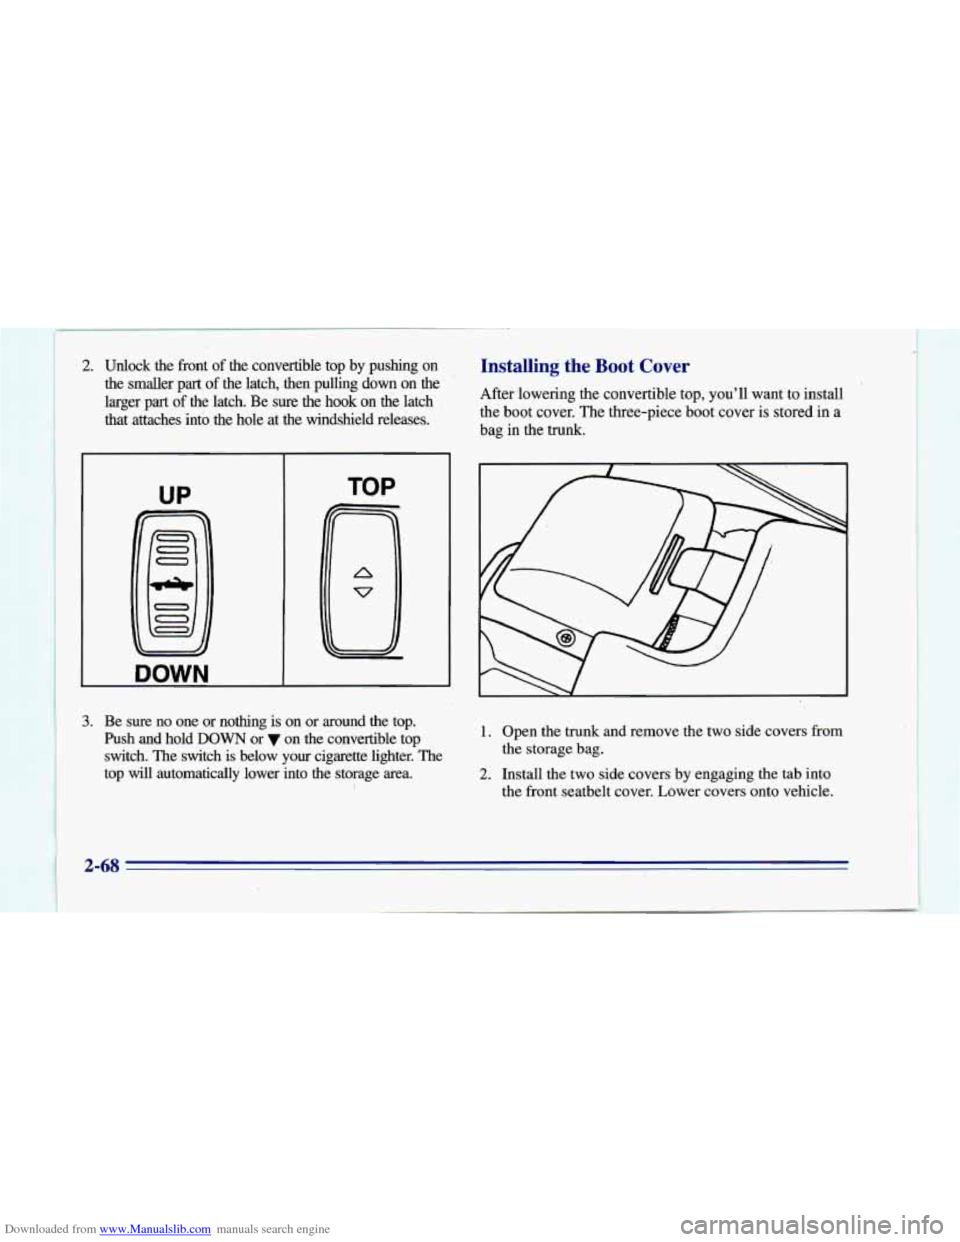
Downloaded from www.Manualslib.com manuals search engine 2. Unlock the front of the convertible top by pushing on
the smaller part of the latch, then pulling down on the
larger part of the latch. Be sure the hook on the latch
that attaches into the hole at the windshield releases.
UP
I DOWN
TOP
Installing the Boot Cover
After lowering the convertible top, you'll want to install
the boot cover. The three-piece boot cover is stored in a
bag in
the trunk.
3. Be sure no one or nothing is on or around the top.
. ' Push and hold DOWN or on the convertible top
switch.
The switch is below your cigarette lighter. The
top
will automatically lower into the storage area.
1. Open the trunk and remove the two side covers from
the storage bag.
2. Install the two side covers by engaging the tab into
the front seatbelt cover. Lower covers onto vehicle.
2-68
Page 124 of 402
Downloaded from www.Manualslib.com manuals search engine Raising ,Your Convertible Top
1. Park on a level surface. Set the parking brake firmly.
If you have an automatic transmission, shift into
PARK (P). If you have a manual transmission, shift
into REVERSE (R). The ignition must be in the
ACC or RUN position. Then lower both sun visors
and lower both windows at least
3 i-nches (8 cm). If
the boot cover is in place,
it must be removed first.
3. Install the middle section of the cover by sliding tabs
into slots on right side cover. Lower the cover and
engage latch.
4. Close the trunk.
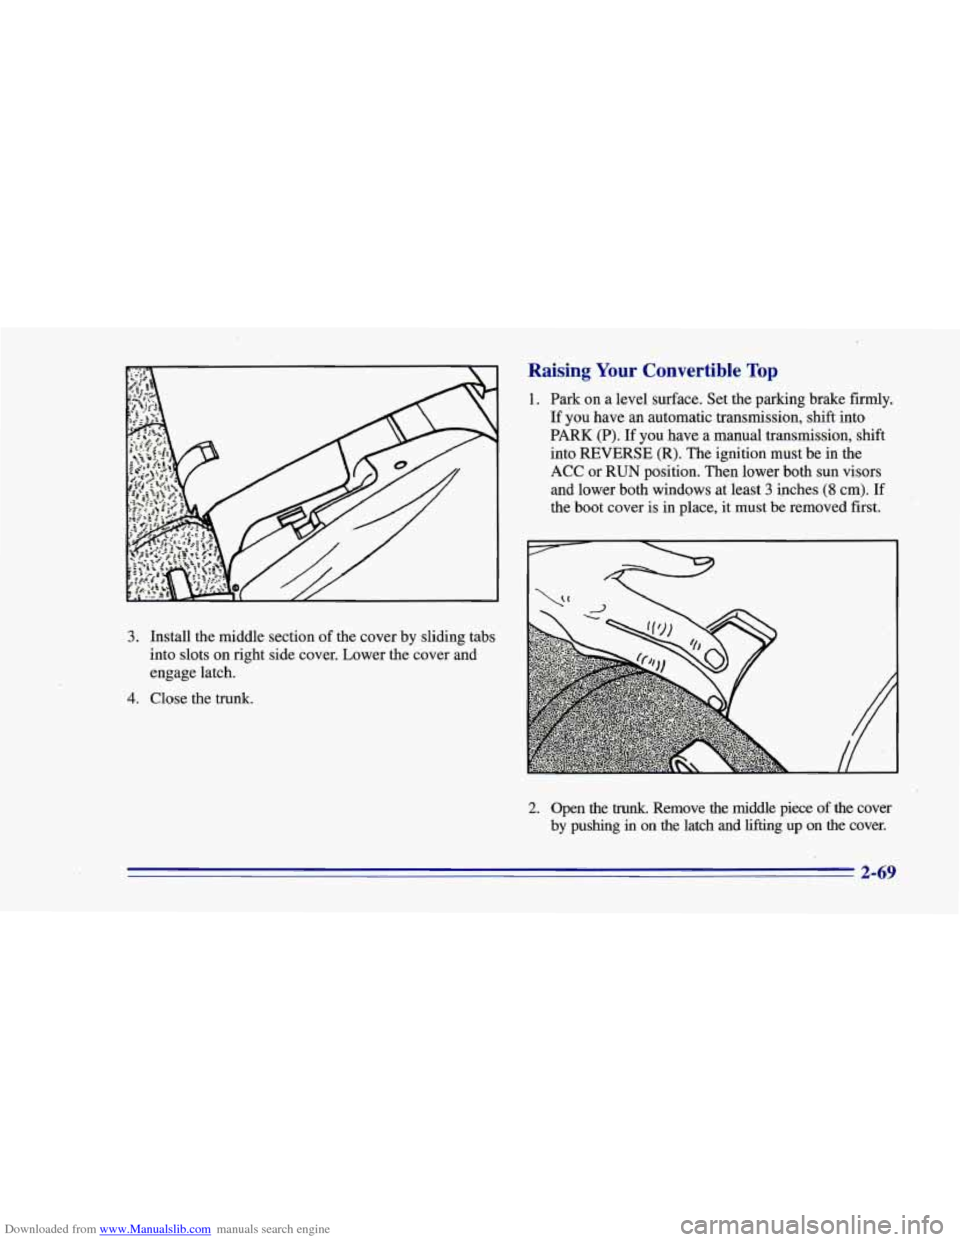
2. Open the trunk. Remove the middle piece of the cover
by pushing in on the latch and lifting up on the cover.
2-69
Page 125 of 402
Downloaded from www.Manualslib.com manuals search engine I I \I I
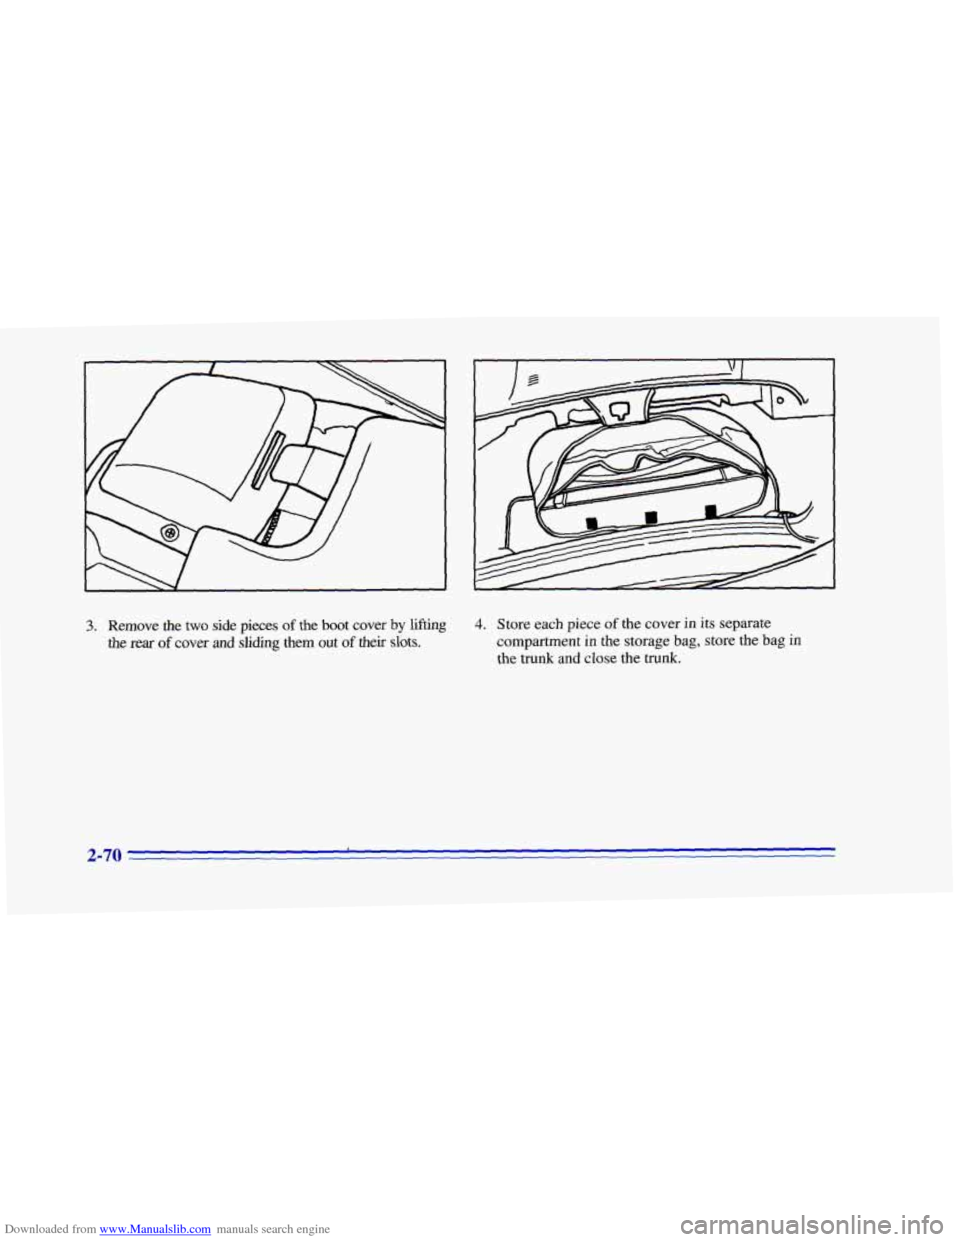
3. Remove the two side pieces of the boot cover by lifting
the
rear of cover and sliding them out of their slots.
4. Store each piece of the cover in its separate
compartment
in the storage bag, store the bag in
the trunk and close the trunk.
2-70
Page 126 of 402
Downloaded from www.Manualslib.com manuals search engine UP TOP
DOWN
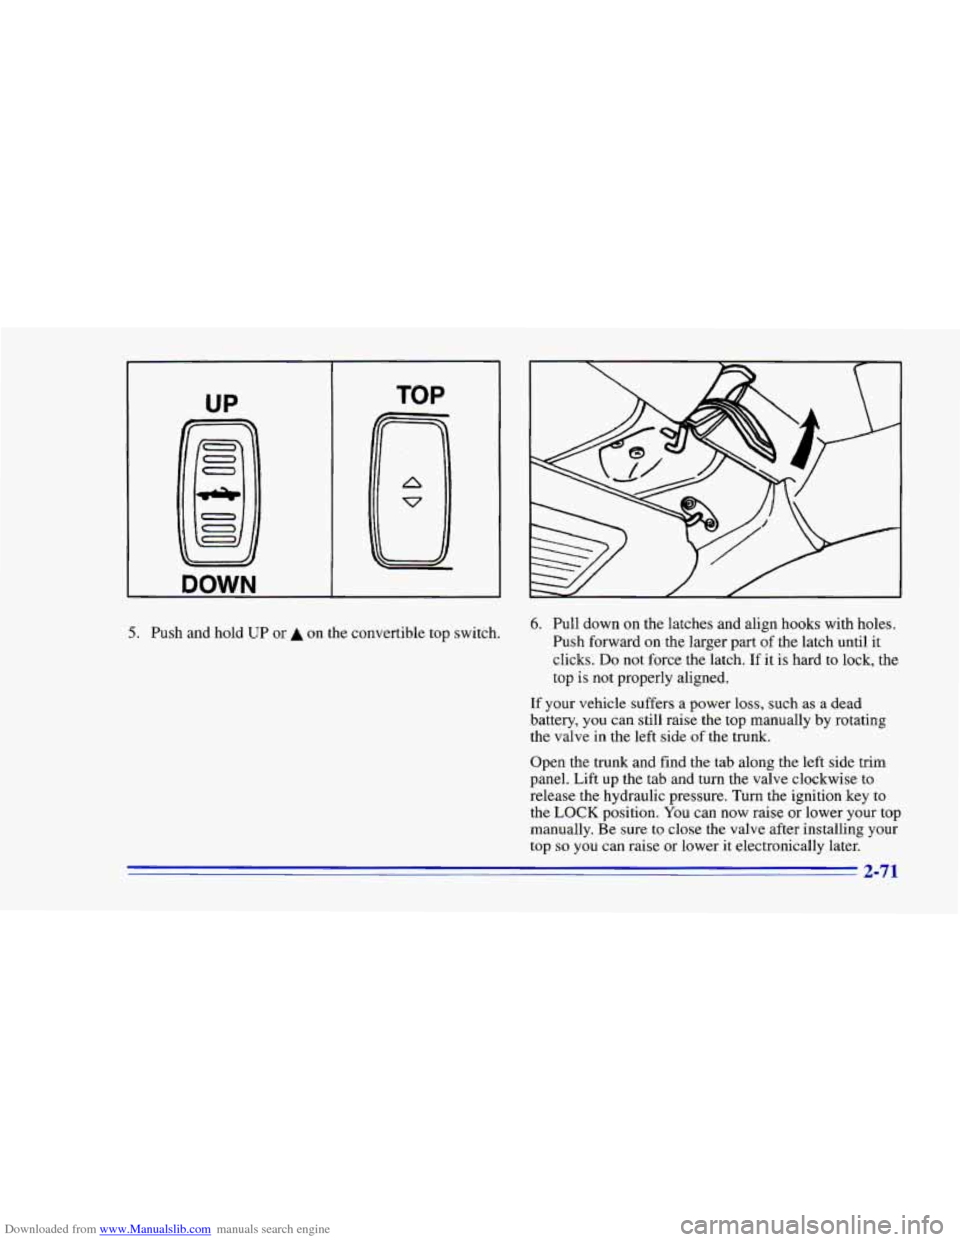
5. Push and hold UP or A on the convertible top switch. 6. Pull down on the latches and align hooks with holes.
Push forward on the larger part
of the latch until it
clicks.
Do not force the latch. If it is hard to lock, the
top
is not properly aligned.
If your vehicle suffers a power loss, such as a dead
battery,
you can still raise the top manually by rotating
the valve in the left side of the trunk.
Open the trunk and find the tab along the left side trim
panel. Lift up the tab and turn the valve clockwise to
release the hydraulic pressure. Turn the ignition key
to
the LOCK position. You can now raise or lower your top
manually. Be sure to close the valve after installing
your
top so you can raise or lower it electronically later.
2-71
Page 127 of 402
Downloaded from www.Manualslib.com manuals search engine Instrument Panel
2-72
Page 128 of 402

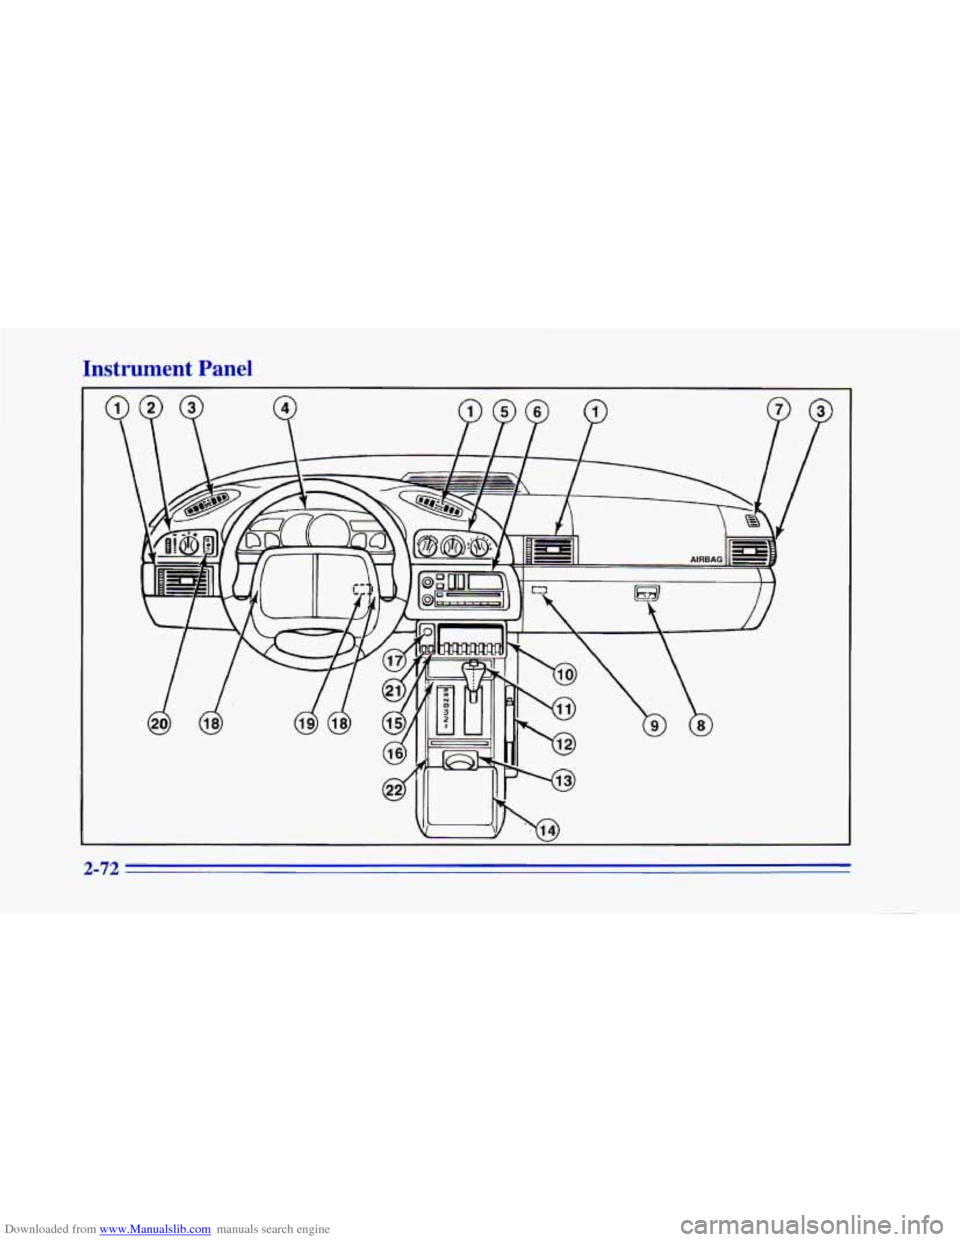
Downloaded from www.Manualslib.com manuals search engine 1. Instrument Panel Ais Deflector
2. Main Light Control
3. Instrument Panel Center Air Deflector
4. Instrument Cluster
5. Comfort Controls
6. Audio System
7. Side Window Defogger Vent
8. Glove Box
9. Remote Hatch Release
10. Cassette Tape Storage
1 1. Shift Lever
12. Parking Brake Lever 13. Cupholder
14.
Storage Console and Compact Disc
15. Acceleration Slip Regulation
(ASR)
Storage (Option) '
Switch (Option)
16. Ashtray (Automatic Transmission)
17. Cigarette Lighter
18. Horn
19. Rear Window Defogger Switch
20. Fog Lamp Switch (Option)
2 1. Convertible Top Switch (Option)
22. Ashtray (Manual Transmission)
2-73
Page 129 of 402
Downloaded from www.Manualslib.com manuals search engine Instrument Panel Cluster
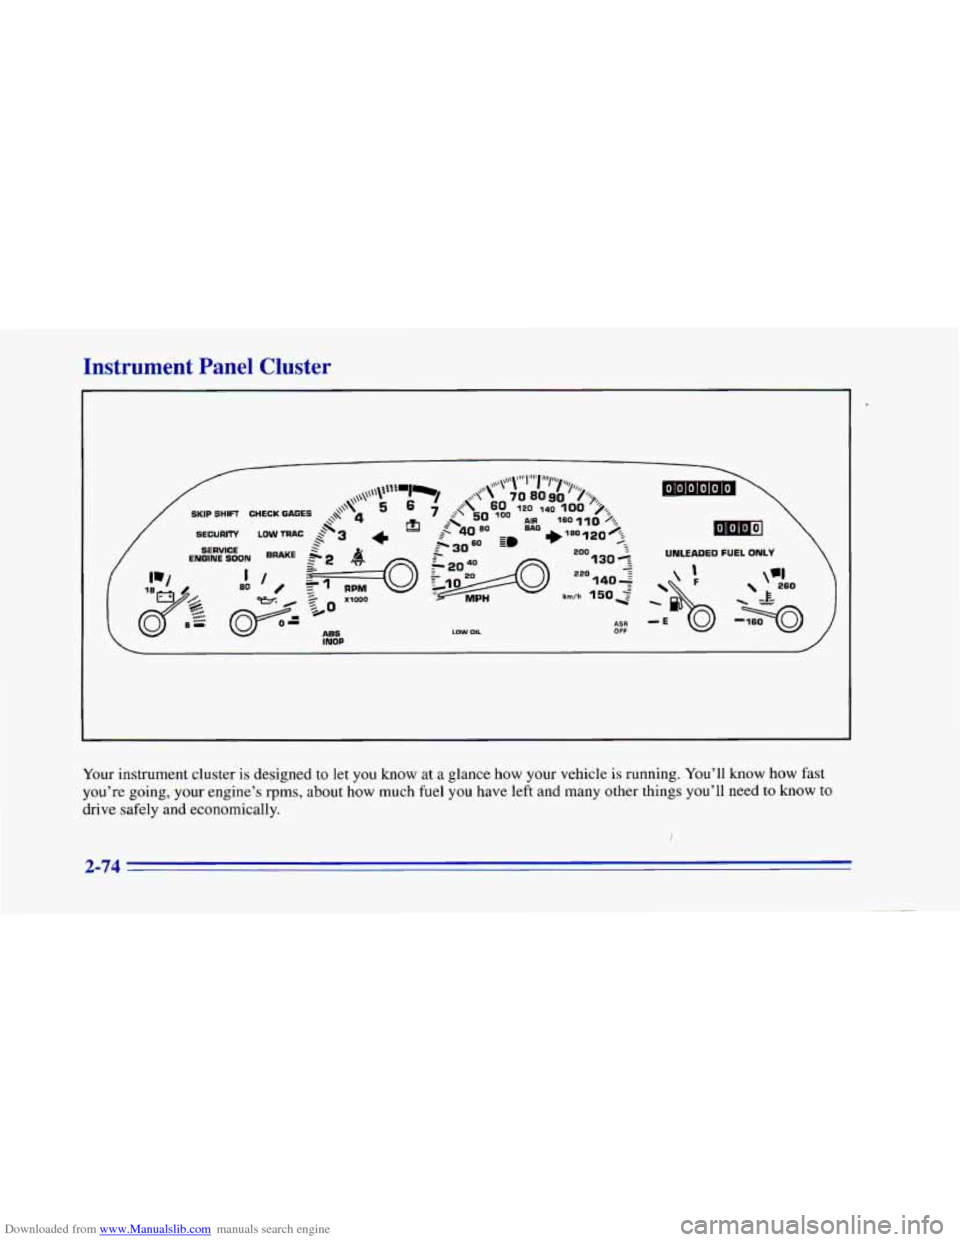
Your instrument cluster is designed to let you know at a glance how your vehicle is running. You’ll know how fast
you’re
going, your engine’s rpms, about how much fuel you have left and many other things you’ll need to know to
drive safely and economically.
t
2-74
Page 130 of 402
Downloaded from www.Manualslib.com manuals search engine Speedometer and Odometer
Your speedometer lets you see your speed in both miles
per hour (mph) and kilometers per hour (kdh). Your
odometer shows how far your vehicle has been driven,
in either miles (used in the United States) or kilometers
(used in Canada).
Your Chevrolet’s odometer is tamper-resistent,
If you
can see silver lines between the numbers, probably
someone has tried to turn it back. The numbers may
not be true.
You may wonder what happens if your Chevrolet needs a
new odometer installed. If possible, the new one has
to be
set to the same reading the old one had. If it can’t be, then
it’s set at zero, but a label on the driver’s door must show
the old reading and when the new one was installed.
Trip Odometer
The trip odometer can tell you how far your car has been
driven since
you last set the trip odometer to zero.
To set the trip odometer to zero, press the knob.
Tachometer
The tachometer displays the engine speed-;’in thousands
of revolutions per minute (rpm).
I NOTICE:
Do not operate the engine with the tachometer in
the red area, or engine damage may occur.
w g Lights, Gages and Indicators
This part aescribes the warning lights and gages that
may be on your vehicle. The pictures will help you
locate them.
Warning lights and gages can signal that something is
wrong before it becomes serious enough to cause an
expensive repair or replacement. Paying attention to
your warning lights and gages could also save you
or
others from injury.
2-75