four CHEVROLET KODIAK 2007 Owners Manual
[x] Cancel search | Manufacturer: CHEVROLET, Model Year: 2007, Model line: KODIAK, Model: CHEVROLET KODIAK 2007Pages: 430, PDF Size: 6.06 MB
Page 2 of 430

Four-Wheel Drive
.................................. 312
Front Axle
............................................ 313
Noise Control System
........................... 314
Bulb Replacement
................................ 315
Windshield Wiper Blade Replacement
... 316
Other Service Items
.............................. 317
Tires
..................................................... 321
Appearance Care
.................................. 331
Vehicle Identification
............................. 340
Electrical System
.................................. 340
Capacities and Specifications
................ 347
Normal Maintenance
Replacement Parts
............................ 352Maintenance Schedule
.............................. 359
Maintenance Schedule
.......................... 360
Customer Assistance Information
............. 403
Customer Assistance and Information
... 404
Reporting Safety Defects
...................... 414
Index
.......................................................... 417
2
Page 48 of 430
Q:What are the different types of add-on
child restraints?
A:Add-on child restraints, which are purchased by
the vehicle’s owner, are available in four basic
types. Selection of a particular restraint should
take into consideration not only the child’s
weight, height, and age but also whether or not
the restraint will be compatible with the motor
vehicle in which it will be used.
For most basic types of child restraints, there
are many different models available. When
purchasing a child restraint, be sure it is
designed to be used in a motor vehicle. If it is,
the restraint will have a label saying that it
meets federal motor vehicle safety standards.
The restraint manufacturer’s instructions
that come with the restraint state the weight
and height limitations for a particular child
restraint. In addition, there are many kinds
of restraints available for children with
special needs.
{CAUTION:
Newborn infants need complete support,
including support for the head and neck.
This is necessary because a newborn
infant’s neck is weak and its head weighs
so much compared with the rest of its
body. In a crash, an infant in a rear-facing
seat settles into the restraint, so the
crash forces can be distributed across
the strongest part of an infant’s body,
the back and shoulders. Infants always
should be secured in appropriate infant
restraints.
48
Page 85 of 430
Keys.............................................................. 86
Remote Keyless Entry (RKE) System.......... 87
Remote Keyless Entry (RKE)
System Operation.................................... 88
Doors and Locks.......................................... 91
Door Locks................................................. 91
Power Door Locks....................................... 92
Windows....................................................... 93
Manual Windows......................................... 93
Power Windows.......................................... 94
Sliding Rear Window................................... 94
Sun Visors.................................................. 95
Starting and Operating Your Vehicle........... 95
New Vehicle Break-In.................................. 95
Ignition Positions......................................... 96
Engine Starter Over-Crank Protection.......... 97
Starting the Gasoline Engine....................... 97
Starting the Diesel Engine......................... 100
Engine Alarm and Automatic Shutdown..... 104
High Idle System....................................... 106
Exhaust Restrictor (Engine Warm-Up)........ 108
Engine Checks Before Operating............... 109
Engine Coolant Heater.............................. 111
Diesel Engine Exhaust Brake.................... 112Two-Speed Rear Axle Electric
Shift Control........................................... 113
Air Shift Control (Automatic
Transmission)......................................... 114
Automatic Transmission Operation............. 115
Manual Transmission Operation................. 116
Power Take-Off (PTO)............................... 118
Four-Wheel Drive...................................... 119
Parking...................................................... 125
Parking Brake (With Hydraulic Brakes)...... 125
Parking Brake (with Air Brakes)................. 126
Parking Brake Burnish Procedure.............. 128
Air Suspension.......................................... 129
Parking Over Things That Burn................. 130
Engine Exhaust......................................... 131
Running the Engine While Parked............. 132
Mirrors......................................................... 133
Manual Rearview Mirror............................. 133
Outside Manual Mirrors............................. 133
Outside Power Mirrors............................... 133
Outside Convex Mirrors............................. 134
Outside Heated Mirrors............................. 134
Storage Areas............................................. 135
Center Console Storage Area.................... 135
Section 2 Features and Controls
85
Page 89 of 430

Matching Transmitter(s) to Your
Vehicle
Each remote keyless entry transmitter is coded to
prevent another transmitter from unlocking your
vehicle. If a transmitter is lost or stolen, a
replacement can be purchased through your
dealer. Remember to bring any remaining
transmitters with you when you go to your dealer.
When the dealer matches the replacement
transmitter to your vehicle, any remaining
transmitters must also be matched. Once your
dealer has coded the new transmitter, the
lost transmitter will not unlock your vehicle. Each
vehicle can have a maximum of four transmitters
matched to it.
Battery Replacement
Under normal use, the battery in your remote
keyless entry transmitter should last about
two years.
You can tell the battery is weak if the transmitter
won’t work at the normal range in any location.
If you have to get close to your vehicle before the
transmitter works, it’s probably time to change
the battery.
Notice:When replacing the battery, use care
not to touch any of the circuitry. Static
from your body transferred to these surfaces
may damage the transmitter.
1. Insert a thin object, such as a coin, into the
slot between the covers of the transmitter
near the key ring hole. Remove the bottom by
twisting the object.
2. Remove and replace the battery, positive (+)
side down. Use one CR2032 battery.
89
Page 111 of 430
Engine Coolant Heater
Your vehicle may be equipped with this feature.
In very cold weather, 0°F (–18°C) or colder,
the engine coolant heater can help. You will get
easier starting and better fuel economy during
engine warm-up. Usually, the coolant heater
should be plugged in a minimum of four hours
prior to starting your vehicle. At temperatures
above 32°F (0°C), use of the coolant heater is
not required.
To Use the Engine Coolant Heater
1. Turn off the engine.
2. Find the plug-in outlet located under the
driver’s door.
3. Plug it into a normal, grounded 110-volt AC
outlet.
{CAUTION:
Plugging the cord into an ungrounded
outlet could cause an electrical shock.
Also, the wrong kind of extension cord
could overheat and cause a re. You
could be seriously injured. Plug the cord
into a properly grounded three-prong
110-volt AC outlet. If the cord will not
reach, use a heavy-duty three-prong
extension cord rated for at least 15 amps.
4. Before starting the engine, be sure to unplug
and store the cord as it was before to keep it
away from moving engine parts. If you do
not, it could be damaged.
How long should you keep the coolant heater
plugged in? The answer depends on the outside
temperature, the kind of oil you have, and some
other things. Instead of trying to list everything here,
we ask that you contact your dealer in the area
where you will be parking your vehicle. The dealer
can give you the best advice for that particular area.
111
Page 116 of 430
Overdrive Defeat
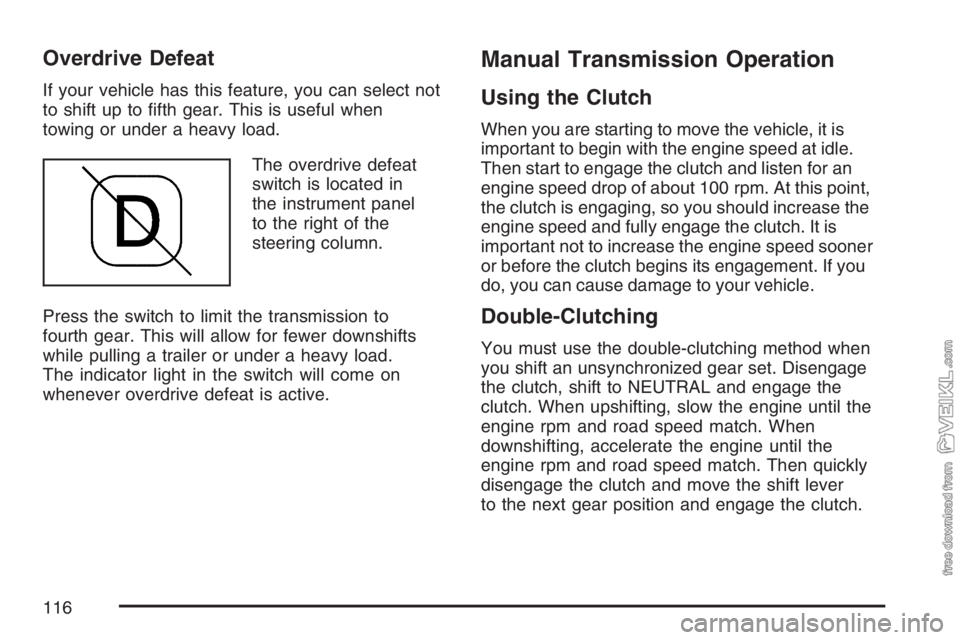
If your vehicle has this feature, you can select not
to shift up to fifth gear. This is useful when
towing or under a heavy load.
The overdrive defeat
switch is located in
the instrument panel
to the right of the
steering column.
Press the switch to limit the transmission to
fourth gear. This will allow for fewer downshifts
while pulling a trailer or under a heavy load.
The indicator light in the switch will come on
whenever overdrive defeat is active.
Manual Transmission Operation
Using the Clutch
When you are starting to move the vehicle, it is
important to begin with the engine speed at idle.
Then start to engage the clutch and listen for an
engine speed drop of about 100 rpm. At this point,
the clutch is engaging, so you should increase the
engine speed and fully engage the clutch. It is
important not to increase the engine speed sooner
or before the clutch begins its engagement. If you
do, you can cause damage to your vehicle.
Double-Clutching
You must use the double-clutching method when
you shift an unsynchronized gear set. Disengage
the clutch, shift to NEUTRAL and engage the
clutch. When upshifting, slow the engine until the
engine rpm and road speed match. When
downshifting, accelerate the engine until the
engine rpm and road speed match. Then quickly
disengage the clutch and move the shift lever
to the next gear position and engage the clutch.
116
Page 119 of 430
Four-Wheel Drive
If your vehicle has four-wheel drive, you can send
the engine’s driving power to all four wheels for
extra traction. To get the most satisfaction
out of four-wheel drive, you must be familiar with
its operation. Read the part that follows before
using four-wheel drive. You should use two-wheel
drive high for most normal driving conditions.
Notice:Driving on clean, dry pavement
in four-wheel drive for an extended period of
time can cause premature wear on your
vehicle’s powertrain. Do not drive on clean,
dry pavement in four-wheel drive for extended
periods of time.
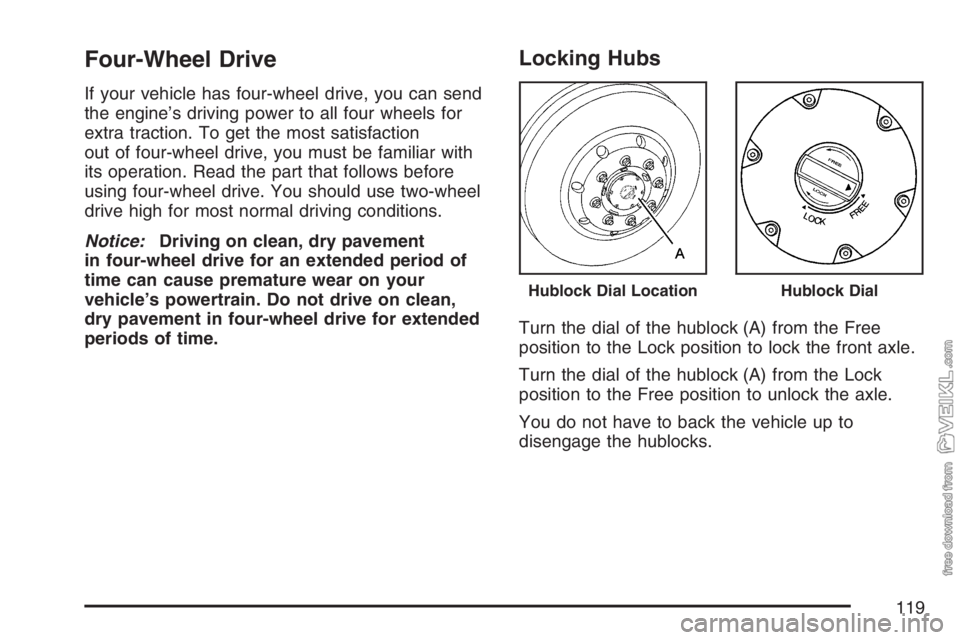
Locking Hubs
Turn the dial of the hublock (A) from the Free
position to the Lock position to lock the front axle.
Turn the dial of the hublock (A) from the Lock
position to the Free position to unlock the axle.
You do not have to back the vehicle up to
disengage the hublocks.
Hublock Dial LocationHublock Dial
119
Page 120 of 430
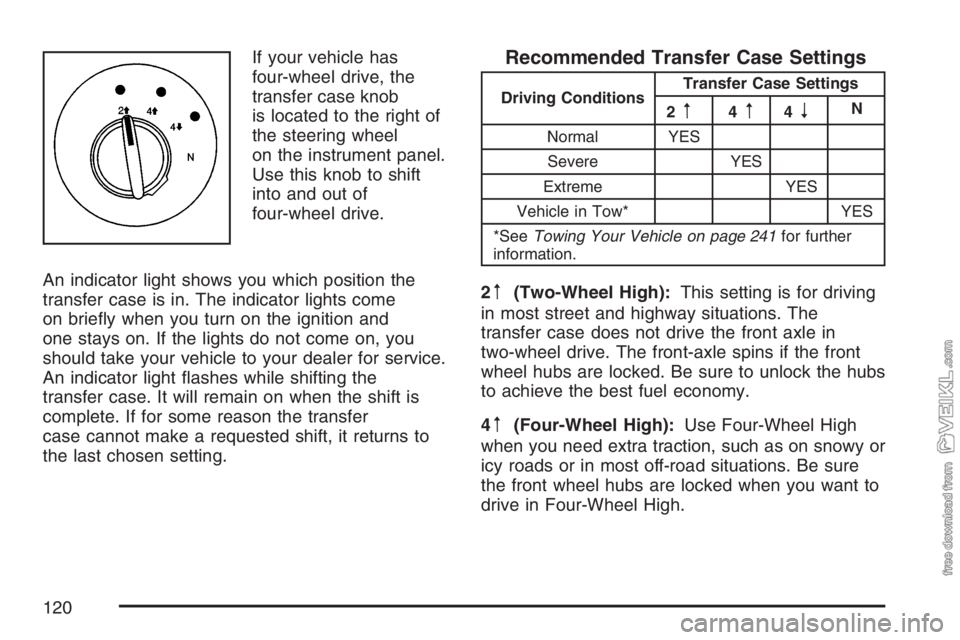
If your vehicle has
four-wheel drive, the
transfer case knob
is located to the right of
the steering wheel
on the instrument panel.
Use this knob to shift
into and out of
four-wheel drive.
An indicator light shows you which position the
transfer case is in. The indicator lights come
on briefly when you turn on the ignition and
one stays on. If the lights do not come on, you
should take your vehicle to your dealer for service.
An indicator light flashes while shifting the
transfer case. It will remain on when the shift is
complete. If for some reason the transfer
case cannot make a requested shift, it returns to
the last chosen setting.Recommended Transfer Case Settings
Driving ConditionsTransfer Case Settings
2m4m4nN
Normal YES
Severe YES
Extreme YES
Vehicle in Tow* YES
*SeeTowing Your Vehicle on page 241for further
information.
2m(Two-Wheel High):This setting is for driving
in most street and highway situations. The
transfer case does not drive the front axle in
two-wheel drive. The front-axle spins if the front
wheel hubs are locked. Be sure to unlock the hubs
to achieve the best fuel economy.
4
m(Four-Wheel High):Use Four-Wheel High
when you need extra traction, such as on snowy or
icy roads or in most off-road situations. Be sure
the front wheel hubs are locked when you want to
drive in Four-Wheel High.
120
Page 121 of 430
4n(Four-Wheel Low):This setting sends
maximum power to all four wheels. You might
choose Four-Wheel Low if you are driving off-road
in deep sand, deep mud, and climbing or
descending steep hills. Be sure the front wheel
hubs are locked when you want to drive in
Four-Wheel Low.
{CAUTION:
Shifting the transfer case to NEUTRAL
can cause your vehicle to roll even if the
transmission is in PARK (P). You or
someone else could be injured. If you are
going to leave your vehicle, set the
parking brake and shift the transmission
to PARK (P) and make sure the transfer
case is in a drive gear.Notice:If your vehicle has an Allison
®
transmission and you try to put the
transmission in PARK (P) while the transfer
case is in Four-Wheel Low, the transmission
might not go into PARK (P) and could damage
your vehicle. When parking your vehicle,
make sure the transfer case is in Two-Wheel
High or Four-Wheel High.
NEUTRAL:Shift the vehicle’s transfer case to
NEUTRAL only when towing your vehicle.
Shifting Into Four-Wheel High
Turn the knob to four-wheel high. This can be
done at 3 mph or less, while you are shifting out
of Four-Wheel Low. The indicator light flashes
while shifting. It remains on after the shift is
complete. Be sure to lock your front hubs.
121
Page 122 of 430
Shifting Into Two-Wheel High
Turn the knob to Two-Wheel High. This can be
done at 3 mph or less, while you are shifting out of
Four-Wheel Low.
Shifting Into Four-Wheel Low
To shift to Four-Wheel Low, the vehicle’s engine
must be running and the vehicle must be stopped
or moving less than 3 mph (5 km/h) with the
transmission in NEUTRAL (N). The preferred
method for shifting into Four-Wheel Low is to have
your vehicle moving 1 or 2 mph (1.6 to 3.2 km/h).
Turn the knob to Four-Wheel Low. You must
wait for the Four-Wheel Low indicator light to stop
flashing and remain on before shifting the
transmission into gear. Be sure to lock the
front hubs.Notice:Shifting the transmission into gear
before the Four-Wheel Drive Low indicator light
has stopped ashing could damage the
transfer case. To help avoid damaging your
vehicle, always wait for the Four-Wheel
Drive Low indicator light to stop ashing
before shifting the transmission into gear.
If you turn the knob to Four-Wheel Low while your
vehicle is in gear and/or moving, the Four-Wheel
Low indicator light flashes for 30 seconds and
does not complete the shift unless your vehicle is
moving less than 3 mph (4.8 km/h) and the
transmission is in NEUTRAL (N). After 30 seconds,
the transfer case returns to the setting last
chosen. If your vehicle is in gear and moving less
than 3 mph (4.8 km/h), the transfer case shifts
to Four-Wheel High.
122