CHRYSLER CROSSFIRE 2008 1.G Owners Manual
Manufacturer: CHRYSLER, Model Year: 2008, Model line: CROSSFIRE, Model: CHRYSLER CROSSFIRE 2008 1.GPages: 358, PDF Size: 4.7 MB
Page 121 of 358
WARNING!
Your motorized door or gate will open and close
while you are programming the universal trans-
ceiver. Do not program the transceiver if people or
pets are in the path of the door or gate. A moving
door or gate can cause serious injury or death to
people and pets or damage to objects.
2. Turn the ignition to the ON/RUN position.
3. Erase the factory test codes by pressing the two
outside buttons. Release the buttons when the light in the
overhead console display begins to flash (about 20 sec-
onds).
NOTE:Step 3 does not have to be followed to program
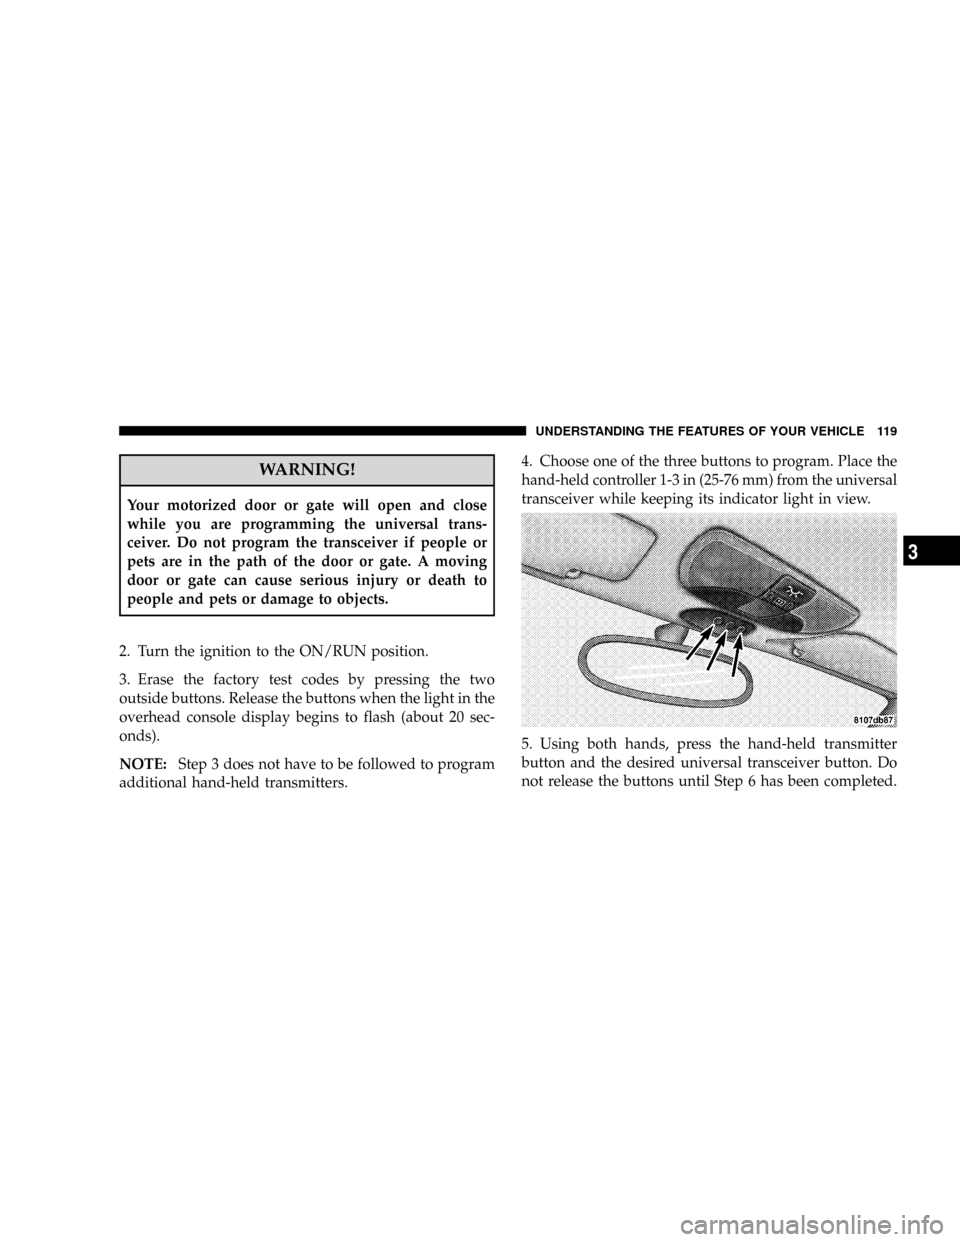
additional hand-held transmitters.4. Choose one of the three buttons to program. Place the
hand-held controller 1-3 in (25-76 mm) from the universal
transceiver while keeping its indicator light in view.
5. Using both hands, press the hand-held transmitter
button and the desired universal transceiver button. Do
not release the buttons until Step 6 has been completed.
UNDERSTANDING THE FEATURES OF YOUR VEHICLE 119
3
Page 122 of 358
NOTE:Some gate operators and garage door openers
may require you to replace this Programming Step 5 with
procedures noted in the ªGate Operator/Canadian Pro-
grammingº section.
6. The indicator light in the universal transceiver will
begin to flash, first slowly and then rapidly. Release both
buttons after the indicator light changes from slow to
rapid flash. If, after 90 seconds, the indicator does not
flash rapidly or goes out, return to Step 1 and repeat the
procedure.
7. Press and hold the just programmed universal trans-
ceiver button and observe the indicator light. If the
indicator stays on constantly, programming is complete
and your device should activate when the universal
transceiver button is pressed and released.
NOTE:To program the remaining two universal trans-
ceiver buttons, begin with Programming Step 4. Do not
repeat Steps 1, 2, and 3.If the indicator light blinks rapidly for two seconds and
then turns to a constant light, continue with Program-
ming Steps 8-10 to complete programming of a rolling
code equipped device (most commonly a garage door
opener).
8. At the garage door opener receiver (motor-head unit)
in the garage, locate the ªlearnº or ªsmartº button. This
can usually be found where the hanging antenna wire is
attached to the motor-head unit.
9. Firmly press and release the ªlearnº or ªsmartº but-
ton. (The name and color of the button may vary by
manufacturer.)
NOTE:There are 30 seconds in which to initiate Step 10.
10. Return to the vehicle and firmly press, hold for two
seconds and release the programmed universal trans-
ceiver button. Repeat the ªpress/hold/releaseº sequence
a second time, and, depending on the brand of the garage
120 UNDERSTANDING THE FEATURES OF YOUR VEHICLE
Page 123 of 358
door opener (or other rolling code equipped device),
repeat this sequence a third time to complete the pro-
gramming.
The universal transceiver should now activate your roll-
ing code equipped device.
If you do not successfully program the universal trans-
ceiver to learn the signal of your hand-held transmitter,
call toll free for customer assistance at 1-800-355-3515, or
on the internet at www.homelink.com.
Gate Operator/Canadian Programming
Canadian radio-frequency laws require transmitter sig-
nals to ªtime-outº (or quit) after several seconds of
transmission. This may not be long enough for the
universal transceiver to pick up the signal during pro-
gramming. Similar to this Canadian law, some U.S. gate
operators are designed to ªtime-outº in the same manner.If you live in Canada or you are having difficulties
programming a gate operator by using the programming
procedures (regardless of where you live), replace Pro-
gramming Step 5 with the following:
NOTE:If programming a garage door opener or gate
operator, it is advised to unplug the device during the
ªcyclingº process to prevent possible overheating.
5. Continue to press and hold the universal transceiver
button while you press and release every two seconds
(ªcycleº) your hand-held transmitter until the frequency
signal has successfully been accepted by the universal
transmitter. (The indicator light will flash slowly and
then rapidly.) Proceed with Programming Step 6 to
complete.
UNDERSTANDING THE FEATURES OF YOUR VEHICLE 121
3
Page 124 of 358
Using the Universal Transceiver
To operate the universal transceiver, simply press and
release the programmed button. Activation will now
occur for the programmed device (i.e., garage door
opener, gate operator, security system, entry door lock,
home/office lighting, etc.) For convenience, the hand-
held transmitter of the device may also be used at any
time.
Erasing Universal Transceiver Buttons
To erase programming from the three buttons (individual
buttons cannot be erased but can be reprogrammed ± see
below), follow this procedure:
²Press and hold the two outer universal transceiver
buttons until the indicator light begins to flash after 20
seconds. Release both buttons. Do not hold for longer
than 30 seconds. The universal transceiver is now inthe program (or learning) mode and can be pro-
grammed at any time beginning with Programming
Step 4.
Reprogramming a Single Button
To program a device using a universal transceiver button
previously programmed, follow these steps:
1. Press and hold the desired universal transceiver but-
ton. DO NOT release the button.
2. The indicator light will begin to flash after 20 seconds.
Without releasing the universal transceiver button, pro-
ceed with Programming Step 4.
Security
If you sell your vehicle, be sure to erase the frequencies.
To erase all of the previously programmed frequencies,
hold down both outside buttons until the light begins to
flash.
122 UNDERSTANDING THE FEATURES OF YOUR VEHICLE
Page 125 of 358
This device complies with part 15 of FCC rules and with
RS-210 of Industry Canada. Operation is subject to the
following conditions:
1. This device may not cause harmful interference.
2. This device must accept any interference that may be
received, including interference that may cause undes-
ired operation.NOTE:Changes or modifications not expressly ap-
proved by the party responsible for compliance could
void the user's authority to operate the equipment.
HomeLinktis a trademark owned by Johnson Controls,
Inc.
UMBRELLA HOOK
Your Crossfire is equipped with an umbrella hook. This
feature is located behind and between the two seats, just
above the map pocket.
UNDERSTANDING THE FEATURES OF YOUR VEHICLE 123
3
Page 126 of 358

Page 127 of 358
UNDERSTANDING YOUR INSTRUMENT PANEL
CONTENTS
mInstruments And Controls.................127
mInstrument Cluster......................128
mInstrument Cluster Description.............129
mªInfinity Modulusº AM/FM Stereo Radio With
Single-Disc CD Player And GPS Navigation....143
mAM/FM Stereo Radio With Single-Disc CD
Player...............................144
NInfinity Modulus Entertainment Systems.....144
NCD Player Operation...................149
NUser Menu..........................151NUser Memory (User ± 1, 2, 3).............152
NMono/Stereo........................152
NDriver ± L/R........................153
NTelephone Mute Characteristics...........153
mCompact Disc Maintenance................154
mRadio Antenna........................154
mRadio Operation And Cellular Phones........155
mClimate Controls.......................155
NTemperature Control...................1564
Page 128 of 358
NFan Control.........................156
NBasic Setting - Heater..................157
NBasic Setting - Air Conditioner............157NDust Filter (If Equipped)................162
NOperating Tips.......................163
126 UNDERSTANDING YOUR INSTRUMENT PANEL
Page 129 of 358
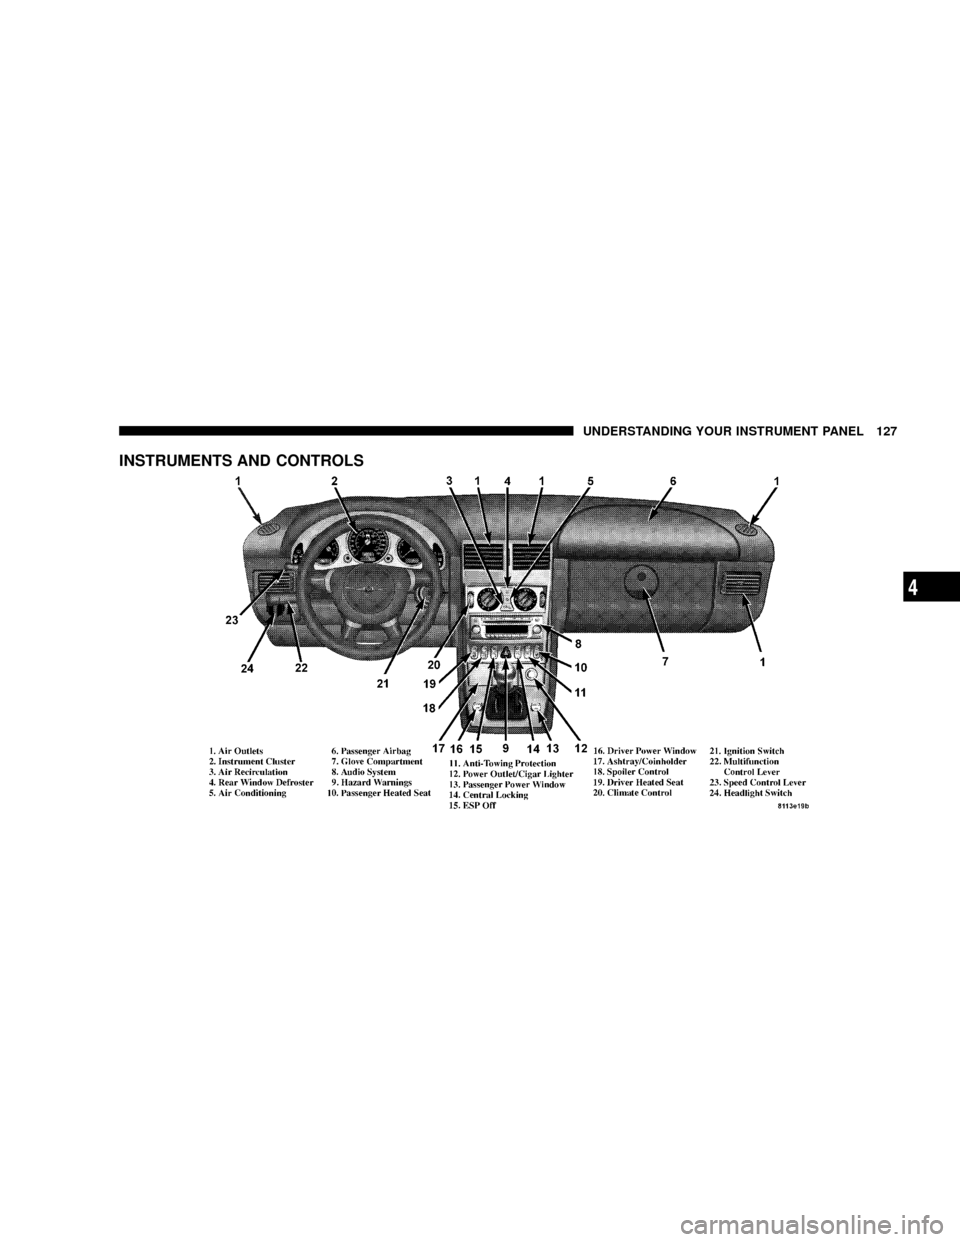
INSTRUMENTS AND CONTROLS
UNDERSTANDING YOUR INSTRUMENT PANEL 127
4
Page 130 of 358
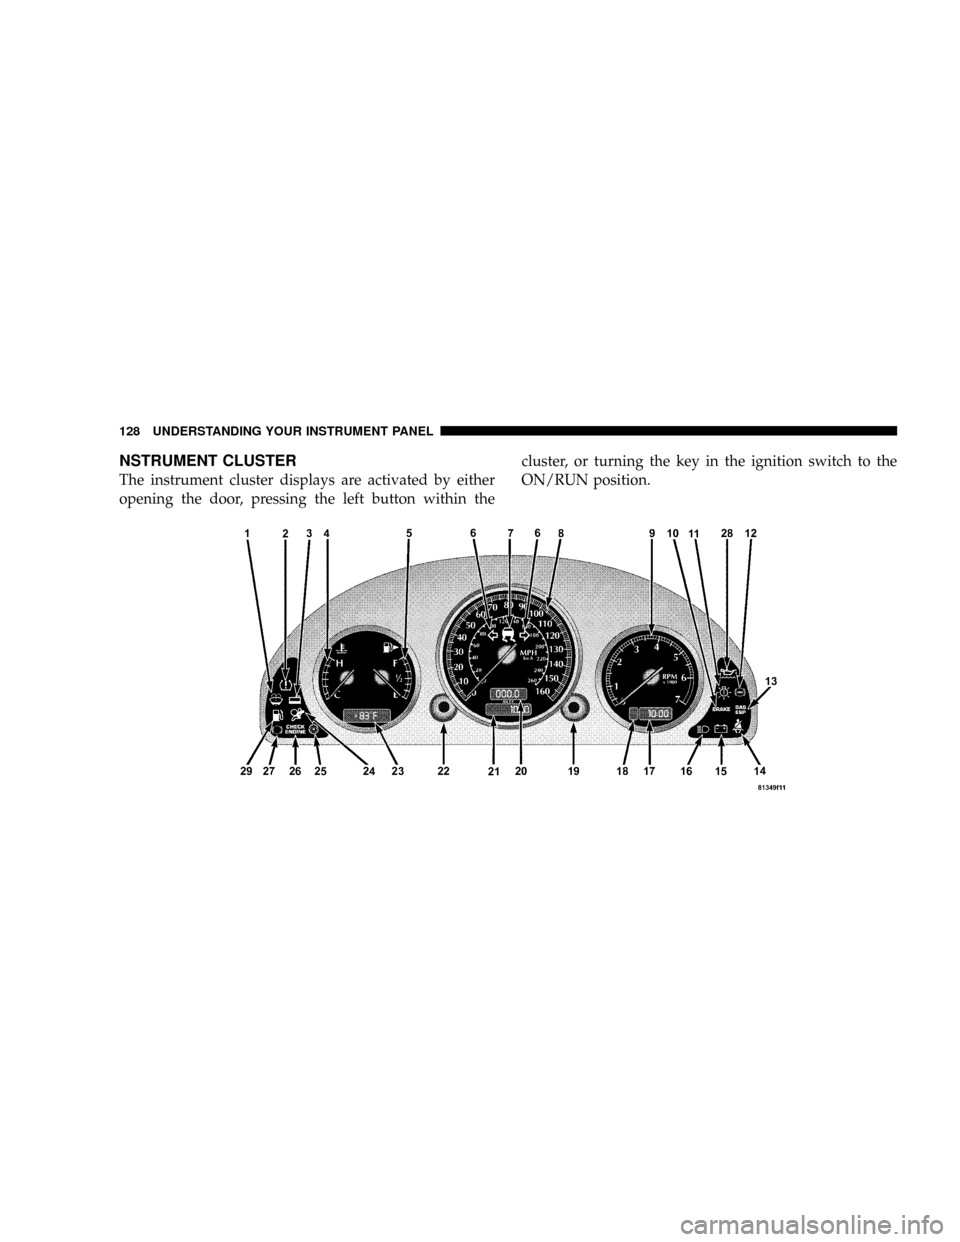
NSTRUMENT CLUSTER
The instrument cluster displays are activated by either
opening the door, pressing the left button within thecluster, or turning the key in the ignition switch to the
ON/RUN position.
128 UNDERSTANDING YOUR INSTRUMENT PANEL