CHRYSLER CROSSFIRE 2008 1.G Owners Manual
CROSSFIRE 2008 1.G
CHRYSLER
CHRYSLER
https://www.carmanualsonline.info/img/25/8490/w960_8490-0.png
CHRYSLER CROSSFIRE 2008 1.G Owners Manual
Trending: gas type, fuel additives, fuel consumption, key battery, door lock, open gas tank, fuel pump
Page 91 of 358
NOTE:When moving the seat, be sure that there are no
items in the footwell or behind the seats. Otherwise you
could damage the seats.Manual Seat Adjustments (If Equipped)
Seat Height (Drivers Seat Only)
²
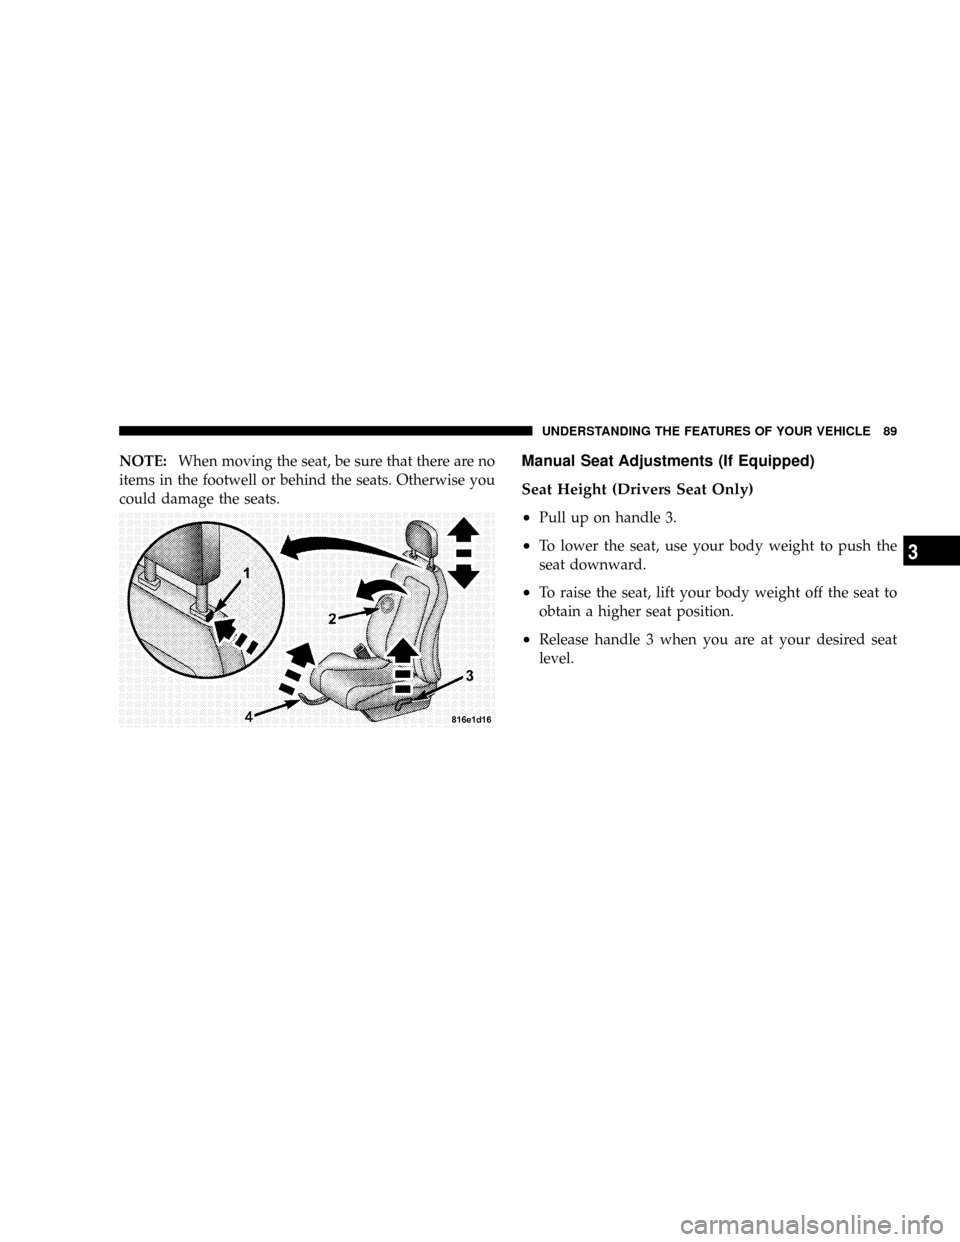
Pull up on handle 3.
²To lower the seat, use your body weight to push the
seat downward.
²To raise the seat, lift your body weight off the seat to
obtain a higher seat position.
²Release handle 3 when you are at your desired seat
level.
UNDERSTANDING THE FEATURES OF YOUR VEHICLE 89
3
Page 92 of 358
Forward/Rearward
²
Pull up on handle 4.
²Move the seat forward or backward to your desired
position which allows you to reach the pedals com-
fortably.
²Let go of handle 4. The seat should make an audible
click when positioned properly.
²Check for proper engagement before driving.
Backrest Tilt
²
Turn handwheel 2 forward or backward to adjust the
backrest tilt to your desired position which allows
your arms to slightly bend when holding the steering
wheel.
Head Restraint Height
WARNING!
For your protection, drive only with properly posi-
tioned head restraints.
Adjust head restraint to support the back of the head
approximately at ear level.
Do not drive the vehicle without the seat head
restraints. Head restraints are intended to help re-
duce injuries during and accident.
²Adjust the height of the head restraints by pulling
them upwards manually.
²For a lower position, press release button 1 and push
down on the head restraints manually.
90 UNDERSTANDING THE FEATURES OF YOUR VEHICLE
Page 93 of 358
Adjust to a comfortable seating position that still allows you
to reach the accelerator and brake pedal safely. The position
should be as far to the rear as possible, consistent with
ability to properly operate controls.
Driver Eight-Way Power Seat (If Equipped)
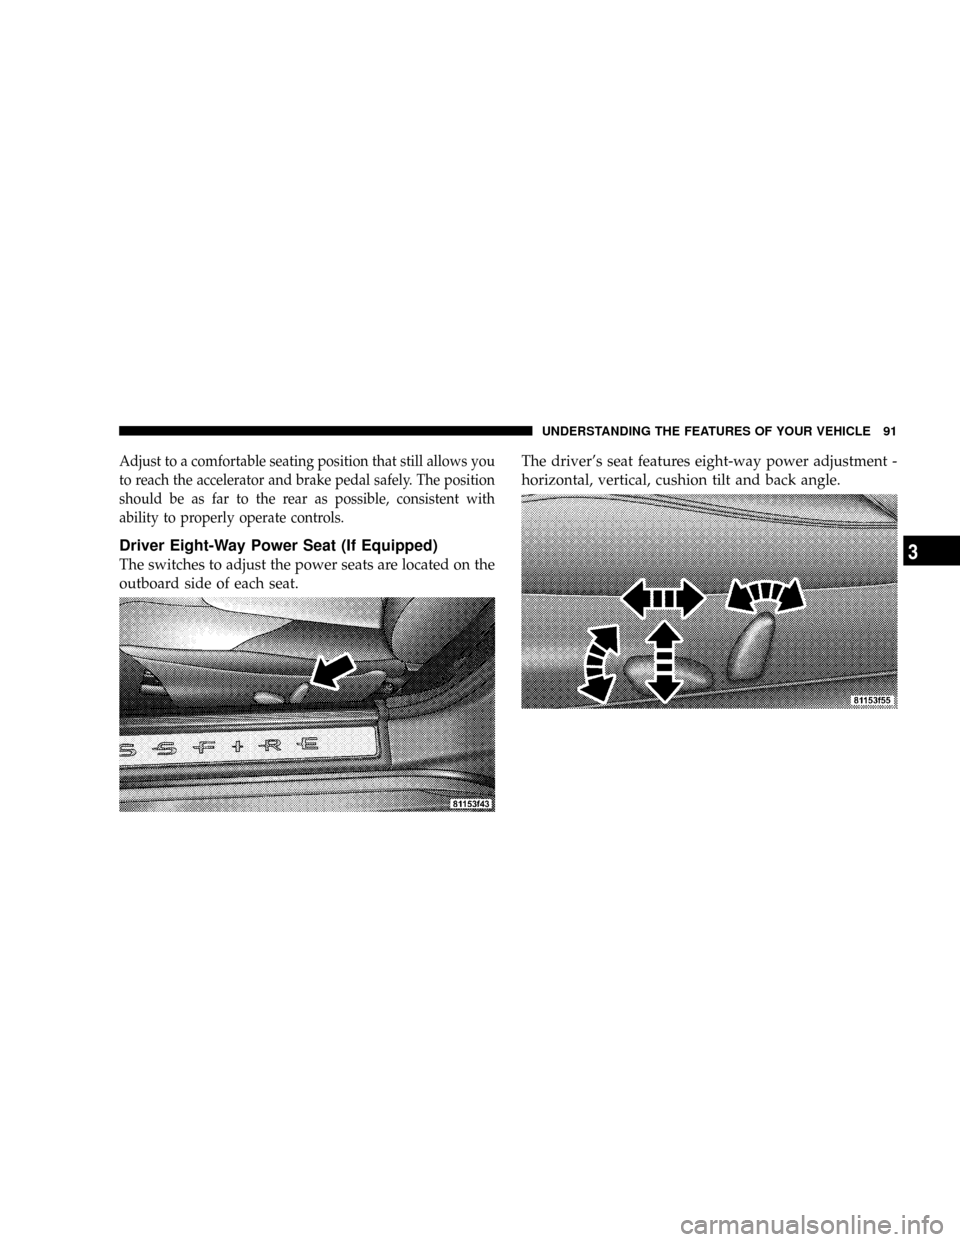
The switches to adjust the power seats are located on the
outboard side of each seat.The driver's seat features eight-way power adjustment -
horizontal, vertical, cushion tilt and back angle.
UNDERSTANDING THE FEATURES OF YOUR VEHICLE 91
3
Page 94 of 358
Passenger Four-Way Power Seat (If Equipped)
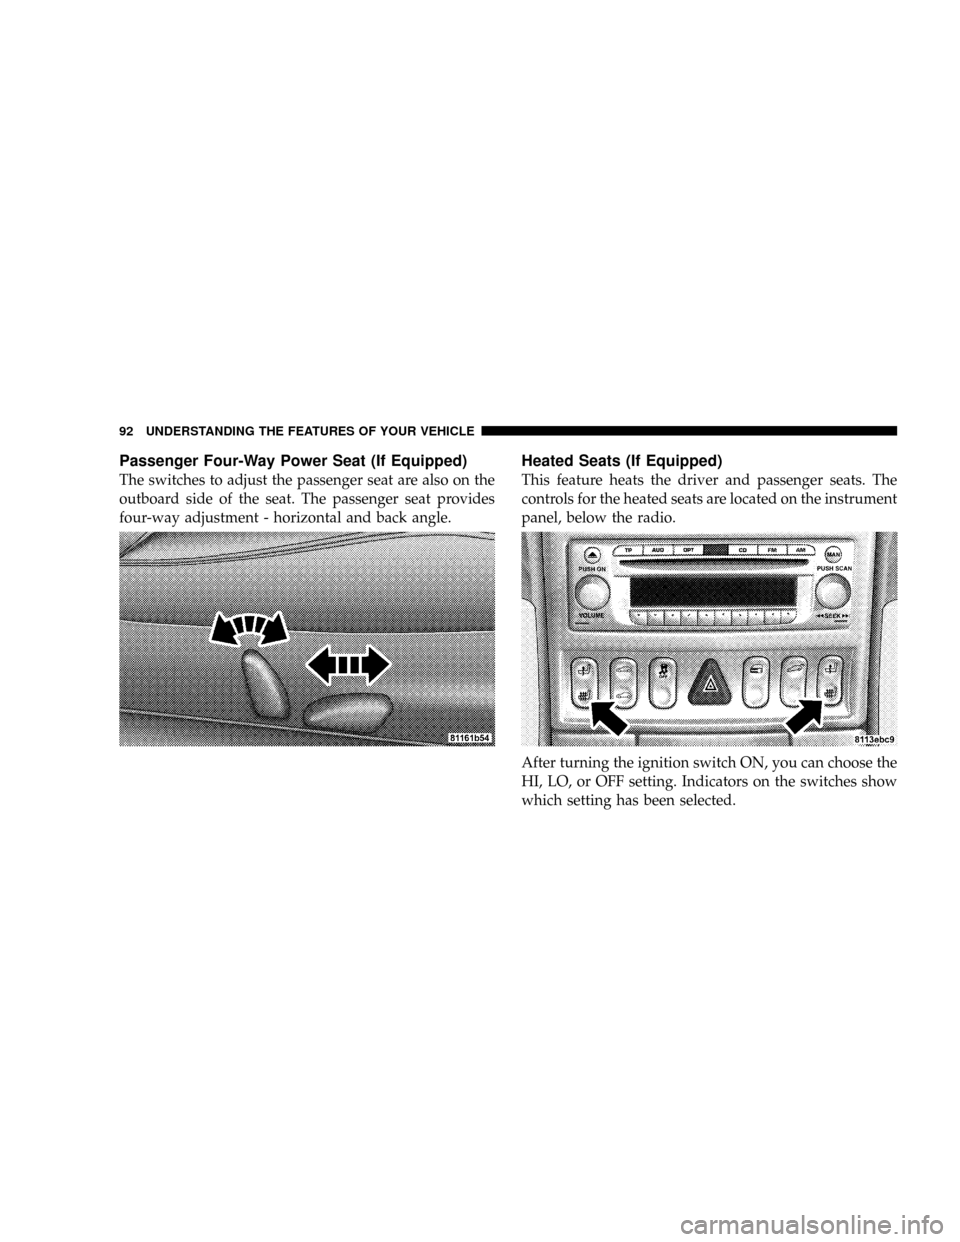
The switches to adjust the passenger seat are also on the
outboard side of the seat. The passenger seat provides
four-way adjustment - horizontal and back angle.
Heated Seats (If Equipped)
This feature heats the driver and passenger seats. The
controls for the heated seats are located on the instrument
panel, below the radio.
After turning the ignition switch ON, you can choose the
HI, LO, or OFF setting. Indicators on the switches show
which setting has been selected.
92 UNDERSTANDING THE FEATURES OF YOUR VEHICLE
Page 95 of 358
The heated seats setting will automatically switch from
HI to LO after approximately five minutes.
TO OPEN AND CLOSE THE HOOD
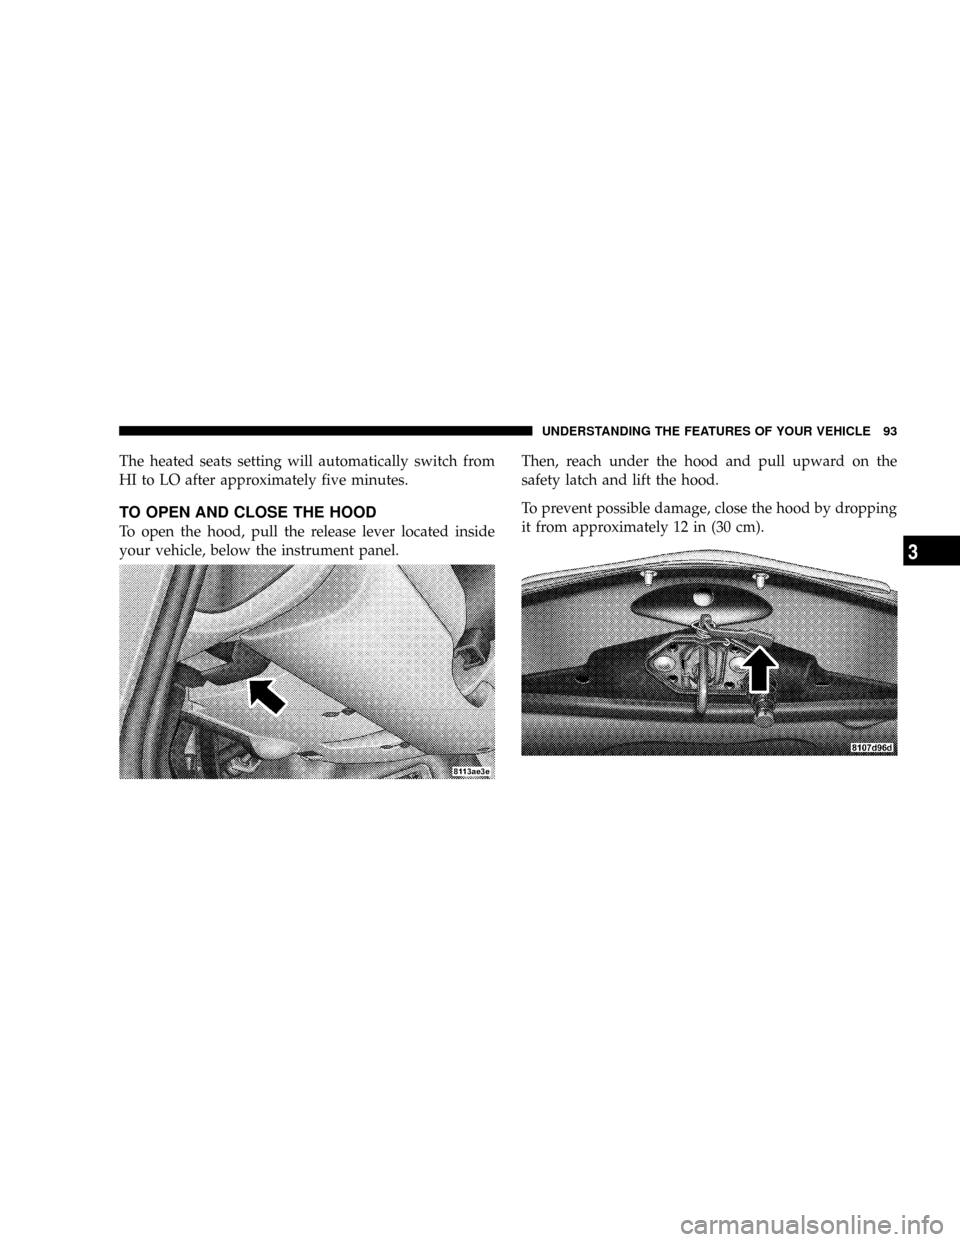
To open the hood, pull the release lever located inside
your vehicle, below the instrument panel.Then, reach under the hood and pull upward on the
safety latch and lift the hood.
To prevent possible damage, close the hood by dropping
it from approximately 12 in (30 cm).
UNDERSTANDING THE FEATURES OF YOUR VEHICLE 93
3
Page 96 of 358
WARNING!
If the hood is not fully latched, it could fly up when
the vehicle is moving, and block your forward vision.
You could have a collision. Be sure all hood latches
are fully latched before driving.
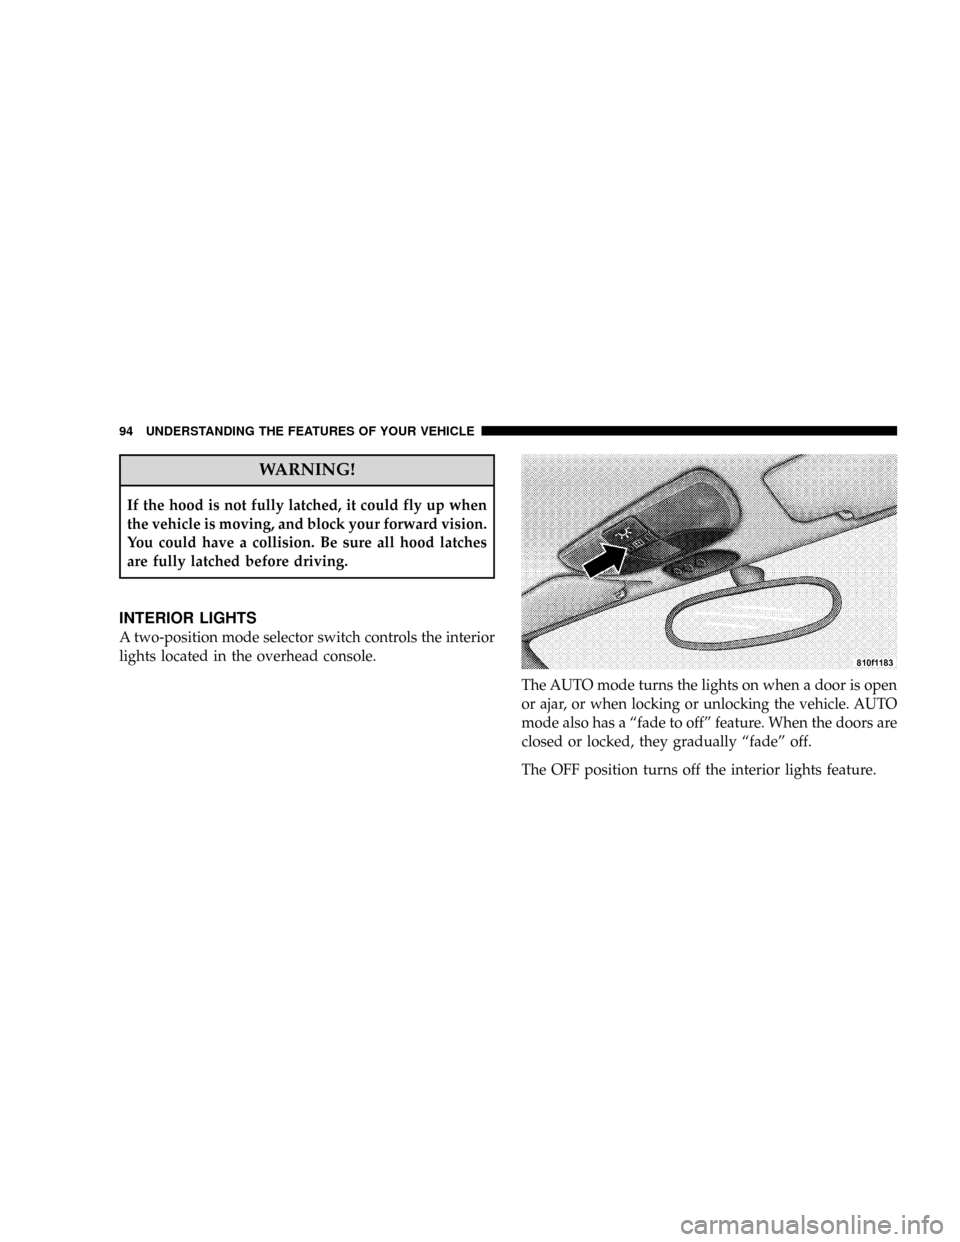
INTERIOR LIGHTS
A two-position mode selector switch controls the interior
lights located in the overhead console.
The AUTO mode turns the lights on when a door is open
or ajar, or when locking or unlocking the vehicle. AUTO
mode also has a ªfade to offº feature. When the doors are
closed or locked, they gradually ªfadeº off.
The OFF position turns off the interior lights feature.
94 UNDERSTANDING THE FEATURES OF YOUR VEHICLE
Page 97 of 358
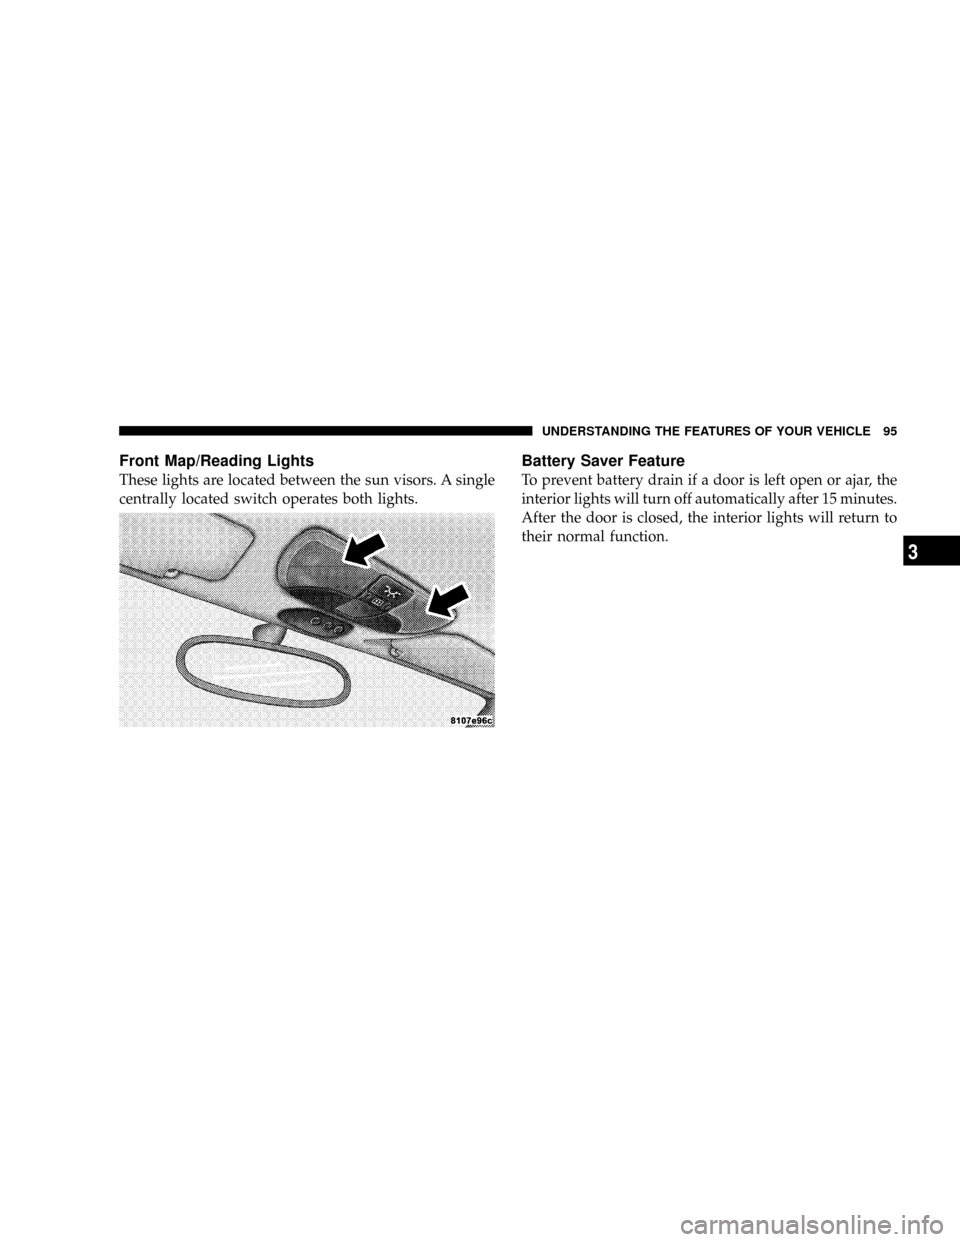
Front Map/Reading Lights
These lights are located between the sun visors. A single
centrally located switch operates both lights.
Battery Saver Feature
To prevent battery drain if a door is left open or ajar, the
interior lights will turn off automatically after 15 minutes.
After the door is closed, the interior lights will return to
their normal function.
UNDERSTANDING THE FEATURES OF YOUR VEHICLE 95
3
Page 98 of 358
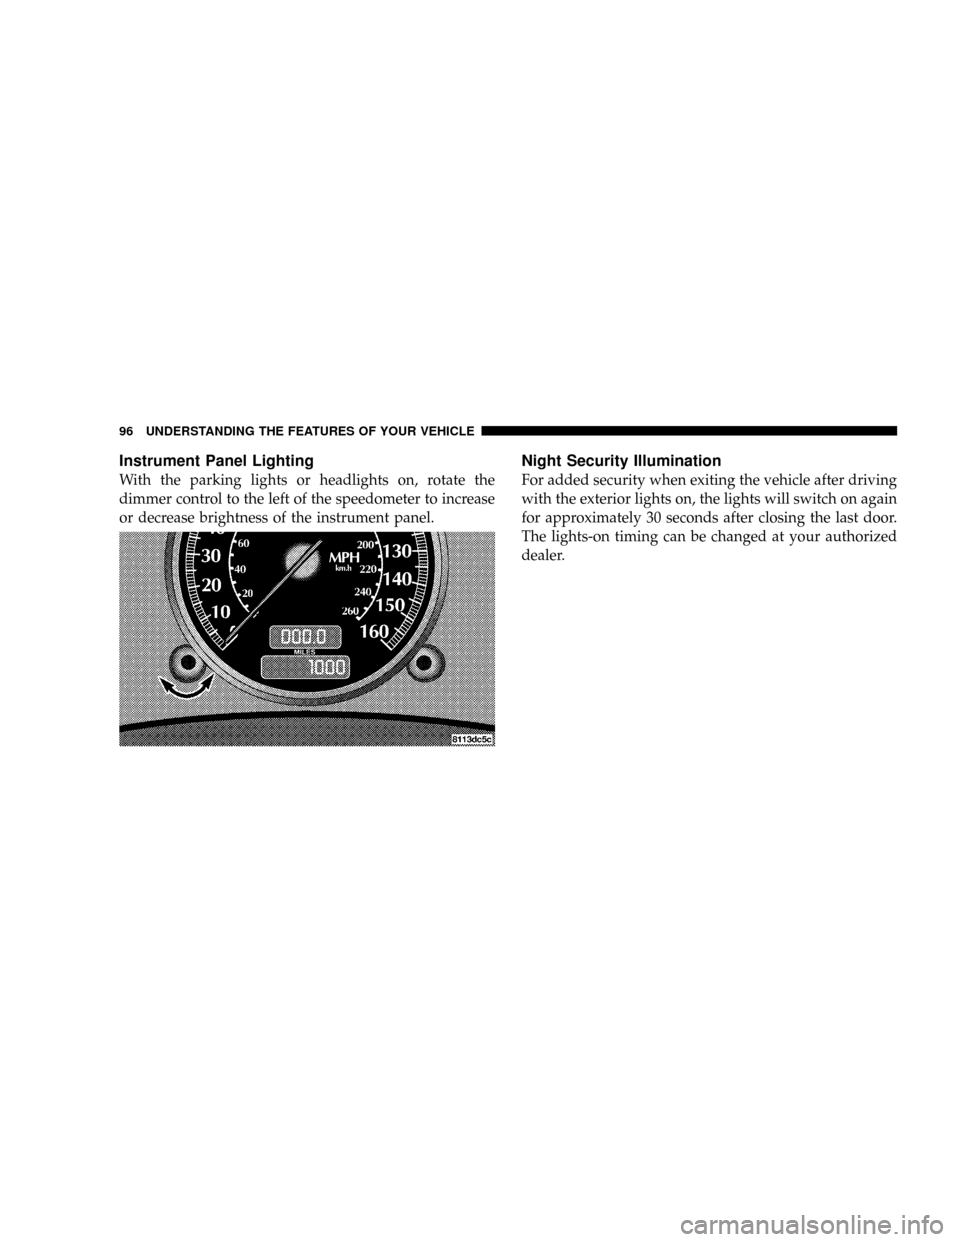
Instrument Panel Lighting
With the parking lights or headlights on, rotate the
dimmer control to the left of the speedometer to increase
or decrease brightness of the instrument panel.
Night Security Illumination
For added security when exiting the vehicle after driving
with the exterior lights on, the lights will switch on again
for approximately 30 seconds after closing the last door.
The lights-on timing can be changed at your authorized
dealer.
96 UNDERSTANDING THE FEATURES OF YOUR VEHICLE
Page 99 of 358
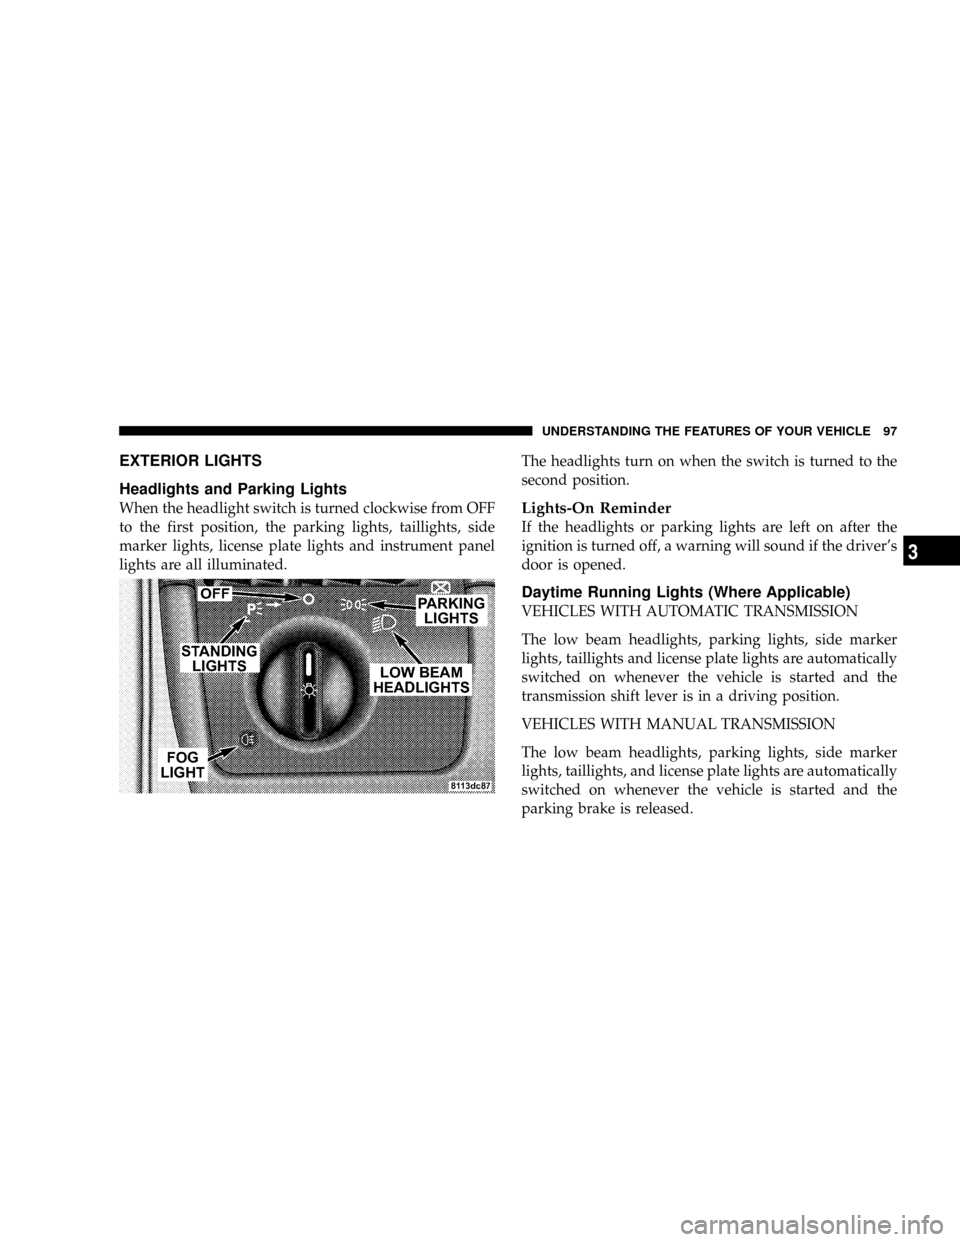
EXTERIOR LIGHTS
Headlights and Parking Lights
When the headlight switch is turned clockwise from OFF
to the first position, the parking lights, taillights, side
marker lights, license plate lights and instrument panel
lights are all illuminated.The headlights turn on when the switch is turned to the
second position.Lights-On Reminder
If the headlights or parking lights are left on after the
ignition is turned off, a warning will sound if the driver's
door is opened.
Daytime Running Lights (Where Applicable)
VEHICLES WITH AUTOMATIC TRANSMISSION
The low beam headlights, parking lights, side marker
lights, taillights and license plate lights are automatically
switched on whenever the vehicle is started and the
transmission shift lever is in a driving position.
VEHICLES WITH MANUAL TRANSMISSION
The low beam headlights, parking lights, side marker
lights, taillights, and license plate lights are automatically
switched on whenever the vehicle is started and the
parking brake is released.
UNDERSTANDING THE FEATURES OF YOUR VEHICLE 97
3
Page 100 of 358
For nighttime driving, the exterior lights switch should
be in the low beam position to permit activation of the
high beam headlights.
Fog Lights (If Equipped)
To operate the fog lights, pull the headlight
switch out one stop, with the parking lights
and/or low beam headlights on. A light to the
lower left of the headlight switch will illumi-
nate when the fog lights are on.
To turn off the fog lights, push the headlight switch in
fully. Selecting high beam headlights will also turn off the
fog lights.
Standing Lights
When the vehicle is parked on the street, the standing
lights (left or right side parking lights) can be turned on,
making your vehicle more visible to passing vehicles.To operate the standing lights, turn the headlight switch
counterclockwise one stop (right lamps) or two stops (left
lamps) from the OFF position. To turn off the standing
lights, return the headlight switch to the OFF position.
The standing lights cannot be operated when the ignition
switch is in the ON/RUN position.
CAUTION!
Standing lamps are intended for short term use when
parking. If these lights are left on for a long period of
time, your car's battery may drain, causing a possible
starting problem. Assure that the headlamp switch is
in the OFF position when leaving the vehicle.
98 UNDERSTANDING THE FEATURES OF YOUR VEHICLE
Trending: key battery, low oil pressure, fuel cap release, battery replacement, tow bar, wheel alignment, recommended oil
