display CITROEN DS3 2018 Handbook (in English)
[x] Cancel search | Manufacturer: CITROEN, Model Year: 2018, Model line: DS3, Model: CITROEN DS3 2018Pages: 248, PDF Size: 8.79 MB
Page 41 of 248
39
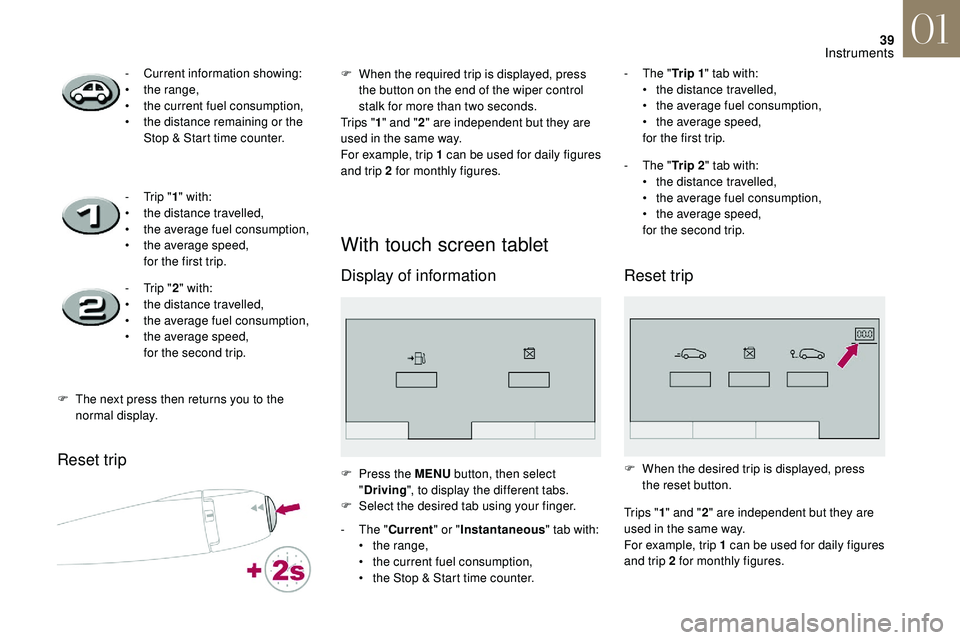
Reset trip
With touch screen tablet
Display of information
- Current information showing:
• t he range,
•
t
he current fuel consumption,
•
t
he distance remaining or the
Stop & Start time counter.
-
T
rip "1" with:
•
t
he distance travelled,
•
t
he average fuel consumption,
•
t
he average speed,
for the first trip.
-
T
rip "2" with:
•
t
he distance travelled,
•
t
he average fuel consumption,
•
t
he average speed,
for the second trip.
F
T
he next press then returns you to the
normal display. F
W hen the required trip is displayed, press
the button on the end of the wiper control
stalk for more than two seconds.
Tr i p s " 1" and " 2" are independent but they are
used in the same way.
For example, trip 1
can be used for daily figures
and trip 2
for monthly figures.
F
P
ress the MENU button, then select
" Driving ", to display the different tabs.
F
S
elect the desired tab using your finger.
-
T
he "Current " or "Instantaneous " tab with:
•
t
he range,
•
t
he current fuel consumption,
•
t
he Stop & Start time counter. -
T he "
Tr i p 1 " tab with:
• t he distance travelled,
•
t
he average fuel consumption,
•
t
he average speed,
for the first trip.
-
T
he "Tr i p 2 " tab with:
•
t
he distance travelled,
•
t
he average fuel consumption,
•
t
he average speed,
for the second trip.
Reset trip
F When the desired trip is displayed, press the reset button.
Tr i p s " 1" and " 2" are independent but they are
used in the same way.
For example, trip 1
can be used for daily figures
and trip 2
for monthly figures.
01
Instruments
Page 42 of 248
40
A few definitions
Range
(miles or km)
The distance which can still be
travelled with the fuel remaining
in the tank (at the average fuel
consumption seen over the last
distance travelled).
This value may fluctuate if a
change
of driving style or terrain results in
a
significant change in the current fuel
consumption.
When the range falls below around 20
miles
(30
km), dashes are displayed. After filling with
at least 5
litres of fuel, the range is recalculated
and is displayed if it exceeds around 60
miles
(10 0
k m).
If dashes instead of figures continue to be
displayed when driving, contact the dealer
network or a
qualified workshop.
Current fuel consumption
(mpg or km/l or l/100 km)
C alculated during the last few
seconds. This function is only displayed from
around 20 mph (30 km/h).
Average fuel consumption
(mpg or km/l or l/100 km)
C alculated since the last time the
trip recorder was reset to zero.
Average speed
(mph or km/h)
Calculated since the last time the
trip recorder was reset to zero.
Distance travelled
(miles or km)
Calculated since the last time the
trip recorder was reset to zero.
Distance remaining to travel
(miles or km)
This is the distance remaining to
travel before the final destination is
reached. It can be input by the user.
If the distance is not entered, dashes
are displayed instead of numbers.
Stop & Start time counter
(minutes/seconds or hours/minutes)
If your vehicle is fitted with Stop &
Start, a time counter adds up the
time spent in STOP mode during
a
j o u r n ey.
It is reset to zero every time the
ignition is switched on using the key.
Date and time adjustment
With monochrome screen A
F Press the MENU button.
F S elect "Display settings" using the buttons
" 5 " or " 6".
F
P
ress " OK" to confirm the selection.
F
S
elect the "Year" function using the buttons
" 5 " or " 6".
F
P
ress " OK" to confirm the selection.
F
D
efine the desired value using the buttons
" 7 " or " 8".
F
P
ress " OK" to confirm the selection.
F
R
estart the procedure for the settings
"Month", "Day", "Time", and "Minutes".
01
Instruments
Page 43 of 248
41
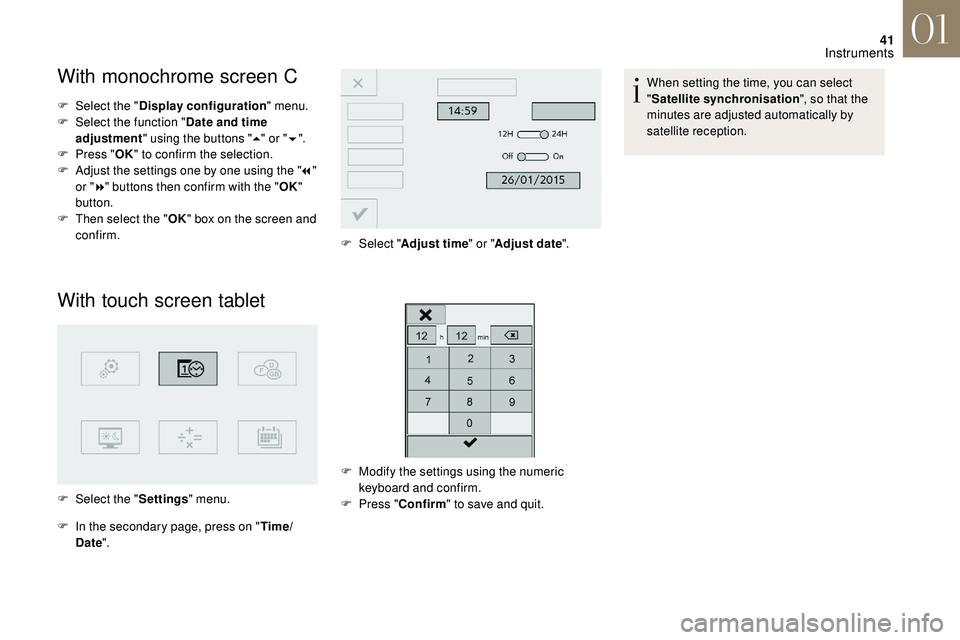
With monochrome screen C
F Select the "Display configuration " menu.
F Sel ect the function " Date and time
adjustment " using the buttons " 5" or " 6".
F
P
ress " OK" to confirm the selection.
F
A
djust the settings one by one using the " 7"
or " 8" buttons then confirm with the " OK"
button.
F
T
hen select the " OK" box on the screen and
confirm.
With touch screen tablet
F Select the " Settings" menu.
F
I
n the secondary page, press on " Time/
Date ". F
Sel
ect "
Adjust time" or " Adjust date". When setting the time, you can select
"
Satellite synchronisation ", so that the
minutes are adjusted automatically by
satellite reception.
F
M
odify the settings using the numeric
keyboard and confirm.
F P ress "Confirm " to save and quit.
01
Instruments
Page 75 of 248
73
For your convenience, the settings are
stored between two starts of the vehicle.
When the engine is cold, the air flow will
only reach its optimum level gradually
to prevent too much cold air being
distributed.
Temperature adjustment
The value shown on the display is a level of
c omfort, not a temperature in degrees Celsius
or Fahrenheit.
Press the 5
and 6 buttons to
change this value. A setting of
around 21
provides optimum
comfort. Nonetheless, depending
on your needs, a setting between
18
and 24 is typical.
This system is designed to operate effectively
in all seasons, with the windows closed.
On entering the vehicle, if the interior is
very cold or very warm, there is no need
to change the value displayed in order to
obtain the comfort required. The system
compensates automatically and corrects
the temperature difference as quickly as
possible.
Automatic visibility programme
For more information on Front demist -
defrost , refer to the corresponding section.
Manual control
It is possible to manually adjust one or more
functions, while keeping the other functions in
automatic mode.
The AUTO symbol goes off.
To return to automatic mode, press the AUTO
button.
Switching to manual mode may result in
some discomfort (temperature, humidity,
odour, misting) and is not optimal for
comfort.
For maximum cooling or heating of the
passenger compartment, it is possible
to exceed the minimum value 14
or the
maximum value 28.
F
P
ress the blue button until " LO" is
displayed or the red button 2 until " HI"
is displayed.
Air conditioning On/Off
Pressing this button stops the air
conditioning.
Switching off may affect comfort levels
(humidity, misting).
Pressing again returns to automatic operation
of the air conditioning. The A/C symbol is
displayed.
Air intake/Air recirculation
For more information on Recirculation of
interior air , refer to the corresponding section.
Air distribution adjustment
Press this button successively
to direct the air flow alternatively
towards:
-
w
indscreen and side windows (demisting or
def r o st ing),
-
w
indscreen, side windows and air vents,
-
w
indscreen, side windows, air vents and
footwells,
-
w
indscreen, side windows and footwells,
-
footwells,
-
a
ir vents and footwells,
-
a
ir vents.
03
Ease of use and comfort
Page 76 of 248
74
Deactivating the system
Press the "empty fan" air flow
button 7 until the fan symbol
disappears.
This action stops all functions of the air
conditioning system.
Temperature is no longer regulated. A slight air
flow can still be felt however, resulting from the
for ward movement of the vehicle.
Pressing the " filled fan" air flow button 7
or
AUTO again reactivates the system with the
values in effect prior to deactivation.
Avoid driving for too long with the system
switched off (risk of misting and air quality
deterioration).
Recirculation of interior air
The intake of exterior air prevents the formation
of mist on the windscreen and side windows.
Interior air recirculation isolates the passenger
compartment from exterior odours and fumes.
This function also allows the desired
temperature in the passenger compartment to
be reached in the shortest time.
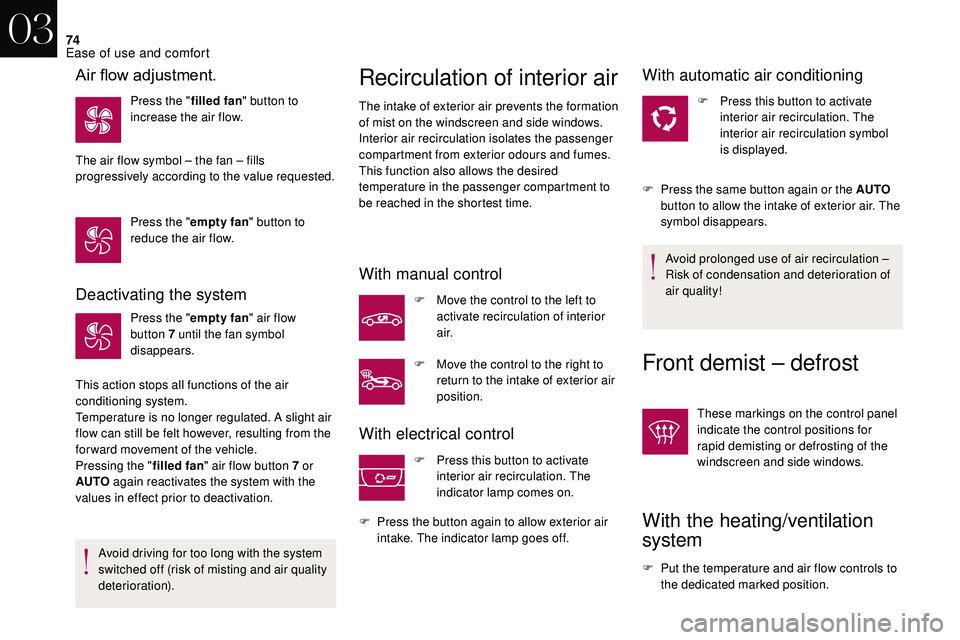
With manual control
F Move the control to the left to activate recirculation of interior
a i r.
F
M
ove the control to the right to
return to the intake of exterior air
position.
With electrical control
F Press this button to activate interior air recirculation. The
indicator lamp comes on.
F
P
ress the button again to allow exterior air
intake. The indicator lamp goes off.
With automatic air conditioning
F Press this button to activate interior air recirculation. The
interior air recirculation symbol
is displayed.
F
P
ress the same button again or the AUTO
button to allow the intake of exterior air. The
symbol disappears.
Avoid prolonged use of air recirculation –
Risk of condensation and deterioration of
air quality!
Front demist – defrost
These markings on the control panel
indicate the control positions for
rapid demisting or defrosting of the
windscreen and side windows.
With the heating/ventilation
system
F Put the temperature and air flow controls to the dedicated marked position.
Air flow adjustment.
Press the " filled fan" button to
increase the air flow.
The air flow symbol – the fan – fills
progressively according to the value requested.
Press the " empty fan" button to
reduce the air flow.
03
Ease of use and comfort
Page 82 of 248
80
It reads the audio file formats (mp3, ogg, wma,
wav, etc.) sent to your audio system, to be
listened to via the vehicle's loudspeakers.
You can manage these files using the steering
mounted controls or the audio system control
panel and display them in the instrument panel
screen.While it is being used, the portable device
can recharge automatically.
12 V accessory socket
F To connect a 12 V accessory (max. power:
120 W), lift the cover and connect a suitable
adaptor. The connection of an unapproved
electrical device, such as a
USB charger,
may adversely affect the operation of
vehicle electrical systems, causing
faults such as poor radio reception or
interference with displays in the screens.
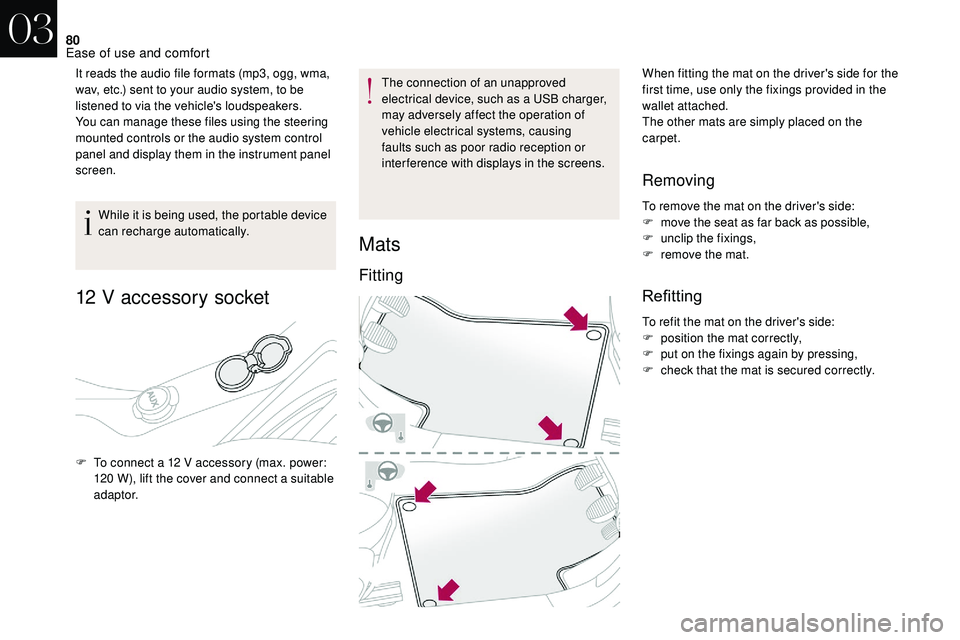
Mats
Fitting
When fitting the mat on the driver's side for the
first time, use only the fixings provided in the
wallet attached.
The other mats are simply placed on the
carpet.
Removing
To remove the mat on the driver's side:
F m ove the seat as far back as possible,
F
un
clip the fixings,
F
r
emove the mat.
Refitting
To refit the mat on the driver's side:
F p osition the mat correctly,
F
p
ut on the fixings again by pressing,
F
c
heck that the mat is secured correctly.
03
Ease of use and comfort
Page 87 of 248
85
Selection of main lighting
mode
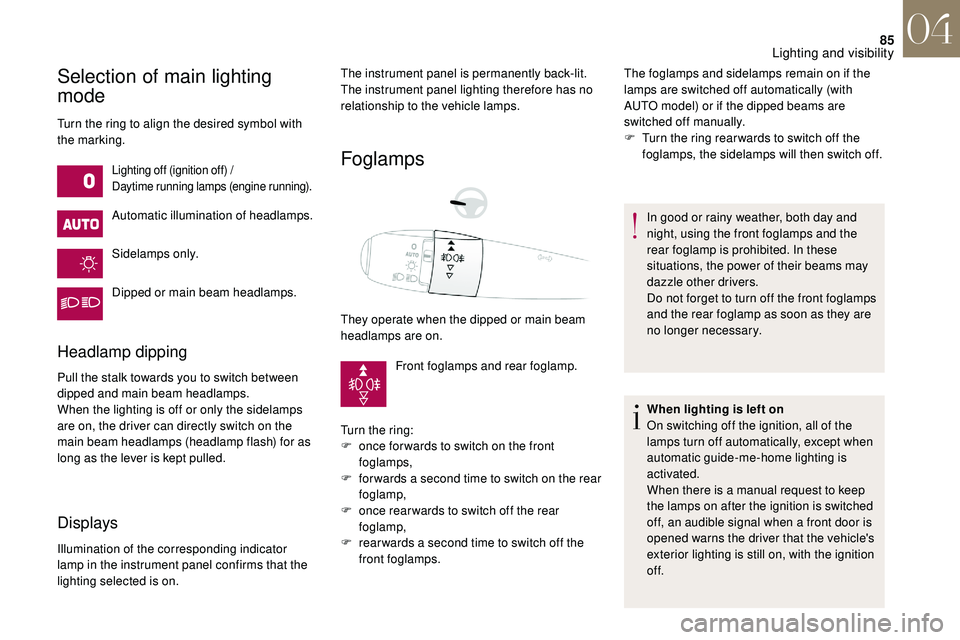
Turn the ring to align the desired symbol with
the marking.
Lighting off (ignition off) /
Daytime running lamps (engine running).
Automatic illumination of headlamps.
Sidelamps only.
Dipped or main beam headlamps.
Headlamp dipping
Pull the stalk towards you to switch between
dipped and main beam headlamps.
When the lighting is off or only the sidelamps
are on, the driver can directly switch on the
main beam headlamps (headlamp flash) for as
long as the lever is kept pulled.
Displays
Illumination of the corresponding indicator
lamp in the instrument panel confirms that the
lighting selected is on.
Foglamps
The instrument panel is permanently back-lit.
The instrument panel lighting therefore has no
relationship to the vehicle lamps.
They operate when the dipped or main beam
headlamps are on.Front foglamps and rear foglamp.
Turn the ring:
F
o
nce for wards to switch on the front
foglamps,
F
f
or wards a second time to switch on the rear
foglamp,
F
o
nce rear wards to switch off the rear
foglamp,
F
r
ear wards a second time to switch off the
front foglamps. The foglamps and sidelamps remain on if the
lamps are switched off automatically (with
AUTO model) or if the dipped beams are
switched off manually.
F
T
urn the ring rear wards to switch off the
foglamps, the sidelamps will then switch off.
In good or rainy weather, both day and
night, using the front foglamps and the
rear foglamp is prohibited. In these
situations, the power of their beams may
dazzle other drivers.
Do not forget to turn off the front foglamps
and the rear foglamp as soon as they are
no longer necessary.
When lighting is left on
On switching off the ignition, all of the
lamps turn off automatically, except when
automatic guide-me-home lighting is
activated.
When there is a
manual request to keep
the lamps on after the ignition is switched
off, an audible signal when a
front door is
opened warns the driver that the vehicle's
exterior lighting is still on, with the ignition
of f.
04
Lighting and visibility
Page 88 of 248
86
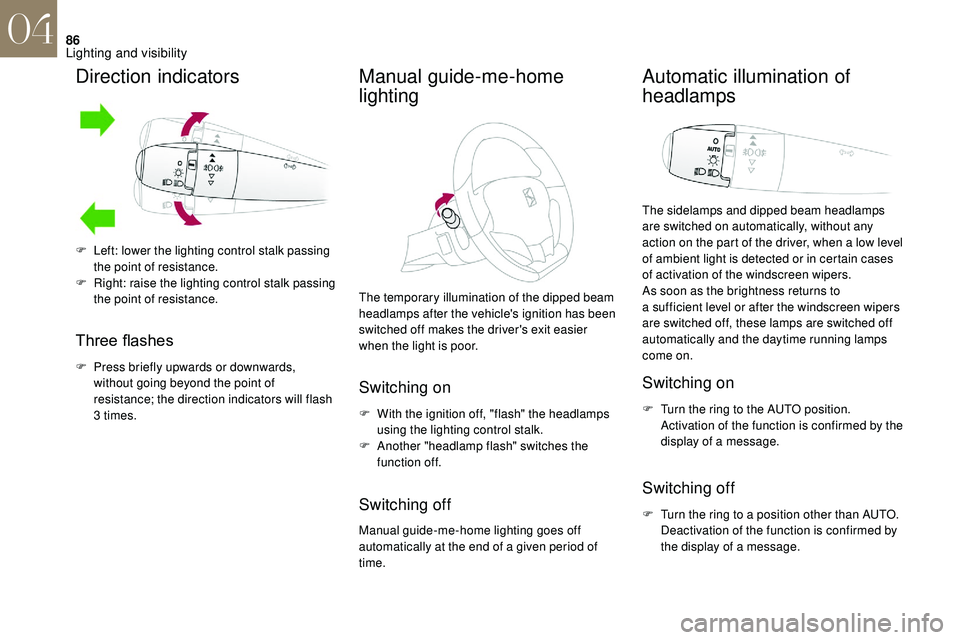
Direction indicators
Three flashes
F Press briefly upwards or downwards, without going beyond the point of
resistance; the direction indicators will flash
3
times.
Manual guide-me-home
lighting
The temporary illumination of the dipped beam
headlamps after the vehicle's ignition has been
switched off makes the driver's exit easier
when the light is poor.
Switching on
F With the ignition off, "flash" the headlamps using the lighting control stalk.
F
A
nother "headlamp flash" switches the
function off.
Switching off
Manual guide-me-home lighting goes off
automatically at the end of a given period of
time.
Automatic illumination of
headlamps
The sidelamps and dipped beam headlamps
are switched on automatically, without any
action on the part of the driver, when a
low level
of ambient light is detected or in certain cases
of activation of the windscreen wipers.
As soon as the brightness returns to
a
sufficient level or after the windscreen wipers
are switched off, these lamps are switched off
automatically and the daytime running lamps
come on.
Switching on
F Turn the ring to the AUTO position. Activation of the function is confirmed by the
display of a
message.
Switching off
F Turn the ring to a position other than AUTO.
Deactivation of the function is confirmed by
the display of a
message.
F
L
eft: lower the lighting control stalk passing
the point of resistance.
F
R
ight: raise the lighting control stalk passing
the point of resistance.
04
Lighting and visibility
Page 89 of 248
87
Operating fault
In the event of a fault with the
s unshine sensor, the lighting comes
on, this warning lamp is displayed
in the instrument panel and/or
a
message appears in the screen,
accompanied by an audible signal.
Contact the dealer network or a
qualified
workshop.
Do not cover the sunshine sensor, linked
with the rain sensor and located in the
centre of the windscreen behind the
interior mirror, as this would disable the
associated functions.
In fog or snow, the sunshine sensor may
detect sufficient light. In this case, the
lighting will not come on automatically.
Automatic guide-me-home
lighting
When the automatic illumination of headlamps
is activated, if the ambient light level is low,
the dipped beam headlamps remain lit when
switching off the ignition.
Programming
Activation, deactivation and the
duration of the guide-me-home
lighting are set in the vehicle
configuration or parameters menu
(except monochrome screen A
where the duration is fixed: 60
s).
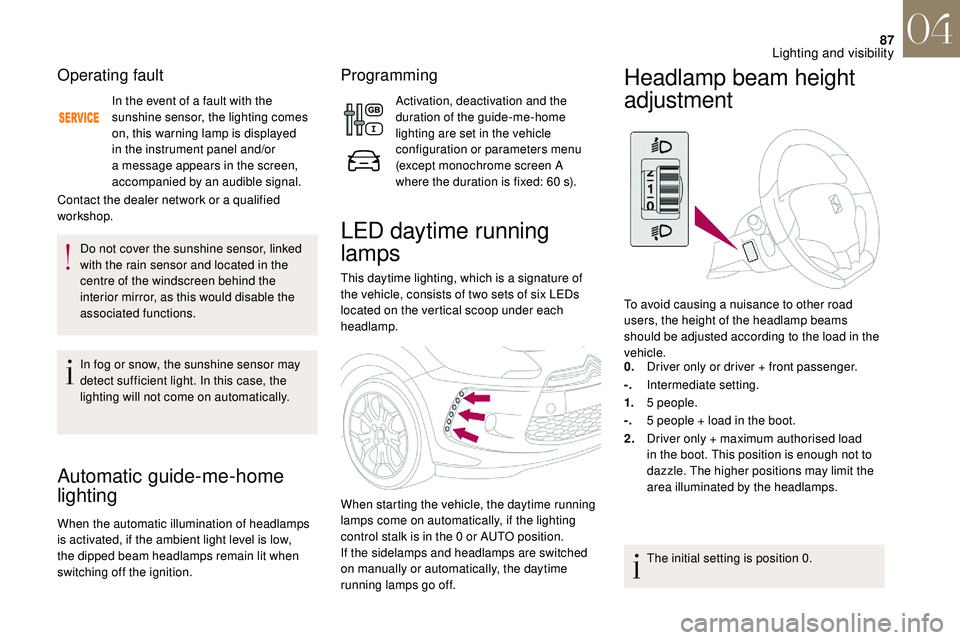
LED daytime running
lamps
This daytime lighting, which is a signature of
t he vehicle, consists of two sets of six LEDs
located on the vertical scoop under each
headlamp.
When starting the vehicle, the daytime running
lamps come on automatically, if the lighting
control stalk is in the 0
or AUTO position.
If the sidelamps and headlamps are switched
on manually or automatically, the daytime
running lamps go off.
Headlamp beam height
adjustment
To avoid causing a nuisance to other road
u sers, the height of the headlamp beams
should be adjusted according to the load in the
vehicle.
0. Driver only or driver + front passenger.
-. Intermediate setting.
1. 5
people.
-. 5
people + load in the boot.
2. Driver only + maximum authorised load
in the boot. This position is enough not to
dazzle. The higher positions may limit the
area illuminated by the headlamps.
The initial setting is position 0.
04
Lighting and visibility
Page 90 of 248
88
Wiper control stalk
The vehicle's front and rear wipers are
designed to improve the driver's visibility
progressively according to the climatic
conditions.
Programming
You can configure automatic wiping for the
front wipers.
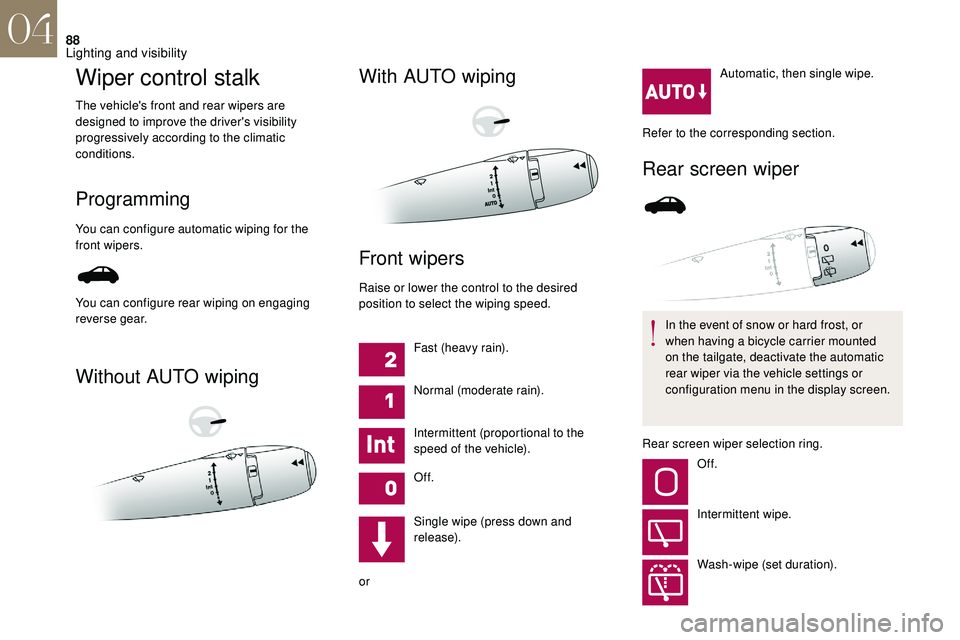
Without AUTO wipingWith AUTO wiping
Front wipers
Raise or lower the control to the desired
position to select the wiping speed.
Fast (heavy rain).
Normal (moderate rain).
Intermittent (proportional to the
speed of the vehicle).
Of f.
Single wipe (press down and
release).
or Automatic, then single wipe.
Refer to the corresponding section.
Rear screen wiper
In the event of snow or hard frost, or
when having a bicycle carrier mounted
on the tailgate, deactivate the automatic
rear wiper via the vehicle settings or
configuration menu in the display screen.
Rear screen wiper selection ring. Of f.
Intermittent wipe.
Wash-wipe (set duration).
You can configure rear wiping on engaging
reverse gear.
04
Lighting and visibility