warning CITROEN DS3 2018 Handbook (in English)
[x] Cancel search | Manufacturer: CITROEN, Model Year: 2018, Model line: DS3, Model: CITROEN DS3 2018Pages: 248, PDF Size: 8.79 MB
Page 31 of 248
29
For more information on the AdBlue®
(BlueHDi engines) , and in particular on
topping up, refer to the corresponding
section.
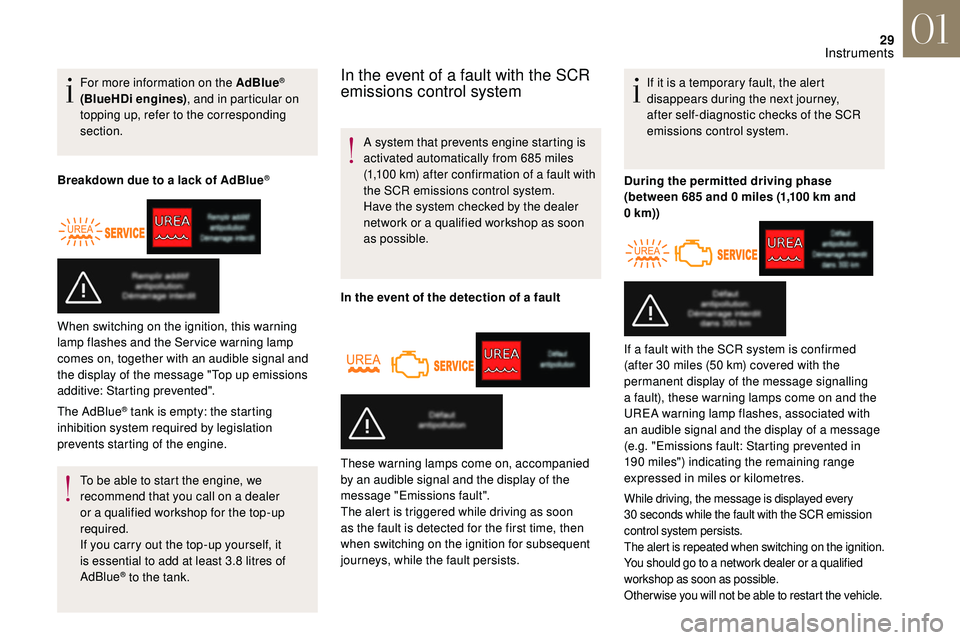
Breakdown due to a
lack of AdBlue
®
The AdBlue® tank is empty: the starting
inhibition system required by legislation
prevents starting of the engine.
To be able to start the engine, we
recommend that you call on a
dealer
or a
qualified workshop for the top-up
required.
If you carry out the top-up yourself, it
is essential to add at least 3.8
litres of
AdBlue
® to the tank.
In the event of a fault with the SCR
e missions control system
A system that prevents engine starting is
activated automatically from 685
miles
(1,100
km) after confirmation of a fault with
the SCR emissions control system.
Have the system checked by the dealer
network or a
qualified workshop as soon
as possible.
In the event of the detection of a
faultIf it is a
temporary fault, the alert
disappears during the next journey,
after self-diagnostic checks of the SCR
emissions control system.
When switching on the ignition, this warning
lamp flashes and the Service warning lamp
comes on, together with an audible signal and
the display of the message "Top up emissions
additive: Starting prevented". These warning lamps come on, accompanied
by an audible signal and the display of the
message "Emissions fault".
The alert is triggered while driving as soon
as the fault is detected for the first time, then
when switching on the ignition for subsequent
journeys, while the fault persists.During the permitted driving phase
(between 685
and 0 miles (1,100 km and
0
km))
If a
fault with the SCR system is confirmed
(after 30
miles (50 km) covered with the
permanent display of the message signalling
a
fault), these warning lamps come on and the
UREA warning lamp flashes, associated with
an audible signal and the display of a
message
(e.g. "Emissions fault: Starting prevented in
190
miles") indicating the remaining range
expressed in miles or kilometres.
While driving, the message is displayed every
30 seconds while the fault with the SCR emission
control system persists.
The alert is repeated when switching on the ignition.
You should go to a
network dealer or a qualified
workshop as soon as possible.
Other wise you will not be able to restart the vehicle.
01
Instruments
Page 32 of 248
30
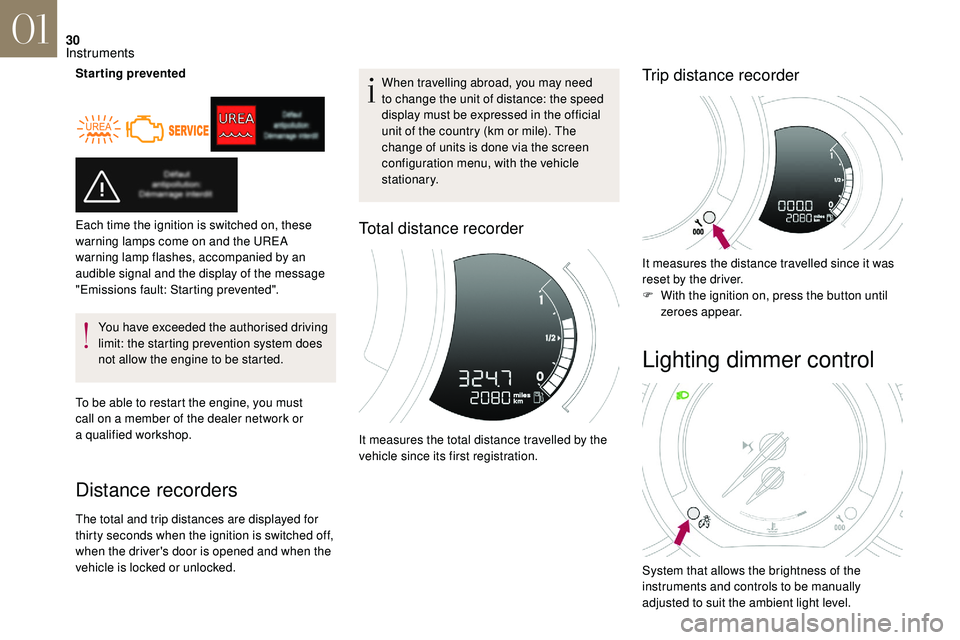
Starting preventedYou have exceeded the authorised driving
limit: the starting prevention system does
not allow the engine to be started.
To be able to restart the engine, you must
call on a
member of the dealer network or
a
qualified workshop.
Distance recorders
The total and trip distances are displayed for
thirty seconds when the ignition is switched off,
when the driver's door is opened and when the
vehicle is locked or unlocked. When travelling abroad, you may need
to change the unit of distance: the speed
display must be expressed in the official
unit of the country (km or mile). The
change of units is done via the screen
configuration menu, with the vehicle
stationary.
Total distance recorder
It measures the total distance travelled by the
vehicle since its first registration.
Trip distance recorder
It measures the distance travelled since it was
reset by the driver.
F
W
ith the ignition on, press the button until
zeroes appear.
Each time the ignition is switched on, these
warning lamps come on and the UREA
warning lamp flashes, accompanied by an
audible signal and the display of the message
"Emissions fault: Starting prevented".
Lighting dimmer control
System that allows the brightness of the
instruments and controls to be manually
adjusted to suit the ambient light level.
01
Instruments
Page 33 of 248
31
Activation
When the lighting is on:
F p ress the button to adjust the brightness of
the lighting for the instruments and controls,
F
r
elease the button when the desired level is
reached.
Deactivation
When the vehicle lighting is off, or in day
mode for vehicles with daytime running lamps,
pressing the button does not have any effect.
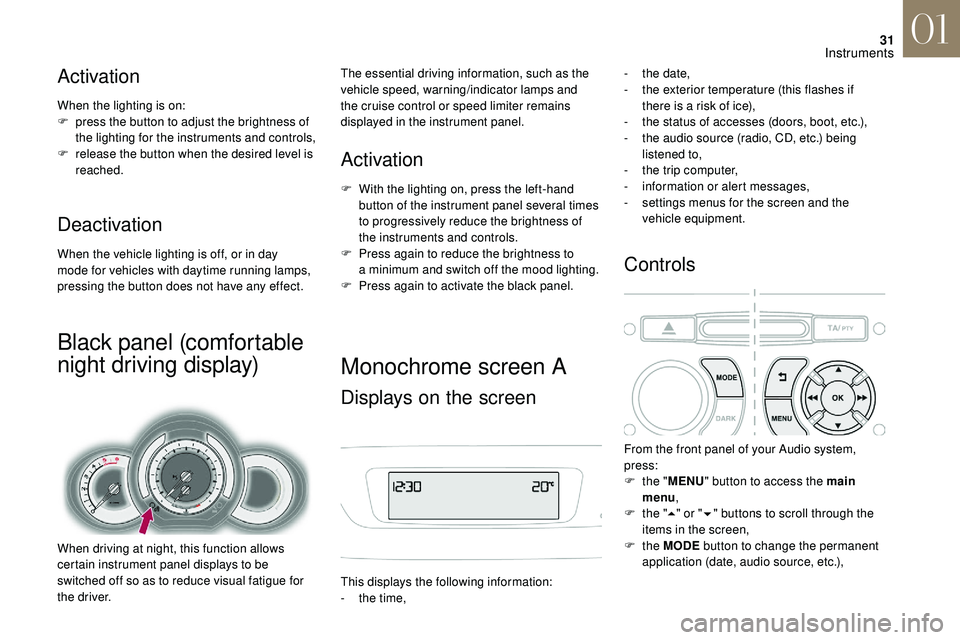
Black panel (comfortable
night driving display)
When driving at night, this function allows
certain instrument panel displays to be
switched off so as to reduce visual fatigue for
the driver.
Activation
F With the lighting on, press the left-hand button of the instrument panel several times
to progressively reduce the brightness of
the instruments and controls.
F
P
ress again to reduce the brightness to
a
minimum and switch off the mood lighting.
F
P
ress again to activate the black panel.
The essential driving information, such as the
vehicle speed, warning/indicator lamps and
the cruise control or speed limiter remains
displayed in the instrument panel.
Monochrome screen A
Displays on the screen
This displays the following information:
-
t he time, -
t
he date,
-
t
he exterior temperature (this flashes if
there is a risk of ice),
-
t
he status of accesses (doors, boot, etc.),
-
t
he audio source (radio, CD, etc.) being
listened to,
-
t
he trip computer,
-
i
nformation or alert messages,
-
s
ettings menus for the screen and the
vehicle equipment.
Controls
From the front panel of your Audio system,
press:
F
t
he "MENU " button to access the main
menu ,
F
t
he "5" or " 6" buttons to scroll through the
items in the screen,
F
the MODE button to change the permanent
application (date, audio source, etc.),
01
Instruments
Page 46 of 248
44
With the remote control
F Press the closed padlock to lock the vehicle completely.
F
P
ress the closed padlock again within five
seconds to deadlock the vehicle.
With the key
F Turn the key to the rear in the driver's door lock to lock the vehicle completely.
F
T
urn the key to the rear again within five
seconds to deadlock the vehicle.
Deadlocking is confirmed by fixed illumination
of the direction indicators for approximately two
seconds.
Depending on your version, the door mirrors
fold at the same time.
Locating your vehicle
F Press the closed padlock to locate your locked vehicle in
a
car park.
This is indicated by lighting of the courtesy
lamps and flashing of the direction indicators
for a
few seconds.
Remote control problem
Following disconnection of the vehicle battery,
replacement of the remote control battery or
in the event of a remote control malfunction,
you can no longer unlock, lock or locate your
vehicle.
F
F
irst of all, use the key in the door lock to
unlock or lock your vehicle.
F
T
hen reinitialise the remote control.
If the problem persists, contact the dealer
network as soon as possible.
Reinitialisation
Battery type: CR1620/3 volts.
F
S
witch off the ignition.
F
T
urn the key to position 2
(Ignition) .
F
P
ress the closed padlock button for a
few
seconds.
F
S
witch off the ignition and remove the key
from the switch.
The remote control is now fully operational
again.
Changing the battery
If the battery is discharged, you are
informed by lighting of this warning lamp in
the instrument panel, an audible signal and
a
message in the multifunction screen.
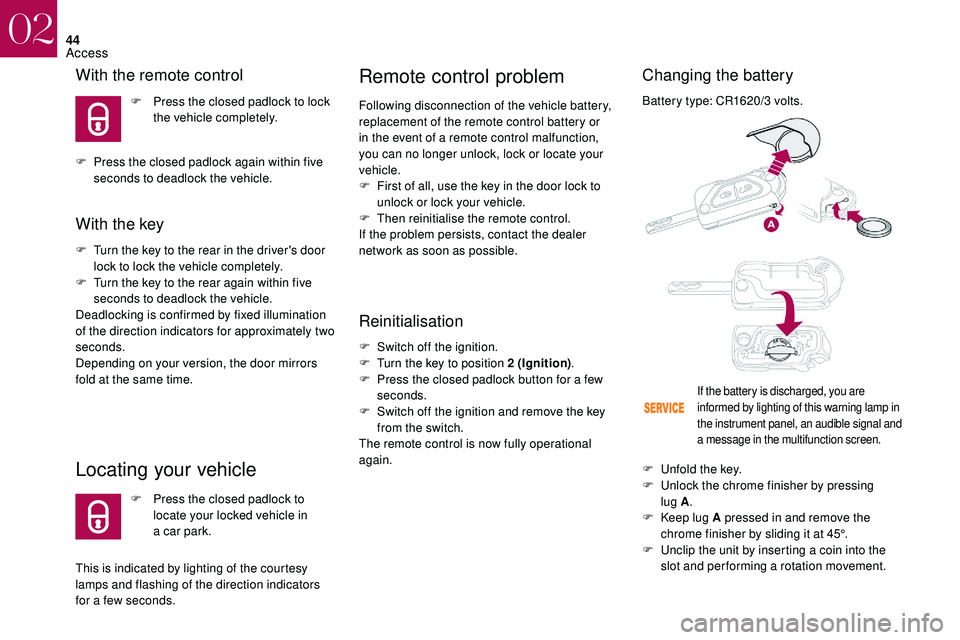
F Unfold the key.
F U nlock the chrome finisher by pressing
lug A .
F
K
eep lug A pressed in and remove the
chrome finisher by sliding it at 45°.
F
U
nclip the unit by inserting a coin into the
slot and per forming a
rotation movement.
02
Access
Page 59 of 248
57
If the vehicle is to be parked outside for
a long period, it is advisable to protect the
roof using a
tarpaulin.
It is advisable to close the roof when you
park the vehicle.
Even if the roof is closed, it is safer not to
leave any valuables inside the vehicle.
Remove the ignition key when you leave
the vehicle to prevent any involuntary roof
movement.
If your vehicle has a
voice command
system, it may be affected if you drive with
the roof open.
Protection of electric motors that control
roof opening and closure: during repeated
opening and closing movements of the
roof, it is possible that heating up of the
electric motors no longer allows the roof to
be opened or closed. Allow the motors to
cool by not trying to move the roof for ten
minutes.Boot
Opening
Closing
- when the engine is running ,
this warning lamp comes on,
accompanied by a
message in
the multifunction screen for a
few
seconds,
-
w
hen the vehicle is moving
(speed higher than 6
mph
(10
km/h)), this warning lamp
comes on, accompanied by an
audible signal and a
message in
the multifunction screen for a
few
seconds.
Back-up control
Unlocking
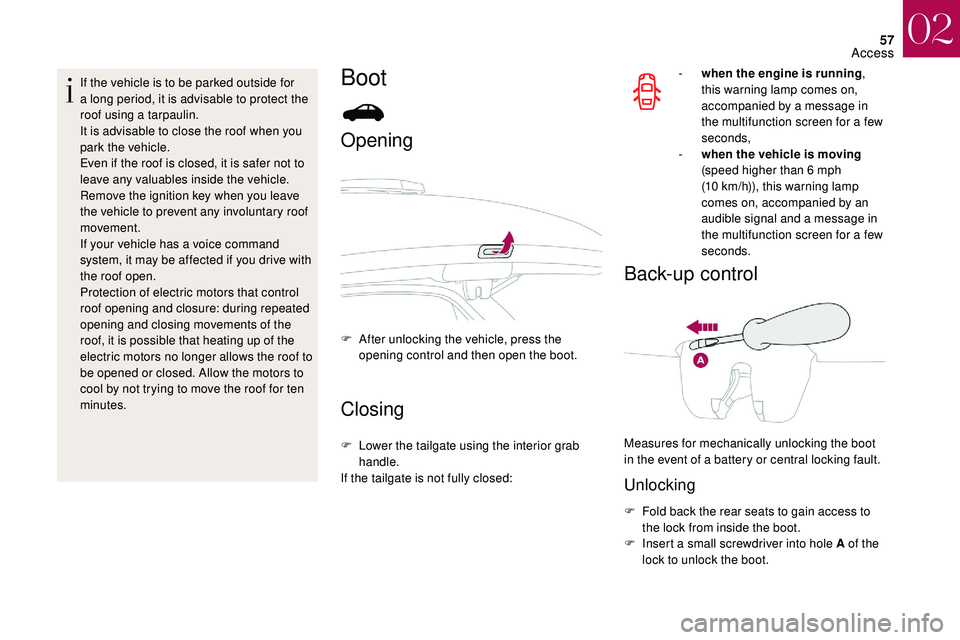
F Fold back the rear seats to gain access to the lock from inside the boot.
F
I
nsert a small screwdriver into hole A of the
lock to unlock the boot.
F
A
fter unlocking the vehicle, press the
opening control and then open the boot.
F
L
ower the tailgate using the interior grab
handle.
If the tailgate is not fully closed: Measures for mechanically unlocking the boot
in the event of a battery or central locking fault.
02
Access
Page 60 of 248
58
Boot
Opening
F After unlocking the vehicle using the remote control or the key, press the opening
control, then raise the tailgate.
Closing
F Lower the tailgate by pressing the centre of its trim.
It is strongly recommended that you do
not lower the tailgate by pressing one of
its sides.
If the tailgate is not fully closed: -
when the engine is running ,
this warning lamp comes on,
accompanied by a
message in
the multifunction screen for a
few
seconds,
- when the vehicle is moving
(speed higher than 6 mph (10 km/h)),
this warning lamp comes on,
accompanied by an audible signal
and a
message in the multifunction
screen for a
few seconds.
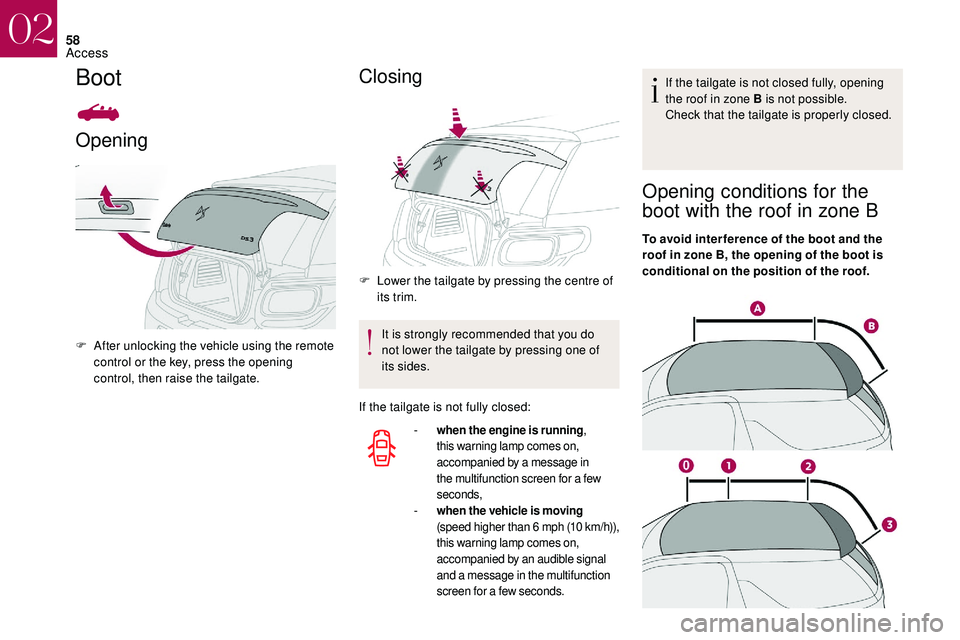
If the tailgate is not closed fully, opening
the roof in zone B is not possible.
Check that the tailgate is properly closed.
Opening conditions for the
boot with the roof in zone B
To avoid inter ference of the boot and the
roof in zone B, the opening of the boot is
conditional on the position of the roof.
02
Access
Page 77 of 248
75
With the manual air
conditioning system
F Put the temperature and air flow controls to the dedicated marked position.
F
P
ut the air intake control to the "Exterior air
intake" position
(manual control moved to the right or
electrical control with indicator lamp off).
F
P
ut the air distribution control to the
"Windscreen" position.
F
S
witch on the air conditioning by pressing
the A /C button; the green indicator lamp in
the button comes on.
With Stop & Start, when the demisting/
defrosting, air conditioning and air flow
functions are activated, STOP mode is not
available.
With automatic air
conditioning
Automatic visibility programme
Press this button to demist or defrost
the windscreen and side windows
as quickly as possible. The indicator
lamp comes on.
The system automatically manages the air
conditioning, air flow and air intake, and
provides optimum distribution towards the
windscreen and side windows.
To stop it, press the button again or press
AUTO , the indicator lamp for the button goes
off and AUTO comes on.
With Stop & Start, when demisting/
defrosting has been activated, STOP
mode is not available.
F
P
ut the air intake control to the "Exterior air
intake" position
(manual control moved to the right or
electrical control with indicator lamp off).
F
P
ut the air distribution control to the
"Windscreen" position.
Rear screen demist -
defrost
The control button is located on the
air conditioning or heating system
control panel.
Switching on
The rear screen demist - defrost can only
operate when the engine is running.
F
P
ress this button to demist /defrost the rear
screen and, depending on version, the door
mirrors. The indicator lamp associated with
the button comes on.
Switching off
Demisting/defrosting switches off automatically
to prevent excessive electrical consumption.
F
I
t is possible to stop the demisting/
defrosting operation before it is switched off
automatically by pressing the button again.
The warning lamp for the button goes out.
If the engine stops before the demisting/
defrosting goes off automatically, it will
resume the next time the engine starts.
Switch off the demisting/defrosting of
the rear screen and door mirrors as
soon as appropriate, as lower current
consumption reduces fuel consumption.
03
Ease of use and comfort
Page 83 of 248
81
To avoid any risk of jamming of the pedals:
- o nly use mats which are suited to the
fixings already present in the vehicle;
these fixings must be used,
-
n
ever place one mat on top of another.
The use of unapproved mats may inter fere
with access to the pedals and hinder the
operation of the cruise control/speed
limiter.
The approved mats have two fixings
located below the seat.
Boot fittings
Rear shelf
To remove the shelf:
F u nhook the two cords,
F
g
ently lift the shelf, then unclip it on each
side.
Rear shelf
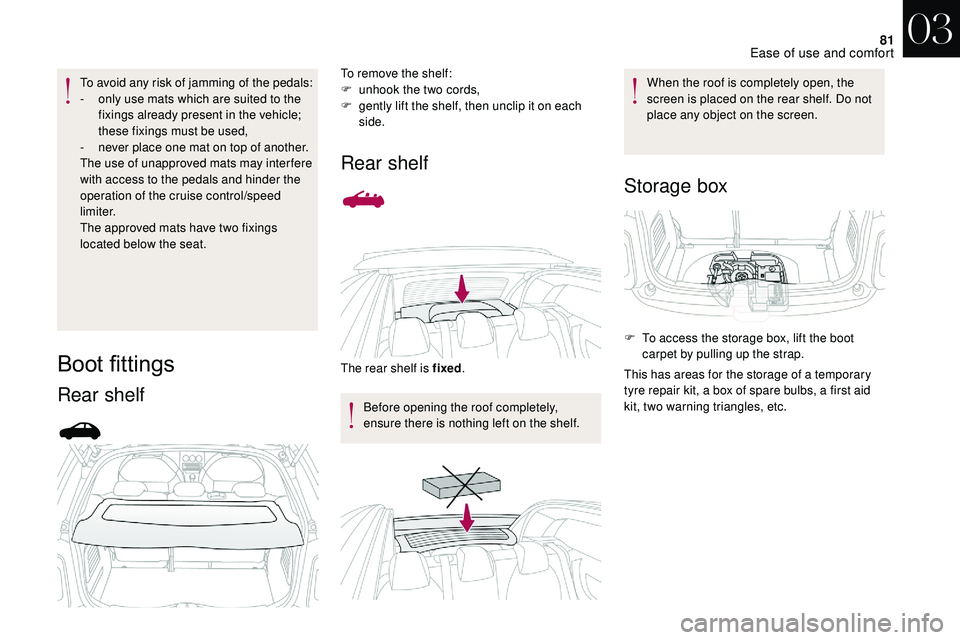
The rear shelf is fixed .
Before opening the roof completely,
ensure there is nothing left on the shelf. When the roof is completely open, the
screen is placed on the rear shelf. Do not
place any object on the screen.
Storage box
F To access the storage box, lift the boot
carpet by pulling up the strap.
This has areas for the storage of a
temporary
tyre repair kit, a box of spare bulbs, a first aid
kit, two warning triangles, etc.
03
Ease of use and comfort
Page 89 of 248
87
Operating fault
In the event of a fault with the
s unshine sensor, the lighting comes
on, this warning lamp is displayed
in the instrument panel and/or
a
message appears in the screen,
accompanied by an audible signal.
Contact the dealer network or a
qualified
workshop.
Do not cover the sunshine sensor, linked
with the rain sensor and located in the
centre of the windscreen behind the
interior mirror, as this would disable the
associated functions.
In fog or snow, the sunshine sensor may
detect sufficient light. In this case, the
lighting will not come on automatically.
Automatic guide-me-home
lighting
When the automatic illumination of headlamps
is activated, if the ambient light level is low,
the dipped beam headlamps remain lit when
switching off the ignition.
Programming
Activation, deactivation and the
duration of the guide-me-home
lighting are set in the vehicle
configuration or parameters menu
(except monochrome screen A
where the duration is fixed: 60
s).
LED daytime running
lamps
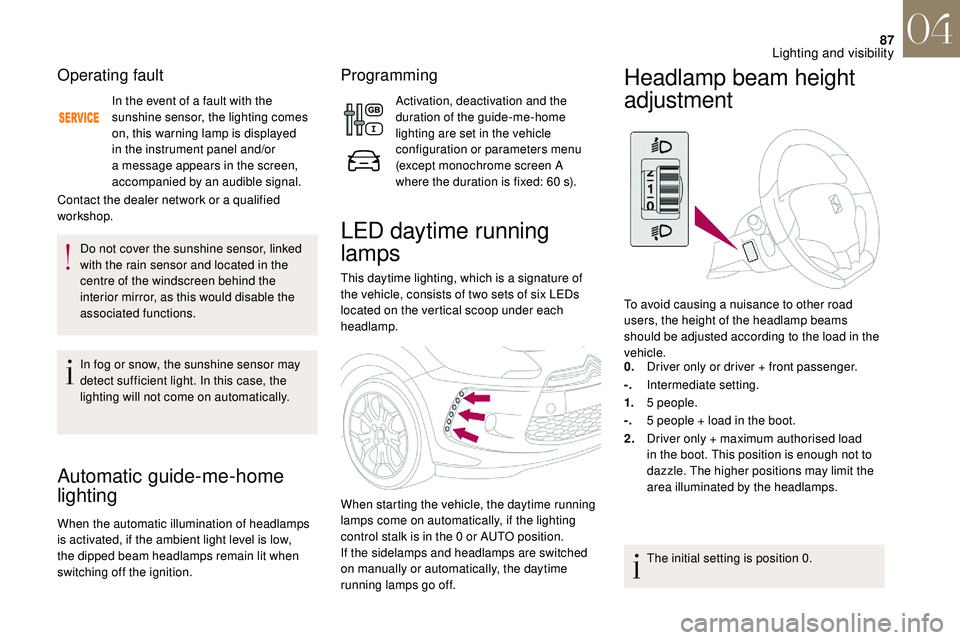
This daytime lighting, which is a signature of
t he vehicle, consists of two sets of six LEDs
located on the vertical scoop under each
headlamp.
When starting the vehicle, the daytime running
lamps come on automatically, if the lighting
control stalk is in the 0
or AUTO position.
If the sidelamps and headlamps are switched
on manually or automatically, the daytime
running lamps go off.
Headlamp beam height
adjustment
To avoid causing a nuisance to other road
u sers, the height of the headlamp beams
should be adjusted according to the load in the
vehicle.
0. Driver only or driver + front passenger.
-. Intermediate setting.
1. 5
people.
-. 5
people + load in the boot.
2. Driver only + maximum authorised load
in the boot. This position is enough not to
dazzle. The higher positions may limit the
area illuminated by the headlamps.
The initial setting is position 0.
04
Lighting and visibility
Page 94 of 248
92
General safety
recommendations
Labels are attached in different places on
your vehicle. They include safety warnings
as well as identification information for
your vehicle. Do not remove them: they
are an integral part of your vehicle.We draw your attention to the following
points:
-
T
he fitting of electrical equipment
or accessories not approved by
DS AUTOMOBILES may cause
excessive current consumption and
faults and failures with the electrical
system of your vehicle. Contact the
dealer network for information on the
range of recommended accessories.
-
A
s a safety measure, access to
the diagnostic socket, used for the
vehicle's electronic systems, is
reser ved strictly for the dealer network
or qualified workshops, equipped
with the special tools required (risk
of malfunctions of the vehicle's
electronic systems that could cause
breakdowns or serious accidents).
The manufacturer cannot be held
responsible if this advice is not
followed.
-
A
ny modification or adaptation
not intended or authorised by
DS
AUTOMOBILES or carried
out without meeting the technical
requirements defined by the
manufacturer will result in the
suspension of the legal and contractual
warranties. Installation of accessory radio
communication transmitters
Before installing a
radio communication
transmitter with an external antenna,
you must contact a member of the
dealer network for the specification
of transmitters which can be fitted
(frequency, maximum power,
aerial position, specific installation
requirements), in line with the Vehicle
Electromagnetic Compatibility
Directive (2004/104/EC).
Depending on country regulations, some
safety equipment may be compulsory:
high visibility safety vests, warning
triangles, breathalysers, spare bulbs,
spare fuses, fire extinguisher, first aid kit,
mud flaps at the rear of the vehicle, etc.
05
Safety