wheel bolt torque DATSUN PICK-UP 1977 Owner's Guide
[x] Cancel search | Manufacturer: DATSUN, Model Year: 1977, Model line: PICK-UP, Model: DATSUN PICK-UP 1977Pages: 537, PDF Size: 35.48 MB
Page 523 of 537

Air
Conditioning
1foo
1t
1
t7
LV
I
1
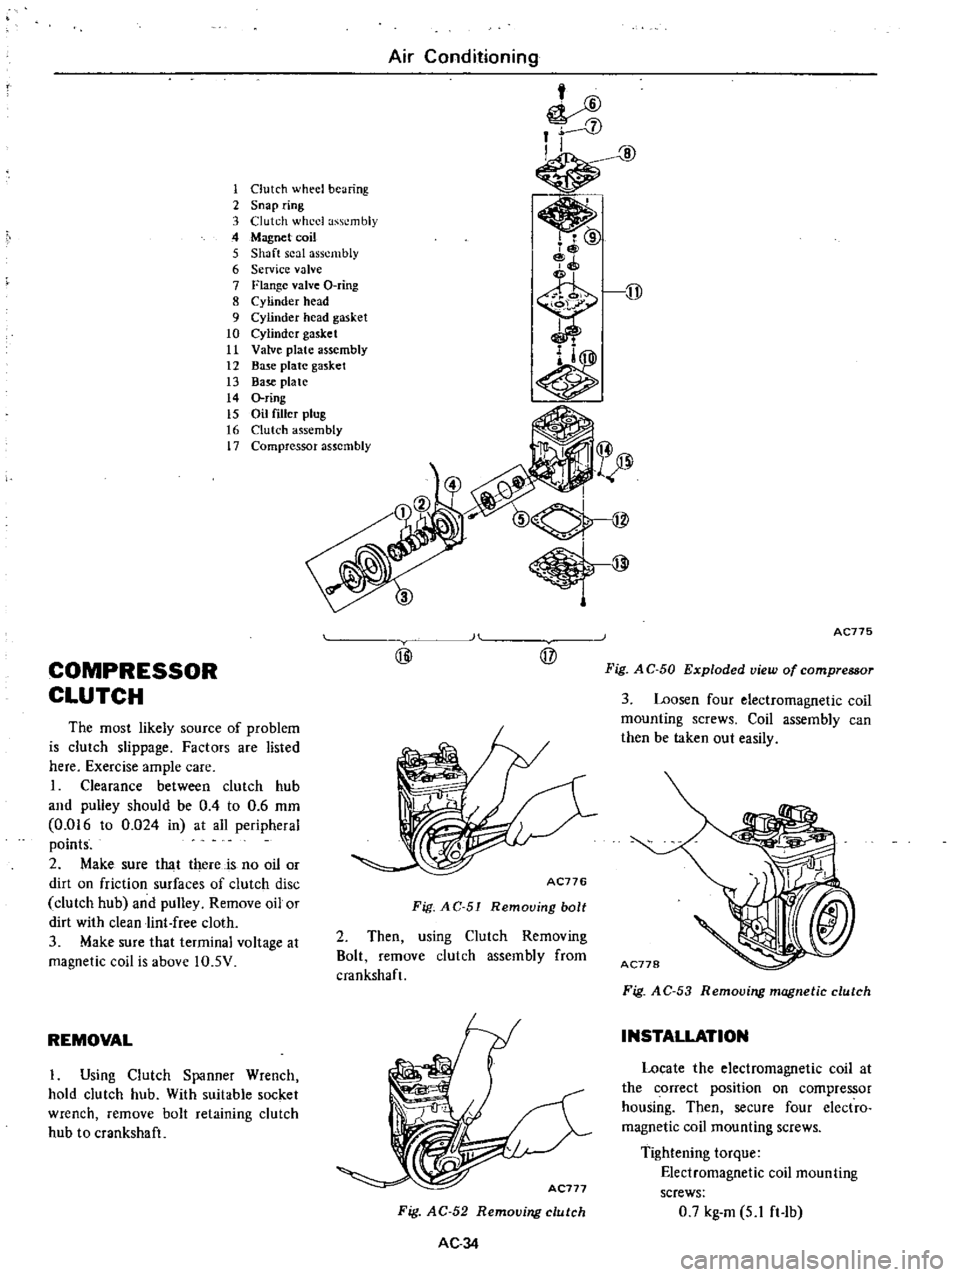
Clutch
wheel
bearing
2
Snap
ring
3
Clutch
wheel
assembly
4
Magnet
coil
5
Shaft
seal
assembly
6
Service
valve
7
Flange
valve
O
ring
8
Cylinder
head
9
Cylinder
head
gasket
10
Cylinder
gasket
11
Valve
plate
assembly
12
Base
plate
gasket
13
Base
plate
14
O
ring
15
Oil
filler
plug
16
Clutch
assembly
17
Compressor
assembly
COMPRESSOR
CLUTCH
The
most
likely
source
of
problem
is
clutch
slippage
Factors
are
listed
here
Exercise
ample
care
I
Clearance
between
clutch
hub
and
pulley
should
be
0
4
to
0
6
mm
0
016
to
0
024
in
at
all
peripheral
points
2
Make
sure
that
there
is
no
oil
or
dirt
on
friction
surfaces
of
clutch
disc
clutch
hub
and
pulley
Remove
oil
or
dirt
with
clean
lint
free
cloth
3
Make
sure
that
terminal
voltage
at
magnetic
coil
is
above
IO
5V
REMOVAL
I
Using
Clutch
Spanner
Wrench
hold
clutch
hub
With
suitable
socket
wrench
remove
bolt
retaining
clutch
hub
to
crankshaft
H
@
@
AC776
Fig
AC
51
Remouing
bolt
2
Then
using
Clutch
Removing
Bolt
remove
clutch
assembly
from
cmnkshaft
Fig
AC
52
Removing
clutch
AC34
AC775
Fig
A
C
50
Exploded
view
of
compressor
3
Loosen
four
electromagnetic
coil
mounting
screws
Coil
assembly
can
then
be
taken
out
easily
Fig
A
C
53
Removing
magnetic
clutch
INSTALLATION
Locate
the
electromagnetic
coil
at
the
correct
position
on
compressor
housing
Then
secure
four
electro
magnetic
coil
mounting
screws
Tightening
torque
Electromagnetic
coil
mounting
screws
0
7
kg
m
5
1
ft
Ib
Page 524 of 537

2
Install
the
clutch
assembly
on
the
crankshaft
Note
Key
should
be
set
on
crank
shaft
before
installing
clutch
assem
bly
3
Using
Clutch
Spanner
Wrench
hold
clutch
hub
With
socket
wrench
secure
clutch
hub
securing
bolt
Tightening
torque
Clutch
hub
securing
bolt
1
5
kg
m
II
ft
lb
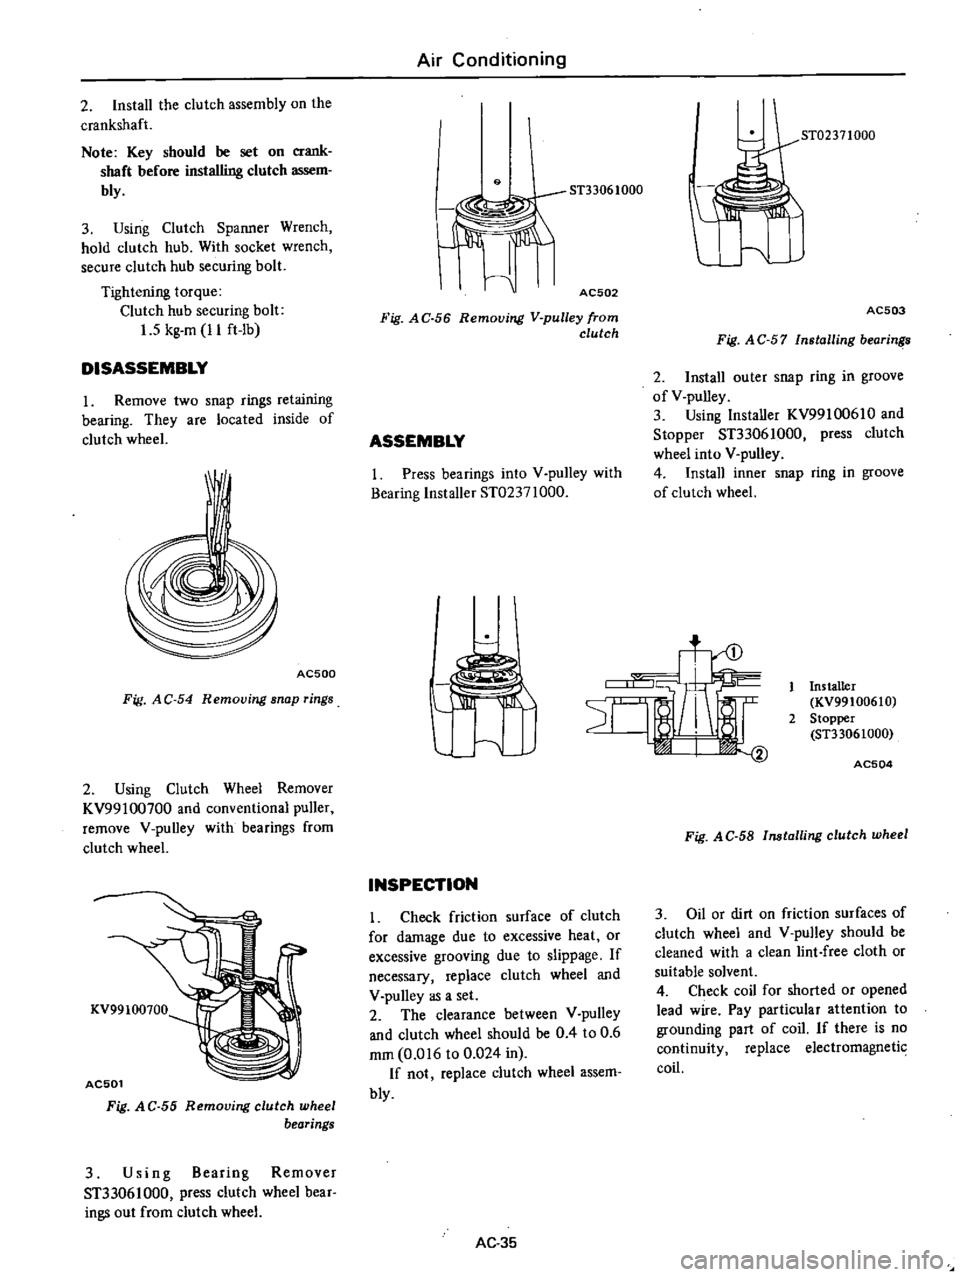
DISASSEMBLY
1
Remove
two
snap
rings
retaining
bearing
They
are
located
inside
of
clutch
wheel
AC500
Fig
AC
54
Removing
snap
rings
2
Using
Clutch
Wheel
Remover
KV99100700
and
conventional
puller
remove
V
pulley
with
bearings
from
clutch
wheel
KV99100700
AC501
Fig
A
C
55
Removing
clutch
wheel
bearings
3
Using
Bearing
Remover
ST33061000
press
clutch
wheel
bear
ings
out
from
clutch
wheel
Air
Conditioning
9
AC502
Fig
AC
56
Removing
V
pulley
from
clutch
ASSEMBLY
I
Press
bearings
into
V
pulley
with
Bearing
Installer
ST02371000
ST02371000
AC503
Fig
A
C
57
Installing
bearin
2
Install
outer
snap
ring
in
groove
of
V
pulley
3
Using
Installer
KV99100610
and
Stopper
ST33061000
press
clutch
wheel
into
V
pulley
4
Install
inner
snap
ring
in
groove
of
clutch
wheel
t
INSPECTION
Check
friction
surface
of
clutch
for
damage
due
to
excessive
heat
or
excessive
grooving
due
to
slippage
If
necessary
replace
clutch
wheel
and
V
pulley
as
a
set
2
The
clearance
between
V
pulley
and
clutch
wheel
should
be
0
4
to
0
6
mm
0
016
to
0
024
in
If
not
replace
clutch
wheel
assem
bly
AC
35
Installer
KV99100610
2
Stopper
ST33061000
AC504
Fig
AC
58
Installing
clutch
wheel
3
Oil
or
dirt
on
friction
surfaces
of
clutch
wheel
and
V
pulley
should
be
cleaned
with
a
clean
lint
free
cloth
or
suitable
solvent
4
Check
coil
for
shorted
or
opened
lead
wire
Pay
particular
attention
to
grounding
part
of
coil
If
there
is
no
continuity
replace
electromagnetic
coil