battery FIAT FIORINO 2017 Owner handbook (in English)
[x] Cancel search | Manufacturer: FIAT, Model Year: 2017, Model line: FIORINO, Model: FIAT FIORINO 2017Pages: 272, PDF Size: 5.87 MB
Page 6 of 272
READ THIS CAREFULLY!
REFUELLING
Petrol engines: only refuel with unleaded petrol
with an octane rating (RON) of no less than
95 conforming to the European specification EN
228.
Diesel engines: only use diesel fuel for motor
vehicles conforming to the European specification
EN 590. The use of other products or mixtures
may damage the engine beyond repair and
consequently invalidate the warranty, depending
on the damage caused.
STARTING THE ENGINE
Petrol engines: make sure that the handbrake is
engaged, set the gearshift lever to neutral, fully
depress the clutch without pressing the
accelerator, then turn the ignition key to AVV
and release it as soon as the engine has started.
Diesel engines: Turn the ignition key to MAR and
wait for the warning light
to go out. Turn
the ignition key to AVV and release as soon as
the engine starts.
PARKING ON FLAMMABLE MATERIAL
The catalytic converter develops high
temperatures during operation. Do not park the
vehicle on grass, dry leaves, pine needles or
other flammable material as this constitutes a fire
hazard.RESPECTING THE ENVIRONMENT
The vehicle is fitted with a system that allows
continuous diagnosis of the emission-related
components in order to help protect the
environment.
ELECTRICAL ACCESSORIES
If, after buying the vehicle, you decide to add
electrical accessories (with the risk of gradually
draining the battery), visit a Fiat Dealership. They
can calculate the overall electrical requirement
and check that the electrical system of the
vehicle can support the required load.
SCHEDULED SERVICING
Correct maintenance is essential for ensuring the
vehicle stays in tip-top condition and retains its
safety features, its environmental friendliness and
low running costs for a long time to come.
THE OWNER'S HANDBOOK CONTAINS…
... important information, advise and warnings for
correct use, driving safety and maintenance of
your vehicle over time. Particular attention
should be paid to information marked with the
following symbols:
(personal safety),(environmental protection),(car integrity).
Page 15 of 272
IMPORTANT During this operation the window
ant-crush safety system is inhibited.
Unlocking/locking the load compartment
from inside the vehicle (Cargo version)
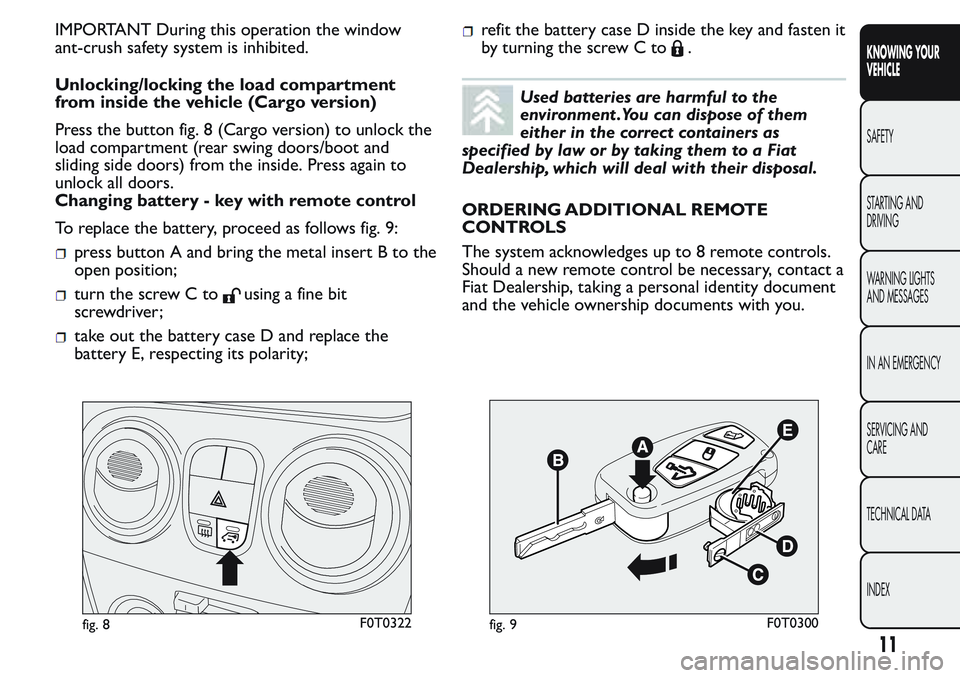
Press the button fig. 8 (Cargo version) to unlock the
load compartment (rear swing doors/boot and
sliding side doors) from the inside. Press again to
unlock all doors.
Changing battery - key with remote control
To replace the battery, proceed as follows fig. 9:
press button A and bring the metal insert B to the
open position;
turn the screw C tousing a fine bit
screwdriver;
take out the battery case D and replace the
battery E, respecting its polarity;
refit the battery case D inside the key and fasten it
by turning the screw C to
.
Used batteries are harmful to the
environment .You can dispose of them
either in the correct containers as
specified by law or by taking them to a Fiat
Dealership, which will deal with their disposal.
ORDERING ADDITIONAL REMOTE
CONTROLS
The system acknowledges up to 8 remote controls.
Should a new remote control be necessary, contact a
Fiat Dealership, taking a personal identity document
and the vehicle ownership documents with you.
fig. 8F0T0322fig. 9F0T0300
11
KNOWING YOUR
VEHICLE
SAFETY
STARTING AND
DRIVING
WARNING LIGHTS
AND MESSAGES
IN AN EMERGENCY
SERVICING AND
CARE
TECHNICAL DATA
INDEX
Page 16 of 272
DEAD LOCK
(for versions/markets, where provided)
This security device prevents the opening of the
doors from inside the passenger compartment
if there has been a break-in attempt (e.g. a window
has been broken).
Dead lock therefore offers the best possible
protection against break-in attempts. We
recommend engaging it whenever the vehicle is
parked and left unattended.
WARNING
Once the dead lock system is engaged it
is impossible to open the doors from
inside the vehicle. Before engaging the system
please therefore check that there is no one left
on board.
WARNING
If the remote control battery is flat , the
system can be engaged by inser ting
the metal key in the door lock as described
previously: in this case, the device only remains
active for the rear doors.Switching the device on
The system is automatically enabled on all the doors
by pressing button
twice on the key with remote
control.
The direction indicators flash twice to let you know
that the device is active.
If one or more of the doors is not perfectly shut, the
dead lock device will not be activated, thus
preventing a person getting into the car through the
open door and, on shutting, it, remaining stuck
inside the passenger compartment.
Switching the device off
The system is disabled automatically on every door
when:
by unlocking the doors;
by turning the ignition key to the ON position.
12
KNOWING YOUR
VEHICLE
SAFETY
STARTING AND
DRIVING
WARNING LIGHTS
AND MESSAGES
IN AN EMERGENCY
SERVICING AND
CARE
TECHNICAL DATA
INDEX
Page 17 of 272
ALARM
(for versions/markets, where provided)
The alarm, in addition to all the previously described
remote control functions, is controlled by the
receiver located under the dashboard near the fuse
box.
ALARM TRIPPING
The alarm trips in the following cases:
unauthorised opening of a door, the bonnet, the
tailgate or a sliding side door (if present)
(perimeter protection)
unauthorized operation of the starting device (key
turned on using a key that is not enabled)
cutting of the battery leads
moving presence inside the passenger
compartment (volumetric protection)
anomalous lifting/tilting of the vehicle.
Depending on the market, the activation of the alarm
causes the activation of the siren and the direction
indicators (for about 26 seconds). Alarm tripping and
the number of cycles depend on the sales market.
There are a maximum number of acoustic/visual
cycles. When this is reached the system returns to
normal operation.
Volumetric and antilifting protections are disabled by
pressing the control button installed on the front
dashboard (see paragraph "Antilift protections).IMPORTANT The engine immobilizer function is
ensured by the Fiat CODE which is automatically
activated when the key is extracted from the ignition.
TURNING THE ALARM ON
With the doors and bonnet closed and the ignition
key either turned to STOP or removed, point the
key with the remote control towards the vehicle and
press and release button
.
Except for some markets, the system produces an
acoustic warning (beep) and enables door locking.
A self-diagnostic stage precedes the turning on of the
alarm: if a fault is detected, the system produces
another acoustic signal.
In this case switch off the alarm by pressing
,
check that all the doors, bonnet and tailgate are
closed correctly; then switch the alarm back on by
pressing
.
If a door or the bonnet is not properly shut, it will
be excluded from the testing by the alarm system.
A fault has occurred in system operation if the alarm
produces an acoustic signal even when the doors,
bonnet and boot are correctly closed. Go to a
Fiat Dealership.
IMPORTANT The alarm does not come on when the
central locking is activated using the metal insert in
the key.
IMPORTANT The alarm is configured to comply with
the regulations existing in different countries.
13
KNOWING YOUR
VEHICLE
SAFETY
STARTING AND
DRIVING
WARNING LIGHTS
AND MESSAGES
IN AN EMERGENCY
SERVICING AND
CARE
TECHNICAL DATA
INDEX
Page 20 of 272
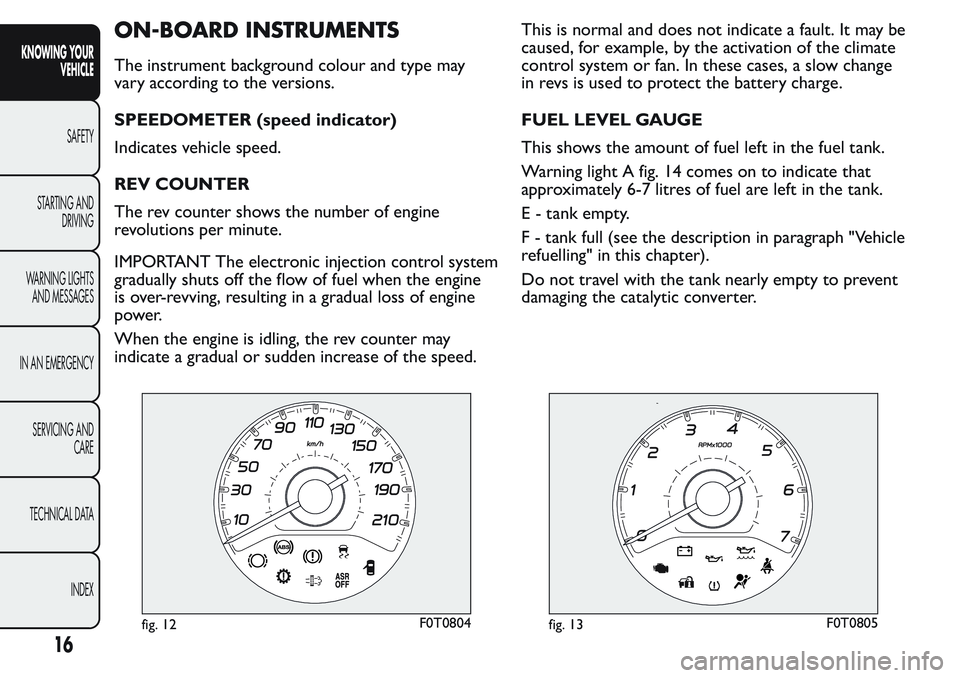
ON-BOARD INSTRUMENTS
The instrument background colour and type may
vary according to the versions.
SPEEDOMETER (speed indicator)
Indicates vehicle speed.
REV COUNTER
The rev counter shows the number of engine
revolutions per minute.
IMPORTANT The electronic injection control system
gradually shuts off the flow of fuel when the engine
is over-revving, resulting in a gradual loss of engine
power.
When the engine is idling, the rev counter may
indicate a gradual or sudden increase of the speed.This is normal and does not indicate a fault. It may be
caused, for example, by the activation of the climate
control system or fan. In these cases, a slow change
in revs is used to protect the battery charge.
FUEL LEVEL GAUGE
This shows the amount of fuel left in the fuel tank.
Warning light A fig. 14 comes on to indicate that
approximately 6-7 litres of fuel are left in the tank.
E - tank empty.
F - tank full (see the description in paragraph "Vehicle
refuelling" in this chapter).
Do not travel with the tank nearly empty to prevent
damaging the catalytic converter.
fig. 12F0T0804fig. 13F0T0805
16
KNOWING YOUR
VEHICLE
SAFETY
STARTING AND
DRIVING
WARNING LIGHTS
AND MESSAGES
IN AN EMERGENCY
SERVICING AND
CARE
TECHNICAL DATA
INDEX
Page 39 of 272
“manual” resetting by the user, by pressing the
relevant button;
automatically when the distance travelled reaches
9,999.9 km (miles) or when the journey time
reaches 99.59:59 (99 hours and 59 minutes);
disconnection/reconnection of the battery.
IMPORTANT The reset operation when “Trip A”
details are being displayed only resets the
information associated with this function.
IMPORTANT The reset operation when “Trip B”
details are being displayed resets only the
information associated with this function.
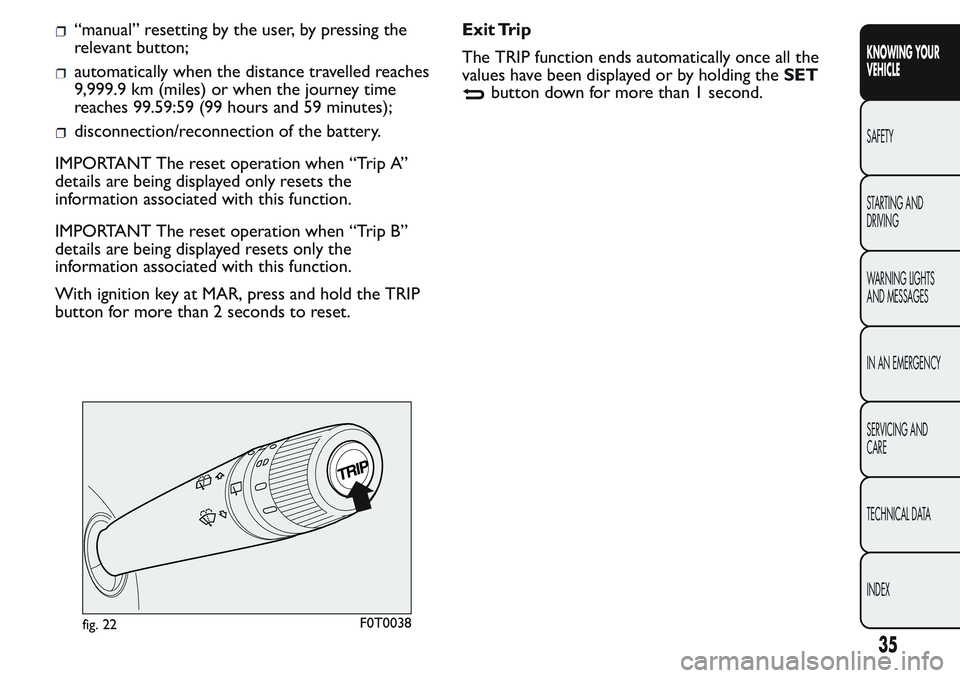
With ignition key at MAR, press and hold the TRIP
button for more than 2 seconds to reset.Exit Trip
The TRIP function ends automatically once all the
values have been displayed or by holding theSET
button down for more than 1 second.
fig. 22F0T0038
35
KNOWING YOUR
VEHICLE
SAFETY
STARTING AND
DRIVING
WARNING LIGHTS
AND MESSAGES
IN AN EMERGENCY
SERVICING AND
CARE
TECHNICAL DATA
INDEX
Page 53 of 272
knob A turned to blue section
take the slider B to
turn knob C to the required speed
turn knob D to
INTERNAL AIR RECIRCULATION
ACTIVATION
Take the slider B to
.
It is advisable to switch the internal air recirculation
on while standing in queues or in tunnels to prevent
the introduction of polluted air.
Do not use the function for a long time, particularly
if there are several passengers on board, to prevent
the windows from steaming up.
IMPORTANT The internal air recirculation system
makes it possible to reach the required heating
or cooling conditions more quickly. Do not use the
internal air recirculation function on rainy/cold
days to avoid the possibility of the windows misting.
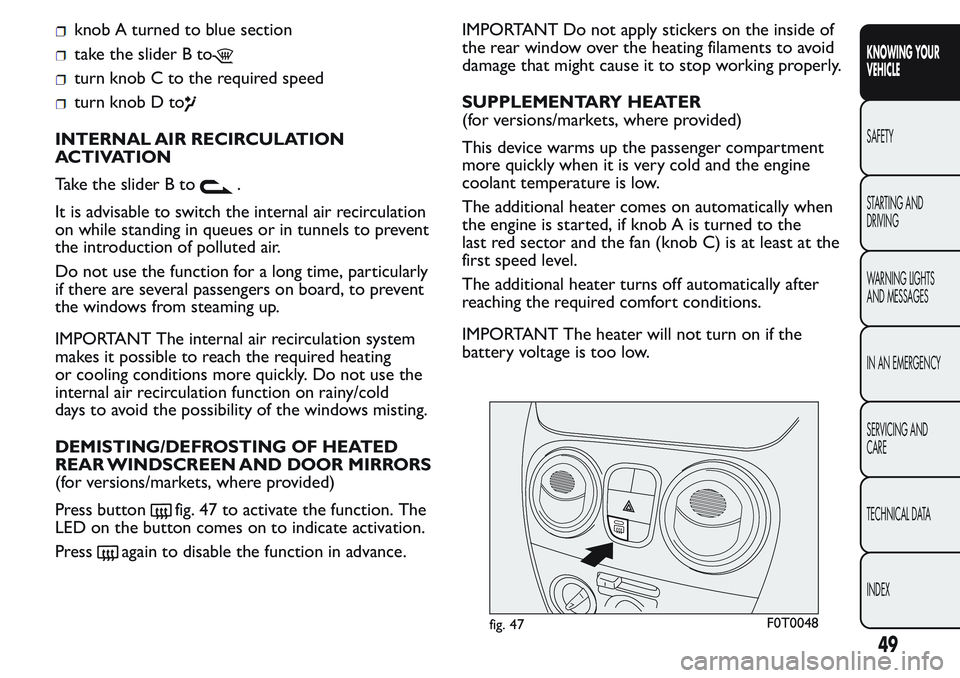
DEMISTING/DEFROSTING OF HEATED
REAR WINDSCREEN AND DOOR MIRRORS
(for versions/markets, where provided)
Press button
fig. 47 to activate the function. The
LED on the button comes on to indicate activation.
Press
again to disable the function in advance.IMPORTANT Do not apply stickers on the inside of
the rear window over the heating filaments to avoid
damage that might cause it to stop working properly.
SUPPLEMENTARY HEATER
(for versions/markets, where provided)
This device warms up the passenger compartment
more quickly when it is very cold and the engine
coolant temperature is low.
The additional heater comes on automatically when
the engine is started, if knob A is turned to the
last red sector and the fan (knob C) is at least at the
first speed level.
The additional heater turns off automatically after
reaching the required comfort conditions.
IMPORTANT The heater will not turn on if the
battery voltage is too low.
fig. 47F0T0048
49
KNOWING YOUR
VEHICLE
SAFETY
STARTING AND
DRIVING
WARNING LIGHTS
AND MESSAGES
IN AN EMERGENCY
SERVICING AND
CARE
TECHNICAL DATA
INDEX
Page 56 of 272
turn knob C to
take the slider B to
turn knob D to
press knob C.
Adjusting cooling
Proceed as follows:
take the slider B to
turn knob A rightwards to increase the
temperature
turn knob C leftwards to reduce the fan speed.
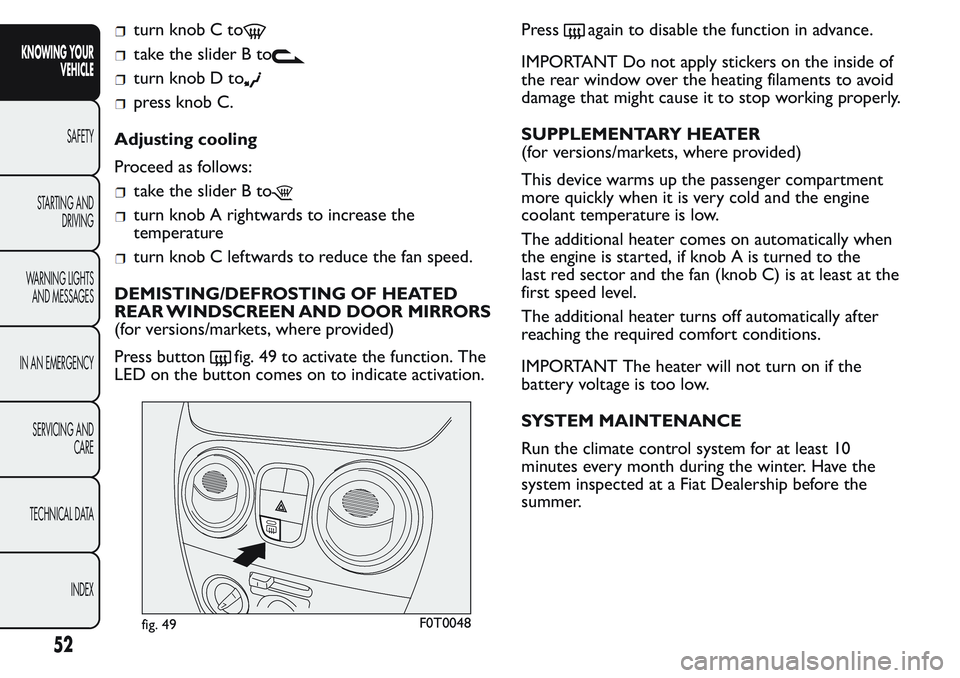
DEMISTING/DEFROSTING OF HEATED
REAR WINDSCREEN AND DOOR MIRRORS
(for versions/markets, where provided)
Press button
fig. 49 to activate the function. The
LED on the button comes on to indicate activation.Press
again to disable the function in advance.
IMPORTANT Do not apply stickers on the inside of
the rear window over the heating filaments to avoid
damage that might cause it to stop working properly.
SUPPLEMENTARY HEATER
(for versions/markets, where provided)
This device warms up the passenger compartment
more quickly when it is very cold and the engine
coolant temperature is low.
The additional heater comes on automatically when
the engine is started, if knob A is turned to the
last red sector and the fan (knob C) is at least at the
first speed level.
The additional heater turns off automatically after
reaching the required comfort conditions.
IMPORTANT The heater will not turn on if the
battery voltage is too low.
SYSTEM MAINTENANCE
Run the climate control system for at least 10
minutes every month during the winter. Have the
system inspected at a Fiat Dealership before the
summer.
fig. 49F0T0048
52
KNOWING YOUR
VEHICLE
SAFETY
STARTING AND
DRIVING
WARNING LIGHTS
AND MESSAGES
IN AN EMERGENCY
SERVICING AND
CARE
TECHNICAL DATA
INDEX
Page 63 of 272
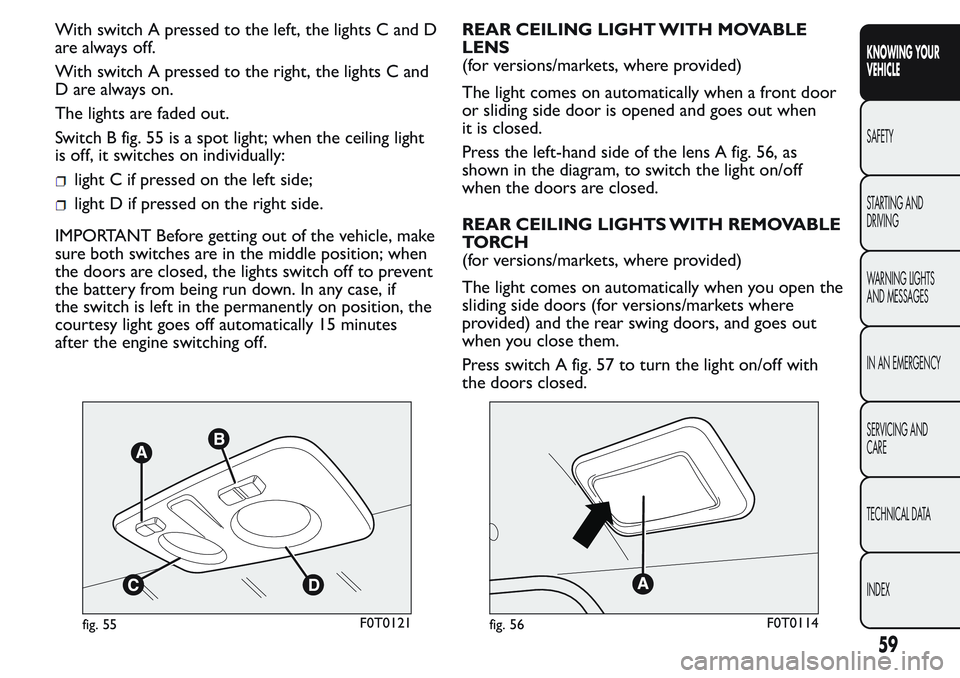
With switch A pressed to the left, the lights C and D
arealwaysoff.
With switch A pressed to the right, the lights C and
D are always on.
The lights are faded out.
Switch B fig. 55 is a spot light; when the ceiling light
is off, it switches on individually:
light C if pressed on the left side;
light D if pressed on the right side.
IMPORTANT Before getting out of the vehicle, make
sure both switches are in the middle position; when
the doors are closed, the lights switch off to prevent
the battery from being run down. In any case, if
the switch is left in the permanently on position, the
courtesy light goes off automatically 15 minutes
after the engine switching off.REAR CEILING LIGHT WITH MOVABLE
LENS
(for versions/markets, where provided)
The light comes on automatically when a front door
or sliding side door is opened and goes out when
it is closed.
Press the left-hand side of the lens A fig. 56, as
shown in the diagram, to switch the light on/off
when the doors are closed.
REAR CEILING LIGHTS WITH REMOVABLE
TO RC H
(for versions/markets, where provided)
The light comes on automatically when you open the
sliding side doors (for versions/markets where
provided) and the rear swing doors, and goes out
when you close them.
Press switch A fig. 57 to turn the light on/off with
the doors closed.
fig. 55F0T0121fig. 56F0T0114
59
KNOWING YOUR
VEHICLE
SAFETY
STARTING AND
DRIVING
WARNING LIGHTS
AND MESSAGES
IN AN EMERGENCY
SERVICING AND
CARE
TECHNICAL DATA
INDEX
Page 64 of 272
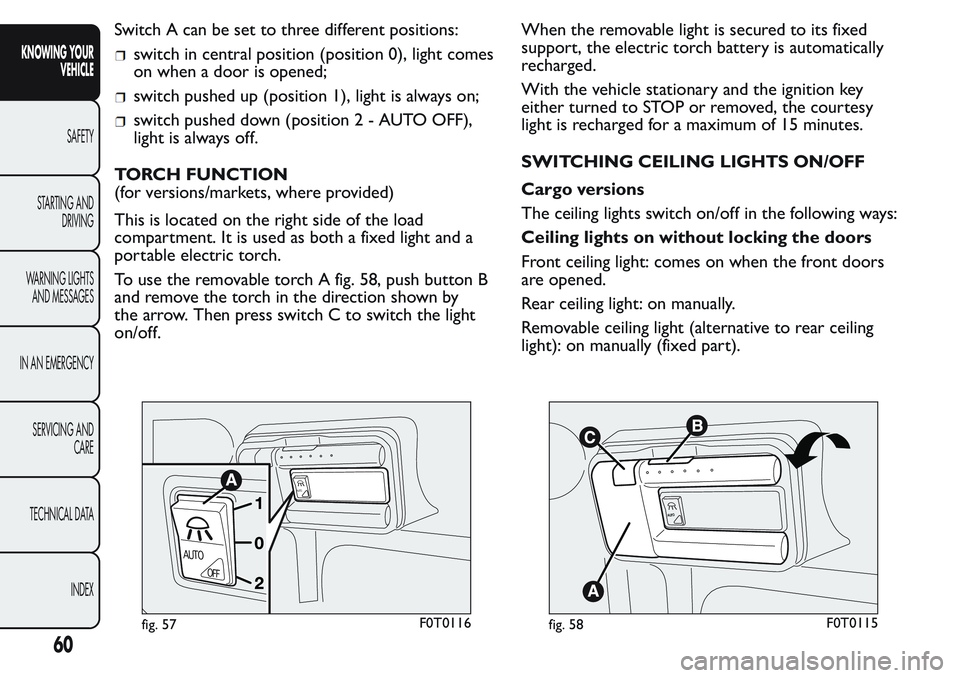
Switch A can be set to three different positions:
switch in central position (position 0), light comes
on when a door is opened;
switch pushed up (position 1), light is always on;
switch pushed down (position2-AUTOOFF),
light is always off.
TORCH FUNCTION
(for versions/markets, where provided)
This is located on the right side of the load
compartment. It is used as both a fixed light and a
portable electric torch.
To use the removable torch A fig. 58, push button B
and remove the torch in the direction shown by
the arrow. Then press switch C to switch the light
on/off.When the removable light is secured to its fixed
support, the electric torch battery is automatically
recharged.
With the vehicle stationary and the ignition key
either turned to STOP or removed, the courtesy
light is recharged for a maximum of 15 minutes.
SWITCHING CEILING LIGHTS ON/OFF
Cargo versions
The ceiling lights switch on/off in the following ways:
Ceiling lights on without locking the doors
Front ceiling light: comes on when the front doors
are opened.
Rear ceiling light: on manually.
Removable ceiling light (alternative to rear ceiling
light): on manually (fixed part).
AUTO
AUTO
OFF
fig. 57F0T0116
A
UT
O
fig. 58F0T0115
60
KNOWING YOUR
VEHICLE
SAFETY
STARTING AND
DRIVING
WARNING LIGHTS
AND MESSAGES
IN AN EMERGENCY
SERVICING AND
CARE
TECHNICAL DATA
INDEX