check FIAT FREEMONT 2016 1.G Owner's Guide
[x] Cancel search | Manufacturer: FIAT, Model Year: 2016, Model line: FREEMONT, Model: FIAT FREEMONT 2016 1.GPages: 412, PDF Size: 3.36 MB
Page 197 of 412
NOTE:When removing the fuel filler cap, lay the cap
tether in the hook, located on the fuel filler door
reinforcement.
•Damage to the fuel system or emissions
control system could result from using an
improper fuel tank filler tube cap.
• A poorly fitting fuel filler cap could let impuri-
ties into the fuel system.
• A poorly fitting fuel filler cap may cause the
“Malfunction Indicator Light (MIL)” to turn on.
• To avoid fuel spillage and overfilling, do not “top
off ” the fuel tank after filling. When the fuel
nozzle “clicks” or shuts off, the fuel tank is full.
WARNING!
• Never have any smoking materials lit
in or
near the vehicle when the gas cap is
removed or the tank is being filled.
• Never add fuel to the vehicle when the engine is
running.
• A fire may result if gasoline is pumped into a
portable container that is inside of a vehicle.You
could be burned. Always place gas containers on
the ground while filling.
• Failure to follow this warning may result in
serious injury or death. NOTE:
• When the fuel nozzle “clicks” or shuts off, the fuel
tank is full.
• Tighten the gas cap until you hear a “clicking” sound. This is an indication that the gas cap is tightened
properly. The MIL in the instrument cluster may turn
on if the gas cap is not secured properly. Make sure
that the gas cap is tightened each time the vehicle is
refueled.
LOOSE FUEL FILLER CAP MESSAGE (for
versions/markets, where provided)
If the vehicle diagnostic system determines that the
fuel filler cap is loose, improperly installed, or damaged,
a “Check Gascap” message will display in the Electronic
Vehicle Information Center (EVIC). If this occurs,
tighten the fuel filler cap properly and press the TRIP
ODOMETER button to turn off the message. If the
problem continues, the message will appear the next
time the vehicle is started.
191
KNOWING
YOUR
VEHICLE
SAFETY
STAR
TING
AND
DRIVING
WARNING
LIGHTS
AND
MESSAGES
IN AN
EMERGENCY
SERVICING
AND CARE
TECHNICAL
SPECIFICATIONS
CONTENTS
Page 202 of 412
WARNING! (Continued)
• A seat belt that is too loose will not protect you
properly. In a sudden stop, you could move too far
forward, increasing the possibility of injury.Wear
your seat belt snugly.
• A seat belt that is worn under your arm is
dangerous.Your body could strike the inside sur-
faces of the vehicle in a collision, increasing head
and neck injury. A seat belt worn under the arm
can cause internal injuries. Ribs aren’t as strong
as shoulder bones. Wear the seat belt over your
shoulder so that your strongest bones will take
the force in a collision.
• A shoulder belt placed behind you will not
protect you from injury during a collision.You are
more likely to hit your head in a collision if you do
not wear your shoulder belt .The lap and shoulder
belt are meant to be used together.
• A frayed or torn seat belt could rip apart in a
collision and leave you with no protection. In-
spect the seat belt system periodically, checking
for cuts, frays, or loose parts. Damaged parts
must be replaced immediately. Do not disas-
semble or modify the seat belt system. Seat belt
assemblies must be replaced after a collision. LAP/SHOULDER BELT OPERATING
INSTRUCTIONS
1. Enter the vehicle and close the door. Sit back and
adjust the seat.
2. The seat belt latch plate is above the back of the front seat, and next to your arm in the rear seat (for
vehicles equipped with a rear seat). Grasp the latch
plate and pull out the seat belt. Slide the latch plate
up the webbing as far as necessary to allow the seat
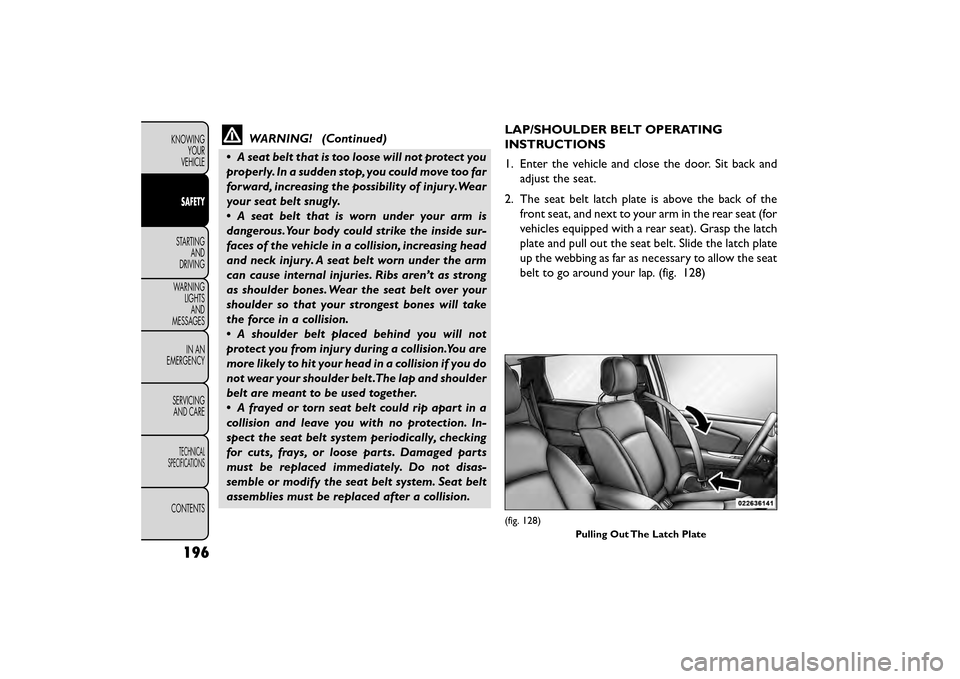
belt to go around your lap. (fig. 128)
(fig. 128)
Pulling Out The Latch Plate
196
KNOWINGYOUR
VEHICLE
SAFETY
STARTING AND
DRIVING
WARNING LIGHTSAND
MESSAGES
IN
AN
EMERGENCY
SERVICINGAND CARE
TECHNICAL
SPECIFICATIONS
CONTENTS
Page 208 of 412
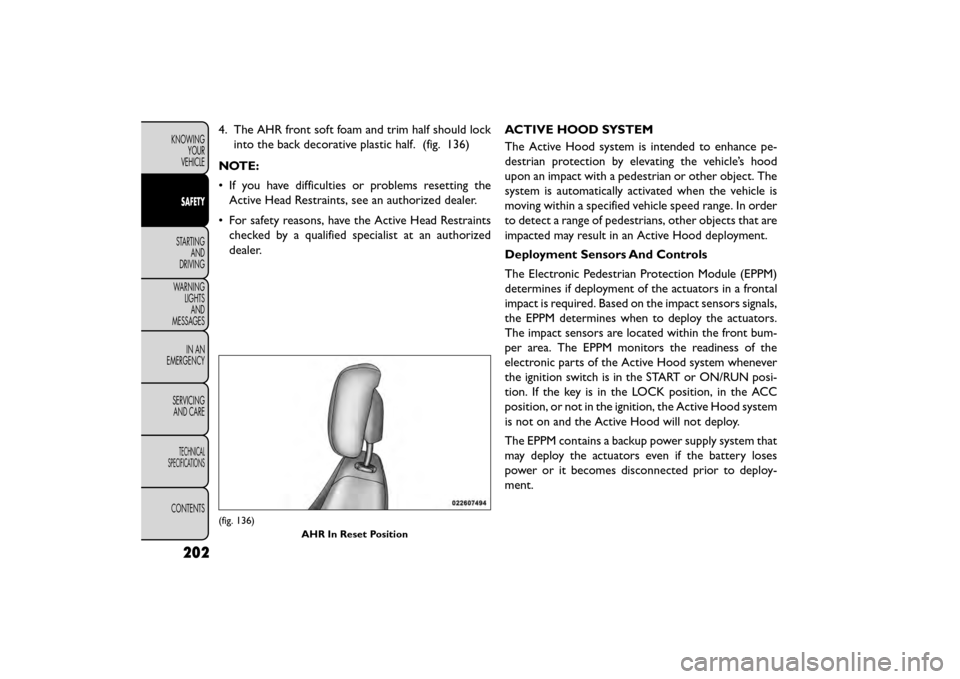
4. The AHR front soft foam and trim half should lockinto the back decorative plastic half. (fig. 136)
NOTE:
• If you have difficulties or problems resetting the Active Head Restraints, see an authorized dealer.
• For safety reasons, have the Active Head Restraints checked by a qualified specialist at an authorized
dealer. ACTIVE HOOD SYSTEM
The Active Hood system is intended to enhance pe-
destrian protection by elevating the vehicle’s hood
upon an impact with a pedestrian or other object. The
system is automatically activated when the vehicle is
moving within a specified vehicle speed range. In order
to detect a range of pedestrians, other objects that are
impacted may result in an Active Hood deployment.
Deployment Sensors And Controls
The Electronic Pedestrian Protection Module (EPPM)
determines if deployment of the actuators in a frontal
impact is required. Based on the impact sensors signals,
the EPPM determines when to deploy the actuators.
The impact sensors are located within the front bum-
per area. The EPPM monitors the readiness of the
electronic parts of the Active Hood system whenever
the ignition switch is in the START or ON/RUN posi-
tion. If the key is in the LOCK position, in the ACC
position, or not in the ignition, the Active Hood system
is not on and the Active Hood will not deploy.
The EPPM contains a backup power supply system that
may deploy the actuators even if the battery loses
power or it becomes disconnected prior to deploy-
ment.
(fig. 136)
AHR In Reset Position
202
KNOWINGYOUR
VEHICLE
SAFETY
STARTING AND
DRIVING
WARNING LIGHTSAND
MESSAGES
IN
AN
EMERGENCY
SERVICINGAND CARE
TECHNICAL
SPECIFICATIONS
CONTENTS
Page 210 of 412
To prevent possible damage, do not slam
the rear of the hood to reset it . Press the
rear of the hood down until an audible
and tactile detent is detected (approximately 5
mm above the fender). This should secure both
hood hinge reset mechanisms.
WARNING!
• Ignoring the Air Bag Warning Light in
y our
instrument panel or the “SERVICE
ACTIVE HOOD” message in the EVIC could mean
you won’t have the Active Hood to enhance pe-
destrian protection. If the light does not come on
as a bulb check when the ignition is first turned
on, stays on after you start the vehicle, or if it
comes on as you drive, see your authorized
dealer.
• Modifications to any part of the Active Hood
system could cause it to fail when you need it . Do
not modify the components or wiring. Do not
modify the front bumper, vehicle body structure,
or add an aftermarket front bumper or cover.
• It is dangerous to try to repair any part of the
Active Hood system yourself. Be sure to tell any-
one who works on your vehicle that it has an
Active Hood system.
(Continued)
WARNING! (Continued)
• Do not attempt to modify any part of your
Active Hood system.The Active Hood may deploy
accidentally or may not function properly if
modifications are made. Take your vehicle to an
authorized dealer for any hood service.
• Drivers must be aware of pedestrians. Always
be sure to check for pedestrians, animals, other
vehicles, and obstructions.You are responsible for
safety and must continue to pay attention to
your surroundings. Failure to do so can result in
serious injury or death.
204
KNOWING YOUR
VEHICLE
SAFETY
STARTING AND
DRIVING
WARNING LIGHTSAND
MESSAGES
IN
AN
EMERGENCY
SERVICINGAND CARE
TECHNICAL
SPECIFICATIONS
CONTENTS
Page 219 of 412
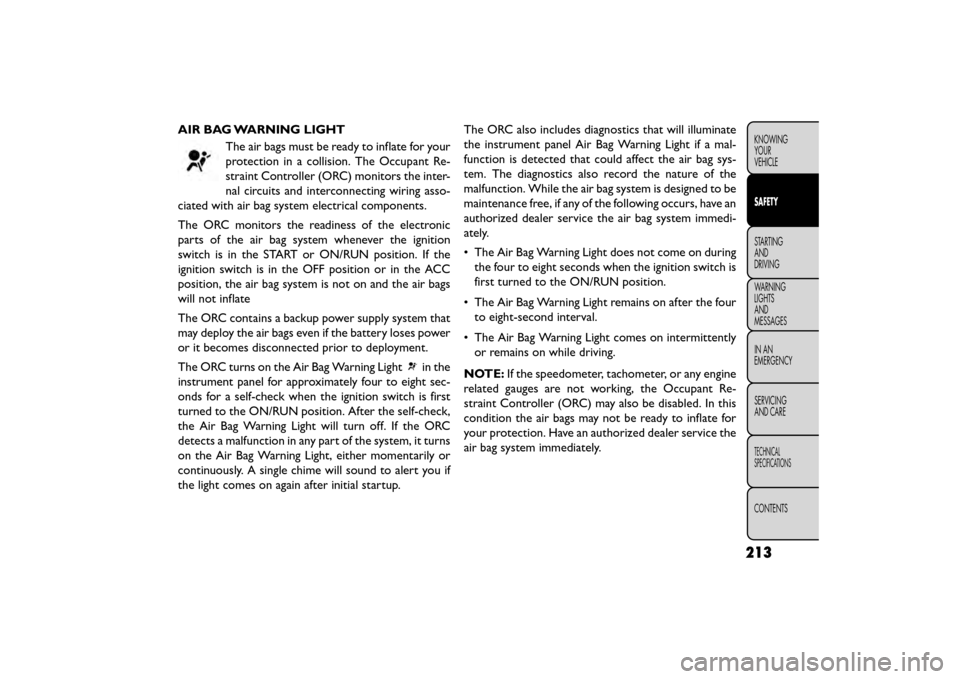
AIR BAG WARNING LIGHTThe air bags must be ready to inflate for your
protection in a collision. The Occupant Re-
straint Controller (ORC) monitors the inter-
nal circuits and interconnecting wiring asso-
ciated with air bag system electrical components.
The ORC monitors the readiness of the electronic
parts of the air bag system whenever the ignition
switch is in the START or ON/RUN position. If the
ignition switch is in the OFF position or in the ACC
position, the air bag system is not on and the air bags
will not inflate
The ORC contains a backup power supply system that
may deploy the air bags even if the battery loses power
or it becomes disconnected prior to deployment.
The ORC turns on the Air Bag Warning Light
in the
instrument panel for approximately four to eight sec-
onds for a self-check when the ignition switch is first
turned to the ON/RUN position. After the self-check,
the Air Bag Warning Light will turn off. If the ORC
detects a malfunction in any part of the system, it turns
on the Air Bag Warning Light, either momentarily or
continuously. A single chime will sound to alert you if
the light comes on again after initial startup. The ORC also includes diagnostics that will illuminate
the instrument panel Air Bag Warning Light if a mal-
function is detected that could affect the air bag sys-
tem. The diagnostics also record the nature of the
malfunction. While the air bag system is designed to be
maintenance free, if any of the following occurs, have an
authorized dealer service the air bag system immedi-
ately.
• The Air Bag Warning Light does not come on during
the four to eight seconds when the ignition switch is
first turned to the ON/RUN position.
• The Air Bag Warning Light remains on after the four to eight-second interval.
• The Air Bag Warning Light comes on intermittently or remains on while driving.
NOTE: If the speedometer, tachometer, or any engine
related gauges are not working, the Occupant Re-
straint Controller (ORC) may also be disabled. In this
condition the air bags may not be ready to inflate for
your protection. Have an authorized dealer service the
air bag system immediately.
213
KNOWING
YOUR
VEHICLE
SAFETY
STARTING
AND
DRIVING
WARNING
LIGHTS
AND
MESSAGES
IN
AN
EMERGENCY
SERVICING
AND CARE
TECHNICAL
SPECIFICATIONS
CONTENTS
Page 220 of 412
WARNING!
Ignoring the Air Bag Warning Light in
your ins
trument panel could mean you
won’t have the air bags to protect you in a
collision. If the light does not come on as a bulb
check when the ignition is first turned on, stays
on after you start the vehicle, or if it comes on as
you drive, have an authorized dealer service the
air bag system immediately.
MAINTAINING YOUR AIR BAG SYSTEM
WARNING!
• Modifications to any part of the air
bag sys
tem could cause it to fail when
you need it . You could be injured if the air bag
system is not there to protect you. Do not modify
the components or wiring, including adding any
kind of badges or stickers to the steering wheel
hub trim cover or the upper right side of the
instrument panel. Do not modify the front bum-
per, vehicle body structure, or add aftermarket
side steps or running boards.
(Continued)
WARNING! (Continued)
• It is dangerous to try to repair any part of the
air bag system yourself. Be sure to tell anyone
who works on your vehicle that it has an air bag
system.
• Do not attempt to modify any part of your air
bag system.The air bag may inflate accidentally
or may not function properly if modifications are
made.Take your vehicle to an authorized dealer
for any air bag system service. If your seat , includ-
ing your trim cover and cushion, needs to be
serviced in any way (including removal or
loosening/tightening of seat attachment bolts),
take the vehicle to your authorized dealer. Only
manufacturer approved seat accessories may be
used. If it is necessary to modify the air bag
system for persons with disabilities, contact your
authorized dealer.
214
KNOWING YOUR
VEHICLE
SAFETY
STARTING AND
DRIVING
WARNING LIGHTSAND
MESSAGES
IN
AN
EMERGENCY
SERVICINGAND CARE
TECHNICAL
SPECIFICATIONS
CONTENTS
Page 222 of 412
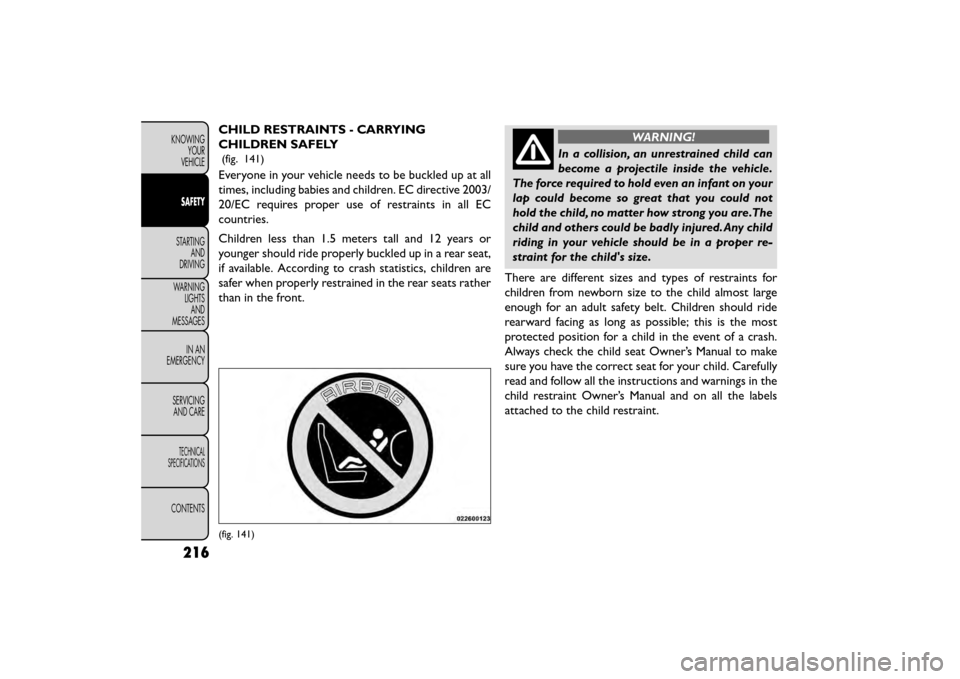
CHILD RESTRAINTS - CARRYING
CHILDREN SAFELY
(fig. 141)
Everyone in your vehicle needs to be buckled up at all
times, including babies and children. EC directive 2003/
20/EC requires proper use of restraints in all EC
countries.
Children less than 1.5 meters tall and 12 years or
younger should ride properly buckled up in a rear seat,
if available. According to crash statistics, children are
safer when properly restrained in the rear seats rather
than in the front.
WARNING!
In a collision, an unrestrained child can
becom e
a projectile inside the vehicle.
The force required to hold even an infant on your
lap could become so great that you could not
hold the child, no matter how strong you are.The
child and others could be badly injured. Any child
riding in your vehicle should be in a proper re-
straint for the child's size.
There are different sizes and types of restraints for
children from newborn size to the child almost large
enough for an adult safety belt. Children should ride
rearward facing as long as possible; this is the most
protected position for a child in the event of a crash.
Always check the child seat Owner’s Manual to make
sure you have the correct seat for your child. Carefully
read and follow all the instructions and warnings in the
child restraint Owner’s Manual and on all the labels
attached to the child restraint.
(fig. 141)
216
KNOWING YOUR
VEHICLE
SAFETY
STARTING AND
DRIVING
WARNING LIGHTSAND
MESSAGES
IN
AN
EMERGENCY
SERVICINGAND CARE
TECHNICAL
SPECIFICATIONS
CONTENTS
Page 223 of 412

In Europe, children restraint systems are defined by
regulation ECE-R44, which divides them into five
weight groups:
Restraint GroupWeight Group
Group0 upto10kg
Group 0+ up to 13 kg
Group 1 9-18 kg
Group 2 15-25 kg
Group 3 22-36 kg
Check the label of your child restraint. All approved
child restraints must include type-approval data and
the control mark on its label. The label must be
permanently secured to the child restraint system. You
should not remove this label from the child restraint.
WARNING!
Extreme Hazard! Do not place rearward
facin g
infant seat in front of an active air
bag. Refer to visor and door shut face mounted
labels for information. Deployment of the air bag
in an accident could cause fatal injuries to the
baby regardless of the severity of the collision. It
is advisable to always carry children in a child
restraint system on the rear seat , which is the
most protected position in the event of a colli-
sion.
“UNIVERSAL” CHILD RESTRAINT
SYSTEMS
The figures in the following sections are examples of
each type of universal child restraint system. Typical
installations are shown. Always install your child re-
straint system according to the child restraint manu-
facturer’s instructions, which must be included with
this type of restraint system.
217
KNOWING
YOUR
VEHICLE
SAFETY
STARTING
AND
DRIVING
WARNING
LIGHTS
AND
MESSAGES
IN
AN
EMERGENCY
SERVICING
AND CARE
TECHNICAL
SPECIFICATIONS
CONTENTS
Page 230 of 412

Seat Belts For Older Children
Children over 1.50 m in height can wear seat belts
instead of using child restraints.
Use this simple 5-step test to decide whether the seat
belt properly fits the child or if they should still use a
Group 2 or Group 3 child restraint to improve the fit of
the seat belt:
1. Can the child sit all the way back against the back ofthe vehicle seat?
2. Do the child’s knees bend comfortably over the front of the vehicle seat – while they are still sitting
all the way back?
3. Does the shoulder belt cross the child’s shoulder between their neck and arm?
4. Is the lap part of the belt as low as possible, touching the child’s thighs and not their stomach?
5. Can the child stay seated like this for the whole trip? If the answer to any of these questions was “no,” then
the child still needs to use a Group 2 or 3 child restraint
in this vehicle. If the child is using the lap/shoulder belt,
check belt fit periodically and make sure the seat belt
buckle is latched. A child’s squirming or slouching can
move the belt out of position. If the shoulder belt
contacts the face or neck, move the child closer to the
center of the vehicle, or use a booster seat to position
the seat belt on the child correctly.
WARNING!
Never allow a child to put the shoulder
belt un
der an arm or behind their back.
In a crash, the shoulder belt will not protect a
child properly, which may result in serious injury
or death. A child must always wear both the lap
and shoulder portions of the seat belt correctly.
224
KNOWING YOUR
VEHICLE
SAFETY
STARTING AND
DRIVING
WARNING LIGHTSAND
MESSAGES
IN
AN
EMERGENCY
SERVICINGAND CARE
TECHNICAL
SPECIFICATIONS
CONTENTS
Page 240 of 412
WARNING! (Continued)
• On seven passenger models, do not allow a
passenger to sit in a third row seat with the
second row seatback(s) folded flat . In a collision,
the passenger could slide underneath the seat
belt and be seriously or even fatally injured.
Exhaust Gas
WARNING!
Exhaust gases can injure or kill. They
con tain
carbon monoxide (CO), which is
colorless and odorless. Breathing it can make you
unconscious and can eventually poison you. To
avoid breathing (CO), follow these safety tips:
• Do not run the engine in a closed garage or in
confined areas any longer than needed to move
your vehicle in or out of the area.
• If you are required to drive with the trunk/
liftgate/rear doors open, make sure that all win-
dows are closed and the climate control
BLOWER switch is set at high speed. DO NOT use
the recirculation mode.
• If it is necessary to sit in a parked vehicle with
the engine running, adjust your heating or cooling
controls to force outside air into the vehicle. Set
the blower at high speed. The best protection against carbon monoxide entry
into the vehicle body is a properly maintained engine
exhaust system.
Whenever a change is noticed in the sound of the
exhaust system, when exhaust fumes can be detected
inside the vehicle, or when the underside or rear of the
vehicle is damaged, have a competent mechanic inspect
the complete exhaust system and adjacent body areas
for broken, damaged, deteriorated, or mispositioned
parts. Open seams or loose connections could permit
exhaust fumes to seep into the passenger compart-
ment. In addition, inspect the exhaust system each time
the vehicle is raised for lubrication or oil change.
Replace as required.
Safety Checks You Should Make Inside The
Vehicle
Seat Belts
Inspect the seat belt system periodically, checking for
cuts, frays, and loose parts. Damaged parts must be
replaced immediately. Do not disassemble or modify
the system.
Front seat belt assemblies must be replaced after a
collision. Rear seat belt assemblies must be replaced
after a collision if they have been damaged (i.e., bent
retractor, torn webbing, etc.). If there is any question
regarding belt or retractor condition, replace the seat
belt.
234
KNOWING
YOUR
VEHICLE
SAFETY
STARTING AND
DRIVING
WARNING LIGHTSAND
MESSAGES
IN
AN
EMERGENCY
SERVICINGAND CARE
TECHNICAL
SPECIFICATIONS
CONTENTS