check FIAT FREEMONT 2016 1.G Manual PDF
[x] Cancel search | Manufacturer: FIAT, Model Year: 2016, Model line: FREEMONT, Model: FIAT FREEMONT 2016 1.GPages: 412, PDF Size: 3.36 MB
Page 356 of 412
Master Cylinder — Brake Fluid Level Check
Check the fluid level in the master cylinder immediately
if the “Brake Warning Light” indicates system failure.
Check the fluid level in the master cylinder when
performing underhood services.
Clean the top of the master cylinder area before
removing the cap. If necessary, add fluid to bring the
fluid level up to the requirements described on the
brake fluid reservoir.
Overfilling of fluid is not recommended because it may
cause leaking in the system.
Fluid level can be expected to fall as the brake pads
wear. Brake fluid level should be checked when pads are
replaced. However, low fluid level may be caused by a
leak and a checkup may be needed.NOTE:
If your vehicle is equipped with a manual
transmission, the brake fluid reservoir supplies fluid
to both the brake system and the clutch release sys-
tem. The two systems are separated in the reservoir,
and a leak in one system will not affect the other
system. The manual transmission clutch release
system should not require fluid replacement during the
life of the vehicle. If the brake fluid reservoir is low and
the brake system does not indicate any leaks or other
problems, it may be a result of a leak in the hydraulic
clutch release system. See your local authorized dealer
for service.
Use only manufacturer's recommended brake fluid.
Refer to “Fluids, Lubricants, and Genuine Parts” in
“Technical Specifications” for further information.
WARNING!
• Use only manufacturer's recom-
m en
ded brake fluid. Refer to “Fluids, Lu-
bricants, and Genuine Parts” in “Technical Speci-
fications” for further information. Using the
wrong type of brake fluid can severely damage
your brake system and/or impair its perfor-
mance. The proper type of brake fluid for your
vehicle is also identified on the original factory
installed hydraulic master cylinder reservoir.
(Continued)
350
KNOWINGYOUR
VEHICLE
SAFETY
STARTING AND
DRIVING
WARNING LIGHTSAND
MESSAGES
IN AN
EMERGENCY
SERVICINGAND C ARE
TECHNICAL
SPECIFICATIONS
CONTENTS
Page 358 of 412
Special Additives
The manufacturer strongly recommends against using any
special additives in the transmission. Automatic Transmis-
sion Fluid (ATF) is an engineered product and its perfor-
mance may be impaired by supplemental additives. There-
fore, do not add any fluid additives to the transmission.
The only exception to this policy is the use of special dyes
for diagnosing fluid leaks. Avoid using transmission sealers
as they may adversely affect seals.
Do not use chemical flushes in your
transmission as the chemicals can dam-
age your transmission components. Such
damage is not covered by the New Vehicle Limited
Warranty.
Fluid Level Check - Six-Speed Transmission
The fluid level is preset at the factory and does not
require adjustment under normal operating conditions.
Routine fluid level checks are not required, therefore
the transmission filler tube is capped and no dipstick is
provided. Your authorized dealer can check your trans-
mission fluid level using a special service dipstick. If you
notice fluid leakage or transmission malfunction, visit
your authorized dealer immediately to have the trans-
mission fluid level checked. Operating the vehicle with
an improper fluid level can cause severe transmission
damage.
If a transmission fluid leak occurs, visit
your authorized dealer immediately. Se-
vere transmission damage may occur.
Your authorized dealer has the proper tools to
adjust the fluid level accurately.
Car maintenance should be done at a
FIAT Dealership. For routine and minor
maintenance operations you wish to
carry out yourself, we do recommend you have
the proper equipment , genuine FIAT spare parts
and the necessary fluids; do not however carry out
these operations if you have no experience.
Fluid Level Check — Four-Speed Automatic
Use the following procedure to check the transmission
fluid level properly:
1. Park the vehicle on level ground.
2. Run the engine at normal idle speed for at least 60 seconds, and leave the engine running for the rest of
this procedure.
3. Fully apply the parking brake, and press the brake pedal.
352
KNOWING YOUR
VEHICLE
SAFETY
STARTING AND
DRIVING
WARNING LIGHTSAND
MESSAGES
IN AN
EMERGENCY
SERVICINGAND C ARE
TECHNICAL
SPECIFICATIONS
CONTENTS
Page 359 of 412
4. Place the shift lever momentarily into each gearposition (allowing time for the transmission to fully
engage in each position), ending with the transmis-
sion in PARK.
5. Wipe the area around the dipstick clean to prevent dirt from entering the transmission.
6. Remove the dipstick and determine if the fluid is hot or cold. Hot fluid is approximately 82° C, which
is the normal operating temperature after the ve-
hicle is driven at least 24 km. Hot fluid cannot be
held comfortably between the fingertips. Cold fluid
is at a temperature of approximately 27° C.
7. Wipe the dipstick clean and reinsert it until seated. Then, remove the dipstick and note the fluid level
on both sides. The fluid level reading is only valid if
there is a solid coating of oil on both sides of the
dipstick. Note that the holes in the dipstick will be
full of fluid if the actual level is at or above the hole.
• If the fluid is hot, the fluid level should be in the crosshatched area marked “HOT” (between the up-
per two holes in the dipstick).
• If the fluid is cold, the fluid level should be between the lower two holes in the area marked “COLD.” • If the fluid level is low, add fluid through the dipstick
tube to bring it to the proper level. Do not overfill.
After adding any quantity of oil through the dipstick
tube, wait at least two minutes for the oil to fully
drain into the transmission before rechecking the
fluid level.
8. Check for leaks. Release the parking brake.
To prevent dirt and water from entering the transmis-
sion after checking or replenishing fluid, make sure that
the dipstick cap is properly re-seated.
• Using a transmission fluid other than
the manufacturer ’s recommended fluid
may cause deterioration in transmission
shift quality and/or torque converter shudder, and
will require more frequent fluid and filter
changes. Refer to “Fluids, Lubricants, and Genuine
Parts” in "Technical Specifications" for fluid
specifications.
• Dirt and water in the transmission can cause
serious damage. To prevent dirt and water from
entering the transmission after checking or re-
plenishing fluid, make sure that the dipstick cap is
re-seated properly.
353
KNOWING
YOUR
VEHICLE
SAFETY
STARTING
AND
DRIVING
WARNING
LIGHTS
AND
MESSAGES
IN AN
EMERGENCY
SERVICING
AND C ARE
TECHNICAL
SPECIFICATIONS
CONTENTS
Page 360 of 412
Fluid And Filter Changes
Refer to the “Maintenance Schedule” for the proper
maintenance intervals.
In addition, change the fluid and filter if the fluid
becomes contaminated (with water, etc.), or if the
transmission is disassembled for any reason.
MANUAL TRANSMISSION (for versions/
markets, where provided)
Lubricant Selection
Use only manufacturers recommended transmission
fluid. Do not add any materials (other than leak detec-
tion dyes). Refer to “Fluids, Lubricants, and Genuine
Parts” in “Technical Specifications” for further informa-
tion.
Frequency Of Fluid Change
Change the manual transmission fluid at the intervals
shown in the “Maintenance Schedule” in this manual.
REAR DRIVE ASSEMBLY (RDA) – AWD
MODELS ONLY
Lubricant Selection
Use only the manufacturer's recommended fluid. Refer
to “Fluids, Lubricants, and Genuine Parts” in “Technical
Specifications” for further information.Fluid Level Check
Visually inspect the unit at each oil change for leakage.
If leakage is detected, check the fluid level by removing
the fill plug. The fluid level should be maintained be-
tween the bottom of the fill hole to 4 mm below the fill
hole.
Add fluid, if necessary, to maintain the proper level.
Frequency Of Fluid Change
Refer to the “Maintenance Schedule” for the proper
maintenance intervals.
POWER TRANSFER UNIT (PTU) – AWD
MODELS ONLY
Lubricant Selection
Use only the manufacturer's recommended fluid. Refer
to “Fluids, Lubricants, and Genuine Parts” in “Technical
Specifications” for further information.
Fluid Level Check
Visually inspect the unit at each oil change for leakage.
If leakage is detected, Check the fluid level by removing
the fill plug. The fluid level should be maintained be-
tween the bottom of the fill hole to 4 mm below the fill
hole.
Add fluid, if necessary, to maintain the proper level.
354
KNOWING
YOUR
VEHICLE
SAFETY
STARTING AND
DRIVING
WARNING LIGHTSAND
MESSAGES
IN AN
EMERGENCY
SERVICINGAND C ARE
TECHNICAL
SPECIFICATIONS
CONTENTS
Page 364 of 412
Glass Surfaces
All glass surfaces should be cleaned on a regular basis
with any commercial household-type glass cleaner.
Never use an abrasive type cleaner. Use caution when
cleaning the inside rear window equipped with an
electric defroster. Do not use scrapers or other sharp
instruments that may scratch the elements.
When cleaning the rear view mirror, spray cleaner on
the towel or rag that you are using. Do not spray
cleaner directly on the mirror.
Cleaning Plastic Instrument Cluster Lenses
The lenses in front of the instruments in this vehicle are
molded in clear plastic. When cleaning the lenses, care
must be taken to avoid scratching the plastic.
1. Clean with a wet soft rag. A mild soap solution maybe used, but do not use high alcohol content or
abrasive cleaners. If soap is used, wipe clean with a
clean damp rag.
2. Dry with a soft cloth. Seat Belt Maintenance
Do not bleach, dye or clean the belts with chemical
solvents or abrasive cleaners. This will weaken the
fabric. Sun damage can also weaken the fabric.
If the belts need cleaning, use a mild soap solution or
lukewarm water. Do not remove the belts from the car
to wash them. Dry with a soft cloth.
Replace the belts if they appear frayed or worn or if the
buckles do not work properly.
WARNING!
A frayed or torn belt could rip apart in a
collisi on
and leave you with no protec-
tion. Inspect the belt system periodically, check-
ing for cuts, frays, or loose parts. Damaged parts
must be replaced immediately. Do not disas-
semble or modify the system. Seat belt assem-
blies must be replaced after a collision if they
have been damaged (i.e., bent retractor, torn
webbing, etc .).
CLEANING THE CUP HOLDERS
Clean with a damp cloth or towel using a mild deter-
gent.
358
KNOWING YOUR
VEHICLE
SAFETY
STARTING AND
DRIVING
WARNING LIGHTSAND
MESSAGES
IN AN
EMERGENCY
SERVICINGAND C ARE
TECHNICAL
SPECIFICATIONS
CONTENTS
Page 376 of 412
WARNING! (Continued)
• Unequal tire pressures can cause steering
problems.You could lose control of your vehicle.
• Unequal tire pressures from one side of the
vehicle to the other can cause the vehicle to drift
to the right or left .
• Always drive with each tire inflated to the
recommended cold tire inflation pressure.
Both under-inflation and over-inflation affect the stabil-
ity of the vehicle and can produce a feeling of sluggish
response or over responsiveness in the steering.
NOTE:
• Unequal tire pressures from side to side may cause erratic and unpredictable steering response.
• Unequal tire pressure from side to side may cause the vehicle to drift left or right.
Economy
Underinflated tires will increase tire rolling resistance
resulting in higher fuel consumption.
Tread Wear
Improper cold tire inflation pressures can cause abnor-
mal wear patterns and reduced tread life, resulting in
the need for earlier tire replacement. Ride Comfort And Vehicle Stability
Proper tire inflation contributes to a comfortable ride.
Over-inflation produces a jarring and uncomfortable
ride.
TIRE INFLATION PRESSURES
The proper cold tire inflation pressure is listed on the
driver's side B-Pillar or rear edge of the driver's side
door.
At least once a month:
• Check and adjust tire pressure with a good quality
pocket-type pressure gauge. Do not make a visual
judgement when determining proper inflation. Tires
may look properly inflated even when they are under-
inflated.
• Inspect tires for signs of tire wear or visible damage.
After inspecting or adjusting the tire
pressure, always reinstall the valve stem
cap. This will prevent moisture and dirt
from entering the valve stem, which could damage
the valve stem.
Inflation pressures specified on the placard are always
“cold tire inflation pressure.” Cold tire inflation pres-
sure is defined as the tire pressure after the vehicle has
not been driven for at least three hours, or driven less
than 1.6 km after sitting for a minimum of three hours.
370
KNOWING YOUR
VEHICLE
SAFETY
STARTING AND
DRIVING
WARNING LIGHTSAND
MESSAGES
IN AN
EMERGENCY
SERVICINGAND CARE
TECHNICAL
SPECIFICATIONS
CONTENTS
Page 377 of 412

The cold tire inflation pressure must not exceed the
maximum inflation pressure molded into the tire side-
wall.
Check tire pressures more often if subject to a wide
range of outdoor temperatures, as tire pressures vary
with temperature changes.
Tire pressures change by approximately 0.07 bar per
7°C of air temperature change. Keep this in mind when
checking tire pressure inside a garage, especially in the
winter.
Example: If garage temperature = 20°C and the outside
temperature = 0°C then the cold tire inflation pressure
should be increased by 0.21 bar, which equals 0.07 bar
for every 7°C for this outside temperature condition.
Tire pressure may increase from 0.13 to 0.4 bar during
operation. DO NOT reduce this normal pressure build
up or your tire pressure will be too low.
TIRE PRESSURES FOR HIGH SPEED
OPERATION
The manufacturer advocates driving at safe speeds and
within posted speed limits. Where speed limits or
conditions are such that the vehicle can be driven at
high speeds, maintaining correct tire inflation pressure
is very important. Increased tire pressure and reduced
vehicle loading may be required for high-speed vehicle
operation. Refer to your authorized tire dealer ororiginal equipment vehicle dealer for recommended
safe operating speeds, loading and cold tire inflation
pressures.
WARNING!
High speed driving with your vehicle un-
der m axim
um load is dangerous. The
added strain on your tires could cause them to
fail. You could have a serious collision. Do not
drive a vehicle loaded to the maximum capacity
at continuous speeds above 120 km/h.
TIRE TYPES
All Season Tires (for versions/markets, where
provided)
All Season tires provide traction for all seasons (spring,
summer, fall and winter). Traction levels may vary
between different all season tires. All season tires can
be identified by the M+S, M&S, M/S or MS designation
on the tire sidewall. Use all season tires only in sets of
four; failure to do so may adversely affect the safety and
handling of your vehicle.
371
KNOWING
YOUR
VEHICLE
SAFETY
STARTING
AND
DRIVING
WARNING
LIGHTS
AND
MESSAGES
IN AN
EMERGENCY
SERVICING
AND CARE
TECHNICAL
SPECIFICATIONS
CONTENTS
Page 378 of 412
Summer Or Three Season Tires (for
versions/markets, where provided)
Summer tires provide traction in both wet and dry
conditions, and are not intended to be driven in snow
or on ice. If your vehicle is equipped with summer tires,
be aware these tires are not designed for winter or cold
driving conditions. Install winter tires on your vehicle
when ambient temperatures are less than 5°C or if
roads are covered with ice or snow. For more informa-
tion, contact an authorized dealer.
Summer tires do not contain the all season designation
or mountain/snowflake symbol on the tire sidewall.
Use summer tires only in sets of four; failure to do so
may adversely affect the safety and handling of your
vehicle.
WARNING!
Do not use summer tires in snow/ice
con di
tions.You could lose vehicle control,
resulting in severe injury or death. Driving too
fast for conditions also creates the possibility of
loss of vehicle control. Snow Tires
Some areas of the country require the use of snow
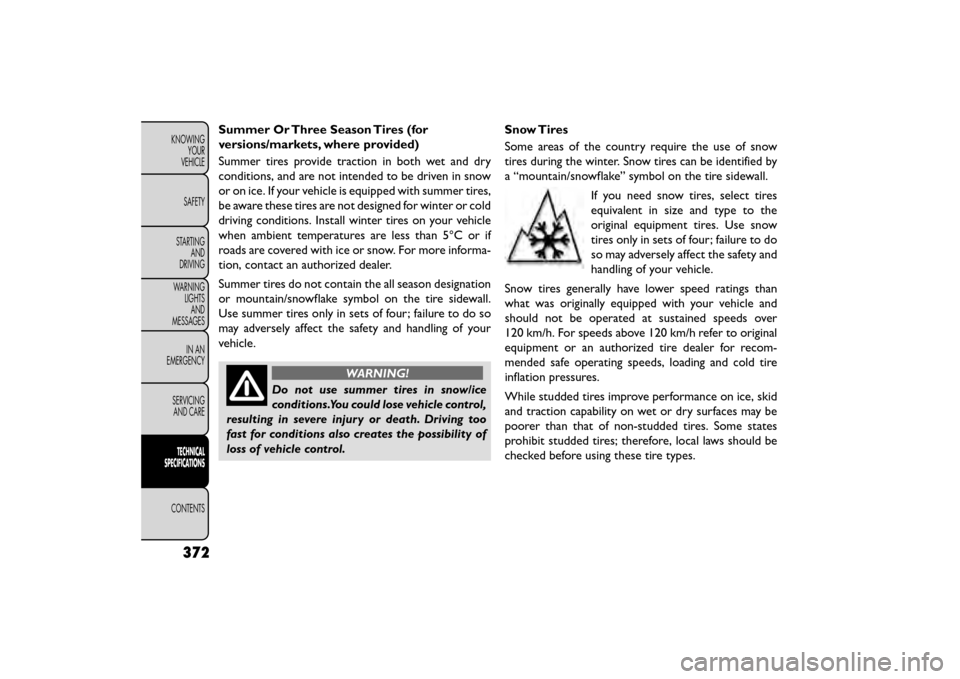
tires during the winter. Snow tires can be identified by
a “mountain/snowflake” symbol on the tire sidewall.
If you need snow tires, select tires
equivalent in size and type to the
original equipment tires. Use snow
tires only in sets of four; failure to do
so may adversely affect the safety and
handling of your vehicle.
Snow tires generally have lower speed ratings than
what was originally equipped with your vehicle and
should not be operated at sustained speeds over
120 km/h. For speeds above 120 km/h refer to original
equipment or an authorized tire dealer for recom-
mended safe operating speeds, loading and cold tire
inflation pressures.
While studded tires improve performance on ice, skid
and traction capability on wet or dry surfaces may be
poorer than that of non-studded tires. Some states
prohibit studded tires; therefore, local laws should be
checked before using these tire types.
372
KNOWING YOUR
VEHICLE
SAFETY
STARTING AND
DRIVING
WARNING LIGHTSAND
MESSAGES
IN AN
EMERGENCY
SERVICINGAND CARE
TECHNICAL
SPECIFICATIONS
CONTENTS
Page 397 of 412
CONTENTS
About Your Brakes..................... .140, 242
ABS (Anti-Lock Brake System) . . . . . .........141, 278
Adding Engine Coolant (Antifreeze) . . ............347
Adding Fuel ............................. .190
Adding Washer Fluid . . . .................... .343
Additives, Fuel . .......................... .380
Airbag................................ .205
Air Bag Advance Front Air Bag . ................205, 206
Air Bag Components . ................... .205
Air bag Operation ...................... .207
Air Bag Warning Light . ................... .213
Enhanced Accident Response . . . . ............212
Event Data Recorder (EDR) . . . . . ............215
FrontAirBag ......................... .205
If A Deployment Occurs . . . . . . .............211
Knee Impact Bolsters . . . . . . . . .............207
Maintaining Your Air Bag System .............214
Side Air Bags . . . . . . . . .................. .208
Air bag Light ..................... .213, 235, 273
Air bag Maintenance ....................... .214
Air Cleaner, Engine (Engine Air Cleaner Filter) ......338
Air Conditioner Maintenance . . . . . . . ...........339
Air Conditioning Filter . . . .................90, 340
Air Conditioning, Operating Tips . . . . ..........89, 91
Air Conditioning, Rear Zone . . . . . . . . .........76, 86
Air Conditioning Refrigerant . . . ............339, 340
Air Conditioning System . ................... .339
Air Pressure, Tires ..................... .275, 370
Alarm (Security Alarm) ................... .16, 278
Alarm System (Security Alarm) ...............16, 18All Wheel Drive (AWD)
.................... .255
Alterations/Modifications, Vehicle .................5
Antifreeze (Engine Coolant) ............346, 347, 384
Disposal ............................ .348
Anti-Lock Brake System (ABS) .................141
Anti-Lock War
ning Light ..............141, 143, 278
Arming System (Security Alarm) .................16
Auto Down Power Windows ..................128
Automatic Dimming Mirror ....................66
Automatic Door Locks ..................... .121
Automatic Headlights ........................92
Automatic Oil Change Indicator .................28
Automatic Transmission ................. .246, 351
Adding Fluid .......................... .352
Autostick ............................ .254
Fluid and Filter Changes .................. .354
Fluid Level Check ...................... .352
Gear Ranges .......................... .249
Autostick .............................. .254
Auto Unlock, Doors ....................... .121
Auxiliary Electrical Outlet (Power Outlet) .........112
Auxiliary Power Outlet ..................... .112
Back-Up Lights ........................... .305
Battery ................................ .338
Gas Caution .......................... .339
Keyless Transmitter Replacement (RKE) .........14
Location ............................ .338
Belts, Seat .............................. .234
Body Mechanism Lubrication ..................341
B-Pillar Location .......................... .366
391
KNOWING
YOUR
VEHICLE
SAFETY
STARTING
AND
DRIVING
WARNING
LIGHTS
AND
MESSAGES
IN AN
EMERGENCY
SERVICING
AND CARE
TECHNICAL
SPECIFICATIONS
CONTENTS
Page 398 of 412
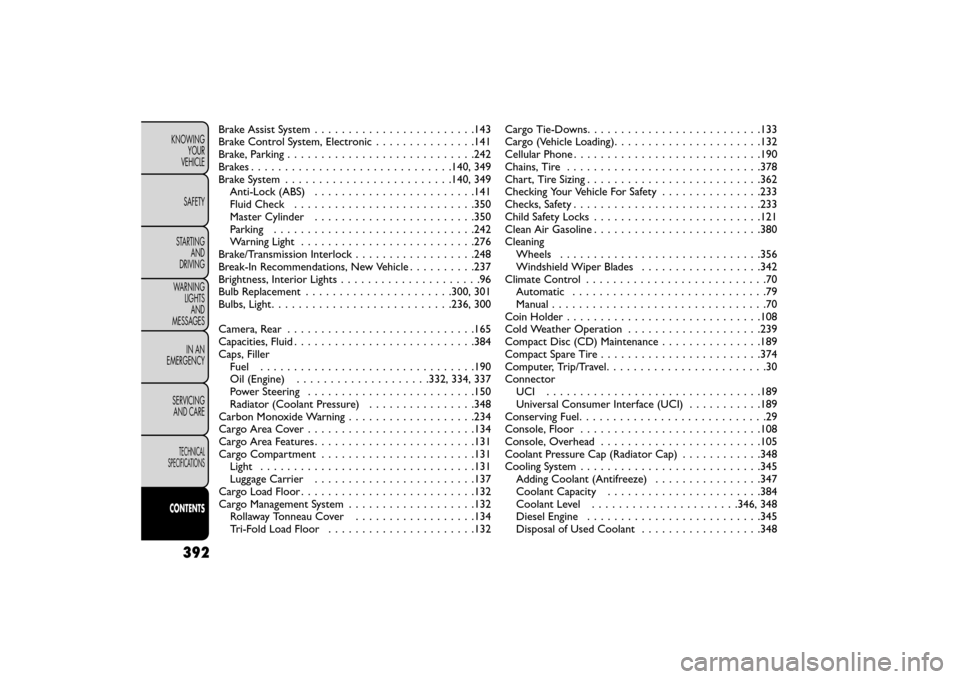
Brake Assist System . . . . . . ..................143
Brake Control System, Electronic ...............141
Brake, Parking ........................... .242
Brakes . . . . . . . . . . . . . . . . . .............140, 349
Brake System . . . ..................... .140, 349
Anti-Lock (ABS) . . . . . . . .................141
Fluid Check . . . . . . . ................... .350
Master Cylinder . ...................... .350
Parking ............................. .242
Warning Light . . . . . . . . ..................276
Brake/Transmission Interlock . .................248
Break-In Recommendations, New Vehicle ..........237
Brightness, Interior Lights . . . ..................96
Bulb Replacement . . ................... .300, 301
Bulbs, Light .......................... .236, 300
Camera, Rear . . ......................... .165
Capacities, Fluid .......................... .384
Caps, Filler Fuel ............................... .190
Oil (Engine) . . . . ............... .332, 334, 337
Power Steering . . . . .................... .150
Radiator (Coolant Pressure) ................348
Carbon Monoxide Warning . . .................234
Cargo Area Cover . . . . .................... .134
Cargo Area Features . . . . . ...................131
Cargo Compartment . . .................... .131
Light ............................... .131
Luggage Carrier . . . . . .................. .137
Cargo Load Floor . . ....................... .132
Cargo Management System . ..................132
Rollaway Tonneau Cover . .................134
Tri-Fold Load Floor . . . . . .................132Cargo Tie-Downs
......................... .133
Cargo (Vehicle Loading) ..................... .132
Cellular Phone ........................... .190
Chains, Tire ............................ .378
Char
t, Tire Sizing ......................... .362
Checking Your Vehicle For Safety ...............233
Checks, Safety ........................... .233
Child Safety Locks ........................ .121
Clean Air Gasoline ........................ .380
Cleaning Wheels ............................. .356
Windshield Wiper Blades ..................342
Climate Control ...........................70
Automatic .............................79
Manual................................70
Coin Holder ............................ .108
Cold Weather Operation ................... .239
Compact Disc (CD) Maintenance ...............189
Compact Spare Tire ....................... .374
Computer, Trip/Travel ........................30
Connector UCI ............................... .189
Universal Consumer Interface (UCI) ...........189
Conserving Fuel ............................29
Console, Floor .......................... .108
Console, Overhead ....................... .105
Coolant Pressure Cap (Radiator Cap) ............348
Cooling System .......................... .345
Adding Coolant (Antifreeze) ................347
Coolant Capacity ...................... .384
Coolant Level ..................... .346, 348
Diesel Engine ......................... .345
Disposal of Used Coolant ..................348
392
KNOWING
YOUR
VEHICLE
SAFETY
STARTING AND
DRIVING
WARNING LIGHTSAND
MESSAGES
IN AN
EMERGENCY
SERVICINGAND CARE
TECHNICAL
SPECIFICATIONS
CONTENTS