FIAT STILO 2004 1.G Connect NavPlus Manual
Manufacturer: FIAT, Model Year: 2004, Model line: STILO, Model: FIAT STILO 2004 1.GPages: 166, PDF Size: 3.8 MB
Page 151 of 166
CONNECT Nav+
150
The SETUP mode enables to set dif-
ferent car and CONNECT Nav+ sys-
tem operating modes and parameters.
Parameters and operating modes
have been grouped in the following
four areas:
– LANGUAGE
– DATE & TEMP
– VEHICLE
– CONNECT.
Every above area is then divided in
different sub-areas. Read carefully
through this chapter to learn any fea-
tures offered by CONNECT Nav+
system.
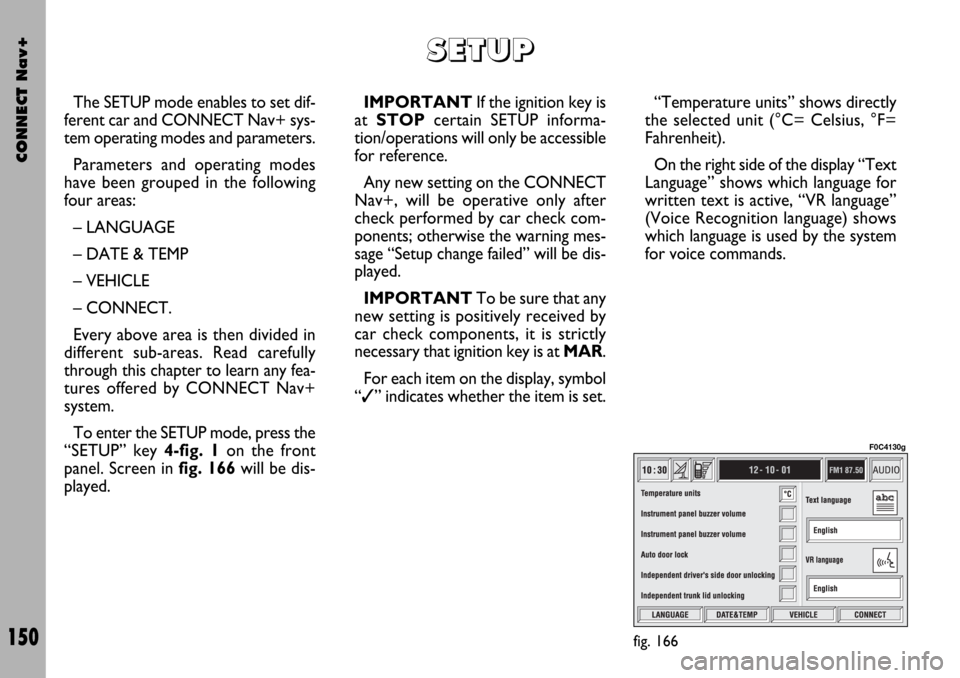
To enter the SETUP mode, press the
“SETUP” key 4-fig. 1on the front
panel. Screen in fig. 166will be dis-
played.IMPORTANTIf the ignition key is
at STOPcertain SETUP informa-
tion/operations will only be accessible
for reference.
Any new setting on the CONNECT
Nav+, will be operative only after
check performed by car check com-
ponents; otherwise the warning mes-
sage “Setup change failed” will be dis-
played.
IMPORTANTTo be sure that any
new setting is positively received by
car check components, it is strictly
necessary that ignition key is at MAR.
For each item on the display, symbol
“✓” indicates whether the item is set.“Temperature units” shows directly
the selected unit (°C= Celsius, °F=
Fahrenheit).
On the right side of the display “Text
Language” shows which language for
written text is active, “VR language”
(Voice Recognition language) shows
which language is used by the system
for voice commands.
S S
E E
T T
U U
P P
fig. 166
F0C4130g
Page 152 of 166
CONNECT Nav+
151
IMPORTANTSetting (whatever)
language will start the updating pro-
cedure for both the written text and
for voice commands and instructions.
The written text (strings) will be up-
dated immediately upon selecting the
language. To update voice command
and message language the Setup CD
shall be inserted. if the Setup CD is not
inserted when requested, the required
voice command and message language
will not be updated.
To change parameters and operating
modes, press keypad keys 17-fig. 1
under LANGUAGE, DATE&TEMP,
VEHICLE or CONNECT.
This operation will display the spe-
cific screen thus allowing the desired
operations.LANGUAGE
To display the relevant screen page,
press one of the keypad keys 17-fig. 1
under LANGUAGE fig. 167.
IMPORTANTBefore starting lan-
guage upgrading procedure, be sure
that the provided Setup CD is avail-
able and ready to be used.
Selecting icon “LANGUAGE”, by ro-
tating the encoder 14-fig. 1and press-
ing “ENTER” to confirm 15-fig. 1, the
user can set the required language,
available languages are: Italian, English,
French, German, Spanish, Portuguese
and Dutch.Selected language will be valid for
both the written text (“Text Lan-
guage”) and voice recognition (“VR
language”) and for any voice instruc-
tion coming from the system.
To select the required language, ro-
tate the encoder 14-fig. 1and press
“ENTER” to confirm 15-fig. 1.
As concerns the written text, the new
language is active after selecting “OK”
with the encoder 14-fig. 1and press-
ing “ENTER” to confirm 15-fig. 1.
For setting voice recognition, the
user will be requested to input the
Setup CD.
IMPORTANTIf the Setup CD is
not inserted, the new set language will
be operative for written text only.
Voice recognition (and instruction
coming from the system) language will
be the default or the preset one.
fig. 167
F0C4202g
Page 153 of 166
CONNECT Nav+
152
The display will show the following
string:
“Insert Setup CD to change language
of messages and voice commands.
Press ESC to cancel”.
If the Setup CD is inserted the fol-
lowing message will be permanently
displayed:
“System will be unavailable for a few
seconds and calls in progress will be
terminated. Press ENTER to continue
or ESC to cancel”.
If “ENTER” has been pressed 15-
fig. 1the following message will be
permanently displayed:
“Message and voice command lan-
guage change in progress. Do not turn
off system. Please wait”.
The end of the procedure is indicat-
ed by the following message:
“Message and voice command lan-
guage change concluded correctly”.If some errors occur during language
updating, the following message will be
displayed:
“Language change failed. Please re-
peat procedure”.
This message asks the user to repeat
the above procedure.
Whenever the system is switched on
turning the ignition key to MAR, the
language module is checked and if the
system finds a fault the following mes-
sage is displayed:
“Voice commands and messages not
available. Please change the language”.
This message asks the user to repeat
language change procedure.
The user shall set again the desired
language in the SETUP menu and then
follow the above procedure.DATE&TEMP (date
& temperature)
To open the relevant screen page,
press one of the keypad keys 17-fig. 1
under DATE&TEMP fig. 168.
IMPORTANTAny adjustment can
only be performed with ignition key at
MAR. Otherwise setting is rejected
and the warning message “Setup
change failed” will be displayed.
Time displaying can be set accord-
ing to two modes: 12h or 24h.
fig. 168
F0C4132g
Page 154 of 166

CONNECT Nav+
153
To set a new Date/Time (only with
ignition key at MAR, select “Date and
time” icon and then press “ENTER”
15-fig. 1.
To set day, month, year, hours, min-
utes, mode (12h /24h), rotate the en-
coder 14-fig. 1to the required set-
ting and then press “ENTER” to con-
firm 15-fig. 1, each field will be acti-
vated in sequence.
Setting “GG”: selectday rotating
the encoder 14-fig. 1and press “EN-
TER” 15-fig. 1to confirm.
Setting “MMM”: select month rotat-
ing the encoder 14-fig. 1and press
“ENTER” 15-fig. 1to confirm.
Setting AAAA: select year rotating
the encoder 14-fig. 1and press “EN-
TER”15-fig. 1to confirm.
Setting HH: select hour rotating the
encoder 14-fig. 1and press “ENTER”
15-fig. 1to confirm.Setting MM: select minutes rotating
the encoder 14-fig. 1and press “EN-
TER” 15-fig. 1to confirm.
Setting MODO (12h / 24h MODE):
select 12h or 24h mode rotating the
encoder 14-fig. 1and press “ENTER”
15-fig. 1to confirm.
IMPORTANTDuring setting,
hours (HH) are always displayed with
24h mode, regardless of set mode.
IMPORTANTIf set mode is 24h,
the display shows time using digits be-
tween 0 and 23; if set mode is 12h, the
display shows time using digits be-
tween 1 and 12.Temperature measure unit can be
set in °C (Celsius) or °F (Fahrenheit).
To set the temperature unit (only
with ignition key at MAR), select
“Celsius/ Fahrenheit” icon and then
press “ENTER” 15-fig. 1.
Rotate the encoder 14-fig. 1to se-
lect the required unit (°C or °F) and
then press “ENTER” 15-fig. 1to con-
firm.
To store settings and go back to pre-
vious screen, select “OK” with the en-
coder 14-fig. 1and then press “EN-
TER” 15-fig. 1.
Page 155 of 166
CONNECT Nav+
154
VEHICLE
To display the relevant screen page,
press one of the keypad keys 17-fig. 1
under VEHICLE.
Choosing this Setup option two dif-
ferent setting menus are displayed, ac-
cording to the car version.
FIRST MENU - fig. 169
Instrument panel
buzzer volume
To adjust the volume of warning/fail-
ure indications (buzzer) given by the
instrument panel.
The buzzer volume can be adjusted
on 8 levels.
IMPORTANT The buzzer can be
adjusted but not excluded.Rotate the encoder 14-fig. 1to se-
lect “Instrument panel buzzer volume”
and then press “ENTER” 15-fig. 1to
confirm.
The display shows the screen in
fig. 170.
To adjust volume, select “Change”
rotating the encoder 14-fig. 1and
then press “ENTER” 15-fig. 1to con-
firm.
Rotate the encoder 14-fig. 1clock-
wise to increase volume and anti-
clockwise to reduce it.An indication cursor and a numeric
window will help you in setting.
Press “ENTER” 15-fig. 1twice to
confirm and go back to first menu.
Whenever set value exceeds 1, sym-
bol “✓” is displayed in the first menu
next to the corresponding item.
fig. 169
F0C4133g
fig. 170
F0C4134g
Page 156 of 166
CONNECT Nav+
155
Instrument panel
key volume
To adjust or mute instrument panel
key volume (MODE,
Ă”, Ă•).
Instrument panel key volume can be
adjusted on 8 levels. Buzzer volume
can be adjusted and also excluded.
Rotate the encoder 14-fig. 1to se-
lect “Instrument panel key volume”
and press “ENTER” 15-fig. 1to con-
firm.
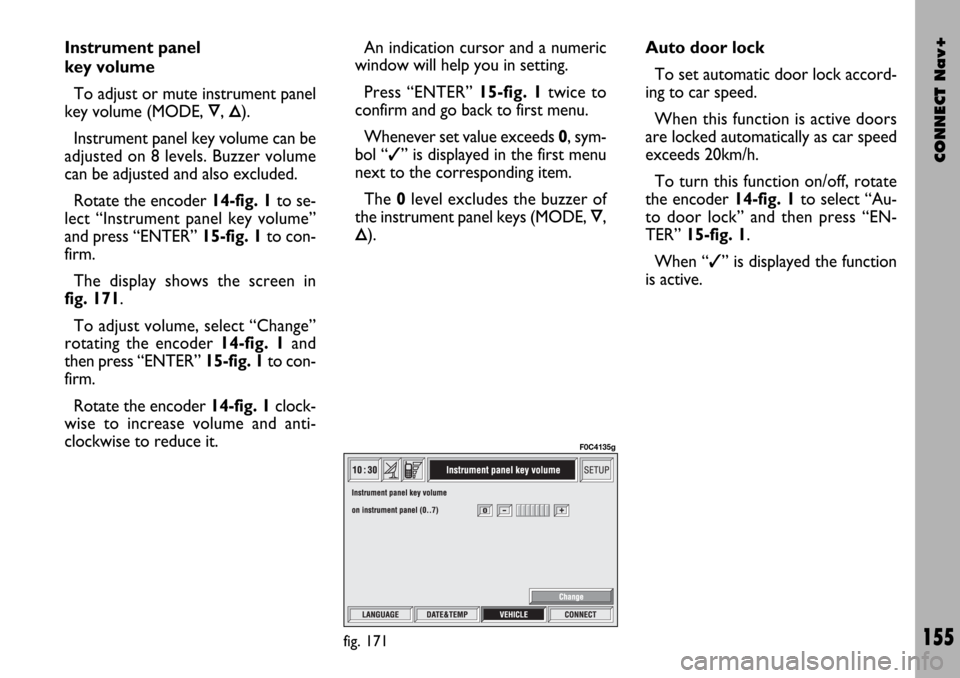
The display shows the screen in
fig. 171.
To adjust volume, select “Change”
rotating the encoder 14-fig. 1and
then press “ENTER” 15-fig. 1to con-
firm.
Rotate the encoder 14-fig. 1clock-
wise to increase volume and anti-
clockwise to reduce it.An indication cursor and a numeric
window will help you in setting.
Press “ENTER” 15-fig. 1twice to
confirm and go back to first menu.
Whenever set value exceeds 0, sym-
bol “✓” is displayed in the first menu
next to the corresponding item.
The 0level excludes the buzzer of
the instrument panel keys (MODE,
Ă”,
Ă•).Auto door lock
To set automatic door lock accord-
ing to car speed.
When this function is active doors
are locked automatically as car speed
exceeds 20km/h.
To turn this function on/off, rotate
the encoder 14-fig. 1to select “Au-
to door lock” and then press “EN-
TER” 15-fig. 1.
When “✓” is displayed the function
is active.
fig. 171
F0C4135g
Page 157 of 166
CONNECT Nav+
156
Independent driver’s side
door unlocking
To activate/deactivate independent
driver’s side door unlocking.
When this function is on only the dri-
ver’s door will be unlocked.
When this function is off all doors
will be unlocked.
To turn this function on/off, rotate
the encoder 14-fig. 1to select “Inde-
pendent driver’s side door unlocking”
and then press “ENTER” 15-fig. 1.
When “✓” is displayed the function
is active.
Independent trunk
lid opening
To activate/deactivate independent
trunk lid unlocking.
When this function is on, trunk lid
stays locked when the other doors are
unlocked.
When this function is off, trunk lid
is unlocked like the other doors.To turn this function on/off, rotate
the encoder 14-fig. 1 to select “In-
dependent trunk lid opening” and then
press “ENTER” 15-fig. 1.
When “✓” is displayed the function
is active.
OK
To activate and to store settings, se-
lect “OK” by rotating the encoder 14-
fig. 1and then press “ENTER” 15-
fig. 1.
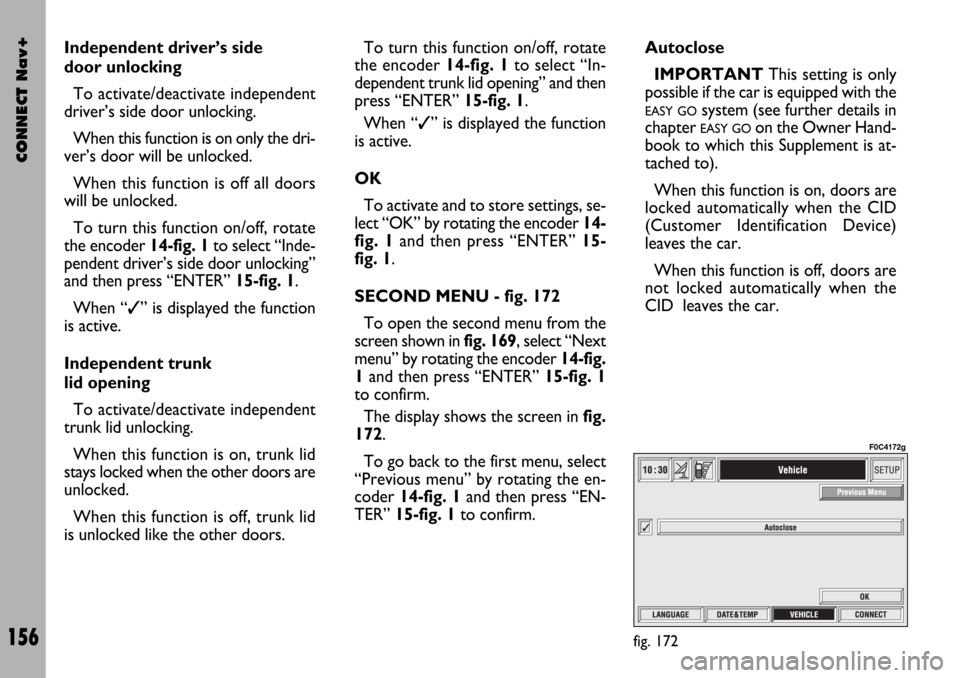
SECOND MENU - fig. 172
To open the second menu from the
screen shown in fig. 169, select “Next
menu” by rotating the encoder 14-fig.
1and then press “ENTER” 15-fig. 1
to confirm.
The display shows the screen in fig.
172.
To go back to the first menu, select
“Previous menu” by rotating the en-
coder 14-fig. 1and then press “EN-
TER” 15-fig. 1to confirm.Autoclose
IMPORTANT This setting is only
possible if the car is equipped with the
EASY GOsystem (see further details in
chapter
EASY GOon the Owner Hand-
book to which this Supplement is at-
tached to).
When this function is on, doors are
locked automatically when the CID
(Customer Identification Device)
leaves the car.
When this function is off, doors are
not locked automatically when the
CID leaves the car.
fig. 172
F0C4172g
Page 158 of 166
CONNECT Nav+
157
To turn this function on/off, select
“Autoclose” by rotating the encoder
14-fig. 1and then press “ENTER” 15-
fig. 1.
When “✓” is displayed the function
is active.
OK
To activate and to store settings, se-
lect “OK” by rotating the encoder 14-
fig. 1and then press “ENTER” 15-
fig. 1.CONNECT (settings)
To display the relevant screen page,
press one of the keypad keys 17-fig. 1
under CONNECT.
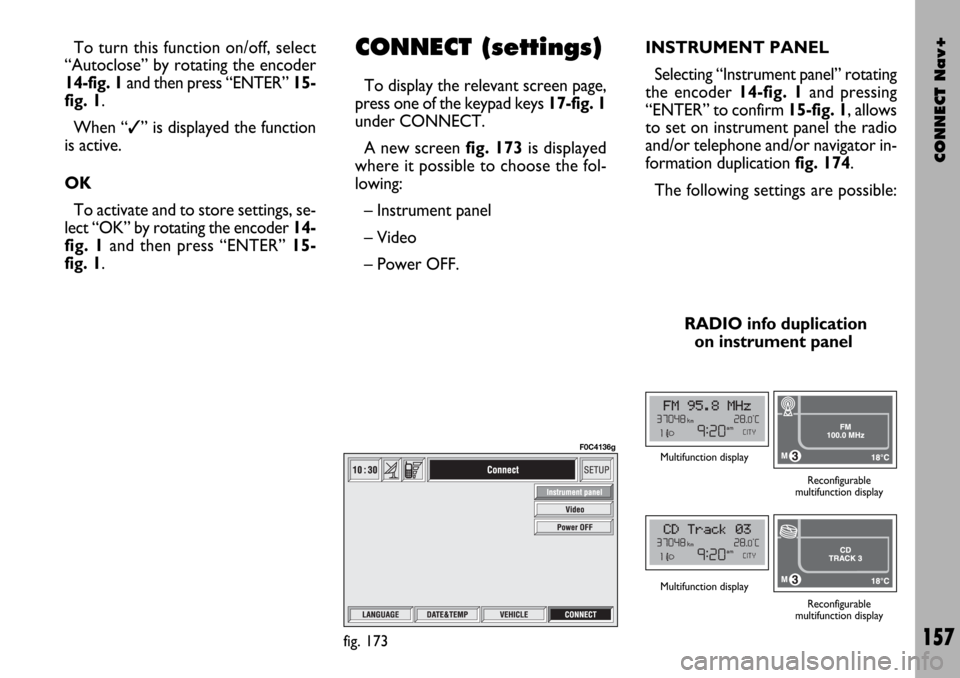
A new screen fig. 173is displayed
where it possible to choose the fol-
lowing:
– Instrument panel
– Video
– Power OFF.
fig. 173
F0C4136g
INSTRUMENT PANEL
Selecting “Instrument panel” rotating
the encoder 14-fig. 1and pressing
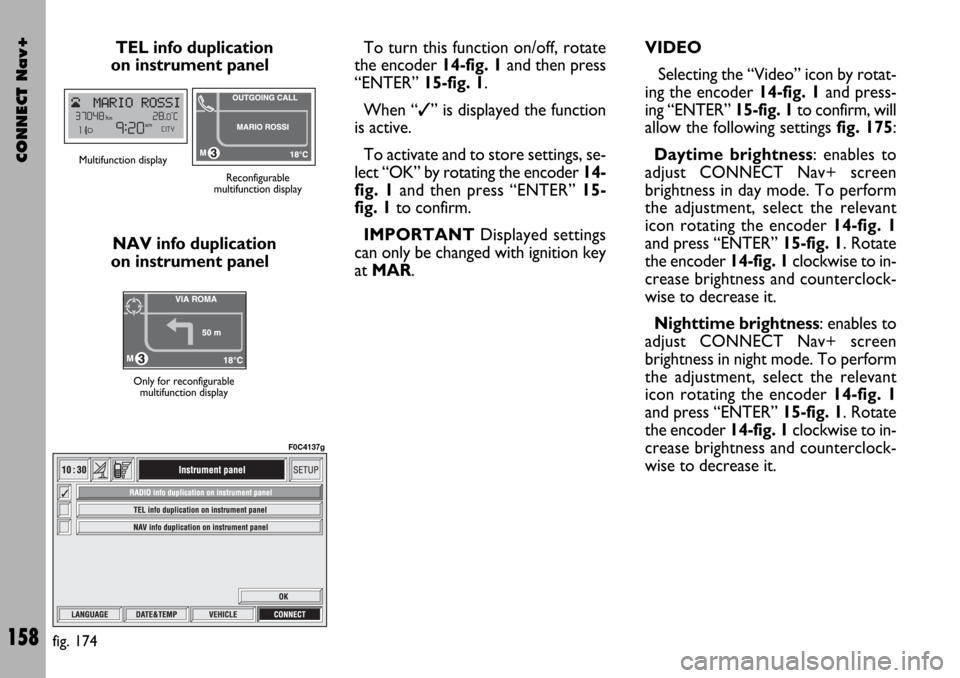
“ENTER” to confirm 15-fig. 1, allows
to set on instrument panel the radio
and/or telephone and/or navigator in-
formation duplication fig. 174.
The following settings are possible:
RADIO info duplication
on instrument panel
Multifunction display
Reconfigurable
multifunction display
Multifunction display
Reconfigurable
multifunction display
Page 159 of 166
CONNECT Nav+
158
TEL info duplication
on instrument panel
NAV info duplication
on instrument panelTo turn this function on/off, rotate
the encoder 14-fig. 1and then press
“ENTER” 15-fig. 1.
When “✓” is displayed the function
is active.
To activate and to store settings, se-
lect “OK” by rotating the encoder 14-
fig. 1and then press “ENTER” 15-
fig. 1to confirm.
IMPORTANTDisplayed settings
can only be changed with ignition key
at MAR.
Multifunction display
Reconfigurable
multifunction display
Only for reconfigurable
multifunction display
fig. 174
F0C4137g
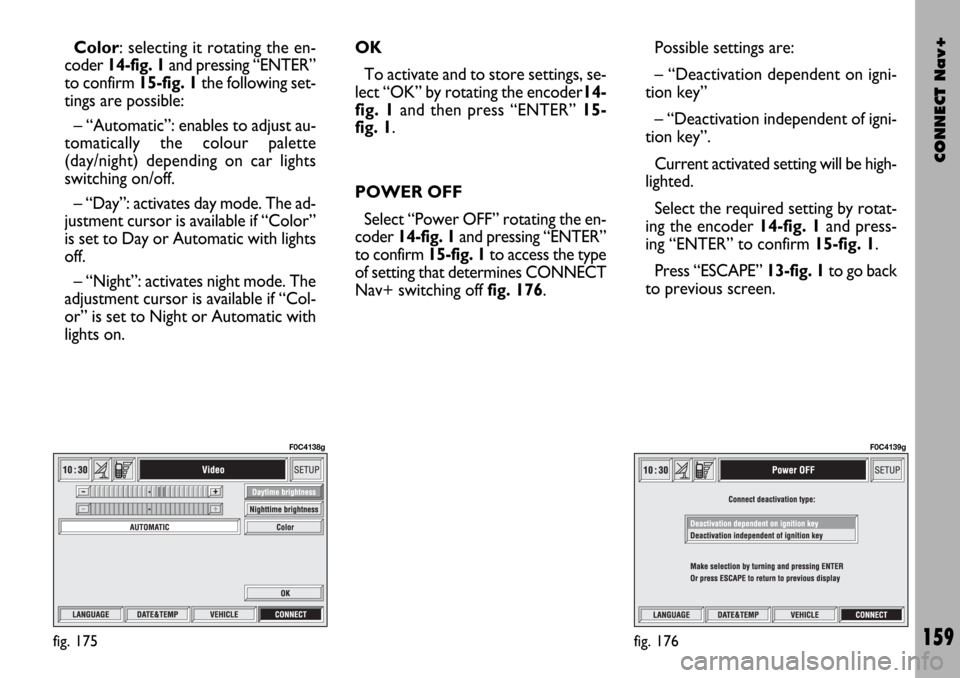
VIDEO
Selecting the “Video” icon by rotat-
ing the encoder 14-fig. 1and press-
ing “ENTER” 15-fig. 1to confirm, will
allow the following settings fig. 175:
Daytime brightness: enables to
adjust CONNECT Nav+ screen
brightness in day mode. To perform
the adjustment, select the relevant
icon rotating the encoder 14-fig. 1
and press “ENTER” 15-fig. 1. Rotate
the encoder 14-fig. 1clockwise to in-
crease brightness and counterclock-
wise to decrease it.
Nighttime brightness: enables to
adjust CONNECT Nav+ screen
brightness in night mode. To perform
the adjustment, select the relevant
icon rotating the encoder 14-fig. 1
and press “ENTER” 15-fig. 1. Rotate
the encoder 14-fig. 1clockwise to in-
crease brightness and counterclock-
wise to decrease it.
Page 160 of 166
CONNECT Nav+
159
Color: selecting it rotating the en-
coder 14-fig. 1and pressing “ENTER”
to confirm 15-fig. 1the following set-
tings are possible:
– “Automatic”: enables to adjust au-
tomatically the colour palette
(day/night) depending on car lights
switching on/off.
– “Day”: activates day mode. The ad-
justment cursor is available if “Color”
is set to Day or Automatic with lights
off.
– “Night”: activates night mode. The
adjustment cursor is available if “Col-
or” is set to Night or Automatic with
lights on.OK
To activate and to store settings, se-
lect “OK” by rotating the encoder14-
fig. 1and then press “ENTER” 15-
fig. 1.
POWER OFF
Select “Power OFF” rotating the en-
coder 14-fig. 1and pressing “ENTER”
to confirm 15-fig. 1to access the type
of setting that determines CONNECT
Nav+ switching off fig. 176.Possible settings are:
– “Deactivation dependent on igni-
tion key”
– “Deactivation independent of igni-
tion key”.
Current activated setting will be high-
lighted.
Select the required setting by rotat-
ing the encoder 14-fig. 1and press-
ing “ENTER” to confirm 15-fig. 1.
Press “ESCAPE” 13-fig. 1to go back
to previous screen.
fig. 175
F0C4138g
fig. 176
F0C4139g