FORD MONDEO 2006 2.G Service Manual
Manufacturer: FORD, Model Year: 2006, Model line: MONDEO, Model: FORD MONDEO 2006 2.GPages: 198, PDF Size: 4.69 MB
Page 41 of 198
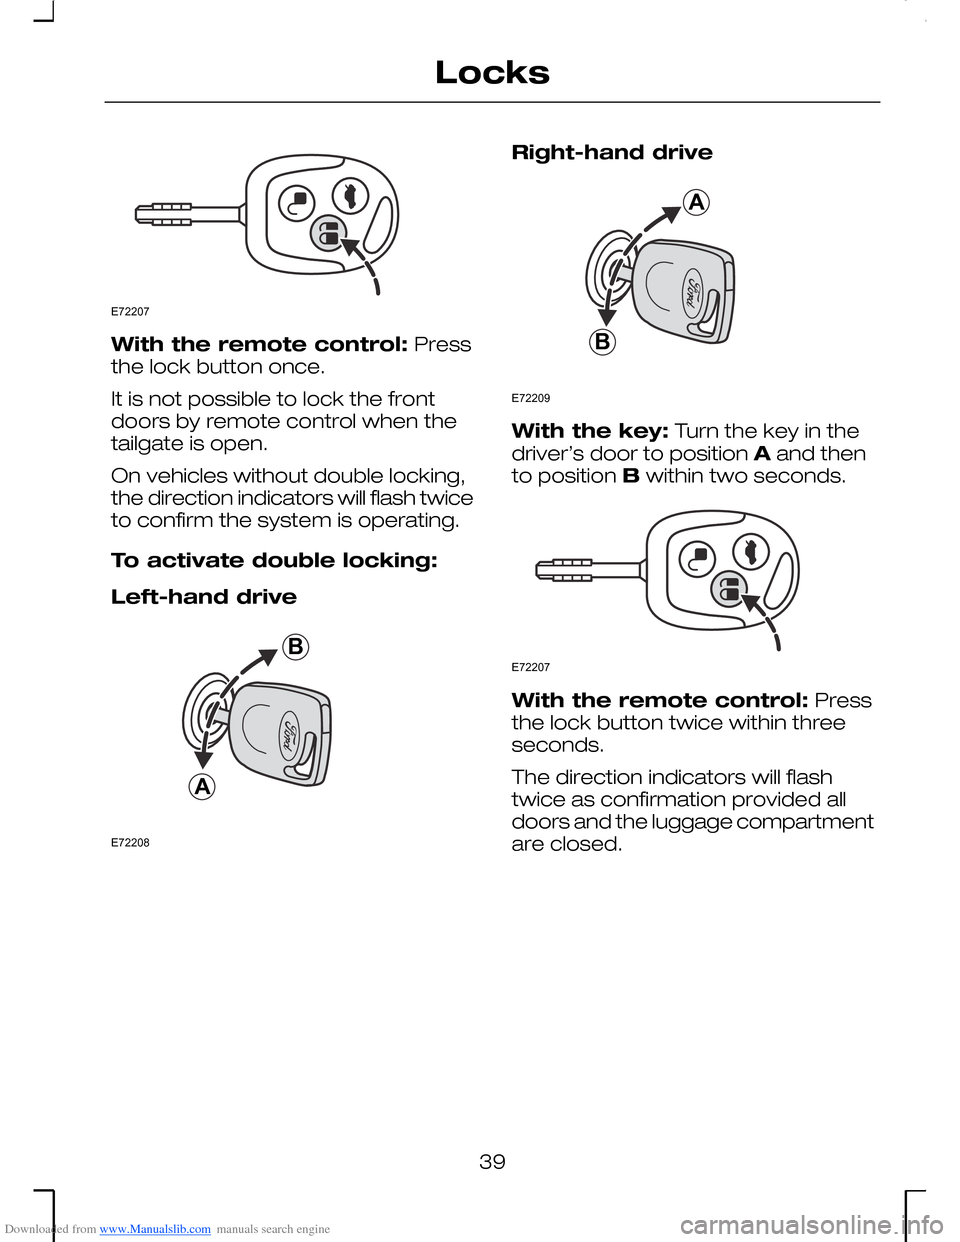
Downloaded from www.Manualslib.com manuals search engine With the remote control: Pressthe lock button once.
It is not possible to lock the frontdoors by remote control when thetailgate is open.
On vehicles without double locking,the direction indicators will flash twiceto confirm the system is operating.
To activate double locking:
Left-hand drive
Right-hand drive
With the key: Turn the key in thedriver’s door to position A and thento position B within two seconds.
With the remote control: Pressthe lock button twice within threeseconds.
The direction indicators will flashtwice as confirmation provided alldoors and the luggage compartmentare closed.
39
LocksE72207 E72208AB E72209BA E72207
Page 42 of 198
Downloaded from www.Manualslib.com manuals search engine GLOBAL OPENING AND
CLOSING
Global opening
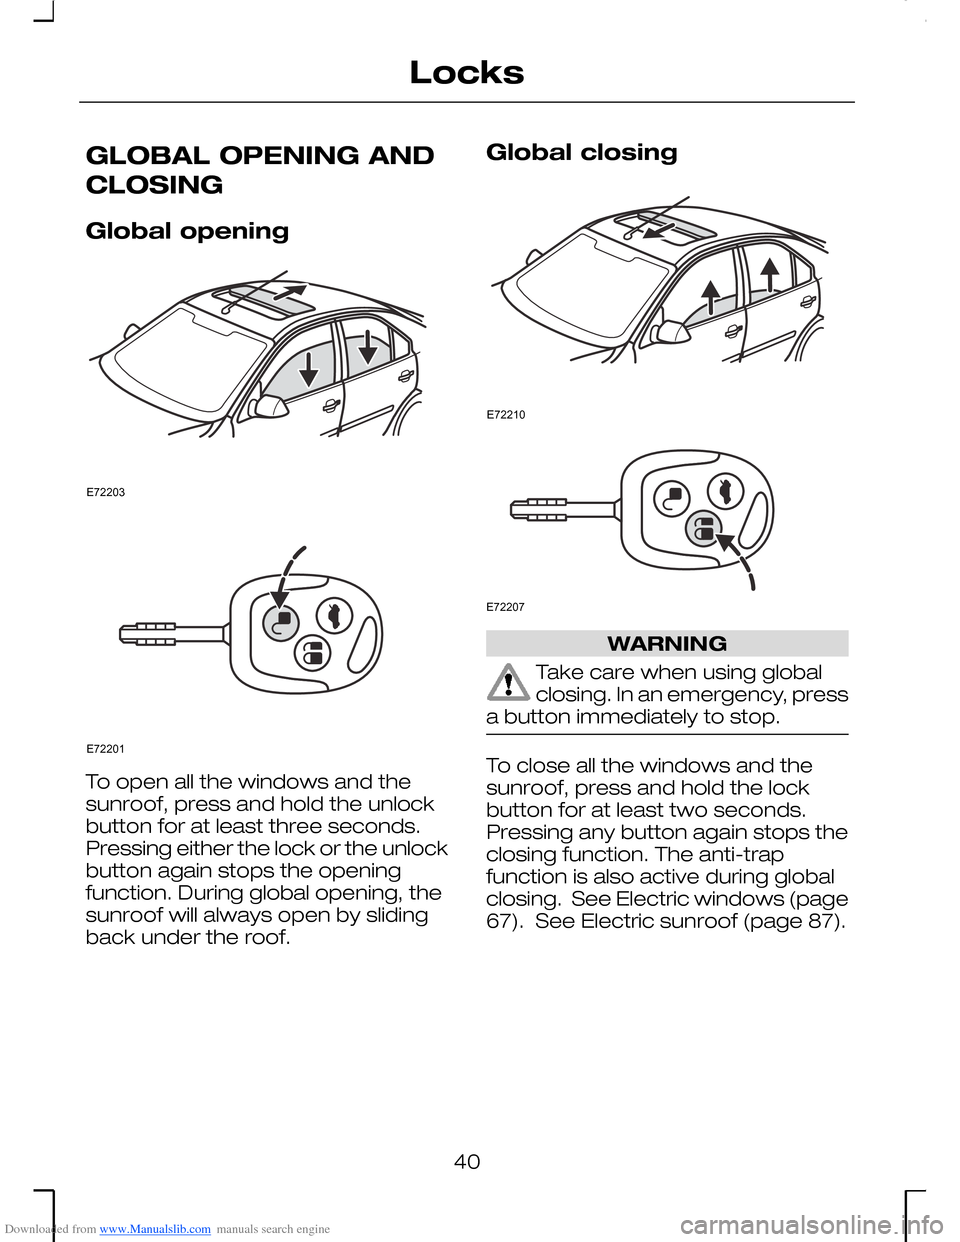
To open all the windows and thesunroof, press and hold the unlockbutton for at least three seconds.Pressing either the lock or the unlockbutton again stops the openingfunction. During global opening, thesunroof will always open by slidingback under the roof.
Global closing
WARNING
Take care when using globalclosing. In an emergency, pressa button immediately to stop.
To close all the windows and thesunroof, press and hold the lockbutton for at least two seconds.Pressing any button again stops theclosing function. The anti-trapfunction is also active during globalclosing. See Electric windows (page67). See Electric sunroof (page 87).
40
LocksE72203 E72201 E72210 E72207
Page 43 of 198
Downloaded from www.Manualslib.com manuals search engine PRINCIPLE OF
OPERATION
The engine immobilisation system isa theft protection feature whichprevents the engine from beingstarted with an incorrectly coded key.
CODED KEYS
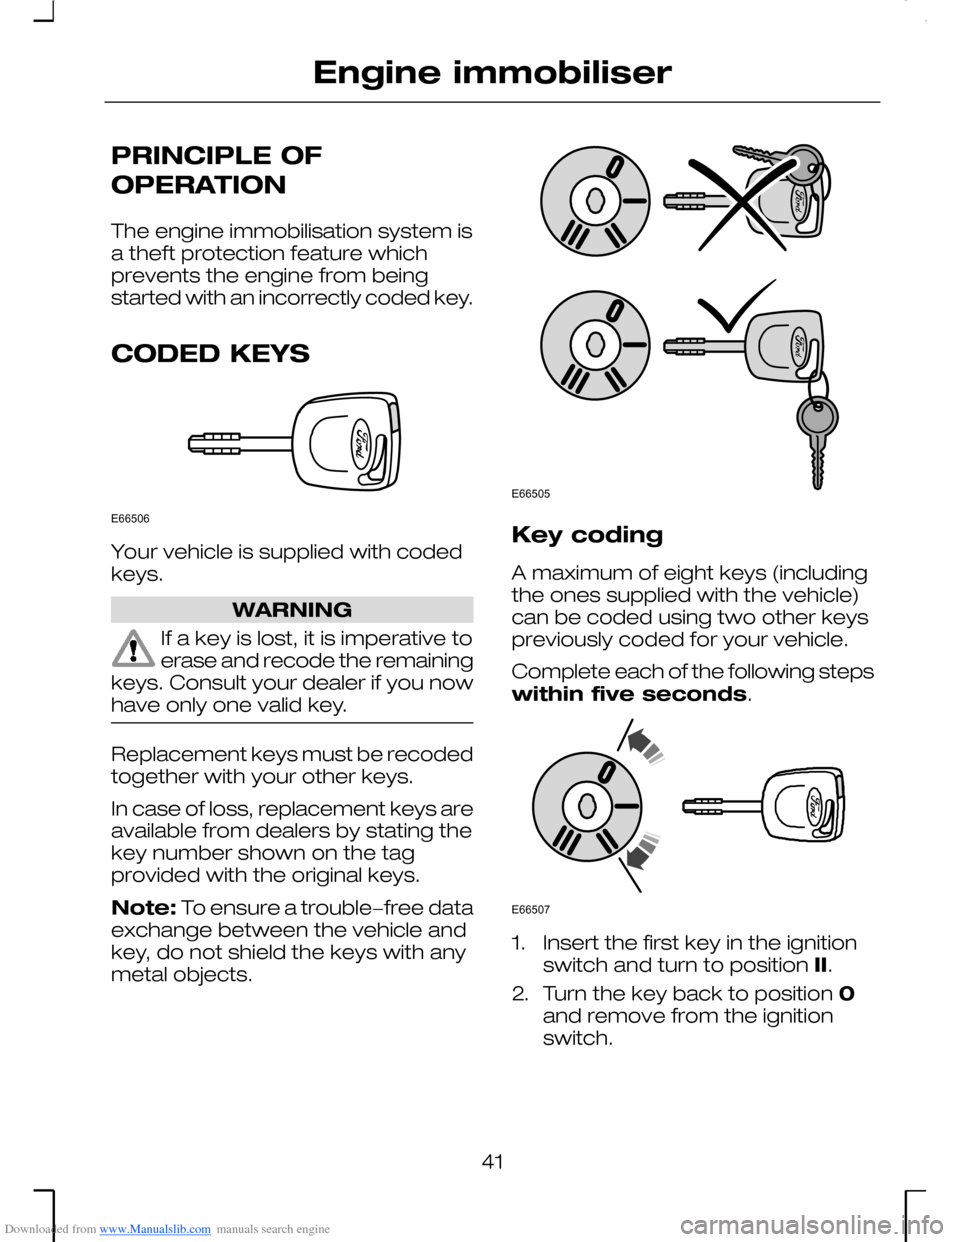
Your vehicle is supplied with codedkeys.
WARNING
If a key is lost, it is imperative toerase and recode the remainingkeys. Consult your dealer if you nowhave only one valid key.
Replacement keys must be recodedtogether with your other keys.
In case of loss, replacement keys areavailable from dealers by stating thekey number shown on the tagprovided with the original keys.
Note: To ensure a trouble−free dataexchange between the vehicle andkey, do not shield the keys with anymetal objects.
Key coding
A maximum of eight keys (includingthe ones supplied with the vehicle)can be coded using two other keyspreviously coded for your vehicle.
Complete each of the following stepswithin five seconds.
1.Insert the first key in the ignitionswitch and turn to position II.
2.Turn the key back to position 0and remove from the ignitionswitch.
41
Engine immobiliserE66506 E66505 E66507
Page 44 of 198
Downloaded from www.Manualslib.com manuals search engine 3.Insert the second key in theignition switch and turn to positionII.
4.Turn the second key back toposition 0 and remove from theignition switch − the key codingmode is now activated.
5.If an uncoded key is now insertedin the ignition switch and turnedto position II within 10 seconds,this key is coded to the system.
6.After the coding process iscompleted, remove the key fromthe ignition switch. Wait fiveseconds for the system to beactivated.
If coding is not completed correctly,the indicator light flashes after theignition is switched on with the newlycoded key and the engine will notstart.
Repeat the coding process afterwaiting 20 seconds with the ignitionswitched on (position II).
Coding erasure
With two keys coded for your vehicleyou can make all the other codedkeys unusable, e.g. after loss:
Complete each of the following stepswithin five seconds.
Carry out the first four steps underKey coding, then continue asfollows:
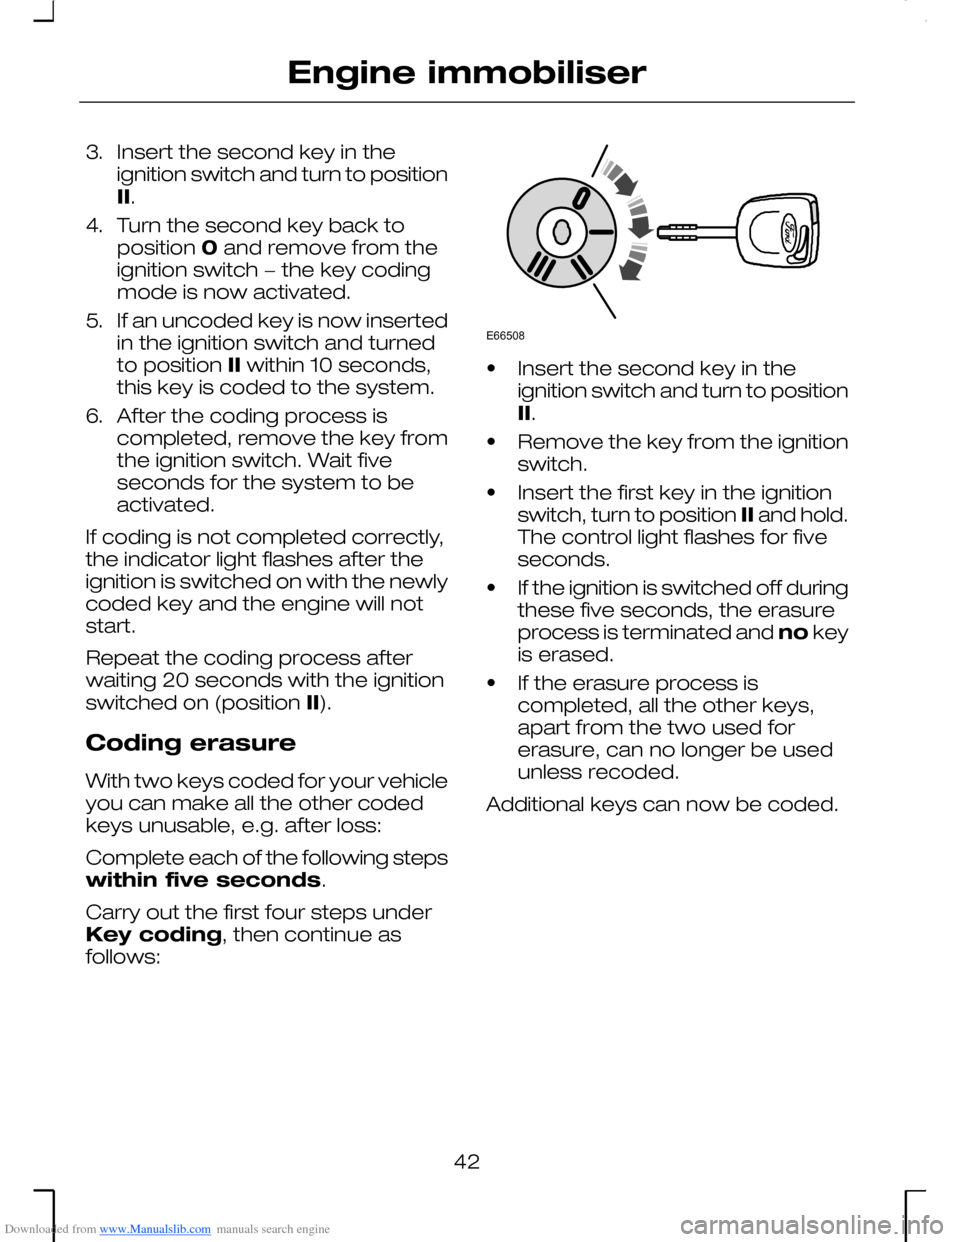
•Insert the second key in theignition switch and turn to positionII.
•Remove the key from the ignitionswitch.
•Insert the first key in the ignitionswitch, turn to position II and hold.The control light flashes for fiveseconds.
•If the ignition is switched off duringthese five seconds, the erasureprocess is terminated and no keyis erased.
•If the erasure process iscompleted, all the other keys,apart from the two used forerasure, can no longer be usedunless recoded.
Additional keys can now be coded.
42
Engine immobiliserE66508
Page 45 of 198
Downloaded from www.Manualslib.com manuals search engine ARMING THE ENGINE
IMMOBILISER
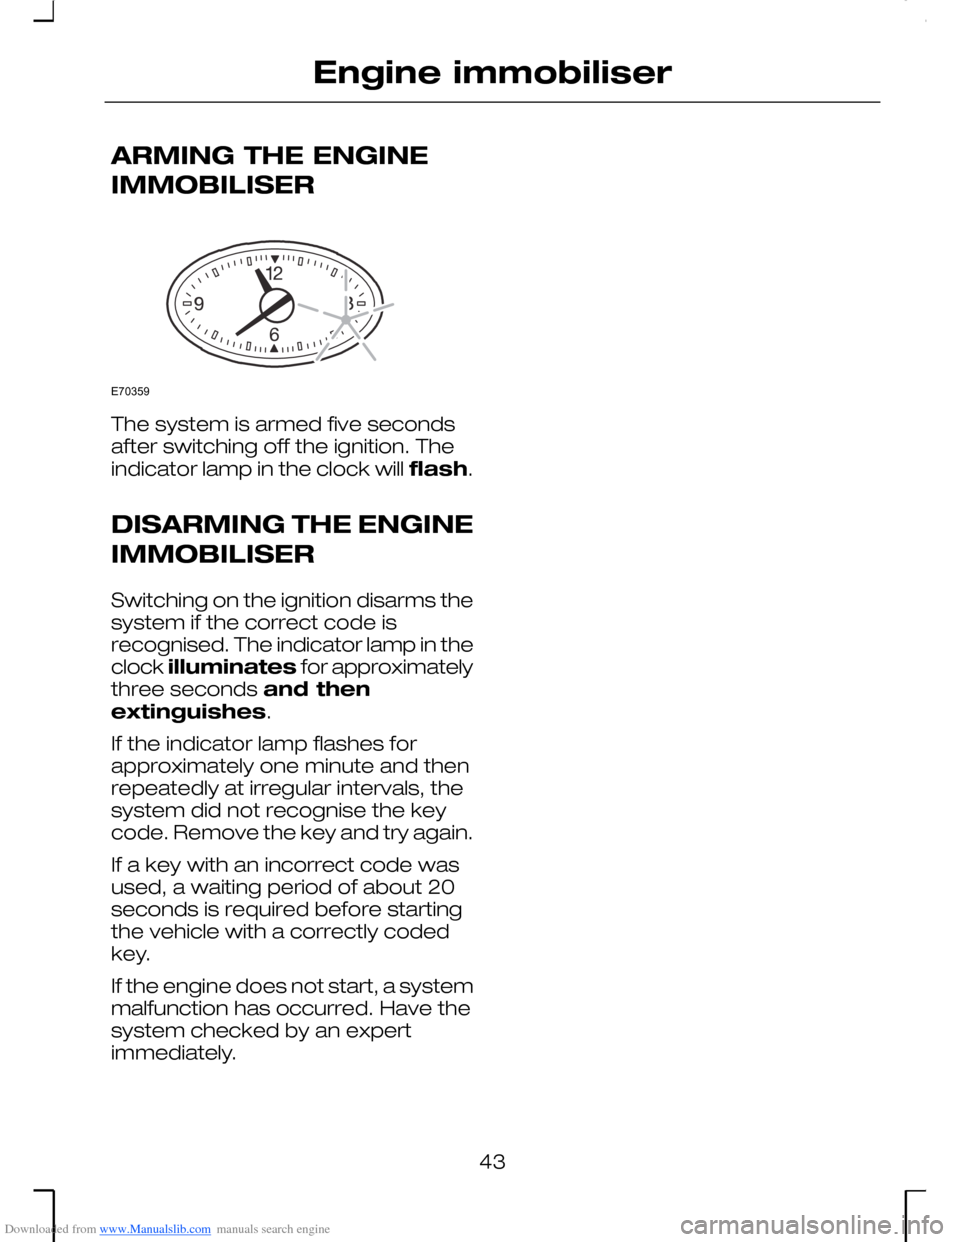
The system is armed five secondsafter switching off the ignition. Theindicator lamp in the clock will flash.
DISARMING THE ENGINE
IMMOBILISER
Switching on the ignition disarms thesystem if the correct code isrecognised. The indicator lamp in theclock illuminates for approximatelythree seconds and thenextinguishes.
If the indicator lamp flashes forapproximately one minute and thenrepeatedly at irregular intervals, thesystem did not recognise the keycode. Remove the key and try again.
If a key with an incorrect code wasused, a waiting period of about 20seconds is required before startingthe vehicle with a correctly codedkey.
If the engine does not start, a systemmalfunction has occurred. Have thesystem checked by an expertimmediately.
43
Engine immobiliserE70359
Page 46 of 198
Downloaded from www.Manualslib.com manuals search engine ARMING THE ALARM
Note: If the vehicle is locked with thekey, this does not activate the alarmsystem (vehicles with 3.0 l Duractec−VE/-ST or 2.5l Duractec−VE engineand enhanced security).
The system is armed as soon as thevehicle is locked and acts as adeterrent to unauthorised personswho attempt to open the doors,bonnet or luggage compartment, orremove the audio system.
Interior sensors
Note: The interior sensors functioncorrectly only if all windows and thesunroof are completely closed. Inaddition to this, the sensors must notbe covered up. The system shouldnot be activated if any persons,animals or other moving objects areinside the vehicle.
Note: Do not activate the interiorsensors if an additional heatingsystem is used, as the alarm couldotherwise be set off.
The interior sensors monitor anymovement within the vehicle.
The interior sensors are activatedtogether with the double lockingsystem.
Automatic arming delay
Up to 20 seconds after activating theanti-theft alarm system, it is stillpossible to open the vehicle againwithout triggering the alarm. Afterthat, the anti-theft alarm system willmonitor all doors, the bonnet and thetailgate, provided that they areclosed.
If a door, the bonnet or the tailgate isclosed later, the system will monitorit after 20 seconds.
Alarm
The alarm sounds for 30 seconds ifan unauthorised person opens adoor, the luggage compartment orthe bonnet, or if the interior sensors(optional) register any movementinside the vehicle.
The hazard warning flashers will flashfor five minutes.
Any attempt to start the engine or toremove the audio system sounds thealarm again.
DISARMING THE ALARM
The anti-theft alarm system can bedeactivated at any time – even whenthe alarm is sounding – by unlockingthe driver’s door with the key or withthe remote control.
44
Alarm
Page 47 of 198
Downloaded from www.Manualslib.com manuals search engine The anti-theft alarm system for thetailgate is deactivated when theluggage compartment is unlockedwith a key (4-door models) or theremote control (all models). Afterclosure, the alarm is once againarmed.
Vehicles with 3.0 l Duratec-VE/-ST or 2.5 l Duratec-VEengine
Note: Unlocking a front door with akey will not deactivate this alarm.
On vehicles with enhanced security(certain markets only), the anti-theftalarm system is deactivated bypressing the unlock button on theremote control.
To deactivate with a non-remote key,open the driver’s door with themechanical key. This starts a 12second delay chime before the alarmsounds. During this period the alarmsystem can be deactivated by turningthe key in the ignition to position II.
45
Alarm
Page 48 of 198
Downloaded from www.Manualslib.com manuals search engine ADJUSTING THE
STEERING WHEEL
WARNING
Never adjust the steering wheelwhen the vehicle is moving.
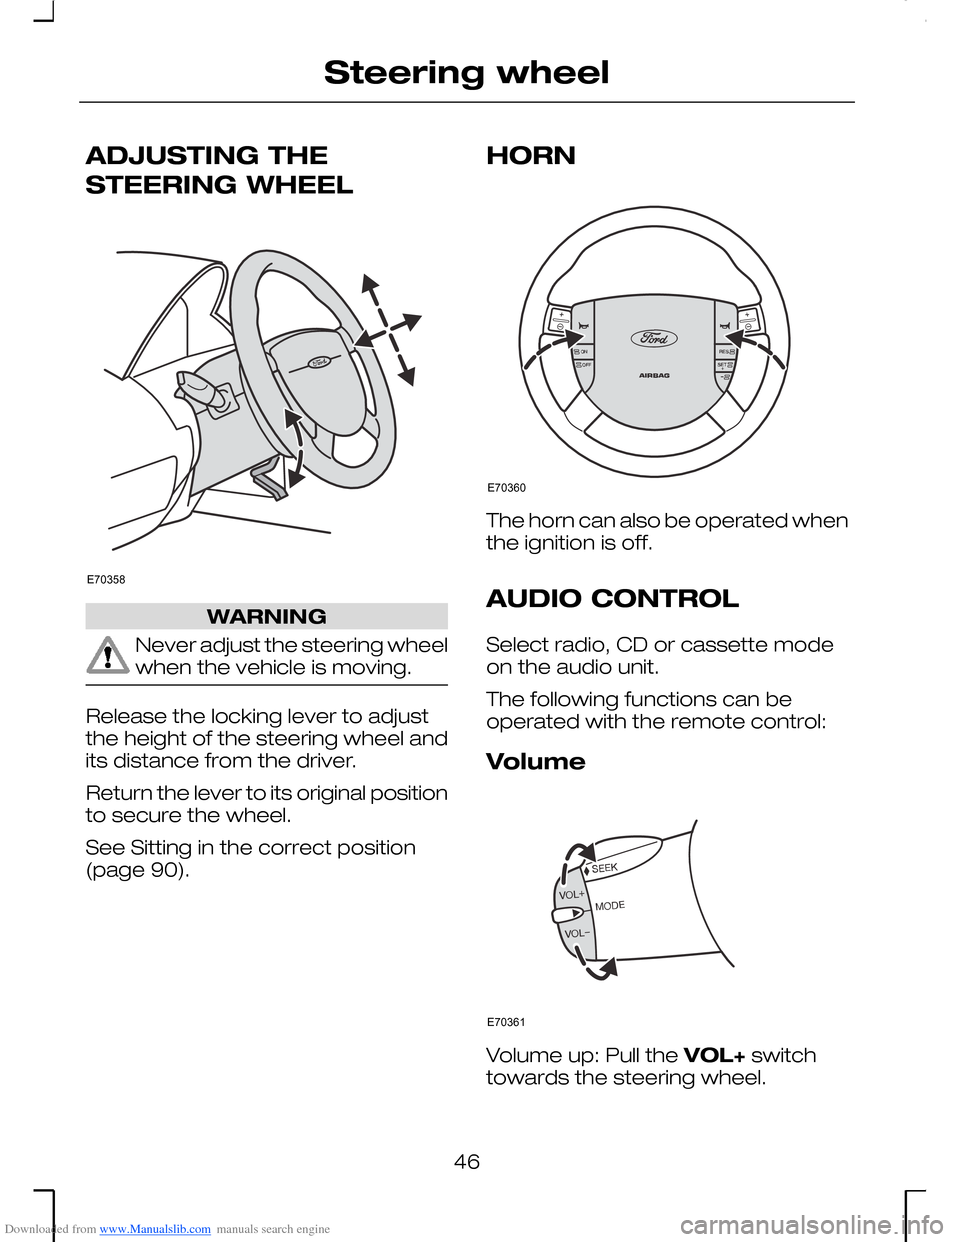
Release the locking lever to adjustthe height of the steering wheel andits distance from the driver.
Return the lever to its original positionto secure the wheel.
See Sitting in the correct position(page 90).
HORN
The horn can also be operated whenthe ignition is off.
AUDIO CONTROL
Select radio, CD or cassette modeon the audio unit.
The following functions can beoperated with the remote control:
Volume
Volume up: Pull the VOL+ switchtowards the steering wheel.
46
Steering wheelE70358 E70360 E70361
Page 49 of 198
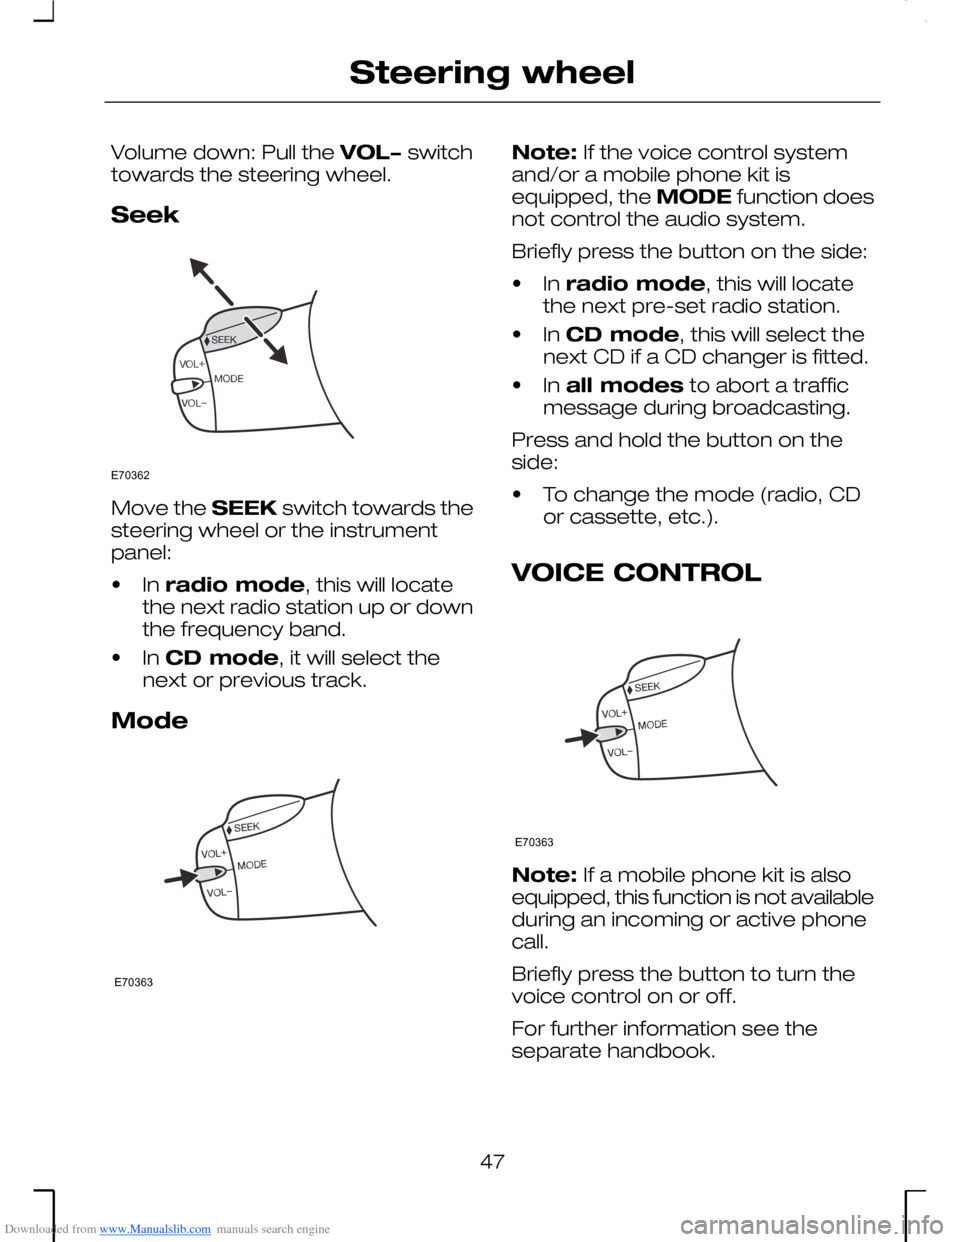
Downloaded from www.Manualslib.com manuals search engine Volume down: Pull the VOL− switchtowards the steering wheel.
Seek
Move the SEEK switch towards thesteering wheel or the instrumentpanel:
•In radio mode, this will locatethe next radio station up or downthe frequency band.
•In CD mode, it will select thenext or previous track.
Mode
Note: If the voice control systemand/or a mobile phone kit isequipped, the MODE function doesnot control the audio system.
Briefly press the button on the side:
•In radio mode, this will locatethe next pre-set radio station.
•In CD mode, this will select thenext CD if a CD changer is fitted.
•In all modes to abort a trafficmessage during broadcasting.
Press and hold the button on theside:
•To change the mode (radio, CDor cassette, etc.).
VOICE CONTROL
Note: If a mobile phone kit is alsoequipped, this function is not availableduring an incoming or active phonecall.
Briefly press the button to turn thevoice control on or off.
For further information see theseparate handbook.
47
Steering wheelE70362 E70363 E70363
Page 50 of 198
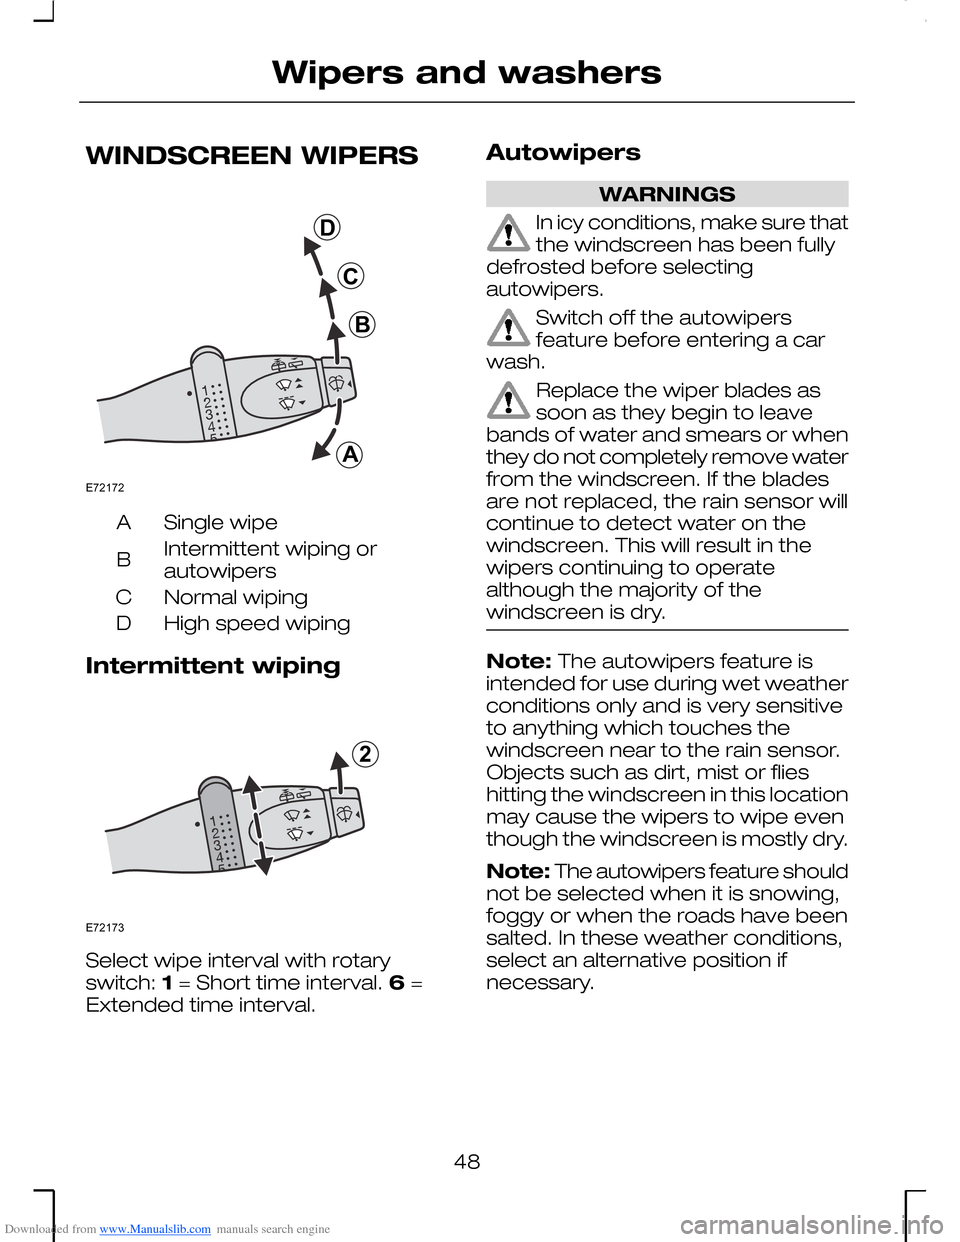
Downloaded from www.Manualslib.com manuals search engine WINDSCREEN WIPERS
Single wipeA
Intermittent wiping orautowipersB
Normal wipingC
High speed wipingD
Intermittent wiping
Select wipe interval with rotaryswitch: 1 = Short time interval. 6 =Extended time interval.
Autowipers
WARNINGS
In icy conditions, make sure thatthe windscreen has been fullydefrosted before selectingautowipers.
Switch off the autowipersfeature before entering a carwash.
Replace the wiper blades assoon as they begin to leavebands of water and smears or whenthey do not completely remove waterfrom the windscreen. If the bladesare not replaced, the rain sensor willcontinue to detect water on thewindscreen. This will result in thewipers continuing to operatealthough the majority of thewindscreen is dry.
Note: The autowipers feature isintended for use during wet weatherconditions only and is very sensitiveto anything which touches thewindscreen near to the rain sensor.Objects such as dirt, mist or flieshitting the windscreen in this locationmay cause the wipers to wipe eventhough the windscreen is mostly dry.
Note: The autowipers feature shouldnot be selected when it is snowing,foggy or when the roads have beensalted. In these weather conditions,select an alternative position ifnecessary.
48
Wipers and washersABCDE72172 E721732