FORD MUSTANG 2003 Workshop Manual
MUSTANG 2003
FORD
FORD
https://www.carmanualsonline.info/img/11/56942/w960_56942-0.png
FORD MUSTANG 2003 Workshop Manual
Trending: headrest, low oil pressure, vacuum, Door, radio antenna, suspension, ESP
Page 1771 of 4378
51. Remove the RH and the LH timing chains and crankshaft sprocket.
52. Remove the RH and LH timing chain guides.
53. Remove the RH and LH cylinder heads.
54. Remove the oil filter adapter.
1. Remove the oil filter.
2. Remove the bolts.
3. Remove the oil filter adapter.
4. Remove the gasket. �K�l�j . 16 �b�a
212003 Mustang Workshop Manual
17. 11. 2011file:///C:/Ford/2000 - 2004/tsocache/SHEF_4464/S3B~us~en~ ...
Page 1772 of 4378
55. Clean and inspect the oil filter adapter.
�zFlush the adapter with parts cleaner. If metal particles are present, install a new oil filter
adapter.
56. Remove the bolts and the oil pump screen and pickup tube.
57. Remove the oil pump screen and pickup tube spacer.
58. Remove the nuts and the windage tray. �K�l�j . 17 �b�a
212003 Mustang Workshop Manual
17. 11. 2011file:///C:/Ford/2000 - 2004/tsocache/SHEF_4464/S3B~us~en~ ...
Page 1773 of 4378
59. Remove the LH engine mount.
60. Remove the RH engine mount.
61. Remove the bolts and the oil pump.
62.
CAUTION: Do not stamp the top of pistons, as ring land damage can occur.
NOTE: Connecting rods and rod caps should be numbered to keep the correct orientation in the
following sequence.
Remove the connecting rod caps for piston number 1 and 6.
�zDiscard the bolts. �K�l�j . 18 �b�a
212003 Mustang Workshop Manual
17. 11. 2011file:///C:/Ford/2000 - 2004/tsocache/SHEF_4464/S3B~us~en~ ...
Page 1774 of 4378
63.
CAUTION: Do not scratch the cylinder walls or crankshaft journals with the
connecting rod.
NOTE: Before removing pistons, inspect the top of the cylinder bores. If necessary, remove the
ridge or carbon deposits from each cylinder using a cylinder ridge reamer following
manufacturer's instructions.
Using the special tool, push pistons number 1 and 6 through the top of the cylinder block.
64. To remove pistons 3 and 5, 4 and 7, 2 and 8, turn crankshaft 90 degrees and repeat the previous two steps.
65. Remove the side main bearing cap bolts. �K�l�j . 19 �b�a
212003 Mustang Workshop Manual
17. 11. 2011file:///C:/Ford/2000 - 2004/tsocache/SHEF_4464/S3B~us~en~ ...
Page 1775 of 4378
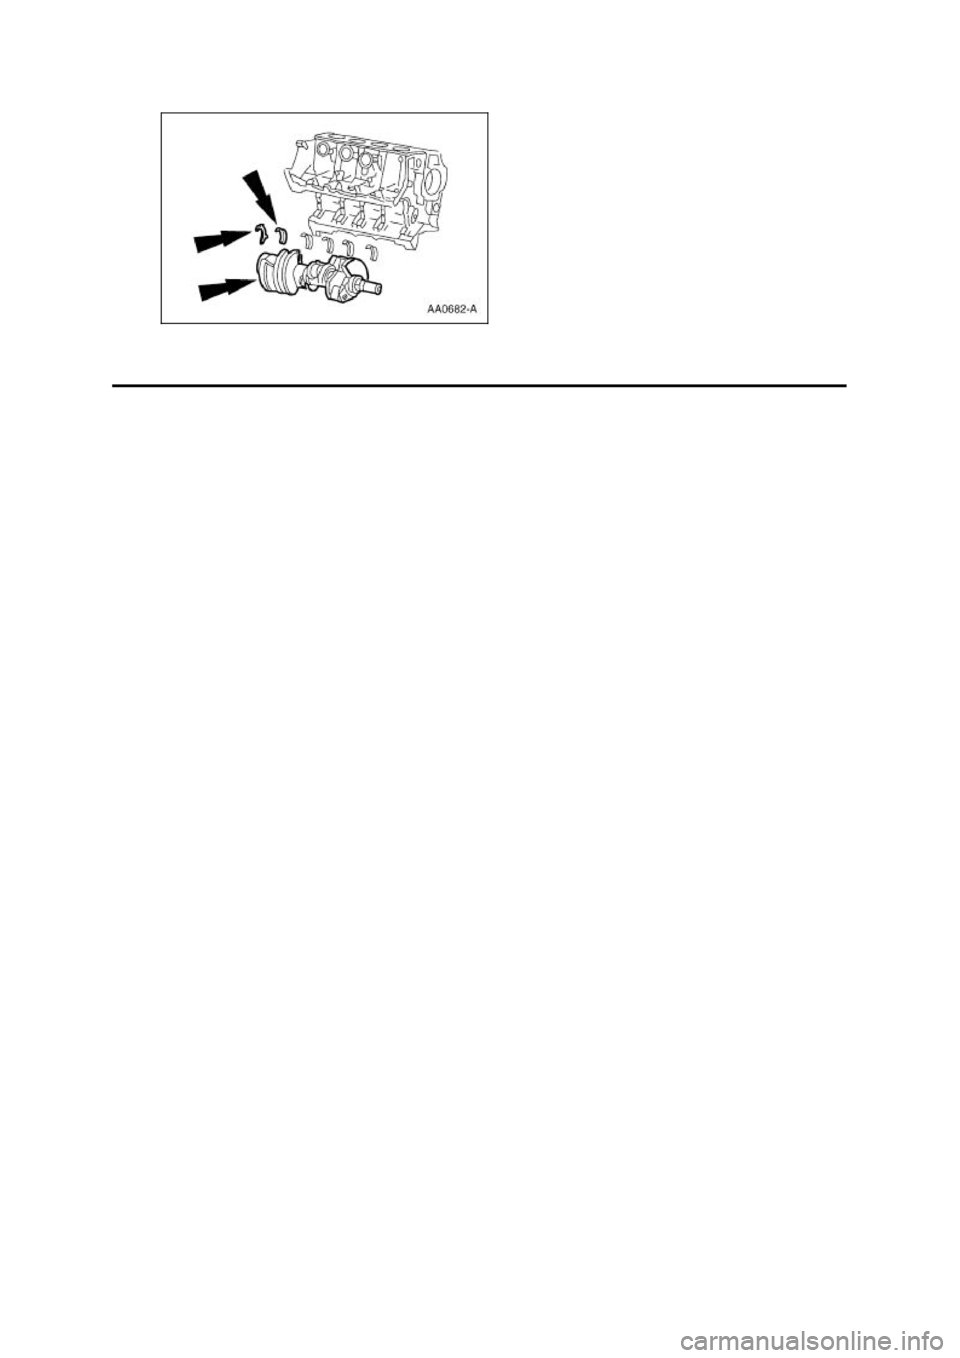
66. Remove and discard the main bearing cap bolts.
67. Remove the main bearing caps and the crankshaft lower main bearings from the cylinder block.
68. Remove the crankshaft, the crankshaft thrust washer, and the crankshaft upper main bearings
from the cylinder block. �K�l�j . 20 �b�a
212003 Mustang Workshop Manual
17. 11. 2011file:///C:/Ford/2000 - 2004/tsocache/SHEF_4464/S3B~us~en~ ...
Page 1776 of 4378
�K�l�j . 21 �b�a
212003 Mustang Workshop Manual
17. 11. 2011file:///C:/Ford/2000 - 2004/tsocache/SHEF_4464/S3B~us~en~ ...
Page 1777 of 4378
DISASSEMBLY AND ASSEMBLY OF SUBASSEMBLIES
Cylinder Head
Disassembly
1. CAUTION: Do not place the cylinder head flat on the bench; the valves will bend.
CAUTION: Before disassembly begins, mark the valve position on the face of each valve being removed. The valves must be re - installed into the same positions. SECTION 303-
01D: Engine — Mach I 4.6L (4V) 2003 Mustang Workshop Manual Special Tool(s)
Compressor, Valve Spring
(Exhaust Side)
303-
567 (T97P-6565- AH) Compressor, Valve Spring
(Intake Side)
303-
452 (T93P-6565- AR) Holding Tool, Camshaft
303-
446 (T93P-6256- AHR) Compressor, Valve Spring, Air
Operated
134-
R0207 or equivalent Installer, Valve Stem Oil Seal
303-
383 (T91P-6571- A)
Material Item Specification
Super Premium SAE 5W-20
Engine Oil
XO- 5W20- QSP or equivalent WSS-
M2C153-
H �K�l�j . 1 �b�a
112003 Mustang Workshop Manual
17. 11. 2011file:///C:/Ford/2000 - 2004/tsocache/SHEF_4464/S3B~us~en~ ...
Page 1778 of 4378
Install the special tool.
2. Remove the exhaust camshaft sprocket and the intake camshaft bolt, washer and spacer.
3. Compress the tensioner and install a lock pin.
4. Remove the special tool.
5. Remove the timing chain and the camshaft sprocket. �K�l�j . 2 �b�a
112003 Mustang Workshop Manual
17. 11. 2011file:///C:/Ford/2000 - 2004/tsocache/SHEF_4464/S3B~us~en~ ...
Page 1779 of 4378
6.
NOTE: LH tensioner is shown, RH tensioner is similar.
Remove the tensioner.
7. Remove the roller followers on the base circle. 1. Install the special tool on the valve spring.
2. Compress the tool and remove the roller follower.
8. Repeat the previous step for the remaining roller followers.
9. Remove the hydraulic lash adjusters. �K�l�j . 3 �b�a
112003 Mustang Workshop Manual
17. 11. 2011file:///C:/Ford/2000 - 2004/tsocache/SHEF_4464/S3B~us~en~ ...
Page 1780 of 4378
10.
CAUTION: Make sure the tool is seated correctly on the valve spring. Apply a small
amount of air at a time. This will prevent the tool from shifting and causing damage to
the cylinder head.
Install the air- operated spring compressor on the cylinder head.
11. Compress the valve spring compressor and remove the key from the valves.
12. Remove the intake valves and the valve springs. 1. Release the pressure and remove the valve spring compressor. 2. Remove the intake valves and the valve springs from the cylinder head. �K�l�j . 4 �b�a
112003 Mustang Workshop Manual
17. 11. 2011file:///C:/Ford/2000 - 2004/tsocache/SHEF_4464/S3B~us~en~ ...
Trending: steering wheel, instrument panel, fuel pressure, jump start terminals, lights, seat adjustment, ECU