HONDA CR-V 2000 RD1-RD3 / 1.G Owners Manual
Manufacturer: HONDA, Model Year: 2000, Model line: CR-V, Model: HONDA CR-V 2000 RD1-RD3 / 1.GPages: 322, PDF Size: 4.64 MB
Page 211 of 322
Transmissio
n Flui d
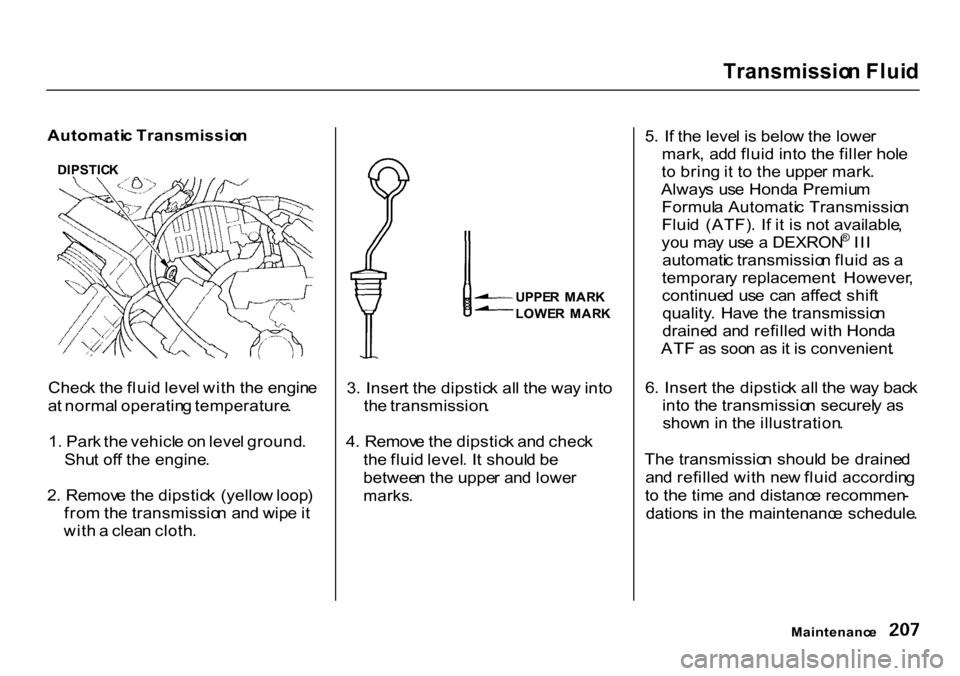
Automati c Transmissio n
DIPSTIC K
Chec k th e flui d leve l wit h th e engin e
a t norma l operatin g temperature .
1 . Par k th e vehicl e o n leve l ground .
Shu t of f th e engine .
2 . Remov e th e dipstic k (yello w loop )
fro m th e transmissio n an d wip e it
wit h a clea n cloth . 3
. Inser t th e dipstic k al l th e wa y int o
th e transmission .
4 . Remov e th e dipstic k an d chec k
th e flui d level . I t shoul d b e
betwee n th e uppe r an d lowe r
marks .
5
. I f th e leve l i s belo w th e lowe r
mark , ad d flui d int o th e fille r hol e
t o brin g it t o th e uppe r mark .
Alway s us e Hond a Premiu m
Formul a Automati c Transmissio n
Flui d (ATF) . I f i t i s no t available ,
yo u ma y us e a DEXRON ®
II I
automati c transmissio n flui d a s a
temporar y replacement . However ,
continue d us e ca n affec t shif t
quality . Hav e th e transmissio n
draine d an d refille d wit h Hond a
AT F a s soo n a s it i s convenient .
6 . Inser t th e dipstic k al l th e wa y bac k
int o th e transmissio n securel y a s
show n in th e illustration .
Th e transmissio n shoul d b e draine d
an d refille d wit h ne w flui d accordin g
t o th e tim e an d distanc e recommen -
dation s i n th e maintenanc e schedule .
Maintenanc e
UPPE
R MAR K
LOWE R MAR K
Page 212 of 322
Transmissio
n Flui d
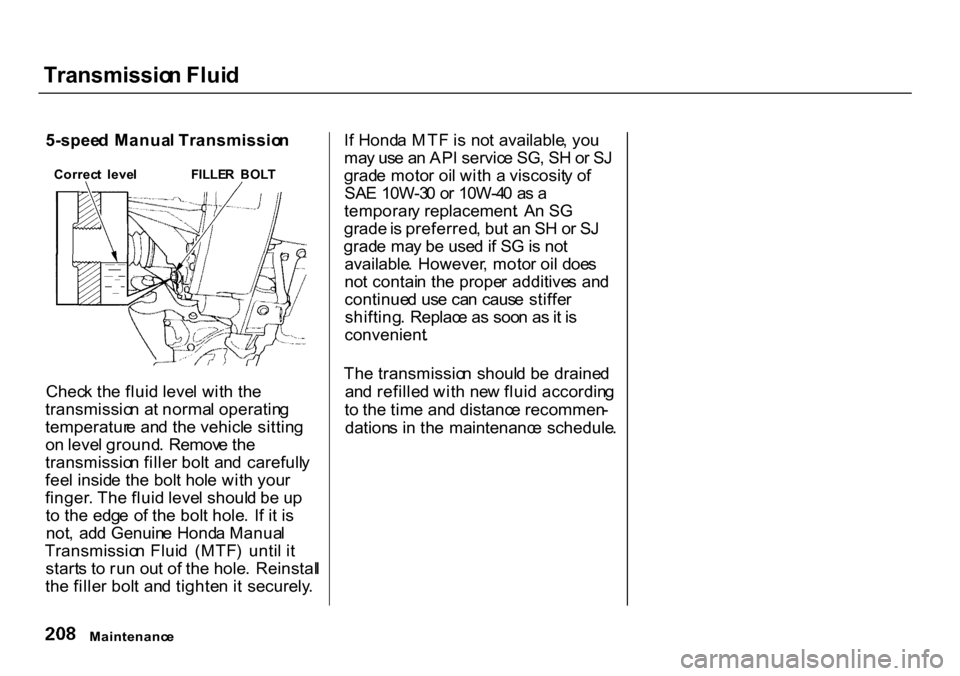
5-spee d Manua l Transmissio n
Chec k th e flui d leve l wit h th e
transmissio n a t norma l operatin g
temperatur e an d th e vehicl e sittin g
o n leve l ground . Remov e th e
transmissio n fille r bol t an d carefull y
fee l insid e th e bol t hol e wit h you r
finger . Th e flui d leve l shoul d b e u p
t o th e edg e o f th e bol t hole . I f i t i s
not , ad d Genuin e Hond a Manua l
Transmissio n Flui d (MTF ) unti l i t
start s t o ru n ou t o f th e hole . Reinstal l
th e fille r bol t an d tighte n i t securely .I
f Hond a MT F is no t available , yo u
ma y us e a n AP I servic e SG , S H o r S J
grad e moto r oi l wit h a viscosit y o f
SA E 10W-3 0 o r 10W-4 0 a s a
temporar y replacement . A n S G
grade is preferred , bu t a n S H o r S J
grad e ma y b e use d if S G is no t
available . However , moto r oi l doe s
no t contai n th e prope r additive s an d
continue d us e ca n caus e stiffe r
shifting . Replac e a s soo n a s it i s
convenient .
Th e transmissio n shoul d b e draine d
an d refille d wit h ne w flui d accordin g
t o th e tim e an d distanc e recommen -
dation s i n th e maintenanc e schedule .
Maintenanc e
FILLE
R BOL T
Correc t leve l
Page 213 of 322
Rea
r Differentia l Flui d
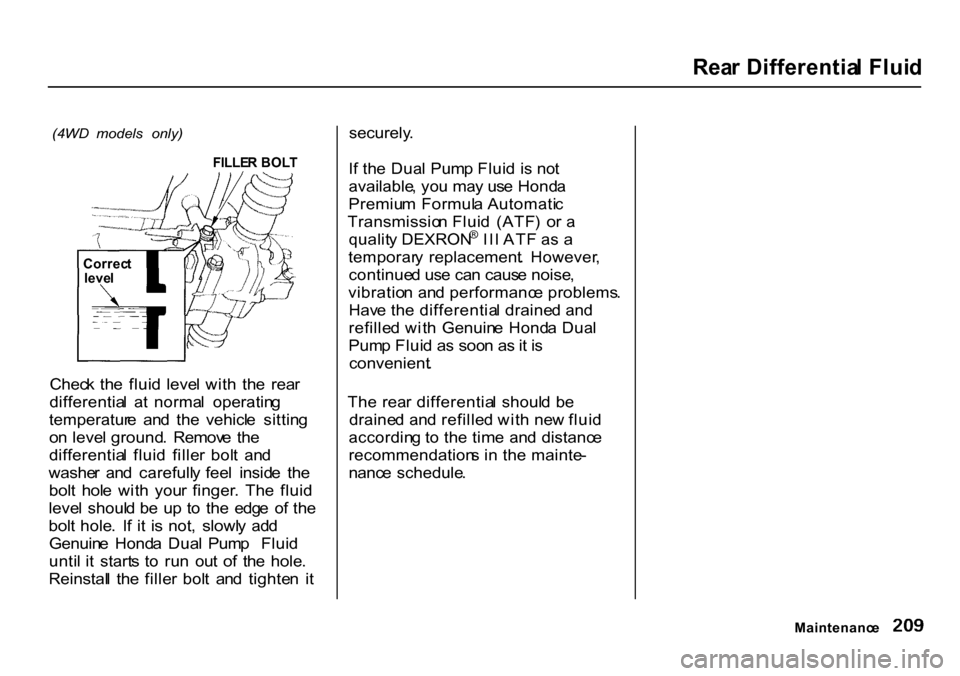
(4WD models only)
FILLER BOL T
Chec k th e flui d leve l wit h th e rea r
differentia l a t norma l operatin g
temperatur e an d th e vehicl e sittin g
o n leve l ground . Remov e th e
differentia l flui d fille r bol t an d
washe r an d carefull y fee l insid e th e
bol t hol e wit h you r finger . Th e flui d
leve l shoul d b e u p t o th e edg e o f th e
bol t hole . I f i t i s not , slowl y ad d
Genuin e Hond a Dua l Pum p Flui d
unti l i t start s t o ru n ou t o f th e hole .
Reinstal l th e fille r bol t an d tighte n i t securely
.
I f th e Dua l Pum p Flui d i s no t
available , yo u ma y us e Hond a
Premiu m Formul a Automati c
Transmissio n Flui d (ATF ) o r a
qualit y DEXRON ®
II I AT F a s a
temporar y replacement . However ,
continue d us e ca n caus e noise ,
vibratio n an d performanc e problems .
Hav e th e differentia l draine d an d
refille d wit h Genuin e Hond a Dua l
Pum p Flui d a s soo n a s it i s
convenient .
Th e rea r differentia l shoul d b e
draine d an d refille d wit h ne w flui d
accordin g t o th e tim e an d distanc e
recommendation s i n th e mainte -
nanc e schedule .
Maintenance
Correc
t
leve l
Page 214 of 322
Brak
e an d Clutc h Flui d
Chec k th e flui d leve l i n th e reser -
voir s monthly . Ther e ar e u p t o tw o
reservoirs , dependin g on the model .
The y are :
Brak e flui d reservoi r (al l models )
Clutc h flui d reservoi r
(manua l transmissio n only )
Th e brak e flui d shoul d b e replace d
accordin g to th e tim e an d distanc e
recommendation s i n th e mainte -
nanc e schedule . Alway
s us e Genuin e Hond a DO T 3
brak e fluid . I f i t i s no t available , yo u
shoul d us e onl y DO T 3 o r DO T 4
fluid , fro m a seale d container , a s a
temporar y replacement . However ,
th e us e o f an y non-Hond a brak e flui d
ca n caus e corrosio n an d decreas e
th e lif e o f th e system . Hav e th e
brak e syste m flushe d an d refille d
wit h Hond a DO T 3 brak e flui d a s
soo n a s possible .
Brak e flui d marke d DO T 5 is no t
compatibl e wit h you r vehicle' s
brakin g syste m an d ca n caus e
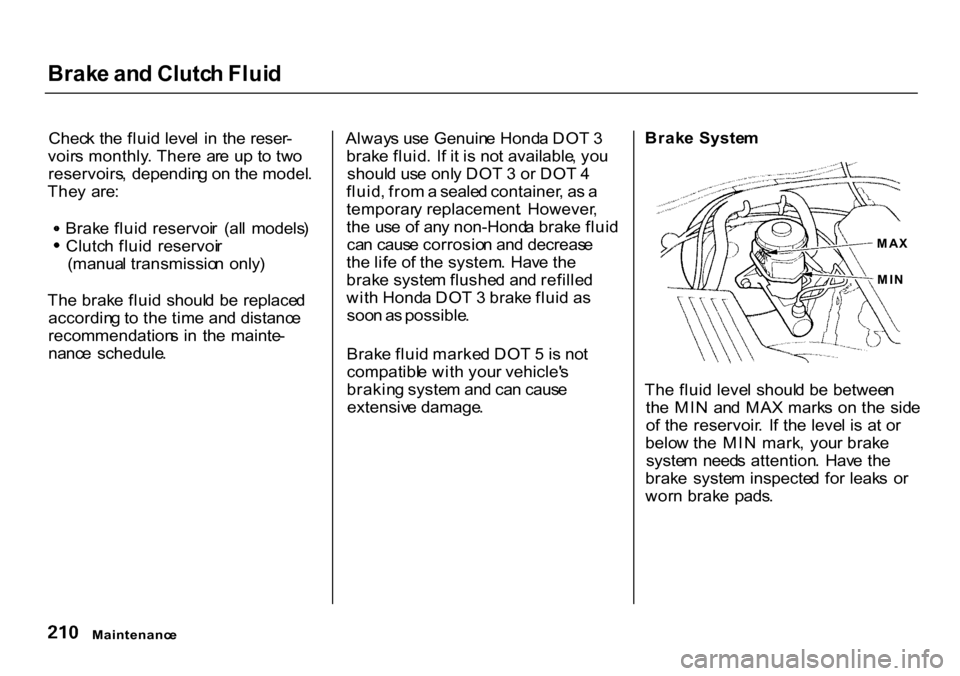
extensiv e damage . Brak
e Syste m
Th e flui d leve l shoul d b e betwee n
th e MI N an d MA X mark s o n th e sid e
o f th e reservoir . I f th e leve l i s a t o r
belo w th e MI N mark , you r brak e
syste m need s attention . Hav e th e
brak e syste m inspecte d fo r leak s o r
wor n brak e pads .
Maintenanc e
MA
X
MI N
Page 215 of 322
Brak
e an d Clutc h Fluid , Powe r Steerin g
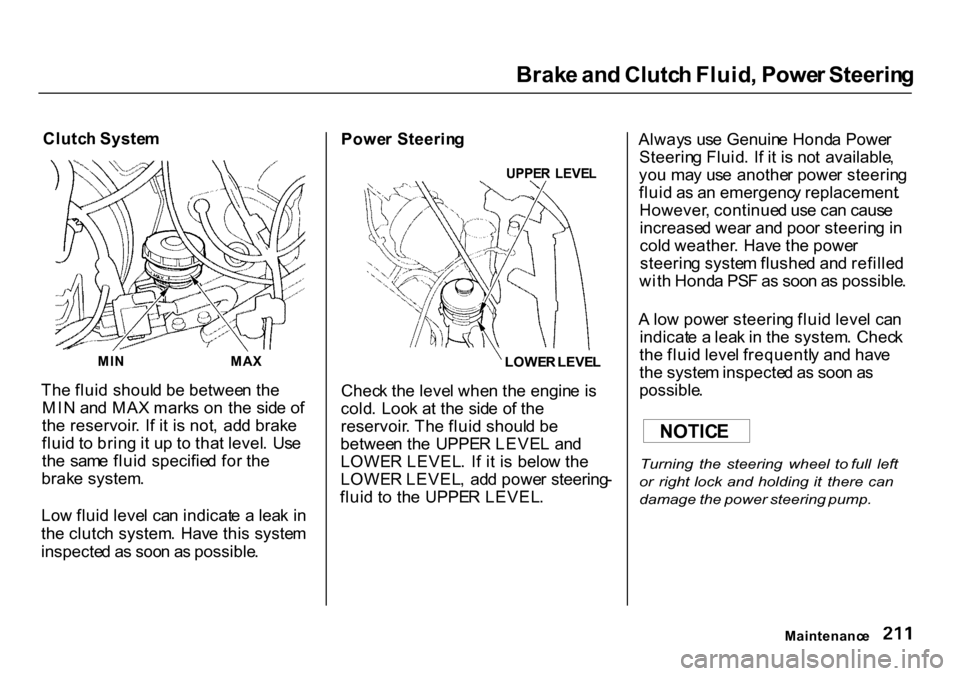
Clutc h Syste m
MI N
MAX
Th e flui d shoul d b e betwee n th e
MI N an d MA X mark s o n th e sid e o f
th e reservoir . I f i t i s not , ad d brak e
flui d t o brin g it u p t o tha t level . Us e
th e sam e flui d specifie d fo r th e
brak e system .
Lo w flui d leve l ca n indicat e a lea k i n
th e clutc h system . Hav e thi s syste m
inspecte d a s soo n a s possible . Powe
r Steerin g
UPPER LEVE L
LOWE R LEVE L
Chec k th e leve l whe n th e engin e i s
cold . Loo k a t th e sid e o f th e
reservoir . Th e flui d shoul d b e
betwee n th e UPPE R LEVE L an d
LOWE R LEVEL . I f i t i s belo w th e
LOWE R LEVEL , ad d powe r steering -
flui d t o th e UPPE R LEVEL . Alway
s us e Genuin e Hond a Powe r
Steerin g Fluid . I f i t i s no t available ,
yo u ma y us e anothe r powe r steerin g
flui d a s a n emergenc y replacement .
However , continue d us e ca n caus e
increase d wea r an d poo r steerin g in
col d weather . Hav e th e powe r
steerin g syste m flushe d an d refille d
wit h Hond a PS F a s soo n a s possible .
A lo w powe r steerin g flui d leve l ca n
indicat e a lea k in th e system . Chec k
th e flui d leve l frequentl y an d hav e
th e syste m inspecte d a s soo n a s
possible .
Turning the steering wheel to full left
or right lock and holding it there can
damage the power steering pump.
Maintenanc e
NOTIC
E
Page 216 of 322
Ai
r Cleane r Elemen t
Th e ai r cleane r elemen t shoul d b e
replace d accordin g t o th e tim e an d
distanc e recommendation s i n th e
maintenanc e schedule . Replacemen
t
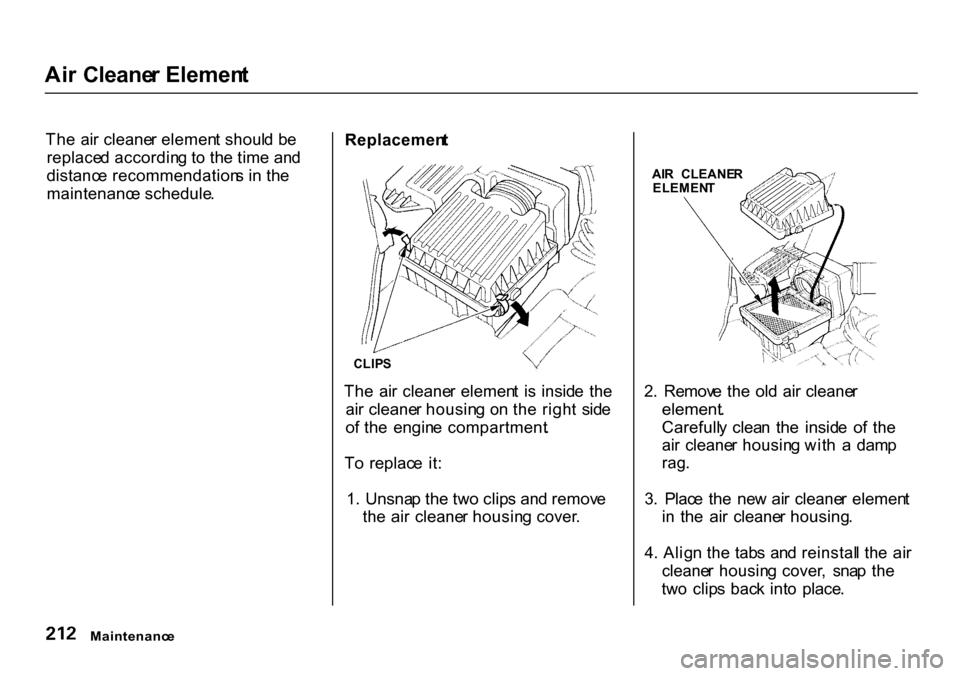
CLIP S
Th e ai r cleane r elemen t i s insid e th e
ai r cleane r housin g o n th e righ t sid e
o f th e engin e compartment .
T o replac e it :
1 . Unsna p th e tw o clip s an d remov e
th e ai r cleane r housin g cover . AI
R CLEANE R
ELEMEN T
2 . Remov e th e ol d ai r cleane r
element .
Carefull y clea n th e insid e o f th e
ai r cleane r housin g wit h a dam p
rag .
3 . Plac e th e ne w ai r cleane r elemen t
i n th e ai r cleane r housing .
4 . Alig n th e tab s an d reinstal l th e ai r
cleane r housin g cover , sna p th e
tw o clip s bac k int o place .
Maintenanc e
Page 217 of 322
Hoo
d Latch , Spar k Plug s
Hoo d Latc h
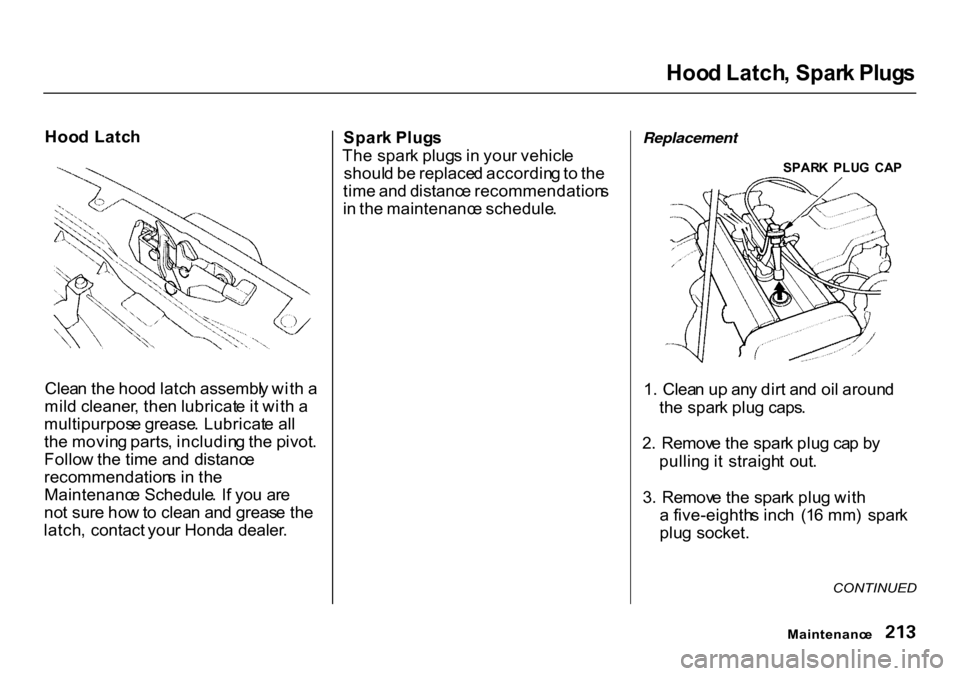
Clea n th e hoo d latc h assembl y wit h a
mil d cleaner , the n lubricat e it wit h a
multipurpos e grease . Lubricat e al l
th e movin g parts , includin g th e pivot .
Follo w th e tim e an d distanc e
recommendation s i n th e
Maintenanc e Schedule . I f yo u ar e
no t sur e ho w to clea n an d greas e th e
latch , contact your Hond a dealer . Spar
k Plug s
Th e spar k plug s i n you r vehicl e
shoul d b e replace d accordin g to th e
tim e an d distanc e recommendation s
i n th e maintenanc e schedule .
Replacement
SPARK PLU G CA P
1. Clea n up any dir t an d oi l aroun d
th e spar k plu g caps .
2 . Remov e th e spar k plu g ca p b y
pullin g it straigh t out .
3 . Remov e th e spar k plu g wit h
a five-eighth s inc h (1 6 mm ) spar k
plu g socket.
CONTINUED
Maintenanc e
Page 218 of 322
Spar
k Plug s
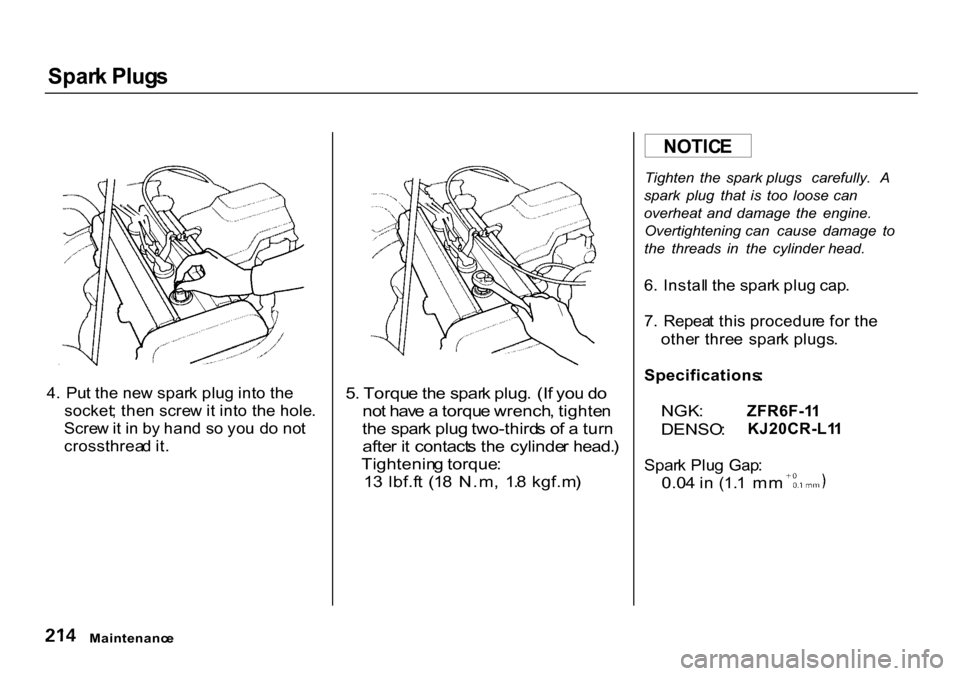
4 . Pu t th e ne w spar k plu g int o th e
socket ; the n scre w it int o th e hole .
Scre w it i n b y han d s o yo u d o no t
crossthrea d it .
5
. Torqu e th e spar k plug . (I f yo u d o
no t hav e a torqu e wrench , tighte n
th e spar k plu g two-third s o f a tur n
afte r i t contact s th e cylinde r head. )
Tightenin g torque :
1 3 lbf.f t (1 8 N.m , 1. 8 kgf.m )
Tighten
the spark plugs carefully. A
spark plug that is too loose can
overheat and damage the engine.
Overtightening can cause damage to
the threads in the cylinder head.
6 . Instal l th e spar k plu g cap .
7 . Repea t thi s procedur e fo r th e
othe r thre e spar k plugs .
Specifications :
NGK :
DENSO :
ZFR6F-1
1
KJ20CR-L1 1
Spar k Plu g Gap :
0.0 4 in
(1. 1
m m
Maintenanc e
NOTIC
E
Page 219 of 322
Batter
y
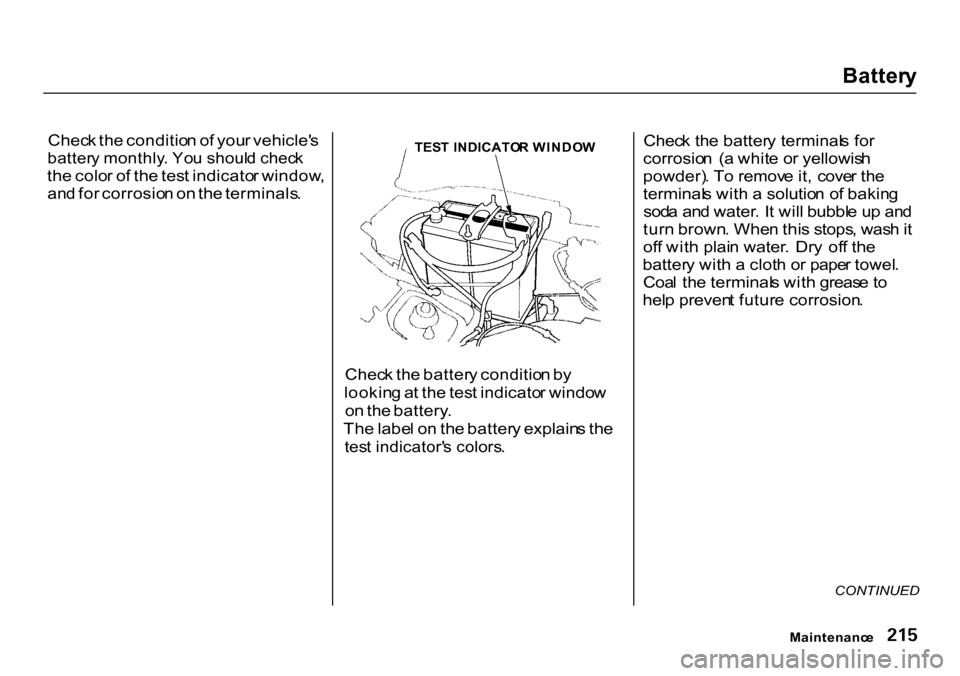
Chec k th e conditio n o f you r vehicle' s
batter y monthly . Yo u shoul d chec k
th e colo r o f th e tes t indicato r window ,
an d fo r corrosio n o n th e terminals .
TES
T INDICATO R WINDO W
Chec k th e batter y conditio n b y
lookin g a t th e tes t indicato r windo w
o n th e battery .
Th e labe l o n th e batter y explain s th e
tes t indicator' s colors .
Chec
k th e batter y terminal s fo r
corrosio n ( a whit e o r yellowis h
powder) . T o remov e it , cove r th e
terminal s wit h a solutio n o f bakin g
sod a an d water . I t wil l bubbl e u p an d
tur n brown . Whe n thi s stops , was h it
of f wit h plai n water . Dr y of f th e
batter y wit h a clot h o r pape r towel .
Coa l th e terminal s wit h greas e t o
hel p preven t futur e corrosion .
CONTINUED
Maintenanc e
Page 220 of 322
Batter
y
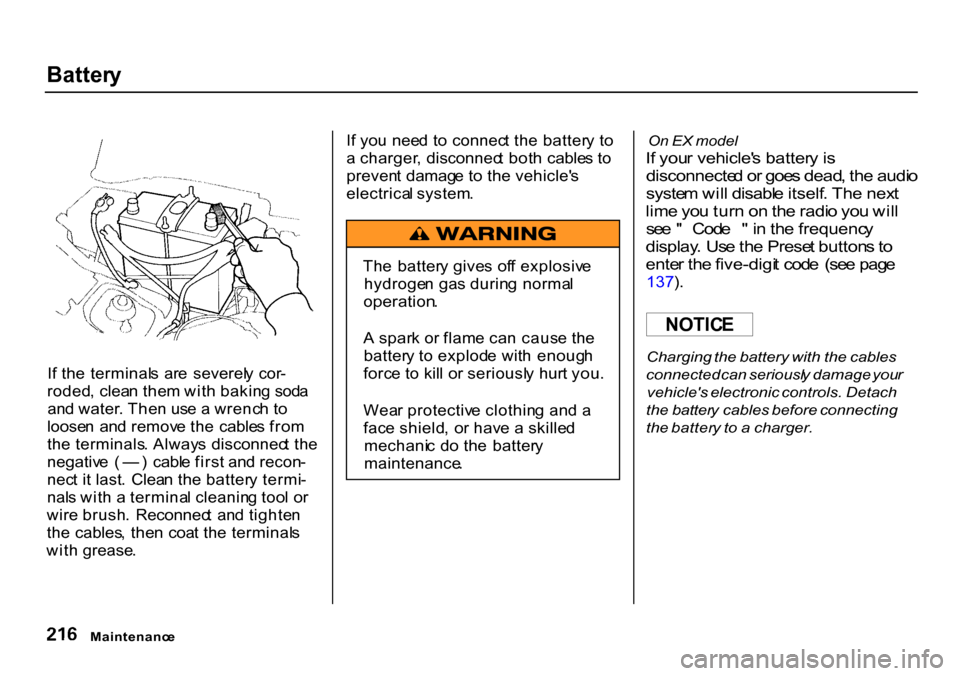
I f th e terminal s ar e severel y cor -
roded , clea n the m wit h bakin g sod a
an d water . The n us e a wrenc h t o
loose n an d remov e th e cable s fro m
th e terminals . Alway s disconnec t th e
negativ e ( — ) cabl e firs t an d recon -
nec t i t last . Clea n th e batter y termi -
nal s wit h a termina l cleanin g too l o r
wir e brush . Reconnec t an d tighte n
th e cables , the n coa t th e terminal s
wit h grease . I
f yo u nee d t o connec t th e batter y t o
a charger , disconnec t bot h cable s t o
preven t damag e t o th e vehicle' s
electrica l system .
On
EX model
I f you r vehicle' s batter y is
disconnecte d o r goe s dead , th e audi o
syste m wil l disabl e itself . Th e nex t
lim e yo u tur n o n th e radi o yo u wil l
se e " Cod e " in th e frequenc y
display . Us e th e Prese t button s to
ente r th e five-digi t cod e (se e pag e
137 ).
Charging the battery with the cables
connected can seriousl y damage your
vehicle's electronic controls. Detach
the batter y cables before connecting
the batter y to a charger.
Maintenanc e
Th
e batter y give s of f explosiv e
hydroge n ga s durin g norma l
operation .
A spar k o r flam e ca n caus e th e
batter y t o explod e wit h enoug h
forc e t o kil l o r seriousl y hur t you .
Wea r protectiv e clothin g an d a
fac e shield , o r hav e a skille d
mechani c d o th e batter y
maintenance .
NOTIC
E