ignition HYUNDAI ELANTRA GT 2019 Service Manual
[x] Cancel search | Manufacturer: HYUNDAI, Model Year: 2019, Model line: ELANTRA GT, Model: HYUNDAI ELANTRA GT 2019Pages: 486, PDF Size: 78.59 MB
Page 174 of 486
3-89
Convenient features of your vehicle
3
Headlamp delay function (if equipped)
If the key is removed from the ignition
switch or placed in the ACC positionor the LOCK/OFF position with theheadlamps ON, the headlamps
(and/or parking lamps) remain on for
about 5 minutes. However, if the dri-
ver’s door is opened and closed, the
headlights are turned off after 15
seconds. Also, with the engine off if
the driver's door is opened and
closed, the headlamps (and/or park-
ing lamps) are turned off after 15
seconds.
The headlamps (and/or parking
lamps) can be turned off by pressing
the lock button on the remote key or
smart key twice or turning the light
switch to the OFF or AUTO position.
You can activate or deactivate the
Headlamp Delay function from theUser Settings Mode (Light) on the
LCD display.
For more information, refer to the
"LCD Display" section in this
chapter. If the driver gets out of the vehicle
through other doors (except dri-
ver's door), the battery saver func-tion does not operate and the
headlamp delay function does not
turn off automatically. Therefore, It
causes the battery to be dis-
charged. In this case, make sure
to turn off the lamp before getting
out of the vehicle.
Interior Lights
Do not use the interior lights for
extended periods when the vehi-
cle is turned off or the battery will
discharge.
Interior lamp AUTO cut
The interior lamps will automatically
go off approximately 20 minutes after
the engine is turned off and the
doors are closed. If a door is opened,
the lamp will go off 40 minutes after
the engine is turned off. If the doors
are locked by the remote key or
smart key and the vehicle enters the
armed stage of the theft alarm sys-
tem, the lamps will go off five sec-
onds later.
NOTICE
NOTICE
Do not use the interior lights
when driving in the dark. The
interior lights may obscure your
view and cause an accident.
WARNING
Page 175 of 486
3-90
Convenient features of your vehicle
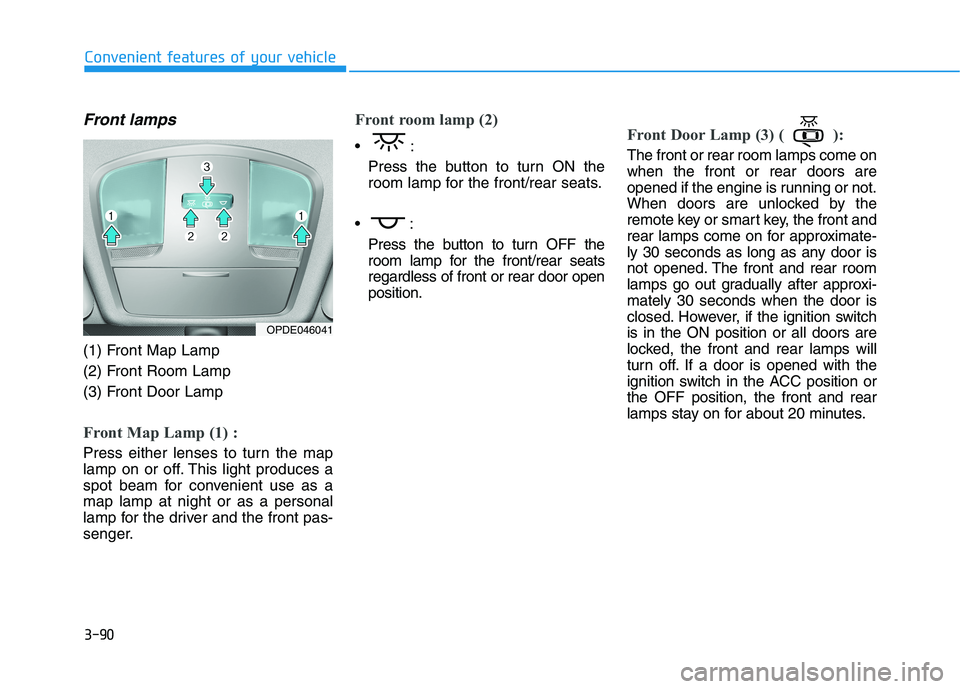
Front lamps
(1) Front Map Lamp
(2) Front Room Lamp
(3) Front Door Lamp
Front Map Lamp (1) :
Press either lenses to turn the map
lamp on or off. This light produces a
spot beam for convenient use as amap lamp at night or as a personal
lamp for the driver and the front pas-
senger.
Front room lamp (2)
Press the button to turn ON the
room lamp for the front/rear seats.
Press the button to turn OFF the
room lamp for the front/rear seatsregardless of front or rear door openposition.Front Door Lamp (3) ( ):
The front or rear room lamps come on when the front or rear doors are
opened if the engine is running or not.
When doors are unlocked by the
remote key or smart key, the front and
rear lamps come on for approximate-
ly 30 seconds as long as any door is
not opened. The front and rear room
lamps go out gradually after approxi-mately 30 seconds when the door is
closed. However, if the ignition switchis in the ON position or all doors are
locked, the front and rear lamps will
turn off. If a door is opened with the
ignition switch in the ACC position orthe OFF position, the front and rear
lamps stay on for about 20 minutes.
OPDE046041
Page 187 of 486
3-102
Convenient features of your vehicle
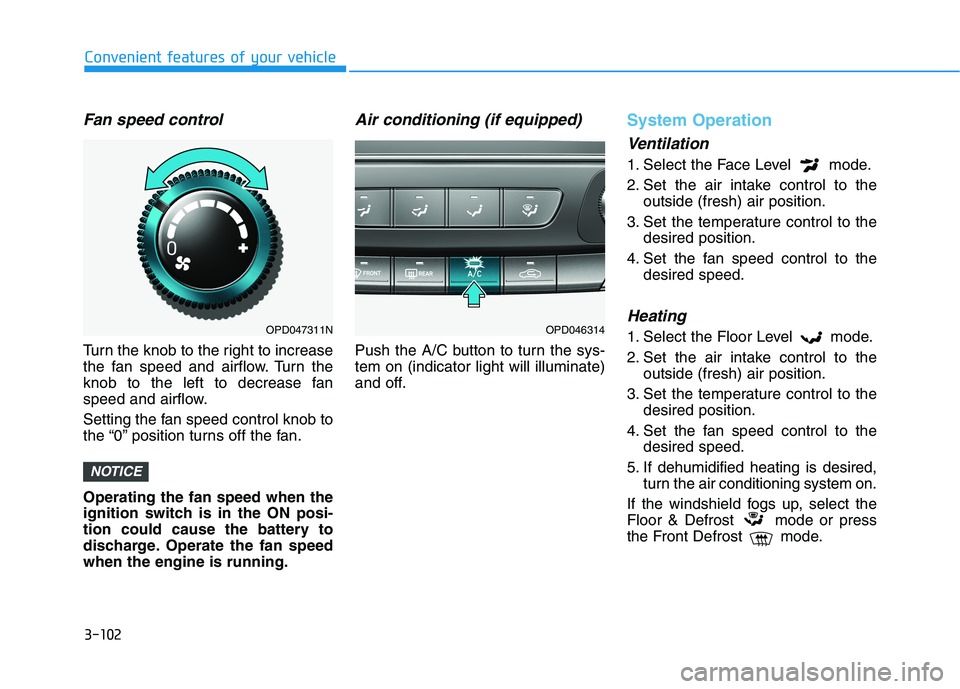
Fan speed control
Turn the knob to the right to increase
the fan speed and airflow. Turn the
knob to the left to decrease fan
speed and airflow.
Setting the fan speed control knob to
the “0” position turns off the fan. Operating the fan speed when the
ignition switch is in the ON posi-
tion could cause the battery to
discharge. Operate the fan speedwhen the engine is running.
Air conditioning (if equipped)
Push the A/C button to turn the sys-tem on (indicator light will illuminate)
and off.
System Operation
Ventilation
1. Select the Face Level mode.
2. Set the air intake control to theoutside (fresh) air position.
3. Set the temperature control to the desired position.
4. Set the fan speed control to the desired speed.
Heating
1. Select the Floor Level mode.
2. Set the air intake control to theoutside (fresh) air position.
3. Set the temperature control to the desired position.
4. Set the fan speed control to the desired speed.
5. If dehumidified heating is desired, turn the air conditioning system on.
If the windshield fogs up, select the
Floor & Defrost mode or press
the Front Defrost mode.
NOTICE
OPD047311NOPD046314
Page 199 of 486

3-114
Convenient features of your vehicle
OFF mode
Push the OFF button to turn the cli-
mate control system off. You can still
operate the mode and air intake but-
tons as long as the ignition switch isin the ON position.
System Operation
Ventilation
1. Select the Face Level mode.
2. Set the air intake control to theoutside (fresh) air position.
3. Set the temperature control to the desired position.
4. Set the fan speed control to the desired speed.
Heating
1. Select the Floor Level mode.
2. Set the air intake control to theoutside (fresh) air position.
3. Set the temperature control to the desired position.
4. Set the fan speed control to the desired speed.
5. If dehumidified heating is desired, turn the air conditioning system on.
If the windshield fogs up, select the
Floor & Defrost mode or press
the Front Defrost mode.
Operation Tips
To keep dust or unpleasant fumes from entering the car through the
ventilation system, temporarily set
the air intake control to the recircu-
lated air position. Return the con-trol to the fresh air position when
the irritation has passed. This will
help keep the driver alert and com-
fortable.
To help prevent the inside of the windshield from fogging, set the air
intake control to the fresh air posi-
tion and fan speed to the desired
position, turn on the air condition-ing system, and adjust the temper-ature control to the desired tem-
perature.
OPD046324
Page 204 of 486
3-119
Convenient features of your vehicle
3
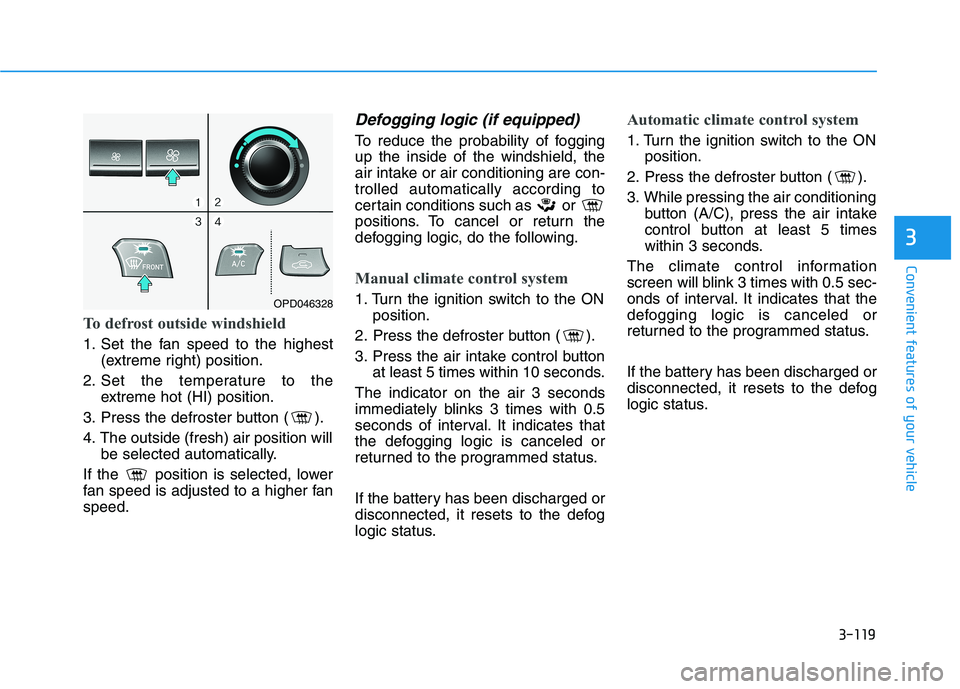
To defrost outside windshield
1. Set the fan speed to the highest(extreme right) position.
2. Set the temperature to the extreme hot (HI) position.
3. Press the defroster button ( ).
4. The outside (fresh) air position will be selected automatically.
If the position is selected, lower
fan speed is adjusted to a higher fanspeed.
Defogging logic (if equipped)
To reduce the probability of foggingup the inside of the windshield, the
air intake or air conditioning are con-trolled automatically according to
certain conditions such as or
positions. To cancel or return the
defogging logic, do the following.
Manual climate control system
1. Turn the ignition switch to the ON position.
2. Press the defroster button ( ).
3. Press the air intake control button at least 5 times within 10 seconds.
The indicator on the air 3 seconds
immediately blinks 3 times with 0.5
seconds of interval. It indicates that
the defogging logic is canceled or
returned to the programmed status.
If the battery has been discharged or
disconnected, it resets to the defog
logic status.
Automatic climate control system
1. Turn the ignition switch to the ON position.
2. Press the defroster button ( ).
3. While pressing the air conditioning button (A/C), press the air intake
control button at least 5 times
within 3 seconds.
The climate control information
screen will blink 3 times with 0.5 sec-
onds of interval. It indicates that the
defogging logic is canceled or
returned to the programmed status.
If the battery has been discharged or
disconnected, it resets to the defog
logic status.
OPD046328
Page 205 of 486
3-120
Convenient features of your vehicle
Auto Defogging System
(Only for Automatic Climate
Control System, if equipped)
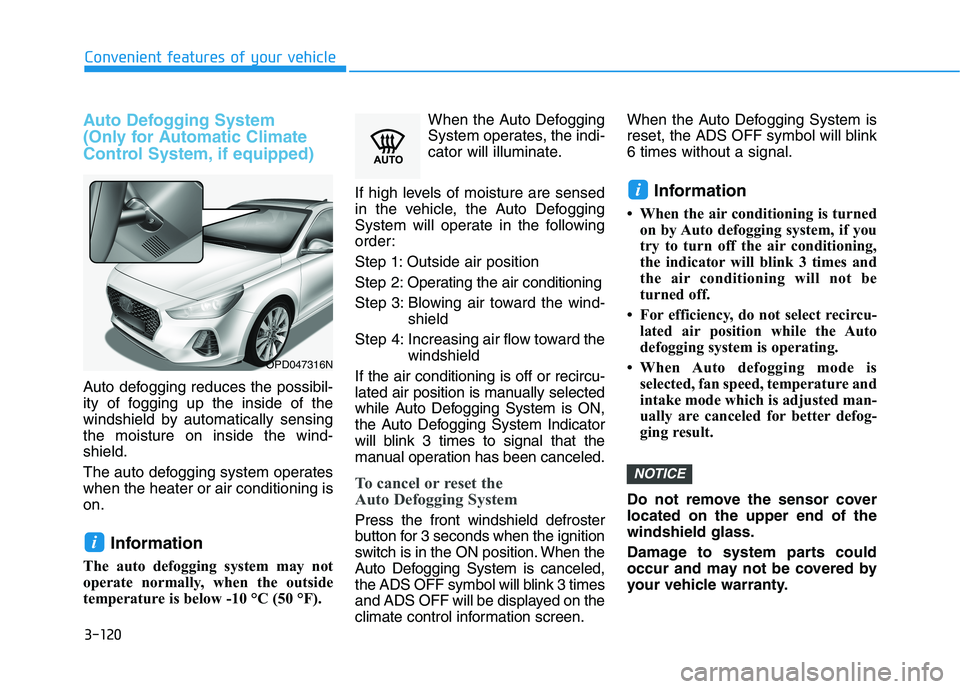
Auto defogging reduces the possibil-
ity of fogging up the inside of the
windshield by automatically sensingthe moisture on inside the wind-shield.
The auto defogging system operates when the heater or air conditioning ison.Information
The auto defogging system may not
operate normally, when the outside
temperature is below -10 °C (50 °F). When the Auto Defogging
System operates, the indi-
cator will illuminate.
If high levels of moisture are sensed
in the vehicle, the Auto Defogging
System will operate in the following
order: Step 1: Outside air position
Step 2: Operating the air conditioning
Step 3: Blowing air toward the wind- shield
Step 4: Increasing air flow toward the windshield
If the air conditioning is off or recircu-
lated air position is manually selected
while Auto Defogging System is ON,
the Auto Defogging System Indicator
will blink 3 times to signal that the
manual operation has been canceled.
To cancel or reset the
Auto Defogging System
Press the front windshield defroster
button for 3 seconds when the ignition
switch is in the ON position. When the
Auto Defogging System is canceled,
the ADS OFF symbol will blink 3 times
and ADS OFF will be displayed on the
climate control information screen. When the Auto Defogging System is
reset, the ADS OFF symbol will blink6 times without a signal.
Information
When the air conditioning is turned on by Auto defogging system, if you
try to turn off the air conditioning,
the indicator will blink 3 times and
the air conditioning will not be
turned off.
For efficiency, do not select recircu- lated air position while the Auto
defogging system is operating.
When Auto defogging mode is selected, fan speed, temperature and
intake mode which is adjusted man-
ually are canceled for better defog-
ging result.
Do not remove the sensor coverlocated on the upper end of thewindshield glass.
Damage to system parts could
occur and may not be covered by
your vehicle warranty.
NOTICE
i
i
OPD047316N
Page 206 of 486
3-121
Convenient features of your vehicle
Rear Window Defroster
To prevent damage to the conduc-
tors bonded to the inside surface
of the rear window, never use
sharp instruments or window
cleaners containing abrasives to
clean the window.
If you want to defrost and defog
the front windshield, refer to the
"Windshield Defrosting and
Defogging" section in this chap-
ter.The defroster heats the window to
remove frost, fog and thin ice from
the interior and exterior of the rear
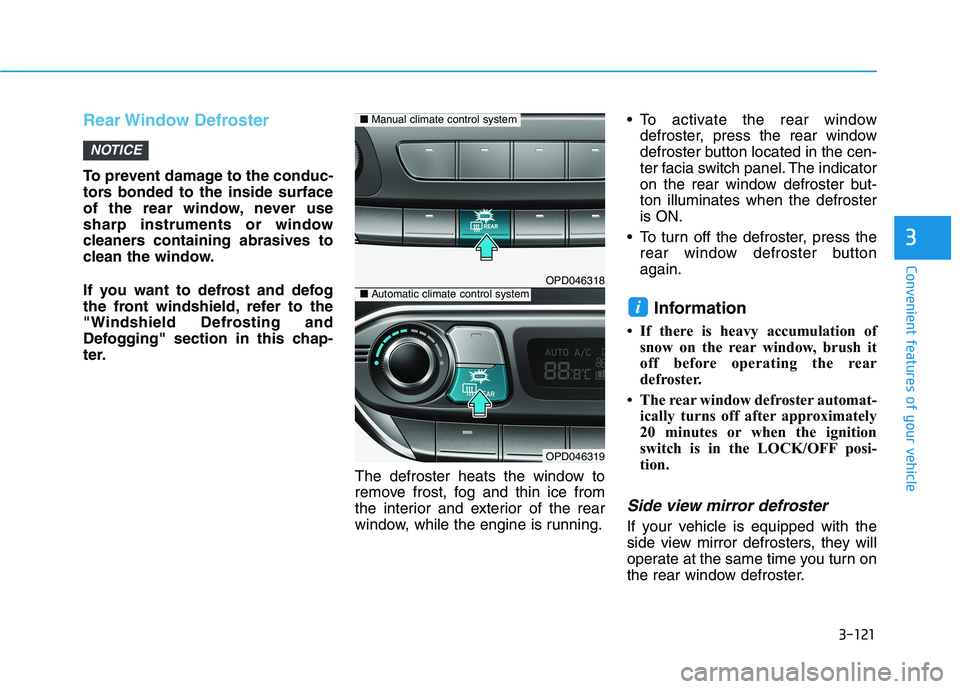
window, while the engine is running. To activate the rear window
defroster, press the rear window
defroster button located in the cen-
ter facia switch panel. The indicator
on the rear window defroster but-ton illuminates when the defrosteris ON.
To turn off the defroster, press the rear window defroster buttonagain.
Information
If there is heavy accumulation of snow on the rear window, brush it
off before operating the rear
defroster.
The rear window defroster automat- ically turns off after approximately
20 minutes or when the ignition
switch is in the LOCK/OFF posi-
tion.
Side view mirror defroster
If your vehicle is equipped with the
side view mirror defrosters, they will
operate at the same time you turn on
the rear window defroster.
i
NOTICE
33
OPD046318
OPD046319
■Manual climate control system
■Automatic climate control system
Page 207 of 486
3-122
Convenient features of your vehicleC
C LLIIMM AATTEE CC OO NNTTRR OO LL AA DDDDIITT IIOO NNAALL FF EE AA TTUU RREESS (( IIFF EE QQ UUIIPP PPEEDD ))
Cluster ionizer (if equipped)
When the ignition switch is in the ON
position, the clean air function turns
on automatically.
Also, the clean air function turns off
automatically, when the ignition
switch is in the OFF position.
Automatic Ventilation (if equipped)
When the ignition switch is in the ON
position or when the engine is run-
ning and temperature is below 15°C(59°F) with the recirculated air posi-
tion selected more than five minutes,
the air intake position will automati-cally change to the outside (fresh) airposition.
To cancel or reset the Automatic
Ventilation
When the air conditioning system is
on, select Face Level mode and
while pressing the A/C button, press
the recirculated air position button
five times within three seconds.
When the automatic ventilation is
set, the air intake control button(recirculated air position) indicator
will blink 6 times. When canceled, the
air intake control button (recirculated
air position) indicator will blink 3
times.
Sunroof Inside Air
Recirculation (if equipped)
When the heater or air conditioning system is on with the sunroofopened, the outside (fresh) air posi-
tion will be automatically selected. At
this time, if you press the recirculated
air position button, the recirculated
air position will be selected but will
change back to the outside (fresh) air
position after 3 minutes. When the sunroof is closed, the air
intake position will return to the orig-
inal position that was selected.
Page 222 of 486
Driving your vehicle
5
Before Driving ........................................................5-4Before Entering the Vehicle ...........................................5-4
Before Starting ..................................................................5-4
Ignition Switch ........................................................5-6 Key Ignition Switch ...........................................................5-6
Engine Start/Stop Button................................................5-9
Manual Transmission ...........................................5-16 Manual Transmission Operation ..................................5-16
Good Driving Practices ..................................................5-18
Automatic Transmission ......................................5-19 Automatic Transmission Operation .............................5-19
Good Driving Practices ..................................................5-23
Dual Clutch Transmission ....................................5-25 Dual Clutch Transmission Operation ..........................5-25
Good Driving Practices ..................................................5-33
Braking System ....................................................5-35 Power Brakes ...................................................................5-35
Disc Brakes Wear Indicator ..........................................5-36
Parking Brake (Hand type) ...........................................5-36
Electronic Parking Brake (EPB)...................................5-38
Auto Hold ..........................................................................5-43
Anti-lock Brake System (ABS) ....................................5-47 Electronic Stability Control (ESC)................................5-49
Vehicle Stability Management (VSM).........................5-52
Hill-Start Assist Control (HAC) ....................................5-53
Good Braking Practices .................................................5-54
Drive Mode Integrated Control System ............5-55
Blind-spot Collision Warning (BCW) system ...5-57 BCW (Blind-spot Collision Warning) ...........................5-58RCCW (Rear Cross-Traffic Collision Warning) .........5-61
Limitations of the System .............................................5-63
Forward Collision-Avoidance Assist (FCA)
system....................................................................5-69 System Setting and Activation.....................................5-69
FCA Warning Message and System Control ............5-71
FCA Sensor .......................................................................5-73
System Malfunction .......................................................5-74
Limitations of the System .............................................5-76
Lane Keeping Assist (LKA) System ...................5-81 LKA system Operation ...................................................5-82
Warning Light and Message.........................................5-86
Limitations of the System .............................................5-87
LKA system Function Change ......................................5-88
Page 225 of 486
5-4
Driving your vehicle
Before Entering the Vehicle
• Be sure all windows, outside mir-ror(s), and outside lights are clean
and unobstructed.
Remove frost, snow, or ice.
Visually check the tires for uneven wear and damage.
Check under the vehicle for any sign of leaks.
Be sure there are no obstacles behind you if you intend to back up.
Before Starting
Make sure the hood, the tailgate,and the doors are securely closed
and locked.
Adjust the position of the seat and steering wheel.
Adjust the inside and outside rearview mirrors.
Verify all the lights work.
Fasten your seatbelt. Check that all passengers have fastened their
seatbelts.
Check the gauges and indicators in the instrument panel and the mes-
sages on the instrument display
when the ignition switch is in theON position.
Check that any items you are car- rying are stored properly or fas-
tened down securely.
BBEEFFOO RREE DD RRIIVV IINN GG
To reduce the risk of SERIOUS
INJURY or DEATH, take the fol-
lowing precautions:
•ALWAYS wear your seat belt.
All passengers must be prop-
erly belted whenever the vehi-
cle is moving. For more infor-
mation, refer to "Seat Belts" in
chapter 2.
Always drive defensively.
Assume other drivers or pedes-
trians may be careless andmake mistakes.
Stay focused on the task of
driving. Driver distraction cancause accidents.
Leave plenty of space between
you and the vehicle in front of
you.
WARNING