Hyundai Equus 2016 Owner's Manual
Manufacturer: HYUNDAI, Model Year: 2016, Model line: Equus, Model: Hyundai Equus 2016Pages: 477, PDF Size: 16.25 MB
Page 331 of 477
5-80
Driving your vehicle
Certification label
The certification label is located on
right side of the driver's door sill.
This label shows the maximum
weight capacity, or called GVWR
(Gross Vehicle Weight Rating). The
GVWR includes the weight of the
vehicle, all occupants, fuel, and load.
This label also tells you the maxi-
mum weight that can be supported
by the front and rear axles, called
Gross Axle Weight Rating (GAWR).
To find out the actual load weight of
the front and rear axles, you need to
weigh your vehicle. Your dealer can
help you with this. Equally and even-
ly spread out the loads across the
centerline.The label will help you decide how
much loads and installed equipment
your vehicle can carry.
When your vehicle carries items
inside, such as suitcases, tools and
packages, those loads move as fast
as your vehicle. When stopping or
sharply turning, or if there is a crash,
those loads may throw forwards
under the influence of inertia, and
cause an injury by hitting with the
driver or an occupant.
OBH059070
- Over loading
Never exceed the GVWR or
the GAWR of your vehicle.
Overloading above those lim-
its may cause an accident or a
vehicle damage. You can cal-
culate the load weight capaci-
ty by weighing the items (or
people), before putting them
in the vehicle. Be careful not
to overload your vehicle.
Do not overload your vehicle above the GVWR, the
front/rear GAWRs or the vehi-
cle weight capacity. When
overloading, including tires,
parts may break. Even, it may
adversely affects the vehicle
handling and braking per-
formance. You may lose con-
trol and crash. Also, overload-
ing may shorten the life span
of your vehicle.
WARNING
Page 332 of 477
5-81
Driving your vehicle05
Overloading may damage yourvehicle. Repairs are not covered
by your warranty. Do not over-
load your vehicle.
Heavier suspension compo- nents for higher durability may
not change the weight capacity.
Ask your dealer to help you load
your vehicle the right way.
NOTICE
Overloading your vehicle mayoverheat the tires and cause
tire failure, possibly leading to
a crash.
Overloading your vehicle may increase a stopping distance,
possibly leading to a crash.
A crash, which is resulted from poor handling, vehicle
damage, tire failure, or a
longer stopping distance, may
result in a serious injury or
death.
WARNING
- Unsecured loads
Items you carry inside your
vehicle may hit and injure an
occupant in a sudden stop or
turn, or in a crash.
Put items in the trunk. Try toevenly spread the weight.
Never stack up items, like suitcases, inside the vehicle,
especially above the seat-
backs.
Do not leave an unsecured child restraint in your vehicle.
When you carry something inside the vehicle, secure it.
WARNING
Page 333 of 477
This is to guide you to load in a prop-
er manner, and to keep the load
weight under the maximum weight
capacity. Proper loading will provide
maximum vehicle performance.
Before loading your vehicle, read the
following terms and explanation for
determining your vehicle's loading
weight, based on the vehicle's speci-
fications and the certification label:
Base curb weight
This is the weight of the vehicle, only
including a full tank of fuel and all
standard equipment. This weight
excludes optional equipment, loads,
or occupants.
Vehicle curb weight
This is the weight of your new vehi-
cle, upon being delivered from a
dealer, including any optional equip-
ment.
Load weight
This is the weight of all the addition-
al items, including the loads and
optional equipment.
GAW (Gross axle weight)
This is the total weight on each
axle(front and rear), including the
vehicle curb weight and the load
weight.
GAWR
(Gross axle weight rating)
This is the maximum weight capacity
of a single axle (front or rear). This
GAWR is shown on the certification
label. The total load weight on each
axle must never exceed its GAWR.
GVW (Gross vehicle weight)
This is the accumulated weight of the
base curb weight, the actual load
weight, and the occupants' weight.
GVWR
(Gross vehicle weight rating)
This is the maximum weight capacity
of a vehicle, including all options,
equipment, occupants and loads.
The GVWR is shown on the certifica-
tion label on the driver’s door sill.
T TR
R A
A I
IL
L E
E R
R
T
T O
O W
W I
IN
N G
G
We do not recommend using this
vehicle to tow a trailer.
V VE
EH
H I
IC
C L
LE
E
W
W E
EI
IG
G H
H T
T
Driving your vehicle
5-82
Page 334 of 477
What to do in an emergency
Road warning..........................................................6-2
Hazard warning flasher ...................................................6-2
In case of an emergency while driving ..............6-2
If the engine stalls at a crossroad or a railroad
crossing........................................................................\
........6-2
If you have a flat tire while driving..............................6-2
If engine stalls while driving...........................................6-3
If the engine will not start ...................................6-3
When the engine does not revolve, or slowly
revolves........................................................................\
........6-3
When the engine normally revolves, but does not
start.....................................................................\
..................6-3
Emergency starting ...............................................6-4
Jump starting ......................................................................6-\
4
Push-starting .....................................................................6-5\
If the engine overheats ........................................6-6
Tire pressure monitoring system (TPMS) ..........6-7
Low tire pressure telltale ................................................6-8
Low tire pressure position telltale ................................6-8
TPMS (Tire Pressure Monitoring System)
malfunction indicator .......................................................6-9
Changing a tire with TPMS...........................................6-10
If you have a flat tire..........................................6-12
Jack and tools ..................................................................6-12
Removing and storing the spare tire .........................6-13
Changing tires .................................................................6-13
Jack label ........................................................................\
...6-19
Towing ...................................................................6-20
Towing service .................................................................6-20
Removable towing hook ................................................6-22
Emergency towing ..........................................................6-22
Page 335 of 477
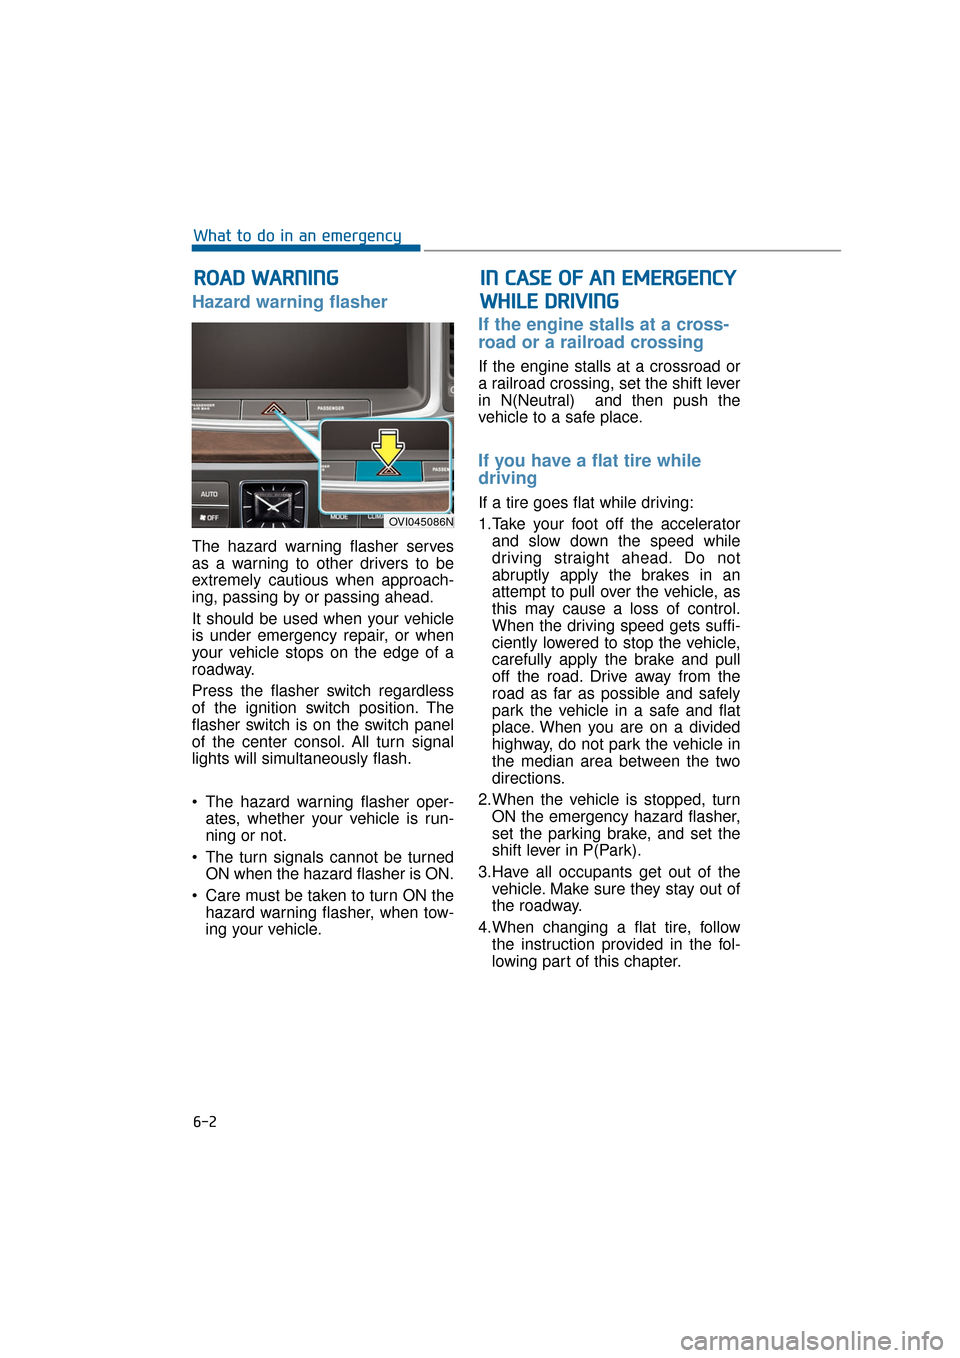
Hazard warning flasher
The hazard warning flasher serves
as a warning to other drivers to be
extremely cautious when approach-
ing, passing by or passing ahead.
It should be used when your vehicle
is under emergency repair, or when
your vehicle stops on the edge of a
roadway.
Press the flasher switch regardless
of the ignition switch position. The
flasher switch is on the switch panel
of the center consol. All turn signal
lights will simultaneously flash.
• The hazard warning flasher oper-ates, whether your vehicle is run-
ning or not.
The turn signals cannot be turned ON when the hazard flasher is ON.
Care must be taken to turn ON the hazard warning flasher, when tow-
ing your vehicle.
If the engine stalls at a cross-
road or a railroad crossing
If the engine stalls at a crossroad or
a railroad crossing, set the shift lever
in N(Neutral) and then push the
vehicle to a safe place.
If you have a flat tire while
driving
If a tire goes flat while driving:
1.Take your foot off the acceleratorand slow down the speed while
driving straight ahead. Do not
abruptly apply the brakes in an
attempt to pull over the vehicle, as
this may cause a loss of control.
When the driving speed gets suffi-
ciently lowered to stop the vehicle,
carefully apply the brake and pull
off the road. Drive away from the
road as far as possible and safely
park the vehicle in a safe and flat
place. When you are on a divided
highway, do not park the vehicle in
the median area between the two
directions.
2.When the vehicle is stopped, turn ON the emergency hazard flasher,
set the parking brake, and set the
shift lever in P(Park).
3.Have all occupants get out of the vehicle. Make sure they stay out of
the roadway.
4.When changing a flat tire, follow the instruction provided in the fol-
lowing part of this chapter.
R RO
O A
AD
D
W
W A
AR
RN
N I
IN
N G
G
6-2
What to do in an emergency
OVI045086N
I
IN
N
C
C A
A S
SE
E
O
O F
F
A
A N
N
E
E M
M E
ER
R G
G E
EN
N C
CY
Y
W
W H
HI
IL
L E
E
D
D R
RI
IV
V I
IN
N G
G
Page 336 of 477
If engine stalls while driving
1.Gradually reduce your drivingspeed while driving straight ahead.
Cautiously drive off the road to a
safe place.
2.Press the emergency hazard flash- er.
3.Try to re-start the engine again. When your vehicle does not re-
start, contact an authorized
EQUUS dealer for the qualified
assistance.When the engine does not
revolve, or slowly revolves
1.Make sure that the shift lever is inN(Neutral) or P (Park), and the
emergency brake is set.
2.Check that the battery connections are clean and tight.
3.Turn ON the interior light. When the light dims or goes out upon operat-
ing the starter, the battery is dis-
charged.
4.Check that the starter connections are securely tightened.
5.Do not push or pull the vehicle to start it. Follow instructions provided
in "Jump starting".
When the engine normally
revolves, but does not start
1.Check the fuel level.
2.With the Engine Start/Stop Buttonin the OFF position, check all con-
nectors of the ignition coils and the
spark plugs. Reconnect any dis-
connected or loose parts.
3.If the engine still does not start, contact an authorized EQUUS
dealer for the qualified assistance
6-3
What to do in an emergency06
I IF
F
T
T H
H E
E
E
E N
N G
GI
IN
N E
E
W
W I
IL
L L
L
N
N O
O T
T
S
S T
T A
A R
RT
T
When the engine does not start,
do not push or pull the car to
start it. This may result in a col-
lision or cause other damage.
CAUTION
Page 337 of 477
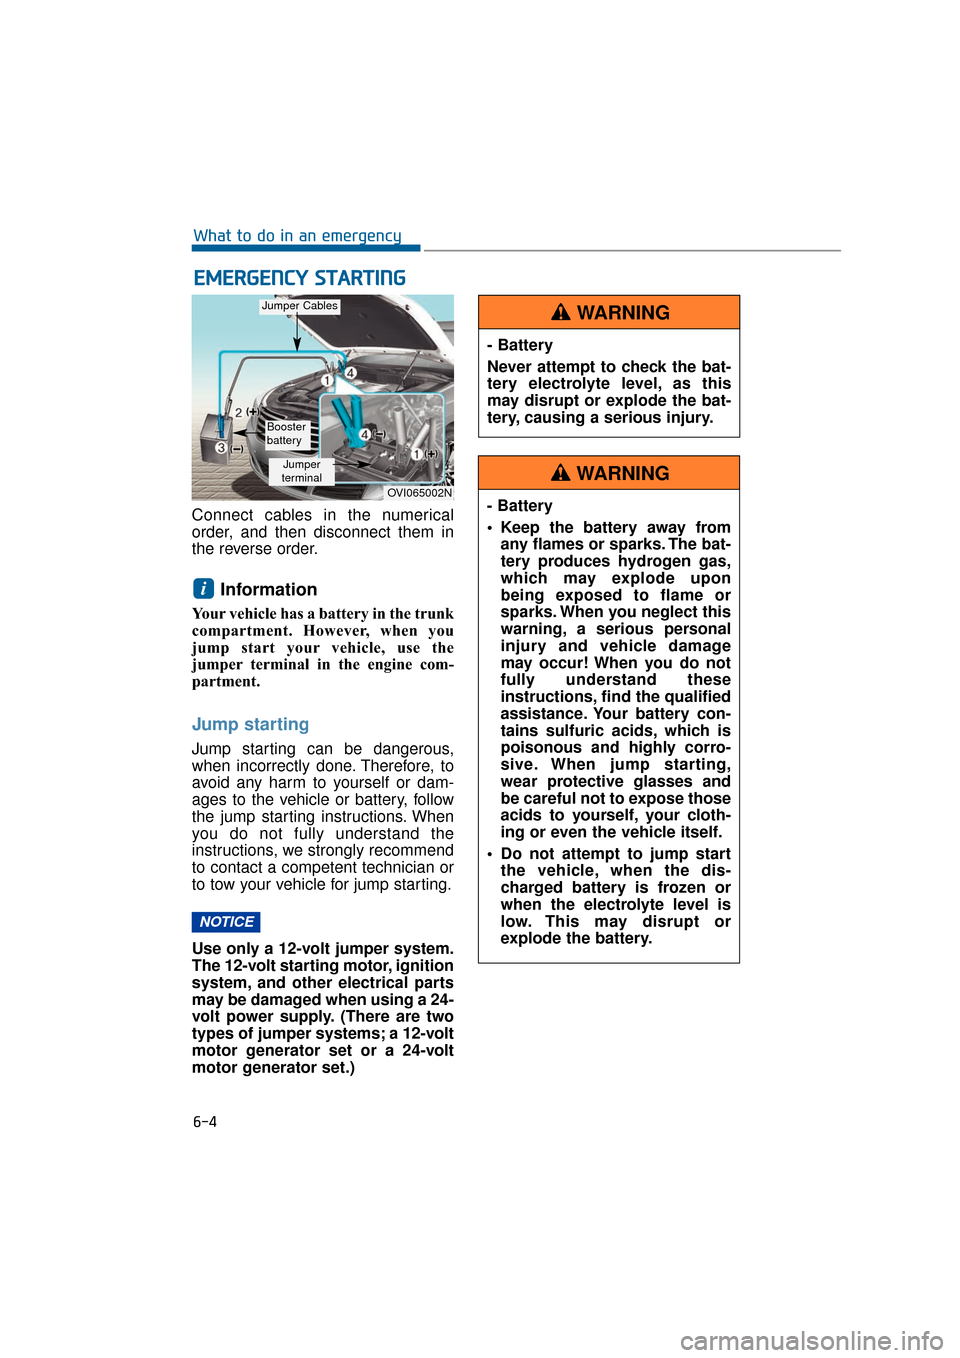
Connect cables in the numerical
order, and then disconnect them in
the reverse order.
Information
Your vehicle has a battery in the trunk
compartment. However, when you
jump start your vehicle, use the
jumper terminal in the engine com-
partment.
Jump starting
Jump starting can be dangerous,
when incorrectly done. Therefore, to
avoid any harm to yourself or dam-
ages to the vehicle or battery, follow
the jump starting instructions. When
you do not fully understand the
instructions, we strongly recommend
to contact a competent technician or
to tow your vehicle for jump starting.
Use only a 12-volt jumper system.
The 12-volt starting motor, ignition
system, and other electrical parts
may be damaged when using a 24-
volt power supply. (There are two
types of jumper systems; a 12-volt
motor generator set or a 24-volt
motor generator set.)
NOTICE
i
E EM
M E
ER
R G
G E
EN
N C
CY
Y
S
S T
T A
A R
RT
TI
IN
N G
G
6-4
What to do in an emergency
OVI065002N
Jumper
terminal
Jumper Cables
Booster
battery
- Battery
Never attempt to check the bat-
tery electrolyte level, as this
may disrupt or explode the bat-
tery, causing a serious injury.
WARNING
- Battery
• Keep the battery away from any flames or sparks. The bat-
tery produces hydrogen gas,
which may explode upon
being exposed to flame or
sparks. When you neglect this
warning, a serious personal
injury and vehicle damage
may occur! When you do not
fully understand these
instructions, find the qualified
assistance. Your battery con-
tains sulfuric acids, which is
poisonous and highly corro-
sive. When jump starting,
wear protective glasses and
be careful not to expose those
acids to yourself, your cloth-
ing or even the vehicle itself.
Do not attempt to jump start the vehicle, when the dis-
charged battery is frozen or
when the electrolyte level is
low. This may disrupt or
explode the battery.
WARNING
Page 338 of 477
Jump starting procedure
Information
Your vehicle has a battery in the trunk
compartment. However, when you
jump start your vehicle, use the
jumper terminal in the engine com-
partment.
1.Make sure the booster battery is12-volt and that its negative termi-
nal is grounded.
2.When the booster battery is in another vehicle, separate the two
vehicles apart.
3.Turn OFF all unnecessary electri- cal systems.
4.Connect the jumper cables in the exact sequence as shown in the
illustration of the previous page.
First connect one of the jumper
cable ends to the positive terminal
of the jumper terminal (1), and then
connect the other end to the posi-
tive terminal on the booster battery
(2). Proceed to connect one of the
other jumper cable ends to the
negative terminal of the booster
battery (3), then the other end to
the negative terminal of the jumper
terminal (4). Clear the jump cables
away from any movable parts or
other battery terminals, when jump
starting.
Keep the jumper cables away from
any others except the correct bat-
tery terminal connections and the
correct grounding connections. Do
not apply unnecessary forces on
the battery when making connec-
tions. - Battery cables
When jump starting the dis-
charged battery in the trunk com-
partment, do not connect the
jumper cable between the nega-
tive terminal of the booster battery
and the negative terminal of the
discharged battery. This may
cause the discharged battery to
overheat, crack, or release the
acids.
Connect the jumper cable
between the negative terminal of
the booster battery and a solid,
stationary or metallic point often
discharges the battery.
5.First, start the engine of the vehicle
with the booster battery, over 2,000
rpm. Then, start your engine with
the discharged battery.
6.Turn your engine ON for at least 20 minutes either in the idling mode or
the driving mode. Otherwise, your
discharged battery is not
recharged enough to re-start the
vehicle.
When the cause of your battery dis-charging is not apparent, have yourvehicle checked by an authorizedEQUUS dealer.
Push-starting
A vehicle equipped with automatic
transmission cannot be push-start-
ed. Follow the instructions in "Jump
starting" of this chapter.
NOTICE
i
6-5
What to do in an emergency06
Page 339 of 477
When the temperature gauge indi-
cates engine overheating, you may
experience a loss of power, loud
pinging, or knocking. The engine is
probably too hot. If this happens, you
should:
1.Pull off the road and stop the vehi-cle as soon as it is safe to do so.
2.Place the shift lever in P(Park), and set the parking brake. When the
A/C is turned ON, turn it OFF.
3.When the engine coolant gushes out, or when steam comes out
from the hood, stop the engine. Do
not open the hood until the coolant
outrushing or steaming stops.
Even when there is no more
coolant outrushing, leave the
engine running and operate the
engine cooling fan. When the fan
does not operate, turn the engine
OFF.
4.Check whether the water pump drive belt is missing. When it is not,
check its tightening. When it seems
to be loose, check for any coolant
leaking from the radiator or hoses
underneath the vehicle. (When the
A/C is turned ON, cold-water drain-
ing is normal upon stopping the
vehicle.) 5.When the water pump drive belt is
broken, or when engine coolant
leaks out, immediately stop the
engine and contact the nearest
authorized EQUUS dealer for
assistance.
6.When you cannot find a cause, wait until the engine temperature
cools down. When there is serious
loss of engine coolant, carefully
add coolant into the reservoir to
bring the fluid level above the
halfway mark.
7.Be cautious and keep alert for fur- ther signs of overheating. When
finding further overheating signs,
contact an authorized EQUUS
dealer for assistance.
I IF
F
T
T H
H E
E
E
E N
N G
GI
IN
N E
E
O
O V
VE
ER
R H
H E
EA
A T
TS
S
6-6
What to do in an emergency
While the engine is running,
keep hair, hands, and clothing
away from moving parts, such
as the fan and drive belts, in
order to prevent an injury.
WARNING
Do not remove theradiator cap, when the
engine is hot. This may
blow out the engine
coolant out of the
opening and cause a
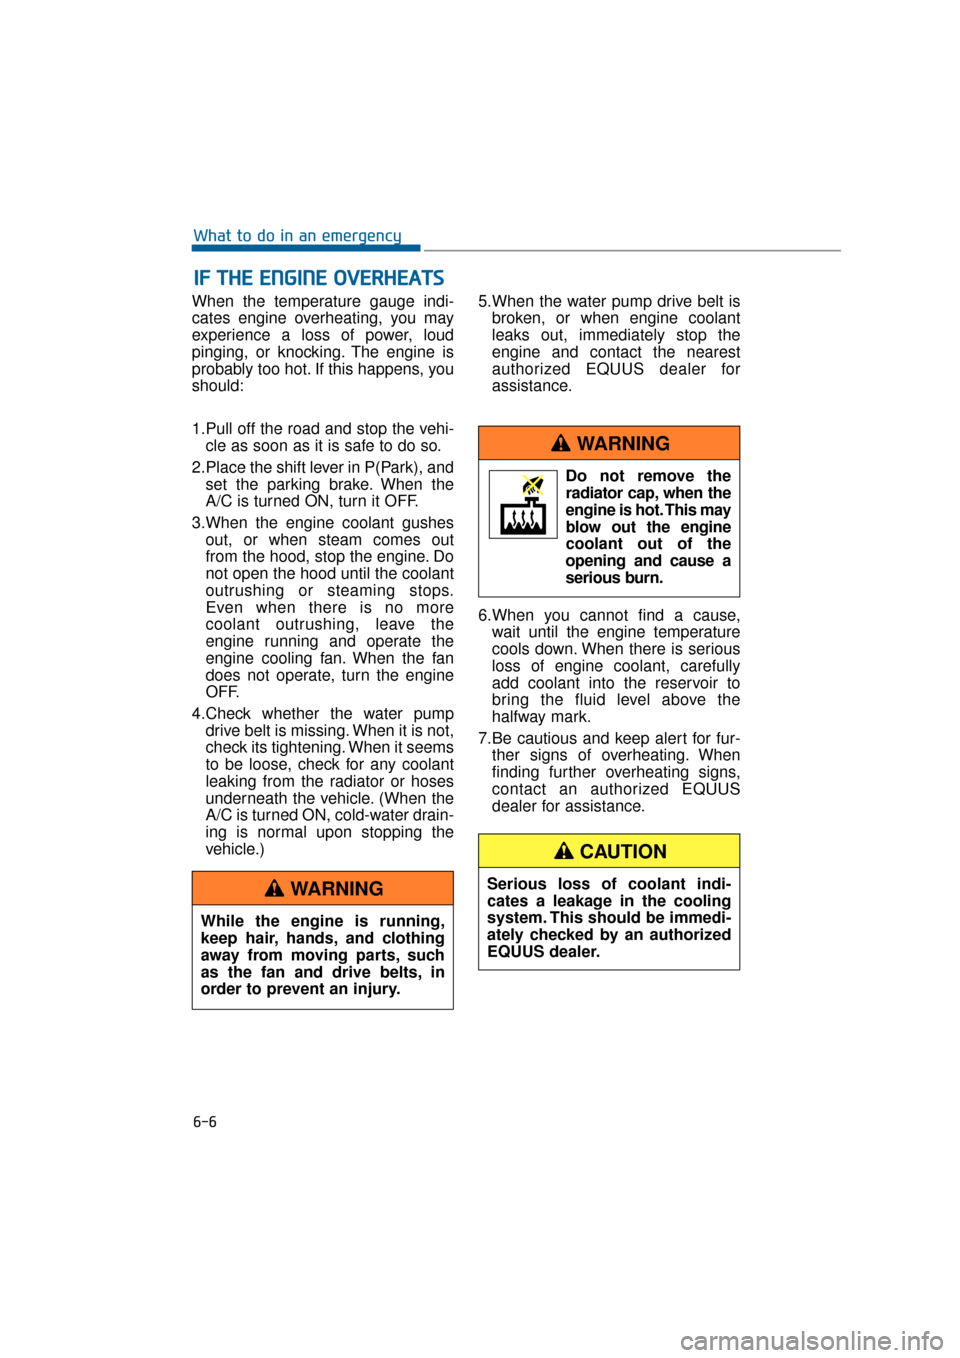
serious burn.
WARNING
Serious loss of coolant indi-
cates a leakage in the cooling
system. This should be immedi-
ately checked by an authorized
EQUUS dealer.
CAUTION
Page 340 of 477
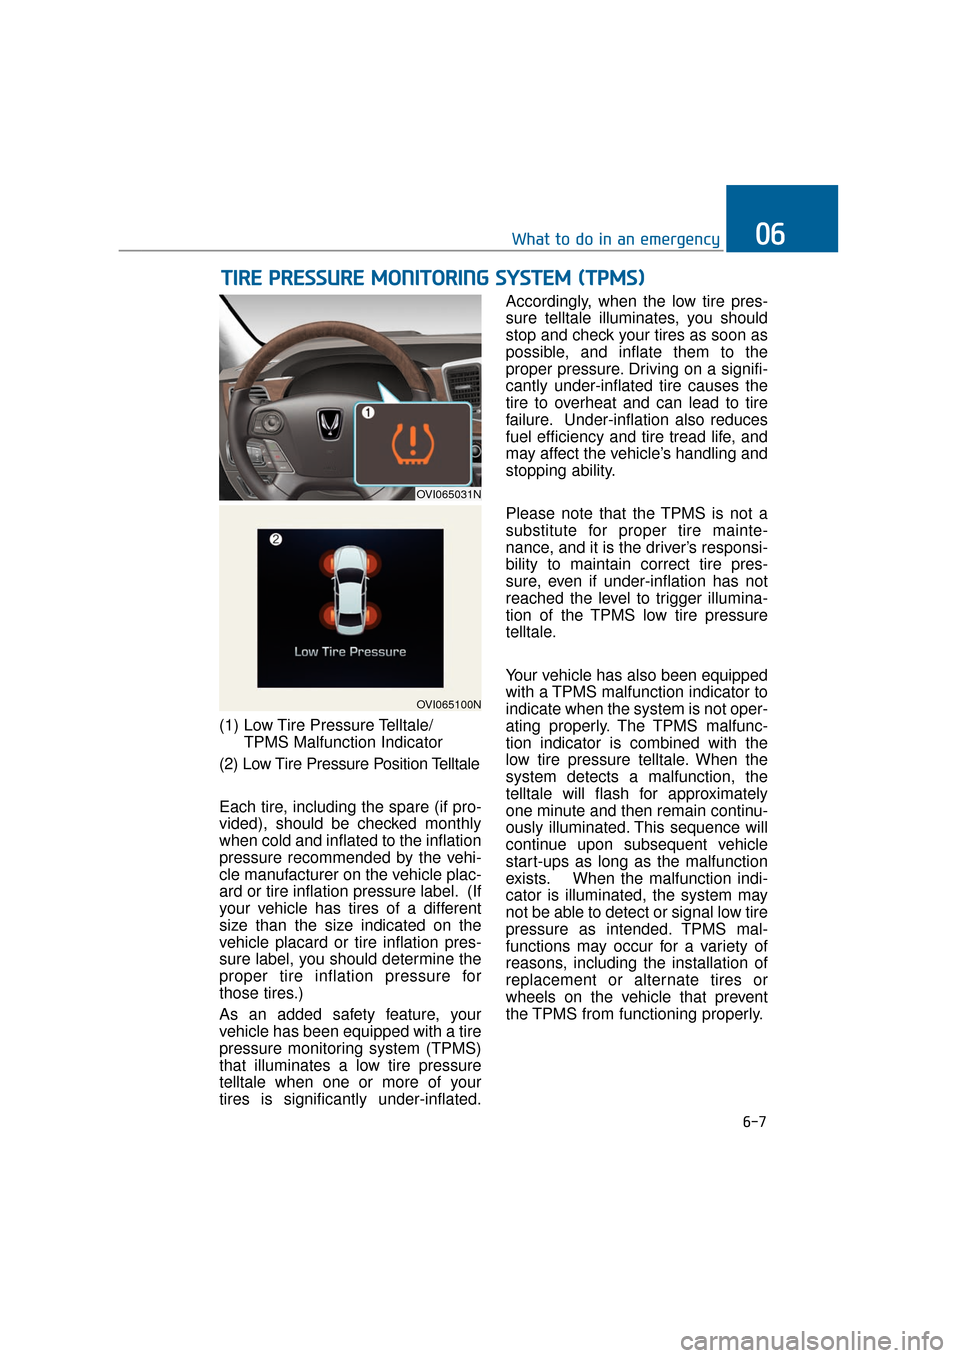
(1) Low Tire Pressure Telltale/TPMS Malfunction Indicator
(2) Low Tire Pressure Position Telltale
Each tire, including the spare (if pro-
vided), should be checked monthly
when cold and inflated to the inflation
pressure recommended by the vehi-
cle manufacturer on the vehicle plac-
ard or tire inflation pressure label. (If
your vehicle has tires of a different
size than the size indicated on the
vehicle placard or tire inflation pres-
sure label, you should determine the
proper tire inflation pressure for
those tires.)
As an added safety feature, your
vehicle has been equipped with a tire
pressure monitoring system (TPMS)
that illuminates a low tire pressure
telltale when one or more of your
tires is significantly under-inflated. Accordingly, when the low tire pres-
sure telltale illuminates, you should
stop and check your tires as soon as
possible, and inflate them to the
proper pressure. Driving on a signifi-
cantly under-inflated tire causes the
tire to overheat and can lead to tire
failure. Under-inflation also reduces
fuel efficiency and tire tread life, and
may affect the vehicle’s handling and
stopping ability.
Please note that the TPMS is not a
substitute for proper tire mainte-
nance, and it is the driver’s responsi-
bility to maintain correct tire pres-
sure, even if under-inflation has not
reached the level to trigger illumina-
tion of the TPMS low tire pressure
telltale.
Your vehicle has also been equipped
with a TPMS malfunction indicator to
indicate when the system is not oper-
ating properly. The TPMS malfunc-
tion indicator is combined with the
low tire pressure telltale. When the
system detects a malfunction, the
telltale will flash for approximately
one minute and then remain continu-
ously illuminated. This sequence will
continue upon subsequent vehicle
start-ups as long as the malfunction
exists. When the malfunction indi-
cator is illuminated, the system may
not be able to detect or signal low tire
pressure as intended. TPMS mal-
functions may occur for a variety of
reasons, including the installation of
replacement or alternate tires or
wheels on the vehicle that prevent
the TPMS from functioning properly.
T T
I
IR
R E
E
P
P R
R E
ES
SS
SU
U R
RE
E
M
M O
ON
NI
IT
T O
O R
RI
IN
N G
G
S
S Y
Y S
ST
T E
EM
M
(
( T
T P
P M
M S
S)
)
6-7
What to do in an emergency06
OVI065031N
OVI065100N