clock Hyundai Matrix 2003 User Guide
[x] Cancel search | Manufacturer: HYUNDAI, Model Year: 2003, Model line: Matrix, Model: Hyundai Matrix 2003Pages: 312, PDF Size: 4.1 MB
Page 86 of 312

FEATURES OF YOUR HYUNDAI
1- 78
H290B03E-GAT
1. POWER ON-OFF Control Knob The radio unit may be operated when the ignition key is in the "ACC" or "ON" position.Press the button to switch the power on. Thedisplay shows the radio frequency in the radiomode, the tape direction indicator in the tapemode or CD track in either the CD mode orCD AUTO CHANGER mode. To switch thepower off, press the button again. VOLUME Control Rotate the knob clockwise to increase the volume and turn the knob counterclockwise toreduce the volume.
2. BASS/BALANCE Control Knob BASS Control Knob Press to pop the knob out. To increase the bass, rotate the knob clockwise, while todecrease the bass, rotate the knob counter-clockwise. BALANCE Control knob Pull the Bass control knob out further. Rotate the knob clockwise to emphasize right speakersound. (Left speaker sound will be attenu-ated) When the control knob is turned coun-terclockwise, left speaker sound will be em-phasized (Right speaker sound will be attenu-ated).
3. TREBLE/FAD Knob TREBLE Control Knob Press to pop the knob out and turn to the left or right for the desired treble tone. FAD (Fader Control) Knob Pull the Bass control knob out further. Turn the control knob counterclockwise to empha-size front speaker sound. (Rear speaker soundwill be attenuated) When the control knob isturned clockwise, rear speaker sound will beemphasized. (Front speaker sound will beattenuated)
4. TUNE (Manual) Select Button Press the ( ) side or ( ) side to increase or to decrease the frequency. Press either but-ton and hold down to continuously scroll,Release button once the desired station isreached. SEEK Operation (Automatic Channel Selection) Press the TUNE select button for 0.5 sec or more. Releasing it will automatically tune tothe next available station with a beep sound.When the ( ) side is pressed longer than 0.5second, releasing will automatically tune tothe next higher frequency and when the ( )side is pressed longer than 0.5 second andreleasing will automatically tune to the nextlower frequency.5. PRESET STATION Select Buttons
Six (6) stations for AM, FM and FM2 respec-
tively can be preset in the electronic memorycircuit. HOW TO PRESET STATIONS
Six AM and twelve FM stations may be pro-
grammed into the memory of the radio. Then, by simply pressing the band select buttonand/or one of the six station select buttons,you may recall any of these stations instantly.To program the stations, follow these steps:
o Press band selector to set the band for AM, FM or FM2.
o Select the desired station to be stored by seek or manual tuning.
o Determine the preset station select button you wish to use to access that station.
o Press the station select button for more than two seconds. A select button indicator will show in the display indicating whichselect button you have depressed. Thefrequency display will flash after it hasbeen stored into the memory with beepsound. You should then release the but-ton, and proceed to program the next de-sired station. A total of 18 stations can beprogrammed by selecting one AM and twoFM station per button.
o When completed, any preset station may be recalled by selecting AM, FM or FM2band and the appropriate station button.
Page 97 of 312

FEATURES OF YOUR HYUNDAI 1- 89
B870D01FC-GAT ANTENNA Roof Antenna
Your car uses a roof antenna to receive both AM and FM broadcast signals.This antenna is a removable type. To removethe antenna, turn the antenna counterclock-wise. To install the antenna, turn the antennaclockwise. CAUTION:
o Be sure to remove the antenna before
washing the car in an automatic car washor it may be damaged.
o Before entering a place with a low height clearance, be sure to adjust the roofantenna low.
o When reinstalling your antenna, it is im- portant that it is fully tightened to ensureproper reception.
HFC2100
Page 100 of 312
DRIVING YOUR HYUNDAI 2- 3
C070C01E
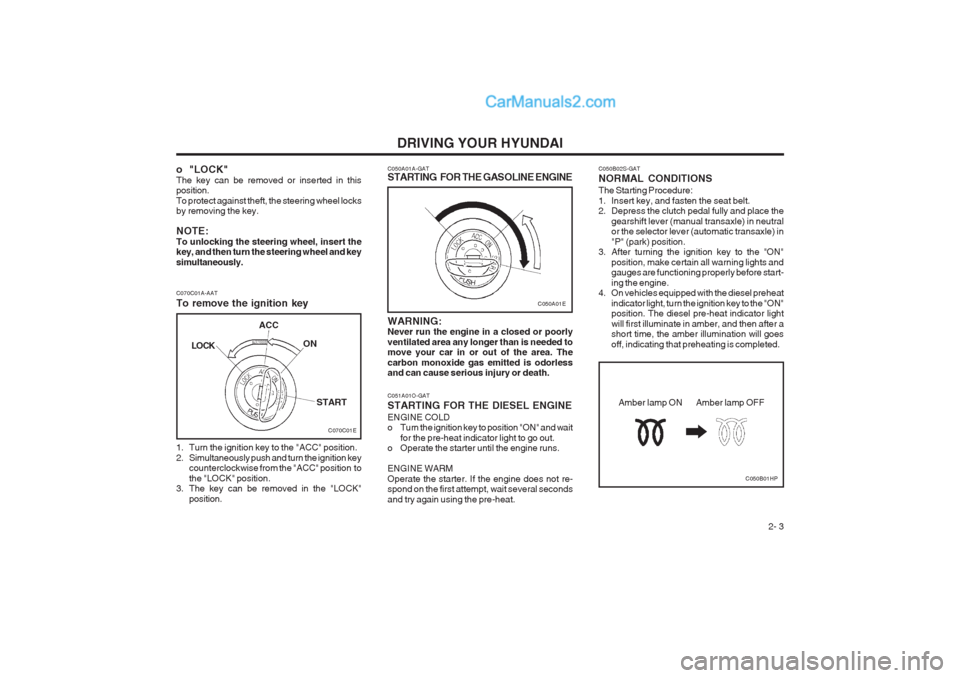
C070C01A-AAT To remove the ignition key
1. Turn the ignition key to the "ACC" position.
2. Simultaneously push and turn the ignition key
counterclockwise from the "ACC" position tothe "LOCK" position.
3. The key can be removed in the "LOCK"
position.LOCK
ACC
ON
START
C050A01E
C050A01A-GAT
STARTING FOR THE GASOLINE ENGINE WARNING: Never run the engine in a closed or poorly ventilated area any longer than is needed to move your car in or out of the area. The carbon monoxide gas emitted is odorless and can cause serious injury or death. C051A01O-GAT STARTING FOR THE DIESEL ENGINE ENGINE COLD
o Turn the ignition key to position "ON" and wait
for the pre-heat indicator light to go out.
o Operate the starter until the engine runs. ENGINE WARM Operate the starter. If the engine does not re- spond on the first attempt, wait several seconds and try again using the pre-heat.
o "LOCK" The key can be removed or inserted in this position. To protect against theft, the steering wheel locks by removing the key. NOTE: To unlocking the steering wheel, insert the key, and then turn the steering wheel and key simultaneously. C050B02S-GAT NORMAL CONDITIONS The Starting Procedure:
1. Insert key, and fasten the seat belt.
2. Depress the clutch pedal fully and place the
gearshift lever (manual transaxle) in neutralor the selector lever (automatic transaxle) in "P" (park) position.
3. After turning the ignition key to the "ON"
position, make certain all warning lights and gauges are functioning properly before start- ing the engine.
4. On vehicles equipped with the diesel preheat
indicator light, turn the ignition key to the "ON" position. The diesel pre-heat indicator light will first illuminate in amber, and then after a short time, the amber illumination will goes off, indicating that preheating is completed.
C050B01HP
Amber lamp ON Amber lamp OFF
Page 117 of 312

WHAT TO DO IN AN EMERGENCY
3-6 D060G01Y-AAT 6. Changing Wheels Loosen the wheel nuts and remove them with your fingers. Slide the wheel off the studs and lay it flat so it cannot roll away. To put the wheel on the hub, pick up the spare tire, line up the holes with the studs and slide the wheel onto them. If this is difficult, tip the wheel slightly and get the top hole in the wheel lined up with the top stud. Then jiggle the wheel back and forth until the wheel can be slid over the other studs.
D060G01FC
D060F02E-AAT 5. Raising the Car After inserting a wrench bar into the wheel nut wrench, install the wrench bar into the jack as shown in the drawing. To raise the vehicle, turn the wheel nut wrench clockwise. As the jack begins to raise the vehicle, double check that it is properly positioned and will not slip. If the jack is on soft ground or sand, place a board, brick, flat stone or other object under the base of the jack to keep it from sinking. Raise the car high enough so that the fully inflated spare tire can be installed. To do this, you will need more ground clearance than is required to remove the flat tire. WARNING: Do not get under the car when it is supported by the jack! This is very dangerous as the vehicle could fall and cause serious injury or death. No one should stay in the car while the jack is being used.HFC4022
Wrench bar
Wheel nut wrench
The wheel nuts should be loosened slightly be- fore raising the car. To loosen the nuts, turn the wheel nut wrench handle counterclockwise. When doing this, be sure that the socket is seated completely over the nut so it cannot slip off. For maximum leverage, position the wrench so the handle is to the right as shown in the drawing. Then, while holding the wrench near the end of the handle, pull up on it with steady pressure. Do not remove the nuts at this time. Just loosen them about one-half turn. D060E01A-AAT 4. Put the Jack in Place The base of the jack should be placed on firm, level ground. The jack should be positioned as shown in the drawing.
HFC4006
Page 118 of 312

WHAT TO DO IN AN EMERGENCY 3-7
STA3071H
WARNING: Wheel and wheel covers may have sharp edges. Handle them carefully to avoid pos- sible severe injury. Before putting the wheel into place, be sure that there is nothing on the hub or wheel (such as mud, tar, gravel, etc.) that interferes with the wheel from fitting solidly against the hub. If there is, remove it. If there is not good contact on the mounting surface between the wheel and hub, the wheel nuts could loosen and cause the loss of a wheel. Loss of a wheel may result in loss of control of the vehicle. This may cause serious injury or death. D060H02A-AAT 7. Re-install Wheel Nuts To reinstall the wheel cover, hold it on the studs, put the wheel nuts on the studs and tighten them finger tight. The nuts should be installed with their small diameter ends directed inward. Jiggle the tire to be sure it is completely seated, then tighten the nuts as much as possible with your fingers again.
Lower the car to the ground by turning the wheel nut wrench counterclockwise. Then position the wrench as shown in the drawing and tighten the wheel nuts. Be sure the socket is seated com- pletely over the nut. Do not stand on the wrench handle or use an extension pipe over the wrench handle. Go around the wheel tightening every other nut until they are all tight. Then double-check each nut for tightness. After changing wheels, have a technician tighten the wheel nuts to their proper torque as soon as possible. Wheel nut tightening torque: Steel wheel & aluminium alloy wheel: 900-1,100 kg.cm (65-80 lb.ft)
D060H01FCD060I01E-GAT 8. Lower Vehicle and Tighten NutsD060I01FC
Page 139 of 312
DO-IT-YOURSELF MAINTENANCE
6-6 If the oil level is close to or below the "L" mark,
add oil until it reaches the "F" mark. To add oil:
1. Remove the oil filler cap by turning it counter- clockwise.
2. Add oil, then check the level again. Do not overfill.
3. Replace the cap by turning it clockwise.
The distance between the "F" and "L" marks is
equal to about 1 liter(Gasoline Engine)/1.2 liter(Diesel Engine) of oil.
G350A01A-GAT
ENGINE OIL CONSUMPTION Function of Engine Oil
Engine oil has the primary function of lubricat-
ing and cooling the inside of the engine.
Engine oil consumption It is normal that an engine should consume
some engine oil while normal driving. The cause of oil consumption in a normal engine are asfollows;
o Engine oil is used to lubricate pistons, piston rings and cylinders. A thin film of oil is left on the cylinder wall when a piston moves downwards in thecylinder. High negative pressure generated
during engine operation sucks some of theoil into the combustion chamber. This oil with some oil of the cylinder wall is burned by the high temperature combustion gases during the combustion process.
o The engine oil consumption is strongly ef- fected by the viscosity and quality of oil,engine rpm and driving condition etc. Theengine oil is more consumed under severedriving conditions such as high speeds and
frequent acceleration and deceleration thannormal driving condition.
G040A03FC-GAT
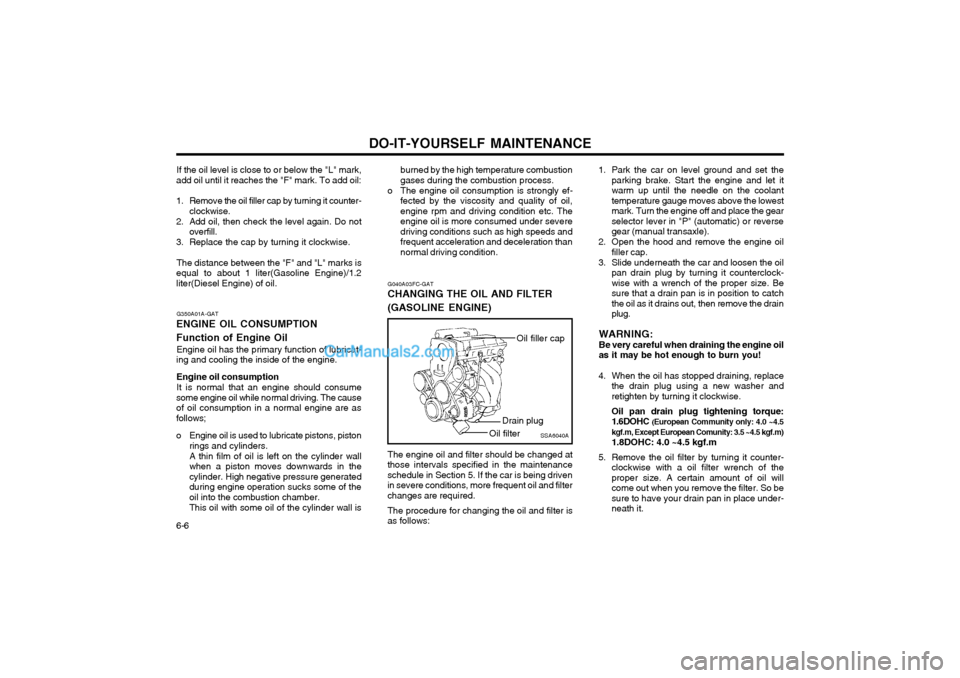
CHANGING THE OIL AND FILTER (GASOLINE ENGINE)
The engine oil and filter should be changed at
those intervals specified in the maintenance schedule in Section 5. If the car is being drivenin severe conditions, more frequent oil and filterchanges are required.
The procedure for changing the oil and filter is
as follows: 1. Park the car on level ground and set the
parking brake. Start the engine and let itwarm up until the needle on the coolanttemperature gauge moves above the lowestmark. Turn the engine off and place the gearselector lever in "P" (automatic) or reversegear (manual transaxle).
2. Open the hood and remove the engine oil filler cap.
3. Slide underneath the car and loosen the oil pan drain plug by turning it counterclock-wise with a wrench of the proper size. Besure that a drain pan is in position to catchthe oil as it drains out, then remove the drainplug.
WARNING:Be very careful when draining the engine oilas it may be hot enough to burn you!
4. When the oil has stopped draining, replace the drain plug using a new washer andretighten by turning it clockwise. Oil pan drain plug tightening torque: 1.6DOHC (European Community only: 4.0 ~4.5
kgf.m, Except European Comunity: 3.5 ~4.5 kgf.m) 1.8DOHC: 4.0 ~4.5 kgf.m
5. Remove the oil filter by turning it counter- clockwise with a oil filter wrench of the proper size. A certain amount of oil willcome out when you remove the filter. So besure to have your drain pan in place under-neath it.
SSA6040A
Oil filler cap
Drain plug
Oil filter
Page 140 of 312
DO-IT-YOURSELF MAINTENANCE 6-7
G040C01FCEngine oil drain plug
Oil filter
G040B03FC-GAT
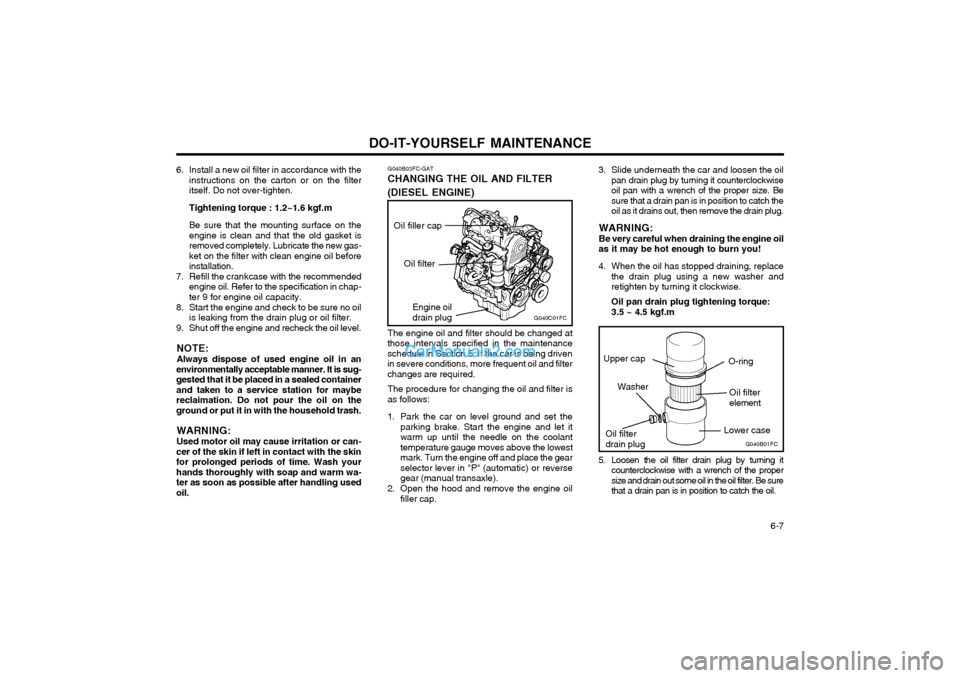
CHANGING THE OIL AND FILTER (DIESEL ENGINE)
The engine oil and filter should be changed at
those intervals specified in the maintenance schedule in Section 5. If the car is being drivenin severe conditions, more frequent oil and filterchanges are required.
The procedure for changing the oil and filter is
as follows:
1. Park the car on level ground and set the parking brake. Start the engine and let it warm up until the needle on the coolanttemperature gauge moves above the lowestmark. Turn the engine off and place the gearselector lever in "P" (automatic) or reversegear (manual transaxle).
2. Open the hood and remove the engine oil filler cap. 3. Slide underneath the car and loosen the oil
pan drain plug by turning it counterclockwiseoil pan with a wrench of the proper size. Besure that a drain pan is in position to catch theoil as it drains out, then remove the drain plug.
WARNING: Be very careful when draining the engine oil
as it may be hot enough to burn you!
4. When the oil has stopped draining, replace the drain plug using a new washer and retighten by turning it clockwise. Oil pan drain plug tightening torque: 3.5 ~ 4.5 kgf.m
6. Install a new oil filter in accordance with the
instructions on the carton or on the filter itself. Do not over-tighten. Tightening torque : 1.2~1.6 kgf.mBe sure that the mounting surface on the engine is clean and that the old gasket isremoved completely. Lubricate the new gas-ket on the filter with clean engine oil beforeinstallation.
7. Refill the crankcase with the recommended engine oil. Refer to the specification in chap-ter 9 for engine oil capacity.
8. Start the engine and check to be sure no oil is leaking from the drain plug or oil filter.
9. Shut off the engine and recheck the oil level.
NOTE: Always dispose of used engine oil in an
environmentally acceptable manner. It is sug- gested that it be placed in a sealed containerand taken to a service station for maybereclaimation. Do not pour the oil on theground or put it in with the household trash.
WARNING: Used motor oil may cause irritation or can-
cer of the skin if left in contact with the skin for prolonged periods of time. Wash yourhands thoroughly with soap and warm wa-ter as soon as possible after handling usedoil. 5. Loosen the oil filter drain plug by turning it
counterclockwise with a wrench of the propersize and drain out some oil in the oil filter. Be surethat a drain pan is in position to catch the oil.
G040B01FCOil filter drain plug O-ring
Oil filterelement
Washer
Upper cap
Lower case
Oil filler cap
Page 141 of 312
DO-IT-YOURSELF MAINTENANCE
6-8
G050B01A-AAT
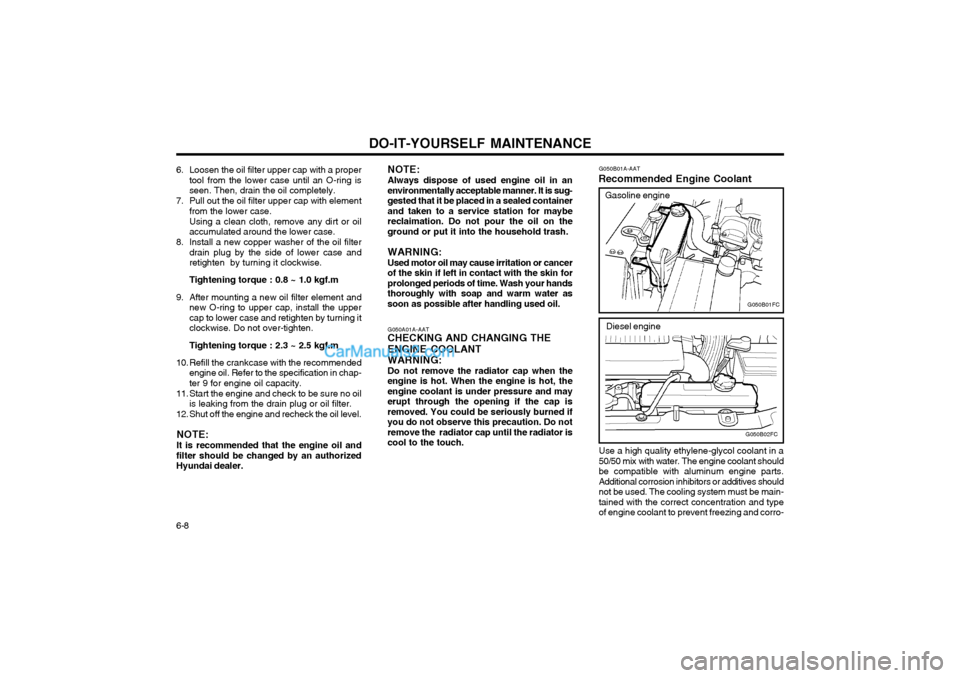
Recommended Engine Coolant
Use a high quality ethylene-glycol coolant in a 50/50 mix with water. The engine coolant shouldbe compatible with aluminum engine parts.Additional corrosion inhibitors or additives shouldnot be used. The cooling system must be main-tained with the correct concentration and typeof engine coolant to prevent freezing and corro-
G050B01FC
G050B02FC
Gasoline engine
Diesel engine
6. Loosen the oil filter upper cap with a proper tool from the lower case until an O-ring is seen. Then, drain the oil completely.
7. Pull out the oil filter upper cap with element from the lower case. Using a clean cloth, remove any dirt or oil accumulated around the lower case.
8. Install a new copper washer of the oil filter drain plug by the side of lower case andretighten by turning it clockwise.
Tightening torque : 0.8 ~ 1.0 kgf.m
9. After mounting a new oil filter element and new O-ring to upper cap, install the upper cap to lower case and retighten by turning itclockwise. Do not over-tighten.
Tightening torque : 2.3 ~ 2.5 kgf.m
10. Refill the crankcase with the recommended engine oil. Refer to the specification in chap- ter 9 for engine oil capacity.
11. Start the engine and check to be sure no oil is leaking from the drain plug or oil filter.
12. Shut off the engine and recheck the oil level.
NOTE: It is recommended that the engine oil and
filter should be changed by an authorized Hyundai dealer. G050A01A-AAT
CHECKING AND CHANGING THE ENGINE COOLANT
WARNING: Do not remove the radiator cap when the
engine is hot. When the engine is hot, the engine coolant is under pressure and mayerupt through the opening if the cap isremoved. You could be seriously burned ifyou do not observe this precaution. Do notremove the radiator cap until the radiator iscool to the touch. NOTE: Always dispose of used engine oil in an environmentally acceptable manner. It is sug-gested that it be placed in a sealed containerand taken to a service station for maybereclaimation. Do not pour the oil on theground or put it into the household trash. WARNING: Used motor oil may cause irritation or
cancer
of the skin if left in contact with the skin for prolonged periods of time. Wash your handsthoroughly with soap and warm water assoon as possible after handling used oil.
Page 143 of 312
DO-IT-YOURSELF MAINTENANCE
6-10
CHAMPION NGK RC10YC BKR5ES
Unleaded
engine Leaded
engine
RC10YC4 BKR5ES-11
4. Turn the radiator cap counterclockwise with-
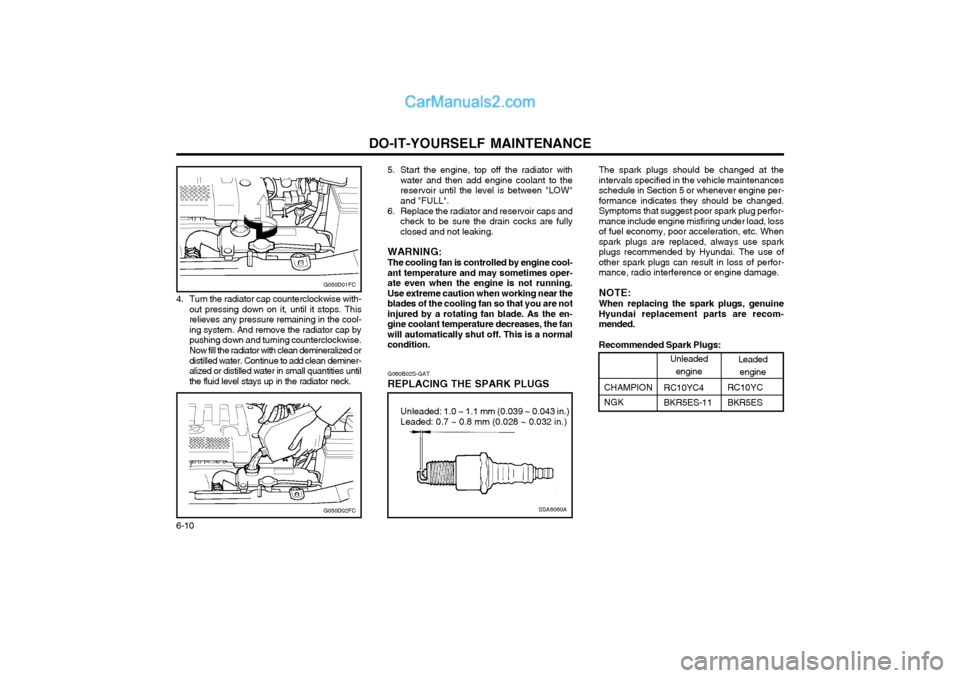
out pressing down on it, until it stops. This relieves any pressure remaining in the cool-ing system. And remove the radiator cap bypushing down and turning counterclockwise. Now fill the radiator with clean demineralized or distilled water. Continue to add clean deminer-alized or distilled water in small quantities untilthe fluid level stays up in the radiator neck. G060B02S-GAT
REPLACING THE SPARK PLUGS The spark plugs should be changed at theintervals specified in the vehicle maintenancesschedule in Section 5 or whenever engine per-formance indicates they should be changed.Symptoms that suggest poor spark plug perfor-mance include engine misfiring under load, lossof fuel economy, poor acceleration, etc. Whenspark plugs are replaced, always use sparkplugs recommended by Hyundai. The use ofother spark plugs can result in loss of perfor-mance, radio interference or engine damage. NOTE: When replacing the spark plugs, genuine Hyundai replacement parts are recom-mended. Recommended Spark Plugs:
SSA6060A
Unleaded: 1.0 ~ 1.1 mm (0.039 ~ 0.043 in.) Leaded: 0.7 ~ 0.8 mm (0.028 ~ 0.032 in.)
G050D01FC
5. Start the engine, top off the radiator with
water and then add engine coolant to the reservoir until the level is between "LOW"and "FULL".
6. Replace the radiator and reservoir caps and check to be sure the drain cocks are fullyclosed and not leaking.
WARNING: The cooling fan is controlled by engine cool- ant temperature and may sometimes oper-ate even when the engine is not running.Use extreme caution when working near theblades of the cooling fan so that you are notinjured by a rotating fan blade. As the en-gine coolant temperature decreases, the fanwill automatically shut off. This is a normalcondition.
G050D02FC
Page 144 of 312

DO-IT-YOURSELF MAINTENANCE 6-11
NOTE: Spark plugs should be tightened firmly. Over- tightening can damage the threads in thealuminum cylinder head. Leaving them tooloose can cause the spark plugs to get veryhot and possibly result in damage to theengine.
7. Replace the cable by pushing the insulated connector directly down onto the electrode.Check to be sure it has snapped into placeand can't fall off.
SSA6061ASSA6062A
WARNING: It is recommended that the engine be cool
or cold when changing the spark plugs. If the engine is hot, you could burn yourself on the insulated connector, the spark plug or the engine itself.
4. When preparing to remove the old spark plug, guide the socket down over the spark plug, being careful not to damage the ce-ramic insulator.
5. To remove the spark plug, turn the wrench handle in a counterclockwise direction.
6. To install the new spark plug, guide the socket down over the spark plug, beingcareful not to damage the ceramic insulator.
G060C01S-GAT
Changing the Spark Plugs
You will find it easier to change spark plugs if
the engine is cold. Always change one sparkplug at a time. This helps avoid getting the wiresmixed up.
1. Remove the center cover on the engine rocker cover.
2. Using a clean cloth, remove any dirt that has accumulated around the spark plug so it cannot fall into the cylinder when the sparkplug is removed.
3. To remove the spark plug cable, pull straight up on the insulated connector, not the cable.Pulling on the cable may damage the carboncore conductor.
SSA6060B