Hyundai Matrix 2005 User Guide
Manufacturer: HYUNDAI, Model Year: 2005, Model line: Matrix, Model: Hyundai Matrix 2005Pages: 407, PDF Size: 10.31 MB
Page 11 of 407
1- 3
CONTROLS AND EQUIPMENT
B880C02A-GAT
Key Numbers
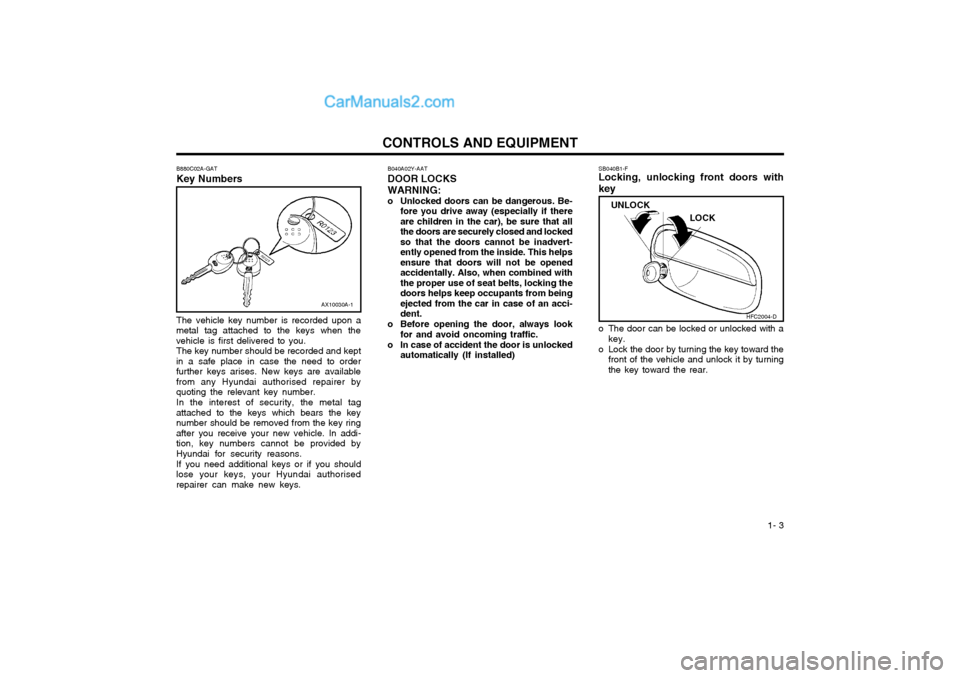
The vehicle key number is recorded upon a
metal tag attached to the keys when the vehicle is first delivered to you. The key number should be recorded and kept
in a safe place in case the need to orderfurther keys arises. New keys are availablefrom any Hyundai authorised repairer byquoting the relevant key number.
In the interest of security, the metal tag
attached to the keys which bears the keynumber should be removed from the key ringafter you receive your new vehicle. In addi-tion, key numbers cannot be provided byHyundai for security reasons.
If you need additional keys or if you should
lose your keys, your Hyundai authorisedrepairer can make new keys. SB040B1-F Locking, unlocking front doors with key
o The door can be locked or unlocked with a
key.
o Lock the door by turning the key toward the front of the vehicle and unlock it by turning the key toward the rear.
AX10030A-1
B040A02Y-AAT DOOR LOCKS WARNING:
o Unlocked doors can be dangerous. Be- fore you drive away (especially if there are children in the car), be sure that allthe doors are securely closed and lockedso that the doors cannot be inadvert-ently opened from the inside. This helpsensure that doors will not be openedaccidentally. Also, when combined withthe proper use of seat belts, locking thedoors helps keep occupants from beingejected from the car in case of an acci-dent.
o Before opening the door, always look for and avoid oncoming traffic.
o In case of accident the door is unlocked automatically (If installed)
LOCK
UNLOCK
HFC2004-D
Page 12 of 407
CONTROLS AND EQUIPMENT
1- 4
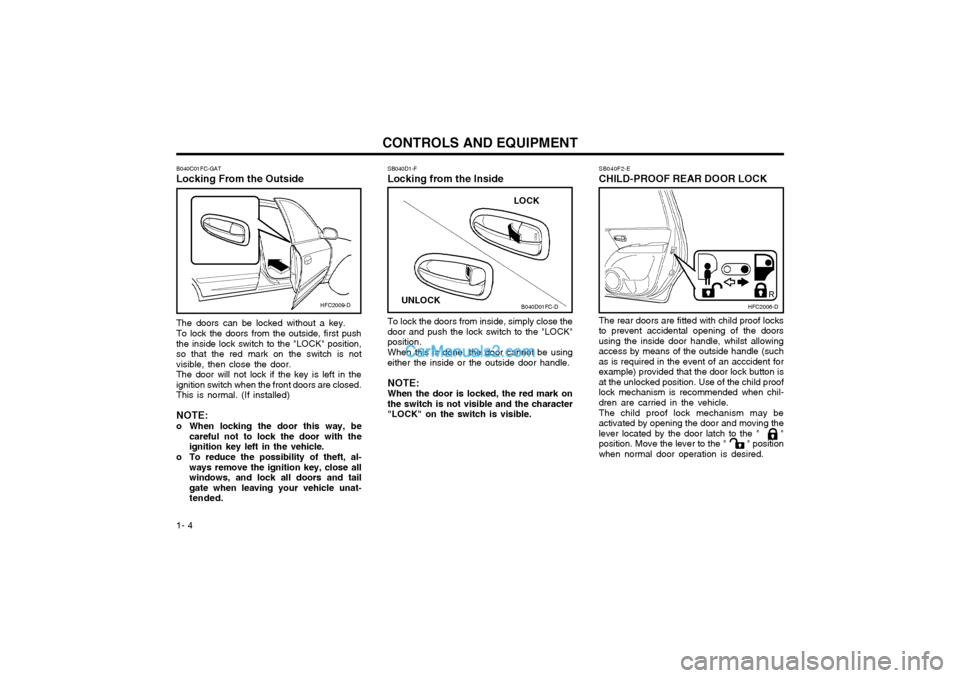
SB040F2-E CHILD-PROOF REAR DOOR LOCK The rear doors are fitted with child proof locks to prevent accidental opening of the doorsusing the inside door handle, whilst allowingaccess by means of the outside handle (suchas is required in the event of an acccident forexample) provided that the door lock button isat the unlocked position. Use of the child prooflock mechanism is recommended when chil-dren are carried in the vehicle. The child proof lock mechanism may be activated by opening the door and moving thelever located by the door latch to the " "position. Move the lever to the " " positionwhen normal door operation is desired.
SB040D1-F Locking from the Inside
B040D01FC-D
To lock the doors from inside, simply close the
door and push the lock switch to the "LOCK" position.
When this is done, the door cannot be using
either the inside or the outside door handle.
NOTE:When the door is locked, the red mark on
the switch is not visible and the character"LOCK" on the switch is visible.HFC2006-D
LOCK
UNLOCK
B040C01FC-GAT Locking From the Outside The doors can be locked without a key. To lock the doors from the outside, first push the inside lock switch to the "LOCK" position,so that the red mark on the switch is notvisible, then close the door.The door will not lock if the key is left in theignition switch when the front doors are closed.This is normal. (If installed) NOTE:
o When locking the door this way, be
careful not to lock the door with the ignition key left in the vehicle.
o To reduce the possibility of theft, al- ways remove the ignition key, close allwindows, and lock all doors and tailgate when leaving your vehicle unat-tended.
HFC2009-D
Page 13 of 407
1- 5
CONTROLS AND EQUIPMENT
SB040G1-F
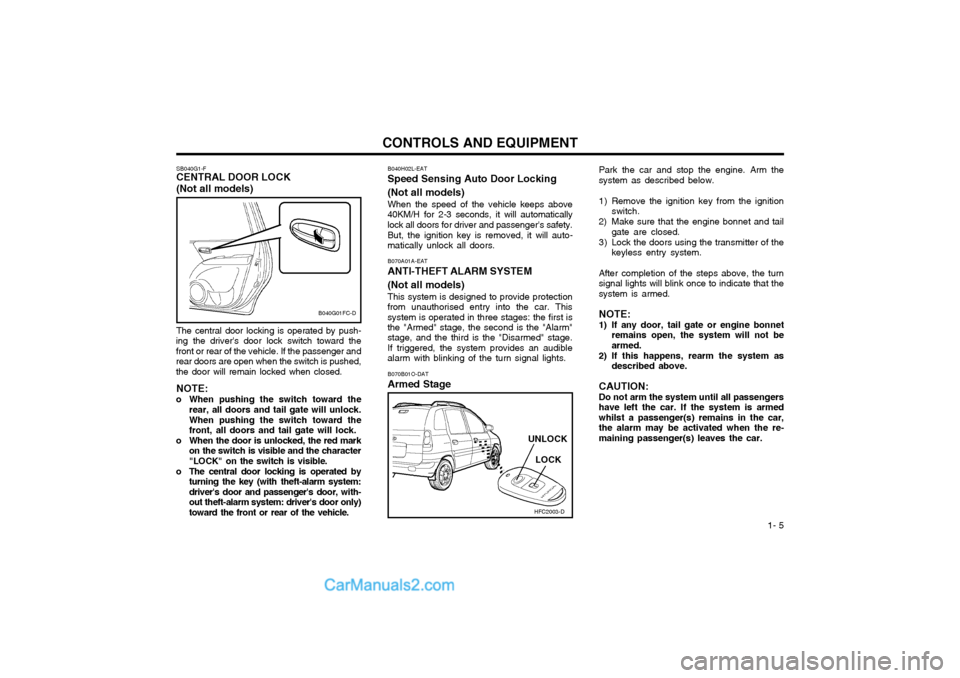
CENTRAL DOOR LOCK (Not all models) The central door locking is operated by push-
ing the driver's door lock switch toward the front or rear of the vehicle. If the passenger andrear doors are open when the switch is pushed,the door will remain locked when closed.
NOTE:
o When pushing the switch toward the rear, all doors and tail gate will unlock. When pushing the switch toward the front, all doors and tail gate will lock.
o When the door is unlocked, the red mark on the switch is visible and the character"LOCK" on the switch is visible.
o The central door locking is operated by turning the key (with theft-alarm system:driver's door and passenger's door, with-out theft-alarm system: driver's door only)toward the front or rear of the vehicle. B070A01A-EAT
ANTI-THEFT ALARM SYSTEM (Not all models)
This system is designed to provide protection
from unauthorised entry into the car. This system is operated in three stages: the first isthe "Armed" stage, the second is the "Alarm" stage, and the third is the "Disarmed" stage. If triggered, the system provides an audiblealarm with blinking of the turn signal lights.
HFC2003-D
LOCK
UNLOCK
B040G01FC-D
B070B01O-DAT
Armed Stage Park the car and stop the engine. Arm the system as described below.
1) Remove the ignition key from the ignition
switch.
2) Make sure that the engine bonnet and tail gate are closed.
3) Lock the doors using the transmitter of the keyless entry system.
After completion of the steps above, the turn signal lights will blink once to indicate that thesystem is armed. NOTE:
1) If any door, tail gate or engine bonnet remains open, the system will not be armed.
2) If this happens, rearm the system as described above.
CAUTION: Do not arm the system until all passengers have left the car. If the system is armedwhilst a passenger(s) remains in the car,the alarm may be activated when the re-maining passenger(s) leaves the car.
B040H02L-EAT
Speed Sensing Auto Door Locking (Not all models)
When the speed of the vehicle keeps above
40KM/H for 2-3 seconds, it will automatically lock all doors for driver and passenger's safety.
But, the ignition key is removed, it will auto-
matically unlock all doors.
Page 14 of 407
CONTROLS AND EQUIPMENT
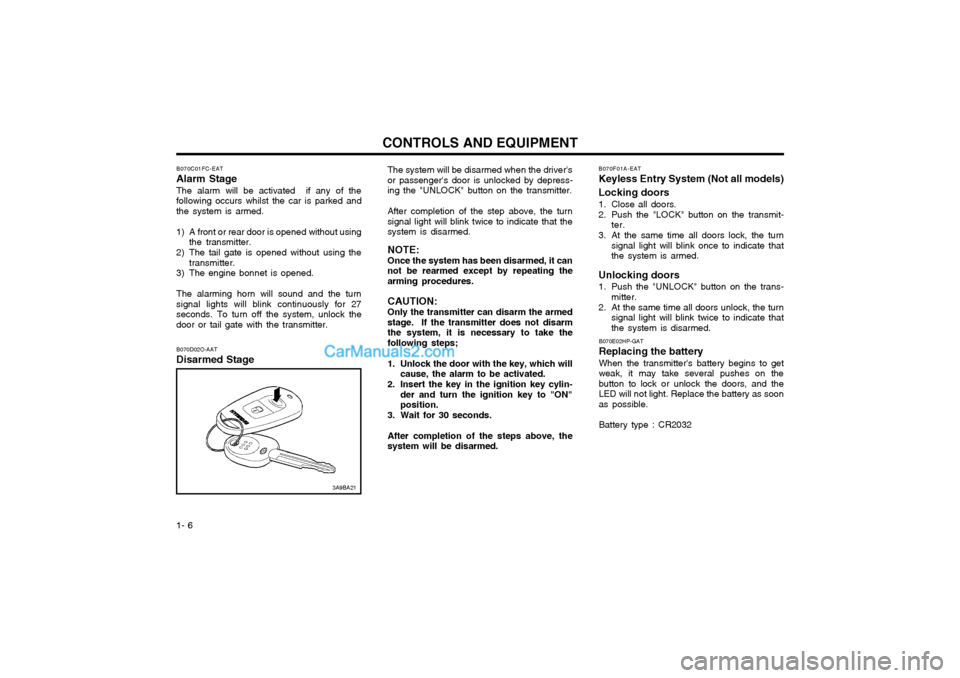
1- 6 The system will be disarmed when the driver's or passenger's door is unlocked by depress-ing the "UNLOCK" button on the transmitter. After completion of the step above, the turn signal light will blink twice to indicate that thesystem is disarmed. NOTE: Once the system has been disarmed, it can not be rearmed except by repeating thearming procedures. CAUTION: Only the transmitter can disarm the armed stage. If the transmitter does not disarmthe system, it is necessary to take thefollowing steps;
1. Unlock the door with the key, which will
cause, the alarm to be activated.
2. Insert the key in the ignition key cylin- der and turn the ignition key to "ON" position.
3. Wait for 30 seconds. After completion of the steps above, the system will be disarmed. B070F01A-EAT Keyless Entry System (Not all models) Locking doors
1. Close all doors.
2. Push the "LOCK" button on the transmit-
ter.
3. At the same time all doors lock, the turn signal light will blink once to indicate that the system is armed.
Unlocking doors
1. Push the "UNLOCK" button on the trans- mitter.
2. At the same time all doors unlock, the turn signal light will blink twice to indicate that the system is disarmed.
B070E02HP-GAT Replacing the batteryWhen the transmitter's battery begins to get weak, it may take several pushes on thebutton to lock or unlock the doors, and theLED will not light. Replace the battery as soonas possible. Battery type : CR2032
B070C01FC-EAT Alarm Stage The alarm will be activated if any of the following occurs whilst the car is parked andthe system is armed.
1) A front or rear door is opened without using
the transmitter.
2) The tail gate is opened without using the transmitter.
3) The engine bonnet is opened.The alarming horn will sound and the turn signal lights will blink continuously for 27seconds. To turn off the system, unlock thedoor or tail gate with the transmitter.
B070D02O-AAT Disarmed Stage
3A9BA21
Page 15 of 407
1- 7
CONTROLS AND EQUIPMENT
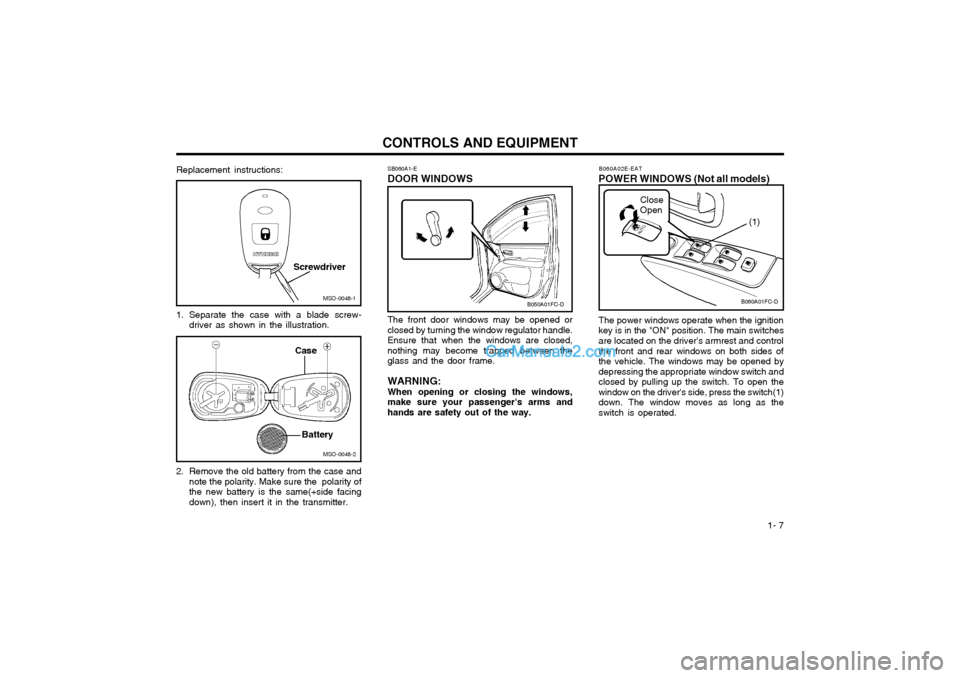
SB060A1-E DOOR WINDOWS The front door windows may be opened or closed by turning the window regulator handle.Ensure that when the windows are closed,nothing may become trapped between theglass and the door frame. WARNING: When opening or closing the windows, make sure your passenger's arms andhands are safety out of the way.B060A02E-EAT
POWER WINDOWS (Not all models) The power windows operate when the ignition key is in the "ON" position. The main switchesare located on the driver's armrest and control the front and rear windows on both sides of the vehicle. The windows may be opened bydepressing the appropriate window switch andclosed by pulling up the switch. To open thewindow on the driver's side, press the switch(1)down. The window moves as long as theswitch is operated.
MSO-0048-1
MSO-0048-2
Screwdriver
Case
Battery
B050A01FC-D
Close Open
B060A01FC-D
(1)
Replacement instructions:
1. Separate the case with a blade screw- driver as shown in the illustration.
2. Remove the old battery from the case and note the polarity. Make sure the polarity of the new battery is the same(+side facingdown), then insert it in the transmitter.
Page 16 of 407
CONTROLS AND EQUIPMENT
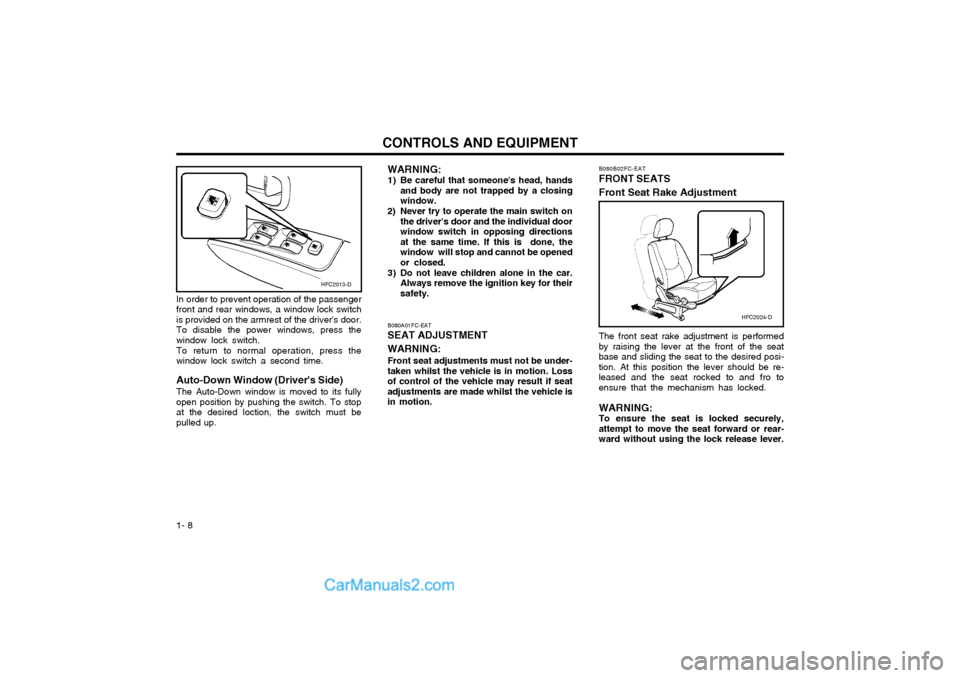
1- 8 The front seat rake adjustment is performed by raising the lever at the front of the seatbase and sliding the seat to the desired posi-tion. At this position the lever should be re-leased and the seat rocked to and fro toensure that the mechanism has locked. WARNING: To ensure the seat is locked securely,attempt to move the seat forward or rear-ward without using the lock release lever.
B080B02FC-EAT FRONT SEATS Front Seat Rake Adjustment
HFC2024-DB080A01FC-EAT
SEAT ADJUSTMENT WARNING:
Front seat adjustments must not be under-
taken whilst the vehicle is in motion. Loss of control of the vehicle may result if seatadjustments are made whilst the vehicle isin motion.
WARNING:
1) Be careful that someone's head, hands
and body are not trapped by a closing window.
2) Never try to operate the main switch on the driver's door and the individual doorwindow switch in opposing directionsat the same time. If this is done, thewindow will stop and cannot be openedor closed.
3) Do not leave children alone in the car. Always remove the ignition key for theirsafety.
In order to prevent operation of the passengerfront and rear windows, a window lock switchis provided on the armrest of the driver's door.To disable the power windows, press thewindow lock switch. To return to normal operation, press the window lock switch a second time. Auto-Down Window (Driver's Side) The Auto-Down window is moved to its fully open position by pushing the switch. To stopat the desired loction, the switch must bepulled up.
HFC2013-D
Page 17 of 407
1- 9
CONTROLS AND EQUIPMENTSB070E1-E
Lumbar Support Adjustment (Not all models) (Driver's seat only)
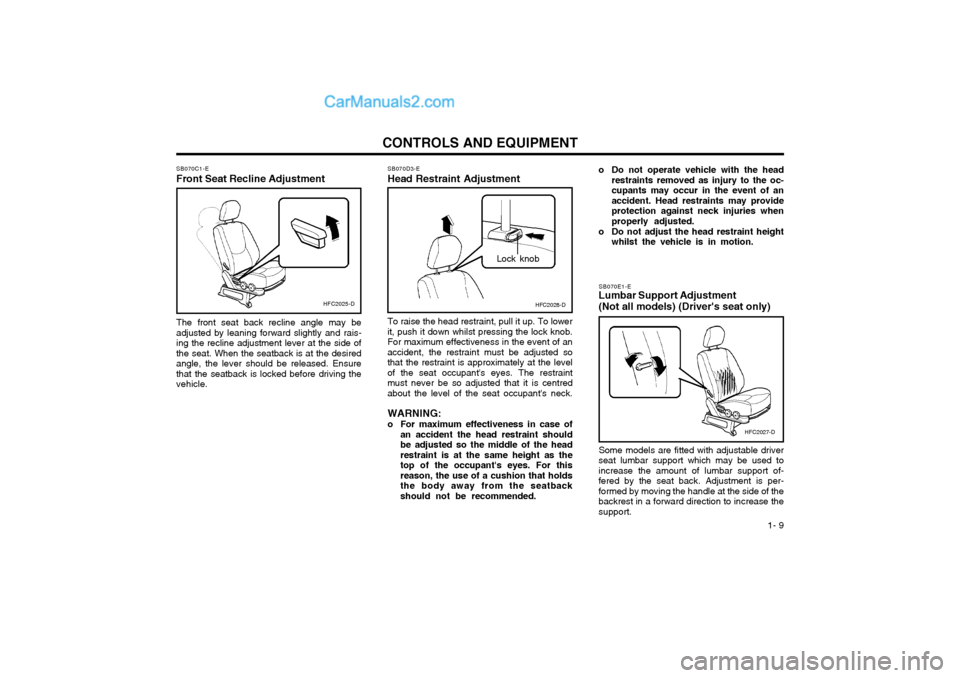
Some models are fitted with adjustable driver
seat lumbar support which may be used to increase the amount of lumbar support of-fered by the seat back. Adjustment is per-formed by moving the handle at the side of thebackrest in a forward direction to increase thesupport.
SB070D3-E Head Restraint Adjustment To raise the head restraint, pull it up. To lower it, push it down whilst pressing the lock knob.For maximum effectiveness in the event of anaccident, the restraint must be adjusted sothat the restraint is approximately at the levelof the seat occupant's eyes. The restraintmust never be so adjusted that it is centredabout the level of the seat occupant's neck. WARNING:
o For maximum effectiveness in case of
an accident the head restraint should be adjusted so the middle of the headrestraint is at the same height as thetop of the occupant's eyes. For thisreason, the use of a cushion that holdsthe body away from the seatbackshould not be recommended.
SB070C1-E
Front Seat Recline Adjustment
The front seat back recline angle may beadjusted by leaning forward slightly and rais-ing the recline adjustment lever at the side ofthe seat. When the seatback is at the desiredangle, the lever should be released. Ensurethat the seatback is locked before driving thevehicle.
HFC2027-D
HFC2025-DHFC2028-D
Lock knob
o Do not operate vehicle with the head
restraints removed as injury to the oc- cupants may occur in the event of anaccident. Head restraints may provideprotection against neck injuries whenproperly adjusted.
o Do not adjust the head restraint height whilst the vehicle is in motion.
Page 18 of 407
CONTROLS AND EQUIPMENT
1- 10
HFC2060
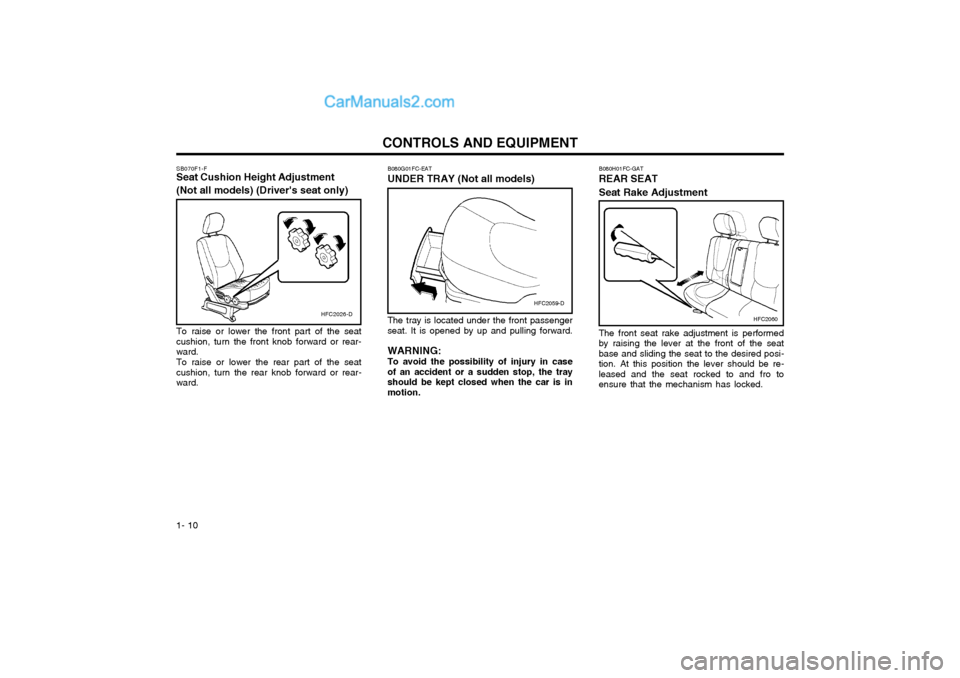
The front seat rake adjustment is performed by raising the lever at the front of the seatbase and sliding the seat to the desired posi-tion. At this position the lever should be re-leased and the seat rocked to and fro toensure that the mechanism has locked.
B080H01FC-GAT REAR SEAT Seat Rake Adjustment
B080G01FC-EAT UNDER TRAY (Not all models) The tray is located under the front passenger seat. It is opened by up and pulling forward. WARNING: To avoid the possibility of injury in case of an accident or a sudden stop, the trayshould be kept closed when the car is inmotion.
HFC2059-D
SB070F1-F Seat Cushion Height Adjustment (Not all models) (Driver's seat only) To raise or lower the front part of the seat cushion, turn the front knob forward or rear-ward. To raise or lower the rear part of the seat cushion, turn the rear knob forward or rear-ward.
HFC2026-D
Page 19 of 407
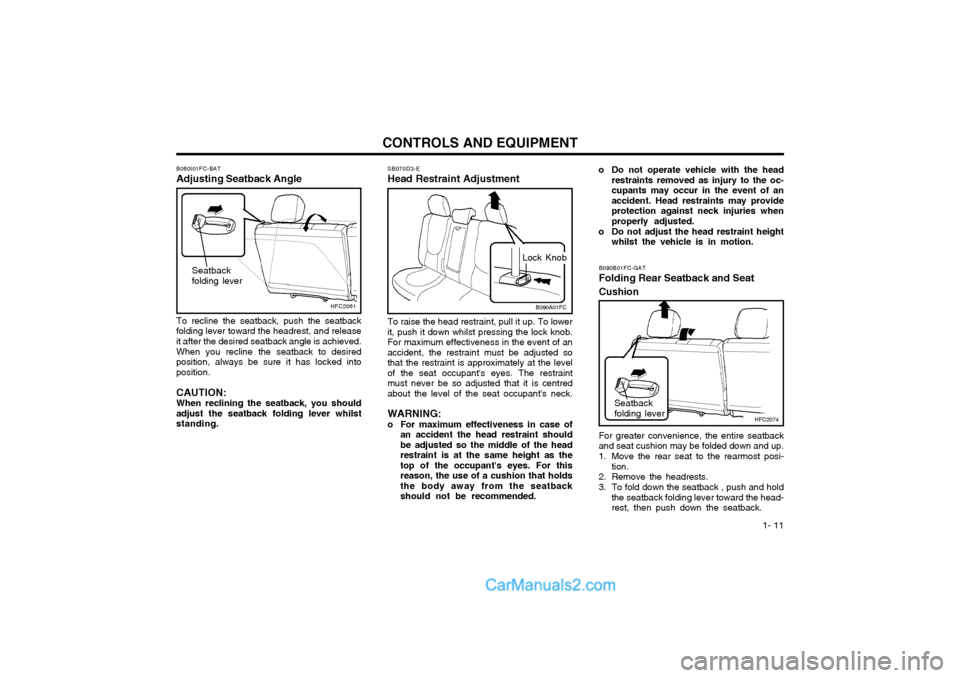
1- 11
CONTROLS AND EQUIPMENT
B090A01FC
Lock Knob
SB070D3-E Head Restraint Adjustment To raise the head restraint, pull it up. To lower it, push it down whilst pressing the lock knob.For maximum effectiveness in the event of anaccident, the restraint must be adjusted sothat the restraint is approximately at the levelof the seat occupant's eyes. The restraintmust never be so adjusted that it is centredabout the level of the seat occupant's neck. WARNING:
o For maximum effectiveness in case of
an accident the head restraint shouldbe adjusted so the middle of the headrestraint is at the same height as thetop of the occupant's eyes. For thisreason, the use of a cushion that holdsthe body away from the seatbackshould not be recommended.
B080I01FC-BAT
Adjusting Seatback Angle
HFC2061
To recline the seatback, push the seatback
folding lever toward the headrest, and release it after the desired seatback angle is achieved.
When you recline the seatback to desired
position, always be sure it has locked intoposition.
CAUTION:When reclining the seatback, you should
adjust the seatback folding lever whilststanding. B090B01FC-GAT Folding Rear Seatback and Seat Cushion
HFC2074
Seatback folding lever
For greater convenience, the entire seatback and seat cushion may be folded down and up.
1. Move the rear seat to the rearmost posi- tion.
2. Remove the headrests.
3. To fold down the seatback , push and hold the seatback folding lever toward the head- rest, then push down the seatback.
Seatback folding lever
o Do not operate vehicle with the head
restraints removed as injury to the oc- cupants may occur in the event of anaccident. Head restraints may provideprotection against neck injuries whenproperly adjusted.
o Do not adjust the head restraint height whilst the vehicle is in motion.
Page 20 of 407
CONTROLS AND EQUIPMENT
1- 12 o Objects should not extend higher than
the top of the front seatbacks. This could allow cargo to slide forward andcause injury or damage during suddenstops.
o When you return the folded down seatback to its upright position, alwaysbe sure to install the headrests in theirproper positions. Headrests are impor-tant to the safety of occupants in a rearcollision. If the headrests are not in-stalled in their proper position, seriousinjury or death could result if a rear endcollision occurs.
B100A01FC-EAT
SEAT WARMER (Not all models)
The seat warmer is provided to warm the front
seats during cold weather. When the engine is running, push either of the switches to warmthe driver's seat or the passenger's seat.
B100A01FC
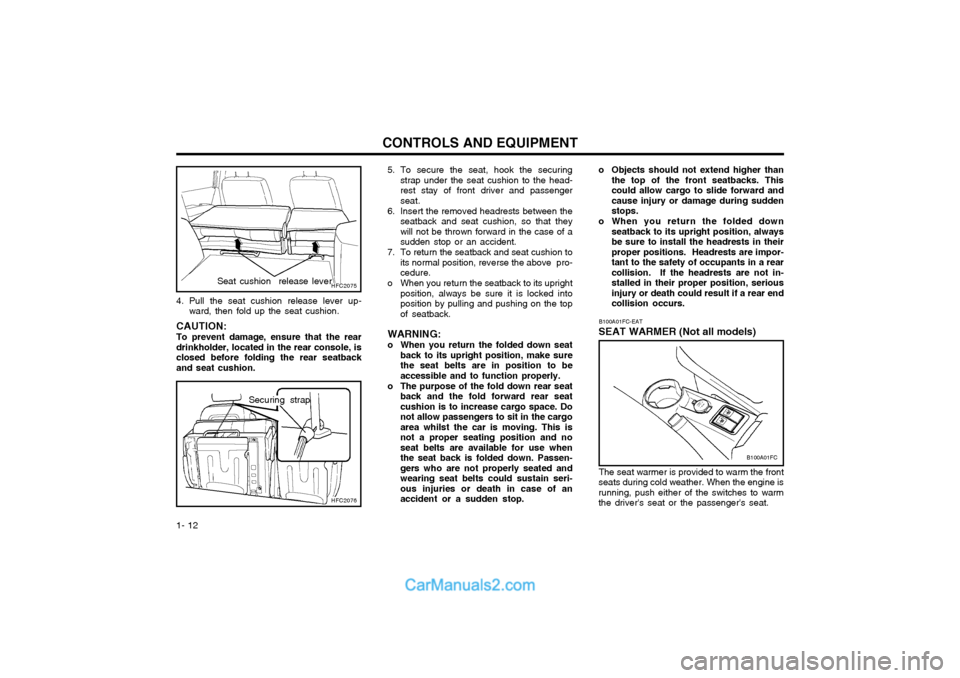
5. To secure the seat, hook the securing strap under the seat cushion to the head- rest stay of front driver and passengerseat.
6. Insert the removed headrests between the seatback and seat cushion, so that theywill not be thrown forward in the case of asudden stop or an accident.
7. To return the seatback and seat cushion to its normal position, reverse the above pro-cedure.
o When you return the seatback to its upright position, always be sure it is locked intoposition by pulling and pushing on the topof seatback.
WARNING:
o When you return the folded down seat back to its upright position, make sure the seat belts are in position to beaccessible and to function properly.
o The purpose of the fold down rear seat back and the fold forward rear seatcushion is to increase cargo space. Donot allow passengers to sit in the cargoarea whilst the car is moving. This isnot a proper seating position and noseat belts are available for use whenthe seat back is folded down. Passen-gers who are not properly seated andwearing seat belts could sustain seri-ous injuries or death in case of anaccident or a sudden stop.
CAUTION: To prevent damage, ensure that the rear drinkholder, located in the rear console, isclosed before folding the rear seatbackand seat cushion.
4. Pull the seat cushion release lever up-
ward, then fold up the seat cushion.
HFC2075
HFC2076
Seat cushion release lever
Securing strap