display INFINITI G35 2006 Workshop Manual
[x] Cancel search | Manufacturer: INFINITI, Model Year: 2006, Model line: G35, Model: INFINITI G35 2006Pages: 344, PDF Size: 6.81 MB
Page 199 of 344
The system confirms the name, location
and number. The system then asks if you
would like to store another location for
the same name. If you do not wish to
store another location, the system ends
the VR session.
ªEditº
q B
Use the Edit command to alter an existing
phone book entry or to add a 2nd, 3rd or
4th phone number to an existing entry.
When prompted by the system, say the
name of the entry you wish to edit.
The system acknowledges the name and
asks you for the location you would like
to edit.
Say the name of the location. The system
acknowledges and asks you for the phone
number you would like to store with this
location.
See ªHow to say numbersº earlier in this
section for more information.
The system repeats the number and
prompts you for the next command. When
you have finished entering numbers,
choose ªStore.º
The system confirms the name, location
and number, then announces that the en- try has been stored. The system then
ends the VR session.
ªDeleteº
q C
Use the Delete command to erase one en-
try from the phone book, all entries from
the phone book, the current redial
number or the current call back number.
To delete entries from the phone book,
say a name or ªAll entriesº when
prompted by the system.
The system acknowledges the command
and asks you to confirm the deletion.
To delete the current redial number or call
back number, say ªredial numberº or ªcall
back numberº when prompted by the sys-
tem.
If a redial number or a call back number
exists, the system deletes them without
asking for confirmation.
If there is no number for the entry you are
trying to delete, the system says so and
ends the VR session.
ªList namesº
q D
Use the List Names command to hear all
the names and locations in the phone
book. The system recites the phone book en-
tries but does not include the actual
phone numbers. When the playback of
the list is complete the system ends the
VR session.
You can stop the playback of the list at
any time by pressing the button on
the steering wheel. The system ends the
VR session.
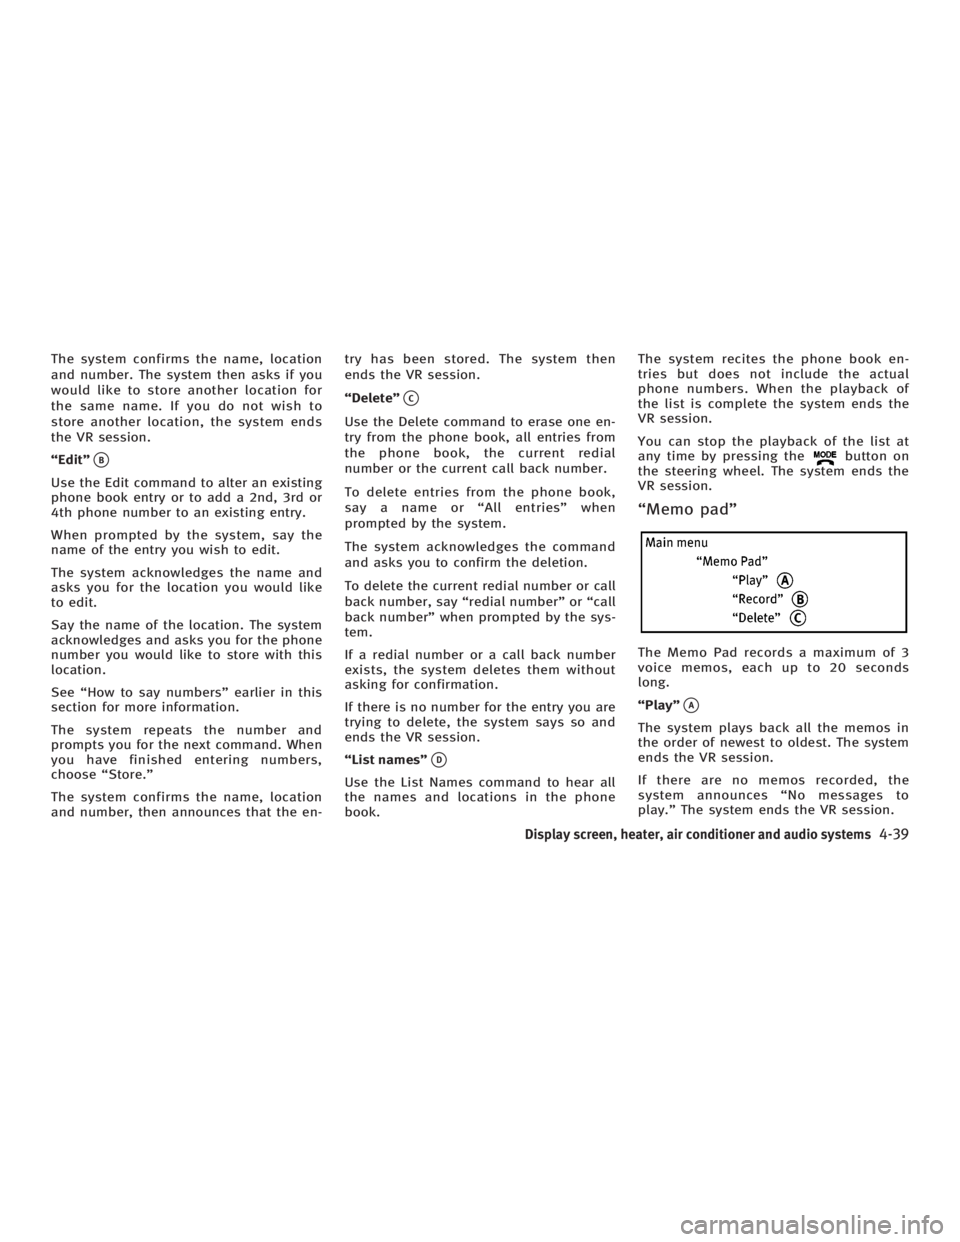
ªMemo padº
The Memo Pad records a maximum of 3
voice memos, each up to 20 seconds
long.
ªPlayº
q A
The system plays back all the memos in
the order of newest to oldest. The system
ends the VR session.
If there are no memos recorded, the
system announces ªNo messages to
play.º The system ends the VR session.
Display screen, heater, air conditioner and audio systems
4-39
w 06.1.4/V35-D/V5.0
X
Page 200 of 344
ªRecordº
q B
The system announces ªRecordingº and a
tone sounds signaling you to begin.
Speak the information you wish to record
clearly. When you are done, press the
or button on the steering
wheel.
A tone sounds and the system announces
ªMemo recorded.º Another tone sounds
to end the VR session.
If the memo pad is full, the system asks if
you wish to record over the oldest memo.
ªDeleteº
q C
The Delete command erases all memos.
The system asks you to confirm this ac-
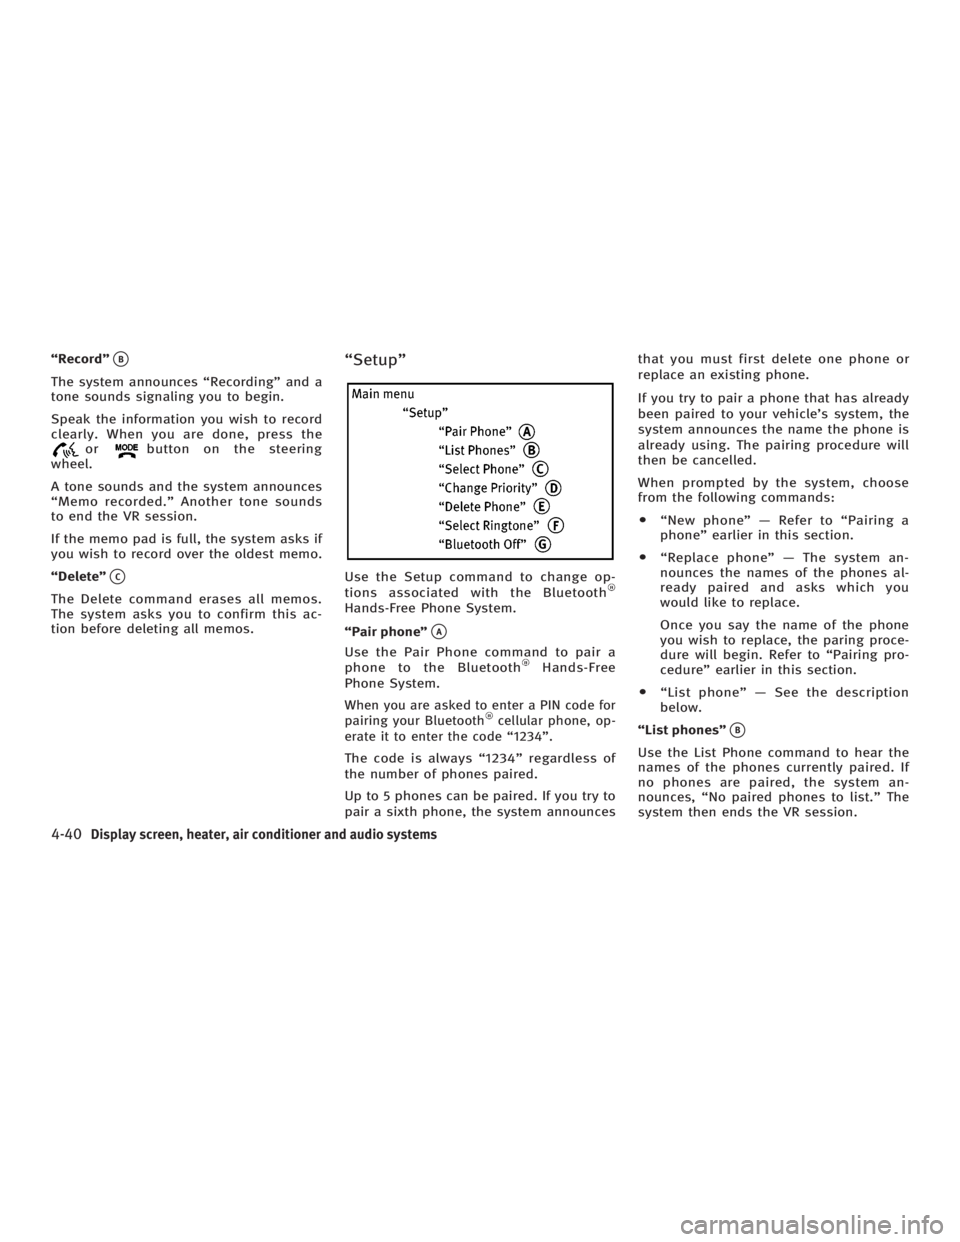
tion before deleting all memos. ªSetupº
Use the Setup command to change op-
tions associated with the Bluetooth
Hands-Free Phone System.
ªPair phoneº
q A
Use the Pair Phone command to pair a
phone to the Bluetooth Hands-Free
Phone System.
When you are asked to enter a PIN code for
pairing your Bluetooth cellular phone, op-
erate it to enter the code ª1234º.
The code is always ª1234º regardless of
the number of phones paired.
Up to 5 phones can be paired. If you try to
pair a sixth phone, the system announces that you must first delete one phone or
replace an existing phone.
If you try to pair a phone that has already
been paired to your vehicle's system, the
system announces the name the phone is
already using. The pairing procedure will
then be cancelled.
When prompted by the system, choose
from the following commands:
O ªNew phoneº Ð Refer to ªPairing a
phoneº earlier in this section.
O ªReplace phoneº Ð The system an-
nounces the names of the phones al-
ready paired and asks which you
would like to replace.
Once you say the name of the phone
you wish to replace, the paring proce-
dure will begin. Refer to ªPairing pro-
cedureº earlier in this section.
O ªList phoneº Ð See the description
below.
ªList phonesº
q B
Use the List Phone command to hear the
names of the phones currently paired. If
no phones are paired, the system an-
nounces, ªNo paired phones to list.º The
system then ends the VR session.
4-40 Display screen, heater, air conditioner and audio systems
w 06.1.4/V35-D/V5.0
X
Page 201 of 344
ªSelect phoneº
q C
Use the Select Phone command to select
a phone of lesser priority when two or
more phones paired with Bluetooth
Hands-Free Phone System are in the ve-
hicle at the same time.
The system asks you to name the phone
and confirm the selection.
Once the selection is confirmed, the se-
lected phone remains active until the igni-
tion switch is turned OFF or you select a
new phone.
ªChange priorityº
q D
Use the Change Priority command to
change the priority level of the active
phone.
The priority level determines which phone
is active when more than one paired
Bluetooth phone is in the vehicle.
The system states the priority level of the
active phone and asks for a new priority
level (1, 2, 3, 4, 5).
If the new priority level is already being
used for another phone, the two phones
will swap priority levels. For example, if the current priority levels
are:
Priority Level 1 = Phone A
Priority Level 2 = Phone B
Priority Level 3 = Phone C
and you change the priority level of Phone
C to Level 1, then:
Priority Level 1 = Phone C
Priority Level 2 = Phone B
Priority Level 3 = Phone A
ªDelete phoneº
q E
Use the Delete Phone command to delete
a specific phone or all phones from the
Bluetooth Hands-Free Phone System.
The system announces the names of the
phones already paired with the system and
their priority level. The system then gives
you the option to delete a specific phone,
all phones or listen to the list again.
Once you chose to delete a phone or all
phones, the system asks you to confirm
this action.
NOTE:
When you delete a phone, the associated
phone book for that phone will also be de-
leted. ªSelect ringtoneº
q F
Use the Select Ringtone command to se-
lect the tone heard in the vehicle when an
incoming call is received.
The system announces the name of the
active phone and asks you to choose from
the following commands:
O ªRingtoneº Ð The system plays a ring-
tone and asks if you would like to se-
lect that tone. If you say no, the
system plays the next ringtone avail-
able and continues to cycle through
the ringtones until you select one or
quit.
O ªSilentº Ð The system asks you to
confirm your wish to disable the ring-
tone.
ªBluetooth offº
q G
Use the Bluetooth Off command to turn
off the Bluetooth Hands-Free Phone Sys-
tem.
When Bluetooth Hands-Free Phone
System is off, you will not be able to
make or receive calls using INFINITI Voice
Recognition. Also, you will not have ac-
cess to the Phone Book.
Display screen, heater, air conditioner and audio systems
4-41
w 06.1.4/V35-D/V5.0
X
Page 202 of 344
You can still use the Memo Pad and ac-
cess Setup.
To turn on the system again, choose the
Bluetooth On command from the Setup
command.
SPEAKER ADAPTATION (SA) MODE Speaker Adaptation allows up to two out-of
dialect users to train the system to improve
recognition accuracy. By repeating a
number of commands, the users can create
a voice model of their own voice that is
stored in the system. The system is ca-
pable of storing a different speaker adapta-
tion model for memory A and memory B.
If memory A is available, the system will
use memory A to store the model. If
memory A is in use and memory B is
available, the system will use memory B
to store the model. If both of the memory
locations are in use, the system will ask
the user to select which memory location
should be overwritten.
Training procedure The procedure for training a voice is as
follows.
1. Position the vehicle in a reasonably
quiet outdoor location. 2. Sit in the driver's seat with the engine
running, the parking brake on, and the
transmission in Park.
3. Press and hold the button for
more than 5 seconds.
4. The system announces: ªPress the
PHONE/SEND ( ) button for the
hands-free phone system to enter the
speaker adaptation mode or press the
PHONE/END ( ) button to select a
different language.º
5. Press the button.
For information on selecting a dif-
ferent language, see ªChoosing a lan-
guageº earlier in this section.
6. Voice memory A or memory B is se-
lected automatically. If both memory
locations are already in use, the
system will prompt you to overwrite
one. Follow the instructions provided
by the system.
7. When preparation is complete and you
are ready to begin, the press the
button.
8. The SA mode will be explained. Follow
the instructions provided by the
system. 9. When training is finished, the system
will tell you an adequate number of
phrases have been recorded.
10. The system will ask you to say your
name. Follow the instructions to regis-
ter your name.
11. The system will announce that
speaker adaptation has been com-
pleted and the system is ready.
The SA mode will stop if:
O The button is pressed for more
than 5 seconds in SA mode.
O The vehicle is driven during SA mode.
O The ignition switch is turned to the
OFF or LOCK position.
Training phrases During the SA mode, the system instructs
you to say the following phrases.
(The system will prompt you for each
phrase.)
O phone book new entry
O dial three oh four two nine
O delete call back number
O setup pair phone
4-42 Display screen, heater, air conditioner and audio systems
w 06.1.13/V35-D/V5.0
X
Page 203 of 344
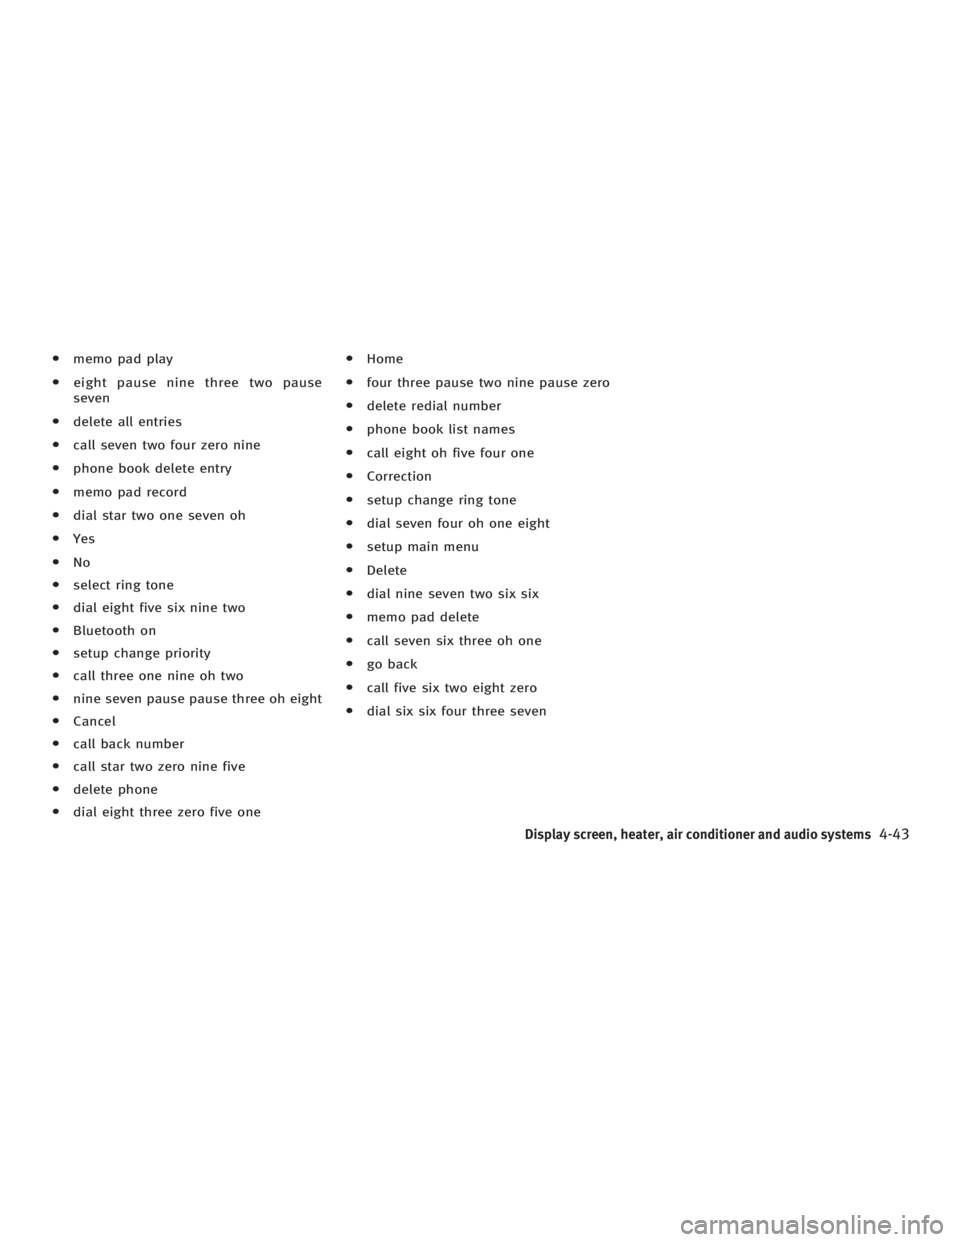
O memo pad play
O eight pause nine three two pause
seven
O delete all entries
O call seven two four zero nine
O phone book delete entry
O memo pad record
O dial star two one seven oh
O Yes
O No
O select ring tone
O dial eight five six nine two
O Bluetooth on
O setup change priority
O call three one nine oh two
O nine seven pause pause three oh eight
O Cancel
O call back number
O call star two zero nine five
O delete phone
O dial eight three zero five one O Home
O four three pause two nine pause zero
O delete redial number
O phone book list names
O call eight oh five four one
O Correction
O setup change ring tone
O dial seven four oh one eight
O setup main menu
O Delete
O dial nine seven two six six
O memo pad delete
O call seven six three oh one
O go back
O call five six two eight zero
O dial six six four three seven
Display screen, heater, air conditioner and audio systems
4-43
w 06.1.13/V35-D/V5.0
X
Page 204 of 344
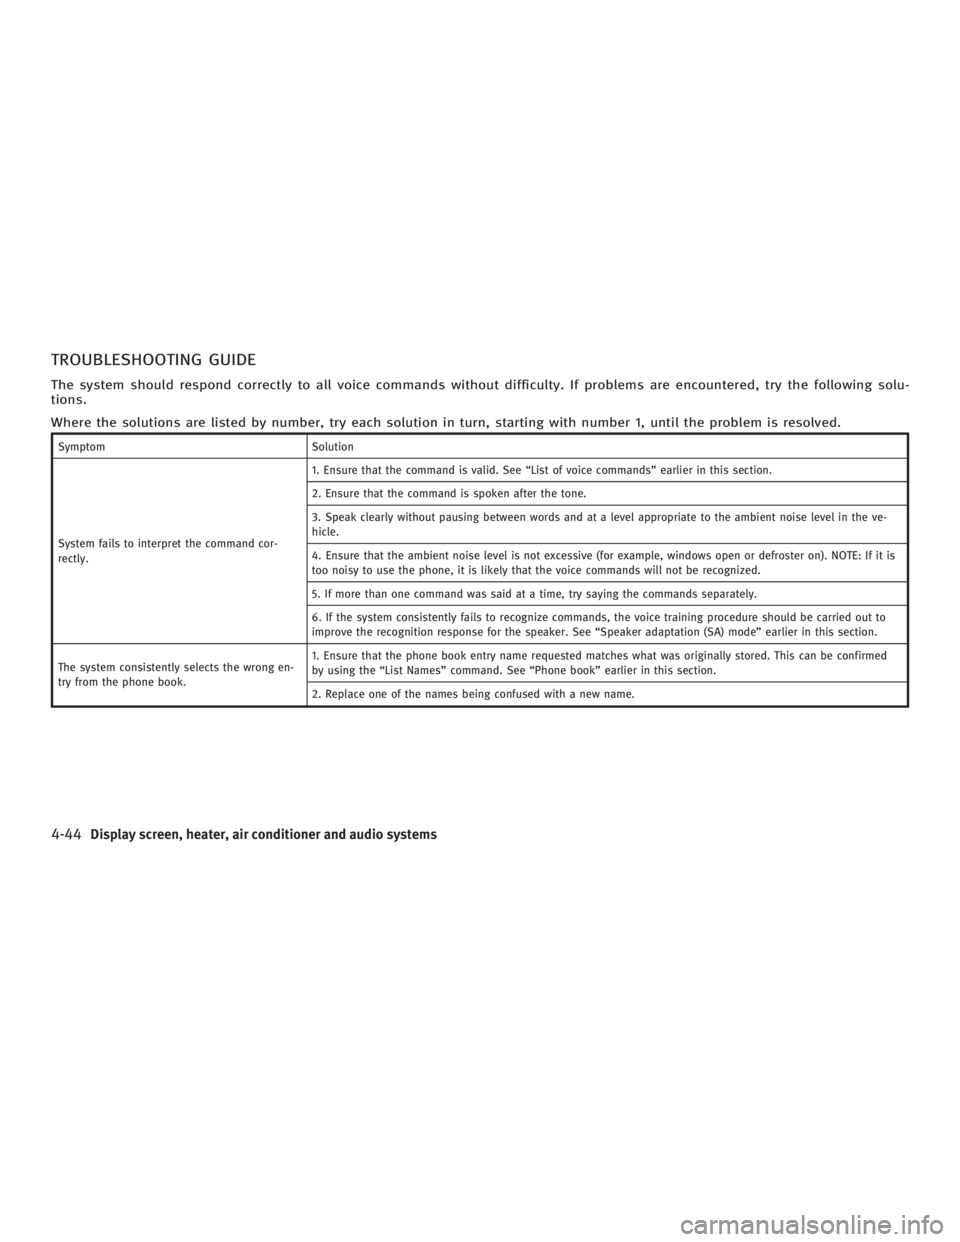
TROUBLESHOOTING GUIDE The system should respond correctly to all voice commands without difficulty. If problems are encountered, try the following solu-
tions.
Where the solutions are listed by number, try each solution in turn, starting with number 1, until the problem is resolved. Symptom Solution
System fails to interpret the command cor-
rectly. 1. Ensure that the command is valid. See ªList of voice commandsº earlier in this section.
2. Ensure that the command is spoken after the tone.
3. Speak clearly without pausing between words and at a level appropriate to the ambient noise level in the ve-
hicle.
4. Ensure that the ambient noise level is not excessive (for example, windows open or defroster on). NOTE: If it is
too noisy to use the phone, it is likely that the voice commands will not be recognized.
5. If more than one command was said at a time, try saying the commands separately.
6. If the system consistently fails to recognize commands, the voice training procedure should be carried out to
improve the recognition response for the speaker. See ªSpeaker adaptation (SA) modeº earlier in this section.
The system consistently selects the wrong en-
try from the phone book. 1. Ensure that the phone book entry name requested matches what was originally stored. This can be confirmed
by using the ªList Namesº command. See ªPhone bookº earlier in this section.
2. Replace one of the names being confused with a new name.
4-44 Display screen, heater, air conditioner and audio systems
w 06.1.13/V35-D/V5.0
X
Page 218 of 344
D (Drive):
Use this position for all normal forward
driving.
Manual shift mode When the selector lever is shifted from
the D position to the manual shift gate
with the vehicle stopped or while driving,
the transmission enters the manual shift
mode. Shift range can be selected manu-
ally.
In the manual shift mode, the shift range
is displayed on the position indicator in
the meter.
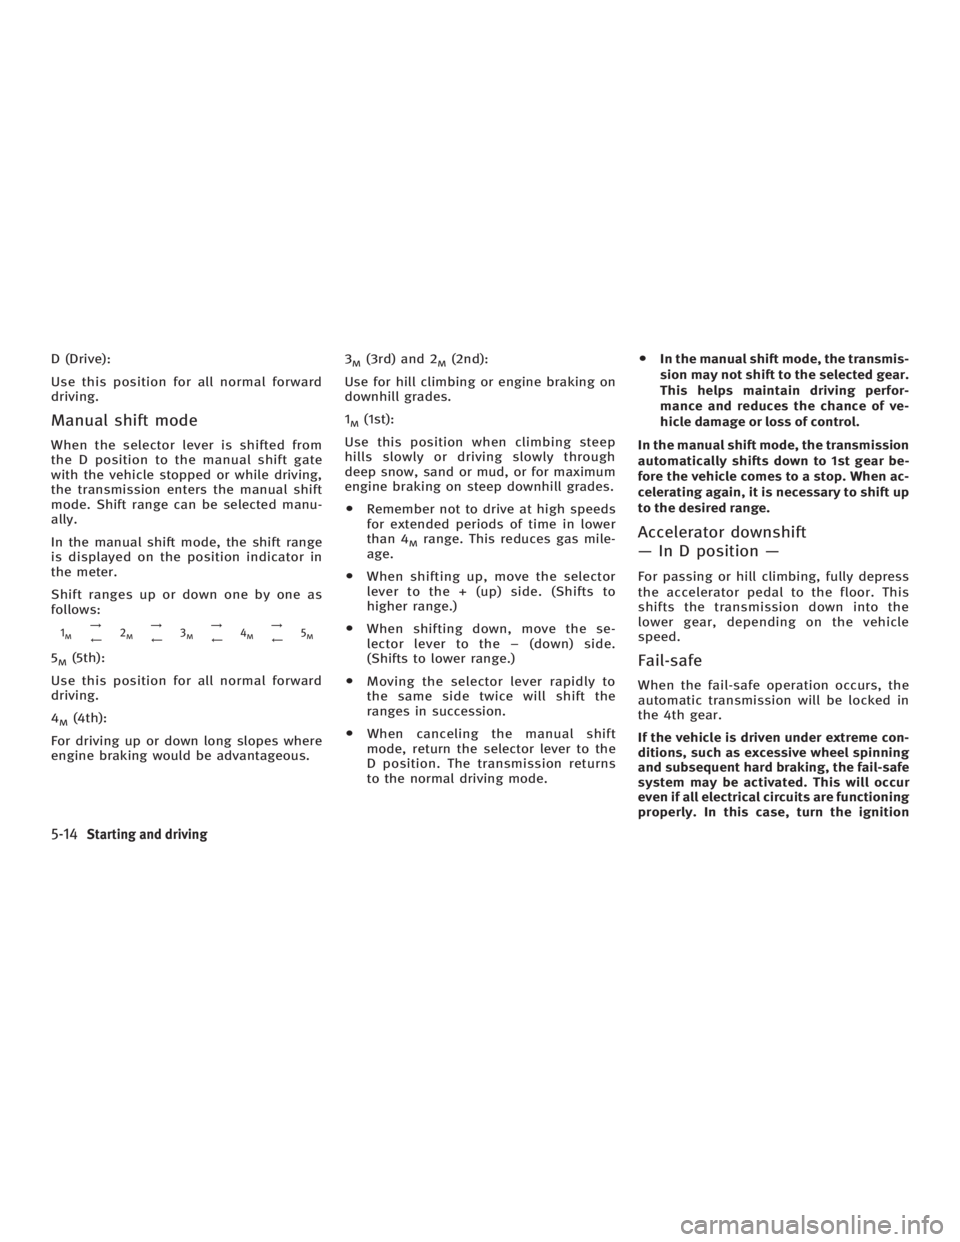
Shift ranges up or down one by one as
follows: 1 M
!
à 2 M
!
à 3 M
!
à 4 M
!
à 5 M
5 M
(5th):
Use this position for all normal forward
driving.
4 M
(4th):
For driving up or down long slopes where
engine braking would be advantageous. 3 M
(3rd) and 2 M
(2nd):
Use for hill climbing or engine braking on
downhill grades.
1 M
(1st):
Use this position when climbing steep
hills slowly or driving slowly through
deep snow, sand or mud, or for maximum
engine braking on steep downhill grades.
O Remember not to drive at high speeds
for extended periods of time in lower
than 4 M
range. This reduces gas mile-
age.
O When shifting up, move the selector
lever to the + (up) side. (Shifts to
higher range.)
O When shifting down, move the se-
lector lever to the þ (down) side.
(Shifts to lower range.)
O Moving the selector lever rapidly to
the same side twice will shift the
ranges in succession.
O When canceling the manual shift
mode, return the selector lever to the
D position. The transmission returns
to the normal driving mode. O In the manual shift mode, the transmis-
sion may not shift to the selected gear.
This helps maintain driving perfor-
mance and reduces the chance of ve-
hicle damage or loss of control.
In the manual shift mode, the transmission
automatically shifts down to 1st gear be-
fore the vehicle comes to a stop. When ac-
celerating again, it is necessary to shift up
to the desired range.
Accelerator downshift
Ð In D position Ð For passing or hill climbing, fully depress
the accelerator pedal to the floor. This
shifts the transmission down into the
lower gear, depending on the vehicle
speed.
Fail-safe When the fail-safe operation occurs, the
automatic transmission will be locked in
the 4th gear.
If the vehicle is driven under extreme con-
ditions, such as excessive wheel spinning
and subsequent hard braking, the fail-safe
system may be activated. This will occur
even if all electrical circuits are functioning
properly. In this case, turn the ignition
5-14 Starting and driving
w 06.1.4/V35-D/V5.0
X
Page 221 of 344
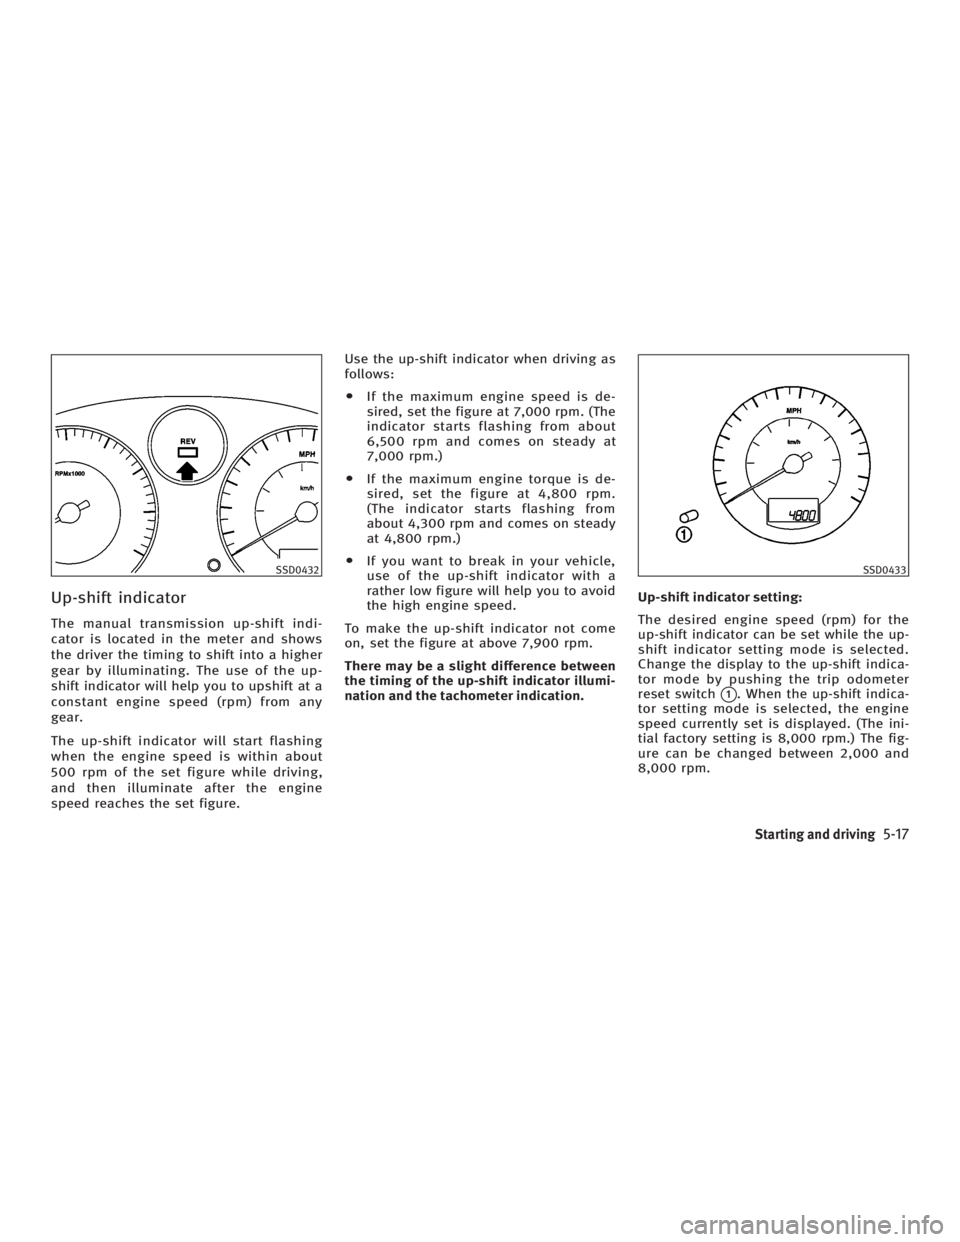
Up-shift indicator The manual transmission up-shift indi-
cator is located in the meter and shows
the driver the timing to shift into a higher
gear by illuminating. The use of the up-
shift indicator will help you to upshift at a
constant engine speed (rpm) from any
gear.
The up-shift indicator will start flashing
when the engine speed is within about
500 rpm of the set figure while driving,
and then illuminate after the engine
speed reaches the set figure. Use the up-shift indicator when driving as
follows:
O If the maximum engine speed is de-
sired, set the figure at 7,000 rpm. (The
indicator starts flashing from about
6,500 rpm and comes on steady at
7,000 rpm.)
O If the maximum engine torque is de-
sired, set the figure at 4,800 rpm.
(The indicator starts flashing from
about 4,300 rpm and comes on steady
at 4,800 rpm.)
O If you want to break in your vehicle,
use of the up-shift indicator with a
rather low figure will help you to avoid
the high engine speed.
To make the up-shift indicator not come
on, set the figure at above 7,900 rpm.
There may be a slight difference between
the timing of the up-shift indicator illumi-
nation and the tachometer indication. Up-shift indicator setting:
The desired engine speed (rpm) for the
up-shift indicator can be set while the up-
shift indicator setting mode is selected.
Change the display to the up-shift indica-
tor mode by pushing the trip odometer
reset switch
q 1
. When the up-shift indica-
tor setting mode is selected, the engine
speed currently set is displayed. (The ini-
tial factory setting is 8,000 rpm.) The fig-
ure can be changed between 2,000 and
8,000 rpm.SSD0432 SSD0433
Starting and driving
5-17
w 06.1.4/V35-D/V5.0
X
Page 222 of 344
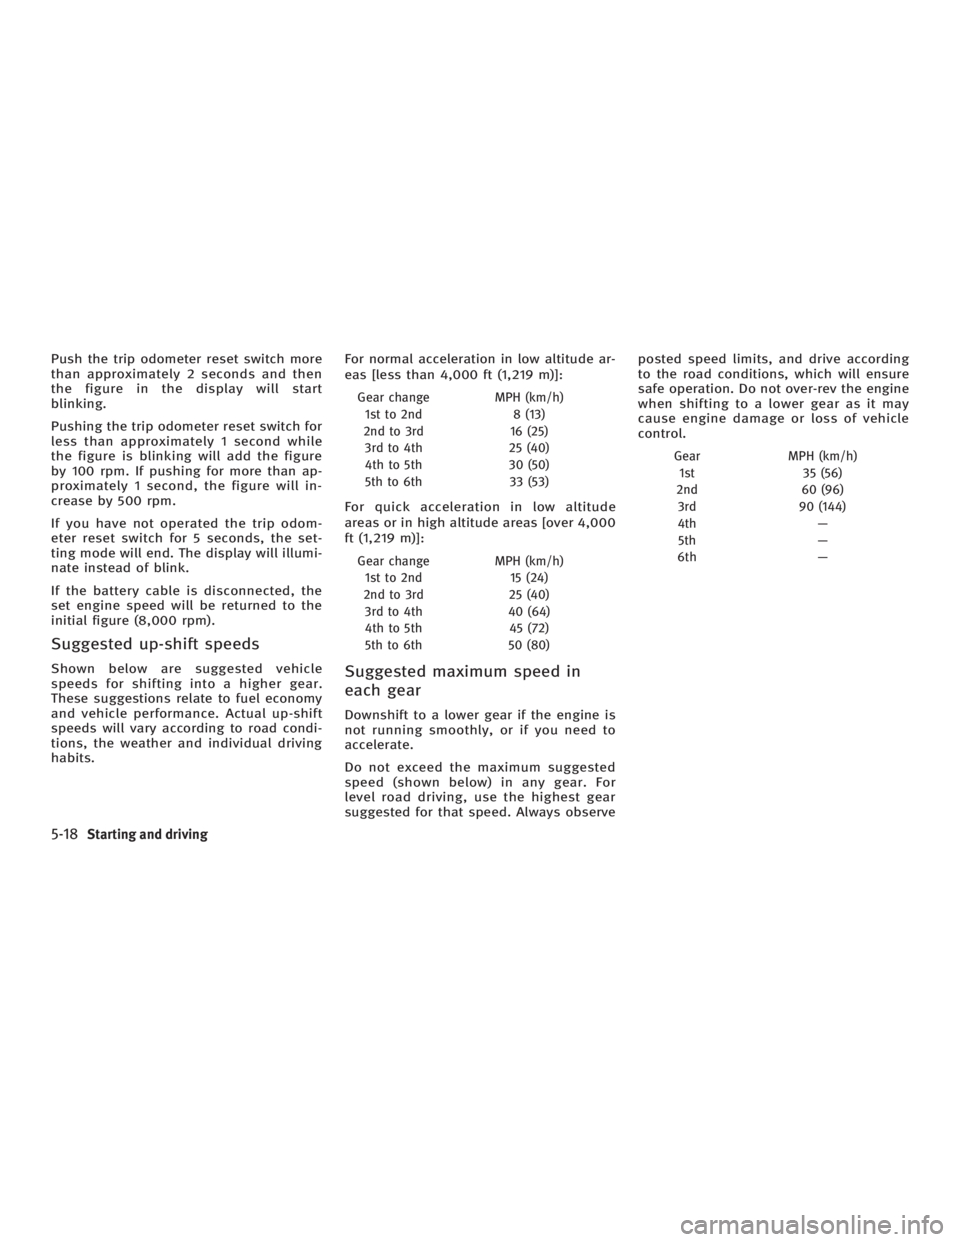
Push the trip odometer reset switch more
than approximately 2 seconds and then
the figure in the display will start
blinking.
Pushing the trip odometer reset switch for
less than approximately 1 second while
the figure is blinking will add the figure
by 100 rpm. If pushing for more than ap-
proximately 1 second, the figure will in-
crease by 500 rpm.
If you have not operated the trip odom-
eter reset switch for 5 seconds, the set-
ting mode will end. The display will illumi-
nate instead of blink.
If the battery cable is disconnected, the
set engine speed will be returned to the
initial figure (8,000 rpm).
Suggested up-shift speeds Shown below are suggested vehicle
speeds for shifting into a higher gear.
These suggestions relate to fuel economy
and vehicle performance. Actual up-shift
speeds will vary according to road condi-
tions, the weather and individual driving
habits. For normal acceleration in low altitude ar-
eas [less than 4,000 ft (1,219 m)]:
Gear change MPH (km/h)
1st to 2nd 8 (13)
2nd to 3rd 16 (25)
3rd to 4th 25 (40)
4th to 5th 30 (50)
5th to 6th 33 (53)
For quick acceleration in low altitude
areas or in high altitude areas [over 4,000
ft (1,219 m)]:
Gear change MPH (km/h)
1st to 2nd 15 (24)
2nd to 3rd 25 (40)
3rd to 4th 40 (64)
4th to 5th 45 (72)
5th to 6th 50 (80)
Suggested maximum speed in
each gear Downshift to a lower gear if the engine is
not running smoothly, or if you need to
accelerate.
Do not exceed the maximum suggested
speed (shown below) in any gear. For
level road driving, use the highest gear
suggested for that speed. Always observe posted speed limits, and drive according
to the road conditions, which will ensure
safe operation. Do not over-rev the engine
when shifting to a lower gear as it may
cause engine damage or loss of vehicle
control.
Gear MPH (km/h)
1st 35 (56)
2nd 60 (96)
3rd 90 (144)
4th Ð
5th Ð
6th Ð
5-18 Starting and driving
w 06.1.4/V35-D/V5.0
X
Page 336 of 344
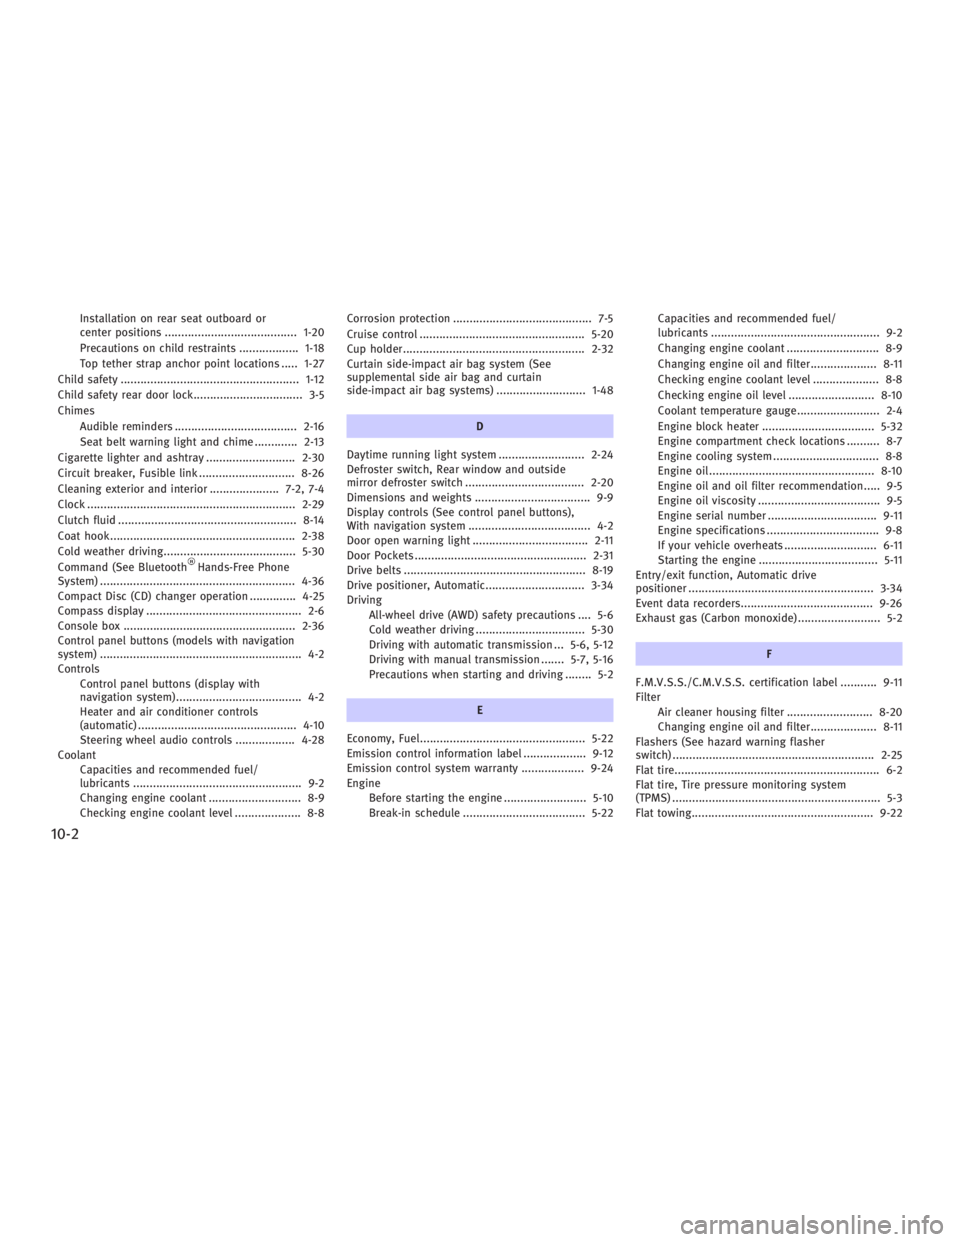
Installation on rear seat outboard or
center positions ........................................ 1-20
Precautions on child restraints .................. 1-18
Top tether strap anchor point locations ..... 1-27
Child safety ...................................................... 1-12
Child safety rear door lock................................. 3-5
Chimes
Audible reminders ..................................... 2-16
Seat belt warning light and chime ............. 2-13
Cigarette lighter and ashtray ........................... 2-30
Circuit breaker, Fusible link ............................. 8-26
Cleaning exterior and interior ..................... 7-2, 7-4
Clock ............................................................... 2-29
Clutch fluid ...................................................... 8-14
Coat hook ........................................................ 2-38
Cold weather driving........................................ 5-30
Command (See Bluetooth
Hands-Free Phone
System) ........................................................... 4-36
Compact Disc (CD) changer operation .............. 4-25
Compass display ............................................... 2-6
Console box .................................................... 2-36
Control panel buttons (models with navigation
system) ............................................................. 4-2
Controls
Control panel buttons (display with
navigation system)...................................... 4-2
Heater and air conditioner controls
(automatic) ................................................ 4-10
Steering wheel audio controls .................. 4-28
Coolant
Capacities and recommended fuel/
lubricants ................................................... 9-2
Changing engine coolant ............................ 8-9
Checking engine coolant level .................... 8-8 Corrosion protection .......................................... 7-5
Cruise control .................................................. 5-20
Cup holder....................................................... 2-32
Curtain side-impact air bag system (See
supplemental side air bag and curtain
side-impact air bag systems) ........................... 1-48
D
Daytime running light system .......................... 2-24
Defroster switch, Rear window and outside
mirror defroster switch .................................... 2-20
Dimensions and weights ................................... 9-9
Display controls (See control panel buttons),
With navigation system ..................................... 4-2
Door open warning light ................................... 2-11
Door Pockets .................................................... 2-31
Drive belts ....................................................... 8-19
Drive positioner, Automatic.............................. 3-34
Driving
All-wheel drive (AWD) safety precautions .... 5-6
Cold weather driving ................................. 5-30
Driving with automatic transmission ... 5-6, 5-12
Driving with manual transmission ....... 5-7, 5-16
Precautions when starting and driving ........ 5-2
E
Economy, Fuel.................................................. 5-22
Emission control information label ................... 9-12
Emission control system warranty ................... 9-24
Engine
Before starting the engine ......................... 5-10
Break-in schedule ..................................... 5-22 Capacities and recommended fuel/
lubricants ................................................... 9-2
Changing engine coolant ............................ 8-9
Changing engine oil and filter.................... 8-11
Checking engine coolant level .................... 8-8
Checking engine oil level .......................... 8-10
Coolant temperature gauge......................... 2-4
Engine block heater .................................. 5-32
Engine compartment check locations .......... 8-7
Engine cooling system ................................ 8-8
Engine oil .................................................. 8-10
Engine oil and oil filter recommendation..... 9-5
Engine oil viscosity ..................................... 9-5
Engine serial number ................................. 9-11
Engine specifications .................................. 9-8
If your vehicle overheats ............................ 6-11
Starting the engine .................................... 5-11
Entry/exit function, Automatic drive
positioner ........................................................ 3-34
Event data recorders........................................ 9-26
Exhaust gas (Carbon monoxide) ......................... 5-2
F
F.M.V.S.S./C.M.V.S.S. certification label ........... 9-11
Filter
Air cleaner housing filter .......................... 8-20
Changing engine oil and filter.................... 8-11
Flashers (See hazard warning flasher
switch) ............................................................. 2-25
Flat tire.............................................................. 6-2
Flat tire, Tire pressure monitoring system
(TPMS) ............................................................... 5-3
Flat towing....................................................... 9-22
10-2
w 06.1.5/V35-D/V5.0
X