roof INFINITI QX4 2001 Factory Service Manual
[x] Cancel search | Manufacturer: INFINITI, Model Year: 2001, Model line: QX4, Model: INFINITI QX4 2001Pages: 2395, PDF Size: 43.2 MB
Page 474 of 2395

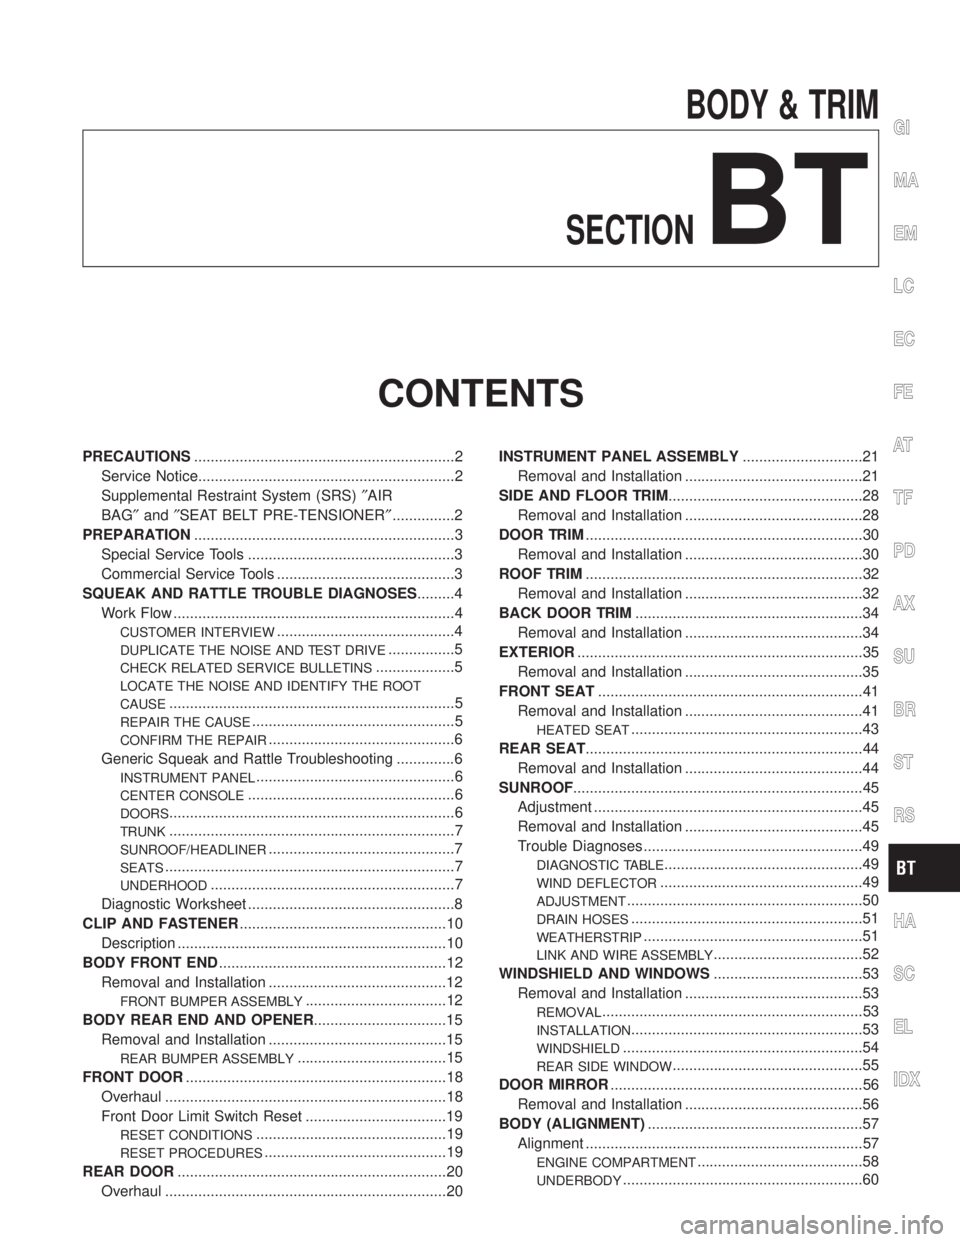
BODY & TRIM
SECTION
BT
CONTENTS
PRECAUTIONS...............................................................2
Service Notice..............................................................2
Supplemental Restraint System (SRS)²AIR
BAG²and²SEAT BELT PRE-TENSIONER²...............2
PREPARATION...............................................................3
Special Service Tools ..................................................3
Commercial Service Tools ...........................................3
SQUEAK AND RATTLE TROUBLE DIAGNOSES.........4
Work Flow ....................................................................4
CUSTOMER INTERVIEW...........................................4
DUPLICATE THE NOISE AND TEST DRIVE................5
CHECK RELATED SERVICE BULLETINS...................5
LOCATE THE NOISE AND IDENTIFY THE ROOT
CAUSE
.....................................................................5
REPAIR THE CAUSE.................................................5
CONFIRM THE REPAIR.............................................6
Generic Squeak and Rattle Troubleshooting ..............6
INSTRUMENT PANEL................................................6
CENTER CONSOLE..................................................6
DOORS.....................................................................6
TRUNK.....................................................................7
SUNROOF/HEADLINER.............................................7
SEATS......................................................................7
UNDERHOOD...........................................................7
Diagnostic Worksheet ..................................................8
CLIP AND FASTENER..................................................10
Description .................................................................10
BODY FRONT END.......................................................12
Removal and Installation ...........................................12
FRONT BUMPER ASSEMBLY..................................12
BODY REAR END AND OPENER................................15
Removal and Installation ...........................................15
REAR BUMPER ASSEMBLY....................................15
FRONT DOOR...............................................................18
Overhaul ....................................................................18
Front Door Limit Switch Reset ..................................19
RESET CONDITIONS..............................................19
RESET PROCEDURES............................................19
REAR DOOR.................................................................20
Overhaul ....................................................................20INSTRUMENT PANEL ASSEMBLY.............................21
Removal and Installation ...........................................21
SIDE AND FLOOR TRIM...............................................28
Removal and Installation ...........................................28
DOOR TRIM...................................................................30
Removal and Installation ...........................................30
ROOF TRIM...................................................................32
Removal and Installation ...........................................32
BACK DOOR TRIM.......................................................34
Removal and Installation ...........................................34
EXTERIOR.....................................................................35
Removal and Installation ...........................................35
FRONT SEAT................................................................41
Removal and Installation ...........................................41
HEATED SEAT........................................................43
REAR SEAT...................................................................44
Removal and Installation ...........................................44
SUNROOF......................................................................45
Adjustment .................................................................45
Removal and Installation ...........................................45
Trouble Diagnoses.....................................................49
DIAGNOSTIC TABLE................................................49
WIND DEFLECTOR.................................................49
ADJUSTMENT.........................................................50
DRAIN HOSES........................................................51
WEATHERSTRIP.....................................................51
LINK AND WIRE ASSEMBLY....................................52
WINDSHIELD AND WINDOWS....................................53
Removal and Installation ...........................................53
REMOVAL...............................................................53
INSTALLATION........................................................53
WINDSHIELD..........................................................54
REAR SIDE WINDOW..............................................55
DOOR MIRROR.............................................................56
Removal and Installation ...........................................56
BODY (ALIGNMENT)....................................................57
Alignment ...................................................................57
ENGINE COMPARTMENT........................................58
UNDERBODY..........................................................60
GI
MA
EM
LC
EC
FE
AT
TF
PD
AX
SU
BR
ST
RS
HA
SC
EL
IDX
Page 480 of 2395

TRUNK=NBBT0025S04Trunk noises are often caused by a loose jack or loose items put into the trunk by the owner.
In addition look for:
1. Trunk lid bumpers out of adjustment
2. Trunk lid striker out of adjustment
3. The trunk lid torsion bars knocking together
4. A loose license plate or bracket
Most of these incidents can be repaired by adjusting, securing or insulating the item(s) or component(s) caus-
ing the noise.
SUNROOF/HEADLINERNBBT0025S05Noises in the sunroof/headliner area can often be traced to one of the following:
1. Sunroof lid, rail, linkage or seals making a rattle or light knocking noise
2. Sunvisor shaft shaking in the holder
3. Front or rear windshield touching headliner and squeaking
Again, pressing on the components to stop the noise while duplicating the conditions can isolate most of these
incidents. Repairs usually consist of insulating with felt cloth tape.
SEATSNBBT0025S06When isolating seat noises it's important to note the position the seat is in and the load placed on the seat
when the noise is present. These conditions should be duplicated when verifying and isolating the cause of
the noise.
Cause of seat noise include:
1. Headrest rods and holders
2. A squeak between the seat pad cushion and frame
3. The rear seat back lock and bracket
These noises can be isolated by moving or pressing on the suspected components while duplicating the con-
ditions under which the noise occurs. Most of these incidents can be repaired by repositioning the component
or applying urethane tape to the contact area.
UNDERHOODNBBT0025S07Some interior noises may be caused by components under the hood or on the engine wall. The noise is then
transmitted into the passenger compartment.
Causes of transmitted underhood noises include:
1. Any component mounted to the engine wall
2. Components that pass through the engine wall
3. Engine wall mounts and connectors
4. Loose radiator mounting pins
5. Hood bumpers out of adjustment
6. Hood striker out of adjustment
These noises can be difficult to isolate since they cannot be reached from the interior of the vehicle. The best
method is to secure, move or insulate one component at a time and test drive the vehicle. Also, engine RPM
or load can be changed to isolate the noise. Repairs can usually be made by moving, adjusting, securing, or
insulating the component causing the noise.
GI
MA
EM
LC
EC
FE
AT
TF
PD
AX
SU
BR
ST
RS
HA
SC
EL
IDX
SQUEAK AND RATTLE TROUBLE DIAGNOSES
Generic Squeak and Rattle Troubleshooting (Cont'd)
BT-7
Page 505 of 2395

Removal and InstallationNBBT00111. Remove front and rear seats. Refer to ªFRONT SEATº and ªREAR SEATº for details, BT-41, BT-44.
2. Remove front and rear seat belts. Refer to RS-4 and RS-5, ªFront Seat Beltº and ªRear Seat Beltº for
details.
3. Remove body side trim. Refer to ªSIDE AND FLOOR TRIMº for details, BT-28.
4. Remove roof console assembly.
5. Remove inside mirror assembly.
6. Remove sun visors.
7. Remove interior lamp assembly and luggage room lamp assembly.
8. Remove assist grips.
9. Remove clips securing headlining.
10. Remove rear roof garnish.
11. Remove headlining from vehicle through either back door.
ROOF TRIM
Removal and Installation
BT-32
Page 506 of 2395

SBT487
GI
MA
EM
LC
EC
FE
AT
TF
PD
AX
SU
BR
ST
RS
HA
SC
EL
IDX
ROOF TRIM
Removal and Installation (Cont'd)
BT-33
Page 518 of 2395

AdjustmentNBBT0016Install motor & limit SW assembly and sunroof rail assembly in the following sequence:
1. Arrange equal lengths of link and wire assemblies on both sides of sunroof opening.
2. Connect sunroof connector to sunroof switch and positive (+) power supply.
3. Set lid assembly to fully closed position
by operating OPEN switch and TILT switch.
4. Fit outer side of lid assembly to the surface of roof on body outer panel.
5. Remove motor, and keep OPEN switch pressed until motor pinion gear reaches the end of its rotating
range.
6. Install motor.
7. Check that motor drive gear fits properly in wires.
8. Press TILT-UP switch to check lid assembly for normal tilting.
9. Check sunroof lid assembly for normal operations (tilt-up, tilt-down, open, and close).
SBF920F
Removal and InstallationNBBT0017IAfter any adjustment, check sunroof operation and lid align-
ment.
IHandle finisher plate and glass lid with care so not to cause
damage.
IIt is desirable for easy installation to mark each point before
removal.
CAUTION:
IAlways work with a helper.
IBefore removal, fully close the glass lid assembly, then
after removal, do not move motor assembly.
GI
MA
EM
LC
EC
FE
AT
TF
PD
AX
SU
BR
ST
RS
HA
SC
EL
IDX
SUNROOF
Adjustment
BT-45
Page 519 of 2395

SBT515-C
*1 BT-32 *2 EL-174
SUNROOF
Removal and Installation (Cont'd)
BT-46
Page 520 of 2395

MBF462BG
GI
MA
EM
LC
EC
FE
AT
TF
PD
AX
SU
BR
ST
RS
HA
SC
EL
IDX
SUNROOF
Removal and Installation (Cont'd)
BT-47
Page 521 of 2395

SBT082
Using flat-bladed screwdriver, pry shade assembly holder off
rail. Then pull shade assembly forward to remove it from rail.
MBF491BA
Disengage pawls from rail, then remove wind deflector holder.
MBF492B
Using flat-bladed screwdriver, pry stopper spring off rail
groove. Then slide rear guide backward to remove it from rail.
MBF493B
Remove wire and link assembly from rail while pushing link
back with flat-bladed screwdriver.
SUNROOF
Removal and Installation (Cont'd)
BT-48
Page 522 of 2395

Trouble Diagnoses=NBBT0018DIAGNOSTIC TABLENBBT0018S01NOTE:
For diagnosing electric problem, refer to EL-174 ªPOWER SUN-
ROOFº for details.
Check items (Components)
Wind deflector Adjustment Drain hoses WeatherstripLink and wire
assembly
Reference page BT-49 BT-50 BT-51 BT-51 BT-52
SymptomExcessive wind
noise12 3
Water leaks 1 2 3
Sunroof rattles1423
Excessive opera-
tion noise123
The numbers in this table mean checking order.
SBT331
WIND DEFLECTORNBBT0018S021. Open lid.
2. Check visually for proper installation.
3. Check to ensure a proper amount of petroleum jelly has been
applied to wind deflector connection points; apply if necessary.
SBT332
4. Check that wind deflector is properly retracted by hand. If it is
not, remove and visually check condition. (Refer to removal
procedures, BT-45.) If wind deflector is damaged, replace with
new one. If wind deflector is not damaged, re-install properly.
GI
MA
EM
LC
EC
FE
AT
TF
PD
AX
SU
BR
ST
RS
HA
SC
EL
IDX
SUNROOF
Trouble Diagnoses
BT-49
Page 523 of 2395

ADJUSTMENTNBBT0018S03
SBT723
If any gap or height difference between glass lid and roof is found,
check glass lid fit and adjust as follows:
Gap AdjustmentNBBT0018S03011. Open shade assembly.
2. Tilt glass lid up then remove side trim.
3. Loosen glass lid securing nuts (3 each on left and right sides),
then tilt glass lid down.
4. Adjust glass lid from outside of vehicle so it resembles ªA-Aº
as shown in the figure above.
5. Tilt glass lid up and down until it is adjusted to ªB-Bº as shown
in the figure above.
6. After adjusting glass lid, tilt glass lid up and tighten nuts.
7. Tilt glass lid up and down several times to check that it moves
smoothly.
Height Difference AdjustmentNBBT0018S03021. Tilt glass lid up and down.
2. Check height difference between roof panel and glass lid to
see if it is as ªA-Aº as shown in the figure above.
3. If necessary, adjust it by using one of following procedures.
IAdjust by adding or removing adjustment shim(s) between
glass lid and link assembly.
IIf glass lid protrudes above roof panel, add shim(s) or plain
washer(s) at sunroof mounting bracket or stud bolt locations to
adjust sunroof installation as required.
SUNROOF
Trouble Diagnoses (Cont'd)
BT-50