center console ISUZU TROOPER 1995 Owner's Manual
[x] Cancel search | Manufacturer: ISUZU, Model Year: 1995, Model line: TROOPER, Model: ISUZU TROOPER 1995Pages: 1928
Page 1759 of 1928
BODY 10-1
SECTION 10
BODY
\V CAUTION : When fasteners are removed, always reinstall them at the same location from which they
were removed. If a fastener needs to be replaced, use the correct part number fastener for
that application. If the correct part number fastener is not available, a fastener of equal size
and strength (or stronger)
may be used. Fasteners must be used when installing fasteners
that require it. If the above conditions are not followed, parts of system damage could result.
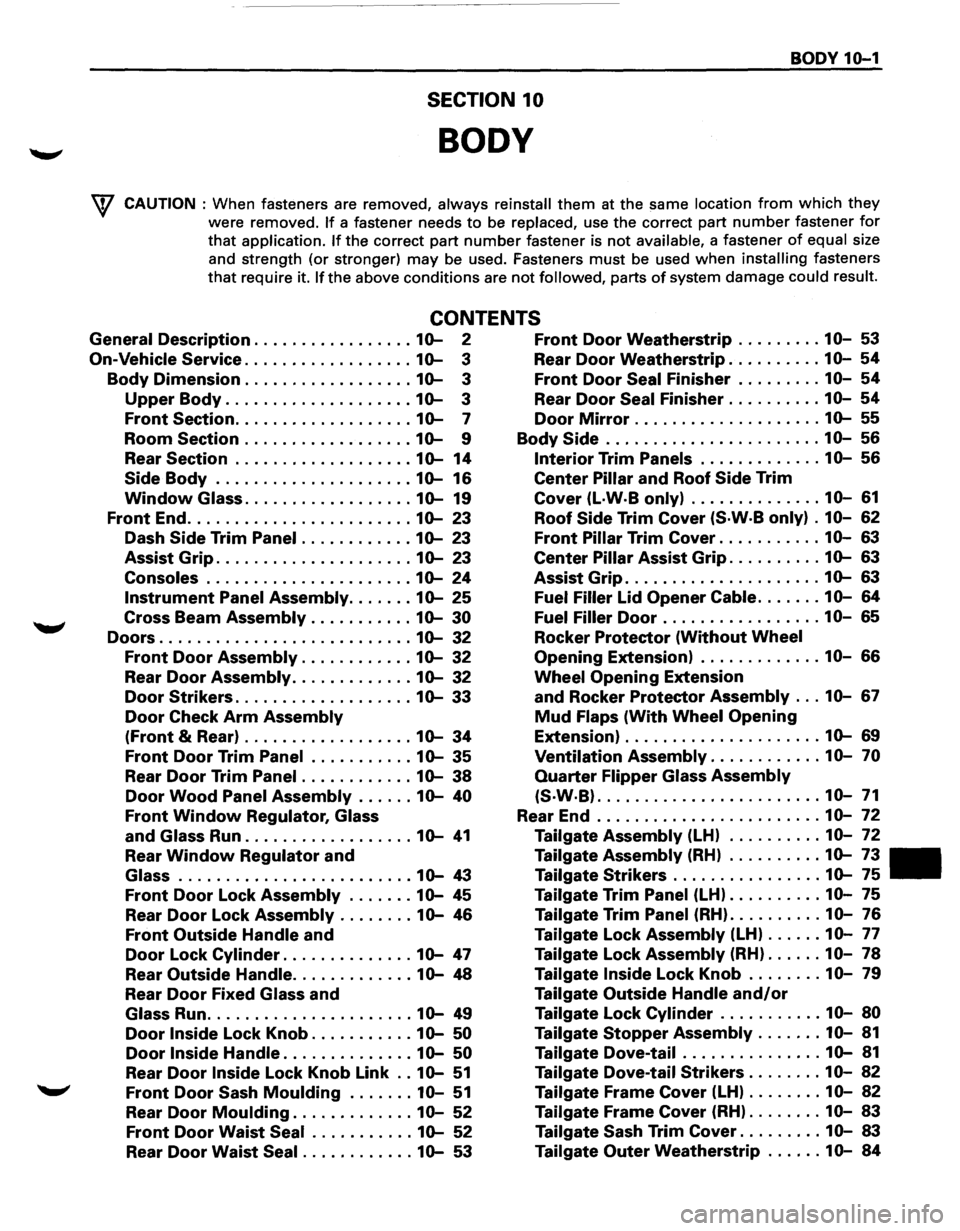
CONTENTS
General Description ................. 10-2 Front Door Weatherstrip ......... 10-53
On-Vehicle Service .................. 10-3 Rear Door Weatherstrip .......... 10-54
Body Dimension .................. 10-3 Front Door Seal Finisher ......... 10-54
Upper Body .................... 10-3 Rear Door Seal Finisher .......... 10-54
Front Section ................... 10-7 Door Mirror .................... 10-55
Room Section .................. 10-9 Body Side ....................... 10-56
Rear Section ................... 10-14 Interior Trim Panels ............. 10-56
Side Body ..................... 10-16 Center Pillar and Roof Side Trim
Window Glass .................. 10-19 Cover (L·W·B only) .............. 10-61
Front End ........................ 10-23 Roof Side Trim Cover (S·W·B only) . 10-62
Dash Side Trim Panel ............ 10-23 Front Pillar Trim Cover ........... 10-63
Assist Grip ..................... 10-23 Center Pillar Assist Grip .......... 10-63
Consoles ...................... 10-24 Assist Grip ..................... 10-63
Instrument Panel Assembly ....... 10-25 Fuel Filler lid Opener Cable ....... 10-64
Cross Beam Assembly ........... 10-30 Fuel Filler Door ................. 10-65
Doors ........................... 10-32 Rocker Protector (Without Wheel
Front Door Assembly ............ 10-32 Opening Extension) ............. 10-66
Rear Door Assembly ............. 10-32 Wheel Opening Extension
Door Strikers ................... 10-33 and Rocker Protector Assembly ... 10-67
Door Check Arm Assembly Mud Flaps (With Wheel Opening
(Front & Rear) .................. 10-34 Extension) ..................... 10-69
Front Door Trim Panel ........... 10-35 Ventilation Assembly ............ 10-70
Rear Door Trim Panel ............ 10-38 Quarter Flipper Glass Assembly
Door Wood Panel Assembly ...... 10-40 (S·W·B) ........................ 10-71
Front Window Regulator, Glass Rear End ........................ 10-72
and Glass Run .................. 10-41 Tailgate Assembly (LH) .......... 10-72
Rear Window Regulator and Tailgate Assembly (RH) .......... 10-73
Glass ......................... 10-43 Tailgate Strikers ................ 10-75
Front Door Lock Assembly ....... 10-45 Tailgate Trim Panel (LH) .......... 10-75
Rear Door Lock Assembly ........ 10-46 Tailgate Trim Panel (RH) .......... 10-76
Front Outside Handle and Tailgate Lock Assembly (LH) ...... 10-77
Door Lock Cylinder .............. 10-47 Tailgate Lock Assembly (RH) ...... 10-78
Rear Outside Handle ............. 10-48 Tailgate Inside Lock Knob ........ 10-79
Rear Door Fixed Glass and Tailgate Outside Handle and/or
Glass Run ...................... 10-49 Tailgate Lock Cylinder ........... 10-80
Door Inside Lock Knob ........... 10-50 Tailgate Stopper Assembly ....... 10-81
Door Inside Handle .............. 10-50 Tailgate Dove-tail ............... 10-81
Rear Door Inside Lock Knob Link .. 10-51 Tailgate Dove-tail Strikers ........ 10-82
Front Door Sash Moulding ....... 10-51 Tailgate Frame Cover (LH) ........ 10-82
Rear Door Moulding ............. 10-52 Tailgate Frame Cover (RH) ........ 10-83
Front Door Waist Seal ........... 10-52 Tailgate Sash Trim Cover ......... 10-83
Rear Door Waist Seal ............ 10-53 Tailgate Outer Weatherstrip ...... 10-84
Page 1782 of 1928
10-24 BODY
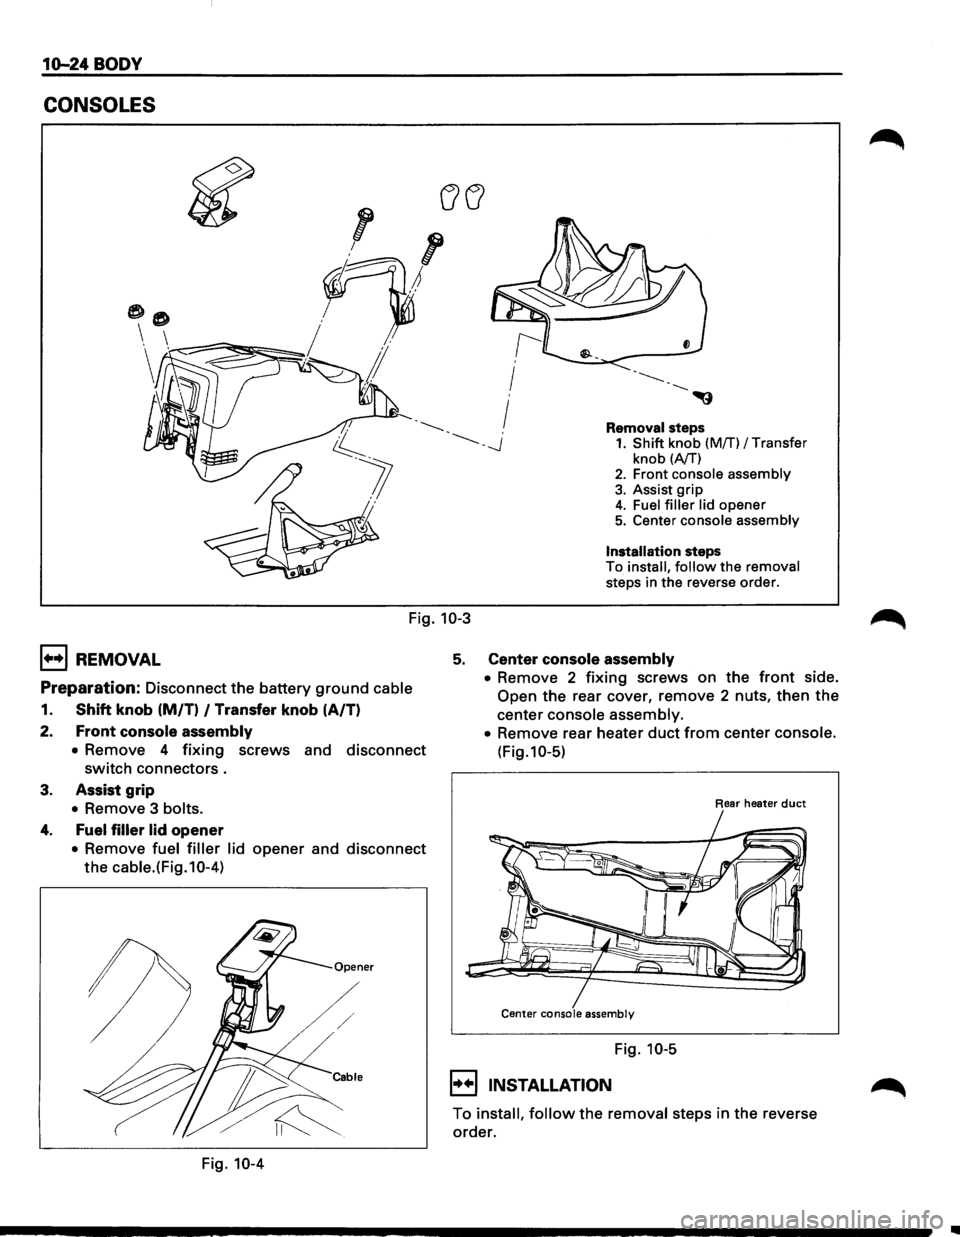
CONSOLES
Removal steps 1. Shift knob (Mff) I Transfer
knob (A/T) 2. Front console assembly
3. Assist grip 4. Fuel filler lid opener 5. Center console assembly
Installation steps
To install, follow the removal
steps in the reverse order.
Fig. 10-3
1+•1 REMOVAL
Preparation: Disconnect the battery ground cable
1. Shift knob (M/T) I Transfer knob (A/T)
2.
Front console assembly
• Remove 4 fixing screws and disconnect
switch connectors.
3. Assist grip
• Remove 3 bolts.
4. Fuel filler lid opener
• Remove fuel filler lid opener and disconnect
the cable.(Fig.10-4)
Fig. 10-4
5. Center console assembly
• Remove 2 fixing screws on the front side.
Open the rear cover, remove 2 nuts, then the
center console assembly.
•
Remove rear heater duct from center console.
(Fig.10-5)
Rear heater duct
Center console assembly
Fig. 10-5
I••IINSTALLATION
To install, follow the removal steps in the reverse
order.
Page 1822 of 1928
1(H;4 BODY
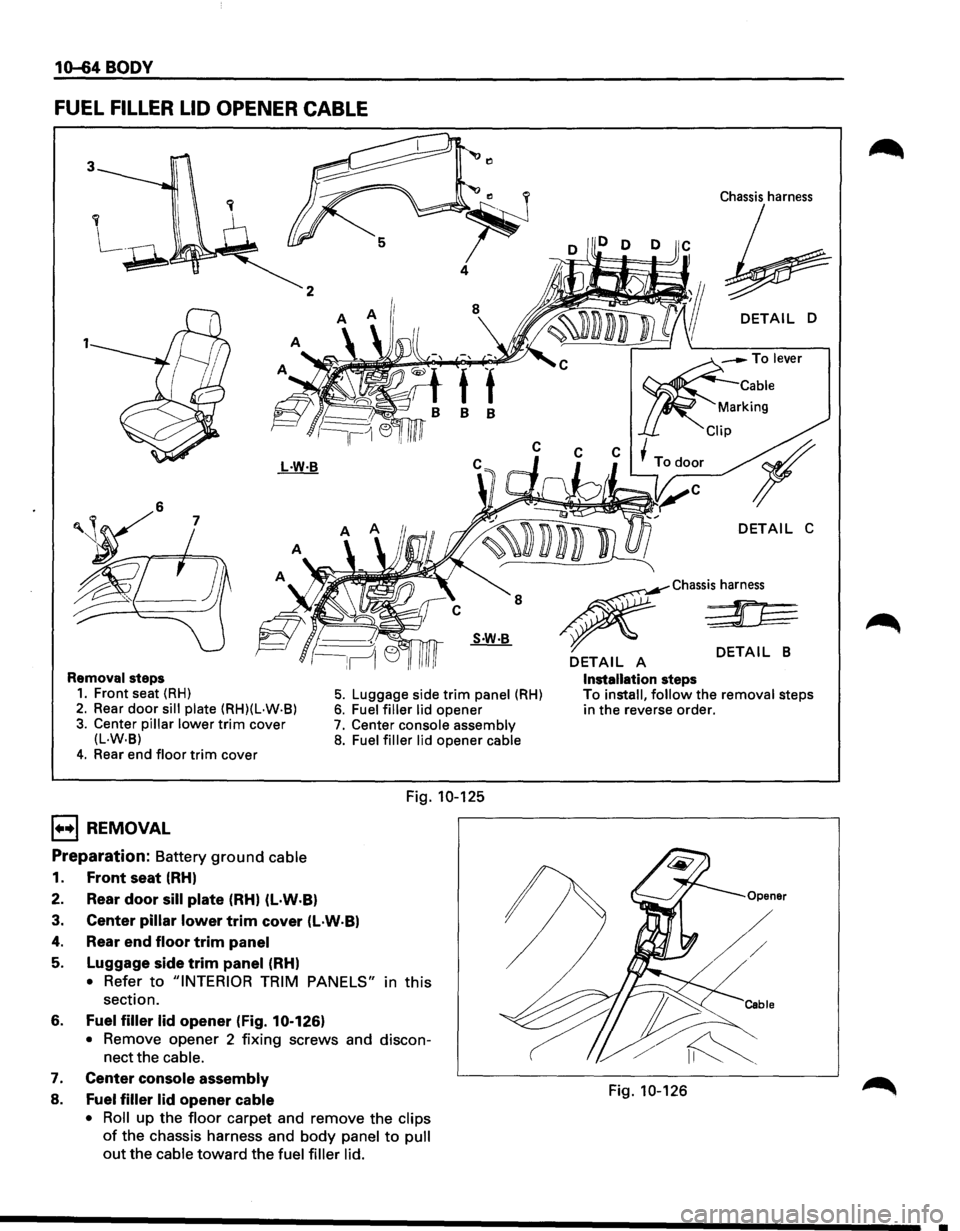
FUEL FILLER LID OPENER CABLE
2
1
8 8
Chassis harness
DETAIL D
-To lever
Cable
rking
p
~C~~C~~C~~Todooc r
Removal steps 1. Front seat (RH)
2. Rear door sill plate (RH)(L·W·B)
3. Center pillar lower trim cover (L·W.B)
4. Rear end floor trim cover
1••1 REMOVAL
Preparation: Battery ground cable
1. Front seat (RHl
2. Rear door sill plate (RH) (l·W·Bl
5. Luggage side trim panel (RH) 6. Fuel filler lid opener
7. Center console assembly 8. Fuel filler lid opener cable
Fig. 10-125
3. Center pillar lower trim cover (l·W·Bl
4. Rear end floor trim panel
5. Luggage side trim panel (RHl
• Refer to "INTERIOR TRIM PANELS" in this
section.
6.
Fuel filler lid opener (Fig. 10-126)
•
Remove opener 2 fixing screws and discon
nect the
cable.
7. Center console assembly
8. Fuel filler lid opener cable
• Roll
up the floor carpet and remove the clips
of the chassis harness and body panel to pull
out the cable toward the fuel filler lid.
DETAIL C
~Chassis harness
/~ ~
DETAIL A DETAIL B
Installation steps To install, follow the removal steps in the reverse order.
Fig. 10-126