JAGUAR X308 1998 2.G Workshop Manual
X308 1998 2.G
JAGUAR
JAGUAR
https://www.carmanualsonline.info/img/21/7640/w960_7640-0.png
JAGUAR X308 1998 2.G Workshop Manual
Page 1941 of 2490
2. Install lamp carrier on backligh t mountings, ensuring retaining
tangs seat correctly.
3. Install lamp module.
1. Slide lamp module into ca rrier ensuring retaining clips
seat correctly.
4. Connect harness connector to lamp assembly.
5. Install cover on lamp ensuring ta ngs locate correctly in carrier.
Page 1943 of 2490
Exterior Lighting - High Mounted Stoplamp Bulb
Removal and Installation
Removal
Installation
1. Remove cover from stop lamp.
1. Depress two tangs at base of lamp cover and withdraw cover.
2. Remove lamp module.
1. Release spring clips at each end and remove lamp module from carrier.
3. CAUTION: Exercise care to avoid contact with reflective
surfaces.
Withdraw lens and remove re levant bulb from module.
1. CAUTION: Exercise care to avoid contact with reflective
surfaces.
Install new bulbs as nece ssary and install lens.
2. Install module.
1. Slide module into carrier and seat securing clip at
Page 1944 of 2490
each end.
3. Install lamp cover.
1. Position cover over modu le and seat lower retaining
clips in carrier.
Page 1945 of 2490
Exterior
Lighting - License Plate Lamp
Rem
oval and Installation
Remov
al
Installation
1.
Remove battery cover and disconnect ground cable from battery
terminal. Refer to 86.15.19.
2. Remove trunk lamp assemblies. Refer to 86.45.16
3. Remove trunk lid upper trim finisher. Refer to 76.43.79.
4.
From inside trunk lid, press tang at each side of lamp and push
lamp outwards.
5.
Withdraw number plate lamp from trunk lid for access and
disconnect lamp harness multiplug.
6.
Remove and discard foam seal from lamp.
1. Install new foam seal to number plate lamp.
2. Position number plate lamp at trunk lid and connect harness
multiplug.
3. Install number plate lamp in trunk lid aperture ensuring that seal
seats correctly.
4. Install trunk upper trim finisher. Refer to 76.43.79.
5. Install trunk lamp assemb lies. Refer to 86.45.16.
6. Connect ground cable to battery terminal and fit battery cover.
Refer to 86.15.15.
Page 1946 of 2490
Exterior Lighting - License Plate Lamp Bulb
Removal and Installation
Removal
Installation
1. Remove the two number plate lamp lens securing screws.
2. Remove lens from lamp assembly and discard gasket.
3. Remove bulb from lamp assembly.
1. Install bulb in lamp assembly.
2. Install new lens gasket to lamp assembly.
3. Ensuring that gasket is correctly positioned, install lens on
lamp assembly.
4. Install lens securing screws.
Page 1947 of 2490
Exterior Lighting - Low Beam HeadlampVehicles Without: Headlamp
Leveling
Removal and Installation
Removal
Installation
1. Remove headlamp assembly fo r access. Refer to 86.41.33.
2. Release bulb holder securing tangs and withdraw holder for
access.
3. Invert headlamp assembly.
4. Release headlamp unit adju sting screws and pivot.
1. Install headlamp unit adjusting screws and pivot in locating
seats.
2. Invert headlamp assembly.
3. Install headlamp assembly bulb holder.
Page 1948 of 2490
4. Install headlamp assembly. Refer to 86.41.33.
5. Align headlamp beams.
Page 1949 of 2490
Exterior Lighting - Low Beam HeadlampVehicles With: Headlamp Leveling
Removal and Installation
Removal
Installation
1.
Remove headlamp assembly for access. Refer to 86.41.33.
2. Release bulb holder securing tangs and withdraw holder for
access.
3. Invert headlamp assembly.
4. Release headlamp unit adjusting screws and pivot.
5. Remove actuator.
1. Release headlamp unit from leveling actuator adjusting screw.
2. Rotate actuator 1/4 turn inward, tilt forward end
downward and withdraw assembly from headlamp.
1. Install headlamp unit adjusting screws and pivot in locating
seats.
2. Invert headlamp assembly and install bulb holder.
3. With forward end tilted downward, position actuator assembly on
headlamp mounting.
4. Align actuator with headlamp and rotate it 1/4 turn outwards to
engage and fully seat in mounting.
5. Install headlamp assembly. Refer to 86.41.33.
6. Align headlamp beams.
Page 1950 of 2490
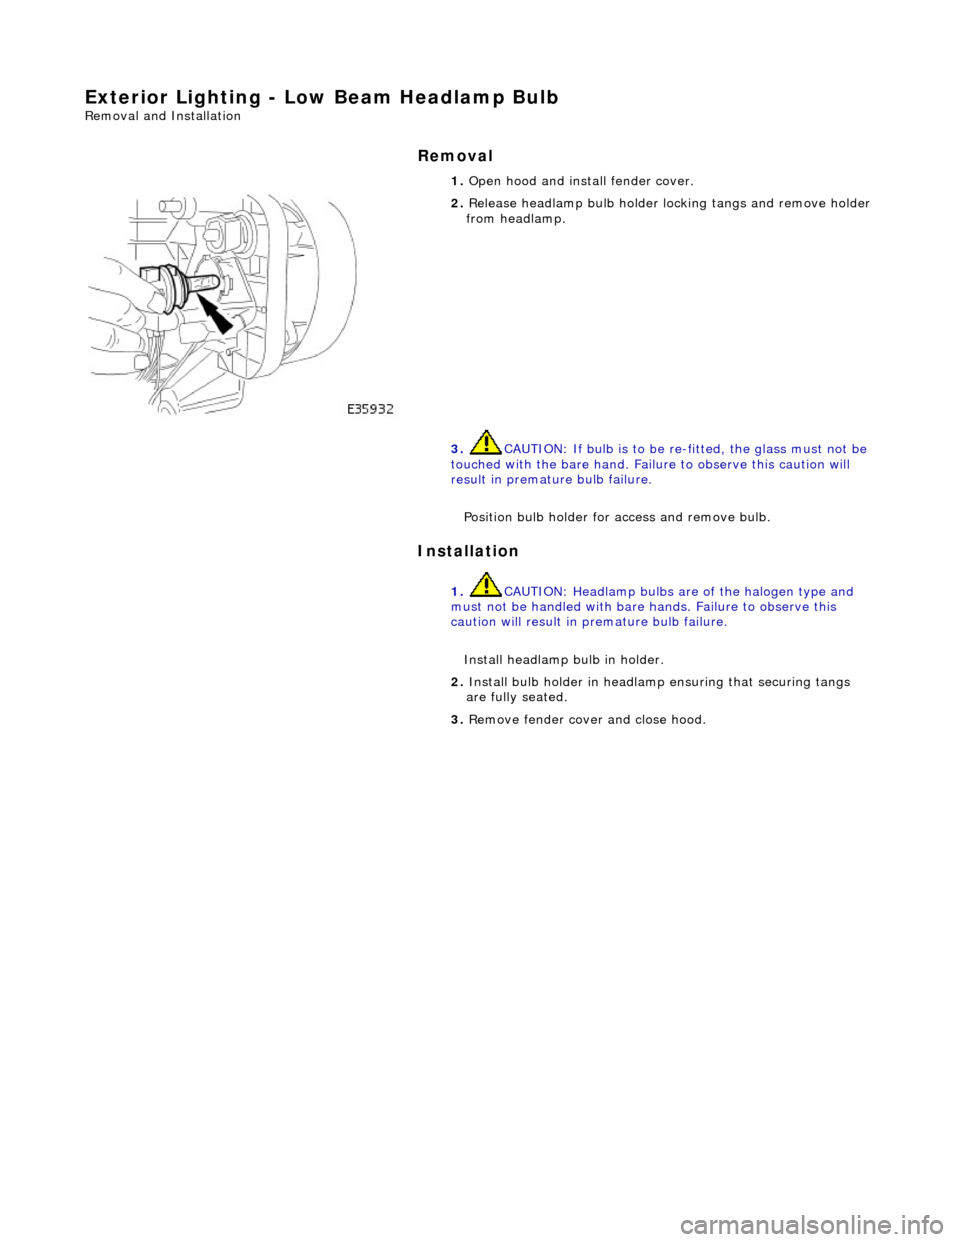
Exterior Lighting - Low Beam Headlamp Bulb
Removal and Installation
Removal
Installation
1.
Open hood and install fender cover.
2. Release headlamp bulb holder locking tangs and remove holder from headlamp.
3. CAUTION: If bulb is to be re -fitted, the glass must not be
touched with the bare hand. Failure to observe this caution will
result in premature bulb failure.
Position bulb holder for access and remove bulb.
1. CAUTION: Headlamp bulbs are of the halogen type and
must not be handled with bare hands. Failure to observe this
caution will result in premature bulb failure.
Install headlamp bulb in holder.
2. Install bulb holder in headlamp ensuring that securing tangs
are fully seated.
3. Remove fender cover and close hood.
Page 1951 of 2490
Exterior Lighting - Rear Lamp Assembly
Removal and Installation
Removal
Installation
1.
Depress retaining tang and remove rear lamp interior trim
finisher.
2. Disconnect rear lamp harness multiplug.
3. Remove three nuts securing rear lamp assembly to BIW and
remove lamp from vehicle.
1. Check that rubber seals ar e undamaged and correctly
positioned on rear lamp assembly.
2. Install rear lamp as sembly in BIW aperture, ensuring that
rubber seals seat correctly.
3. Install three nuts securing lamp assembly to BIW.
4. Connect harness multiplug to rear lamp assembly.
5. Install interior trim finisher on rear lamp assembly ensuring
that retaining tang engages correctly.


