lock JAGUAR X308 1998 2.G Workshop Manual
[x] Cancel search | Manufacturer: JAGUAR, Model Year: 1998, Model line: X308, Model: JAGUAR X308 1998 2.GPages: 2490, PDF Size: 69.81 MB
Page 717 of 2490
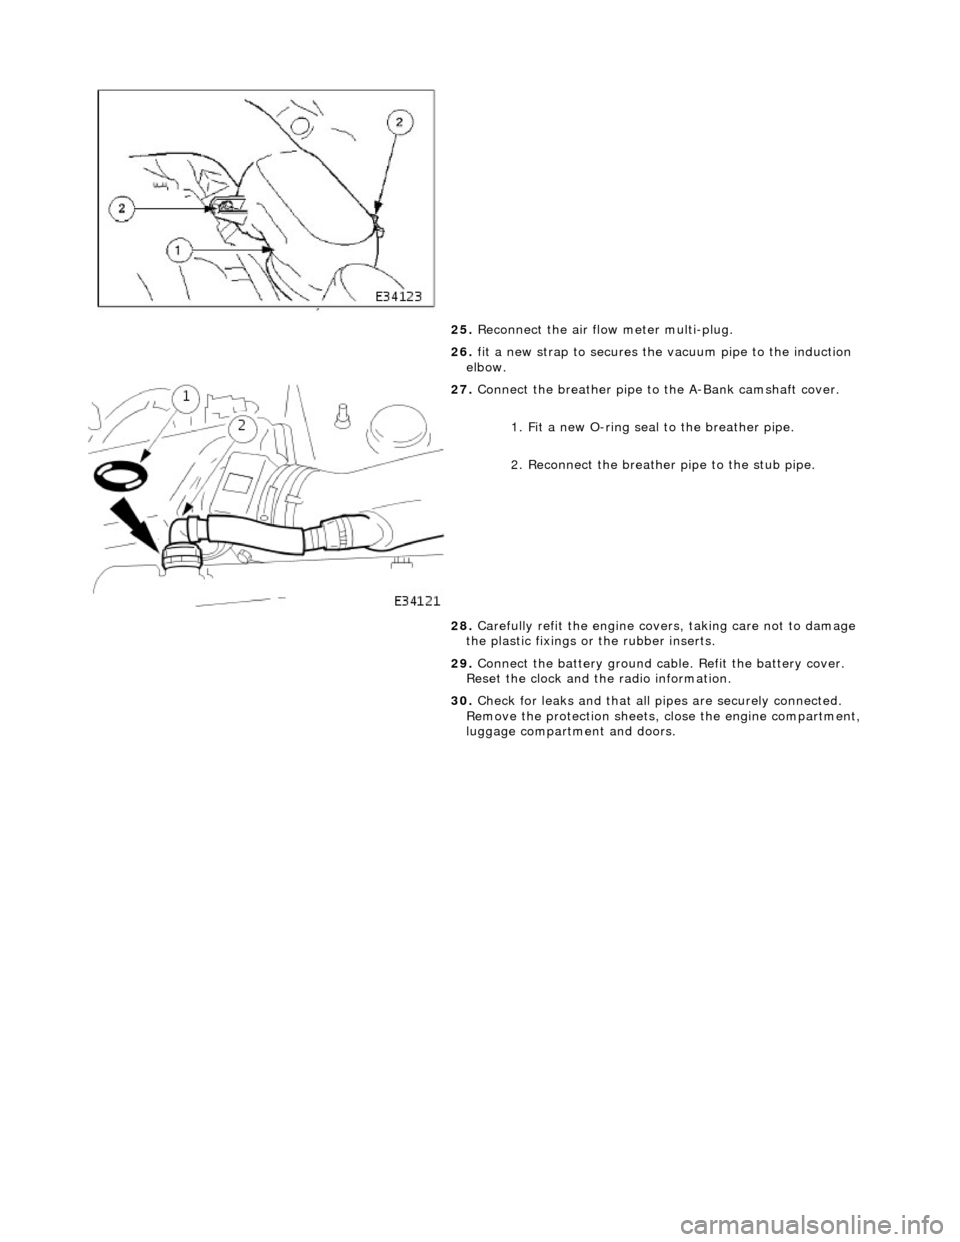
25. Reconnect the air flow meter multi-plug.
26. fit a new strap to secures the vacuum pipe to the induction
elbow.
27. Connect the breather pipe to the A-Bank camshaft cover.
1. Fit a new O-ring seal to the breather pipe.
2. Reconnect the breather pipe to the stub pipe.
28. Carefully refit the engine covers, taking care not to damage
the plastic fixings or the rubber inserts.
29. Connect the battery ground cabl e. Refit the battery cover.
Reset the clock and the radio information.
30. Check for leaks and that all pi pes are securely connected.
Remove the protection sheets, close the engine compartment,
luggage compartment and doors.
Page 726 of 2490

11. Reconnect the multi-plug, located on the bracket under the
left side of th e throttle body.
12. Connect the coolant hoses to the throttle body.
Remove the blanking plugs from the hoses.
Connect the coolant feed hose and secure with the clip.
Connect the coolant return hose and secure with the clip.
13. CAUTION: Under no circumstances may the quadrant be held clear of the throttle stop by cable tension
Refit the throttle cable and ensure that there is neither tension
nor slack in the cable
Tighten the locknut without altering the setting or
introducing twist into the cable outer
Check the kickdown setting us ing the PDU. For scan tool
procedure, refer to 303-14 , Throttle cable, Renew
14. Reconnect the multi-plugs to the throttle body.
1. Connect the throttle body motor multi-plug.
2. Connect the two potentiometer multi-plugs, one each side of the throttle.
Page 728 of 2490
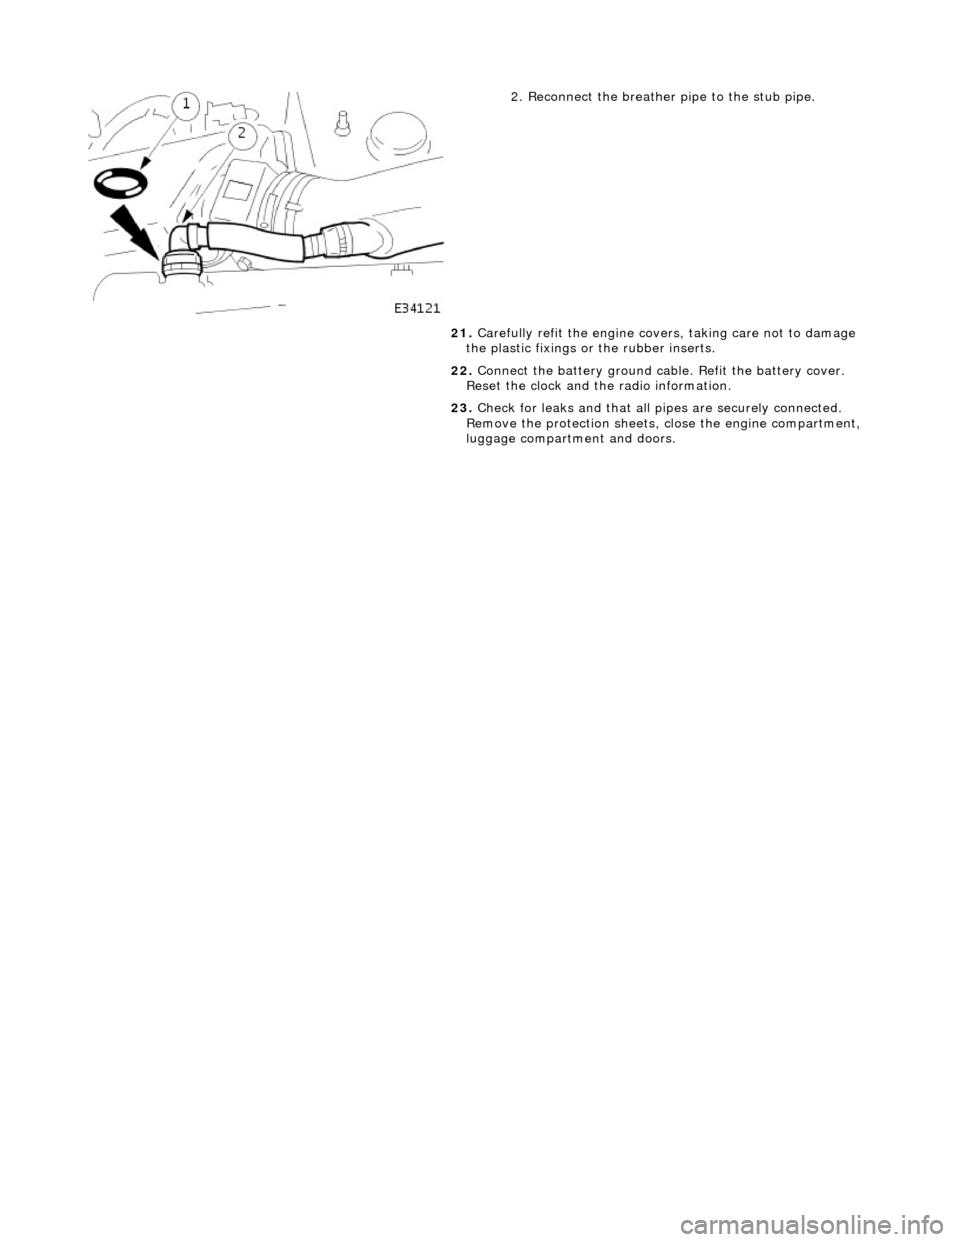
2. Reconnect the breather pipe to the stub pipe.
21. Carefully refit the engine covers, taking care not to damage
the plastic fixings or the rubber inserts.
22. Connect the battery ground cabl e. Refit the battery cover.
Reset the clock and the radio information.
23. Check for leaks and that all pi pes are securely connected.
Remove the protection sheets, close the engine compartment,
luggage compartment and doors.
Page 752 of 2490

Engine - Oil Pan Gasket
In-vehicle Repair
Removal
Installation
1. Open the engine compartment and fit paintwork protection
sheets.
2. Raise the vehicle on a ramp.
3. Drain the engine oil.
1. Position the waste oil bowser.
2. Remove the drain plug and drain the engine oil.
Fit a new sealing washer to the drain plug.
Wipe the drain plug and refit it to the oil pan to prevent oil
dripping.
Move the oil bowser away from the vehicle.
4. Remove the oil pan.
1. Remove the eighteen bolt s which secure the oil pan.
2. Remove the oil pan.
3. Remove the gasket.
5. Clean and inspect the sealing face s on the oil pan. and mating
faces.
1. Fit the oil pan gasket to the cylinder block adaptor body.
Insert the seal into the locating positions in the groove,
working around from a corner.
Press in the remainder of th e seal, following the same
procedure.
2. Fit the oil pan.
1. Position and align the oil pan.
2. Fit, but do not tighten, all eighteen bolts which secure
the oil pan.
Page 755 of 2490
Engine - Oil Pump4.0L NA V8 - AJ27/3.2L NA V8 - AJ26
In-vehicle Repair
Removal
Installation
1. Disconnect battery ground cable.
Remove the battery cover.
2. Remove the engine compartment cover (bonnet) for improved
access to the fro nt of the engine. Refer to Operation 76.16.01.
3. Remove the Crankshaft Sprocket B-Bank. Refer to Operation
12.65.76.
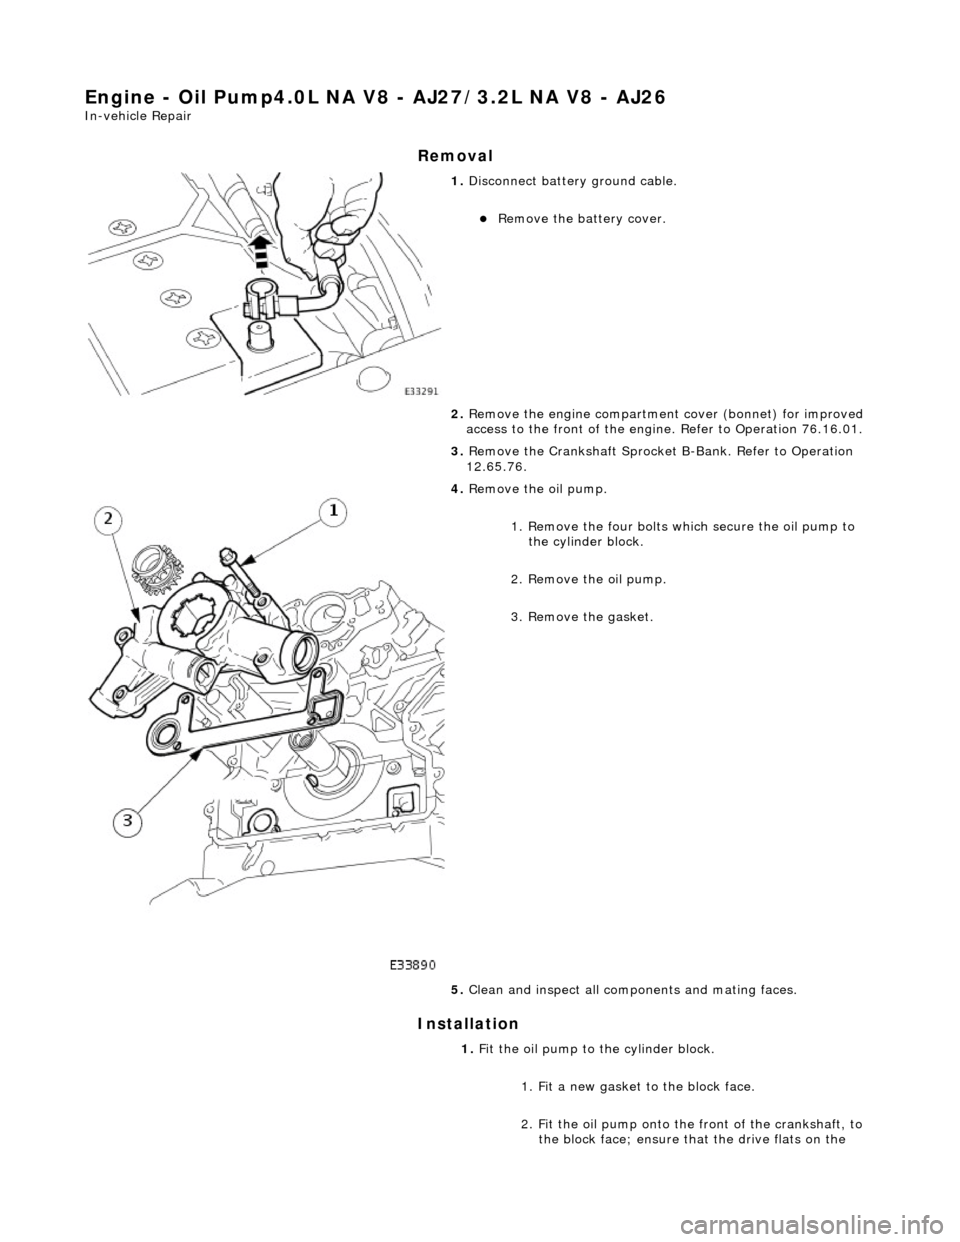
4. Remove the oil pump.
1. Remove the four bolts which secure the oil pump to the cylinder block.
2. Remove the oil pump.
3. Remove the gasket.
5. Clean and inspect all compon ents and mating faces.
1. Fit the oil pump to the cylinder block.
1. Fit a new gasket to the block face.
2. Fit the oil pump onto the front of the crankshaft, to
the block face; ensure that the drive flats on the
Page 757 of 2490
Engine - Oil Pump4.0L SC V8 - AJ26
In-vehicle Repair
Removal
Installation
1. Disconnect battery ground cable.
Remove the battery cover.
2. Remove the engine compartment cover (bonnet) for improved
access to the fro nt of the engine. Refer to Operation 76.16.01
(SC).
3. Remove the Crankshaft Sprocket B-Bank. Refer to Operation
12.65.76 (SC).
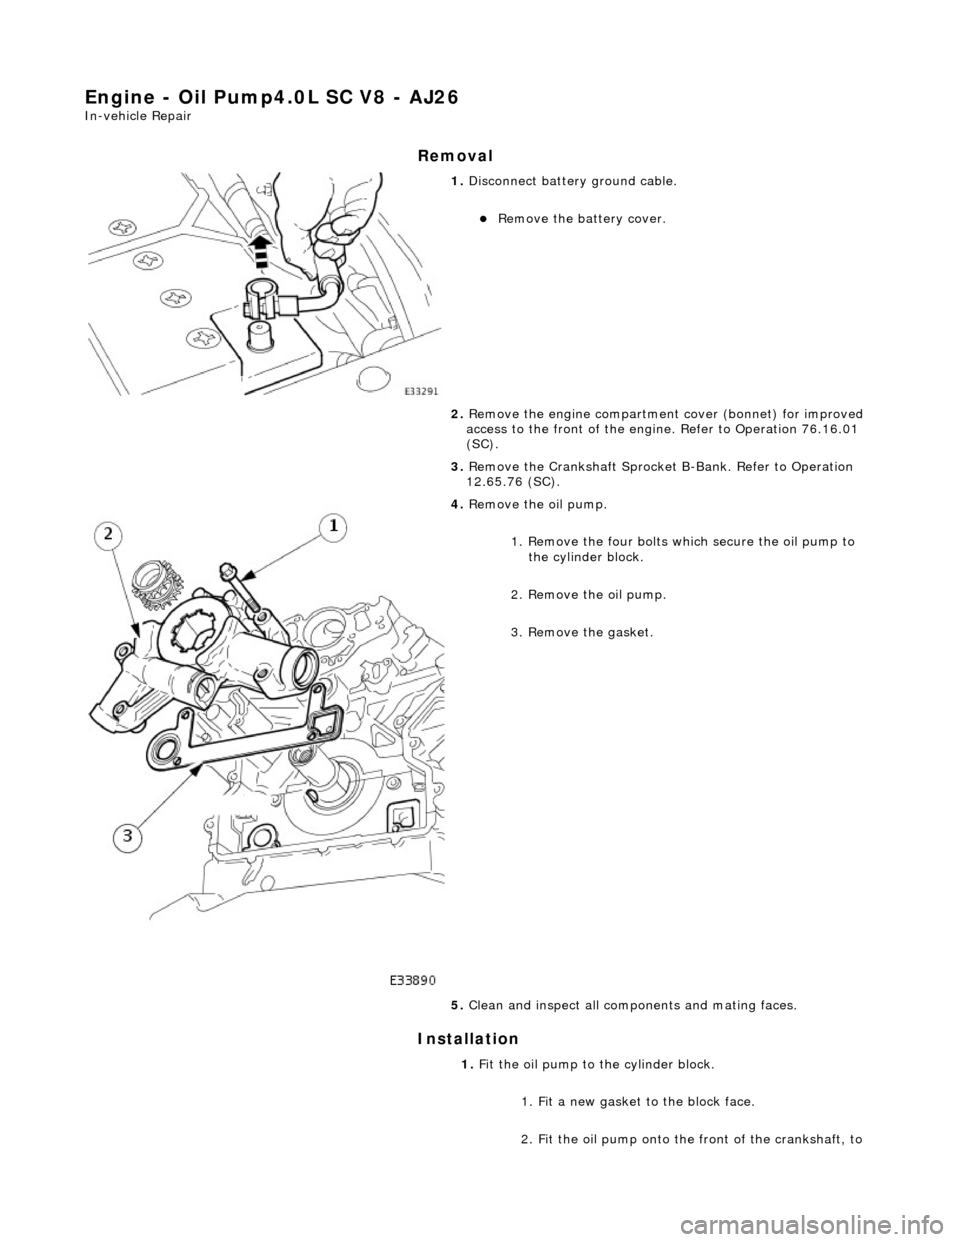
4. Remove the oil pump.
1. Remove the four bolts which secure the oil pump to the cylinder block.
2. Remove the oil pump.
3. Remove the gasket.
5. Clean and inspect all compon ents and mating faces.
1. Fit the oil pump to the cylinder block.
1. Fit a new gasket to the block face.
2. Fit the oil pump onto the front of the crankshaft, to
Page 758 of 2490
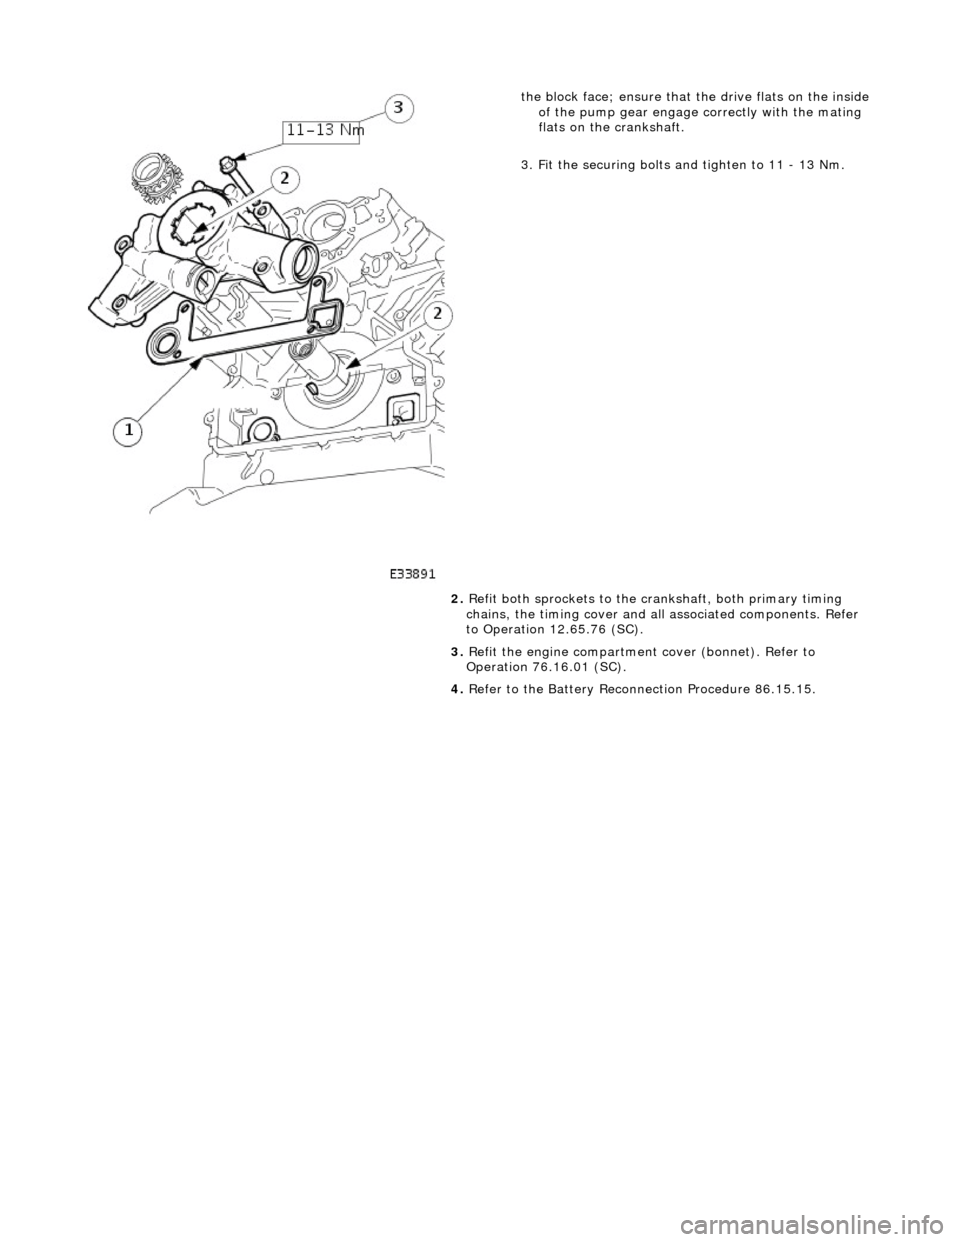
the block face; ensure that the drive flats on the inside
of the pump gear engage correctly with the mating
flats on the crankshaft.
3. Fit the securing bolts and tighten to 11 - 13 Nm.
2. Refit both sprockets to the crankshaft, both primary timing
chains, the timing cover and al l associated components. Refer
to Operation 12.65.76 (SC).
3. Refit the engine compartment cover (bonnet). Refer to
Operation 76.16.01 (SC).
4. Refer to the Battery Reconnection Procedure 86.15.15.
Page 759 of 2490

Engine - Primary Timing Chain LH4.0L NA V8 - AJ27
In-vehicle Repair
Removal
Special Tool(s)
Camshaft setting
303 - 530
Timing chain tensioning
303 - 532
Wedges, primary chain
303 - 533
Crankshaft setting
303 - 531
1. Open the engine compartment and fit paintwork protection
sheets.
2. Set the engine compartment cover to the service access
position.
3. Disconnect the batt ery ground cable.
Remove the battery cover.
4. Remove the Timing Co ver. Refer to Operation 12.65.01 in this
Section.
5. Remove the VVT bush carrier from the A-Bank.
1. Remove the three bolts which secure the carrier to the cylinder block.
Page 760 of 2490

2. Release the carrier from the two ring dowels and
remove it.
6. Remove the seals from the bush carrier.
1. Remove the sealing ring (scarf jointed) from the
carrier bush groove.
2. Remove the O-ring from the carrier oil-way recess.
7. Remove the VVT bush carrier from the B-Bank.
1. Remove the two bolts and one nut which secure the carrier to the cylinder block.
2. Release the carrier from the two ring dowels and
remove it.
8. Remove the seals from the bush carrier.
1. Remove the sealing ring (scarf jointed) from the
carrier bush groove.
2. Remove the O-ring from the carrier oil-way recess.
9. Raise the vehicle on a ramp.
10. Remove the crankshaft position sensor.
1. Remove the bolt which secures the crankshaft position sensor to the flywheel housing.
1. Remove the sensor and allow it to hang free under
the engine.
Page 761 of 2490

2. Remove the access grommet (for torque converter bolts) from the housing.
11. Fit the damper securing bolt (old one) to the crankshaft,
hand-tight only.
12. Rotate the crankshaft until the triangular arrow indent on
the drive plate is visible thro ugh the access hole; confirm
that the timing flat on ea ch camshaft is uppermost.
13. Fit the crankshaft setting peg 303 - 531 to the crankshaft
position sensor location.
1. Fit the crankshaft setting peg 303 - 531.
1. Position the crankshaft so that the setting peg engages fully into the timing slot.
2. Fit and tighten the bolt to secure the setting peg.
14. Remove the damper securing bolt from the crankshaft.
15. Lower the vehicle on the ramp.
16. Fit the camshaft locking tool 303 - 530 to the A-Bank
camshafts, aligning the shafts slightly as necessary.
17. Loosen the bolt which secures the sprocket to the camshaft.