battery JAGUAR X308 1998 2.G Workshop Manual
[x] Cancel search | Manufacturer: JAGUAR, Model Year: 1998, Model line: X308, Model: JAGUAR X308 1998 2.GPages: 2490, PDF Size: 69.81 MB
Page 1311 of 2490

Pinpoint test F: P0715
With EM007 and EM046 disconnected, measure the insulation resistance between EM007/016 and EM007/044 1
Is the resistance > 10 MOHM?
Yes GO to E8
No Inspect harness / connectors EM007 and EM046 for damage,
corrosion, bent / pushed back pins. Repair as necessary and
test the system for normal operation.
E8: END
Perform appropriate service drive cycle and check for the
presence of DTC 1
Has the fault code cleared?
Yes STOP
No Contact Jaguar Service
PINPOINT TEST F : P0715
TEST CONDITIONSDETAILS/RESULTS/ACTIONS
F1: RETRIEVE DTCS
• NOTE: Battery and or ECM disconnection prior to scanning wi ll erase all data, ensure that the correct DTC is present
Page 1316 of 2490

Pinpoint test G: P1722
With EM007 and EM046 disconnected, measure the insulation resistance between EM007/014 and EM007/042 1
Is the resistance > 10 MOHM?
Yes GO to F8
No Inspect harness / connectors EM007 and EM046 for damage,
corrosion, bent / pushed back pins. Repair as necessary and
test the system for normal operation.
F8: END
Perform appropriate service drive cycle and check for the
presence of DTC. 1
Has the fault code cleared?
Yes STOP
No Contact Jaguar Service
PINPOINT TEST G : P1722
TEST CONDITIONSDETAILS/RESULTS/ACTIONS
G1: RETRIEVE DTCS
• NOTE: Battery and or ECM disconnection prior to scanning wi ll erase all data, ensure that the correct DTC is present.
Page 1321 of 2490

Pinpoint test H: P1726
Pinpoint test I: P1730, P1734, P1779
G8: END
Perform appropriate service drive cycle and check for the
presence of DTC. 1
Has the fault code cleared?
Yes STOP
No Contact Jaguar Service
PINPOINT TEST H : P1726
TEST CONDITIONSDETAILS/RESULTS/ACTIONS
H1: RETRIEVE DTCS
• NOTE: Battery and or ECM disconnection prior to scanning wi ll erase all data, ensure that the correct DTC is present.
Connect the scan tool 1
Have the DTC(s) and freeze frame data been recorded?
Yes GO to H2
H2: RENEW TRANSMISSION
Renew the transmission 1
Has the transmission been renewed?
Yes GO to H3
H3: END
Drive the vehicle for a period from cold to include idle, brisk
acceleration and steady state cruising up to and including
normal engine temperature. Check for the presence of DTC 1
Has the fault code cleared?
Yes STOP
No Contact Jaguar Service
PINPOINT TEST I : P1730, P1734, P1779
TEST CONDITIONSDETAILS/RESULTS/ACTIONS
I1: RETRIEVE DTCS
• NOTE: Battery and or ECM disconnection prior to scanning wi ll erase all data, ensure that the correct DTC is present.
Page 1331 of 2490

Pinpoint test K: P1789, P1793
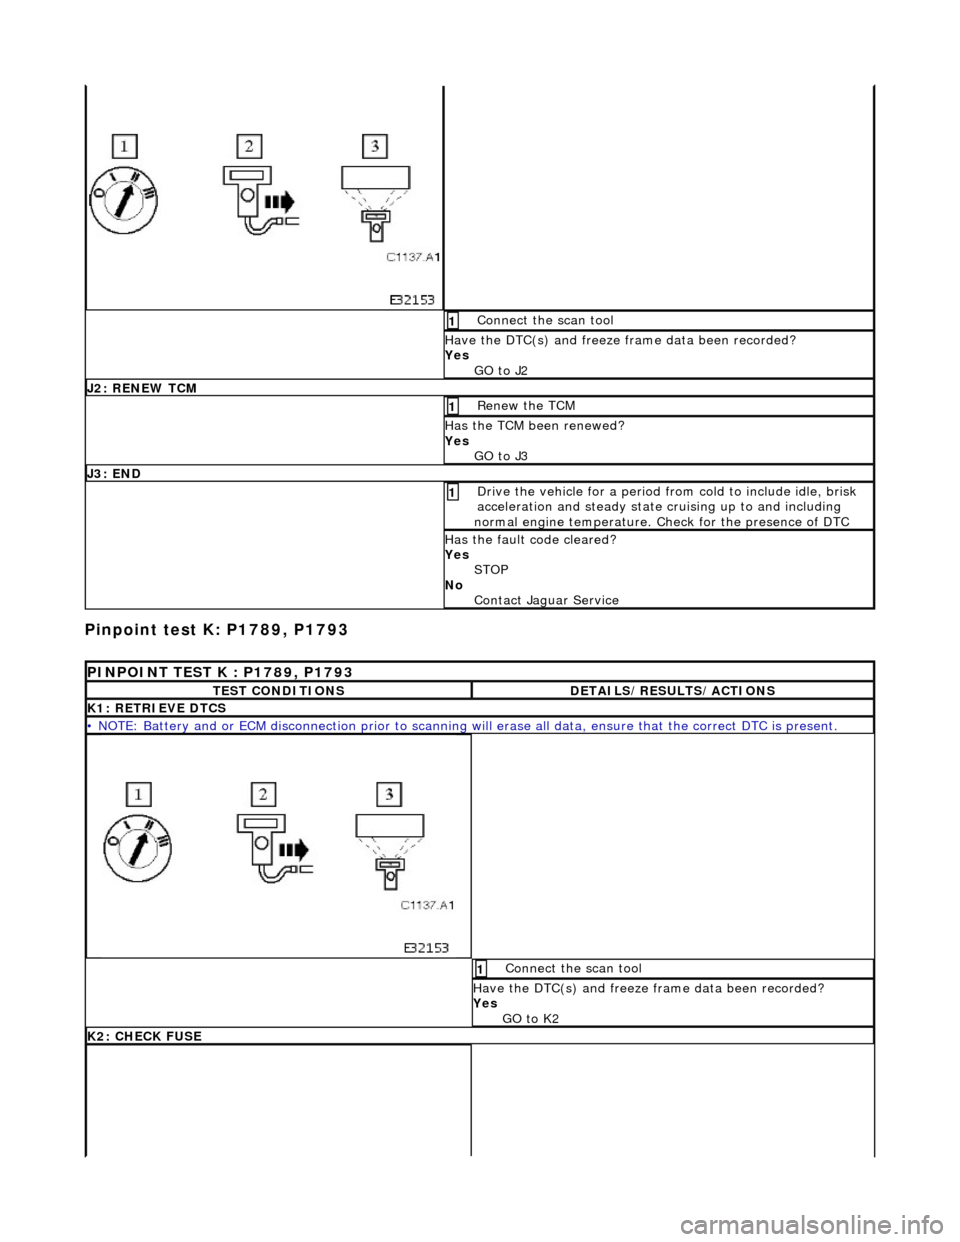
Connect the scan tool 1
Have the DTC(s) and freeze frame data been recorded?
Yes GO to J2
J2: RENEW TCM
Renew the TCM 1
Has the TCM been renewed?
Yes GO to J3
J3: END
Drive the vehicle for a period from cold to include idle, brisk
acceleration and steady state cruising up to and including
normal engine temperature. Check for the presence of DTC 1
Has the fault code cleared?
Yes STOP
No Contact Jaguar Service
PINPOINT TEST K : P1789, P1793
TEST CONDITIONSDETAILS/RESULTS/ACTIONS
K1: RETRIEVE DTCS
• NOTE: Battery and or ECM disconnection prior to scanning wi ll erase all data, ensure that the correct DTC is present.
Connect the scan tool 1
Have the DTC(s) and freeze frame data been recorded?
Yes GO to K2
K2: CHECK FUSE
Page 1333 of 2490

Pinpoint test L: P0710
With EM007 and LS008 disconnected, measure the
resistance between EM007/054 and LS008/007 1
Repeat for EM007/055 and LS008/007 2
Is the resistance < 0.5 OHM?
Yes GO to K5
No Inspect harness / connector EM007, LS008, EM051, splice
EMS42 for damage, corrosion, bent / pushed back pins.
Repair as necessary and te st the system for normal
operation.
K5: END
Perform appropriate service drive cycle and check for the
presence of DTC. 1
Has the fault code cleared?
Yes STOP
No Contact Jaguar Service
PINPOINT TEST L : P0710
TEST CONDITIONSDETAILS/RESULTS/ACTIONS
L1: RETRIEVE DTCS
• NOTE: Battery and or ECM disconnection prior to scanning wi ll erase all data, ensure that the correct DTC is present.
Page 1339 of 2490

Automatic Transmission/Transaxle - 4.0L NA V8 - AJ27/3.2L NA V8 - AJ26
- Electronic Pressure Control (EPC) Solenoid
In-vehicle Repair
Removal
1. Disconnect battery ground cable.
пЃ¬Remove the battery cover.
2. Raise the vehicle on a suitable lift.
2. WARNING: TRANSMISSION FLUID MAY CAUSE
SEVERE BURNS, ENSURE THAT ALL SAFETY PROCEDURES
ARE OBSERVED.
пЃ¬Carefully remove the drain plug and drain the
transmission fluid.
3. Remove the twenty-two fixings which secure the fluid pan .
пЃ¬Remove the fluid pan and all traces of gasket material.
4. Disconnect regulator / solenoid connectors.
5. Remove RH rear valve body securing screws.
Page 1341 of 2490

3. NOTE: Ensure extreme clea nliness and never reuse
transmission fluid.
Using a new gasket, install the fl uid pan and tighten the fixings
to the specified torque figure.
4. Connect the battery and fit the battery cover..
пЃ¬Reset the radio and the clock.
5. Refer to (44.24.02) for fluid fill procedure.
Page 1348 of 2490

Automatic Transmission/Transaxle - 4.0L NA V8 - AJ27/3.2L NA V8 - AJ26
- Main Control Valve Body
In-vehicle Repair
Removal
1. Disconnect battery ground cable.
пЃ¬Remove the battery cover.
2. Raise the vehicle for access.
2. WARNING: TRANSMISSION FLUID MAY CAUSE
SEVERE BURNS, ENSURE THAT ALL SAFETY PROCEDURES
ARE OBSERVED.
пЃ¬Carefully remove the drain plug and drain the
transmission fluid.
3. Remove the twenty-two bolts which secure the fluid pan.
пЃ¬Remove the fluid pan and all tr aces of gasket material.
4. Remove the fluid filter, (44.24.07).
5. Remove the input speed sensor.
• NOTE: M5 fixing.
1. Remove the screw from the input speed sensor securing bracket and pu ll the sensor clear.
пЃ¬Disconnect the harness multiplug.
Page 1351 of 2490

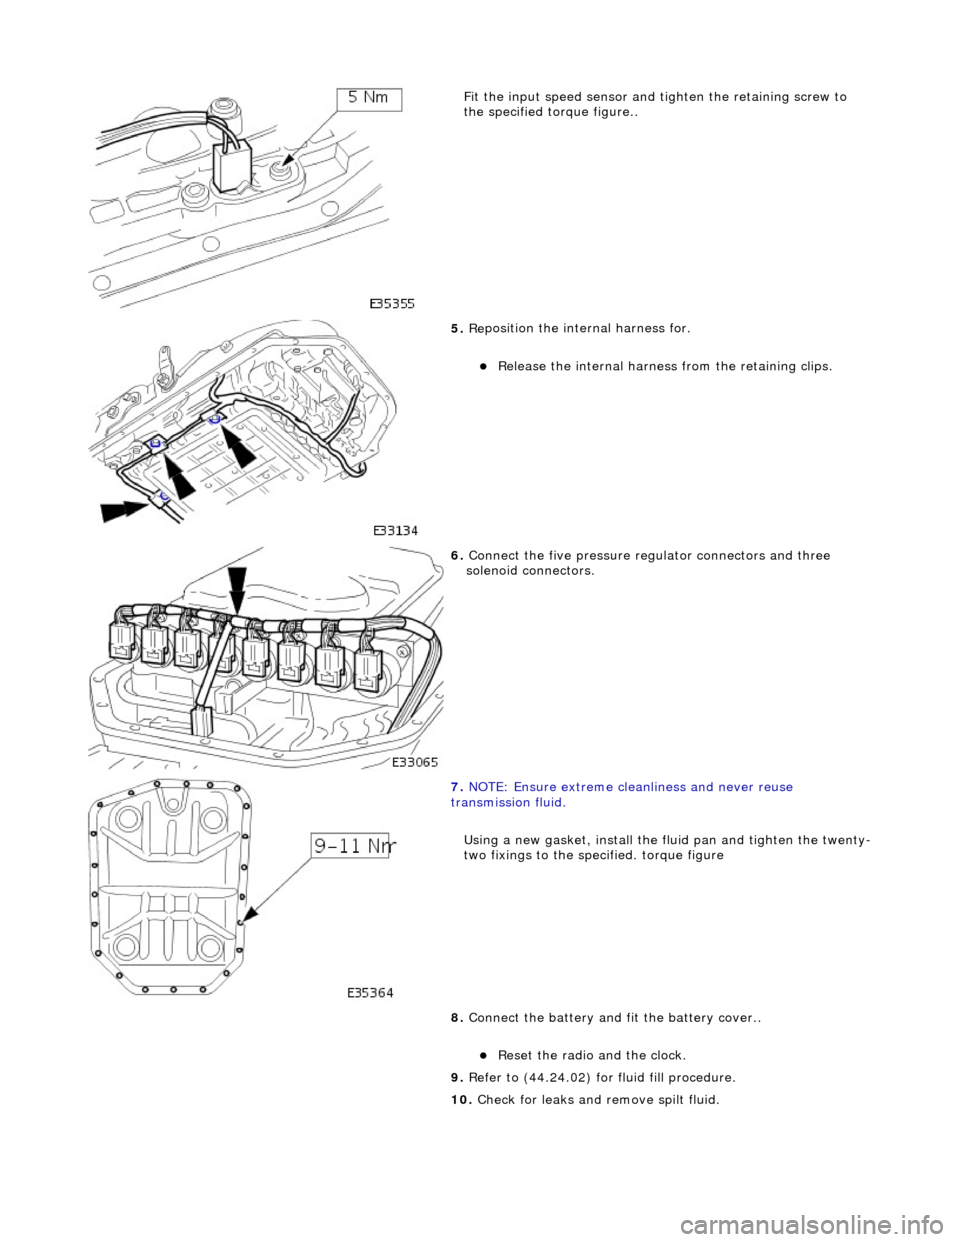
Fit the inpu
t speed sensor and
tighten the retaining screw to
the specified to rque figure..
5. Re
position the inte
rnal harness for.
пЃ¬R
elease the internal harness
from the retaining clips.
6. Connect
the five pressure re
gulator connectors and three
solenoid connectors.
7. N
OTE: Ensure extreme clea
nliness and never reuse
transmission fluid.
Using a new gasket, install the fl uid pan and tighten the twenty-
two fixings to the specified. torque figure
8. Connect the battery and fit the battery cover..
пЃ¬Reset th
e radio and the clock.
9. Refer to (44.24.02) for fluid fill procedure.
10. Check for leaks and remove spilt fluid.
Page 1352 of 2490

Automatic Transmission/Transaxle - 4.0L NA V8 - AJ27/3.2L NA V8 - AJ26
- Output Shaft Speed (OSS) Sensor
In-vehicle Repair
Removal
1. Disconnect battery ground cable.
пЃ¬Remove the battery cover.
2. Raise the vehicle on a lift.
2. WARNING: TRANSMISSION FLUID MAY CAUSE
SEVERE BURNS, ENSURE THAT ALL SAFETY PROCEDURES
ARE OBSERVED.
пЃ¬Carefully remove the drain plug and drain the
transmission fluid.
3. Remove the twenty-two bolts which secure the fluid pan.
пЃ¬Remove the fluid pan and all tr aces of gasket material.
4. Remove the output speed sensor.
• NOTE: M6 fixing.
1. Release the screw which secures the output speed sensor bracket and pull the sensor clear.
5. Disconnect the multiplug from the speed sensor.