JAGUAR XFR 2010 1.G Workshop Manual
Manufacturer: JAGUAR, Model Year: 2010, Model line: XFR, Model: JAGUAR XFR 2010 1.GPages: 3039, PDF Size: 58.49 MB
Page 591 of 3039

Non Pressure Leaks
Any reduced fluid volume in the brake master cylinder reservoir may be caused by two types of none pressure external leaks.
Type 1: An external leak may occur at the brake master cylinder reservoir cap because of incorrect positioning of the gasket
and cap. Reposition cap and gasket.
Type 2: An external leak may occur at the brake master cylinder reservoir mounting seals. Repair such a leak by installing new
seals and make sure that the brake master cylinder reservoir retaining bolt is correctly installed.
Page 592 of 3039
Brake System - General Information - Brake Disc Runout Check
General Procedures
Check Published: 01-Jul-2014
1. Remove the wheel and tire.
For additional information, refer to: Wheel and Tire (204-04 Wheels and Tires, Removal and Installation).
2. Install all the wheel nuts and tighten equally to 20 Nm (15 lb.ft).
Make sure that the brake disc is fully seated against the hub
face.
3. Install a dial test indicator gauge and holding fixture to a suitable
mounting point.
4. NOTE: If the runout is outside specification, check the hub face
runout.
Using the dial test indicator, measure the inner and outer faces of the
brake disc. For additional information, refer to: (206-00 Brake System -
General Information)
Specifications - 3.0L NA V6 - AJ27 (Specifications), Specifications - TDV6 3.0L Diesel /V8 5.0L Petrol/V8 S/C 5.0L Petrol (Specifications).
1. Position the gauge so that it contacts the disc 10 mm (0.4 in)
from the outer edge.
2. Slowly rotate the hub/disc assembly. Note the reading.
5. If a front hub runout check is required, remove the front brake disc. For
additional information, refer to:
Brake Disc - Vehicles With: Standard Brakes (206-03A Front Disc Brake - V6 3.0L Petrol, Removal and Installation),
Brake Disc - Vehicles With: Standard Brakes (206-03B Front Disc Brake - TDV6 3.0L Diesel /V8 5.0L Petrol/V8 S/C 5.0L Petrol, Removal and
Installation),
Brake Disc - Vehicles With: High Performance Brakes (206-03A Front Disc Brake - V6 3.0L Petrol, Removal and Installation),
Brake Disc - Vehicles With: High Performance Brakes (206-03B Front Disc Brake - TDV6 3.0L Diesel /V8 5.0L Petrol/V8 S/C 5.0L Petrol, Removal
and Installation).
6. If a rear hub runout check is required, remove the rear brake disc. For
additional information, refer to:
Brake Disc (206-04A Rear Disc Brake - V6 3.0L Petrol, Removal and Installation),
Brake Disc - Vehicles With: High Performance Brakes (206-04B Rear Disc Brake - TDV6 3.0L Diesel /V8 5.0L Petrol/V8 S/C 5.0L Petrol, Removal
and Installation),
Brake Disc - Vehicles With: Standard Brakes (206-04B Rear Disc Brake - TDV6 3.0L Diesel /V8 5.0L Petrol/V8 S/C 5.0L Petrol, Removal and
Installation).
7. NOTE: The hub surface should be free from dirt and corrosion. Do not
use abrasive cloths to clean hub faces.
Using the dial test indicator, measure the hub face runout.
1. Position the gauge so that it contacts the mounting tube
between the stud and the chamfer.
2. Slowly rotate the hub and note the runout. For additional
information, refer to the specification chart.
If the front hub runout exceeds the specifications, install a new
hub, brake disc and recheck. For additional information, refer to:
(204-01 Front Suspension)
Front Wheel Bearing and Wheel Hub - V6 3.0L Petrol (Removal and Installation),
Page 593 of 3039
Petrol/V8 S/C 5.0L Petrol (Removal and Installation). If the rear hub runout exceeds the specifications, install a new
hub, brake disc and recheck.
For additional information, refer to: Rear Wheel Bearing (204-02 Rear Suspension, Removal and Installation).
8. If the front hub face is within specification, install a new brake disc. For
additional information, refer to:
Brake Disc - Vehicles With: Standard Brakes (206-03A Front Disc Brake - V6 3.0L Petrol, Removal and Installation),
Brake Disc - Vehicles With: Standard Brakes (206-03B Front Disc Brake - TDV6 3.0L Diesel /V8 5.0L Petrol/V8 S/C 5.0L Petrol, Removal and
Installation),
Brake Disc - Vehicles With: High Performance Brakes (206-03A Front Disc Brake - V6 3.0L Petrol, Removal and Installation),
Brake Disc - Vehicles With: High Performance Brakes (206-03B Front Disc Brake - TDV6 3.0L Diesel /V8 5.0L Petrol/V8 S/C 5.0L Petrol, Removal
and Installation).
If the rear hub face is within specification, install a new disc.
9. Install the wheel and tire.
For additional information, refer to: Wheel and Tire (204-04 Wheels and Tires, Removal and Installation).
Page 594 of 3039
Brake System - General Information - Brake System Bleeding
General Procedures
CAUTIONS:
The brake fluid reservoir must remain full with new, clean brake fluid at all times during bleeding. Published: 11-May-2011
Brake fluid will damage paint finished surfaces. If spilled, immediately remove the fluid and clean the area with water.
NOTE:
All vehicles
1. WARNING: Do not work on or under a vehicle supported only by a
jack. Always support the vehicle on safety stands.
Raise and support the vehicle.
2. Check that the brake fluid lines are secure and that there are no signs of
a brake fluid leak. If a brake fluid leak is detected, investigate and
rectify the cause of the leak before bleeding the brakes.
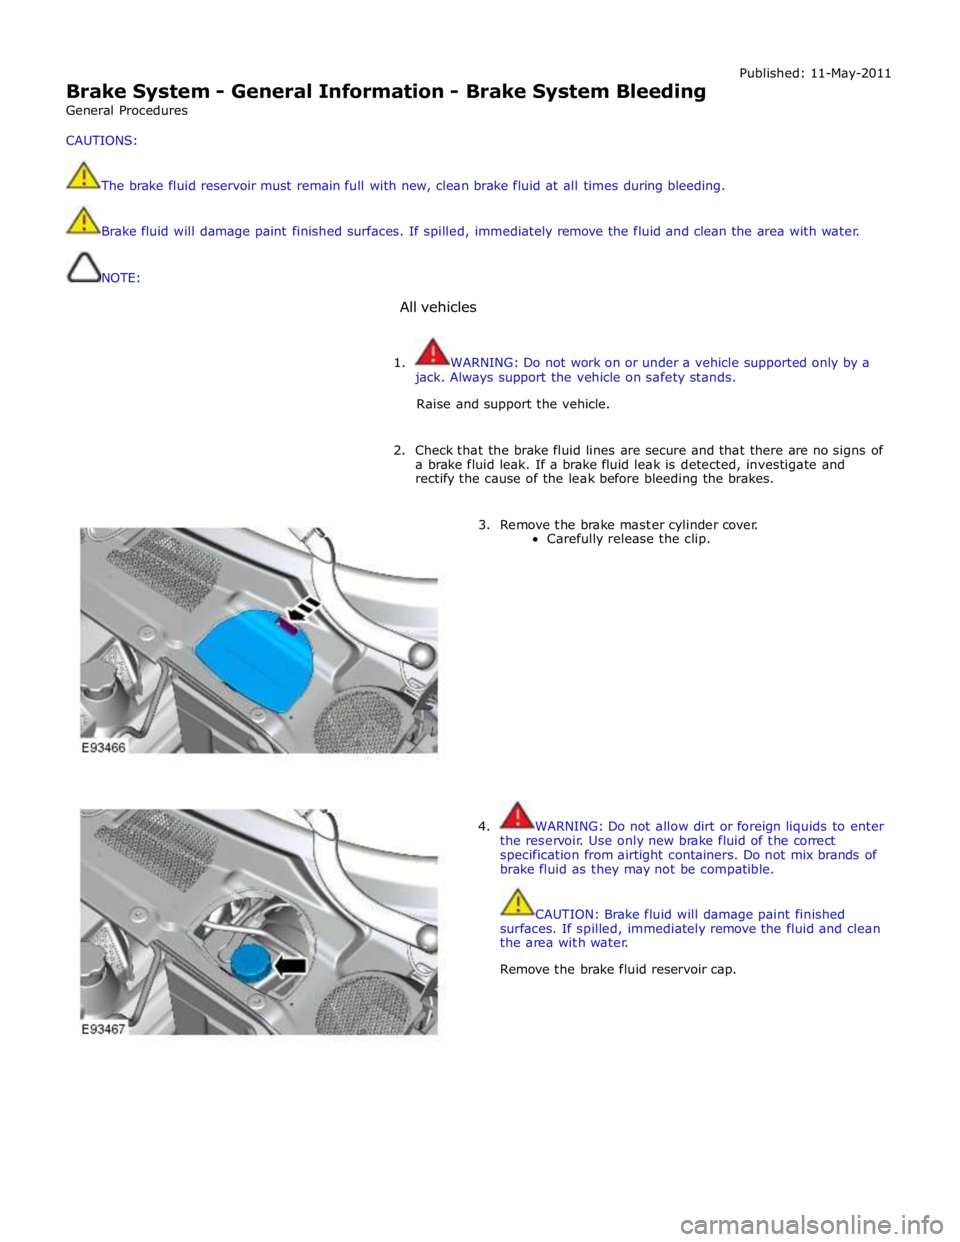
3. Remove the brake master cylinder cover.
Carefully release the clip.
4. WARNING: Do not allow dirt or foreign liquids to enter
the reservoir. Use only new brake fluid of the correct
specification from airtight containers. Do not mix brands of
brake fluid as they may not be compatible.
CAUTION: Brake fluid will damage paint finished
surfaces. If spilled, immediately remove the fluid and clean
the area with water.
Remove the brake fluid reservoir cap.
Page 595 of 3039
5.
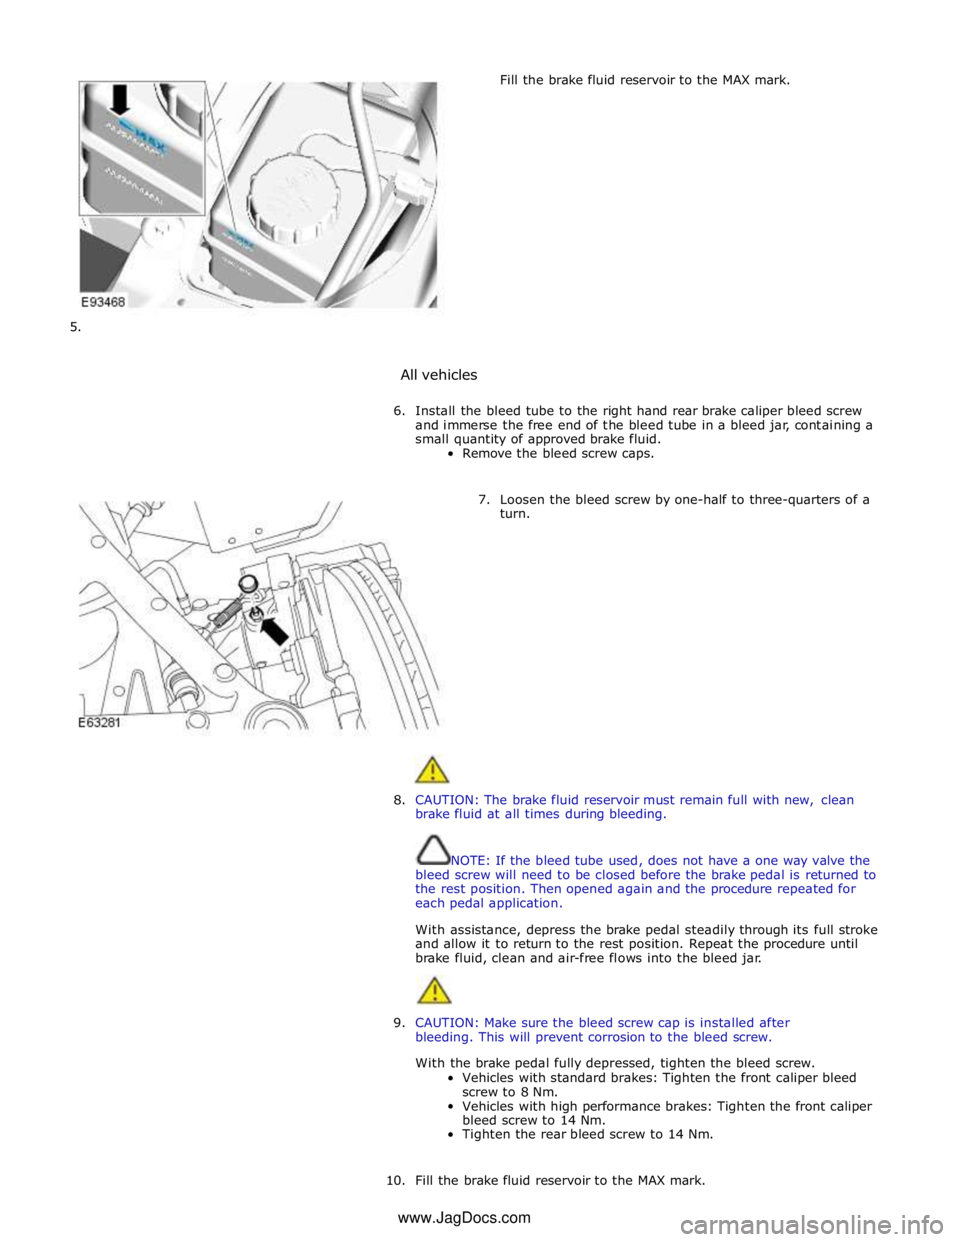
All vehicles Fill the brake fluid reservoir to the MAX mark.
6. Install the bleed tube to the right hand rear brake caliper bleed screw
and immerse the free end of the bleed tube in a bleed jar, containing a
small quantity of approved brake fluid.
Remove the bleed screw caps.
7. Loosen the bleed screw by one-half to three-quarters of a
turn.
8. CAUTION: The brake fluid reservoir must remain full with new, clean
brake fluid at all times during bleeding.
NOTE: If the bleed tube used, does not have a one way valve the
bleed screw will need to be closed before the brake pedal is returned to
the rest position. Then opened again and the procedure repeated for
each pedal application.
With assistance, depress the brake pedal steadily through its full stroke
and allow it to return to the rest position. Repeat the procedure until
brake fluid, clean and air-free flows into the bleed jar.
9. CAUTION: Make sure the bleed screw cap is installed after
bleeding. This will prevent corrosion to the bleed screw.
With the brake pedal fully depressed, tighten the bleed screw.
Vehicles with standard brakes: Tighten the front caliper bleed
screw to 8 Nm.
Vehicles with high performance brakes: Tighten the front caliper
bleed screw to 14 Nm.
Tighten the rear bleed screw to 14 Nm.
10. Fill the brake fluid reservoir to the MAX mark. www.JagDocs.com
Page 596 of 3039
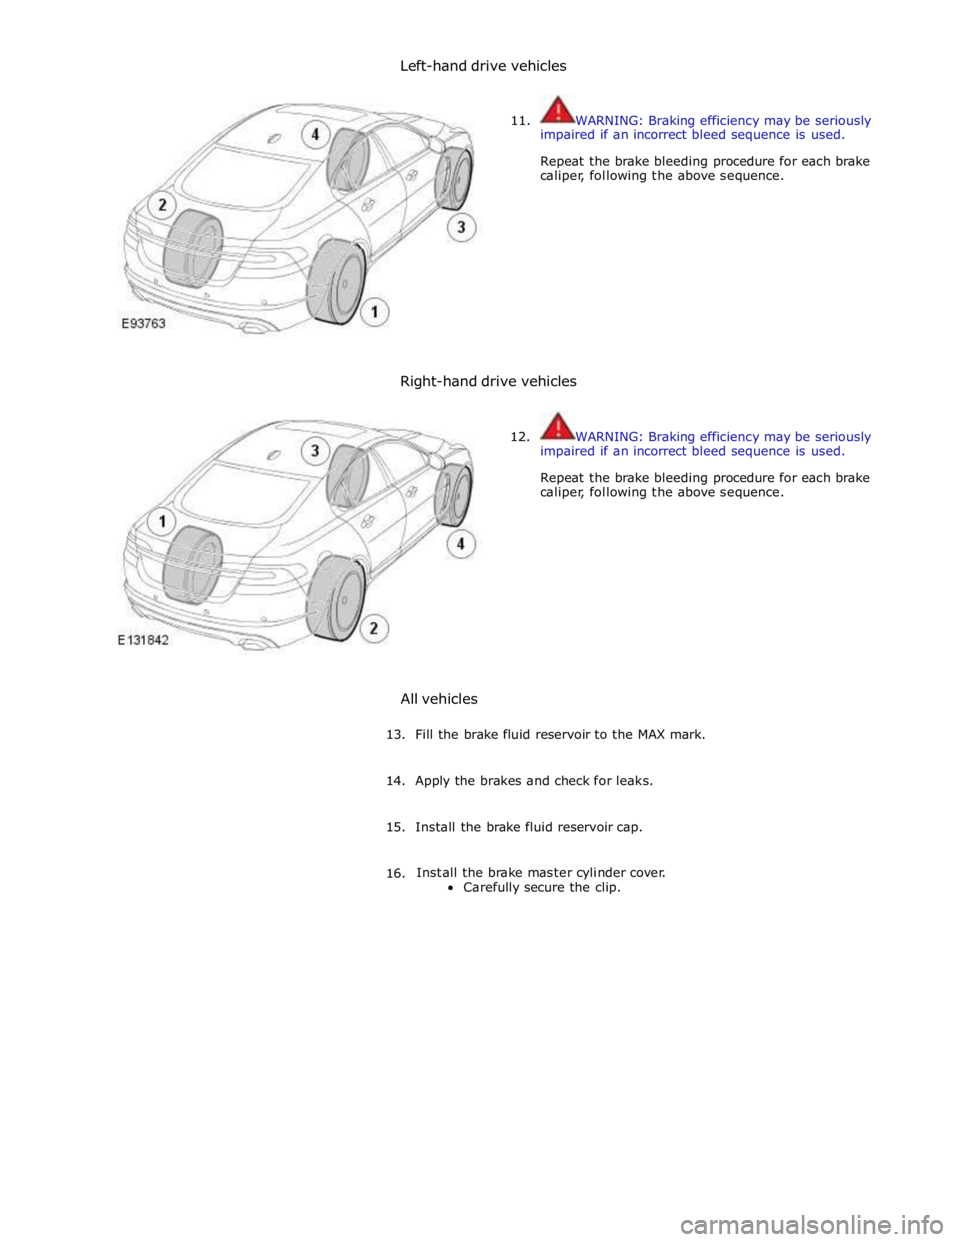
Left-hand drive vehicles
11.
WARNING: Braking efficiency may be seriously
impaired if an incorrect bleed sequence is used.
Repeat the brake bleeding procedure for each brake
caliper, following the above sequence.
Right-hand drive vehicles
All vehicles
12.
WARNING: Braking efficiency may be seriously
impaired if an incorrect bleed sequence is used.
Repeat the brake bleeding procedure for each brake
caliper, following the above sequence.
13. Fill the brake fluid reservoir to the MAX mark.
14. Apply the brakes and check for leaks.
15. Install the brake fluid reservoir cap.
16. Install the brake master cylinder cover.
Carefully secure the clip.
Page 597 of 3039
Published: 17-Feb-2012
Brake System - General Information - Front Brake Disc Runout Check - With
Wheel On Vehicles With: High Performance Brakes
General Procedures
1. NOTES:
Some variation in the illustrations may occur, but the essential
information is always correct.
RH illustration shown, LH similar
All measurements must taken with the wheel installed.
2. WARNING: Make sure to support the vehicle with axle stands.
Raise the front of the vehicle.
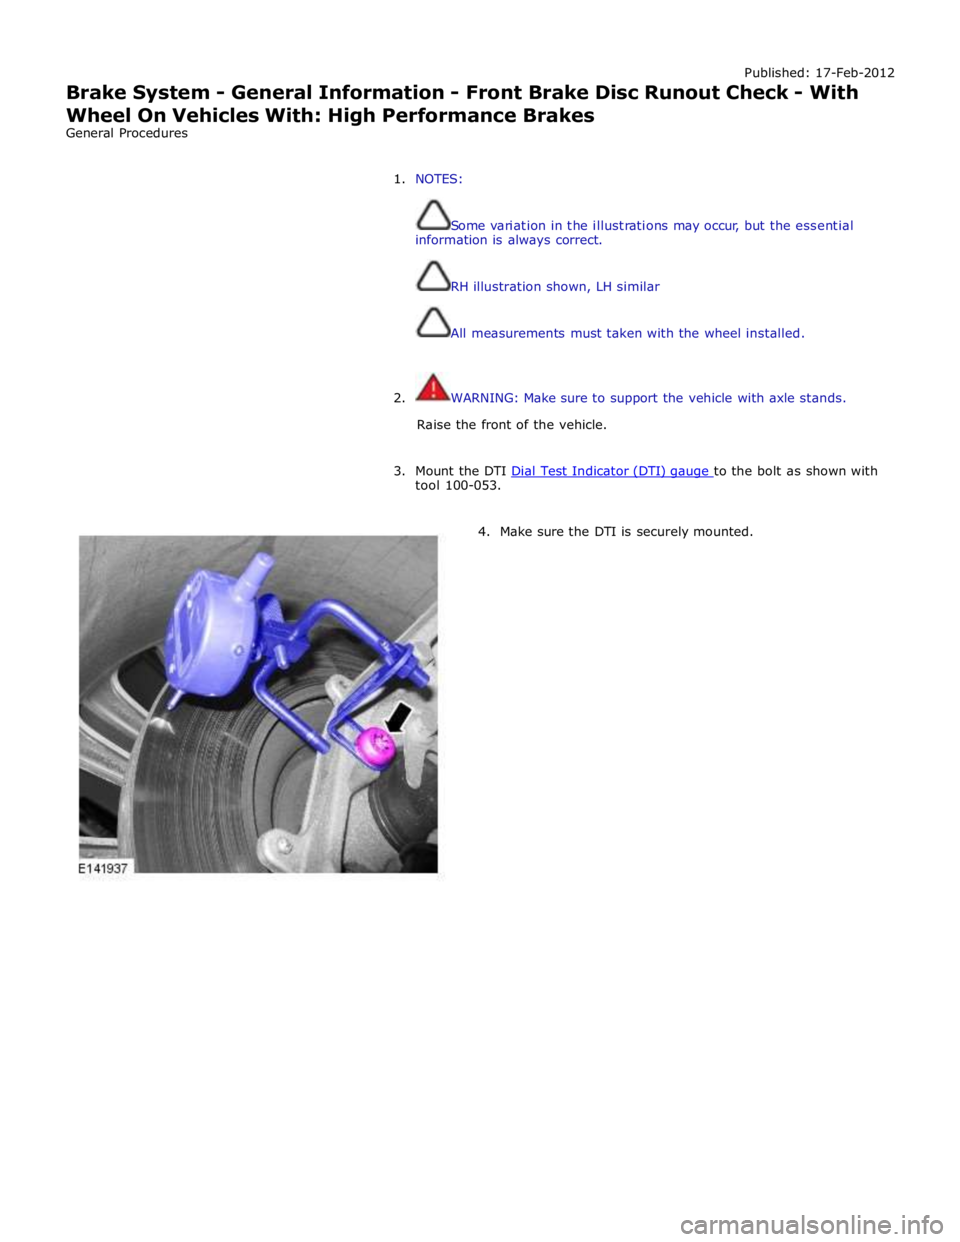
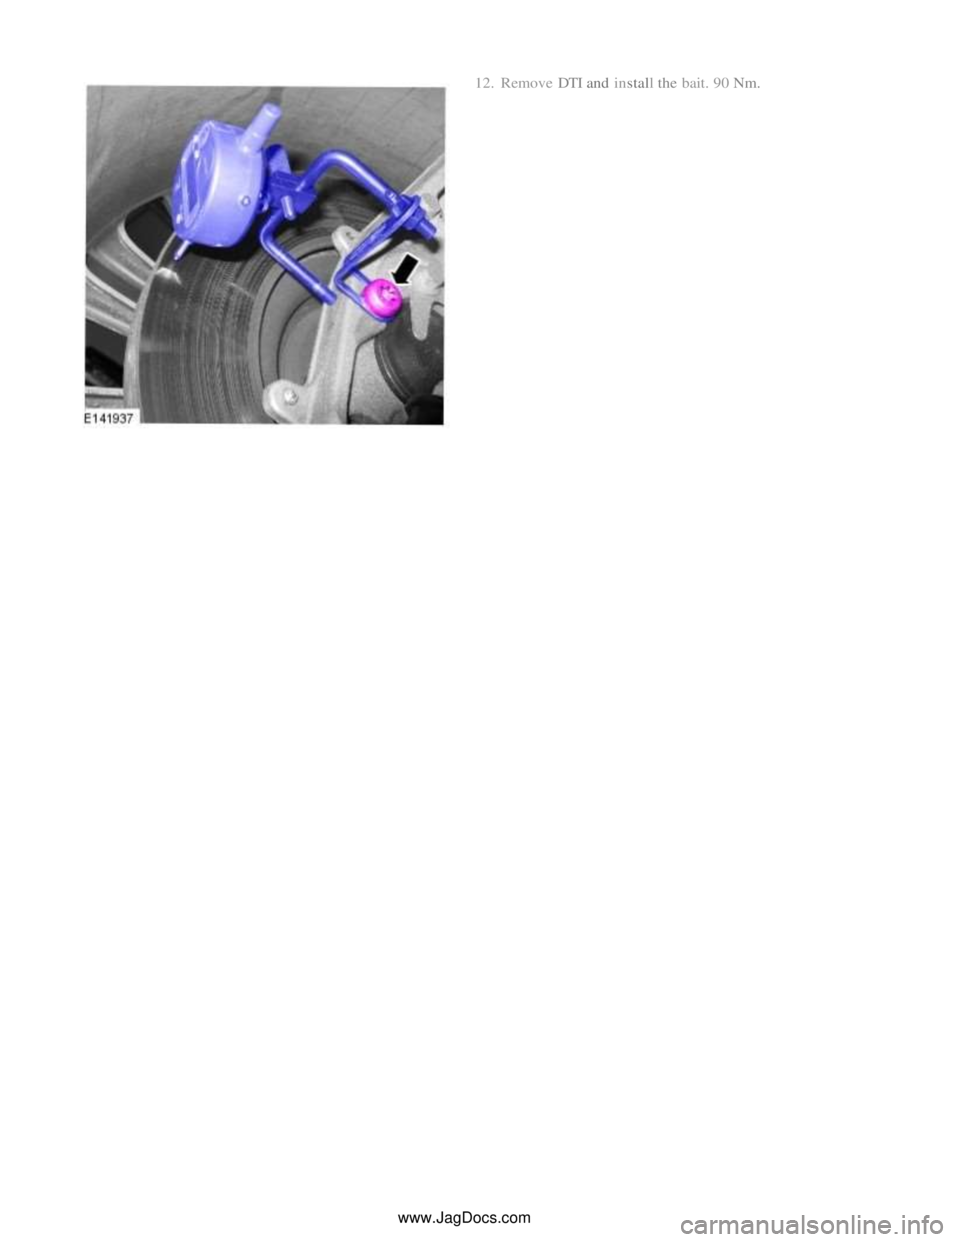
3. Mount the DTI Dial Test Indicator (DTI) gauge to the bolt as shown with tool 100-053.
4. Make sure the DTI is securely mounted.
Page 598 of 3039
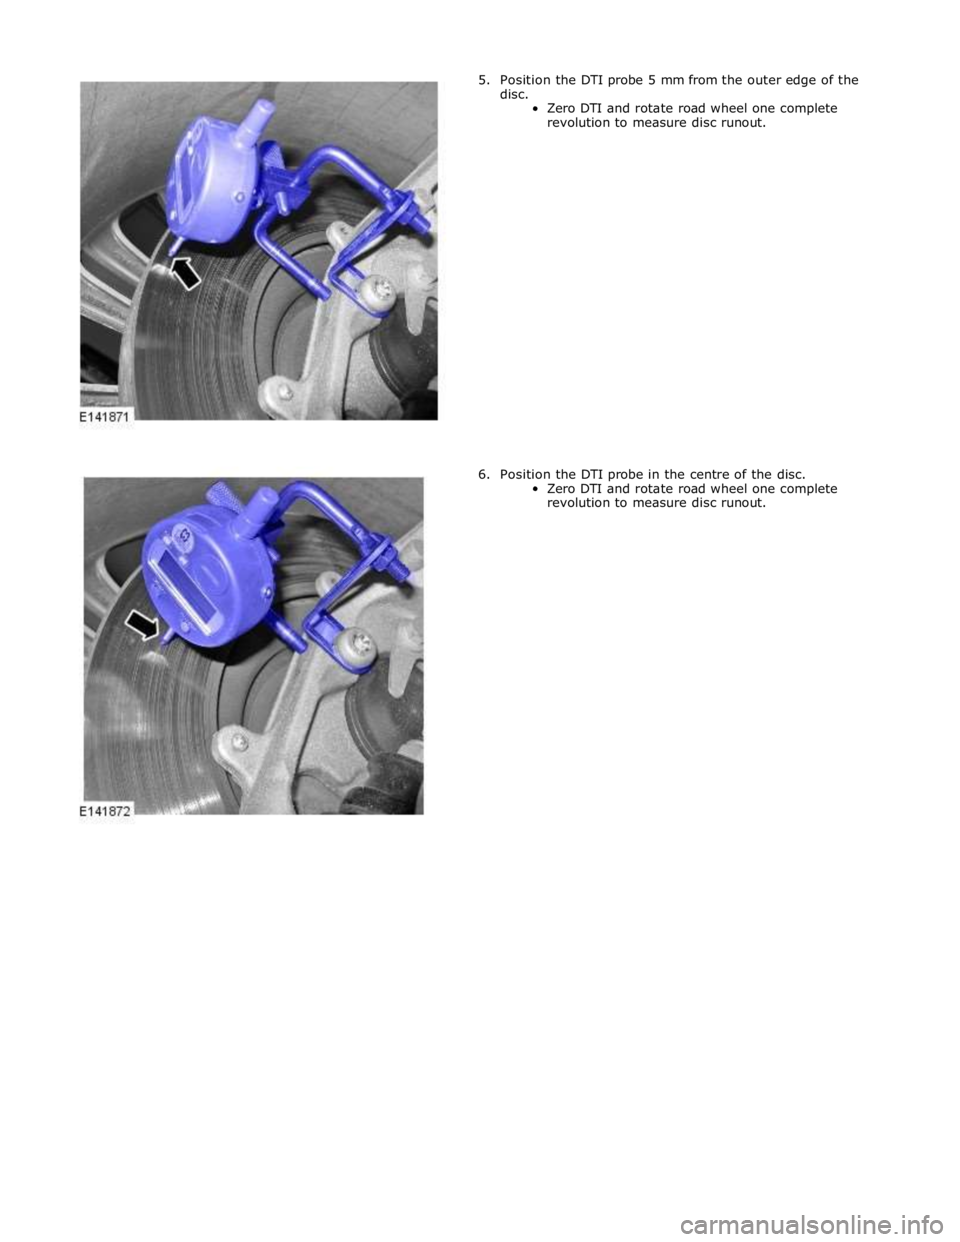
5. Position the DTI probe 5 mm from the outer edge of the
disc.
Zero DTI and rotate road wheel one complete
revolution to measure disc runout.
6. Position the DTI probe in the centre of the disc.
Zero DTI and rotate road wheel one complete
revolution to measure disc runout.
Page 599 of 3039
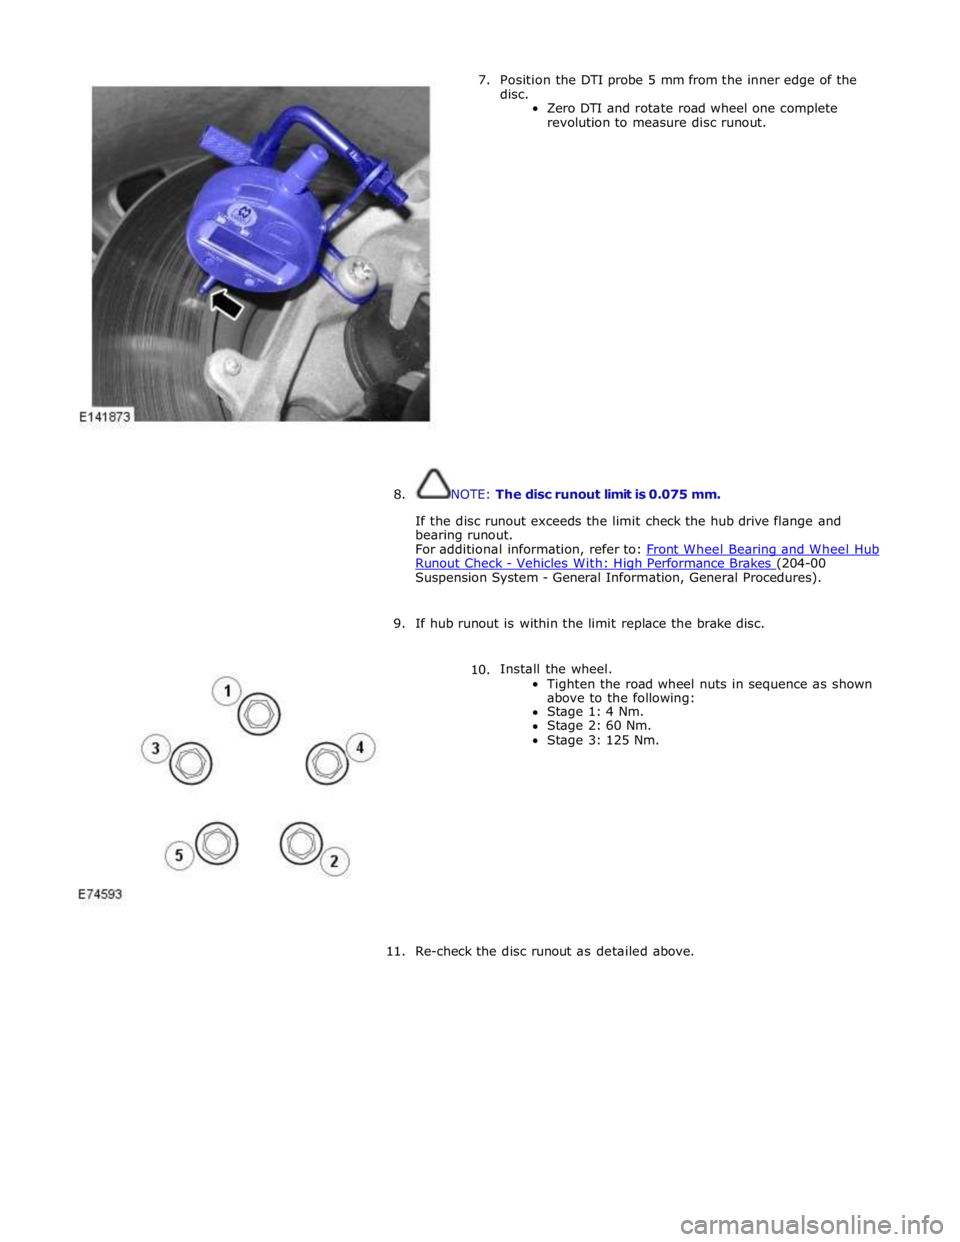
7. Position the DTI probe 5 mm from the inner edge of the
disc.
Zero DTI and rotate road wheel one complete
revolution to measure disc runout.
8. NOTE: The disc runout limit is 0.075 mm.
If the disc runout exceeds the limit check the hub drive flange and
bearing runout.
For additional information, refer to: Front Wheel Bearing and Wheel Hub Runout Check - Vehicles With: High Performance Brakes (204-00 Suspension System - General Information, General Procedures).
9. If hub runout is within the limit replace the brake disc.
10. Install the wheel.
Tighten the road wheel nuts in sequence as shown
above to the following:
Stage 1: 4 Nm.
Stage 2: 60 Nm.
Stage 3: 125 Nm.
11. Re-check the disc runout as detailed above.
Page 600 of 3039
www.JagDocs.com