clock JEEP COMPASS 2020 Owner handbook (in English)
[x] Cancel search | Manufacturer: JEEP, Model Year: 2020, Model line: COMPASS, Model: JEEP COMPASS 2020Pages: 328, PDF Size: 8.85 MB
Page 195 of 328
193
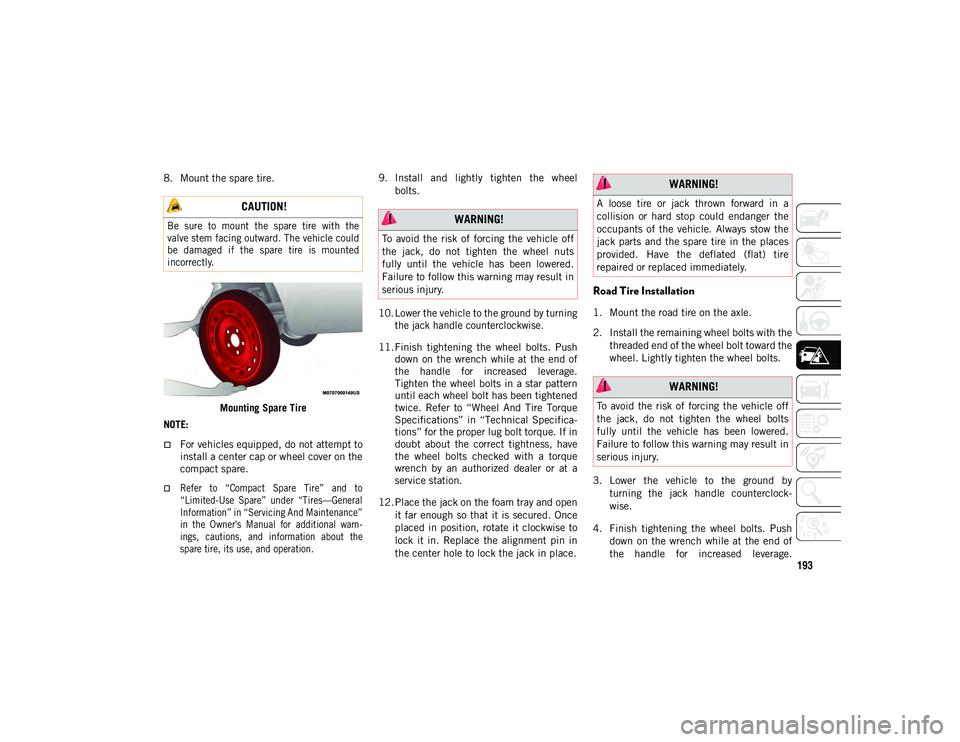
8. Mount the spare tire.Mounting Spare Tire
NOTE:
For vehicles equipped, do not attempt to install a center cap or wheel cover on the
compact spare.
Refer to “Compact Spare Tire” and to
“Limited-Use Spare” under “Tires—General
Information” in “Servicing And Maintenance”
in the Owner's Manual for additional warn- ings, cautions, and information about thespare tire, its use, and operation.
9. Install and lightly tighten the wheel
bolts.
10. Lower the vehicle to the ground by turning the jack handle counterclockwise.
11. Finish tightening the wheel bolts. Push down on the wrench while at the end of
the handle for increased leverage.
Tighten the wheel bolts in a star pattern
until each wheel bolt has been tightened
twice. Refer to “Wheel And Tire Torque
Specifications” in “Technical Specifica -
tions” for the proper lug bolt torque. If in
doubt about the correct tightness, have
the wheel bolts checked with a torque
wrench by an authorized dealer or at a
service station.
12. Place the jack on the foam tray and open it far enough so that it is secured. Once
placed in position, rotate it clockwise to
lock it in. Replace the alignment pin in
the center hole to lock the jack in place.
Road Tire Installation
1. Mount the road tire on the axle.
2. Install the remaining wheel bolts with thethreaded end of the wheel bolt toward the
wheel. Lightly tighten the wheel bolts.
3. Lower the vehicle to the ground by turning the jack handle counterclock -
wise.
4. Finish tightening the wheel bolts. Push down on the wrench while at the end of
the handle for increased leverage.
CAUTION!
Be sure to mount the spare tire with the
valve stem facing outward. The vehicle could
be damaged if the spare tire is mounted
incorrectly.
WARNING!
To avoid the risk of forcing the vehicle off
the jack, do not tighten the wheel nuts
fully until the vehicle has been lowered.
Failure to follow this warning may result in
serious injury.
WARNING!
A loose tire or jack thrown forward in a
collision or hard stop could endanger the
occupants of the vehicle. Always stow the
jack parts and the spare tire in the places
provided. Have the deflated (flat) tire
repaired or replaced immediately.
WARNING!
To avoid the risk of forcing the vehicle off
the jack, do not tighten the wheel bolts
fully until the vehicle has been lowered.
Failure to follow this warning may result in
serious injury.
2020_JEEP_M6_UG_UK.book Page 193
Page 265 of 328
263
UCONNECT 3 WITH 5–INCH
DISPLAY — IF EQUIPPED
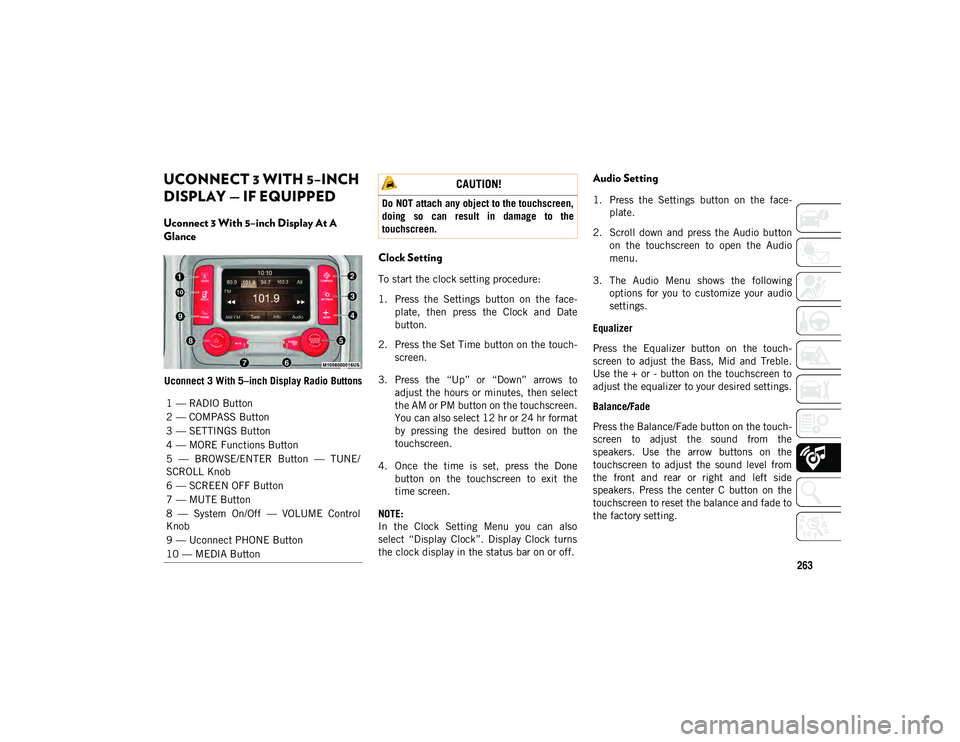
Uconnect 3 With 5–inch Display At A
Glance
Uconnect 3 With 5–inch Display Radio Buttons
Clock Setting
To start the clock setting procedure:
1. Press the Settings button on the face-
plate, then press the Clock and Date
button.
2. Press the Set Time button on the touch -
screen.
3. Press the “Up” or “Down” arrows to adjust the hours or minutes, then select
the AM or PM button on the touchscreen.
You can also select 12 hr or 24 hr format
by pressing the desired button on the
touchscreen.
4. Once the time is set, press the Done button on the touchscreen to exit the
time screen.
NOTE:
In the Clock Setting Menu you can also
select “Display Clock”. Display Clock turns
the clock display in the status bar on or off.
Audio Setting
1. Press the Settings button on the face -
plate.
2. Scroll down and press the Audio button on the touchscreen to open the Audio
menu.
3. The Audio Menu shows the following options for you to customize your audio
settings.
Equalizer
Press the Equalizer button on the touch -
screen to adjust the Bass, Mid and Treble.
Use the + or - button on the touchscreen to
adjust the equalizer to your desired settings.
Balance/Fade
Press the Balance/Fade button on the touch -
screen to adjust the sound from the
speakers. Use the arrow buttons on the
touchscreen to adjust the sound level from
the front and rear or right and left side
speakers. Press the center C button on the
touchscreen to reset the balance and fade to
the factory setting.
1 — RADIO Button
2 — COMPASS Button
3 — SETTINGS Button
4 — MORE Functions Button
5 — BROWSE/ENTER Button — TUNE/
SCROLL Knob
6 — SCREEN OFF Button
7 — MUTE Button
8 — System On/Off — VOLUME Control
Knob
9 — Uconnect PHONE Button
10 — MEDIA Button
CAUTION!
Do NOT attach any object to the touchscreen,
doing so can result in damage to the
touchscreen.
2020_JEEP_M6_UG_UK.book Page 263
Page 269 of 328
267
Apps — If Equipped
To access the Apps, Press the More button,
and the press the Apps button to browse the
list of applications:
EcoDrive
MyCar
TuneIn
Deezer
Reuters
Twitter
Facebook Check-In, and many more.
UCONNECT 4 WITH 7-INCH
DISPLAY
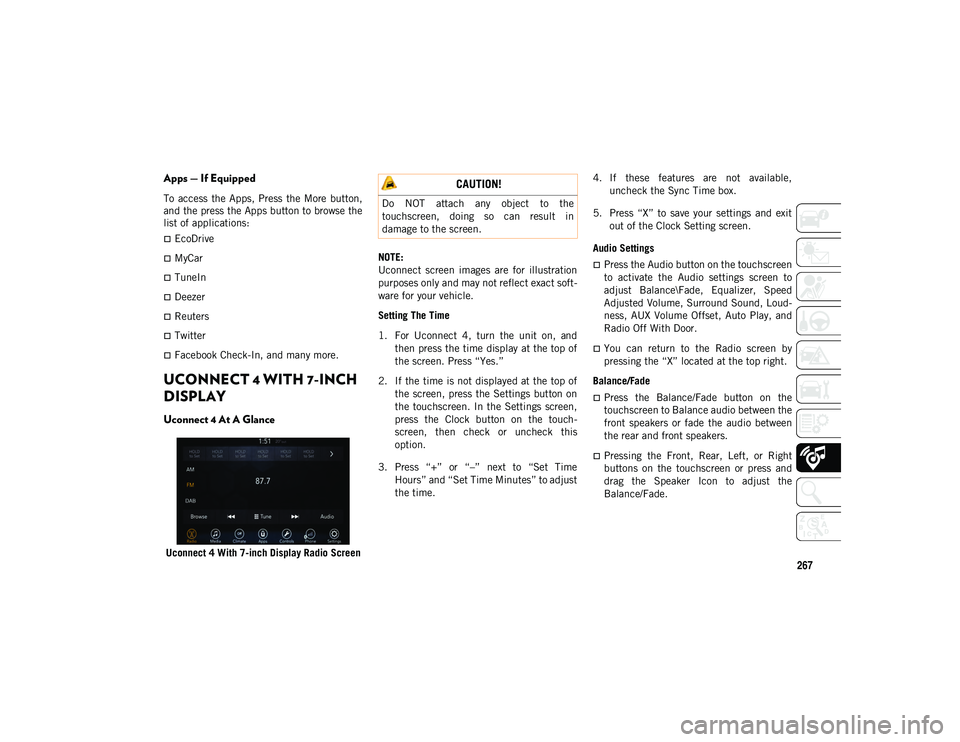
Uconnect 4 At A Glance
Uconnect 4 With 7-inch Display Radio ScreenNOTE:
Uconnect screen images are for illustration
purposes only and may not reflect exact soft
-
ware for your vehicle.
Setting The Time
1. For Uconnect 4, turn the unit on, and then press the time display at the top of
the screen. Press “Yes.”
2. If the time is not displayed at the top of the screen, press the Settings button on
the touchscreen. In the Settings screen,
press the Clock button on the touch -
screen, then check or uncheck this
option.
3. Press “+” or “–” next to “Set Time Hours” and “Set Time Minutes” to adjust
the time. 4. If these features are not available,
uncheck the Sync Time box.
5. Press “X” to save your settings and exit out of the Clock Setting screen.
Audio Settings
Press the Audio button on the touchscreen
to activate the Audio settings screen to
adjust Balance\Fade, Equalizer, Speed
Adjusted Volume, Surround Sound, Loud -
ness, AUX Volume Offset, Auto Play, and
Radio Off With Door.
You can return to the Radio screen by
pressing the “X” located at the top right.
Balance/Fade
Press the Balance/Fade button on the
touchscreen to Balance audio between the
front speakers or fade the audio between
the rear and front speakers.
Pressing the Front, Rear, Left, or Right
buttons on the touchscreen or press and
drag the Speaker Icon to adjust the
Balance/Fade.
CAUTION!
Do NOT attach any object to the
touchscreen, doing so can result in
damage to the screen.
2020_JEEP_M6_UG_UK.book Page 267
Page 276 of 328
MULTIMEDIA
274
UCONNECT 4C/4C NAV
WITH 8.4–INCH DISPLAY
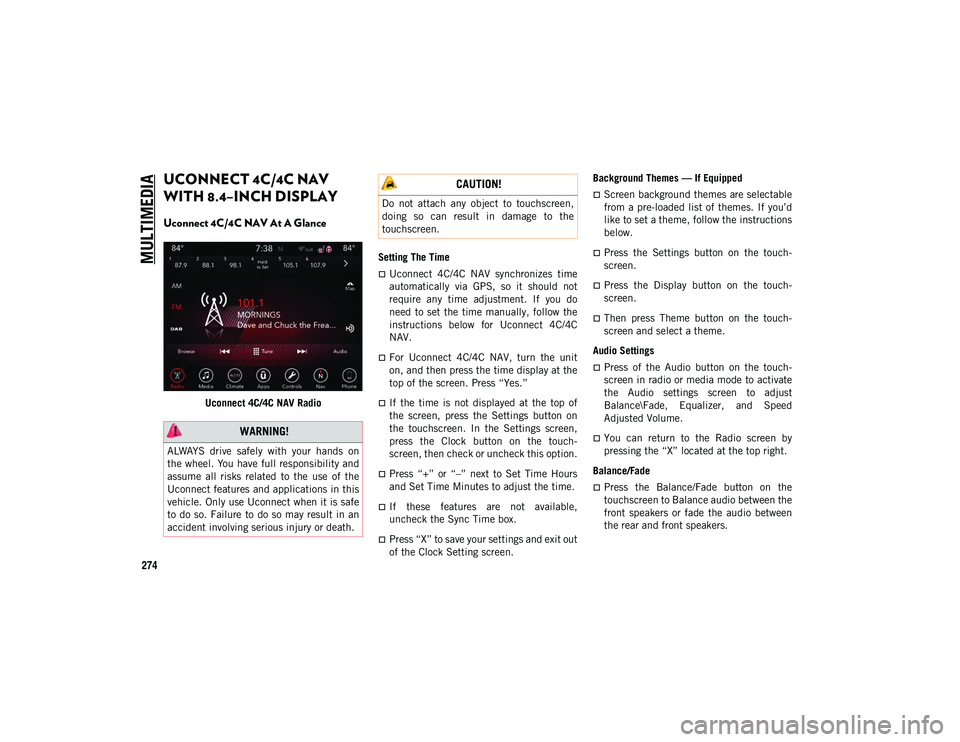
Uconnect 4C/4C NAV At A Glance
Uconnect 4C/4C NAV RadioSetting The Time
Uconnect 4C/4C NAV synchronizes time
automatically via GPS, so it should not
require any time adjustment. If you do
need to set the time manually, follow the
instructions below for Uconnect 4C/4C
NAV.
For Uconnect 4C/4C NAV, turn the unit
on, and then press the time display at the
top of the screen. Press “Yes.”
If the time is not displayed at the top of
the screen, press the Settings button on
the touchscreen. In the Settings screen,
press the Clock button on the touch
-
screen, then check or uncheck this option.
Press “+” or “–” next to Set Time Hours
and Set Time Minutes to adjust the time.
If these features are not available,
uncheck the Sync Time box.
Press “X” to save your settings and exit out
of the Clock Setting screen. Background Themes — If Equipped
Screen background themes are selectable
from a pre-loaded list of themes. If you’d
like to set a theme, follow the instructions
below.
Press the Settings button on the touch
-
screen.
Press the Display button on the touch -
screen.
Then press Theme button on the touch -
screen and select a theme.
Audio Settings
Press of the Audio button on the touch -
screen in radio or media mode to activate
the Audio settings screen to adjust
Balance\Fade, Equalizer, and Speed
Adjusted Volume.
You can return to the Radio screen by
pressing the “X” located at the top right.
Balance/Fade
Press the Balance/Fade button on the
touchscreen to Balance audio between the
front speakers or fade the audio between
the rear and front speakers.
WARNING!
ALWAYS drive safely with your hands on
the wheel. You have full responsibility and
assume all risks related to the use of the
Uconnect features and applications in this
vehicle. Only use Uconnect when it is safe
to do so. Failure to do so may result in an
accident involving serious injury or death.
CAUTION!
Do not attach any object to touchscreen,
doing so can result in damage to the
touchscreen.
2020_JEEP_M6_UG_UK.book Page 274
Page 286 of 328
MULTIMEDIA
284
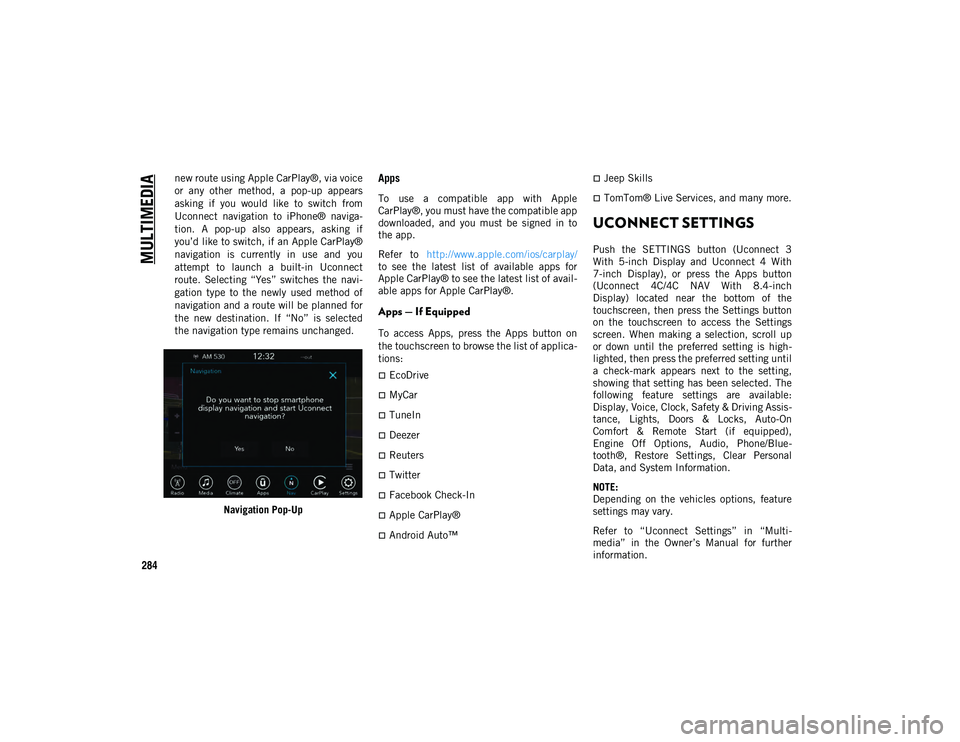
new route using Apple CarPlay®, via voice
or any other method, a pop-up appears
asking if you would like to switch from
Uconnect navigation to iPhone® naviga-
tion. A pop-up also appears, asking if
you’d like to switch, if an Apple CarPlay®
navigation is currently in use and you
attempt to launch a built-in Uconnect
route. Selecting “Yes” switches the navi-
gation type to the newly used method of
navigation and a route will be planned for
the new destination. If “No” is selected
the navigation type remains unchanged.
Navigation Pop-UpApps
To use a compatible app with Apple
CarPlay®, you must have the compatible app
downloaded, and you must be signed in to
the app.
Refer to http://www.apple.com/ios/carplay/
to see the latest list of available apps for
Apple CarPlay® to see the latest list of avail -
able apps for Apple CarPlay®.
Apps — If Equipped
To access Apps, press the Apps button on
the touchscreen to browse the list of applica -
tions:
EcoDrive
MyCar
TuneIn
Deezer
Reuters
Twitter
Facebook Check-In
Apple CarPlay®
Android Auto™
Jeep Skills
TomTom® Live Services, and many more.
UCONNECT SETTINGS
Push the SETTINGS button (Uconnect 3
With 5-inch Display and Uconnect 4 With
7-inch Display), or press the Apps button
(Uconnect 4C/4C NAV With 8.4-inch
Display) located near the bottom of the
touchscreen, then press the Settings button
on the touchscreen to access the Settings
screen. When making a selection, scroll up
or down until the preferred setting is high -
lighted, then press the preferred setting until
a check-mark appears next to the setting,
showing that setting has been selected. The
following feature settings are available:
Display, Voice, Clock, Safety & Driving Assis -
tance, Lights, Doors & Locks, Auto-On
Comfort & Remote Start (if equipped),
Engine Off Options, Audio, Phone/Blue -
tooth®, Restore Settings, Clear Personal
Data, and System Information.
NOTE:
Depending on the vehicles options, feature
settings may vary.
Refer to “Uconnect Settings” in “Multi -
media” in the Owner’s Manual for further
information.
2020_JEEP_M6_UG_UK.book Page 284
Page 287 of 328
285
STEERING WHEEL AUDIO
CONTROLS
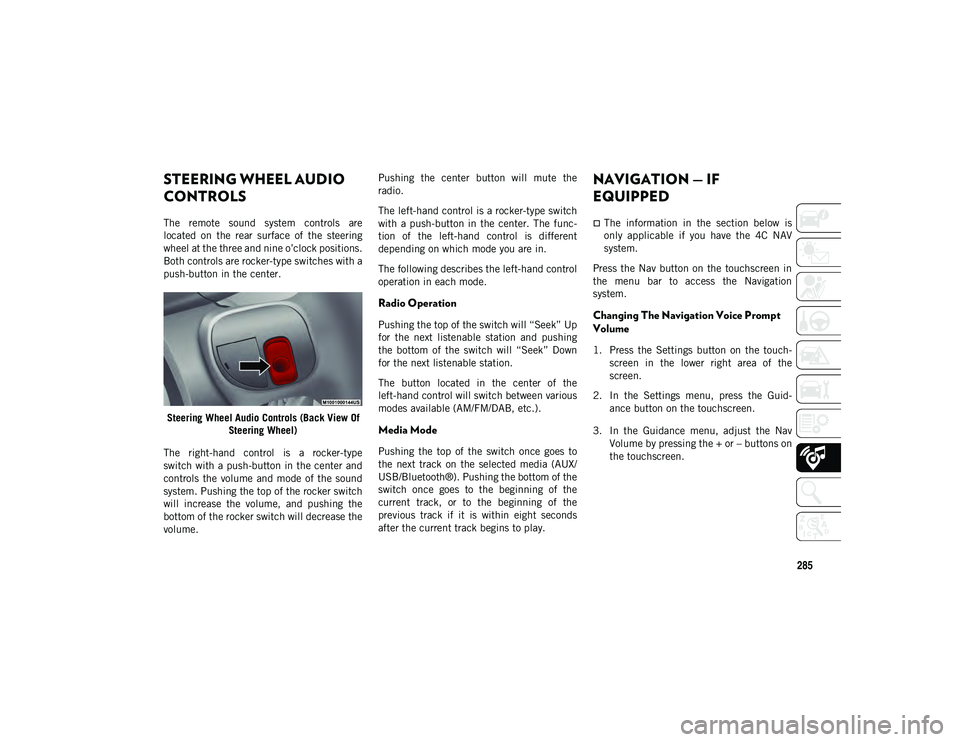
The remote sound system controls are
located on the rear surface of the steering
wheel at the three and nine o’clock positions.
Both controls are rocker-type switches with a
push-button in the center.Steering Wheel Audio Controls (Back View Of Steering Wheel)
The right-hand control is a rocker-type
switch with a push-button in the center and
controls the volume and mode of the sound
system. Pushing the top of the rocker switch
will increase the volume, and pushing the
bottom of the rocker switch will decrease the
volume. Pushing the center button will mute the
radio.
The left-hand control is a rocker-type switch
with a push-button in the center. The func
-
tion of the left-hand control is different
depending on which mode you are in.
The following describes the left-hand control
operation in each mode.
Radio Operation
Pushing the top of the switch will “Seek” Up
for the next listenable station and pushing
the bottom of the switch will “Seek” Down
for the next listenable station.
The button located in the center of the
left-hand control will switch between various
modes available (AM/FM/DAB, etc.).
Media Mode
Pushing the top of the switch once goes to
the next track on the selected media (AUX/
USB/Bluetooth®). Pushing the bottom of the
switch once goes to the beginning of the
current track, or to the beginning of the
previous track if it is within eight seconds
after the current track begins to play.
NAVIGATION — IF
EQUIPPED
The information in the section below is
only applicable if you have the 4C NAV
system.
Press the Nav button on the touchscreen in
the menu bar to access the Navigation
system.
Changing The Navigation Voice Prompt
Volume
1. Press the Settings button on the touch -
screen in the lower right area of the
screen.
2. In the Settings menu, press the Guid -
ance button on the touchscreen.
3. In the Guidance menu, adjust the Nav Volume by pressing the + or – buttons on
the touchscreen.
2020_JEEP_M6_UG_UK.book Page 285
Page 320 of 328
318
INDEX
C
Camera, Rear .................................... 164
Capacities, Fluid................................ 254
Caps, FillerFuel .............................................. 165
Oil (Engine) ................................... 222
Radiator (Coolant Pressure) ............. 230
Car Washes ....................................... 241
Carbon Monoxide Warning .......... 128 , 252
Certification Label ............................. 171
Chains, Tire ...................................... 239
Change Oil Indicator ............................ 56
Changing A Flat Tire .................. 189 , 232
Checking Your Vehicle For Safety ........ 128
Checks, Safety .................................. 128
Child Safety Locks ............................... 23
Cleaning Windshield Wiper Blades ................ 228
Climate Control ................................... 36
Clock Settings ................................... 263
Compact Spare Tire ........................... 238
Computer, Trip/Travel ........................... 59
Cooling Pressure Cap (Radiator Cap) .... 230
Cooling System .................................. 229 Coolant Level ................................. 229
Cooling Capacity ............................ 254Pressure Cap ................................. 230
Radiator Cap.................................. 230
Selection Of Coolant (Antifreeze) ........................ 254 , 255 Cruise Light ............................. 69
, 70 , 71
Customer Assistance .......................... 305
Customer Programmable Features ....... 284
Cybersecurity .................................... 262
D
Daytime Running Lights ..................31 , 32
Dealer Service ................................... 227
Defroster, Windshield......................... 129
Diagnostic System, Onboard ................. 71
Diesel Display Messages ............................. 57
Diesel Fuel ....................................... 252
Diesel Fuel Requirements .................. 252
Dimmer Switch Headlight ...................................31 , 32
Dipsticks Oil (Engine) ................................... 225
Disabled Vehicle Towing .................... 207
Do Not Disturb ...........................293 , 302
Door Ajar .......................................60 , 61
Door Ajar Light ...............................60 , 61
Drag And Drop Menu ......................... 268
Driver’s Seat Back Tilt ......................... 24
E
Electric Brake Control System............... 73 Anti-Lock Brake System.................... 72Traction Control System.................... 80
Electric Parking Brake ....................... 134 Electrical Outlet, Auxiliary (Power
Outlet) ................................................52
Electronic Speed Control (Cruise
Control) .............................................150
Electronic Stability Control (ESC) ..........74
Electronic Throttle Control Warning
Light ...................................................61
Emergency Gas Can Refueling .............204
Emergency, In Case Of Hazard Warning Flasher ..................177
Jacking .................................. 189 , 232
Jump Starting ................................202
Tow Hooks .....................................209
Towing ..........................................207
Emissions..........................................260
Engine ..............................................222 Checking Oil Level ..........................225
Coolant (Antifreeze) ........................255
Cooling ..........................................229Exhaust Gas Caution ............... 128 , 252
Jump Starting ................................202
Oil ........................................ 254 , 255
Oil Filler Cap ..................................222
Oil Selection ..................................254
Overheating....................................204
Starting .........................................131
Enhanced Accident Response
Feature ..................................... 111 , 211
Ethanol .............................................250
Exhaust Gas Cautions ................. 128 , 252
2020_JEEP_M6_UG_UK.book Page 318