JEEP RENEGADE 2018 Owner handbook (in English)
Manufacturer: JEEP, Model Year: 2018, Model line: RENEGADE, Model: JEEP RENEGADE 2018Pages: 356, PDF Size: 6.11 MB
Page 31 of 356
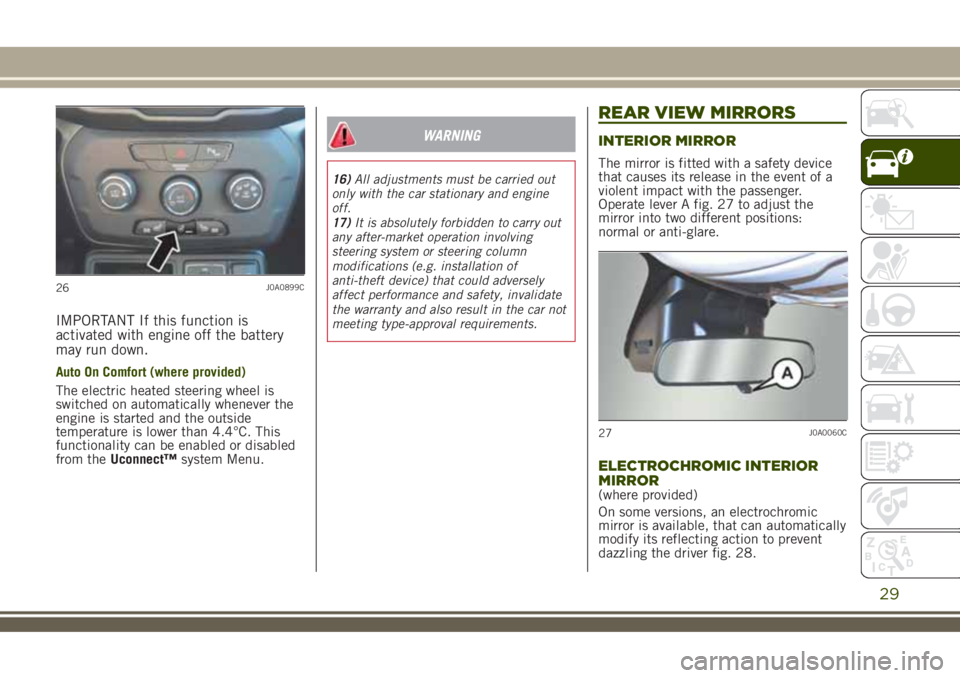
IMPORTANT If this function is
activated with engine off the battery
may run down.
Auto On Comfort (where provided)
The electric heated steering wheel is
switched on automatically whenever the
engine is started and the outside
temperature is lower than 4.4°C. This
functionality can be enabled or disabled
from theUconnect™system Menu.
WARNING
16)All adjustments must be carried out
only with the car stationary and engine
off.
17)It is absolutely forbidden to carry out
any after-market operation involving
steering system or steering column
modifications (e.g. installation of
anti-theft device) that could adversely
affect performance and safety, invalidate
the warranty and also result in the car not
meeting type-approval requirements.
REAR VIEW MIRRORS
INTERIOR MIRROR
The mirror is fitted with a safety device
that causes its release in the event of a
violent impact with the passenger.
Operate lever A fig. 27 to adjust the
mirror into two different positions:
normal or anti-glare.
ELECTROCHROMIC INTERIOR
MIRROR
(where provided)
On some versions, an electrochromic
mirror is available, that can automatically
modify its reflecting action to prevent
dazzling the driver fig. 28.
26J0A0899C
27J0A0060C
29
Page 32 of 356
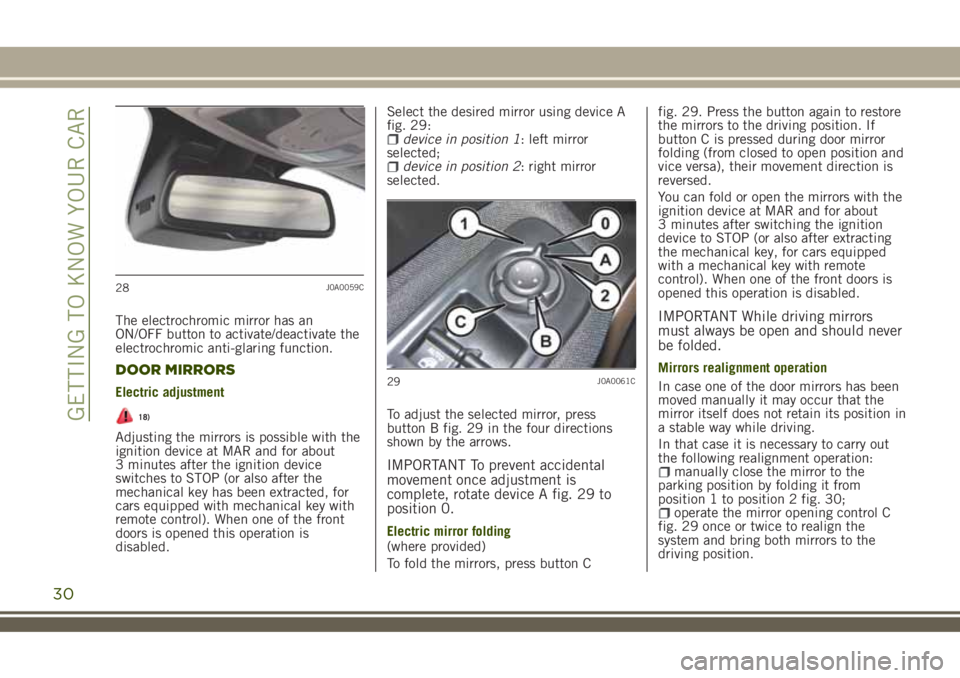
The electrochromic mirror has an
ON/OFF button to activate/deactivate the
electrochromic anti-glaring function.
DOOR MIRRORS
Electric adjustment
18)
Adjusting the mirrors is possible with the
ignition device at MAR and for about
3 minutes after the ignition device
switches to STOP (or also after the
mechanical key has been extracted, for
cars equipped with mechanical key with
remote control). When one of the front
doors is opened this operation is
disabled.Select the desired mirror using device A
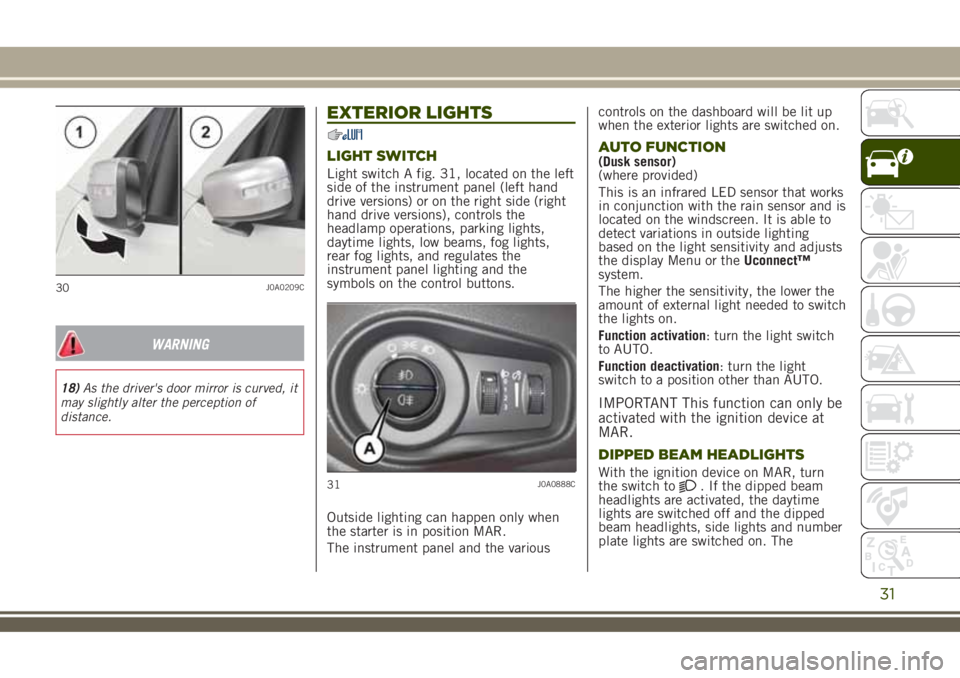
fig. 29:
device in position 1: left mirror
selected;
device in position 2: right mirror
selected.
To adjust the selected mirror, press
button B fig. 29 in the four directions
shown by the arrows.
IMPORTANT To prevent accidental
movement once adjustment is
complete, rotate device A fig. 29 to
position 0.
Electric mirror folding
(where provided)
To fold the mirrors, press button Cfig. 29. Press the button again to restore
the mirrors to the driving position. If
button C is pressed during door mirror
folding (from closed to open position and
vice versa), their movement direction is
reversed.
You can fold or open the mirrors with the
ignition device at MAR and for about
3 minutes after switching the ignition
device to STOP (or also after extracting
the mechanical key, for cars equipped
with a mechanical key with remote
control). When one of the front doors is
opened this operation is disabled.
IMPORTANT While driving mirrors
must always be open and should never
be folded.
Mirrors realignment operation
In case one of the door mirrors has been
moved manually it may occur that the
mirror itself does not retain its position in
a stable way while driving.
In that case it is necessary to carry out
the following realignment operation:
manually close the mirror to the
parking position by folding it from
position 1 to position 2 fig. 30;
operate the mirror opening control C
fig. 29 once or twice to realign the
system and bring both mirrors to the
driving position.
28J0A0059C
29J0A0061C
30
GETTING TO KNOW YOUR CAR
Page 33 of 356
WARNING
18)As the driver's door mirror is curved, it
may slightly alter the perception of
distance.
EXTERIOR LIGHTS
LIGHT SWITCH
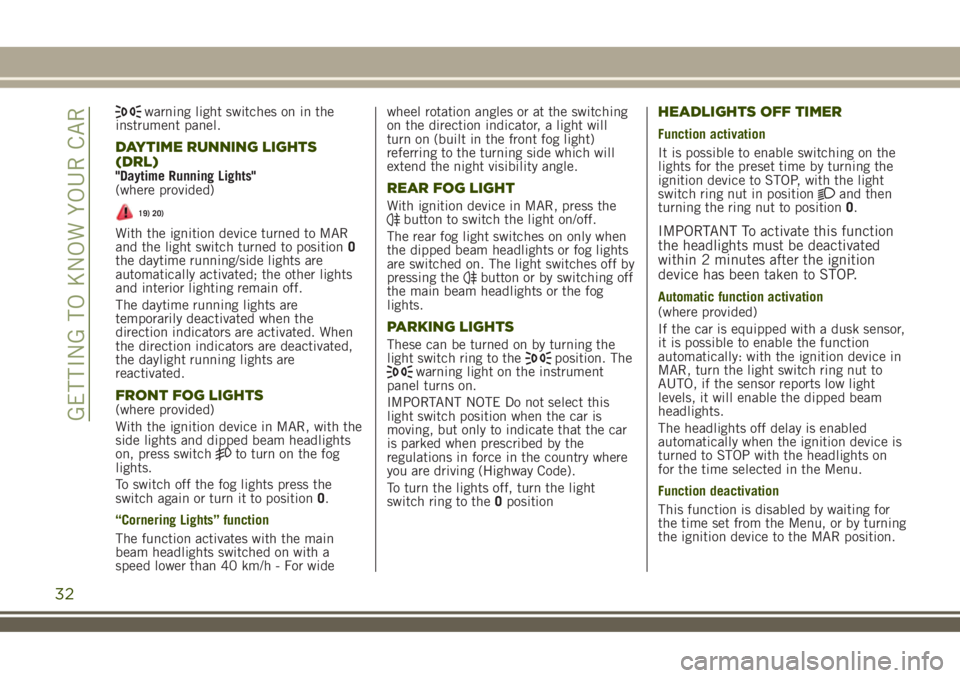
Light switch A fig. 31, located on the left
side of the instrument panel (left hand
drive versions) or on the right side (right
hand drive versions), controls the
headlamp operations, parking lights,
daytime lights, low beams, fog lights,
rear fog lights, and regulates the
instrument panel lighting and the
symbols on the control buttons.
Outside lighting can happen only when
the starter is in position MAR.
The instrument panel and the variouscontrols on the dashboard will be lit up
when the exterior lights are switched on.
AUTO FUNCTION(Dusk sensor)
(where provided)
This is an infrared LED sensor that works
in conjunction with the rain sensor and is
located on the windscreen. It is able to
detect variations in outside lighting
based on the light sensitivity and adjusts
the display Menu or theUconnect™
system.
The higher the sensitivity, the lower the
amount of external light needed to switch
the lights on.
Function activation: turn the light switch
to AUTO.
Function deactivation: turn the light
switch to a position other than AUTO.
IMPORTANT This function can only be
activated with the ignition device at
MAR.
DIPPED BEAM HEADLIGHTS
With the ignition device on MAR, turn
the switch to. If the dipped beam
headlights are activated, the daytime
lights are switched off and the dipped
beam headlights, side lights and number
plate lights are switched on. The
30J0A0209C
31J0A0888C
31
Page 34 of 356
warning light switches on in the
instrument panel.
DAYTIME RUNNING LIGHTS
(DRL)
"Daytime Running Lights"
(where provided)
19) 20)
With the ignition device turned to MAR
and the light switch turned to positionO
the daytime running/side lights are
automatically activated; the other lights
and interior lighting remain off.
The daytime running lights are
temporarily deactivated when the
direction indicators are activated. When
the direction indicators are deactivated,
the daylight running lights are
reactivated.
FRONT FOG LIGHTS(where provided)
With the ignition device in MAR, with the
side lights and dipped beam headlights
on, press switch
to turn on the fog
lights.
To switch off the fog lights press the
switch again or turn it to positionO.
“Cornering Lights” function
The function activates with the main
beam headlights switched on with a
speed lower than 40 km/h - For widewheel rotation angles or at the switching
on the direction indicator, a light will
turn on (built in the front fog light)
referring to the turning side which will
extend the night visibility angle.
REAR FOG LIGHT
With ignition device in MAR, press thebutton to switch the light on/off.
The rear fog light switches on only when
the dipped beam headlights or fog lights
are switched on. The light switches off by
pressing the
button or by switching off
the main beam headlights or the fog
lights.
PARKING LIGHTS
These can be turned on by turning the
light switch ring to theposition. Thewarning light on the instrument
panel turns on.
IMPORTANT NOTE Do not select this
light switch position when the car is
moving, but only to indicate that the car
is parked when prescribed by the
regulations in force in the country where
you are driving (Highway Code).
To turn the lights off, turn the light
switch ring to theOposition
HEADLIGHTS OFF TIMER
Function activation
It is possible to enable switching on the
lights for the preset time by turning the
ignition device to STOP, with the light
switch ring nut in position
and then
turning the ring nut to positionO.
IMPORTANT To activate this function
the headlights must be deactivated
within 2 minutes after the ignition
device has been taken to STOP.
Automatic function activation
(where provided)
If the car is equipped with a dusk sensor,
it is possible to enable the function
automatically: with the ignition device in
MAR, turn the light switch ring nut to
AUTO, if the sensor reports low light
levels, it will enable the dipped beam
headlights.
The headlights off delay is enabled
automatically when the ignition device is
turned to STOP with the headlights on
for the time selected in the Menu.
Function deactivation
This function is disabled by waiting for
the time set from the Menu, or by turning
the ignition device to the MAR position.
32
GETTING TO KNOW YOUR CAR
Page 35 of 356
If the headlights are switched off before
the ignition, they will switch off normally.
MAIN BEAM HEADLIGHTS
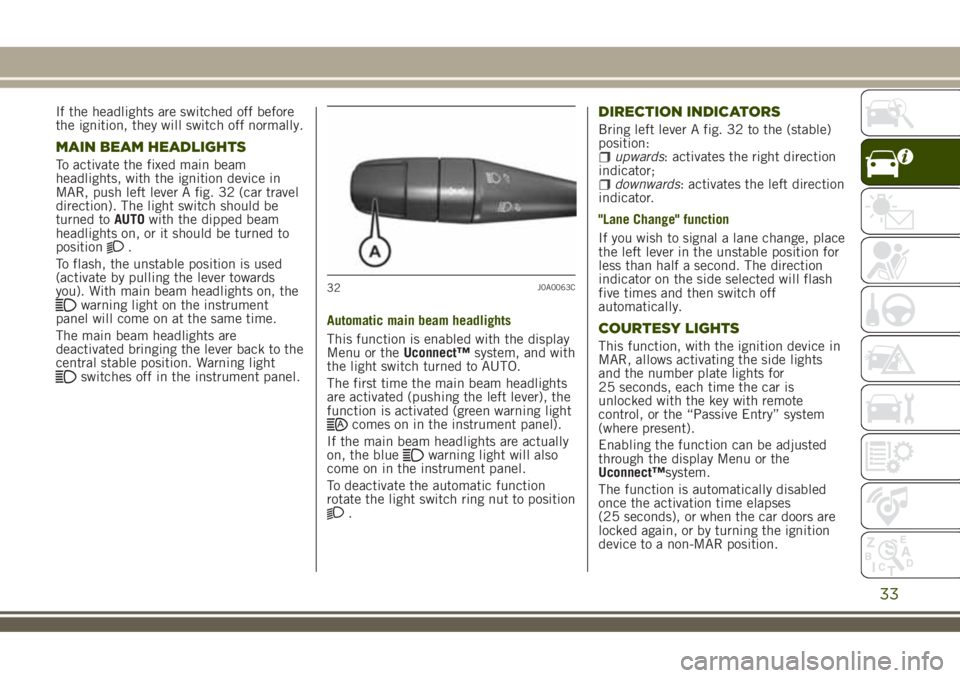
To activate the fixed main beam
headlights, with the ignition device in
MAR, push left lever A fig. 32 (car travel
direction). The light switch should be
turned toAUTOwith the dipped beam
headlights on, or it should be turned to
position
.
To flash, the unstable position is used
(activate by pulling the lever towards
you). With main beam headlights on, the
warning light on the instrument
panel will come on at the same time.
The main beam headlights are
deactivated bringing the lever back to the
central stable position. Warning light
switches off in the instrument panel.Automatic main beam headlights
This function is enabled with the display
Menu or theUconnect™system, and with
the light switch turned to AUTO.
The first time the main beam headlights
are activated (pushing the left lever), the
function is activated (green warning light
comes on in the instrument panel).
If the main beam headlights are actually
on, the blue
warning light will also
come on in the instrument panel.
To deactivate the automatic function
rotate the light switch ring nut to position
.
DIRECTION INDICATORS
Bring left lever A fig. 32 to the (stable)
position:
upwards: activates the right direction
indicator;
downwards: activates the left direction
indicator.
"Lane Change" function
If you wish to signal a lane change, place
the left lever in the unstable position for
less than half a second. The direction
indicator on the side selected will flash
five times and then switch off
automatically.
COURTESY LIGHTS
This function, with the ignition device in
MAR, allows activating the side lights
and the number plate lights for
25 seconds, each time the car is
unlocked with the key with remote
control, or the “Passive Entry” system
(where present).
Enabling the function can be adjusted
through the display Menu or the
Uconnect™system.
The function is automatically disabled
once the activation time elapses
(25 seconds), or when the car doors are
locked again, or by turning the ignition
device to a non-MAR position.
32J0A0063C
33
Page 36 of 356
HEADLIGHT REGULATION
Headlight corrector
It only works with the starter device in
position MAR and the low beams on.
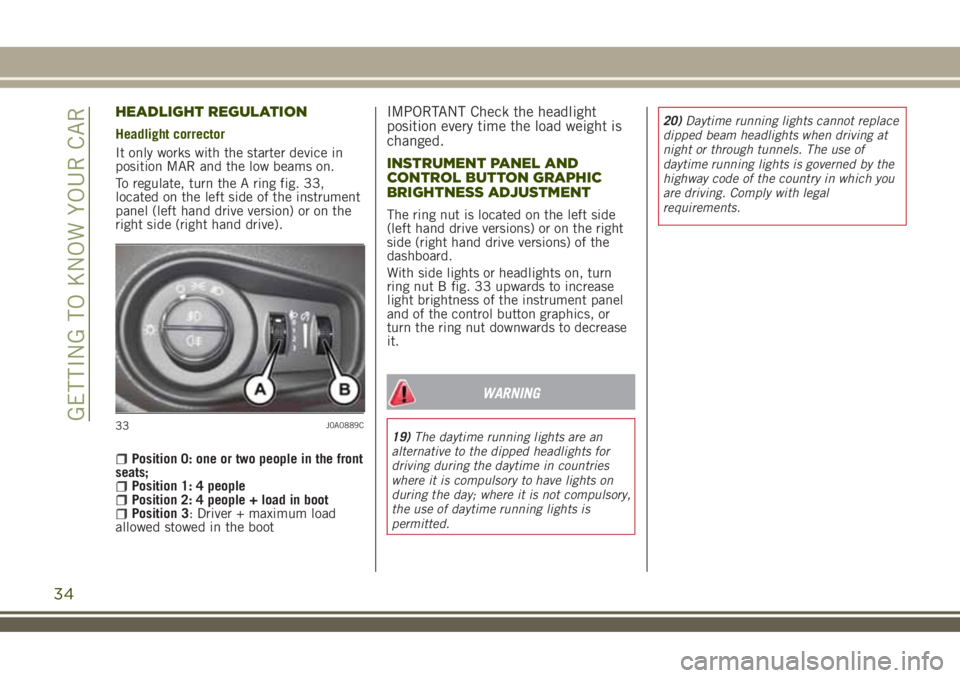
To regulate, turn the A ring fig. 33,
located on the left side of the instrument
panel (left hand drive version) or on the
right side (right hand drive).
Position 0: one or two people in the front
seats;
Position 1: 4 peoplePosition 2: 4 people + load in bootPosition 3: Driver + maximum load
allowed stowed in the boot
IMPORTANT Check the headlight
position every time the load weight is
changed.
INSTRUMENT PANEL AND
CONTROL BUTTON GRAPHIC
BRIGHTNESS ADJUSTMENT
The ring nut is located on the left side
(left hand drive versions) or on the right
side (right hand drive versions) of the
dashboard.
With side lights or headlights on, turn
ring nut B fig. 33 upwards to increase
light brightness of the instrument panel
and of the control button graphics, or
turn the ring nut downwards to decrease
it.
WARNING
19)The daytime running lights are an
alternative to the dipped headlights for
driving during the daytime in countries
where it is compulsory to have lights on
during the day; where it is not compulsory,
the use of daytime running lights is
permitted.20)Daytime running lights cannot replace
dipped beam headlights when driving at
night or through tunnels. The use of
daytime running lights is governed by the
highway code of the country in which you
are driving. Comply with legal
requirements.33J0A0889C
34
GETTING TO KNOW YOUR CAR
Page 37 of 356
INTERIOR LIGHTS
FRONT CEILING LIGHT
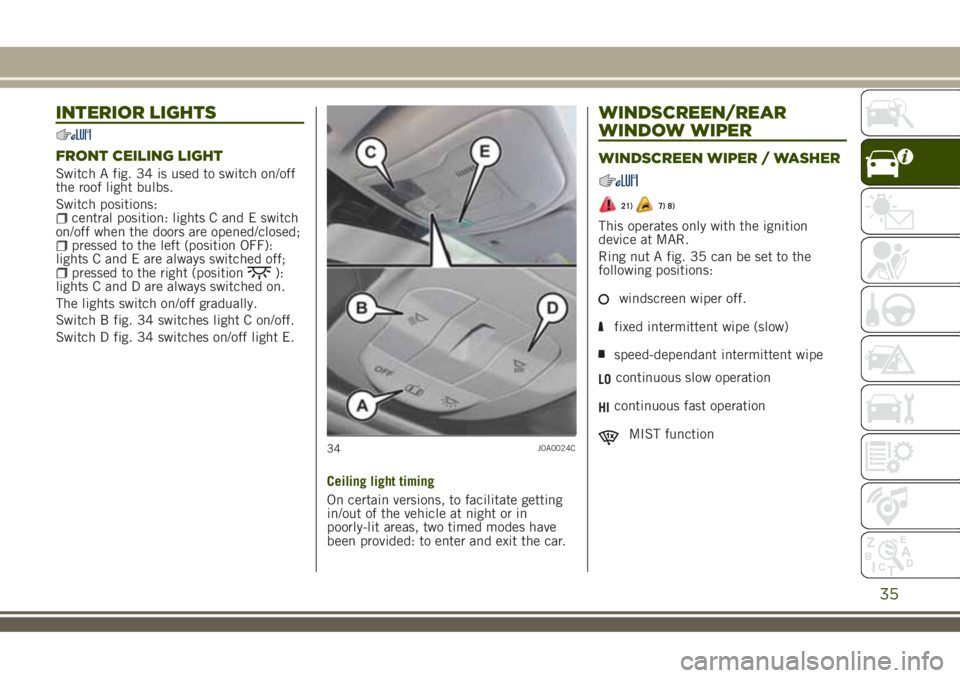
Switch A fig. 34 is used to switch on/off
the roof light bulbs.
Switch positions:
central position: lights C and E switch
on/off when the doors are opened/closed;
pressed to the left (position OFF):
lights C and E are always switched off;
pressed to the right (position):
lights C and D are always switched on.
The lights switch on/off gradually.
Switch B fig. 34 switches light C on/off.
Switch D fig. 34 switches on/off light E.
Ceiling light timing
On certain versions, to facilitate getting
in/out of the vehicle at night or in
poorly-lit areas, two timed modes have
been provided: to enter and exit the car.
WINDSCREEN/REAR
WINDOW WIPER
WINDSCREEN WIPER / WASHER
21)7) 8)
This operates only with the ignition
device at MAR.
Ring nut A fig. 35 can be set to the
following positions:
windscreen wiper off.
fixed intermittent wipe (slow)
speed-dependant intermittent wipe
LOcontinuous slow operation
HIcontinuous fast operation
MIST function34J0A0024C
35
Page 38 of 356
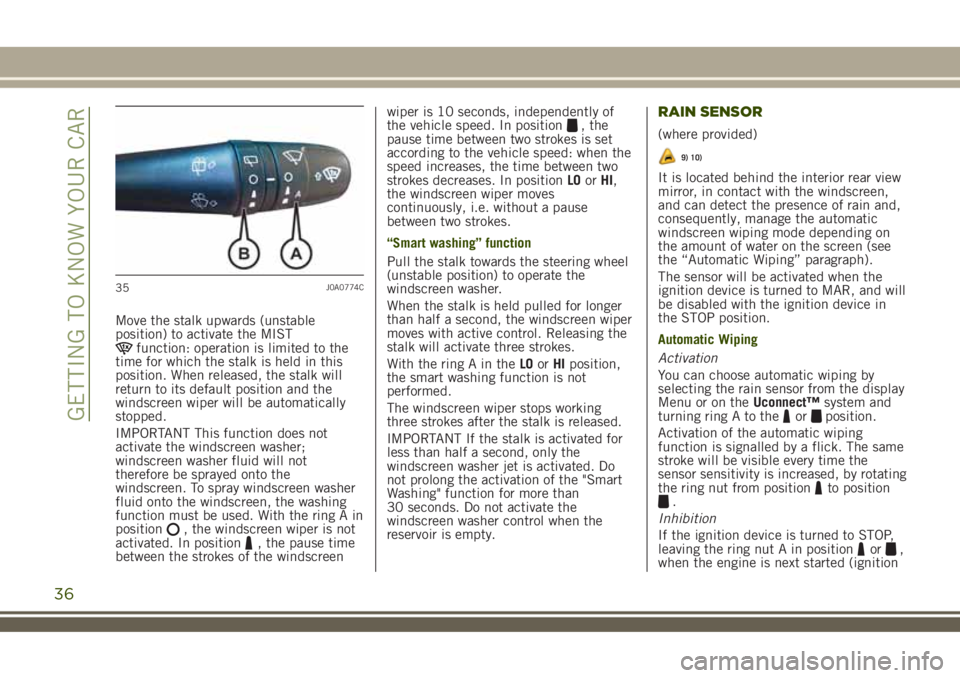
Move the stalk upwards (unstable
position) to activate the MIST
function: operation is limited to the
time for which the stalk is held in this
position. When released, the stalk will
return to its default position and the
windscreen wiper will be automatically
stopped.
IMPORTANT This function does not
activate the windscreen washer;
windscreen washer fluid will not
therefore be sprayed onto the
windscreen. To spray windscreen washer
fluid onto the windscreen, the washing
function must be used. With the ring A in
position
, the windscreen wiper is not
activated. In position, the pause time
between the strokes of the windscreenwiper is 10 seconds, independently of
the vehicle speed. In position
, the
pause time between two strokes is set
according to the vehicle speed: when the
speed increases, the time between two
strokes decreases. In positionLOorHI,
the windscreen wiper moves
continuously, i.e. without a pause
between two strokes.
“Smart washing” function
Pull the stalk towards the steering wheel
(unstable position) to operate the
windscreen washer.
When the stalk is held pulled for longer
than half a second, the windscreen wiper
moves with active control. Releasing the
stalk will activate three strokes.
With the ring A in theLOorHIposition,
the smart washing function is not
performed.
The windscreen wiper stops working
three strokes after the stalk is released.
IMPORTANT If the stalk is activated for
less than half a second, only the
windscreen washer jet is activated. Do
not prolong the activation of the "Smart
Washing" function for more than
30 seconds. Do not activate the
windscreen washer control when the
reservoir is empty.RAIN SENSOR
(where provided)
9) 10)
It is located behind the interior rear view
mirror, in contact with the windscreen,
and can detect the presence of rain and,
consequently, manage the automatic
windscreen wiping mode depending on
the amount of water on the screen (see
the “Automatic Wiping” paragraph).
The sensor will be activated when the
ignition device is turned to MAR, and will
be disabled with the ignition device in
the STOP position.
Automatic Wiping
Activation
You can choose automatic wiping by
selecting the rain sensor from the display
Menu or on theUconnect™system and
turning ring A to the
orposition.
Activation of the automatic wiping
function is signalled by a flick. The same
stroke will be visible every time the
sensor sensitivity is increased, by rotating
the ring nut from position
to position.
Inhibition
If the ignition device is turned to STOP,
leaving the ring nut A in position
or,
when the engine is next started (ignition
35J0A0774C
36
GETTING TO KNOW YOUR CAR
Page 39 of 356
device at MAR), no wiping cycle occurs
for system protection reasons.
It is possible to reactivate the automatic
wiping mode in three ways:
by rotating ring A to theposition
and back to theorpositionby moving the stalk upwards to
position MIST
upon exceeding the 5 km/h speed with
the rain sensor
Deactivation
Use the display Menu or the Uconnect
(TM)system, or turn ring A to any
non-intermittent position (or).
REAR WINDOW WIPER /
WASHER
Activation
Ring B can be set to the following
positions:
rearscreen wiper offintermittent wipe
continuous operation, without
pausing between two strokes.
By operating ring nut B, the rear window
wiper can function in the following
modes:
continuous: when the ring is turned to
theposition;intermittent: when the ring nut is in
positionand the rear window wiper is
stopped;
synchronous: when the ring nut is in
positionand the rear window wiper is
moving or set to AUTO. In this mode, the
rear window wiper makes one stroke for
each two strokes of the windscreen
wiper;
single stroke: when the ring is in theposition, the windscreen wiper is
active and reverse gear is engaged.
Push the stalk towards the dashboard
(rocking position) to activate the rear
window washer jet. Keep pushing the
lever to automatically activate both the
rear window washer jet and the rear
window wiper with a single movement.
Deactivation
The function stops when the stalk is
released.
WARNING
21)Make sure the device is switched off
whenever the windscreen must be
cleaned.
IMPORTANT
7)Never use the windscreen wipers to
remove layers of snow or ice from the
windscreen. In such conditions, the
windscreen wiper may be subjected to
excessive stress and the motor cut-out
switch, which prevents operation for a few
seconds, may intervene. If operation is not
subsequently restored, even after
restarting the engine, contact a Jeep
Dealership.
8)Do not operate the windscreen wiper
with the blades lifted from the windscreen.
9)Do not activate the rain sensor when
washing the car in an automatic car wash.
10)Make sure the device is switched off if
there is ice on the windscreen.
37
Page 40 of 356
CLIMATE CONTROL SYSTEM
2)
38
GETTING TO KNOW YOUR CAR
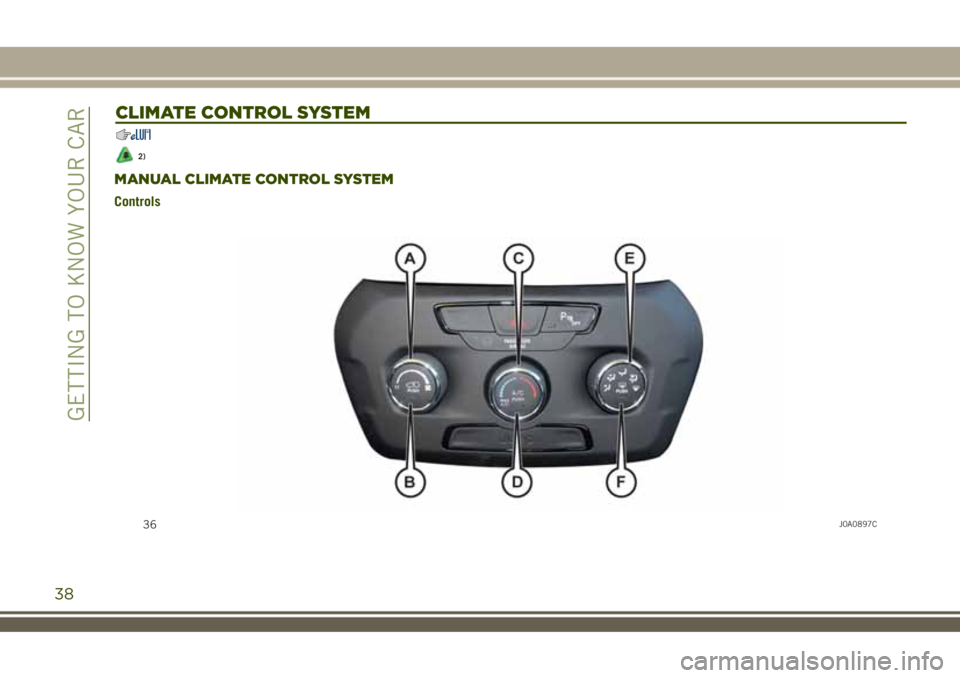
MANUAL CLIMATE CONTROL SYSTEM
Controls
36J0A0897C