Security JEEP WRANGLER 2023 User Guide
[x] Cancel search | Manufacturer: JEEP, Model Year: 2023, Model line: WRANGLER, Model: JEEP WRANGLER 2023Pages: 396, PDF Size: 25.15 MB
Page 24 of 396
22GETTING TO KNOW YOUR VEHICLE
If wearing gloves, or if it has been raining/snowing, or
there is salt/dirt covering the Passive Entry door
handle, the unlock sensitivity can be affected, resulting
in a slower response time.
If the vehicle is unlocked by Passive Entry and no door
is opened within 60 seconds, the vehicle will relock
and, if equipped, will arm the Vehicle Security system.
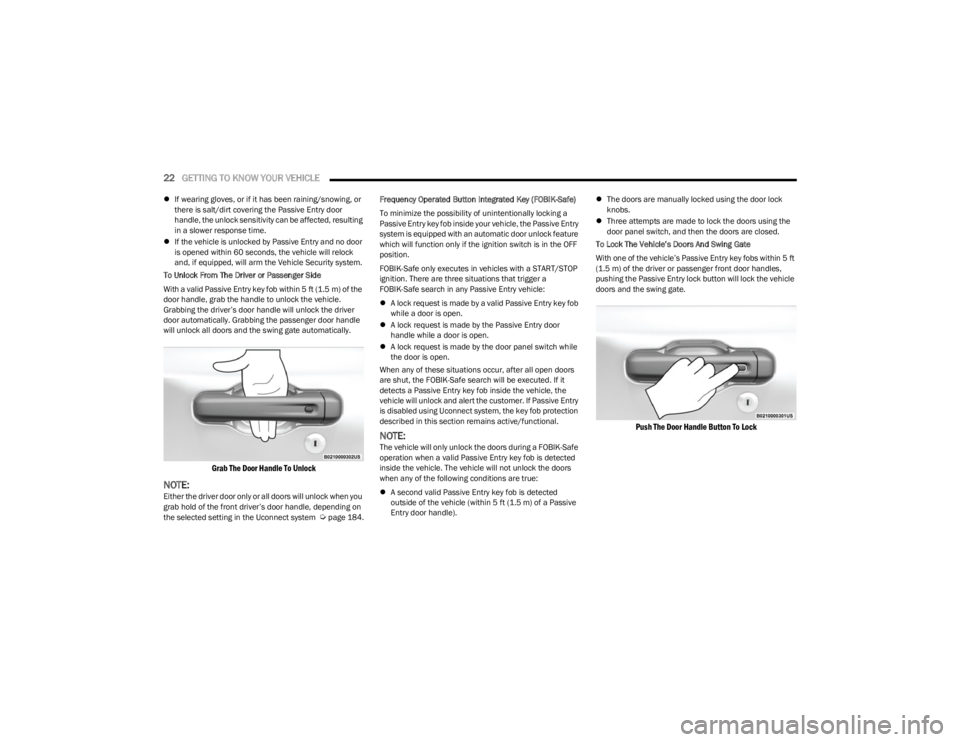
To Unlock From The Driver or Passenger Side
With a valid Passive Entry key fob within 5 ft (1.5 m) of the door handle, grab the handle to unlock the vehicle.
Grabbing the driver’s door handle will unlock the driver
door automatically. Grabbing the passenger door handle
will unlock all doors and the swing gate automatically.
Grab The Door Handle To Unlock
NOTE:Either the driver door only or all doors will unlock when you
grab hold of the front driver’s door handle, depending on
the selected setting in the Uconnect system
Úpage 184. Frequency Operated Button Integrated Key (FOBIK-Safe)
To minimize the possibility of unintentionally locking a
Passive Entry key fob inside your vehicle, the Passive Entry
system is equipped with an automatic door unlock feature
which will function only if the ignition switch is in the OFF
position.
FOBIK-Safe only executes in vehicles with a START/STOP
ignition. There are three situations that trigger a
FOBIK-Safe search in any Passive Entry vehicle:
A lock request is made by a valid Passive Entry key fob
while a door is open.
A lock request is made by the Passive Entry door
handle while a door is open.
A lock request is made by the door panel switch while
the door is open.
When any of these situations occur, after all open doors
are shut, the FOBIK-Safe search will be executed. If it
detects a Passive Entry key fob inside the vehicle, the
vehicle will unlock and alert the customer. If Passive Entry
is disabled using Uconnect system, the key fob protection
described in this section remains active/functional.
NOTE:The vehicle will only unlock the doors during a FOBIK-Safe
operation when a valid Passive Entry key fob is detected
inside the vehicle. The vehicle will not unlock the doors
when any of the following conditions are true:
A second valid Passive Entry key fob is detected
outside of the vehicle (within 5 ft (1.5 m) of a Passive
Entry door handle).
The doors are manually locked using the door lock
knobs.
Three attempts are made to lock the doors using the
door panel switch, and then the doors are closed.
To Lock The Vehicle’s Doors And Swing Gate
With one of the vehicle’s Passive Entry key fobs within 5 ft
(1.5 m) of the driver or passenger front door handles,
pushing the Passive Entry lock button will lock the vehicle
doors and the swing gate.
Push The Door Handle Button To Lock
23_JL_OM_EN_USC_t.book Page 22
Page 27 of 396
GETTING TO KNOW YOUR VEHICLE25
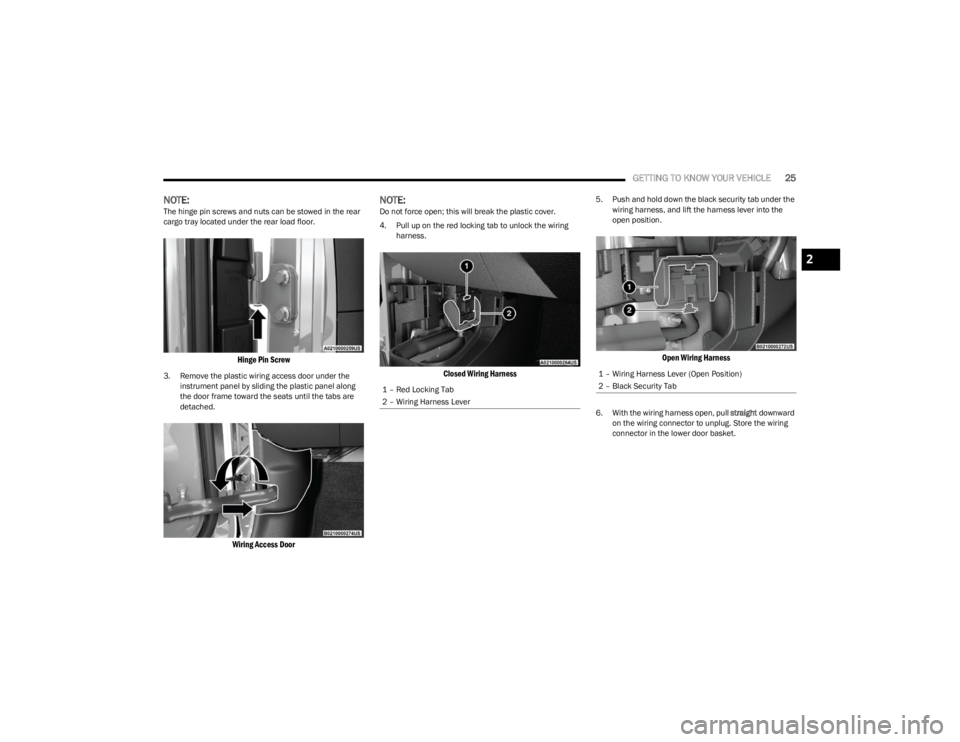
NOTE:The hinge pin screws and nuts can be stowed in the rear
cargo tray located under the rear load floor.
Hinge Pin Screw
3. Remove the plastic wiring access door under the
instrument panel by sliding the plastic panel along
the door frame toward the seats until the tabs are
detached.
Wiring Access Door
NOTE:Do not force open; this will break the plastic cover.
4. Pull up on the red locking tab to unlock the wiring harness.
Closed Wiring Harness
5. Push and hold down the black security tab under the wiring harness, and lift the harness lever into the
open position.
Open Wiring Harness
6. With the wiring harness open, pull straight downward
on the wiring connector to unplug. Store the wiring
connector in the lower door basket.
1 – Red Locking Tab
2 – Wiring Harness Lever
1 – Wiring Harness Lever (Open Position)
2 – Black Security Tab
2
23_JL_OM_EN_USC_t.book Page 25
Page 49 of 396
GETTING TO KNOW YOUR VEHICLE47
The power mirror controls consist of mirror select buttons
and a four-way mirror control switch. To adjust a mirror,
push either the L (left) or R (right) button to select the
mirror that you want to adjust.
Using the mirror control switch, push any of the four
arrows for the direction that you want the mirror to move.
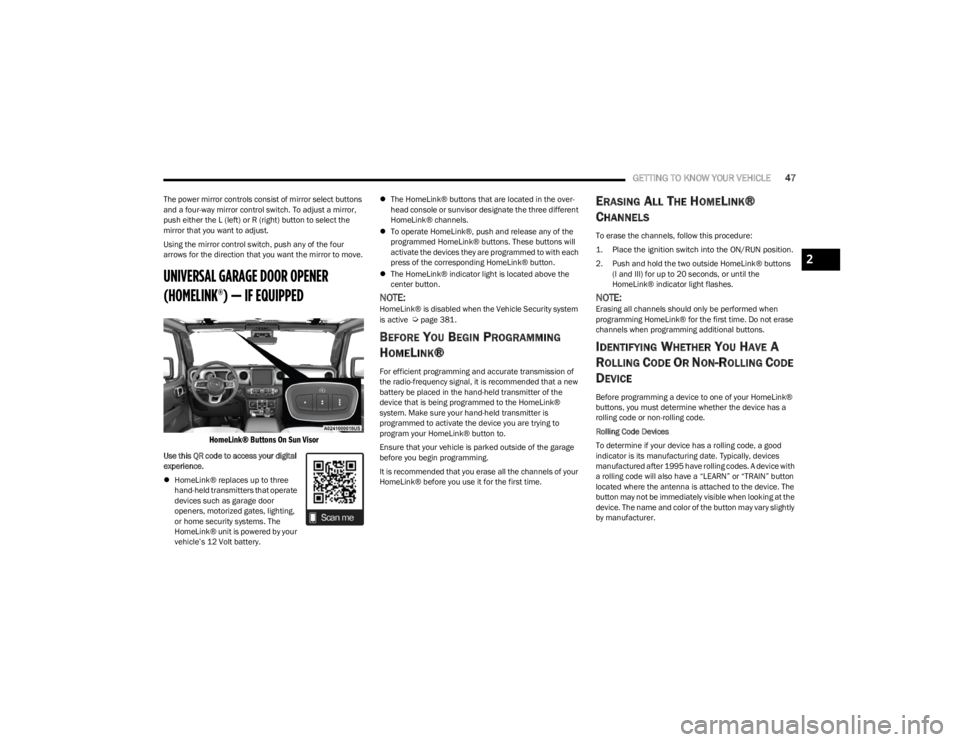
UNIVERSAL GARAGE DOOR OPENER
(HOMELINK®) — IF EQUIPPED
HomeLink® Buttons On Sun Visor
Use this QR code to access your digital
experience.
HomeLink® replaces up to three
hand-held transmitters that operate
devices such as garage door
openers, motorized gates, lighting,
or home security systems. The
HomeLink® unit is powered by your
vehicle’s 12 Volt battery.
The HomeLink® buttons that are located in the over -
head console or sunvisor designate the three different
HomeLink® channels.
To operate HomeLink®, push and release any of the
programmed HomeLink® buttons. These buttons will
activate the devices they are programmed to with each
press of the corresponding HomeLink® button.
The HomeLink® indicator light is located above the
center button.
NOTE:HomeLink® is disabled when the Vehicle Security system
is active Úpage 381.
BEFORE YOU BEGIN PROGRAMMING
H
OMELINK®
For efficient programming and accurate transmission of
the radio-frequency signal, it is recommended that a new
battery be placed in the hand-held transmitter of the
device that is being programmed to the HomeLink®
system. Make sure your hand-held transmitter is
programmed to activate the device you are trying to
program your HomeLink® button to.
Ensure that your vehicle is parked outside of the garage
before you begin programming.
It is recommended that you erase all the channels of your
HomeLink® before you use it for the first time.
ERASING ALL THE HOMELINK®
C
HANNELS
To erase the channels, follow this procedure:
1. Place the ignition switch into the ON/RUN position.
2. Push and hold the two outside HomeLink® buttons
(I and III) for up to 20 seconds, or until the
HomeLink® indicator light flashes.
NOTE:Erasing all channels should only be performed when
programming HomeLink® for the first time. Do not erase
channels when programming additional buttons.
IDENTIFYING WHETHER YOU HAVE A
R
OLLING CODE OR NON-ROLLING CODE
D
EVICE
Before programming a device to one of your HomeLink®
buttons, you must determine whether the device has a
rolling code or non-rolling code.
Rolling Code Devices
To determine if your device has a rolling code, a good
indicator is its manufacturing date. Typically, devices
manufactured after 1995 have rolling codes. A device with
a rolling code will also have a “LEARN” or “TRAIN” button
located where the antenna is attached to the device. The
button may not be immediately visible when looking at the
device. The name and color of the button may vary slightly
by manufacturer.
2
23_JL_OM_EN_USC_t.book Page 47
Page 51 of 396

GETTING TO KNOW YOUR VEHICLE49
REPROGRAMMING A SINGLE
H
OMELINK® BUTTON
To reprogram a single HomeLink® button that has been
previously trained, without erasing all the channels,
proceed as follows. Be sure to determine if the new device
you want to program the HomeLink® button to has a
rolling code or a non-rolling code.
1. Place the ignition in the ON/RUN position, without
starting the engine.
2. Push and hold the desired HomeLink® button until the HomeLink® Indicator light begins to flash after
20 seconds. Do not release the button.
3. Without releasing the button , proceed with Step 2 in
“Programming HomeLink® To A Garage Door
Opener” and follow all remaining steps.
CANADIAN/GATE OPERATOR
P
ROGRAMMING
For programming transmitters in Canada/United States
that require the transmitter signals to “time-out” after
several seconds of transmission.
Canadian radio frequency laws require transmitter signals
to time-out (or quit) after several seconds of transmission
– which may not be long enough for HomeLink® to pick up
the signal during programming. Similar to this Canadian
law, some U.S. gate operators are designed to time-out in
the same manner.
It may be helpful to unplug the device during the cycling
process to prevent possible overheating of the garage
door or gate motor.
1. Place the ignition in the ON/RUN position.
2. Place the hand-held transmitter 1 to 3 inches (3 to
8 cm) away from the HomeLink® button you wish to
program while keeping the HomeLink® indicator light
in view.
3. Continue to press and hold the HomeLink® button, while you press and release (cycle) your hand-held
transmitter every two seconds until HomeLink® has
successfully accepted the frequency signal. The
indicator light will flash slowly and then rapidly when
fully trained.
4. Watch for the HomeLink® indicator to change flash rates. When it changes, it is programmed. It may take
up to 30 seconds or longer in rare cases. The garage
door may open and close while you are programming.
5. Press and hold the programmed HomeLink® button and observe the indicator light.
NOTE:
If the indicator light stays on constantly, program -
ming is complete and the garage door/device
should activate when the HomeLink® button is
pressed.
To program the two remaining HomeLink®
buttons, repeat each step for each remaining
button. DO NOT erase the channels.
If you unplugged the garage door opener/device for
programming, plug it back in at this time. Reprogramming A Single HomeLink® Button
(Canadian/Gate Operator)
To reprogram a channel that has been previously trained,
follow these steps:
1. Place the ignition in the ON/RUN position.
2. Press and hold the desired HomeLink® button until
the indicator light begins to flash after 20 seconds.
Do not release the button.
3. Without releasing the button, proceed with “Canadian/Gate Operator Programming” step 2 and
follow all remaining steps.
SECURITY
It is advised to erase all channels before you sell or turn in
your vehicle.
To do this, push and hold the two outside buttons for 20
seconds until the indicator flashes. Note that all channels
will be erased. Individual channels cannot be erased.
The HomeLink® Universal Transceiver is disabled when
the Vehicle Security system is active.
NOTE:The universal garage door opener only operates when the
engine is running for security reasons associated with
removable tops and doors.
2
23_JL_OM_EN_USC_t.book Page 49
Page 121 of 396
GETTING TO KNOW YOUR INSTRUMENT PANEL119
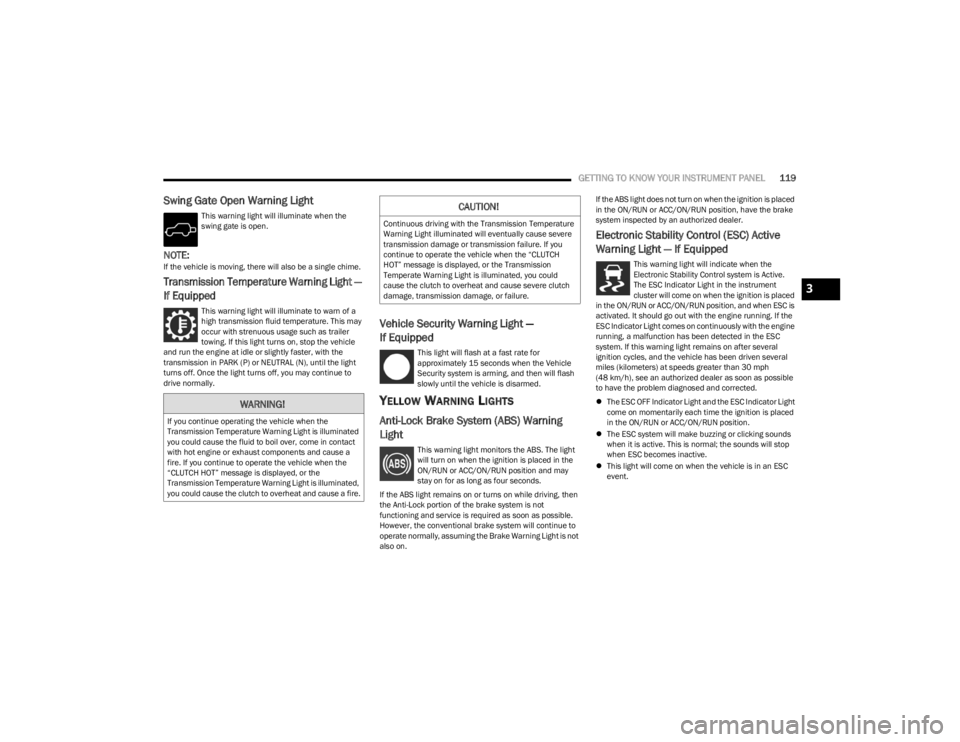
Swing Gate Open Warning Light
This warning light will illuminate when the
swing gate is open.
NOTE:If the vehicle is moving, there will also be a single chime.
Transmission Temperature Warning Light —
If Equipped
This warning light will illuminate to warn of a
high transmission fluid temperature. This may
occur with strenuous usage such as trailer
towing. If this light turns on, stop the vehicle
and run the engine at idle or slightly faster, with the
transmission in PARK (P) or NEUTRAL (N), until the light
turns off. Once the light turns off, you may continue to
drive normally.
Vehicle Security Warning Light —
If Equipped
This light will flash at a fast rate for
approximately 15 seconds when the Vehicle
Security system is arming, and then will flash
slowly until the vehicle is disarmed.
YELLOW WARNING LIGHTS
Anti-Lock Brake System (ABS) Warning
Light
This warning light monitors the ABS. The light
will turn on when the ignition is placed in the
ON/RUN or ACC/ON/RUN position and may
stay on for as long as four seconds.
If the ABS light remains on or turns on while driving, then
the Anti-Lock portion of the brake system is not
functioning and service is required as soon as possible.
However, the conventional brake system will continue to
operate normally, assuming the Brake Warning Light is not
also on. If the ABS light does not turn on when the ignition is placed
in the ON/RUN or ACC/ON/RUN position, have the brake
system inspected by an authorized dealer.
Electronic Stability Control (ESC) Active
Warning Light — If Equipped
This warning light will indicate when the
Electronic Stability Control system is Active.
The ESC Indicator Light in the instrument
cluster will come on when the ignition is placed
in the ON/RUN or ACC/ON/RUN position, and when ESC is
activated. It should go out with the engine running. If the
ESC Indicator Light comes on continuously with the engine
running, a malfunction has been detected in the ESC
system. If this warning light remains on after several
ignition cycles, and the vehicle has been driven several
miles (kilometers) at speeds greater than 30 mph
(48 km/h), see an authorized dealer as soon as possible
to have the problem diagnosed and corrected.
The ESC OFF Indicator Light and the ESC Indicator Light
come on momentarily each time the ignition is placed
in the ON/RUN or ACC/ON/RUN position.
The ESC system will make buzzing or clicking sounds
when it is active. This is normal; the sounds will stop
when ESC becomes inactive.
This light will come on when the vehicle is in an ESC
event.
WARNING!
If you continue operating the vehicle when the
Transmission Temperature Warning Light is illuminated
you could cause the fluid to boil over, come in contact
with hot engine or exhaust components and cause a
fire. If you continue to operate the vehicle when the
“CLUTCH HOT” message is displayed, or the
Transmission Temperature Warning Light is illuminated,
you could cause the clutch to overheat and cause a fire.
CAUTION!
Continuous driving with the Transmission Temperature
Warning Light illuminated will eventually cause severe
transmission damage or transmission failure. If you
continue to operate the vehicle when the “CLUTCH
HOT” message is displayed, or the Transmission
Temperate Warning Light is illuminated, you could
cause the clutch to overheat and cause severe clutch
damage, transmission damage, or failure.
3
23_JL_OM_EN_USC_t.book Page 119
Page 127 of 396
GETTING TO KNOW YOUR INSTRUMENT PANEL125
ONBOARD DIAGNOSTIC SYSTEM
(OBD II) C
YBERSECURITY
Your vehicle is required to have OBD II and a connection
port to allow access to information related to the
performance of your emissions controls. Authorized
service technicians may need to access this information to
assist with the diagnosis and service of your vehicle and
emissions system
Úpage 184.
EMISSIONS INSPECTION AND
MAINTENANCE PROGRAMS
In some localities, it may be a legal requirement to pass an
inspection of your vehicle's emissions control system.
Failure to pass could prevent vehicle registration.
For states that require an Inspection and
Maintenance (I/M), this check verifies the
Malfunction Indicator Light (MIL) is functioning
and is not on when the engine is running, and
that the OBD II system is ready for testing.
The OBD II system may not be ready if your vehicle was
recently serviced, recently had a depleted battery or a
battery replacement. If the OBD II system should be
determined not ready for the I/M test, your vehicle may fail
the test.
Your vehicle has a simple ignition actuated test, which you
can use prior to going to the test station. To check if your
vehicle's OBD II system is ready, you must do the following:
1. Cycle the ignition switch to the ON position, but do not crank or start the engine.
NOTE:If you crank or start the engine, you will have to start this
test over.
2. As soon as you cycle the ignition switch to the ON position, you will see the Malfunction Indicator Light
(MIL) symbol come on as part of a normal bulb check. 3. Approximately 15 seconds later, one of two things will
happen:
The MIL will flash for about 10 seconds and then
return to being fully illuminated until you turn OFF
the ignition or start the engine. This means that
your vehicle's OBD II system is not ready and you
should not proceed to the I/M station.
The MIL will not flash at all and will remain fully illu -
minated until you place the ignition in the off posi -
tion or start the engine. This means that your
vehicle's OBD II system is ready and you can
proceed to the I/M station.
If your OBD II system is not ready, you should see an
authorized dealer or repair facility. If your vehicle was
recently serviced or had a battery failure or replacement,
you may need to do nothing more than drive your vehicle
as you normally would in order for your OBD II system to
update. A recheck with the previously mentioned test
routine may then indicate that the system is now ready.
Regardless of whether your vehicle's OBD II system is
ready or not, if the MIL is illuminated during normal vehicle
operation you should have your vehicle serviced before
going to the I/M station. The I/M station can fail your
vehicle because the MIL is on with the engine running.
WARNING!
ONLY an authorized service technician should
connect equipment to the OBD II connection port in
order to read the VIN, diagnose, or service your
vehicle.
If unauthorized equipment is connected to the OBD II
connection port, such as a driver-behavior tracking
device, it may:
Be possible that vehicle systems, including
safety related systems, could be impaired or a
loss of vehicle control could occur that may
result in an accident involving serious injury or
death.
Access, or allow others to access, information
stored in your vehicle systems, including
personal information.
3
23_JL_OM_EN_USC_t.book Page 125
Page 186 of 396
184
MULTIMEDIA
UCONNECT SYSTEMS
For detailed information about your Uconnect 4/4C/4C
NAV With 8.4-inch Display system, refer to your Uconnect
Radio Instruction Manual.
NOTE:Uconnect screen images are for illustration purposes only
and may not reflect exact software for your vehicle.
CYBERSECURITY
Depending on applicability, your vehicle may be able to
send or receive information from a wired or wireless
network. This information allows systems and features in
your vehicle to function properly.
Your vehicle may be equipped with certain security
features to reduce the risk of unauthorized and unlawful
access to vehicle systems and wireless communications.
Vehicle software technology continues to evolve over time
and FCA US LLC, working with its suppliers, evaluates and
takes appropriate steps as needed. As always, if you
experience unusual behavior, contact an authorized
dealer immediately,
Úpage 377, or refer to your
Uconnect Radio Instruction Manual for additional contact
information.
The risk of unauthorized and unlawful access to your
vehicle systems may still exist, even if the most recent
version of vehicle software (such as Uconnect software) is
installed.
NOTE:To help further improve user experience, features,
stability, etc., and minimize the potential risk of a security
breach, vehicle owners should routinely check
www.driveuconnect.com (US Residents) or www.driveuco -
nnect.ca (Canadian Residents) to learn about available
Uconnect software updates.
UCONNECT SETTINGS
The Uconnect system uses a combination of buttons on
the touchscreen and buttons on the faceplate located on
the center of the instrument panel. These buttons allow
you to access and change the Customer Programmable
Features. Many features can vary by vehicle.
Buttons on the faceplate are located below and/or beside
the Uconnect system in the center of the instrument
panel. In addition, there is a SCROLL/ENTER control knob located on the right side. Turn the control knob to scroll
through menus and change settings. Push the center of
the control knob one or more times to select or change a
setting.
Your Uconnect system may also have SCREEN OFF and
MUTE buttons on the faceplate.
Push the SCREEN OFF button on the faceplate to turn off
the Uconnect screen. Push the button again or tap the
screen to turn the screen on.
Press the Back Arrow button to exit out of a Menu or
certain option on the Uconnect system.
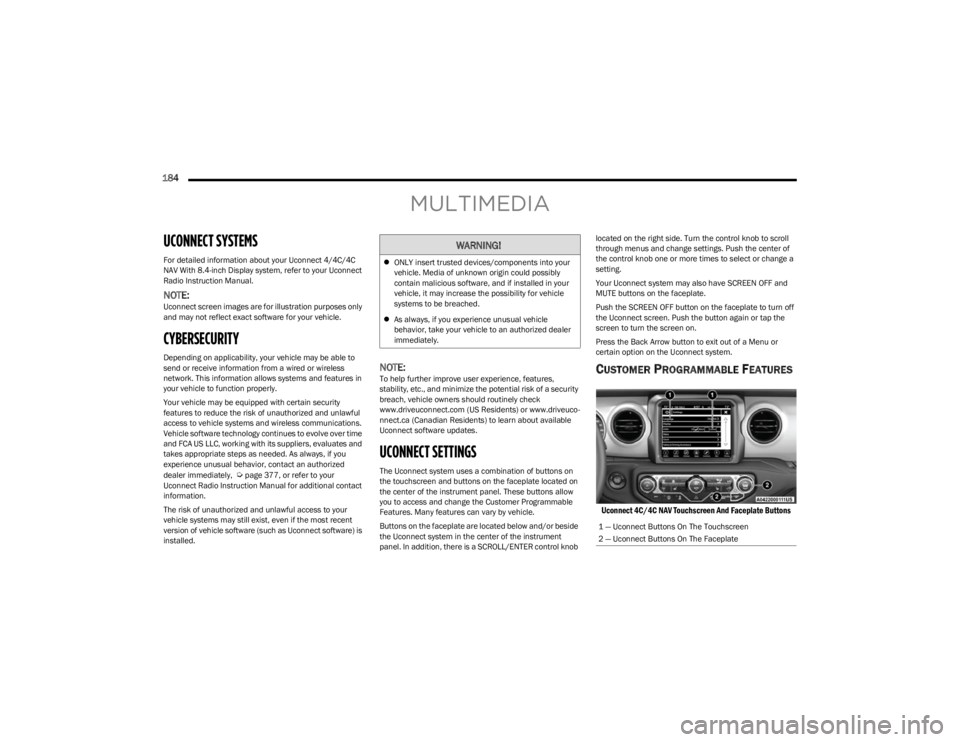
CUSTOMER PROGRAMMABLE FEATURES
Uconnect 4C/4C NAV Touchscreen And Faceplate Buttons
WARNING!
ONLY insert trusted devices/components into your
vehicle. Media of unknown origin could possibly
contain malicious software, and if installed in your
vehicle, it may increase the possibility for vehicle
systems to be breached.
As always, if you experience unusual vehicle
behavior, take your vehicle to an authorized dealer
immediately.
1 — Uconnect Buttons On The Touchscreen
2 — Uconnect Buttons On The Faceplate
23_JL_OM_EN_USC_t.book Page 184
Page 230 of 396
228MULTIMEDIA
For customers in Canada, press the My Vehicle button.
Select from “Dashboard”, “Vehicle Health Report”, and
“Recalls”. The website will then prompt you to log in using
your email address and password.
Edit/Edit Profile:
To manage the details of your SiriusXM Guardian™
account, such as your contact information, password
and SiriusXM Guardian™ PIN, click on the Edit/Edit
Profile button to access the details of your account.
Connected Services Status:
This statement will indicate your SiriusXM
Guardian™-equipped vehicle.
Remote Commands:
For vehicles with an active SiriusXM Guardian™
subscription, press one of these icons and enter your
four-digit SiriusXM Guardian™ Security PIN to remotely
start (if equipped), lock/unlock doors or sound the horn
and flash the lights.
Editing Your Notifications
Notifications are an important element of your SiriusXM
Guardian™ account. For example, any time you use your
remote services (such as Remote Door Unlock), you can
elect to receive a text message, push notification, and/or
E-mail to notify you of the event. To set up the
notifications, please follow these instructions.
1. Log on to your Owner’s Account at
https://
www.mopar.com/en-us.html (US Residents) and
select “Dashboard”, or www.mopar.ca
(Canadian
Residents), select “My Vehicle” and then
“Dashboard”.
2. Click the Edit/Edit Profile button. 3. Once there, select “SiriusXM Guardian™” where you
can edit Notification Preferences.
4. You can enter a mobile phone and/or email address to notify you, and you can customize the types of
messages.
USING SIRIUSXM GUARDIAN™
SOS Call — If Equipped
Access To Emergency Services At The Push Of A Button
SiriusXM Guardian™ In-Vehicle Assistance Features
With SiriusXM Guardian™, your vehicle has onboard
assistance features located on the rearview mirror or
overhead console designed to enhance your driving
experience if you should ever need assistance or support. Description
SOS Call offers a convenient way to get in contact with a
SiriusXM Guardian™ Customer Care agent in the event of
an emergency. When the connection between the vehicle
and the live agent is made, your vehicle will automatically
transmit location information. In the event of a minor
collision, medical or any other emergency, press the SOS
button to be connected to a call center agent who can
send emergency assistance to your vehicle’s location.
NOTE:Certain SiriusXM Guardian™ connected services are
dependent on an operational Uconnect system, cellular
network availability that is compatible with the device in
your vehicle, and GPS network availability. Not all features
of SiriusXM Guardian™ are available everywhere at all
times, particularly in remote or enclosed areas.
How It Works
1. Push the SOS Call button; the indicator light will turn green indicating a call has been placed.
NOTE:
In case the SOS Call button is accidentally pushed,
there is a 10-second delay before the SOS call is
placed. The system will verbally alert you that a call
is about to be made. To cancel the SOS Call connec -
tion, push the SOS Call button on the rearview
mirror or overhead console or press the Cancel
button on the touchscreen within 10 seconds.
During an SOS Call, the Bluetooth®-paired phone
is disconnected so incoming or outgoing calls will
go through your mobile device versus the
hands-free system which is not available due to
the SOS Call.
WARNING!
Some SiriusXM Guardian™ connected services,
including SOS Call and Roadside Assistance Call, will
NOT work without a network connection compatible
with your device.
Center Light Status Description
Off No call activated
Green Active call in progress
Red System error
23_JL_OM_EN_USC_t.book Page 228
Page 232 of 396
230MULTIMEDIA
Automatic SOS — If Equipped
Automatic SOS is a hands-free safety service that can
immediately connect you with help in the event that your
vehicle’s airbags deploy. After an accident, a live agent will
contact you through the Uconnect system and alert
emergency services.
NOTE:An active SiriusXM Guardian™ subscription is required for
this feature to function.
After a crash where the airbags deploy:
1. Automatic SOS will initiate a call with an agent.
2. An agent will receive the call and confirm the location
of the emergency.
3. If needed, the agent will request the assistance of emergency services.
4. First responders will arrive on scene. The agent will remain on the call until emergency services arrive.
NOTE:
Agents are available 24/7 to assist you in the case of
an emergency.
On your behalf, agents are able to notify family
members about the collision.
Agents can brief first responders of the situation before
they arrive on scene.
In the event vehicle occupants are unable to speak,
emergency services will be dispatched based on the
last known GPS coordinates.
SiriusXM Guardian™ connected services are depen -
dent upon an operative telematics device, a cellular
connection, navigation map data, and GPS satellite
reception, which can limit the ability to reach the
response center or reach emergency support.
Terms of service of the Uconnect and the SiriusXM
Guardian™ subscriber agreement apply. See terms of
services for complete service limitation.
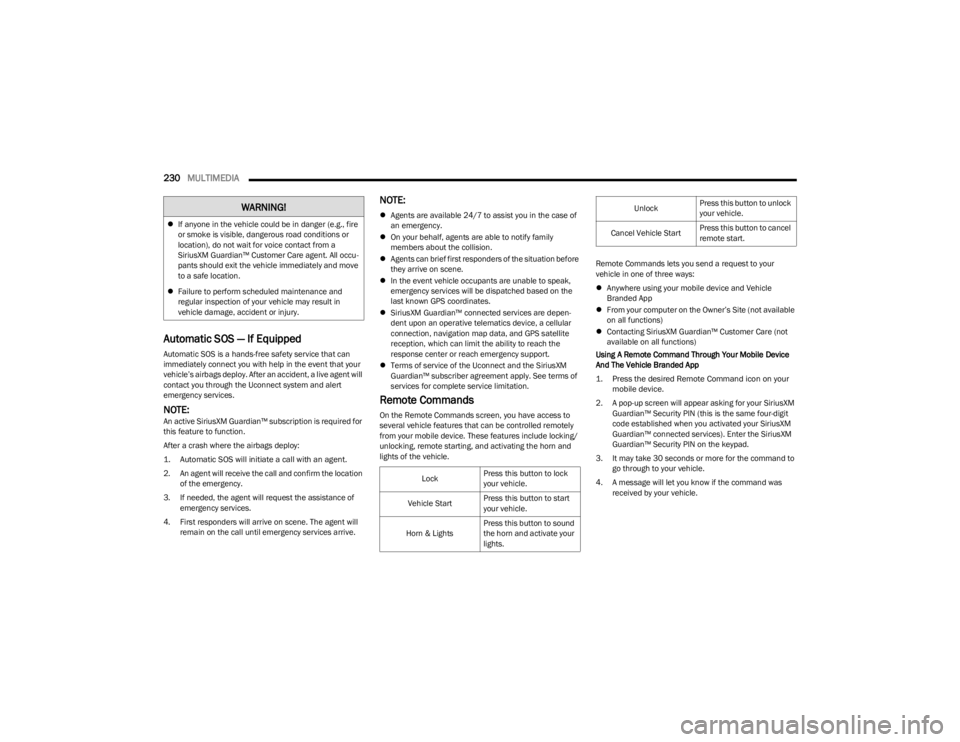
Remote Commands
On the Remote Commands screen, you have access to
several vehicle features that can be controlled remotely
from your mobile device. These features include locking/
unlocking, remote starting, and activating the horn and
lights of the vehicle. Remote Commands lets you send a request to your
vehicle in one of three ways:
Anywhere using your mobile device and Vehicle
Branded App
From your computer on the Owner’s Site (not available
on all functions)
Contacting SiriusXM Guardian™ Customer Care (not
available on all functions)
Using A Remote Command Through Your Mobile Device
And The Vehicle Branded App
1. Press the desired Remote Command icon on your mobile device.
2. A pop-up screen will appear asking for your SiriusXM Guardian™ Security PIN (this is the same four-digit
code established when you activated your SiriusXM
Guardian™ connected services). Enter the SiriusXM
Guardian™ Security PIN on the keypad.
3. It may take 30 seconds or more for the command to go through to your vehicle.
4. A message will let you know if the command was received by your vehicle.
If anyone in the vehicle could be in danger (e.g., fire
or smoke is visible, dangerous road conditions or
location), do not wait for voice contact from a
SiriusXM Guardian™ Customer Care agent. All occu -
pants should exit the vehicle immediately and move
to a safe location.
Failure to perform scheduled maintenance and
regular inspection of your vehicle may result in
vehicle damage, accident or injury.
WARNING!
Lock Press this button to lock
your vehicle.
Vehicle Start Press this button to start
your vehicle.
Horn & Lights Press this button to sound
the horn and activate your
lights.
Unlock
Press this button to unlock
your vehicle.
Cancel Vehicle Start Press this button to cancel
remote start.
23_JL_OM_EN_USC_t.book Page 230
Page 233 of 396
MULTIMEDIA231
Using A Remote Command Through Your Owner’s Site
1. Log on to your Owner’s Site using the username and password you used when activating your SiriusXM
Guardian™ connected services in your vehicle.
NOTE:If you forgot your username or password, links are
provided on the website to help you retrieve them.
2. If you have more than one vehicle registered into your Owner’s Site, select the vehicle you want to send the
command to by clicking on its image along the top.
3. On your dashboard, you will see remote commands. Press the desired icon to activate that feature.
4. You will then be asked to enter your SiriusXM Guardian™ Security PIN (this is the same four-digit
code established when you activated your SiriusXM
Guardian™ connected services). Please enter your
SiriusXM Guardian™ Security PIN.
5. A message will appear on the screen to let you know if the command was received by your vehicle.
Contacting SiriusXM Guardian™ Customer Care (for
example, in case of an accidental lock-out):
1. Contact SiriusXM Guardian™ Customer Care if you are unable to lock your vehicle through the Vehicle
Branded App or your key fob.
2. For security purposes, the SiriusXM Guardian™ Customer Care agent will verify your identity by asking
for your four-digit SiriusXM Guardian™ Security PIN.
3. After providing your SiriusXM Guardian™ Security PIN, you can ask them to perform a remote
command.
NOTE:Anyone with access to your PIN may request Remote Door
Lock/Unlock. It is your responsibility to protect your PIN
appropriately.
Remote Door Lock/Unlock
Description
The Remote Door Lock/Unlock feature provides you the
ability to lock or unlock the door on your vehicle without
the keys and from virtually any distance.
Working Vehicle Conditions
The vehicle must in PARK or at a standstill.
The vehicle must be in an open area with cell tower
reception.
Your mobile device must have a cellular or Wi-Fi
connection.
Requirements
Vehicle must be properly equipped with SiriusXM
Guardian™.
Vehicle must have an operable LTE (voice/data) or 4G
(data) network connection. If using the Vehicle
Branded App to command your vehicle, your device
must be compatible and be connected to an operable
LTE (voice/data) or 4G (data) network connection.
Vehicle must be registered with SiriusXM Guardian™
and have an active subscription that includes the appli -
cable feature.
An ignition cycle is required for some remote
commands, such as Remote Vehicle Start and Remote
Door Lock/Unlock if following a Remote Horn & Lights
activation.
Your Remote Door Lock/Unlock request will not be
processed if the vehicle is in motion, the ignition key is
on or during an emergency call.NOTE:All other remote services should be performed via your
Owner’s Site or through the Vehicle Branded App on your
compatible device.
Remote Vehicle Start
Description
The Remote Vehicle Start feature provides you with the
ability to start the engine on your vehicle without the keys
and from virtually any distance. Once started, the preset
climate controls in your vehicle can warm up or cool down
the interior.
You can also send a command to turn off an engine that
has been started using Remote Vehicle Start. After
15 minutes, if you have not entered your vehicle with the
key, the engine will shut off automatically.
This remote function requires your vehicle to be equipped
with a factory-installed Remote Start system.
You can set up push notifications every time a command
is sent to activate or cancel Remote Start.5
23_JL_OM_EN_USC_t.book Page 231