Lancia Delta 2011 Owner handbook (in English)
Manufacturer: LANCIA, Model Year: 2011, Model line: Delta, Model: Lancia Delta 2011Pages: 290, PDF Size: 8.36 MB
Page 181 of 290
180STARTING AND DRIVING
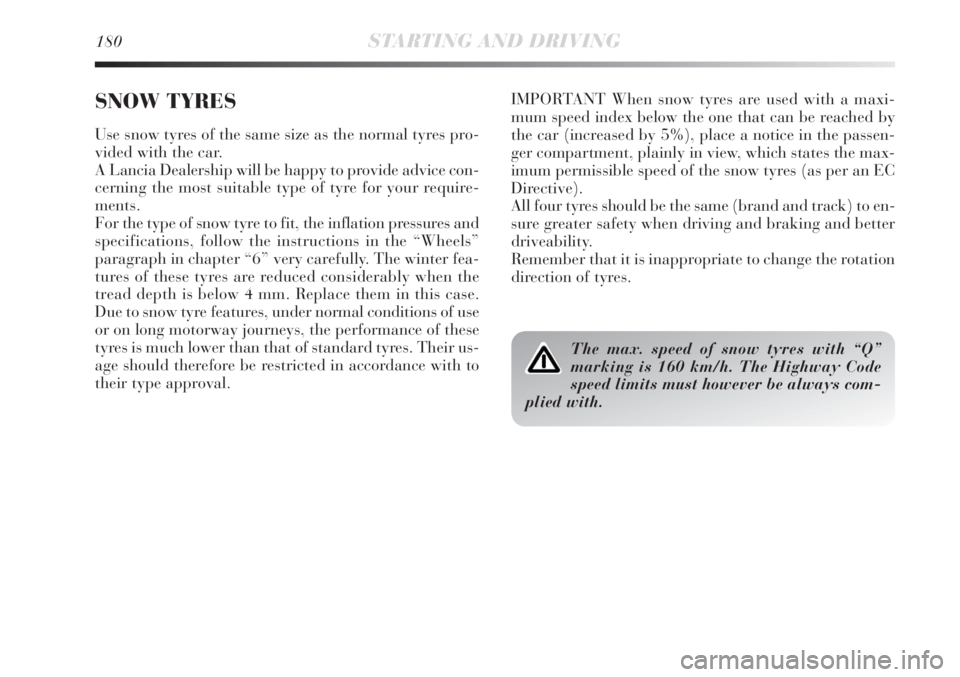
IMPORTANT When snow tyres are used with a maxi-
mum speed index below the one that can be reached by
the car (increased by 5%), place a notice in the passen-
ger compartment, plainly in view, which states the max-
imum permissible speed of the snow tyres (as per an EC
Directive).
All four tyres should be the same (brand and track) to en-
sure greater safety when driving and braking and better
driveability.
Remember that it is inappropriate to change the rotation
direction of tyres.
The max. speed of snow tyres with “Q”
marking is 160 km/h. The Highway Code
speed limits must however be always com-
plied with.
SNOW TYRES
Use snow tyres of the same size as the normal tyres pro-
vided with the car.
A Lancia Dealership will be happy to provide advice con-
cerning the most suitable type of tyre for your require-
ments.
For the type of snow tyre to fit, the inflation pressures and
specifications, follow the instructions in the “Wheels”
paragraph in chapter “6” very carefully. The winter fea-
tures of these tyres are reduced considerably when the
tread depth is below 4 mm. Replace them in this case.
Due to snow tyre features, under normal conditions of use
or on long motorway journeys, the performance of these
tyres is much lower than that of standard tyres. Their us-
age should therefore be restricted in accordance with to
their type approval.
Page 182 of 290

3
STARTING AND DRIVING181
Keep your speed down when snow chains are
fitted. Do not exceed 50 km/h. Avoid pot-
holes, steps and pavements and also avoid
driving long distances on roads not covered with
snow in order to prevent damaging the car and the
roadbed.
SNOW CHAINS
The use of snow chains should be in compliance with lo-
cal regulations.
The snow chains may be applied only onto the front
wheel tyres (drive wheels).
Check the tension of the snow chains after the first few
metres have been driven.
IMPORTANT Snow chains cannot be fitted to the space-
saver spare wheel. So, if a front (drive) wheel is punc-
tured and chains are needed, a rear wheel should be fit-
ted to the front of the car and the space-saving spare
wheel should be fitted to the rear. This way with two nor-
mal drive wheels, snow chains can be fitted to them to
solve an emergency.
CAR INACTIVITY
If the car is to be left inactive for longer than a month,
the following precautions should be followed:
❍park the car in a covered, dry and, if possible, well-
ventilated place;
❍engage a gear;
❍check that the handbrake is not engaged;
❍disconnect the negative battery terminal (for versions
with Start&Stop system refer to the paragraph
“Start&Stop system” in chapter “1”);
❍clean and protect the painted parts of the vehicle with
protective wax;
❍clean and protect the shiny metal parts using special
compounds commercially available;
❍sprinkle talcum powder on the rubber windscreen and
rear window wiper blades and lift them off the glass;
❍open the windows slightly;
❍cover the car with a fabric or perforated plastic sheet.
Do not use sheets of non-perforated plastic as they
do not allow moisture on the car body to evaporate;
❍inflate tyres to a pressure of +0.5 bar above the nor-
mal specified pressure and check regularly;
❍do not drain the engine cooling system.
Page 183 of 290
182STARTING AND DRIVING
page intentionally left blank
Page 184 of 290
4
IN AN EMERGENCY183
Engine starting ....................................................................... 184
Quick tyre repair kit Fix&Go Automatic ................................. 186
Replacing a wheel ................................................................... 193
Changing a bulb ..................................................................... 200
Replacing exterior bulbs .......................................................... 204
Replacing an interior bulb ....................................................... 209
Replacing fuses ....................................................................... 213
Battery recharging .................................................................. 220
Jacking the car ........................................................................ 221
Towing the car ........................................................................ 221
In an emergency we recommend that you call the freephone number
found in the Warranty Booklet.
It is also possible to go to the www.lancia.com website
to find the closest Lancia Dealership.
Page 185 of 290

184IN AN EMERGENCY
ENGINE STARTING
Go to a Lancia Dealership immediately if instrument
panel warning light
Yremains on constantly.
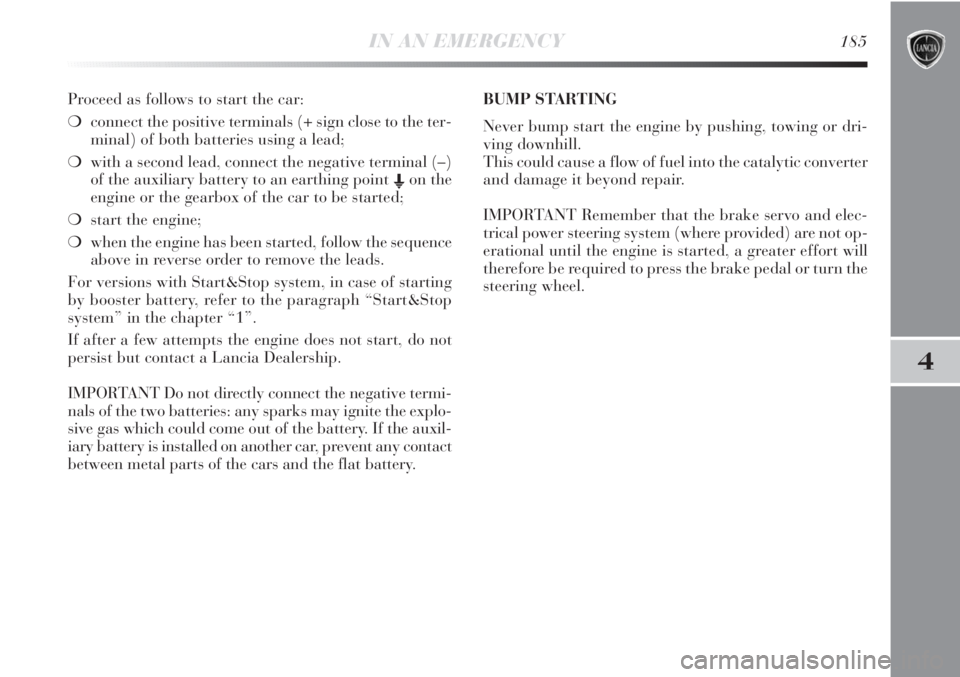
JUMP STARTING fig. 1
If the battery is flat, the engine may be started using an
auxiliary battery with the same capacity or a little higher
than the flat one.
fig. 1L0E0074m
Strictly avoid using a rapid battery charger
for jump starting: this could damage the
electronic systems and the engine fuel sup-
ply and ignition control units.
This starting procedure must be carried out
by expert personnel as incorrect manoeu-
vres can cause electrical discharges of con-
siderable intensity. Furthermore, battery fluid is
poisonous and corrosive: avoid contact with your
skin and eyes. Keep naked flames away from the
battery. No smoking. Do not cause sparks.
Page 186 of 290
IN AN EMERGENCY185
4
Proceed as follows to start the car:
❍connect the positive terminals (+ sign close to the ter-
minal) of both batteries using a lead;
❍with a second lead, connect the negative terminal (–)
of the auxiliary battery to an earthing point E
on the
engine or the gearbox of the car to be started;
❍start the engine;
❍when the engine has been started, follow the sequence
above in reverse order to remove the leads.
For versions with Start&Stop system, in case of starting
by booster battery, refer to the paragraph “Start&Stop
system” in the chapter “1”.
If after a few attempts the engine does not start, do not
persist but contact a Lancia Dealership.
IMPORTANT Do not directly connect the negative termi-
nals of the two batteries: any sparks may ignite the explo-
sive gas which could come out of the battery. If the auxil-
iary battery is installed on another car, prevent any contact
between metal parts of the cars and the flat battery.BUMP STARTING
Never bump start the engine by pushing, towing or dri-
ving downhill.
This could cause a flow of fuel into the catalytic converter
and damage it beyond repair.
IMPORTANT Remember that the brake servo and elec-
trical power steering system (where provided) are not op-
erational until the engine is started, a greater effort will
therefore be required to press the brake pedal or turn the
steering wheel.
Page 187 of 290

186IN AN EMERGENCY
❍informative leaflet (see fig. 3), used to ensure the cor-
rect use of the quick tyre repair kit and then given to
the personnel who will handle the treated tyre;
❍a compressor D-fig. 2 including a pressure gauge and
connections, found in the compartment;
❍a pair of protective gloves located in the side com-
partment of the compressor;
❍adapters for inflating different elements.
The quick repair kit also contains a screwdriver and a tow
ring.
fig. 3L0E0076m
QUICK TYRE REPAIR KIT
FIX & GO AUTOMATIC
The quick tyre repair kit Fix & Go automatic is located
in the luggage compartment.
The kit fig. 2 includes:
❍a canister A containing sealant liquid and fitted with:
– filler tube B;
–
an adhesive label C with the message “max. 80 km/h”
to be applied in a position clearly visible by the dri-
ver (on the dashboard) after repairing the tyre;
fig. 2L0E0075m
Page 188 of 290

IN AN EMERGENCY187
4
In the event of a puncture caused by foreign
bodies, the kit may be used to repair tyres
showing damages on the track or shoulder
up to max. 4 mm diameter.
Give the instruction booklet to the personnel
charged with handling the treated tyre.
The kit cannot be used to repair damage to
the tyre sidewall. Do not use the quick repair
kit if the tyre is damaged as the vehicle has
run on a flat tyre.
If the wheel rim is damaged (bad groove dis-
tortion causing air leakage) it cannot be re-
paired. Do not remove the foreign body
(screw or nail) from the tyre.
IMPORTANT INFORMATION:
The sealing fluid of the quick tyre repair kit is effective
with external temperatures between −20 °C and +50 °C.
The sealing fluid will expire.
Do not operate the compressor for longer
than 20 consecutive minutes. Risk of over-
heating. The quick repair kit is not suitable
for definitive repairs. Tyres may only be repaired
temporarily.
Page 189 of 290
188IN AN EMERGENCY
INFLATION PROCEDURE
Put on the protective gloves provided to-
gether with quick tyre repair kit.
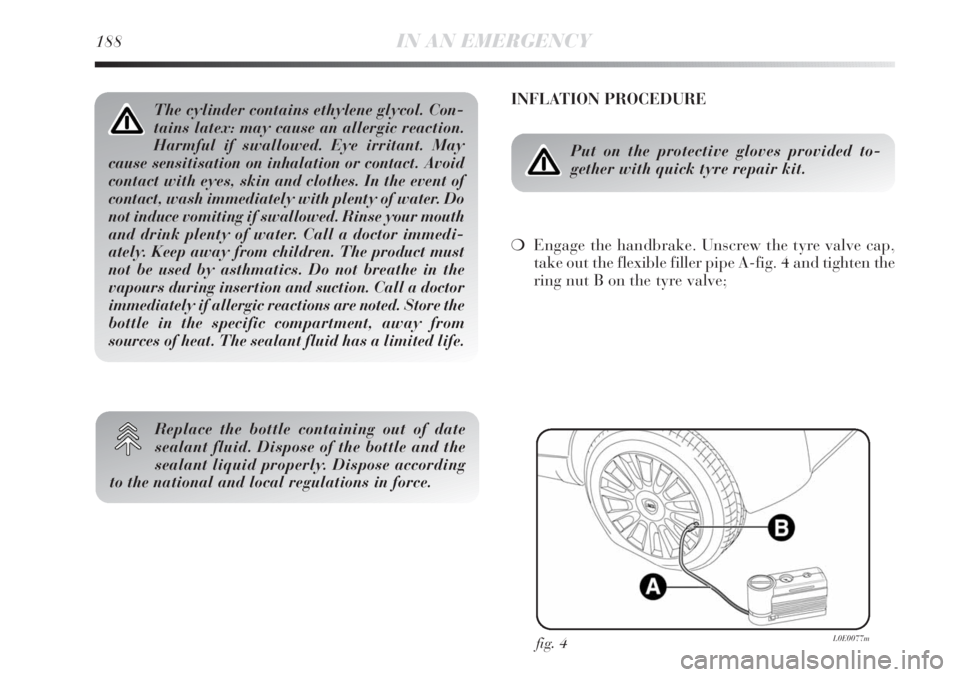
❍Engage the handbrake. Unscrew the tyre valve cap,
take out the flexible filler pipe A-fig. 4 and tighten the
ring nut B on the tyre valve;
fig. 4L0E0077m
The cylinder contains ethylene glycol. Con-
tains latex: may cause an allergic reaction.
Harmful if swallowed. Eye irritant. May
cause sensitisation on inhalation or contact. Avoid
contact with eyes, skin and clothes. In the event of
contact, wash immediately with plenty of water. Do
not induce vomiting if swallowed. Rinse your mouth
and drink plenty of water. Call a doctor immedi-
ately. Keep away from children. The product must
not be used by asthmatics. Do not breathe in the
vapours during insertion and suction. Call a doctor
immediately if allergic reactions are noted. Store the
bottle in the specific compartment, away from
sources of heat. The sealant fluid has a limited life.
Replace the bottle containing out of date
sealant fluid. Dispose of the bottle and the
sealant liquid properly. Dispose according
to the national and local regulations in force.
Page 190 of 290
IN AN EMERGENCY189
4
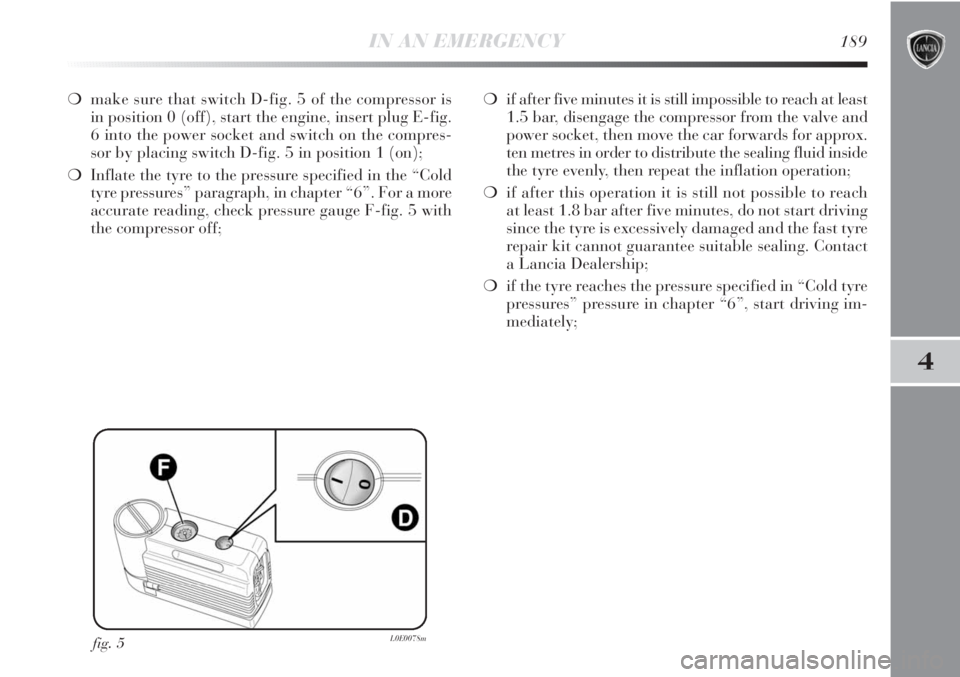
❍make sure that switch D-fig. 5 of the compressor is
in position 0 (off), start the engine, insert plug E-fig.
6 into the power socket and switch on the compres-
sor by placing switch D-fig. 5 in position 1 (on);
❍Inflate the tyre to the pressure specified in the “Cold
tyre pressures” paragraph, in chapter “6”. For a more
accurate reading, check pressure gauge F-fig. 5 with
the compressor off; ❍if after five minutes it is still impossible to reach at least
1.5 bar, disengage the compressor from the valve and
power socket, then move the car forwards for approx.
ten metres in order to distribute the sealing fluid inside
the tyre evenly, then repeat the inflation operation;
❍if after this operation it is still not possible to reach
at least 1.8 bar after five minutes, do not start driving
since the tyre is excessively damaged and the fast tyre
repair kit cannot guarantee suitable sealing. Contact
a Lancia Dealership;
❍if the tyre reaches the pressure specified in “Cold tyre
pressures” pressure in chapter “6”, start driving im-
mediately;
fig. 5L0E0078m