key Lancia Delta 2014 Owner handbook (in English)
[x] Cancel search | Manufacturer: LANCIA, Model Year: 2014, Model line: Delta, Model: Lancia Delta 2014Pages: 291, PDF Size: 5.24 MB
Page 91 of 291

KNOWING YOUR CAR89
1
DOORS
LOCK/RELEAS E FROM OUTS IDE fig. 55
Door release
To releas e all doors : turn the ke y to pos ition 1. Pull up the
a ssociated handle to open the door. Pre ss button Ëon the
remote control to unlock the door s.
Before opening a door, ensure that you can do
it in conditions of safety. Open the doors on-
ly when the car is stationary.
fig. 55L0E0042m
Door lock
To lock all doors : turn the key to position 2 with doors ful-
l y clos ed.
Press button Á on the remote control to lock the door s. If
one of the door s i s not s hut properly , simultaneous lock-
ing is disabled.
IMPORTANT If one of the doors is not properly closed
or if there is a fault in the system, the central locking will
not engage. If the operation i s repeated 10/11 time s in
quick succession, the device is excluded for approximate-
l y 30 s econds .
001-154 Delta GB 2ed 27/01/14 10.46 Pagina 89
Page 93 of 291

KNOWING YOUR CAR91
1
The door lock knob can be realigned (only when the bat-
tery charge has been restored) as follows:
❍ press button
Ëon the key ;
❍ press door lock/relea se button
≈in the das hboard;
❍ open a front door by inserting the key into the key
pawl;
❍ operate the internal door handle.
fig. 57L0E0291m
PASSENGER SIDE FRONT DOOR AND REAR
DOOR EMERGENC Y LOCKING DEVIC E
The passenger side front door and the rear door s have a
device to lock them when there i s no power.
Proceed as follows:
❍ engage the metal in sert of the starting key in position
A - fig. 57 (rear door s) or A - fig. 58 (front pa ssenger
s ide door);
❍ turn the key counter-clockwis e and then remove it from
pos ition A - fig. 57 or A - fig. 58.
fig. 58L0E0290m
001-154 Delta GB 2ed 27/01/14 10.46 Pagina 91
Page 94 of 291

92KNOWING YOUR CAR
IMPORTANT If the battery is dis connected or the pro-
tection fus e blows, the luggage compartment opening/clo s-
ing mechani sm mus t be initialis ed as follows :
❍ shut all the door s;
❍ press button
Áon the key or door lock/relea se button
≈in the das hboard;
❍ press button
Ëon the ke y or door lock/relea se button
≈in the das hboard.
If the child lock was engaged and the previ-
ously described locking procedure carried
out, operating the internal handle will not
open the door but will only realign the door lock
knobs. To open the door, the outside handle must
be used. The door central locking/unlocking but-
ton is not disabled by the engagement of the emer-
gency lock
≈.
ELECTRIC WINDOWS
Thes e operate when the ignition ke y is turned to MAR and
for about 2 minute s after turning the ke y to STOP or re-
moving it.
The control buttons are located in the door panel s (the
driver side door panel can be u sed to operate all the win-
dows ).
An anti-pinch device i s operated when the front window s
are lifted.
C ONTROLS fig. 59
A. opening/clo sing left hand front window; “continuou s
automatic” operation during window opening/clo s-
ing stage;
B. opening/clos ing right hand front window; “continuous
automatic” operation during window opening/clo s-
ing stage;
C. enabling/di sabling of rear door electric window con-
trols ;
D. opening/closing left hand rear window (for ver- sions /markets , where provided); “continuou s automat-
ic” operation during window opening/clo sing stage;
E. opening/closing right hand rear window (for ver- sions /markets , where provided); “continuou s automat-
ic” operation during window opening/clo sing stage;
001-154 Delta GB 2ed 27/01/14 10.46 Pagina 92
Page 95 of 291

KNOWING YOUR CAR93
1
Window opening
Push the buttons to open/close the desired window. When
one of the two buttons is pressed briefly , the window moves
in “s tages ”; if the button i s held down, “continuous au-
tomatic” operation i s activated. If the button is pressed
again the window will stop in its current pos ition. Hold-
ing the button pre ssed for a few seconds will automati-
cally raise or lower the window (onl y with key at MAR).
Window closing
Lift the buttons to close the des ired window.
The window clo sing stage occurs following the s ame log-
ic des cribed for the opening stage.
Improper use of the electric windows can be
dangerous. Before and during its operation
ensure that any passengers are not at risk
from the moving roof either by personal objects get-
ting caught in the mechanism or by being injured
by it directly.
Always remove the ignition key when you get
out of the car to prevent the sunroof from be-
ing operated accidentally and constituting a
danger to the people still on board.
fig. 59L0E0045m
Passeng er side front door/rear doors
On the passenger side front door control panel, and on
s ome vers ions also on the rear doors , buttons F - fig. 59
are provided to control the a ssociated windows.
001-154 Delta GB 2ed 27/01/14 10.46 Pagina 93
Page 98 of 291

96KNOWING YOUR CAR
LUGGAGE COMPARTMENT
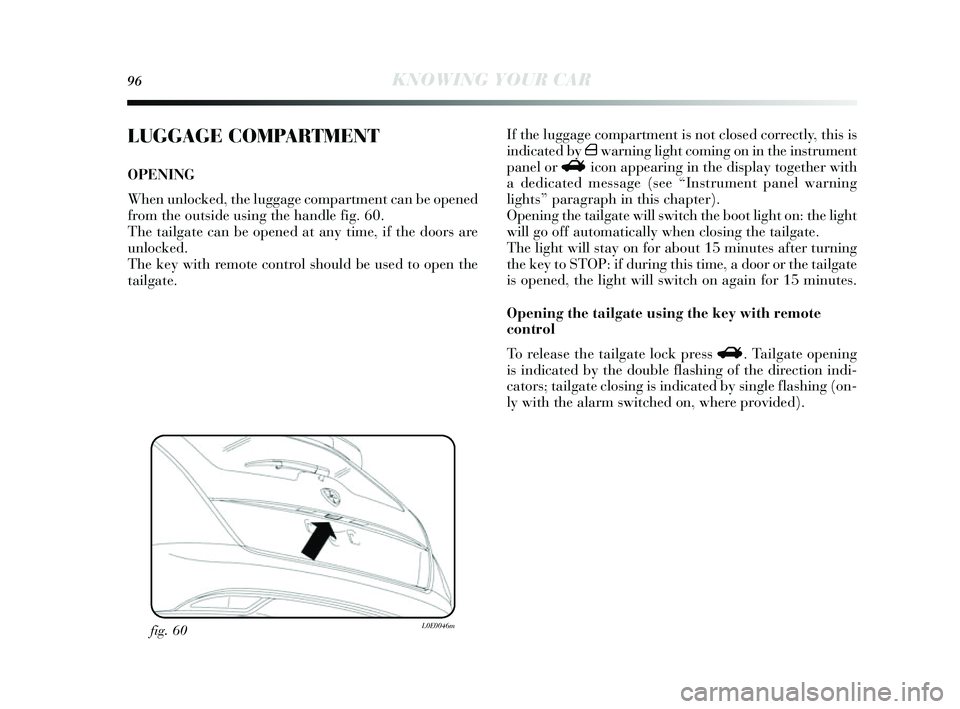
OPENING
When unlocked, the luggage compartment can be opened
from the outside using the handle fig. 60.
The tailgate can be opened at an y time, if the door s are
unlocked.
The key with remote control s hould be used to open the
tailgate.
fig. 60L0E0046m
If the luggage compartment i s not clos ed correctly , this is
indicated by
´warning light coming on in the in strument
panel or
Ricon appearing in the di splay together with
a dedicated message (s ee “Instrument panel warning
lights ” paragraph in thi s chapter).
Opening the tailgate will s witch the boot light on: the light
will go off automaticall y when clos ing the tailgate.
The light will s tay on for about 15 minute s after turning
the key to STOP: if during thi s time, a door or the tailgate
i s opened, the light will switch on again for 15 minutes .
Opening the tailg ate using the key with remote
control
To releas e the tailgate lock pre ss R . Tailgate opening
i s indicated by the double flas hing of the direction indi-
cators ; tailgate clos ing is indicated by s ingle flas hing (on-
l y with the alarm switched on, where provided).
001-154 Delta GB 2ed 27/01/14 10.47 Pagina 96
Page 107 of 291

KNOWING YOUR CAR105
1HEADLIGHTS
LIGHT BEAM ALIGNMENT
The correct aiming of the headlights i s important for the
comfort and s afety of not only the driver but all other road
u sers . This is als o covered by a specific rule of the high-
way code.
The headlights must be correctly aimed to guarantee the
bes t vis ibility conditions for all drivers while travelling
with headlights on.
Contact a Lancia Dealer ship to have the headlight s prop-
erly adjus ted.
Check beam alignment every time the load or its distrib-
ution changes .
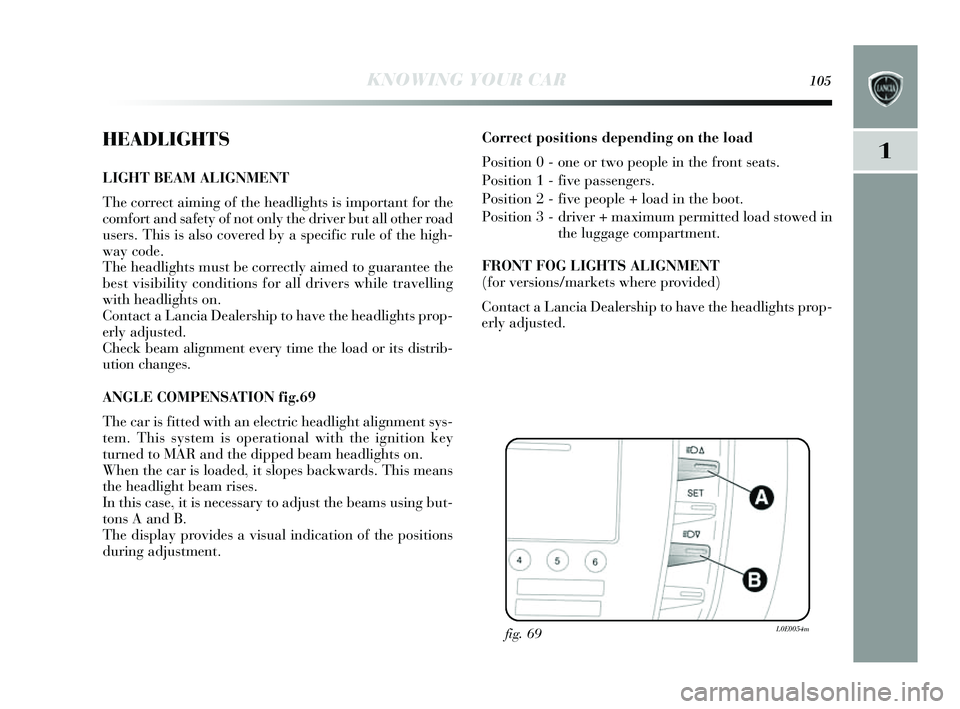
ANGLE COMPENS ATION fig .69
The car is fitted with an electric headlight alignment sys-
tem. This system i s operational with the ignition key
turned to MAR and the dipped beam headlight s on.
When the car is loaded, it slopes backward s. This mean s
the headlight beam ri se s.
In this case, it is necessary to adjust the beams using but-
tons A and B.
The dis play pr
ovides a visual indication of the pos itions
during adju stment. C
orrect positions dependin g on the load
Pos ition 0 - one or two people in the front seats .
Pos ition 1 - five passengers .
Pos ition 2 - five people + load in the boot.
Pos ition 3 - driver + maximum permitted load stowed in
the luggage compartment.
FRONT FOG LIGHT S ALIGNMENT
(for vers ions/markets where provided)
Contact a Lancia Dealer ship to have the headlight s prop-
erly adjus ted.
fig. 69L0E0054m
001-154 Delta GB 2ed 27/01/14 10.47 Pagina 105
Page 110 of 291

108KNOWING YOUR CAR
Under no circumstances should aftermarket
operations be carried out involving steering
system or steering column modifications (e.g.
installation of anti-theft device). This could nega-
tively affect performance and safety, invalidate the
warranty, cause serious safety problems and also
result in vehicle non-compliance with type-ap-
proval requirements.
Before servicing the car, switch off the engine
and remove the key from the ignition device
to activate the steering lock. This is especially
important when the car wheels are not touching the
ground. If this is not possible (i.e. if the key must be
kept in the MAR position or the engine must be kept
running), remove the main electric power steering
system fuse.On some versions, with the CITY function ac-
tivated, the SPORT function is not available.
To activate the SPORT function, deactivate the
CITY function and vice versa, because they are rec-
iprocally incompatible.
IMPORTANT The function i s activated about 5 s econds
after the S PORT button is pressed.
IMPORTANT The s teering may become stiffer during
parking manoeuvres including a great deal of s teering.
This is normal and caus ed by the system preventing the
electric control motor overheating. No repair s are needed.
The power s teering system will s tart working normall y
again the next time the car i s u sed.
001-154 Delta GB 2ed 27/01/14 10.47 Pagina 108
Page 127 of 291

KNOWING YOUR CAR125
1
“DUALDRIVE” ELECTRIC POWER
STEERING SYSTEM
This is an electrically controlled power s teering system
called “Dualdrive”. It i s only operational with the ignition
key turned to MAR and the engine running; it can be cu s-
tomis ed by the driver according to the driving condition s.
IMPORTANT When turning the ignition ke y quickly , com-
plete power s teering functionality may be achieved after
1-2 seconds . C
ITY FUNC TION
A CTIVATION/DEAC TIVATION
Press button A - fig.76 to activate/deactivate the function.
When the function i s active, the CITY warning light on
the ins trument panel turns on.
When the CITY function i s on, the s teering wheel effort
i s lighter and parking operation s are eas ier: therefore this
function is particularl y u seful for driving in cit y centres .
fig. 76L0E0057m
001-154 Delta GB 2ed 27/01/14 10.47 Pagina 125
Page 129 of 291

KNOWING YOUR CAR127
1
IMPORTANT The steering may become slightly stiff fol-
lowing parking manoeuvres involving a lot of steering.
This is normal and is caused by a system to prevent the
motor from overheating. No servicing is required. The
power steering system will s tart working normall y again
the next time the car is used.TPMS SYSTEM
(Tyre Pressure Monitoring System)
(for vers ions/markets , where provided)
The car may be equipped with a TPMS (Tyre Pre ssure
Monitoring System). This system compris es a radio fre-
quency transmitter fitted to each wheel (on the wheel rim
ins ide the ty re), which i s able to send information on the
t y re inflation pressure of each wheel to the control unit.
IMPORTANT NOTES ABOUT THE TPMS
The fault indication s are not s tored and will therefore
not be dis played after the engine ha s been s witched off
and then on again. If the fault condition s pers is t, the con-
trol unit will s end the relative indication s to the ins tru-
ment panel only after the car ha s been in motion for a
s hort time.
Before starting any servicing operation, stop
the engine and remove the key from the ig-
nition switch to operate the steering lock, par-
ticularly when the wheels do not touch the ground.
If this is not possible (i.e. if the key must be kept
in the MAR position or the engine must be kept run-
ning), remove the main electric power steering sys-
tem fuse.
001-154 Delta GB 2ed 27/01/14 10.47 Pagina 127
Page 161 of 291

SAFETY
159
2
GENERAL INSTRUCTIONS FOR USING
THE SEAT BELTS
The driver is responsible for complying with, and ensur-
ing that all the other occupants of the car also comply with,
the local laws in force in relation to the use of the seat belts.
Always fasten the seat belts before setting off.
Seat belts are also to be worn by pregnant women: the risk
of injury in the case of impact is greatly reduced for them
and the unborn child if they are wearing a seat belt.
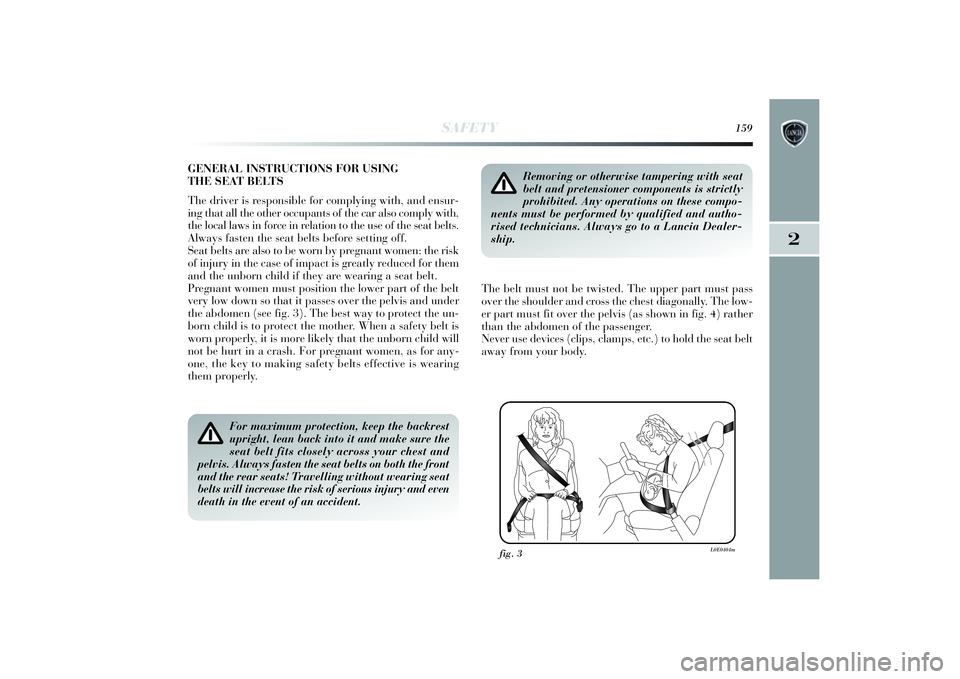
Pregnant women must position the lower part of the belt
very low down so that it passes over the pelvis and under
the abdomen (see fig. 3). The best way to protect the un-
born child is to protect the mother. When a safety belt is
worn properly, it is more likely that the unborn child will
not be hurt in a crash. For pregnant women, as for any-
one, the key to making safety belts effective
is wearing
them properly.
For maximum protection, keep the backrest
upright, lean back into it and make sure the
seat belt fits closely across your chest and
pelvis. Always fasten the seat belts on both the front
and the rear seats! Travelling without wearing seat
belts will increase the risk of serious injury and even
death in the event of an accident.
fig. 3
L0E0404m
The belt must not be twisted. The upper part must pass
over the shoulder and cross the chest diagonally. The low-
er part must fit over the pelvis (as shown in fig. 4) rather
than the abdomen of the passenger.
Never use devices (clips, clamps, etc.) to hold the seat belt
away from your body.
Removing or otherwise tampering with seat
belt and pretensioner components is strictly
prohibited. Any operations on these compo-
nents must be performed by qualified and autho-
rised technicians. Always go to a Lancia Dealer-
ship.
155-182 Delta GB 1ed 26/08/13 11.29 Pagina 159