LAND ROVER FRELANDER 2 2006 Repair Manual
FRELANDER 2 2006
LAND ROVER
LAND ROVER
https://www.carmanualsonline.info/img/64/57251/w960_57251-0.png
LAND ROVER FRELANDER 2 2006 Repair Manual
Trending: transmission, fold seats, wheel alignment, height, air conditioning, fuse diagram, low oil pressure
Page 2111 of 3229
Publi s hed: 11-May-2011
Interior Trim and Ornamentation - B-Pillar Upper Trim Panel
Removal and Inst all ati on
Removal
• NOTE: Removal s t eps in t his procedure may cont ain i nst all ati on det ail s.
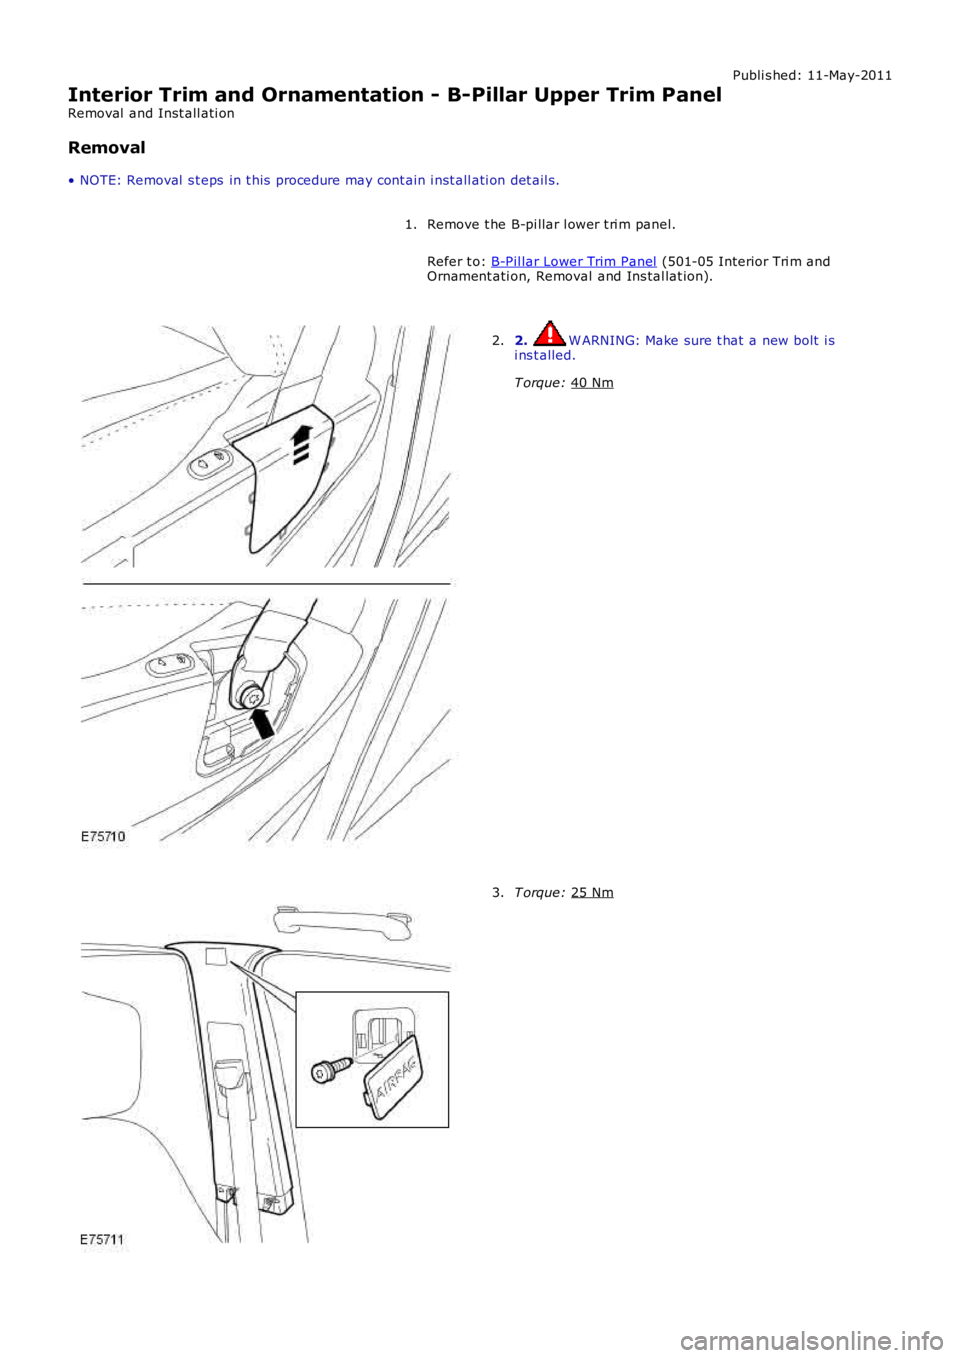
Remove t he B-pi llar l ower t ri m panel.
Refer t o: B-Pil lar Lower Trim Panel (501-05 Interior Tri m and
Ornament ati on, Removal and Ins tal lat ion).
1. 2. W ARNING: Make sure t hat a new bolt i s
i ns t alled.
T orque: 40 Nm 2.
T orque:
25 Nm 3.
Page 2112 of 3229
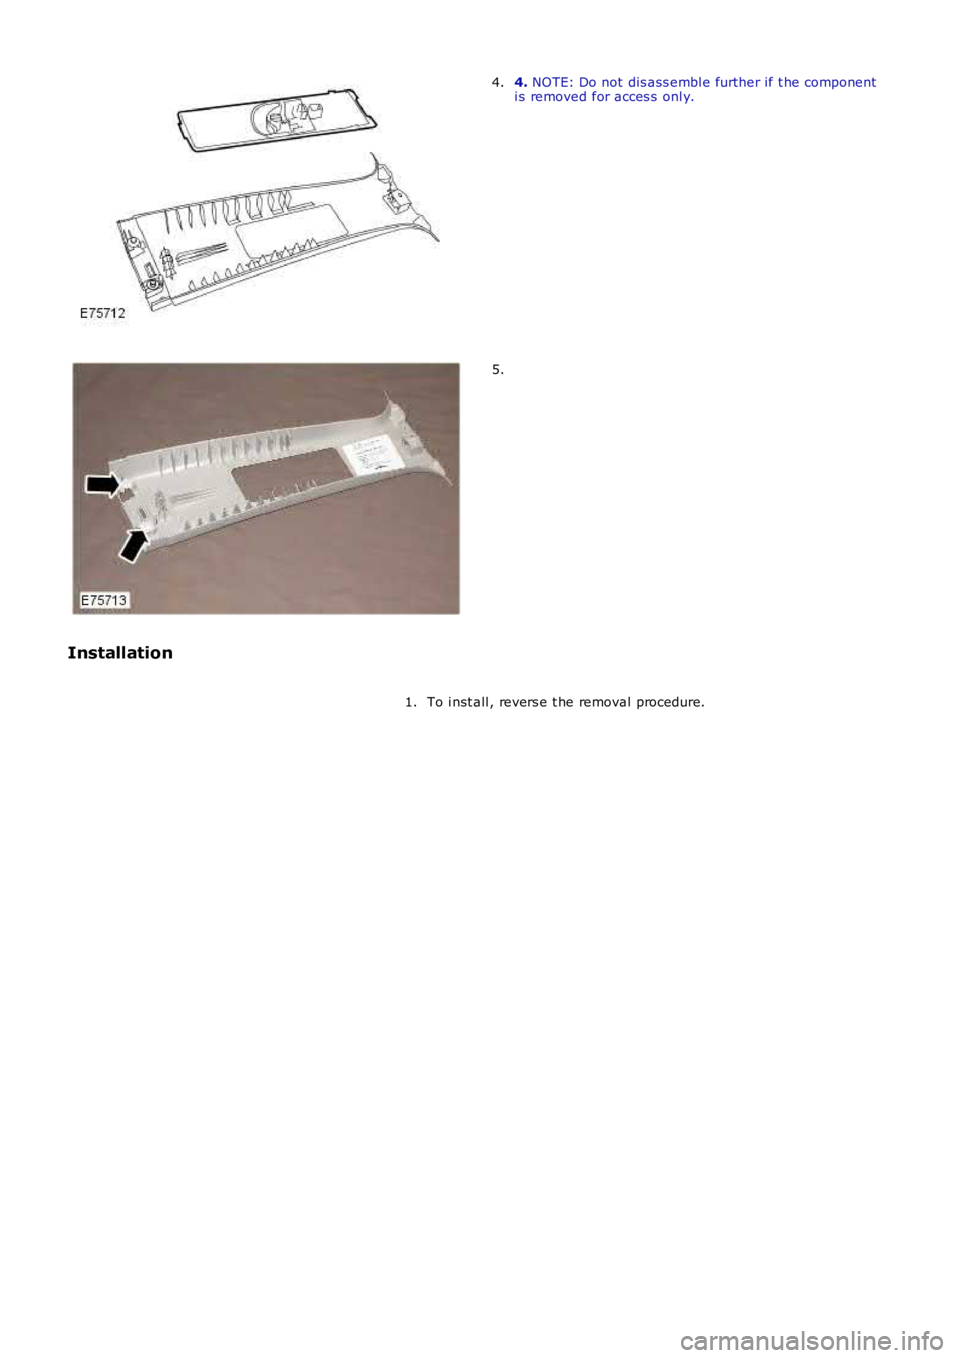
4. NOTE: Do not dis ass embl e further if t he componenti s removed for acces s onl y.4.
5.
Installation
To i nst all , revers e t he removal procedure.1.
Page 2113 of 3229
Publi s hed: 11-May-2011
Interior Trim and Ornamentation - B-Pillar Lower Trim Panel
Removal and Inst all ati on
Removal
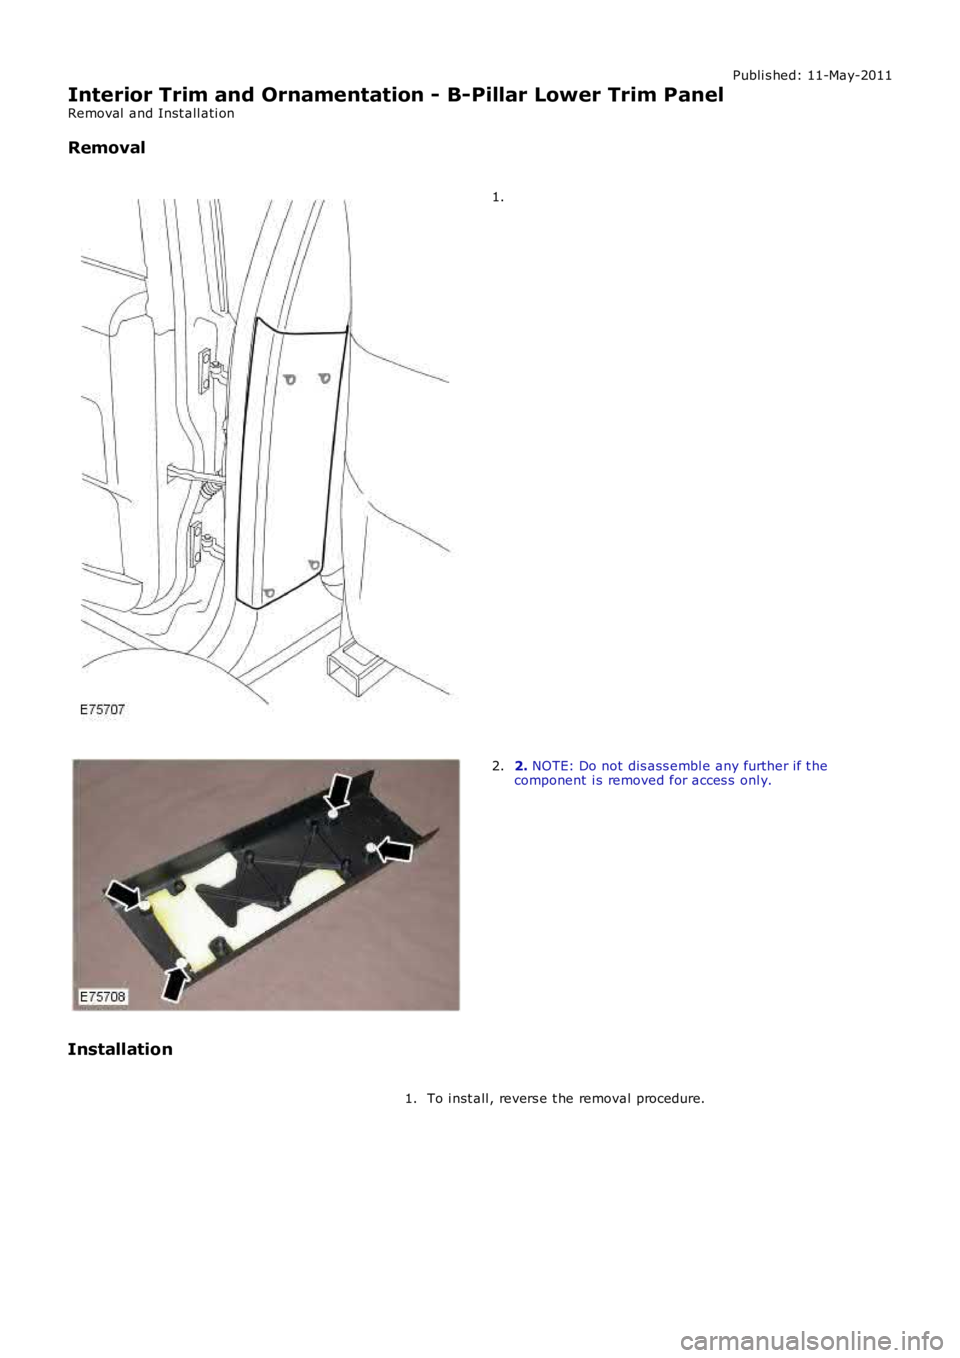
1.
2. NOTE: Do not dis ass embl e any further if t hecomponent i s removed for acces s onl y.2.
Installation
To i nst all , revers e t he removal procedure.1.
Page 2114 of 3229
Publi s hed: 11-May-2011
Interior Trim and Ornamentation - C-Pillar Trim Panel
Removal and Inst all ati on
Removal
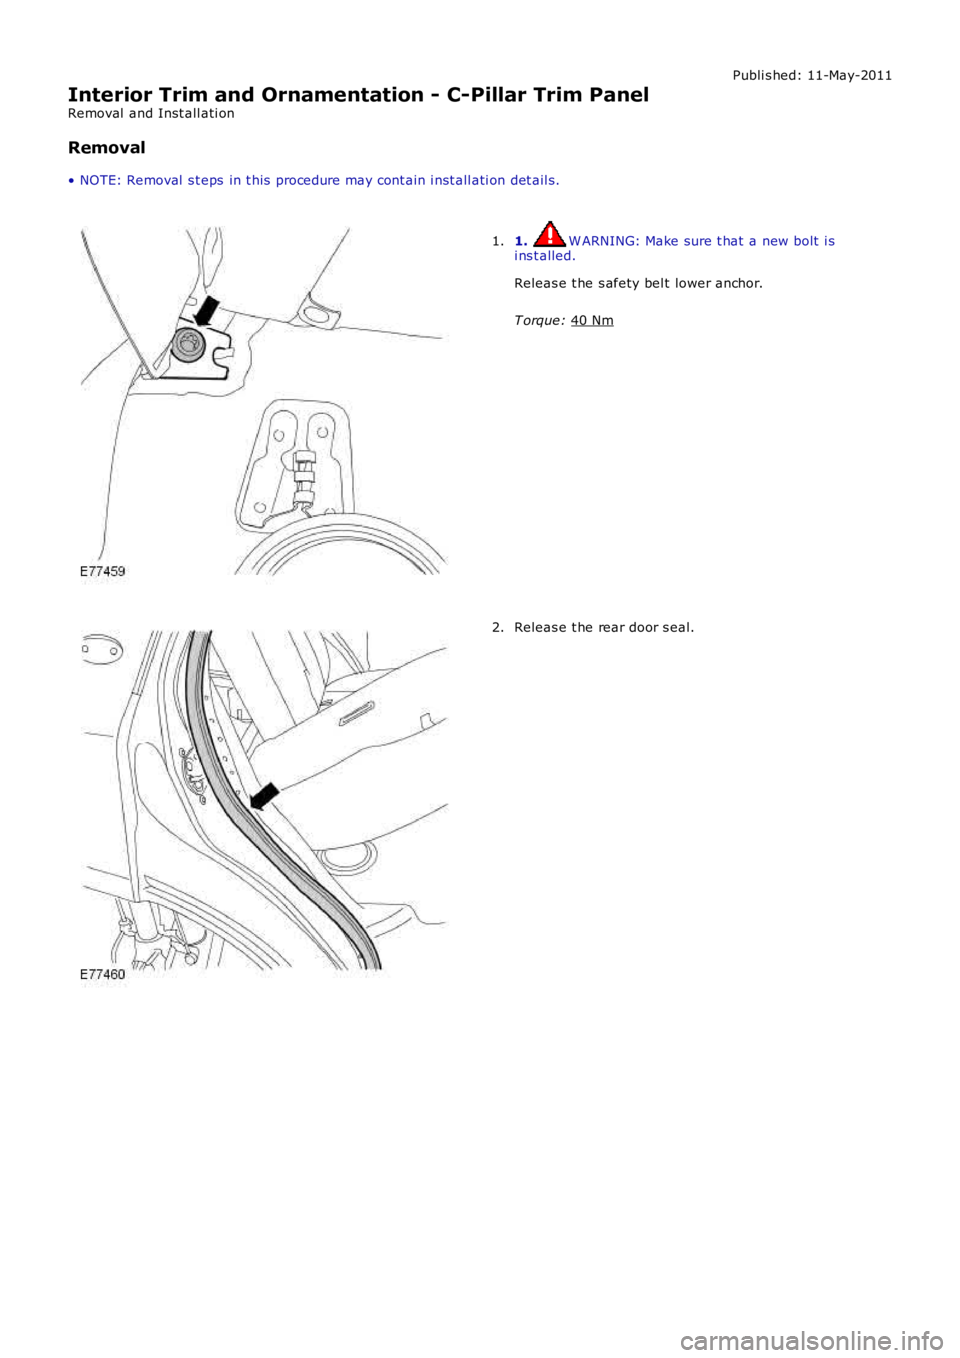
• NOTE: Removal s t eps in t his procedure may cont ain i nst all ati on det ail s. 1. W ARNING: Make sure t hat a new bolt i s
i ns t alled.
Releas e t he s afety bel t lower anchor.
T orque: 40 Nm 1.
Releas e t he rear door s eal.
2.
Page 2115 of 3229
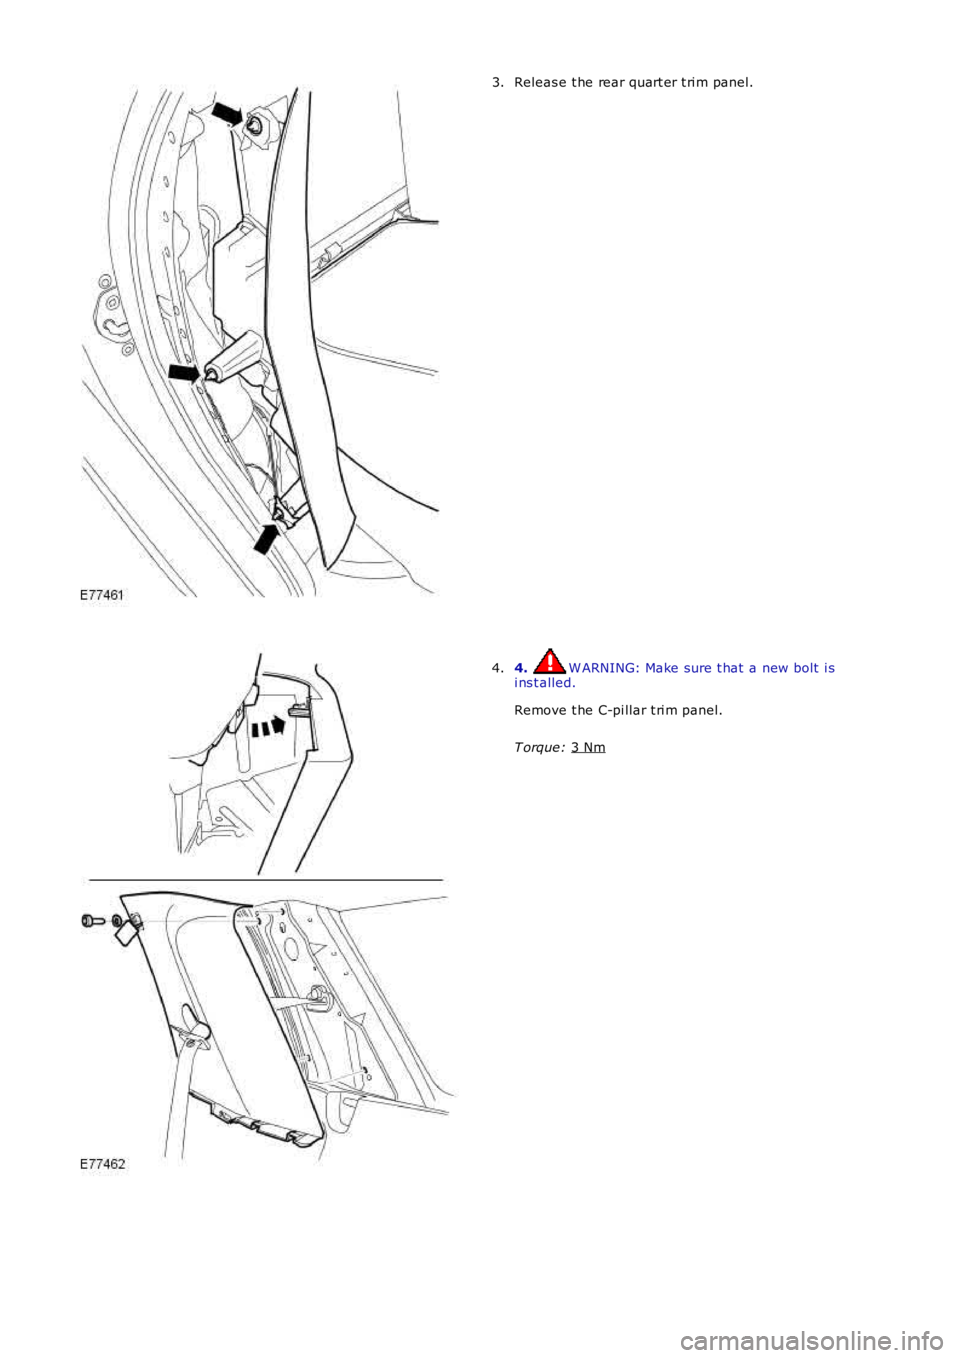
Releas e t he rear quart er t ri m panel.
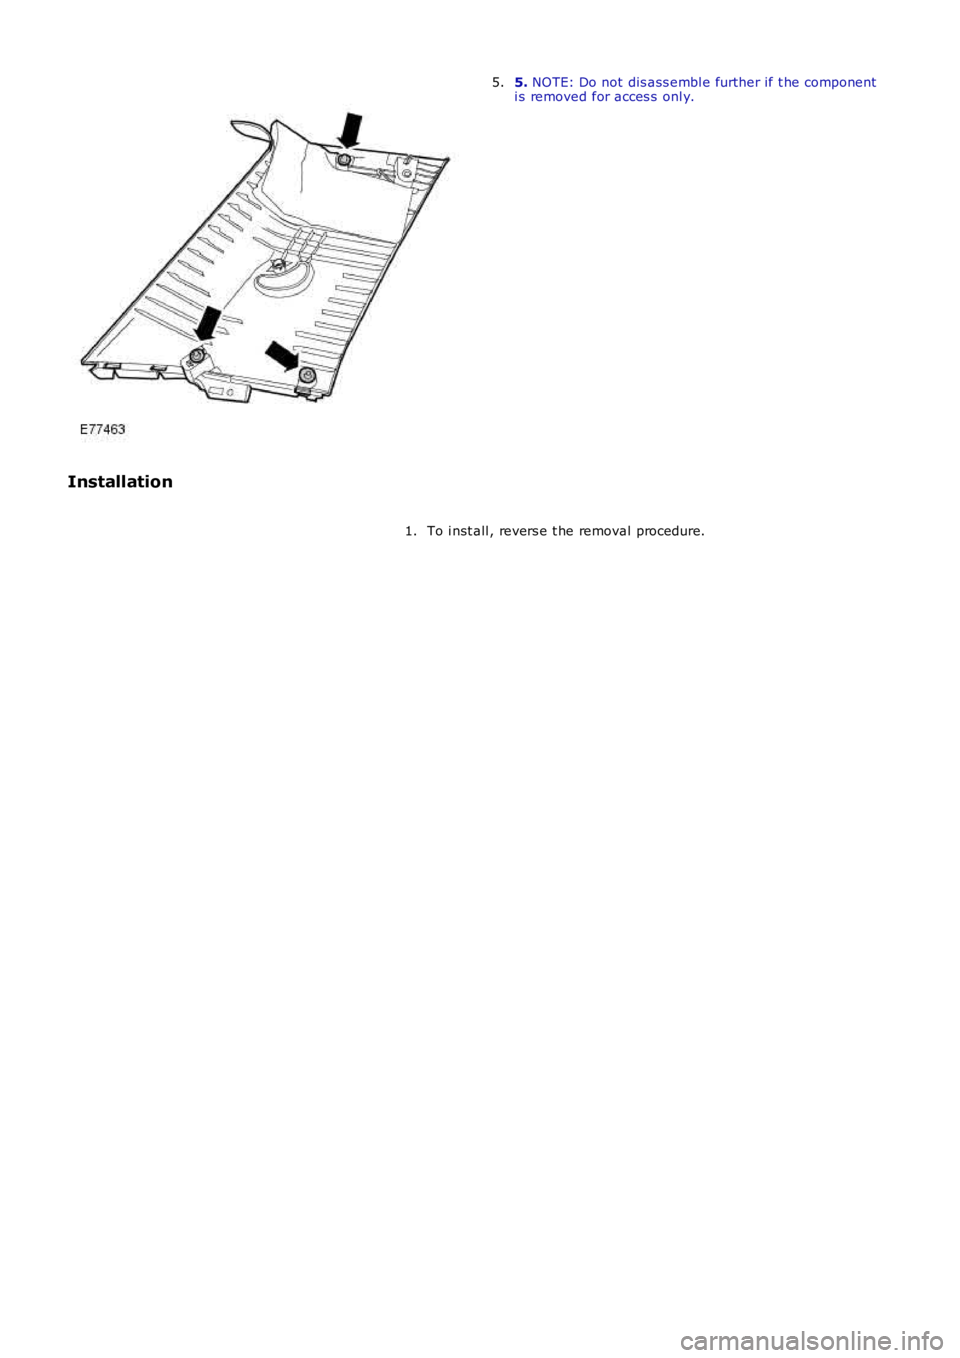
3. 4. W ARNING: Make sure t hat a new bolt i s
i ns t alled.
Remove t he C-pi llar t ri m panel.
T orque: 3 Nm 4.
Page 2116 of 3229
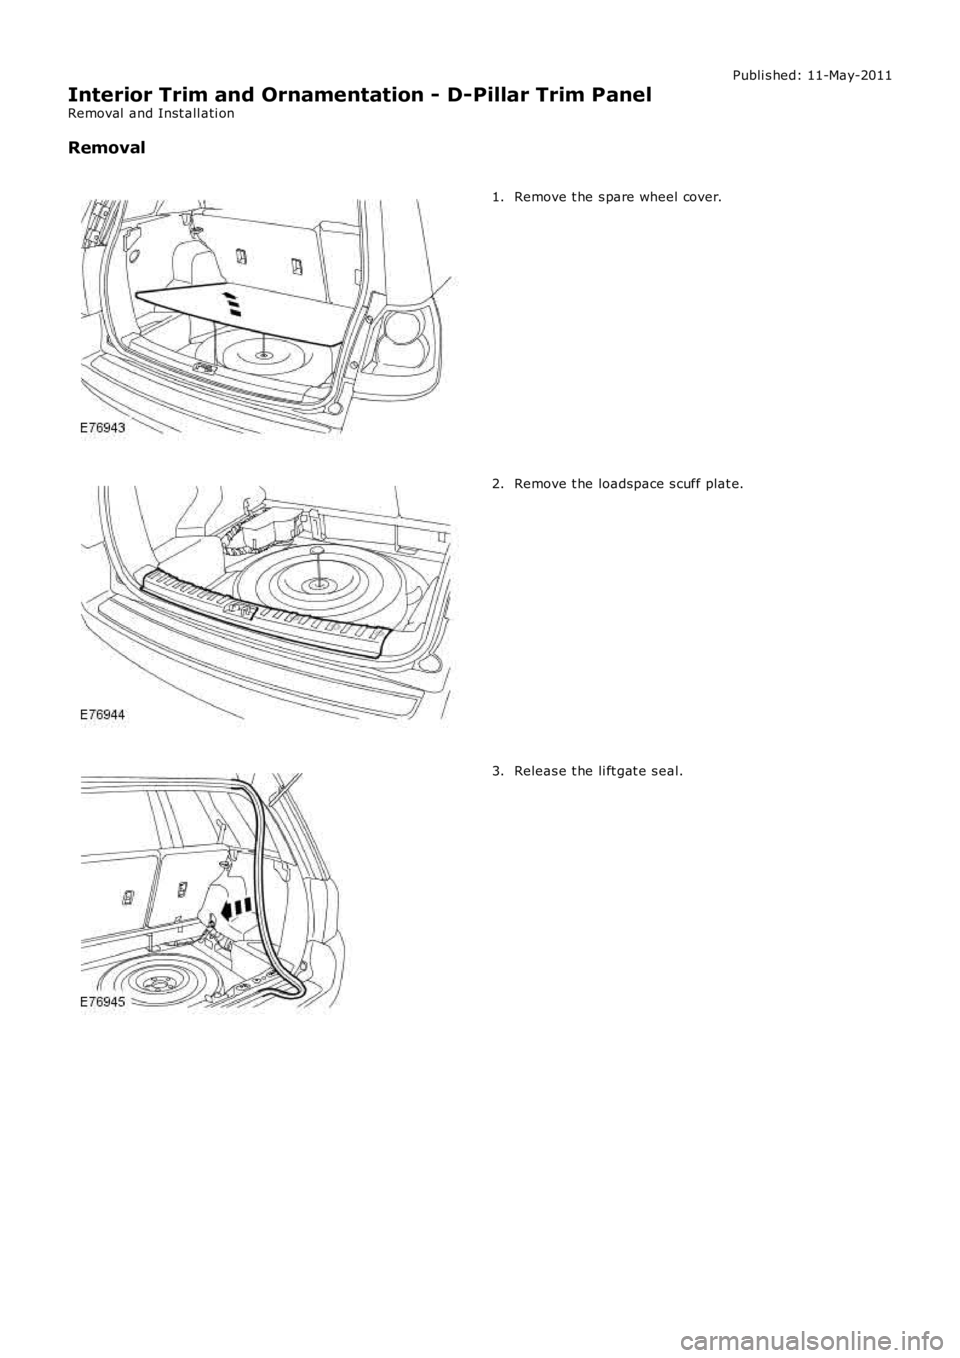
5. NOTE: Do not dis ass embl e further if t he componenti s removed for acces s onl y.5.
Installation
To i nst all , revers e t he removal procedure.1.
Page 2117 of 3229
Publi s hed: 11-May-2011
Interior Trim and Ornamentation - D-Pillar Trim Panel
Removal and Inst all ati on
Removal
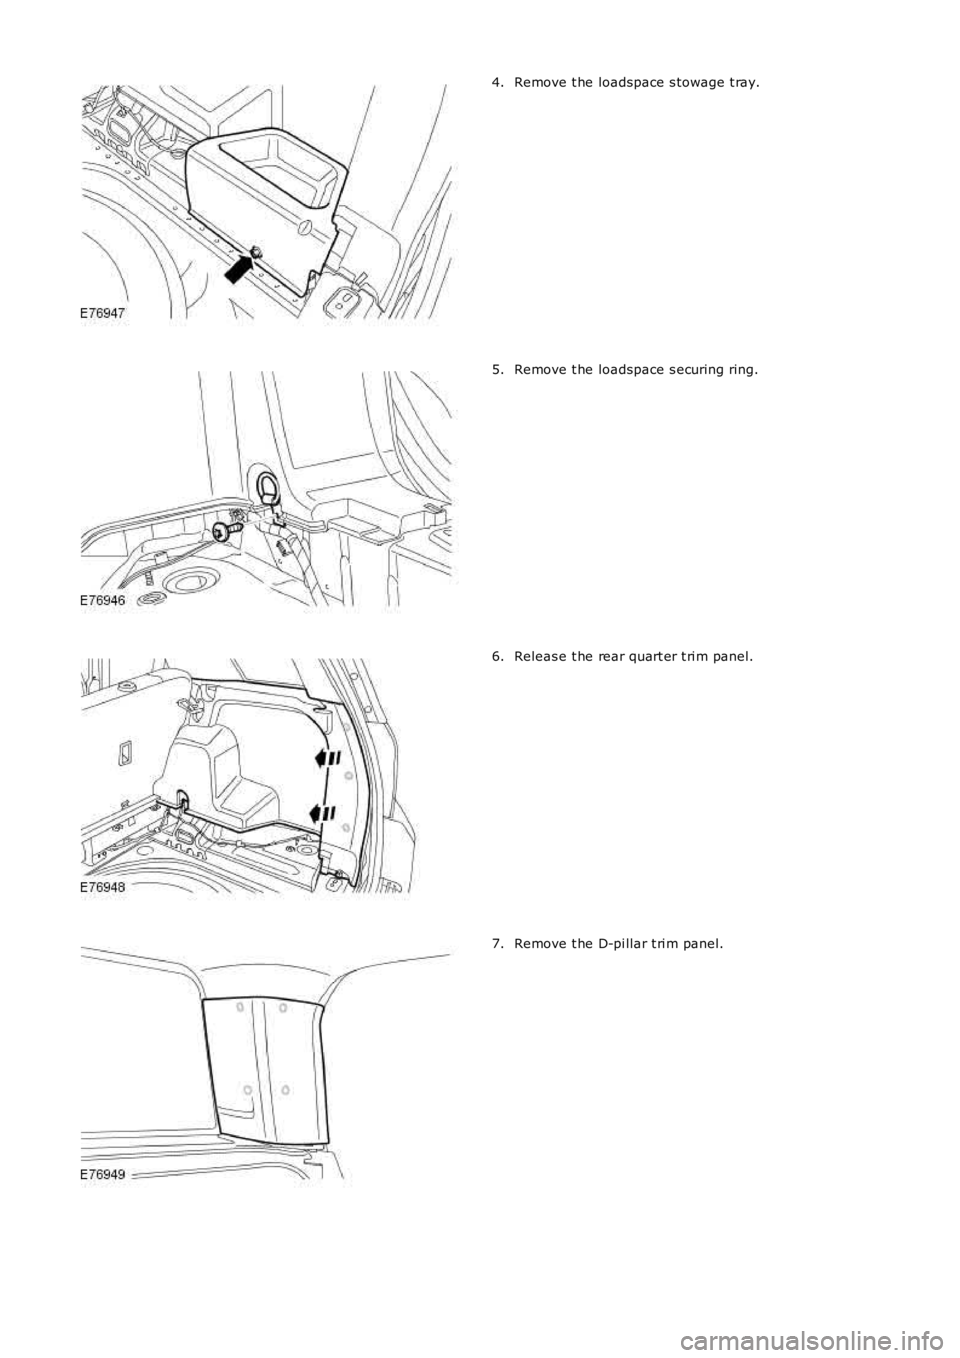
Remove t he s pare wheel cover.1.
Remove t he loadspace s cuff plat e.2.
Releas e t he li ft gat e s eal.3.
Page 2118 of 3229
Remove t he loadspace s towage t ray.4.
Remove t he loadspace s ecuring ring.5.
Releas e t he rear quart er t ri m panel.6.
Remove t he D-pi llar t ri m panel.7.
Page 2119 of 3229
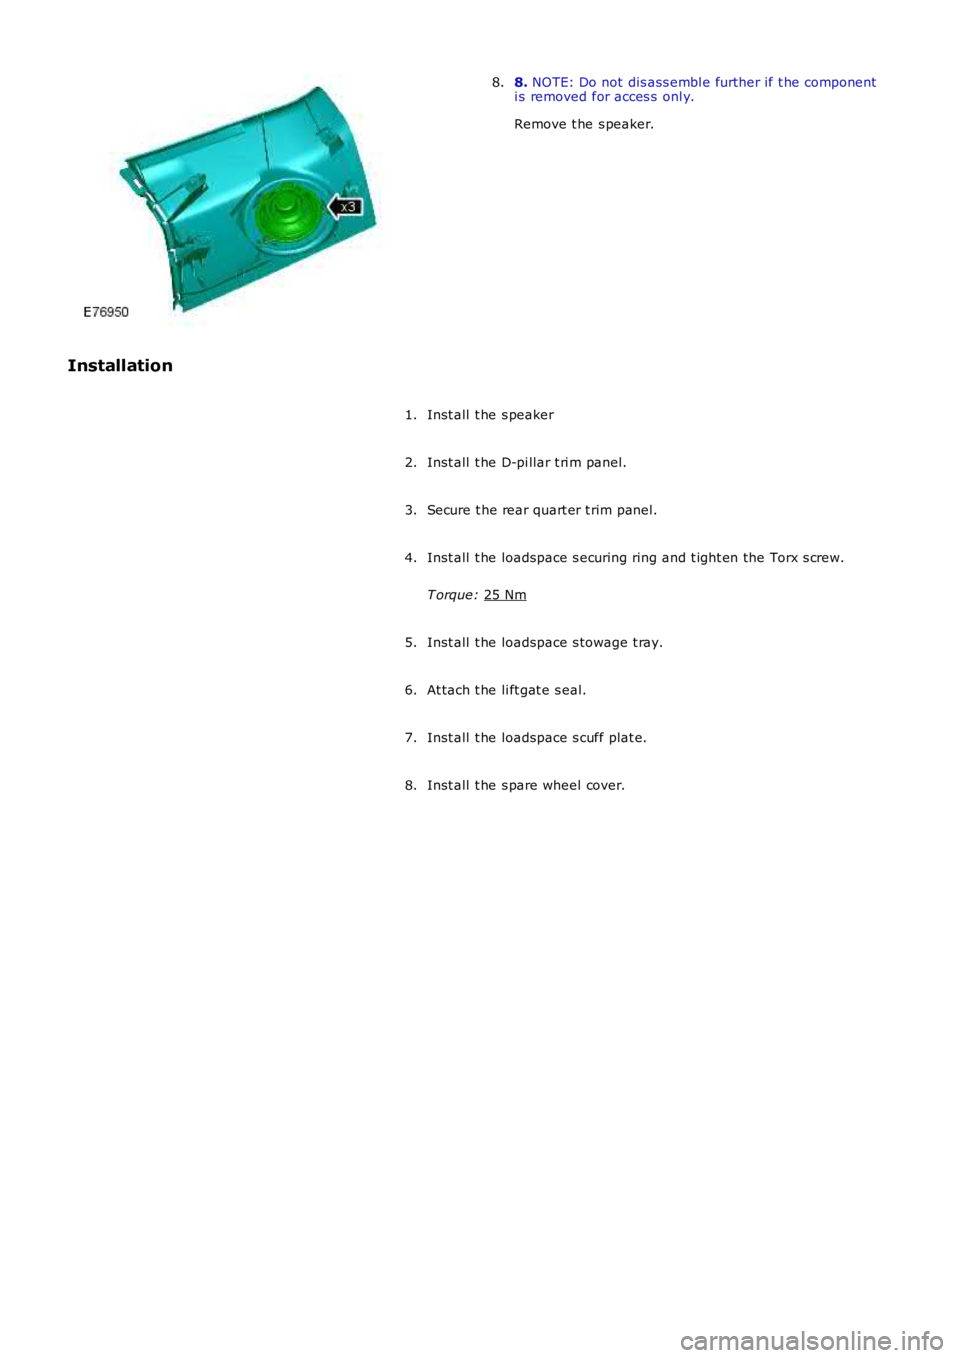
8.
NOTE: Do not dis ass embl e further if t he component
i s removed for acces s onl y.
Remove t he s peaker.
8.
Installation Inst all t he s peaker
1.
Inst all t he D-pi llar t ri m panel.
2.
Secure t he rear quart er t rim panel.
3.
Inst all t he loadspace s ecuring ring and t ight en the Torx s crew.
T orque: 25 Nm 4.
Inst all t he loadspace s towage t ray.
5.
At tach t he li ft gat e s eal.
6.
Inst all t he loadspace s cuff plat e.
7.
Inst all t he s pare wheel cover.
8.
Page 2120 of 3229
Publi s hed: 11-May-2011
Interior Trim and Ornamentation - Front Door Trim Panel
Removal and Inst all ati on
Removal
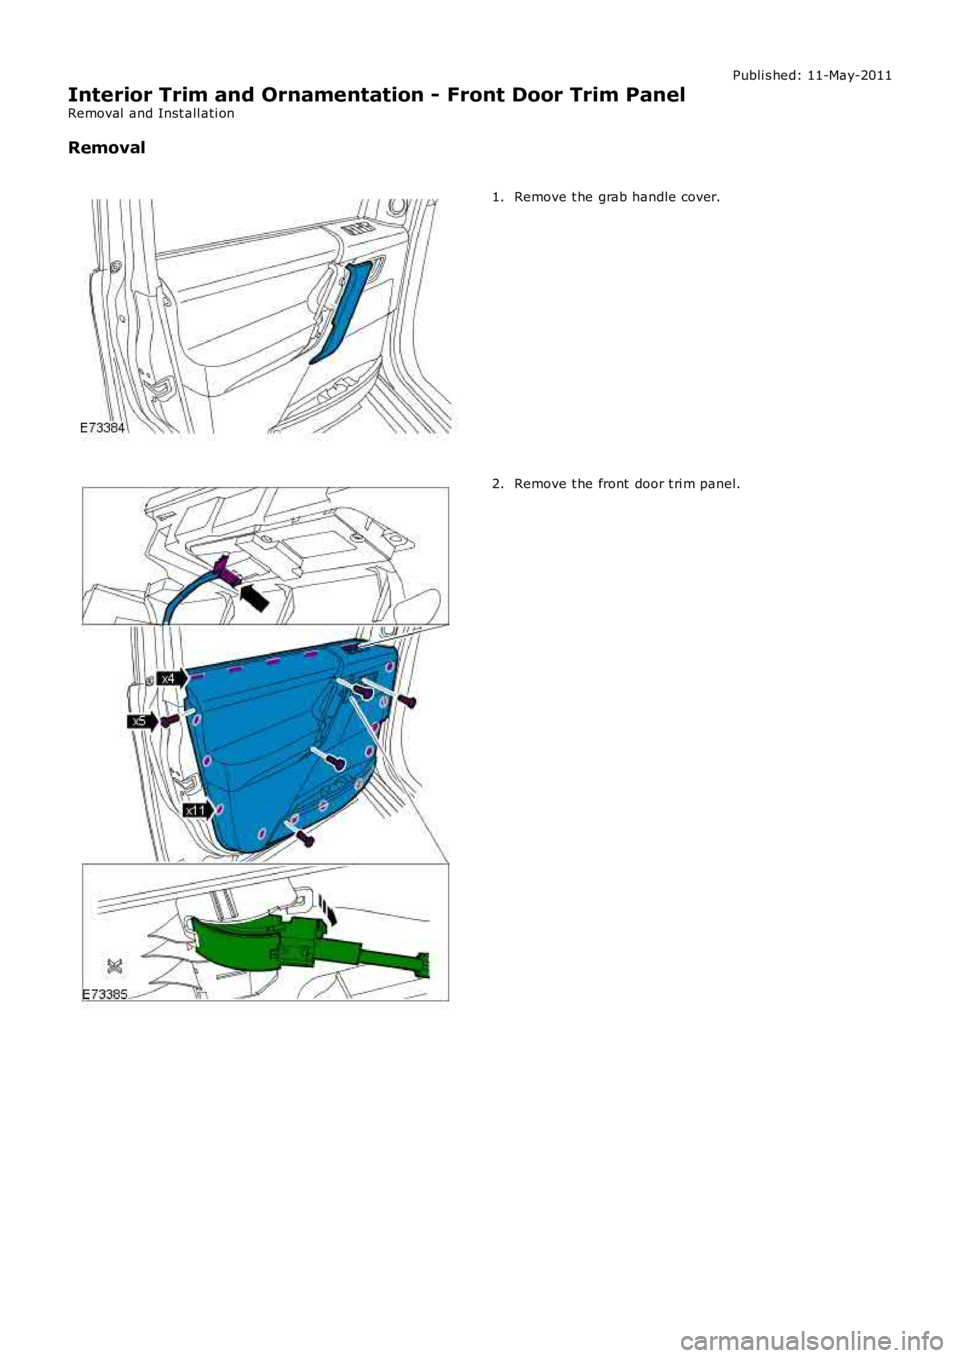
Remove t he grab handle cover.1.
Remove t he front door t ri m panel.2.
Trending: battery, start stop button, ECU, auxiliary battery, brake pads, overheating, sat nav
