Lexus GX460 2021 / LEXUS 2021 GX460 QUICK GUIDE (OM60T24U) User Guide
Manufacturer: LEXUS, Model Year: 2021, Model line: GX460, Model: Lexus GX460 2021Pages: 106, PDF Size: 2.71 MB
Page 11 of 106
11
GX460_QG_OM60T24U_(U)
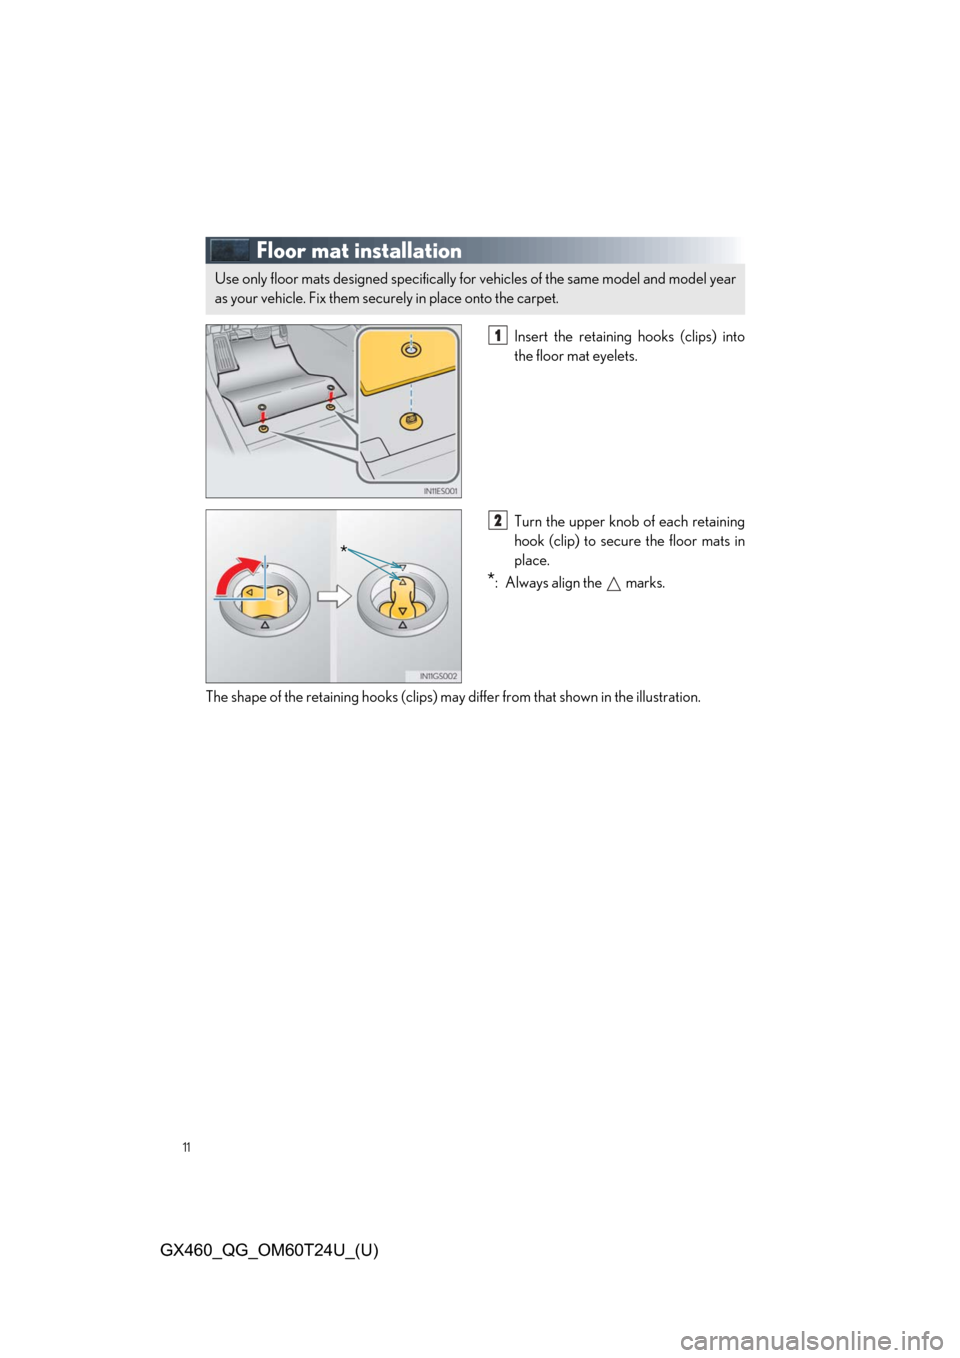
Floor mat installation
Insert the retaining hooks (clips) into
the floor mat eyelets.
Turn the upper knob of each retaining
hook (clip) to secure the floor mats in
place.
*: Always align the marks.
The shape of the retaining hooks (clips) may di ffer from that shown in the illustration.
Use only floor mats designed specifically for vehicles of the same model and model year
as your vehicle. Fix them securely in place onto the carpet.
1
*
2
Page 12 of 106
12
GX460_QG_OM60T24U_(U)
Keys
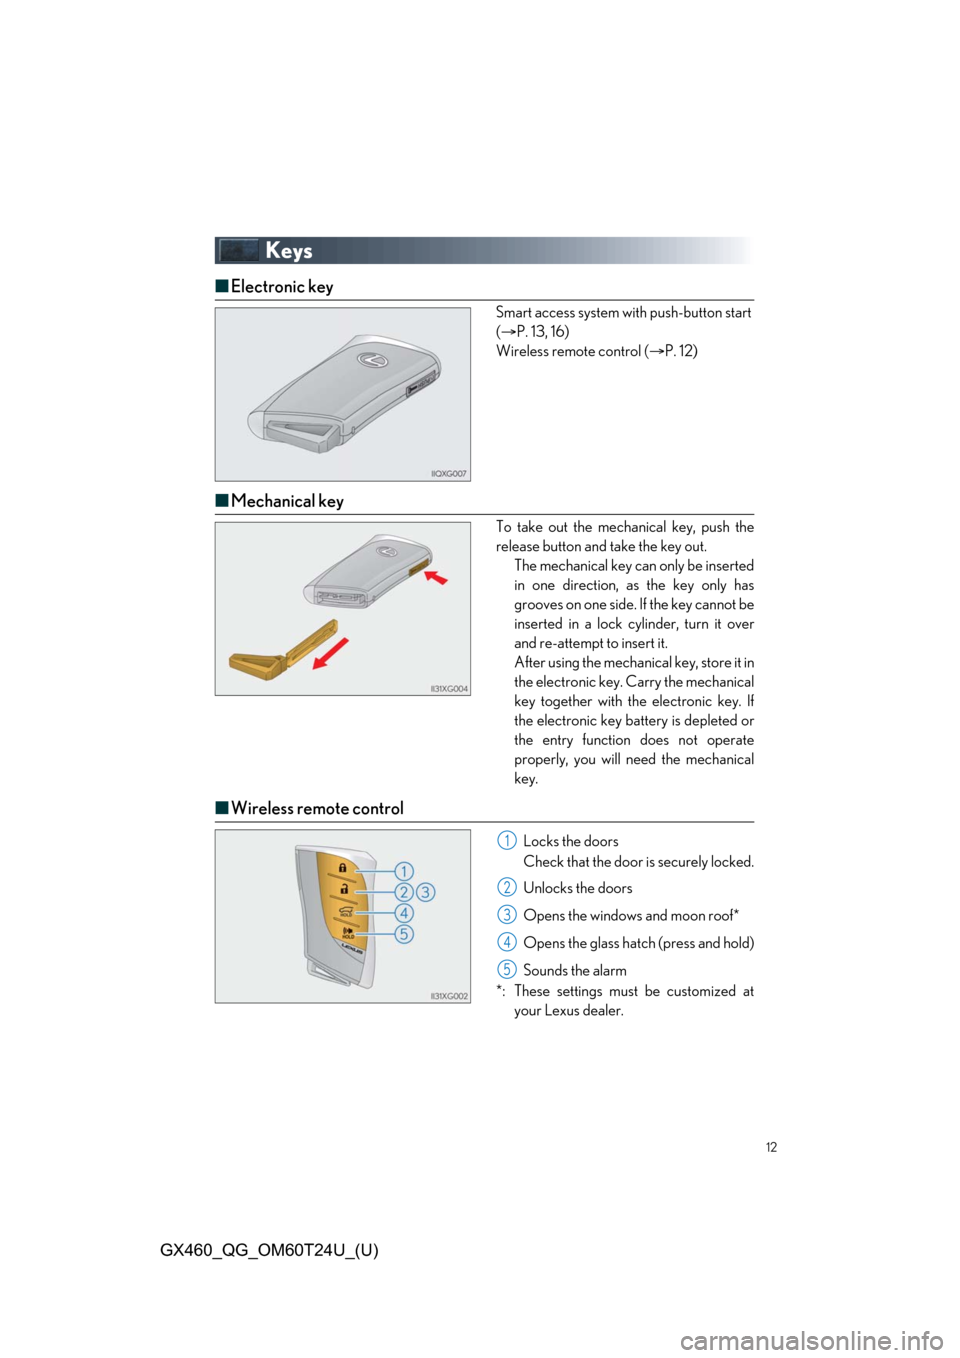
■Electronic key
Smart access system with push-button start
( P. 13, 16)
Wireless remote control ( P. 12)
■Mechanical key
To take out the mechanical key, push the
release button and take the key out.
The mechanical key can only be inserted
in one direction, as the key only has
grooves on one side. If the key cannot be
inserted in a lock cylinder, turn it over
and re-attempt to insert it.
After using the mechani cal key, store it in
the electronic key. Carry the mechanical
key together with the electronic key. If
the electronic key battery is depleted or
the entry function does not operate
properly, you will ne ed the mechanical
key.
■ Wireless remote control
Locks the doors
Check that the door is securely locked.
Unlocks the doors
Opens the windows and moon roof*
Opens the glass hatch (press and hold)
Sounds the alarm
*: These settings must be customized at your Lexus dealer.1
2
3
4
5
Page 13 of 106
13
GX460_QG_OM60T24U_(U)
Smart Access System with Push-button Start
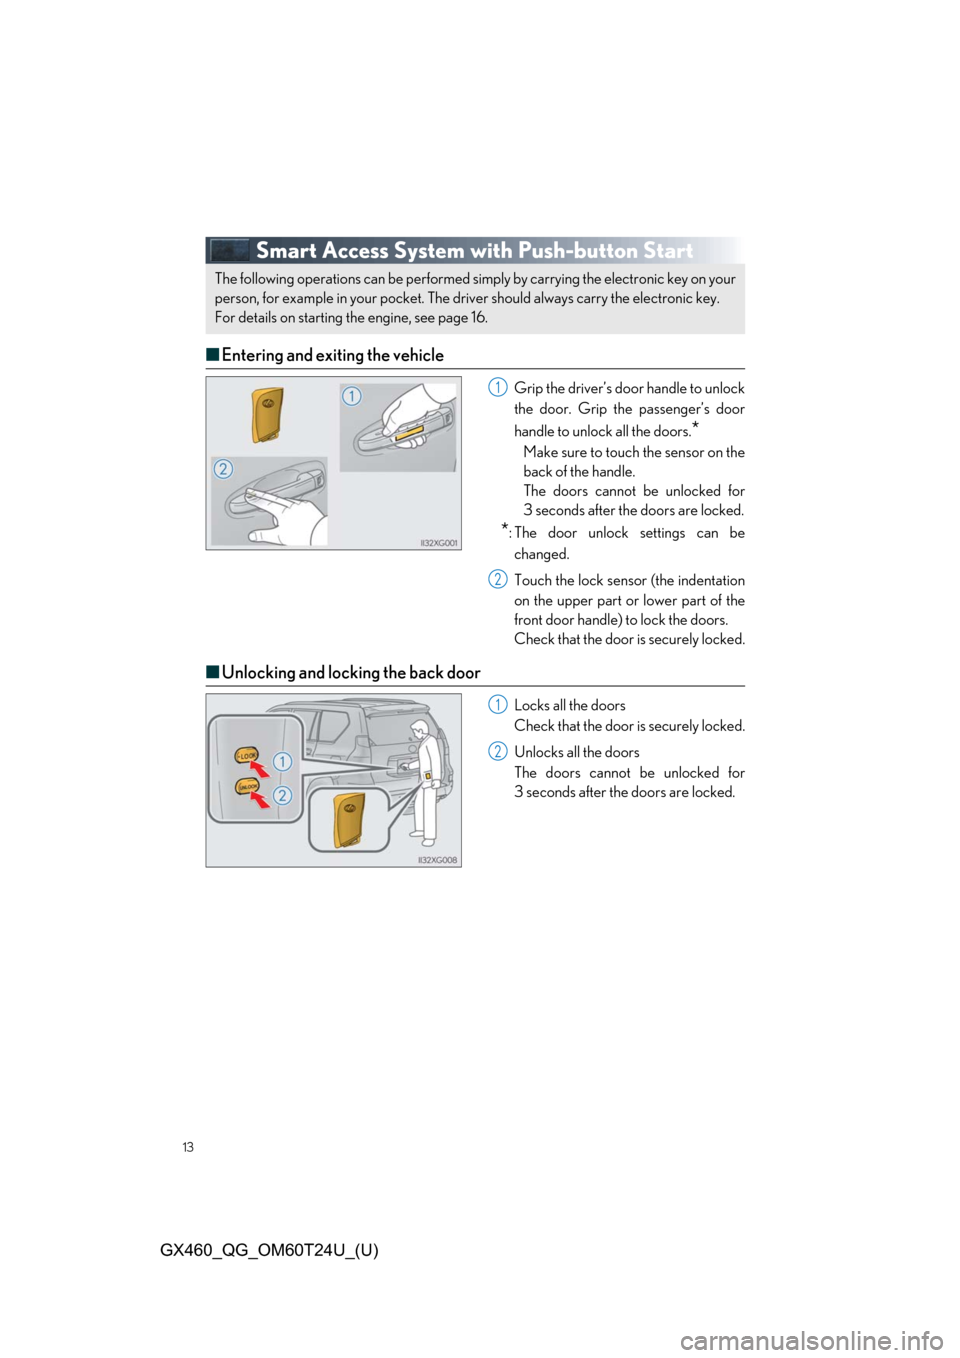
■Entering and exiting the vehicle
Grip the driver’s door handle to unlock
the door. Grip the passenger’s door
handle to unlock all the doors.
*
Make sure to touch the sensor on the
back of the handle.
The doors cannot be unlocked for
3 seconds after the doors are locked.
*: The door unlock settings can be
changed.
Touch the lock sensor (the indentation
on the upper part or lower part of the
front door handle) to lock the doors.
Check that the door is securely locked.
■ Unlocking and locking the back door
Locks all the doors
Check that the door is securely locked.
Unlocks all the doors
The doors cannot be unlocked for
3 seconds after the doors are locked.
The following operations can be performed simply by carrying the electronic key on your
person, for example in your pocket. The driver should always carry the electronic key.
For details on starting the engine, see page 16.
1
2
1
2
Page 14 of 106
14
GX460_QG_OM60T24U_(U)
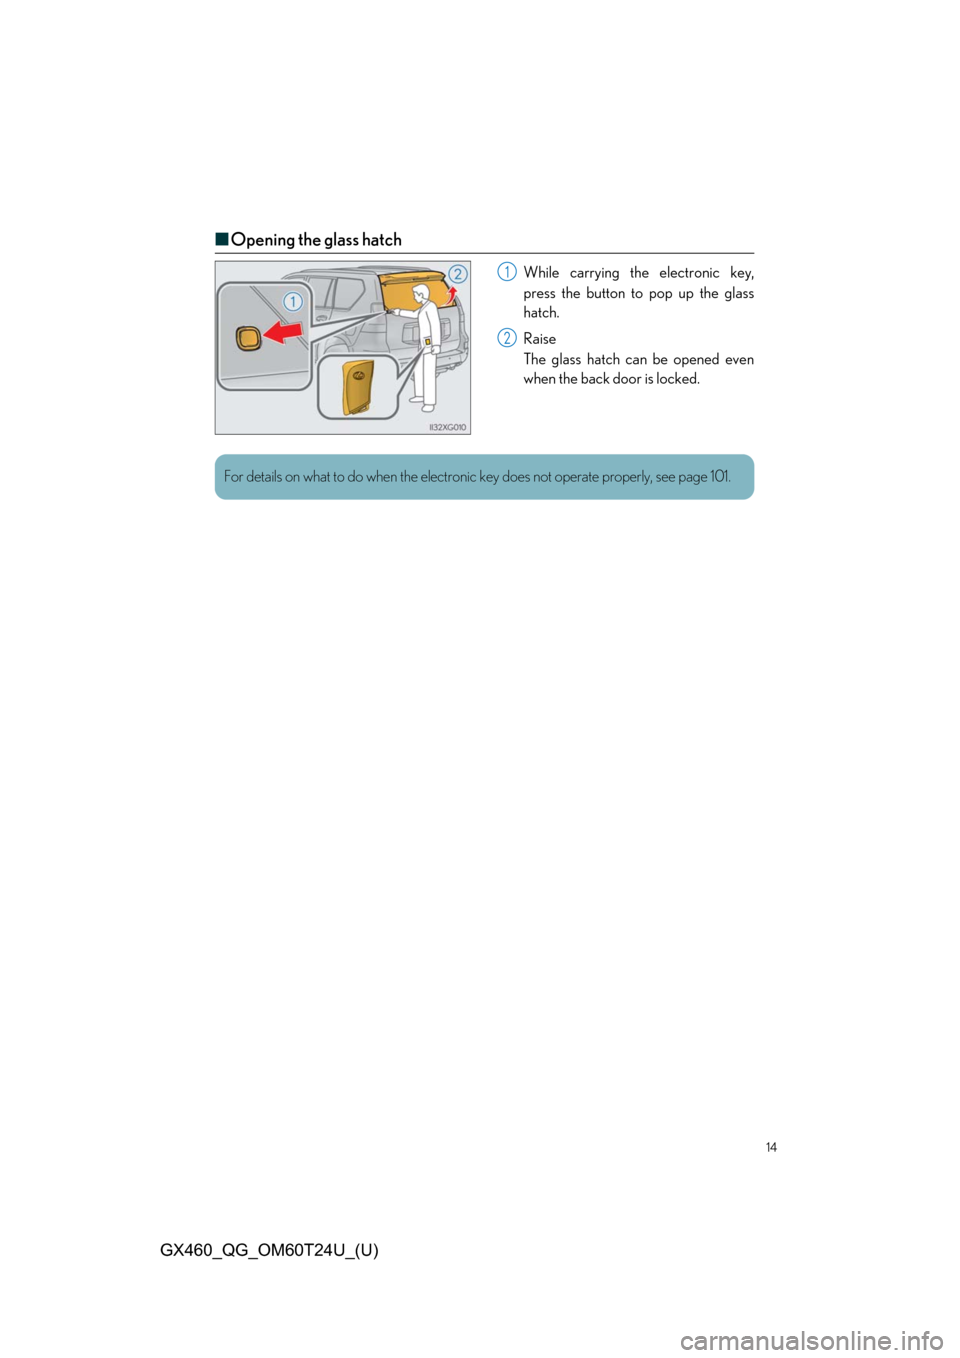
■Opening the glass hatch
While carrying the electronic key,
press the button to pop up the glass
hatch.
Raise
The glass hatch can be opened even
when the back door is locked.1
2
For details on what to do when the electronic key does not operate properly, see page 101.
Page 15 of 106
15
GX460_QG_OM60T24U_(U)
Theft Deterrent System
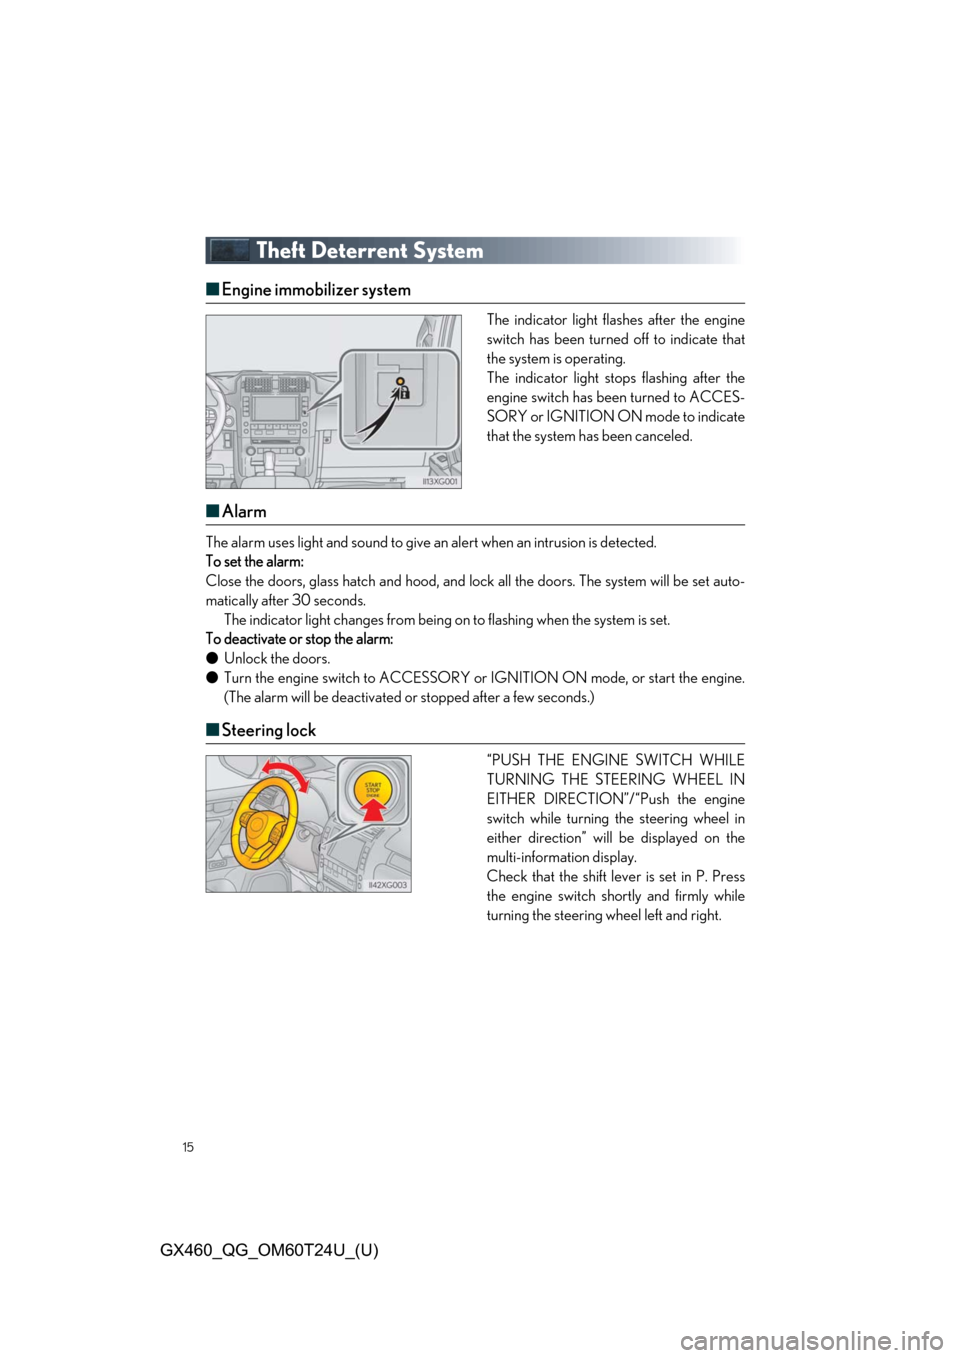
■Engine immobilizer system
The indicator light flashes after the engine
switch has been turned off to indicate that
the system is operating.
The indicator light stop s flashing after the
engine switch has been turned to ACCES-
SORY or IGNITION ON mode to indicate
that the system has been canceled.
■ Alarm
The alarm uses light and sound to give an alert when an intrusion is detected.
To set the alarm:
Close the doors, glass hatch and hood, and lock all the doors. The system will be set auto-
matically after 30 seconds. The indicator light changes from being on to flashing when the system is set.
To deactivate or stop the alarm:
● Unlock the doors.
● Turn the engine switch to ACCESSORY or IGNITION ON mode, or start the engine.
(The alarm will be deactivated or stopped after a few seconds.)
■Steering lock
“PUSH THE ENGINE SWITCH WHILE
TURNING THE STEERING WHEEL IN
EITHER DIRECTION”/“Push the engine
switch while turning the steering wheel in
either direction” will be displayed on the
multi-information display.
Check that the shift leve r is set in P. Press
the engine switch shortly and firmly while
turning the steering wheel left and right.
Page 16 of 106
16
GX460_QG_OM60T24U_(U)
Engine (Ignition) Switch
■Starting the engine
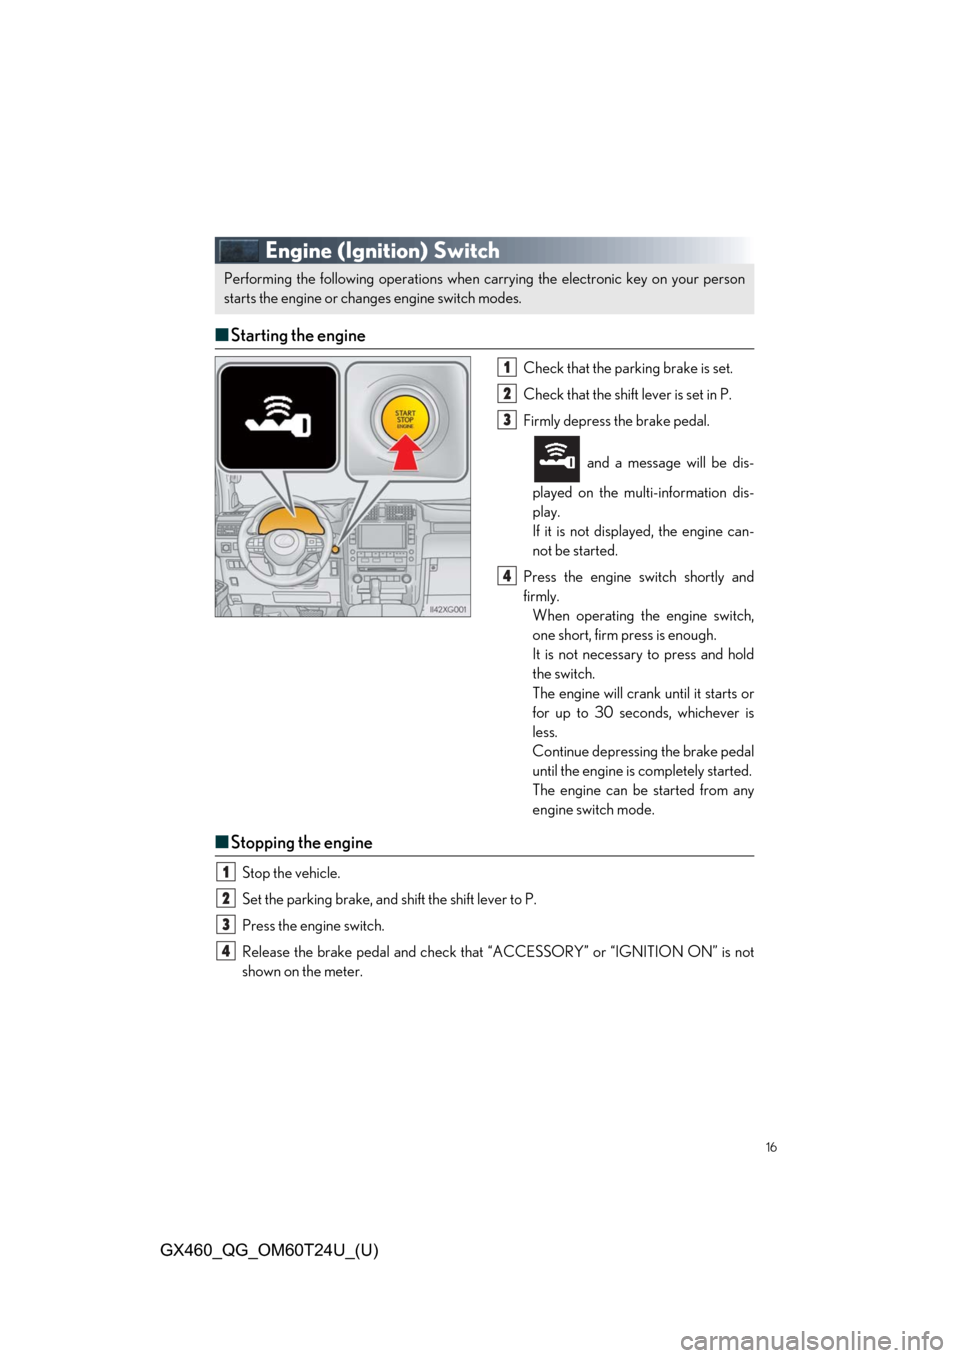
Check that the par king brake is set.
Check that the shift lever is set in P.
Firmly depress the brake pedal.
and a message will be dis-
played on the multi-information dis-
play.
If it is not displayed, the engine can-
not be started.
Press the engine switch shortly and
firmly. When operating the engine switch,
one short, firm press is enough.
It is not necessary to press and hold
the switch.
The engine will crank until it starts or
for up to 30 seconds, whichever is
less.
Continue depressing the brake pedal
until the engine is completely started.
The engine can be started from any
engine switch mode.
■ Stopping the engine
Stop the vehicle.
Set the parking brake, and shift the shift lever to P.
Press the engine switch.
Release the brake pedal an d check that “ACCESSORY” or “IGNITION ON” is not
shown on the meter.
Performing the following oper ations when carrying the electronic key on your person
starts the engine or changes engine switch modes.
1
2
3
4
1
2
3
4
Page 17 of 106
17
GX460_QG_OM60T24U_(U)
■Changing engine switch modes
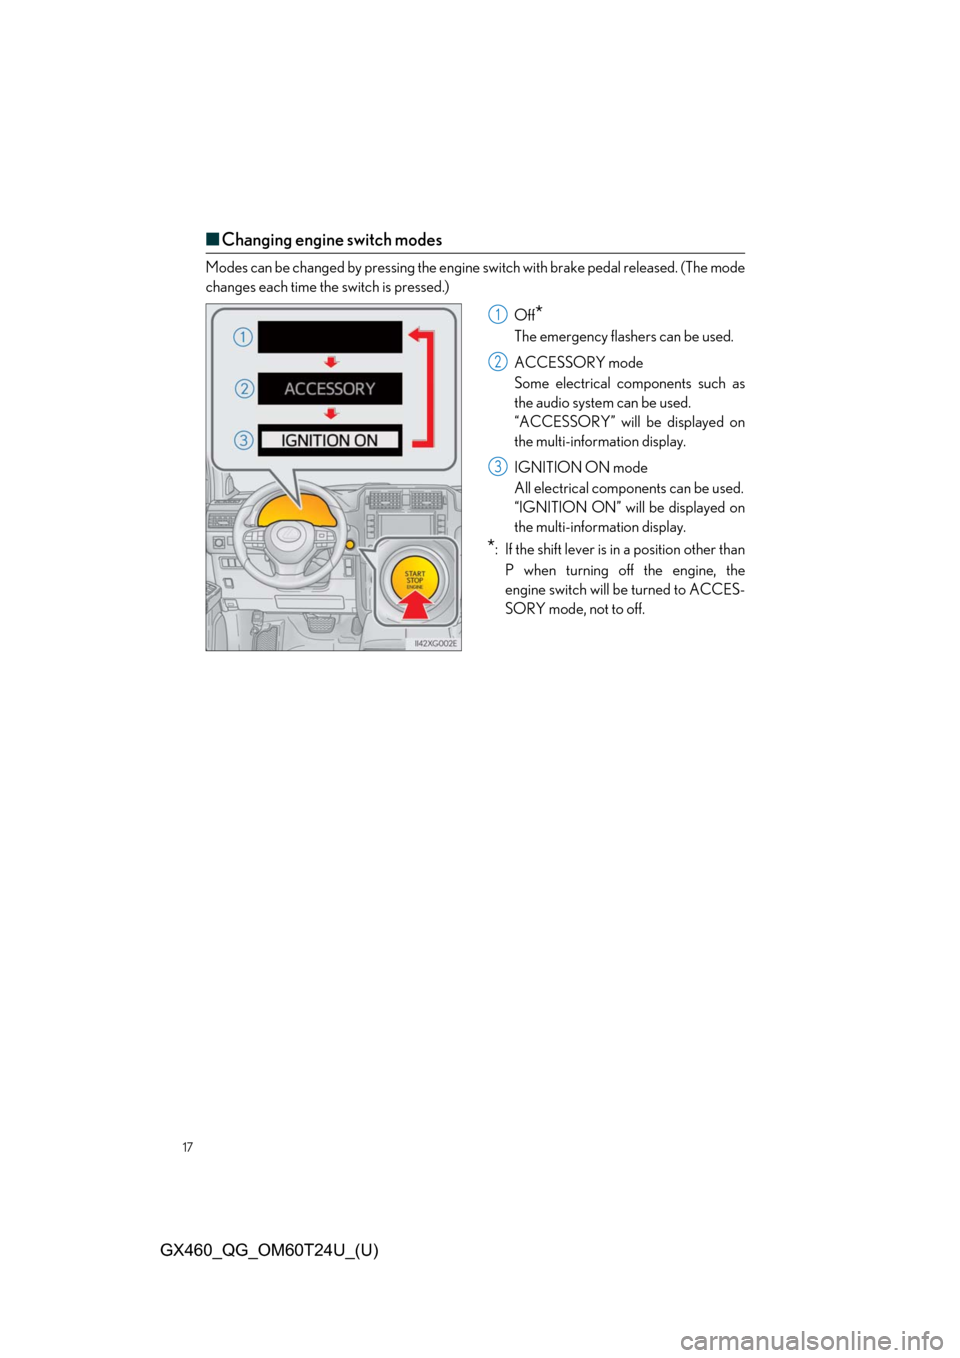
Modes can be changed by pressing the engine switch with brake pedal released. (The mode
changes each time the switch is pressed.)
Off
*
The emergency flashers can be used.
ACCESSORY mode
Some electrical components such as
the audio system can be used.
“ACCESSORY” will be displayed on
the multi-information display.
IGNITION ON mode
All electrical components can be used.
“IGNITION ON” will be displayed on
the multi-information display.
*: If the shift lever is in a position other than
P when turning off the engine, the
engine switch will be turned to ACCES-
SORY mode, not to off.
1
2
3
Page 18 of 106
18
GX460_QG_OM60T24U_(U)
Multi-information Display
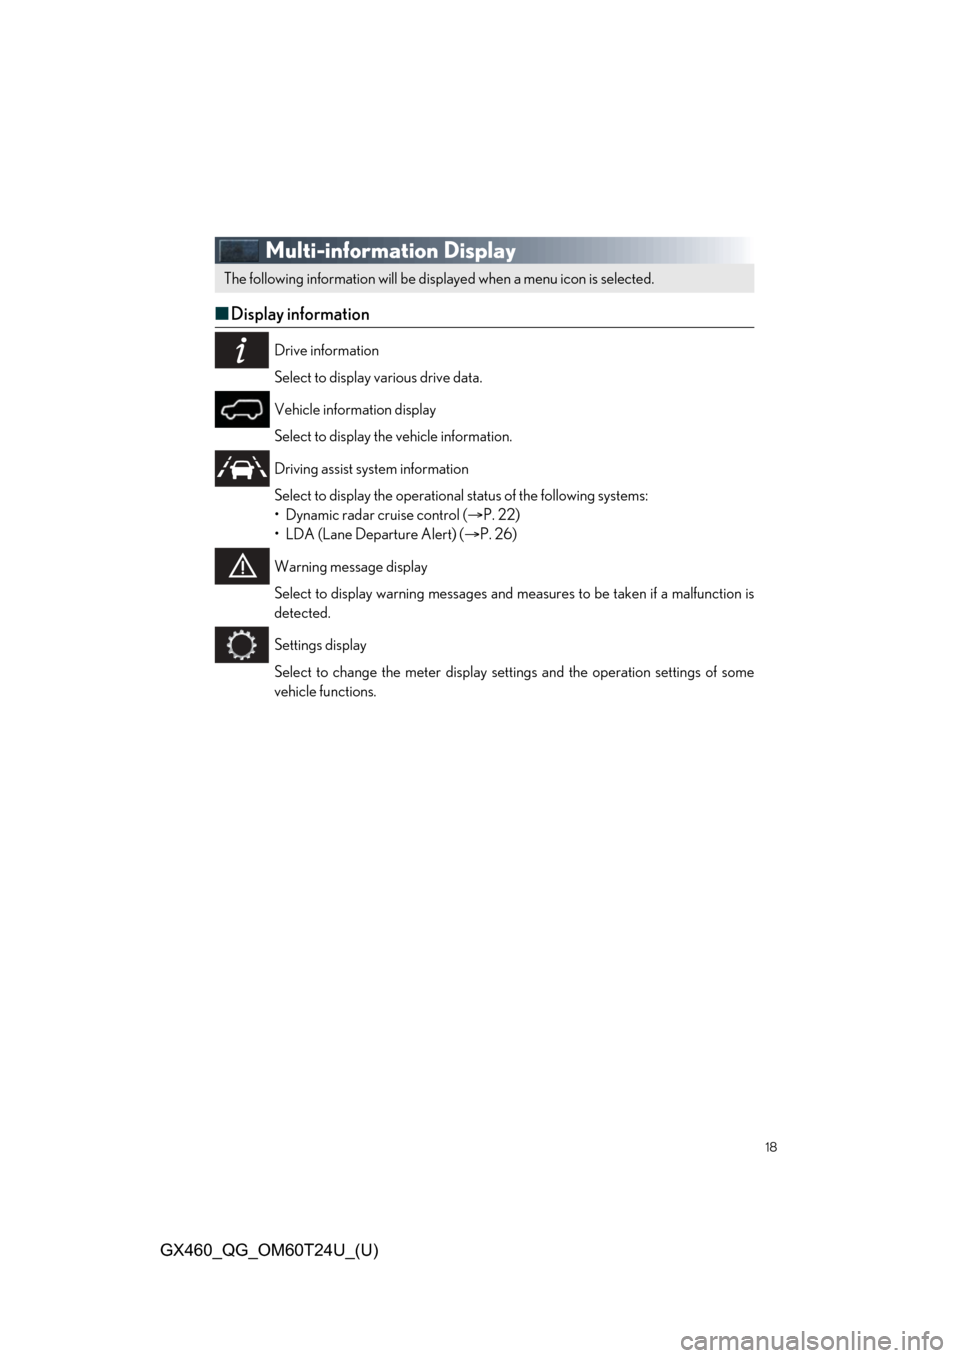
■Display information
Drive information
Select to display various drive data.
Vehicle information display
Select to display the vehicle information.
Driving assist system information
Select to display the operational status of the following systems:
• Dynamic radar cruise control ( P. 22)
• LDA (Lane Departure Alert) ( P. 26)
Warning message display
Select to display warning messages and measures to be taken if a malfunction is
detected.
Settings display
Select to change the meter display sett ings and the operation settings of some
vehicle functions.
The following information will be displa yed when a menu icon is selected.
Page 19 of 106
19
GX460_QG_OM60T24U_(U)
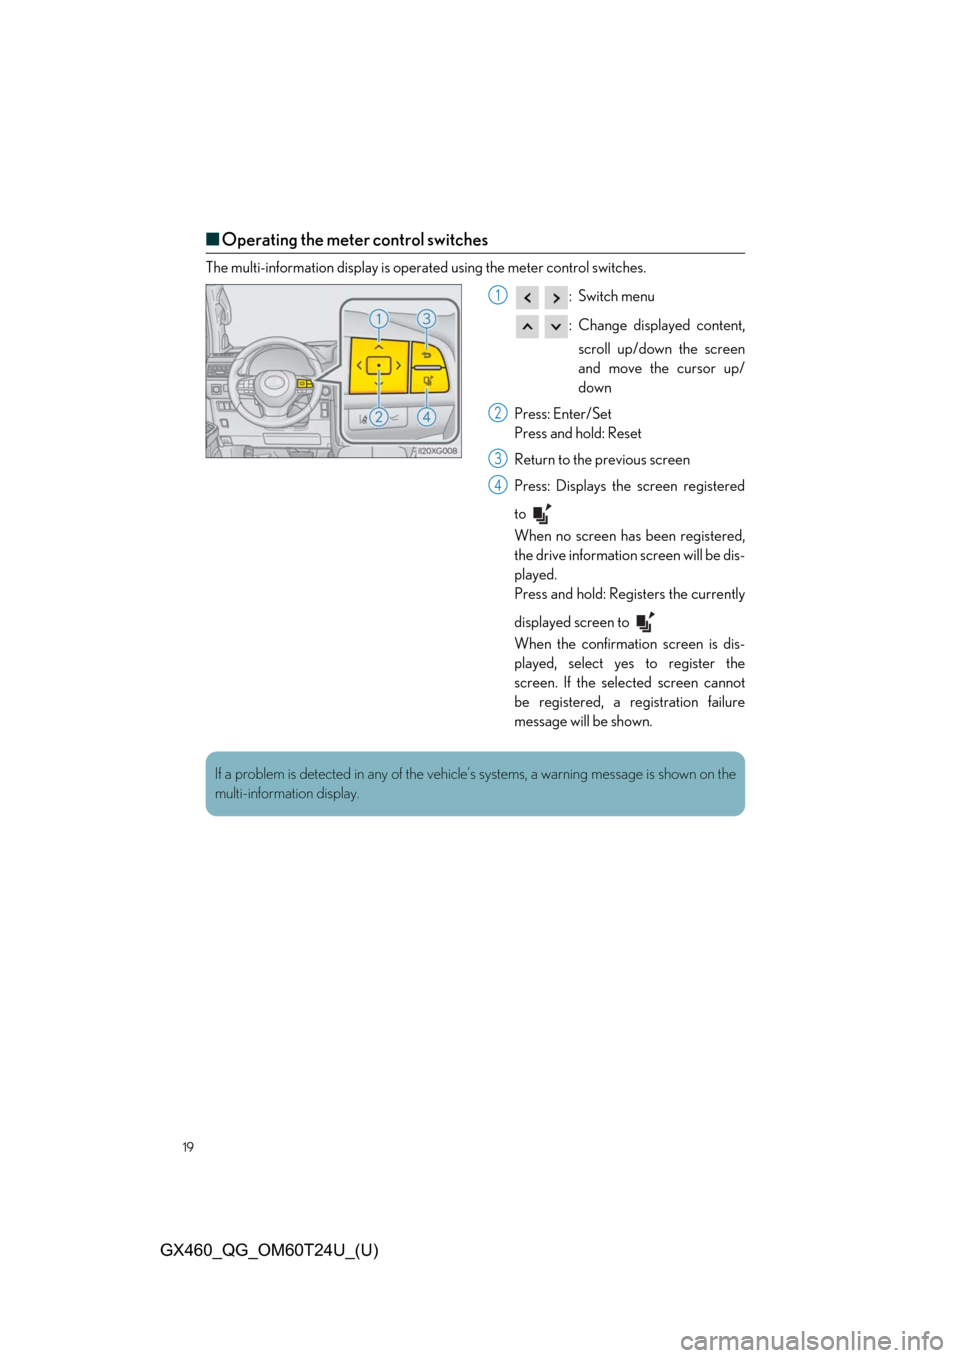
■Operating the meter control switches
The multi-information display is operat ed using the meter control switches.
:Switch menu
:Change displayed content,scroll up/down the screen
and move the cursor up/
down
Press: Enter/Set
Press and hold: Reset
Return to the previous screen
Press: Displays th e screen registered
to
When no screen has been registered,
the drive information screen will be dis-
played.
Press and hold: Registers the currently
displayed screen to
When the confirmation screen is dis-
played, select yes to register the
screen. If the sele cted screen cannot
be registered, a registration failure
message will be shown.
1
2
3
4
If a problem is detected in any of the vehicl e’s systems, a warning message is shown on the
multi-information display.
Page 20 of 106
20
GX460_QG_OM60T24U_(U)
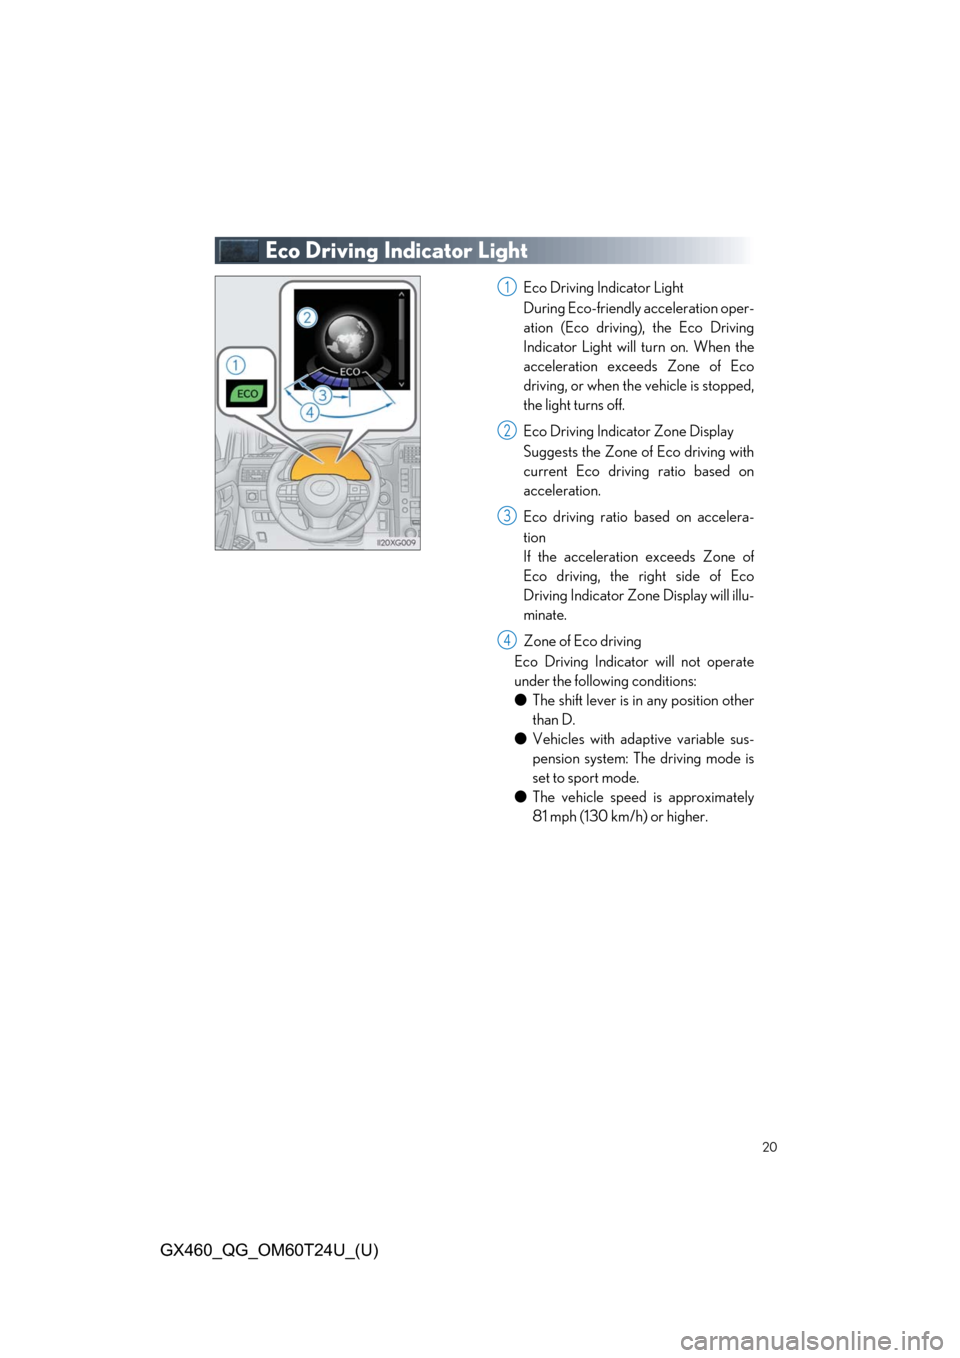
Eco Driving Indicator Light
Eco Driving Indicator Light
During Eco-friendly acceleration oper-
ation (Eco driving), the Eco Driving
Indicator Light will turn on. When the
acceleration exceeds Zone of Eco
driving, or when the vehicle is stopped,
the light turns off.
Eco Driving Indicator Zone Display
Suggests the Zone of Eco driving with
current Eco driving ratio based on
acceleration.
Eco driving ratio based on accelera-
tion
If the acceleration exceeds Zone of
Eco driving, the right side of Eco
Driving Indicator Zone Display will illu-
minate.
Zone of Eco driving
Eco Driving Indicator will not operate
under the following conditions:
● The shift lever is in any position other
than D.
● Vehicles with adaptive variable sus-
pension system: Th e driving mode is
set to sport mode.
● The vehicle speed is approximately
81 mph (130 km/h) or higher.1
2
3
4