LEXUS LS430 2003 Factory Repair Manual
Manufacturer: LEXUS, Model Year: 2003,
Model line: LS430,
Model: LEXUS LS430 2003
Pages: 4500, PDF Size: 87.45 MB
LEXUS LS430 2003 Factory Repair Manual
LS430 2003
LEXUS
LEXUS
https://www.carmanualsonline.info/img/36/57050/w960_57050-0.png
LEXUS LS430 2003 Factory Repair Manual
Trending: cruise control, evaporator, ABS, wipers, AC Compressor control valve, sat nav, adding oil
Page 3531 of 4500
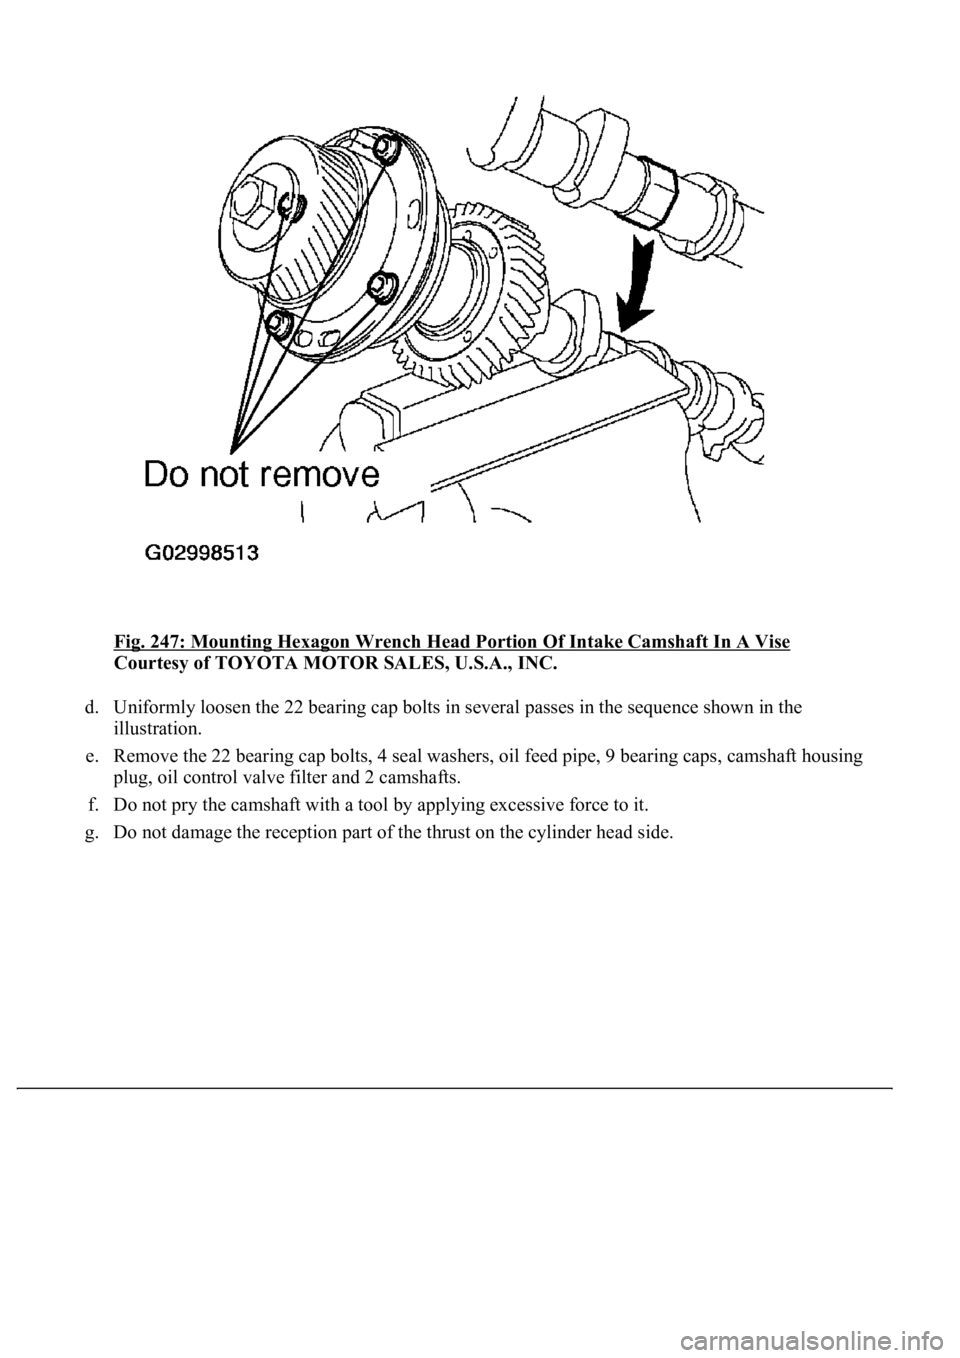
Fig. 247: Mounting Hexagon Wrench Head Portion Of Intake Camshaft In A Vise
Courtesy of TOYOTA MOTOR SALES, U.S.A., INC.
d. Uniformly loosen the 22 bearing cap bolts in several passes in the sequence shown in the
illustration.
e. Remove the 22 bearing cap bolts, 4 seal washers, oil feed pipe, 9 bearing caps, camshaft housing
plug, oil control valve filter and 2 camshafts.
f. Do not pry the camshaft with a tool by applying excessive force to it.
g. Do not damage the reception part of the thrust on the cylinder head side.
Page 3532 of 4500
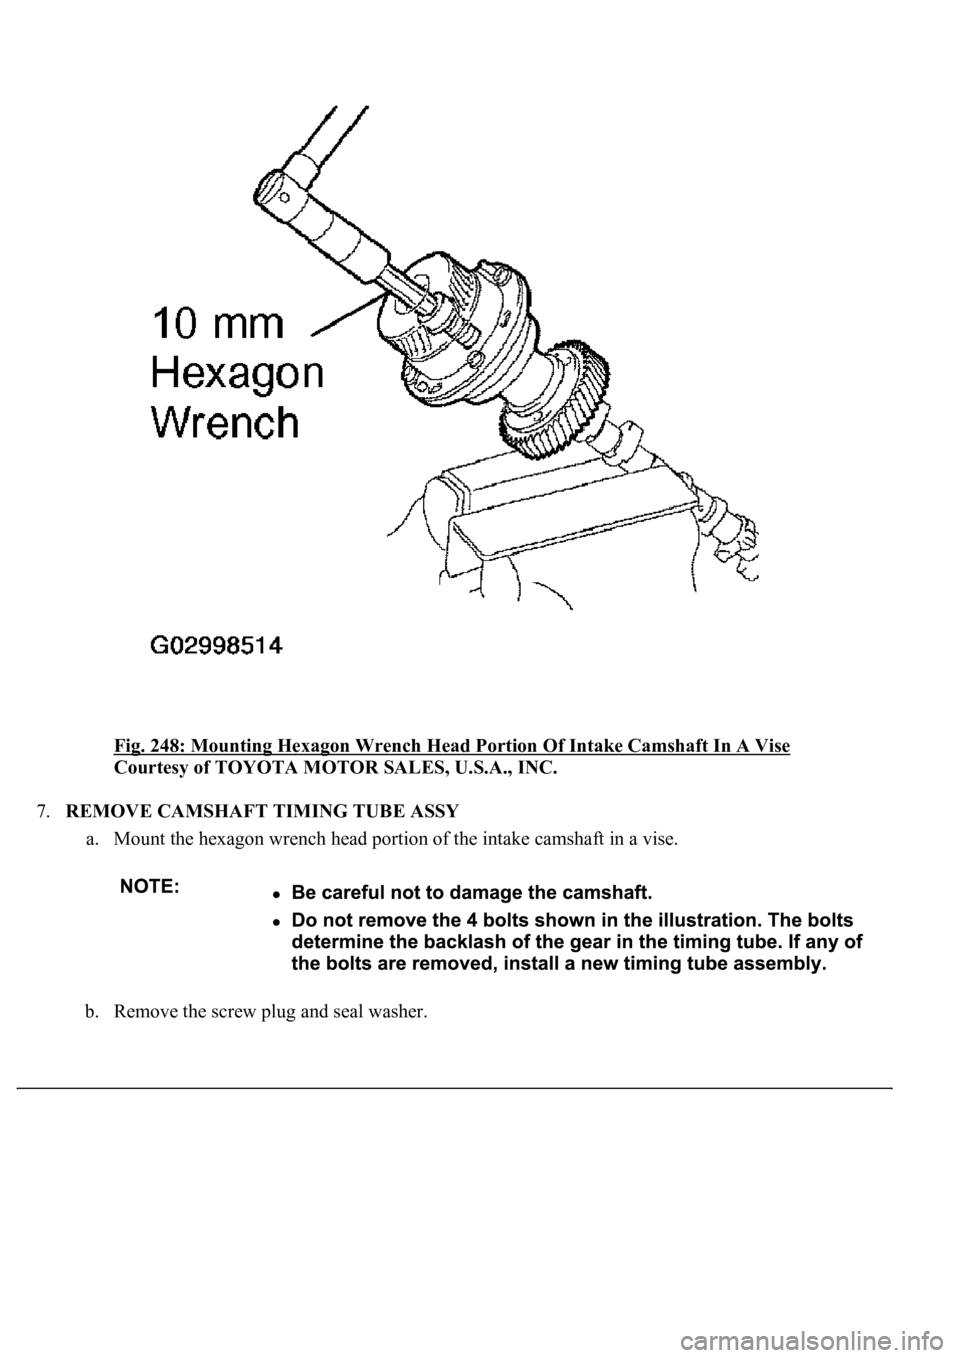
Fig. 248: Mounting Hexagon Wrench Head Portion Of Intake Camshaft In A Vise
Courtesy of TOYOTA MOTOR SALES, U.S.A., INC.
7.REMOVE CAMSHAFT TIMING TUBE ASSY
a. Mount the hexagon wrench head portion of the intake camshaft in a vise.
b. Remove the screw plug and seal washer.
Page 3533 of 4500
Fig. 249: Removing Bolts Using SST
Courtesy of TOYOTA MOTOR SALES, U.S.A., INC.
c. Using a 10 mm hexagon wrench, remove the bolt.
d. Pull out the timing tube and drive gear assembly from the camshaft.
Page 3534 of 4500
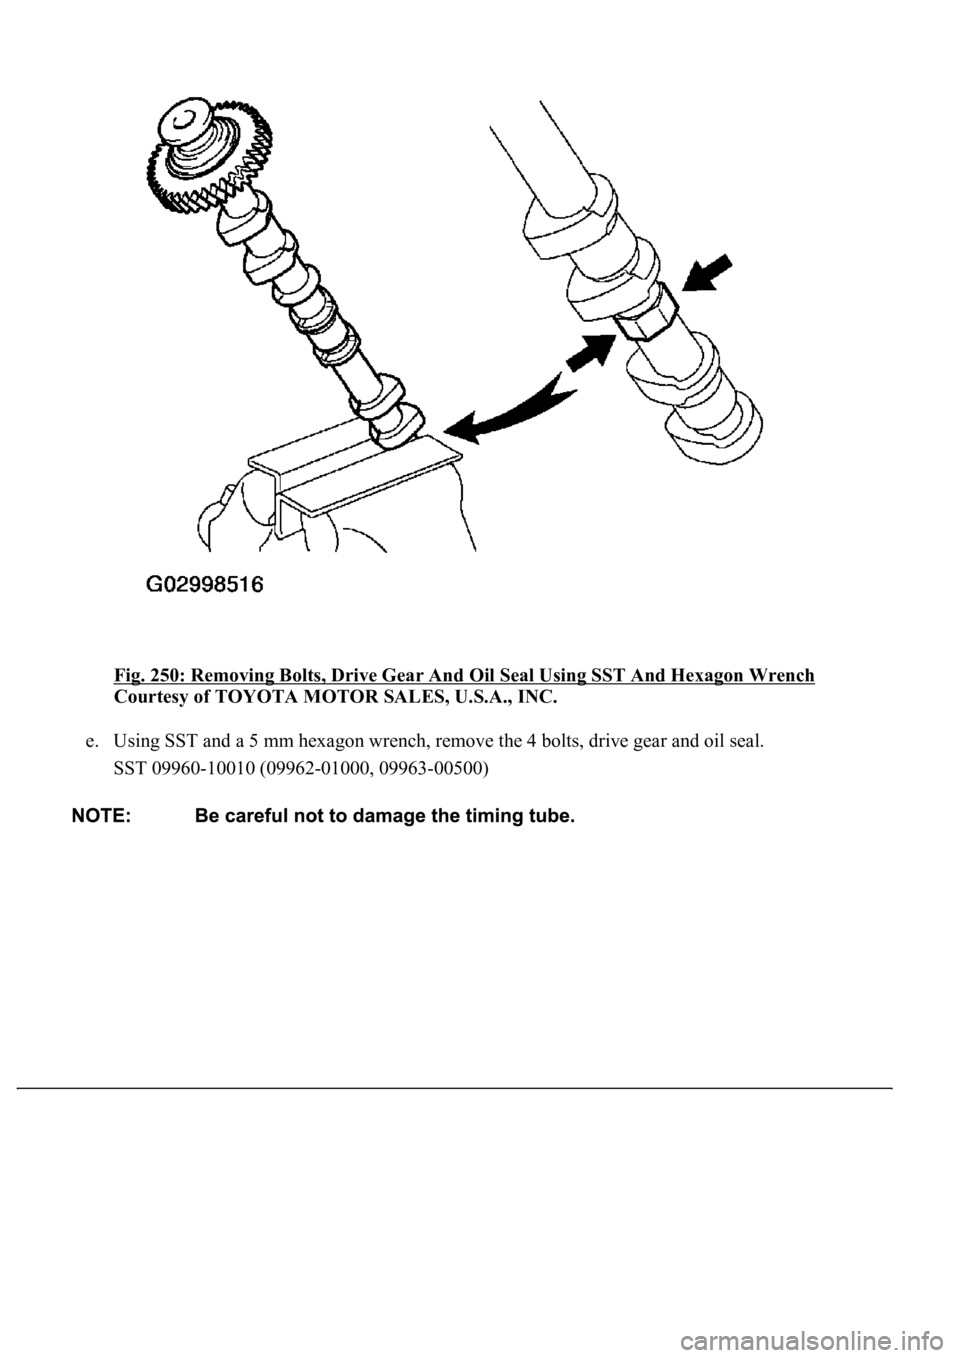
Fig. 250: Removing Bolts, Drive Gear And Oil Seal Using SST And Hexagon Wrench
Courtesy of TOYOTA MOTOR SALES, U.S.A., INC.
e. Using SST and a 5 mm hexagon wrench, remove the 4 bolts, drive gear and oil seal.
SST 09960-10010 (09962-01000, 09963-00500)
Page 3535 of 4500
Fig. 251: Mounting Hexagon Wrench Head Portion Of Camshaft In A Vise
Courtesy of TOYOTA MOTOR SALES, U.S.A., INC.
8.REMOVE CAMSHAFT SUB GEAR
Mount the hexagon wrench head portion of the camshaft in a vise.
Page 3536 of 4500
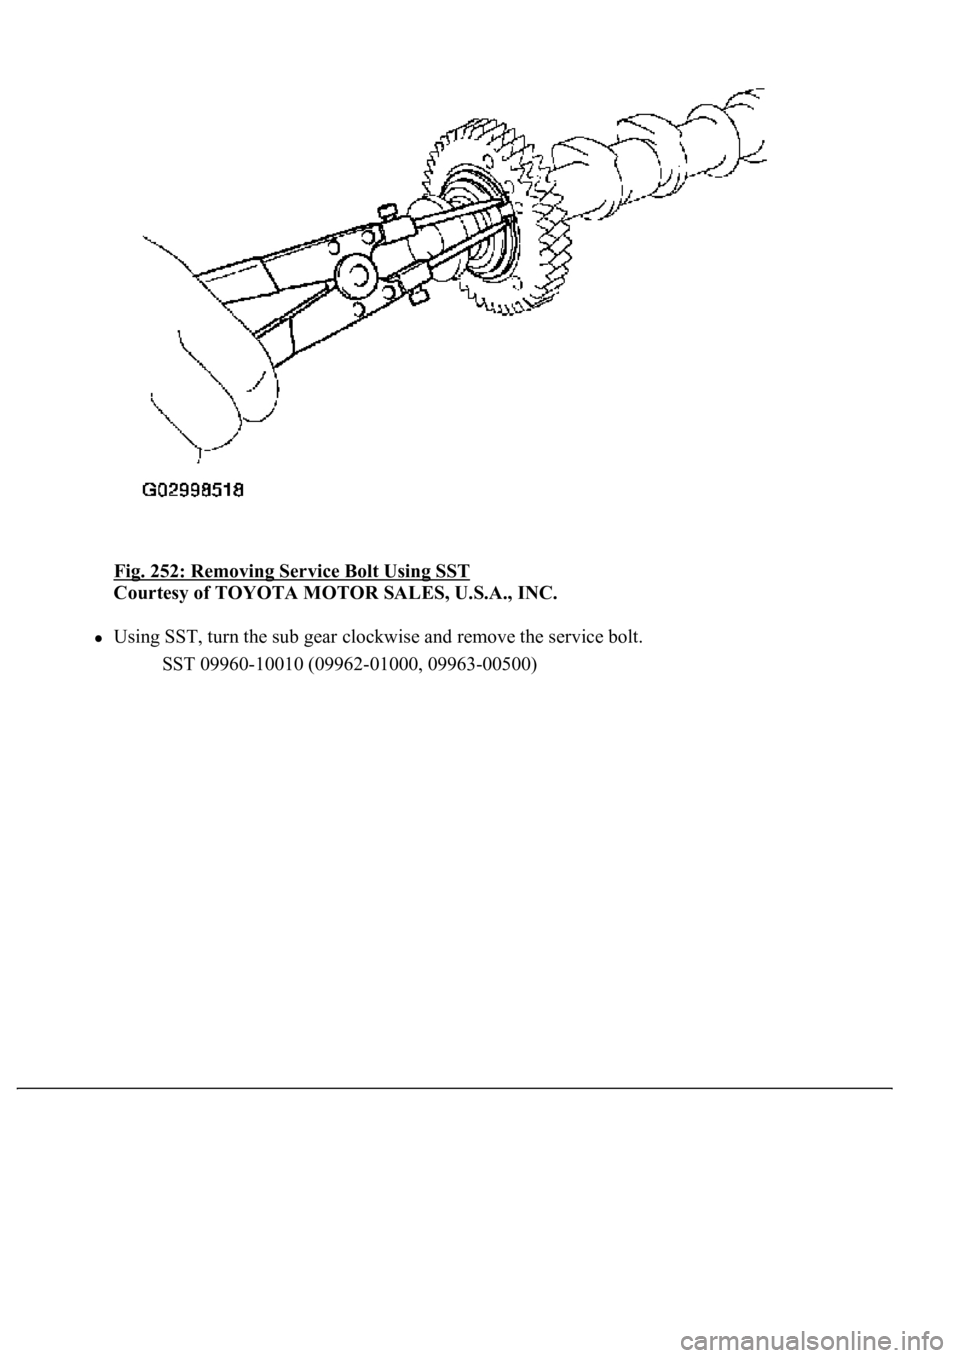
Fig. 252: Removing Service Bolt Using SST
Courtesy of TOYOTA MOTOR SALES, U.S.A., INC.
Using SST, turn the sub gear clockwise and remove the service bolt.
SST 09960-10010 (09962-01000, 09963-00500)
Page 3537 of 4500
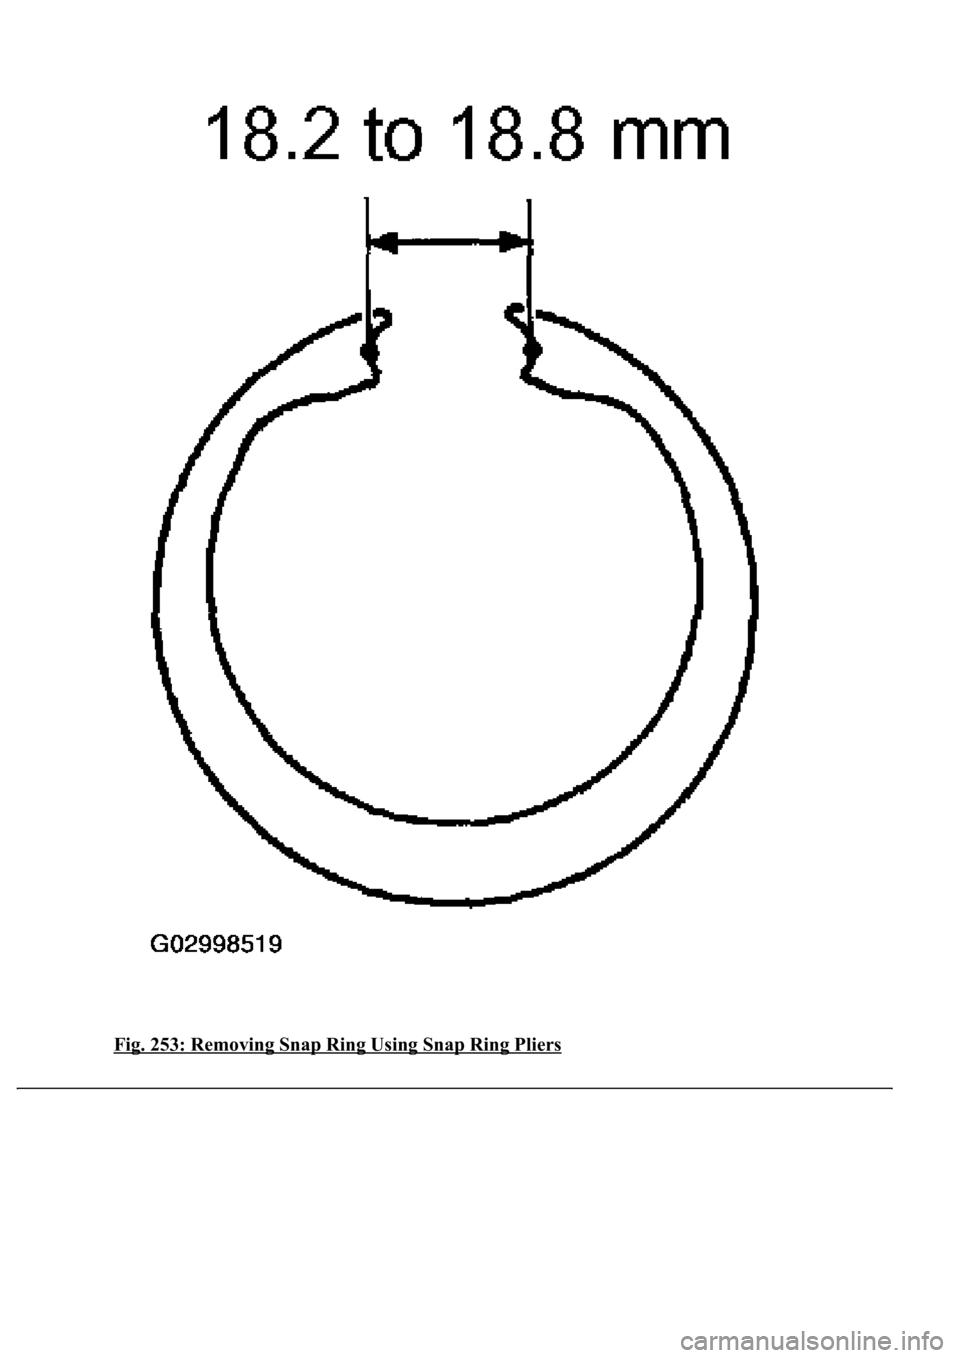
Fig. 253: Removing Snap Ring Using Snap Ring Pliers
Page 3538 of 4500
Courtesy of TOYOTA MOTOR SALES, U.S.A., INC.
Using snap ring pliers, remove the snap ring.
Remove the wave washer, sub gear and bolt washer.
HINT:
Arrange the driven sub gears and bolt washers (RH and LH sides).
Fig. 254: Installing Camshaft Sub Gear
Courtesy of TOYOTA MOTOR SALES, U.S.A., INC.
Using a vernier caliper, measure the gap between the washer ends.
Gap: 18.2 to 18.8 mm (0.712 to 0.740 in.)
If the
gap is not as specified, replace the bolt washer.
Page 3539 of 4500
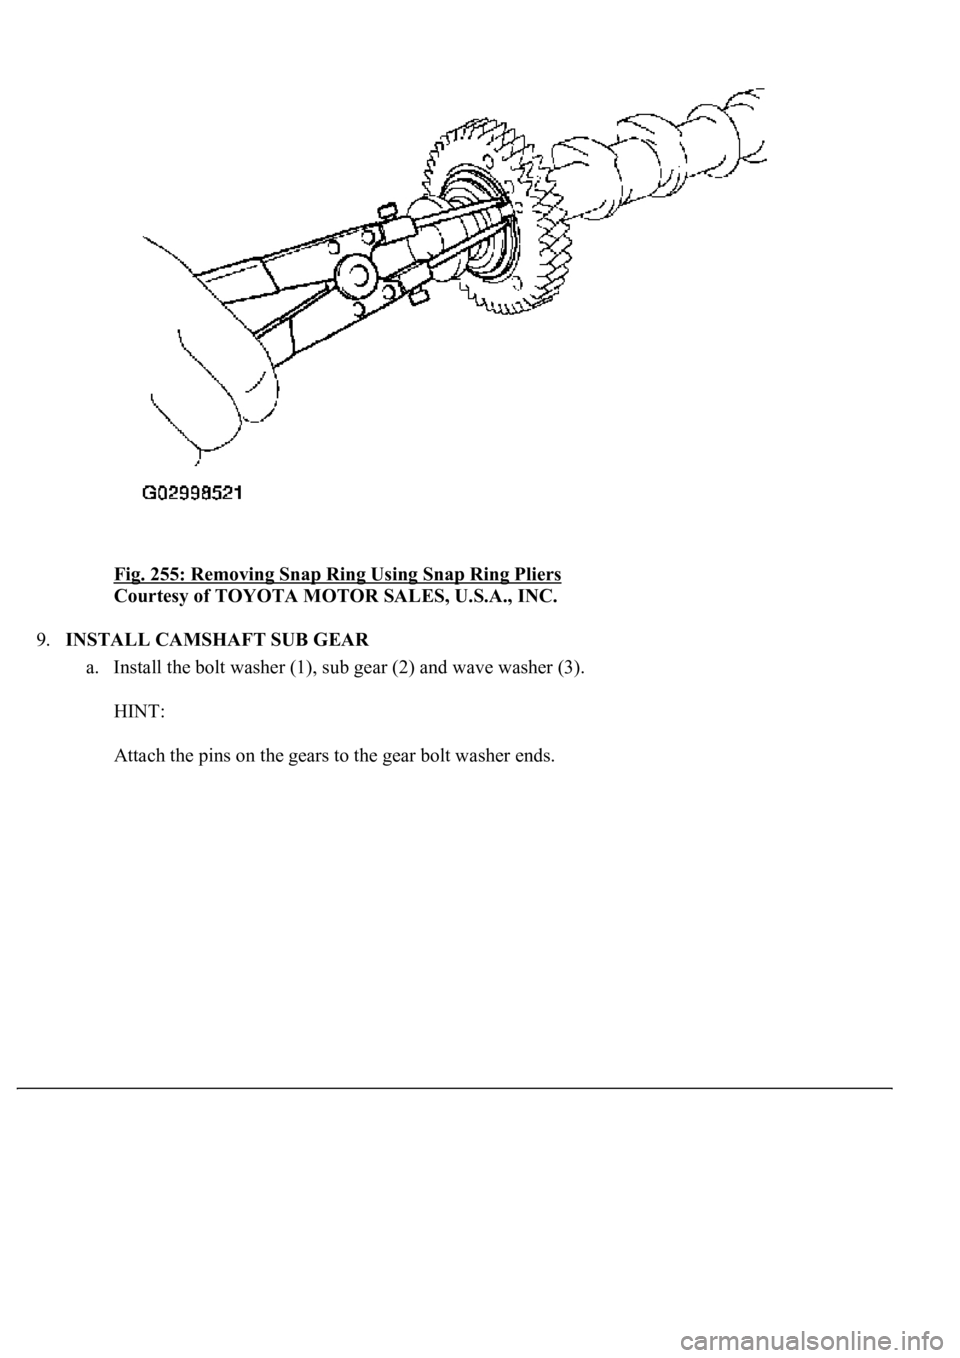
Fig. 255: Removing Snap Ring Using Snap Ring Pliers
Courtesy of TOYOTA MOTOR SALES, U.S.A., INC.
9.INSTALL CAMSHAFT SUB GEAR
a. Install the bolt washer (1), sub gear (2) and wave washer (3).
HINT:
Attach the pins on the
gears to the gear bolt washer ends.
Page 3540 of 4500
Fig. 256: Mounting Hexagon Wrench Head Portion Of Camshaft In Vise
Courtesy of TOYOTA MOTOR SALES, U.S.A., INC.
b.Using snap ring pliers, install the snap ring.
Trending: sat nav, brake, fog light, gas type, check engine light, Compressor control valve, Spd
