LEXUS LS430 2003 Factory Repair Manual
Manufacturer: LEXUS, Model Year: 2003,
Model line: LS430,
Model: LEXUS LS430 2003
Pages: 4500, PDF Size: 87.45 MB
LEXUS LS430 2003 Factory Repair Manual
LS430 2003
LEXUS
LEXUS
https://www.carmanualsonline.info/img/36/57050/w960_57050-0.png
LEXUS LS430 2003 Factory Repair Manual
Trending: electronic modulated, fuel filter location, Skid, ad blue, warning lights, oil pressure, tail light replacement
Page 3491 of 4500
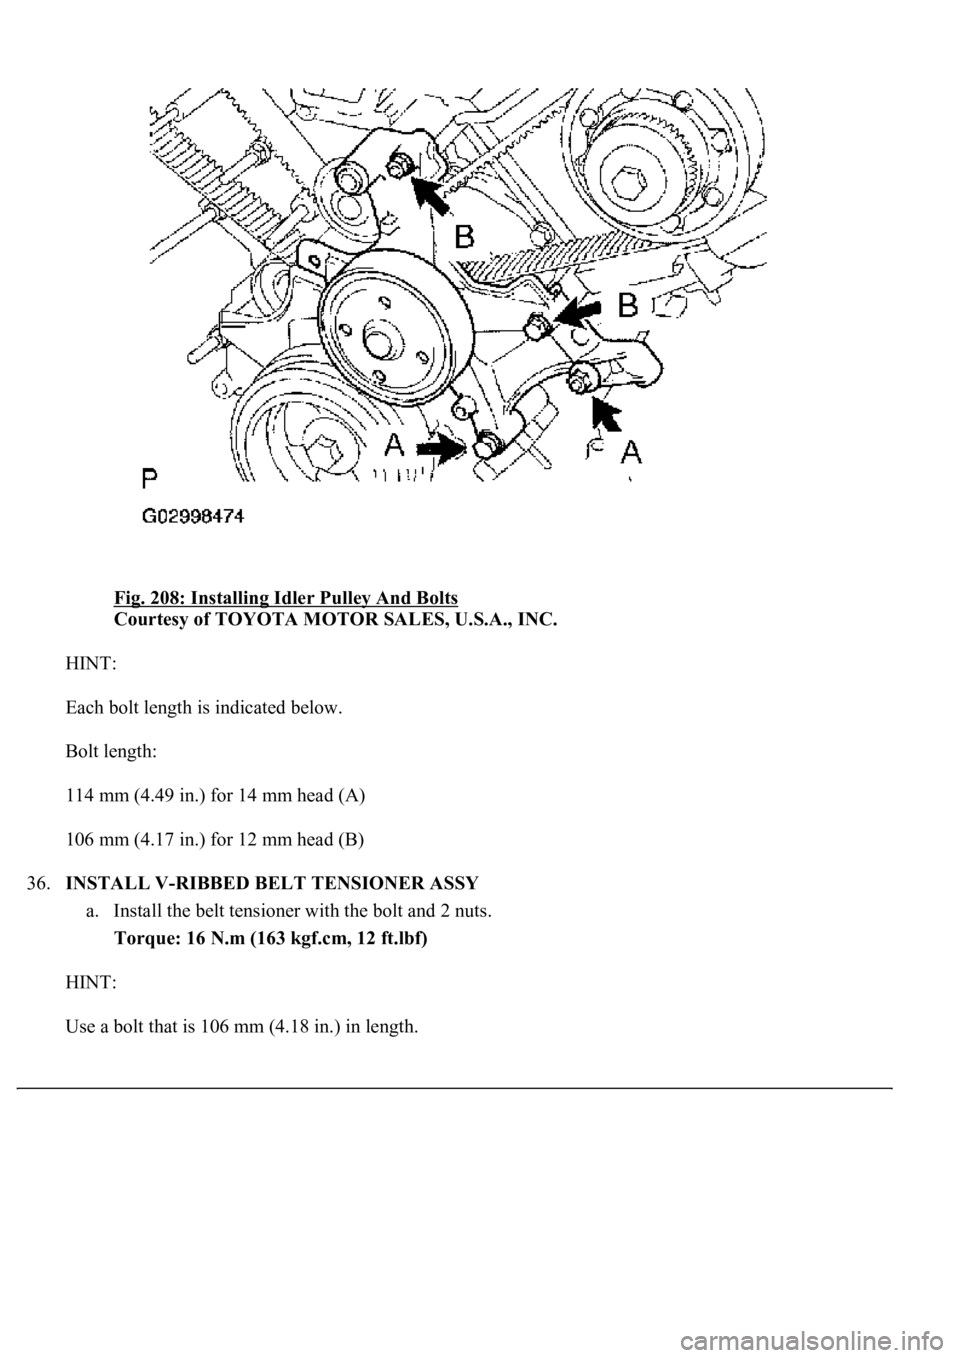
Fig. 208: Installing Idler Pulley And Bolts
Courtesy of TOYOTA MOTOR SALES, U.S.A., INC.
HINT:
Each bolt length is indicated below.
Bolt length:
114 mm (4.49 in.) for 14 mm head (A)
106 mm (4.17 in.) for 12 mm head (B)
36.INSTALL V-RIBBED BELT TENSIONER ASSY
a. Install the belt tensioner with the bolt and 2 nuts.
Torque: 16 N.m (163 kgf.cm, 12 ft.lbf)
HINT:
Use a bolt that is 106 mm (4.18 in.) in length.
Page 3492 of 4500
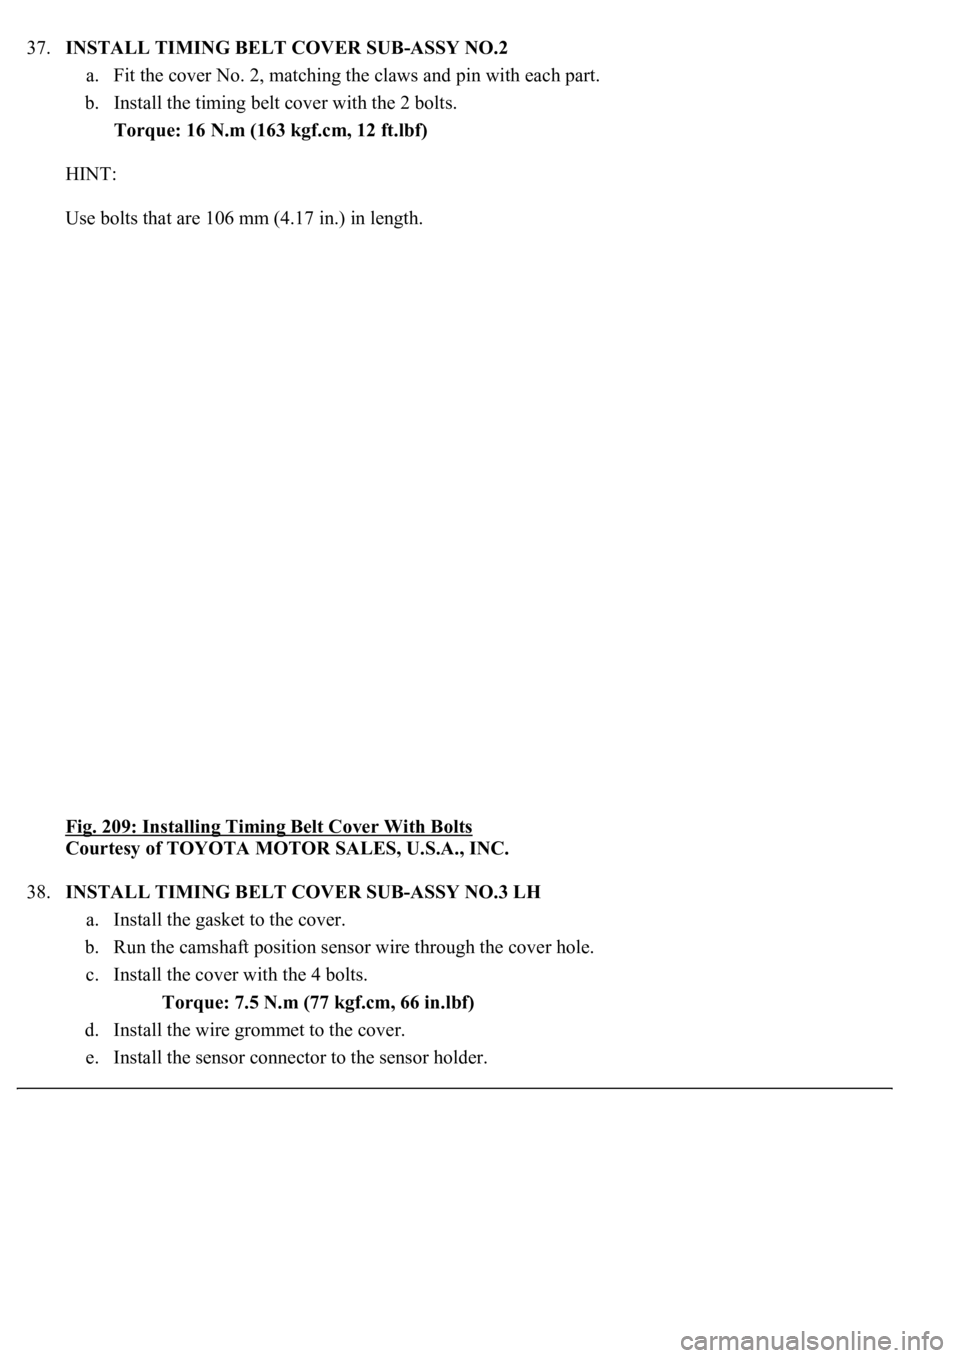
37.INSTALL TIMING BELT COVER SUB-ASSY NO.2
a. Fit the cover No. 2, matching the claws and pin with each part.
b. Install the timing belt cover with the 2 bolts.
Torque: 16 N.m (163 kgf.cm, 12 ft.lbf)
HINT:
Use bolts that are 106 mm (4.17 in.) in length.
Fig. 209: Installing Timing Belt Cover With Bolts
Courtesy of TOYOTA MOTOR SALES, U.S.A., INC.
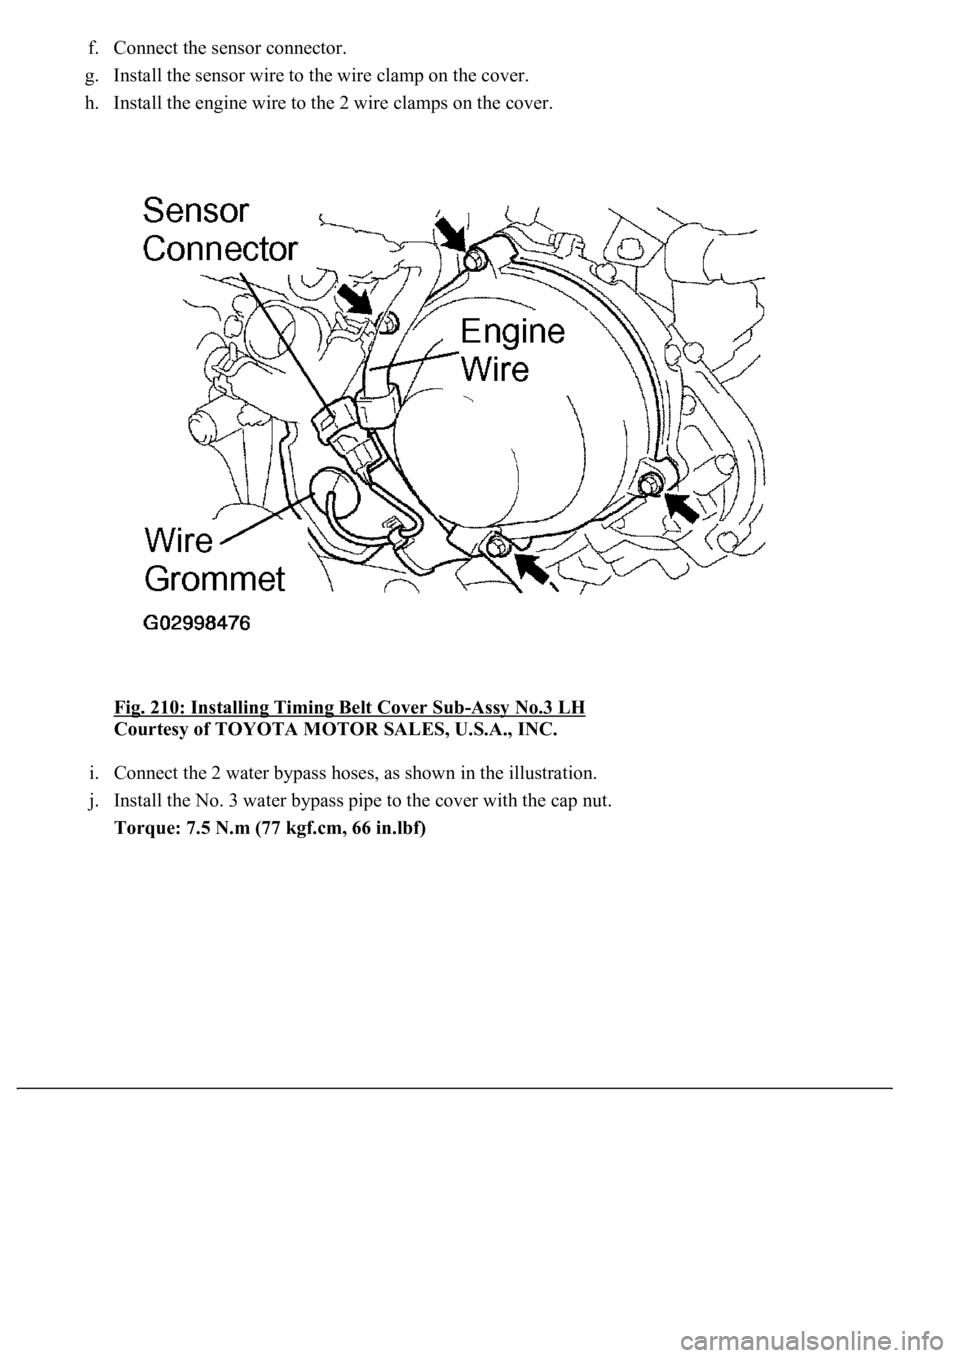
38.INSTALL TIMING BELT COVER SUB-ASSY NO.3 LH
a. Install the gasket to the cover.
b. Run the camshaft position sensor wire through the cover hole.
c. Install the cover with the 4 bolts.
Torque: 7.5 N.m (77 kgf.cm, 66 in.lbf)
d. Install the wire grommet to the cover.
e. Install the sensor connector to the sensor holder.
Page 3493 of 4500
f. Connect the sensor connector.
g. Install the sensor wire to the wire clamp on the cover.
h. Install the engine wire to the 2 wire clamps on the cover.
Fig. 210: Installing Timing Belt Cover Sub
-Assy No.3 LH
Courtesy of TOYOTA MOTOR SALES, U.S.A., INC.
i. Connect the 2 water bypass hoses, as shown in the illustration.
j. Install the No. 3 water bypass pipe to the cover with the cap nut.
Torque: 7.5 N.m (77 kgf.cm, 66 in.lbf)
Page 3494 of 4500
Fig. 211: Connecting Water By-Pass Hoses
Courtesy of TOYOTA MOTOR SALES, U.S.A., INC.
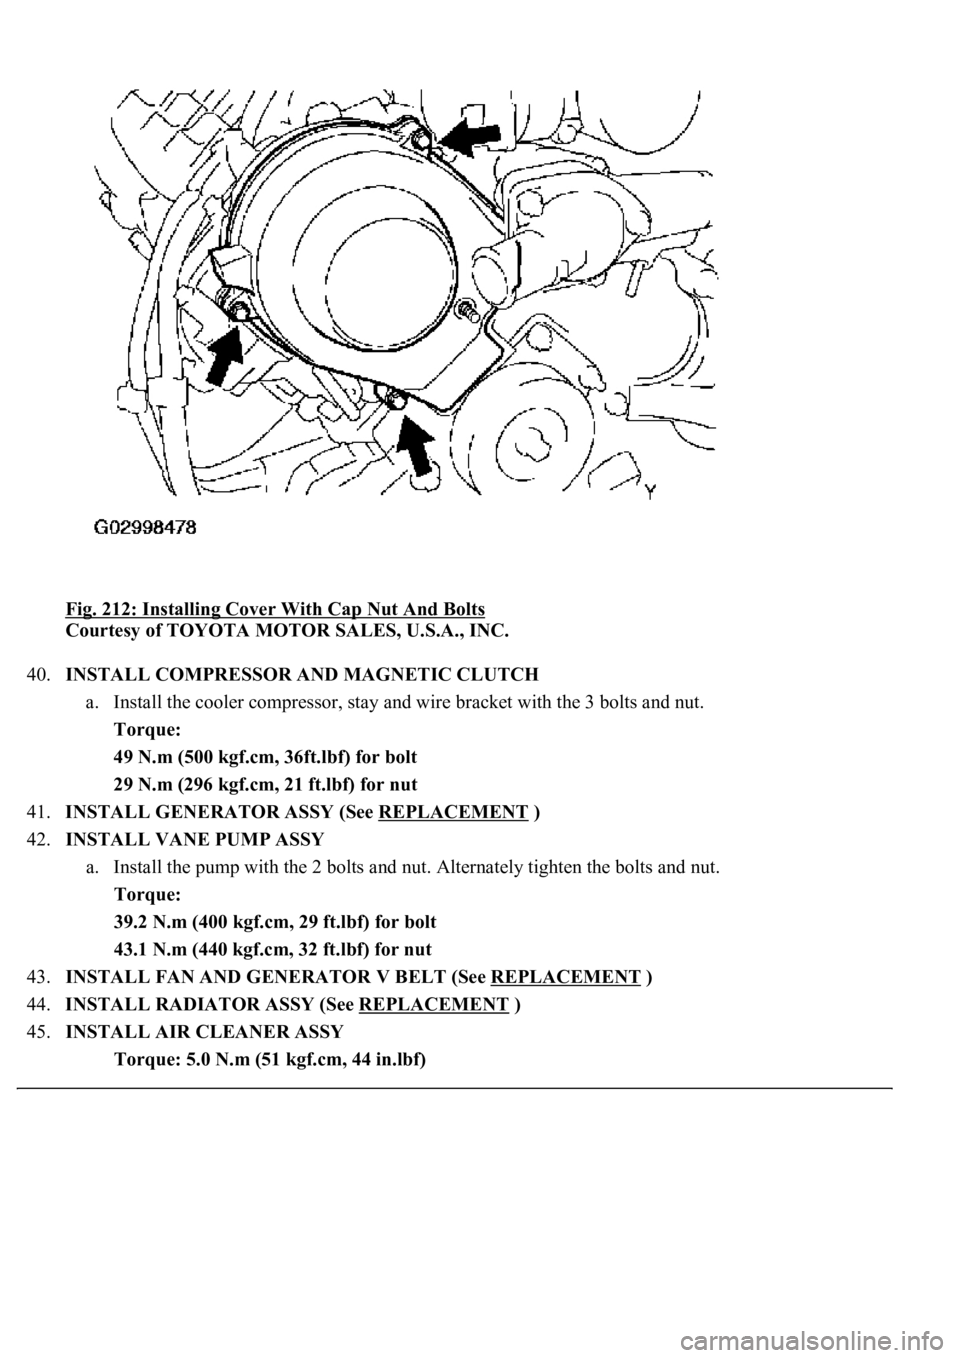
39.INSTALL TIMING CHAIN OR BELT COVER NO.2
a. Install the gasket to the cover.
b. Install the cover with the cap nut and 3 bolts.
Torque: 7.5 N.m (77 kgf.cm, 66 in.lbf)
c. Install the 2 PS air hoses to the clamp on the cover.
Page 3495 of 4500
Fig. 212: Installing Cover With Cap Nut And Bolts
Courtesy of TOYOTA MOTOR SALES, U.S.A., INC.
40.INSTALL COMPRESSOR AND MAGNETIC CLUTCH
a. Install the cooler compressor, stay and wire bracket with the 3 bolts and nut.
Torque:
49 N.m (500 kgf.cm, 36ft.lbf) for bolt
29 N.m (296 kgf.cm, 21 ft.lbf) for nut
41.INSTALL GENERATOR ASSY (See REPLACEMENT
)
42.INSTALL VANE PUMP ASSY
a. Install the pump with the 2 bolts and nut. Alternately tighten the bolts and nut.
Torque:
39.2 N.m (400 kgf.cm, 29 ft.lbf) for bolt
43.1 N.m (440 kgf.cm, 32 ft.lbf) for nut
43.INSTALL FAN AND GENERATOR V BELT (See REPLACEMENT
)
44.INSTALL RADIATOR ASSY (See REPLACEMENT
)
45.INSTALL AIR CLEANER ASSY
Torque: 5.0 N.m (51 kgf.cm, 44 in.lbf)
Page 3496 of 4500
46.INSTALL OIL COOLER OUTLET TUBE NO.1
47.INSTALL OIL COOLER INLET TUBE NO.
48.INSTALL AIR CLEANER INLET NO.1
Torque: 5.0 N.m (51 kgf.cm, 44 in.lbf)
49.INSTALL INTAKE AIR CONNECTOR PIPE
Torque: 5.0 N.m (51 kgf.cm, 44 in.lbf)
50.INSTALL V-BANK COVER
Torque: 5.0 N.m (51 kgf.cm, 44 in.lbf)
51.REFILL ENGINE COOLANT (See REPLACEMENT
)
52.CHECK FOR ENGINE COOLANT LEAKS (See ON
-VEHICLE INSPECTION )
53.INSTALL ENGINE UNDER COVER NO.1
54.CONNECT BATTERY NEGATIVE TERMINAL
REPLACEMENT
1.REMOVE TIMING BELT (See REPLACEMENT
)
2.REMOVE CYLINDER HEAD COVER SUB-ASSY (See REPLACEMENT
)
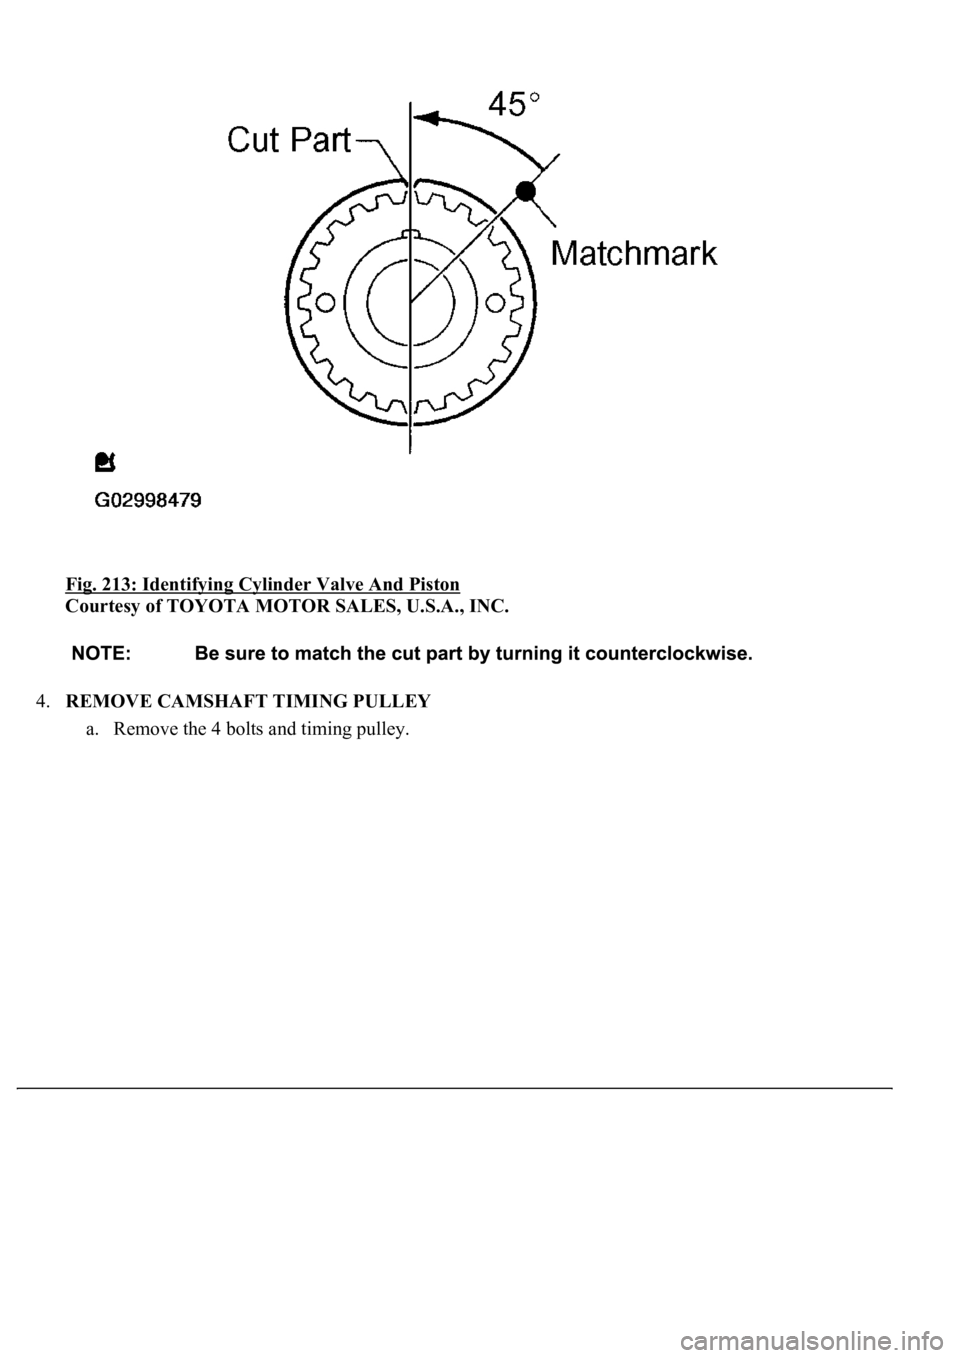
3.PISTON & VALVE BREAK PREVENT WORK
a. Turn the crankshaft timing pulley counterclockwise by 45° and match the cut part with the
illustrated position.
HINT:
When the No. 1 cylinder is positioned at 45° BTDC, the valve and piston do not interfere with each other
even when the valve is fully open.
Page 3497 of 4500
Fig. 213: Identifying Cylinder Valve And Piston
Courtesy of TOYOTA MOTOR SALES, U.S.A., INC.
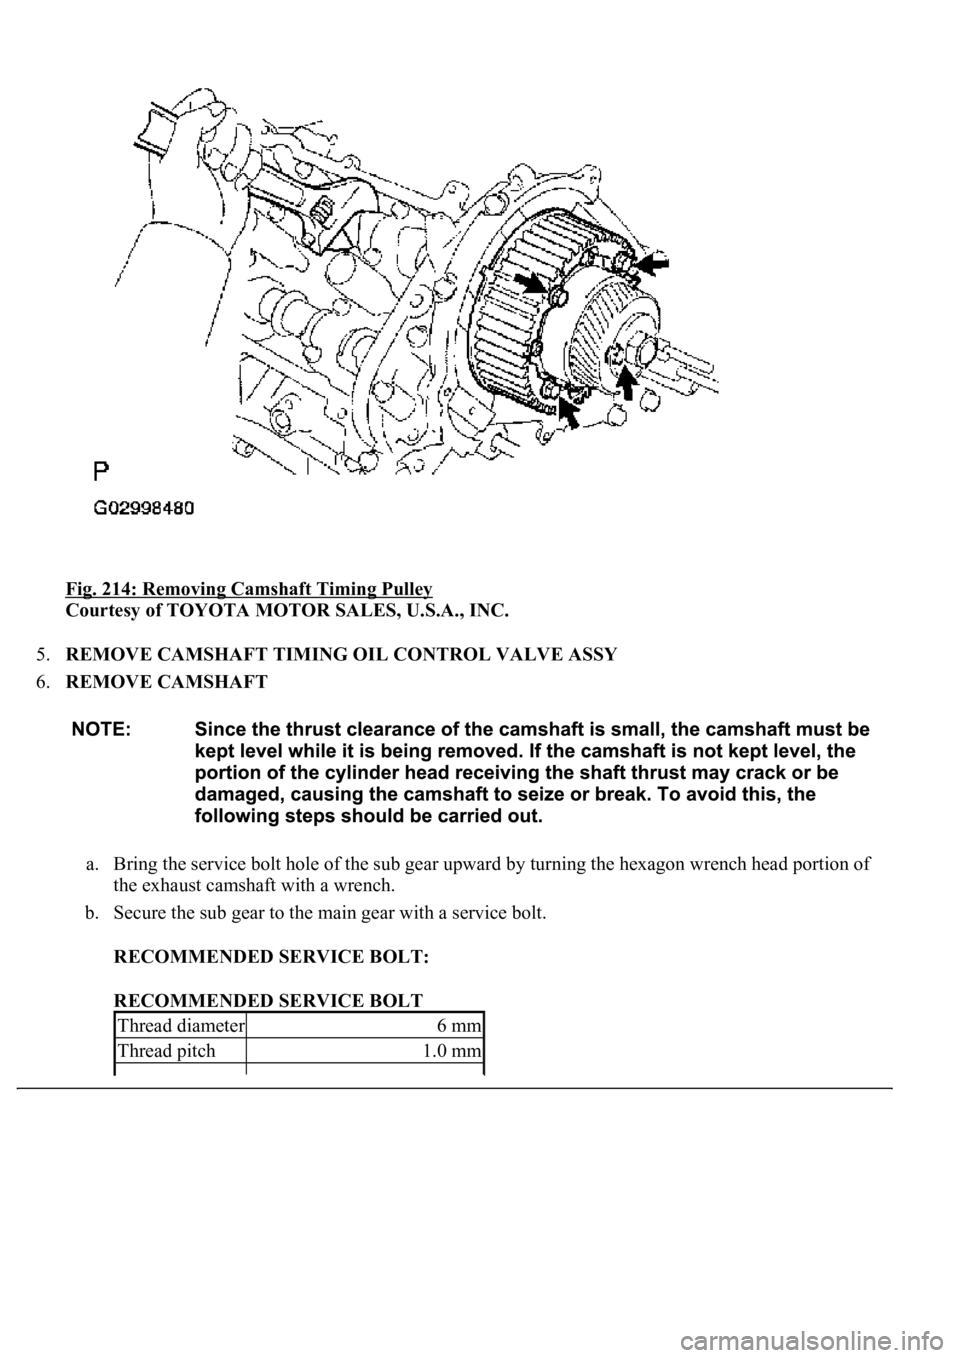
4.REMOVE CAMSHAFT TIMING PULLEY
a. Remove the 4 bolts and timin
g pulley.
Page 3498 of 4500
Fig. 214: Removing Camshaft Timing Pulley
Courtesy of TOYOTA MOTOR SALES, U.S.A., INC.
5.REMOVE CAMSHAFT TIMING OIL CONTROL VALVE ASSY
6.REMOVE CAMSHAFT
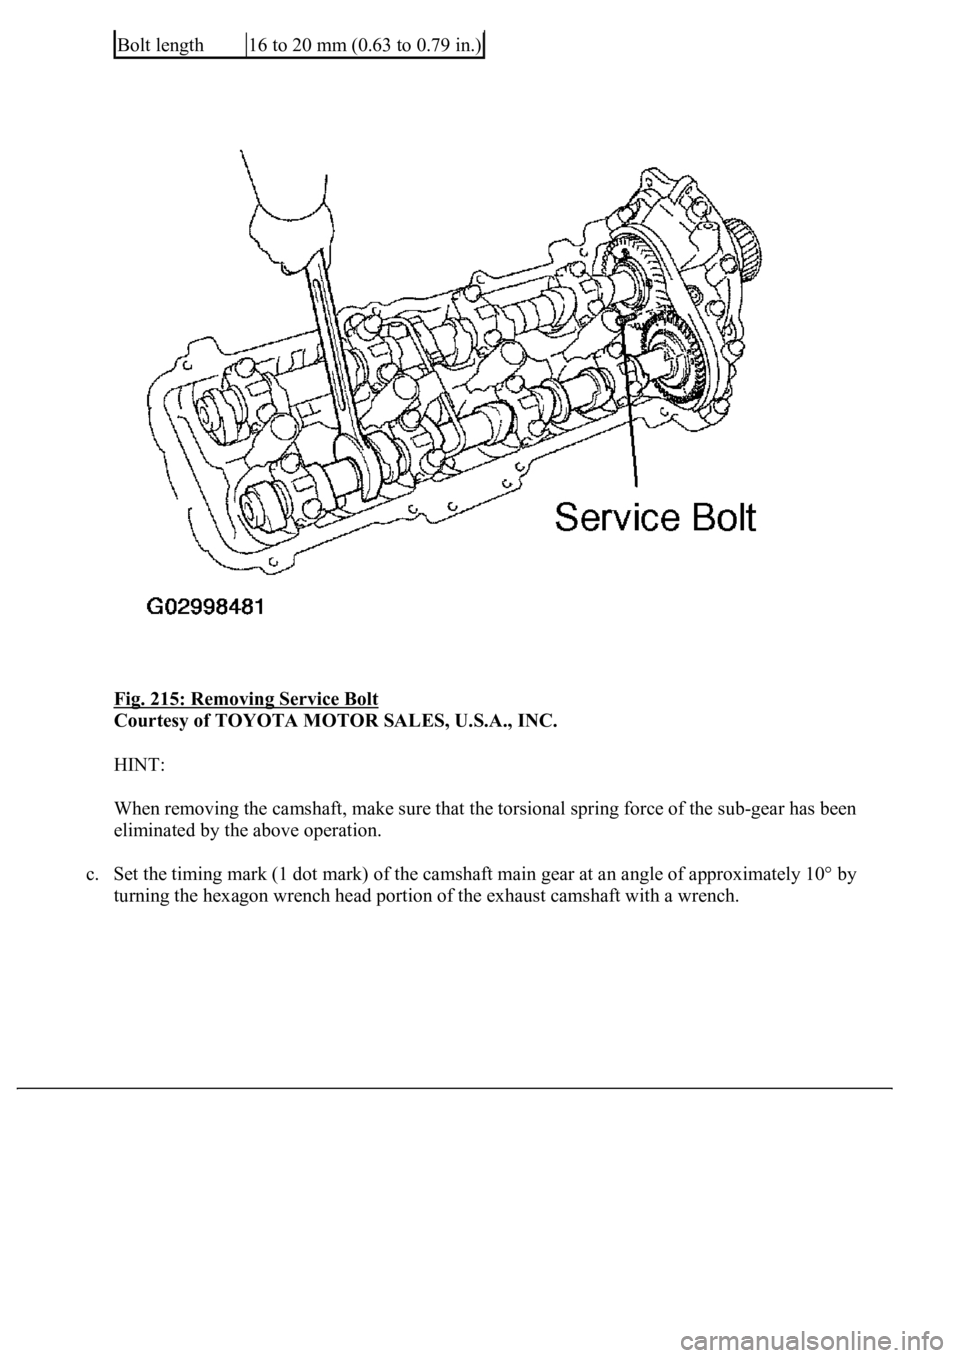
a. Bring the service bolt hole of the sub gear upward by turning the hexagon wrench head portion of
the exhaust camshaft with a wrench.
b. Secure the sub gear to the main gear with a service bolt.
RECOMMENDED SERVICE BOLT:
RECOMMENDED SERVICE BOLT
Thread diameter6 mm
Thread pitch1.0 mm
Page 3499 of 4500
Fig. 215: Removing Service Bolt
Courtesy of TOYOTA MOTOR SALES, U.S.A., INC.
HINT:
<003a004b00480051000300550048005000520059004c0051004a00030057004b004800030046004400500056004b004400490057000f000300500044004e00480003005600580055004800030057004b0044005700030057004b0048000300570052005500
56004c005200510044004f0003005600530055004c0051004a[ force of the sub-gear has been
eliminated by the above operation.
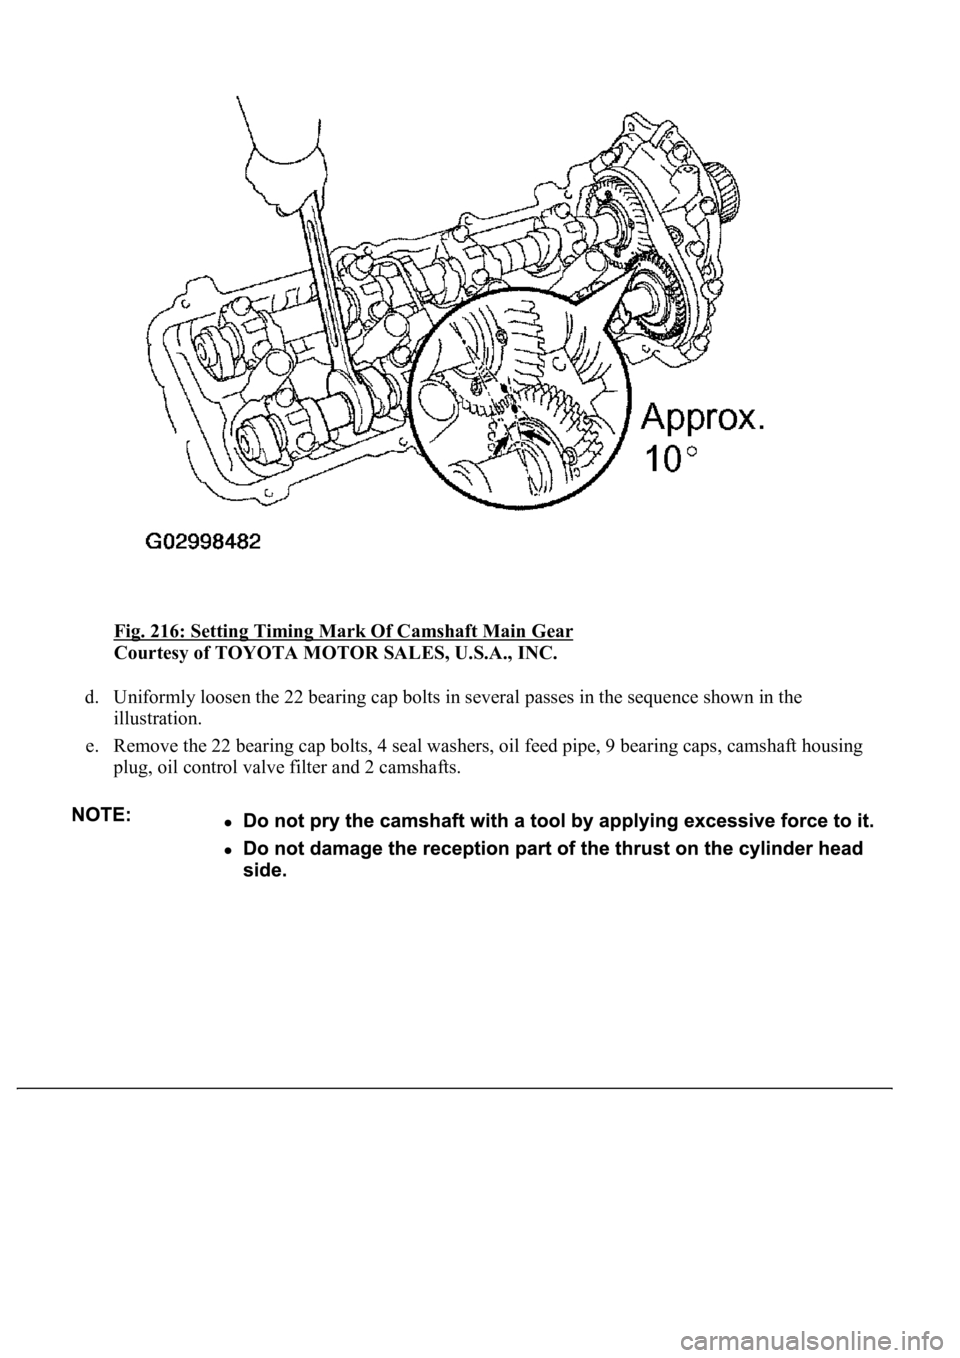
c. Set the timing mark (1 dot mark) of the camshaft main gear at an angle of approximately 10° by
turnin
g the hexagon wrench head portion of the exhaust camshaft with a wrench.
Bolt length16 to 20 mm (0.63 to 0.79 in.)
Page 3500 of 4500
<0029004c004a00110003001500140019001d00030036004800570057004c0051004a00030037004c0050004c0051004a0003003000440055004e00030032004900030026004400500056004b004400490057000300300044004c00510003002a0048004400
55[
Courtesy of TOYOTA MOTOR SALES, U.S.A., INC.
d. Uniformly loosen the 22 bearing cap bolts in several passes in the sequence shown in the
illustration.
e. Remove the 22 bearing cap bolts, 4 seal washers, oil feed pipe, 9 bearing caps, camshaft housing
plug, oil control valve filter and 2 camshafts.
Trending: display, water pump, damper, tow bar, battery, USB, brake light
