LEXUS LS430 2003 Factory Repair Manual
Manufacturer: LEXUS, Model Year: 2003,
Model line: LS430,
Model: LEXUS LS430 2003
Pages: 4500, PDF Size: 87.45 MB
LEXUS LS430 2003 Factory Repair Manual
LS430 2003
LEXUS
LEXUS
https://www.carmanualsonline.info/img/36/57050/w960_57050-0.png
LEXUS LS430 2003 Factory Repair Manual
Trending: Combination, timing belt, diagram, removing v belt tensioner, washer fluid, zero point calibration, steering interlock cable
Page 541 of 4500
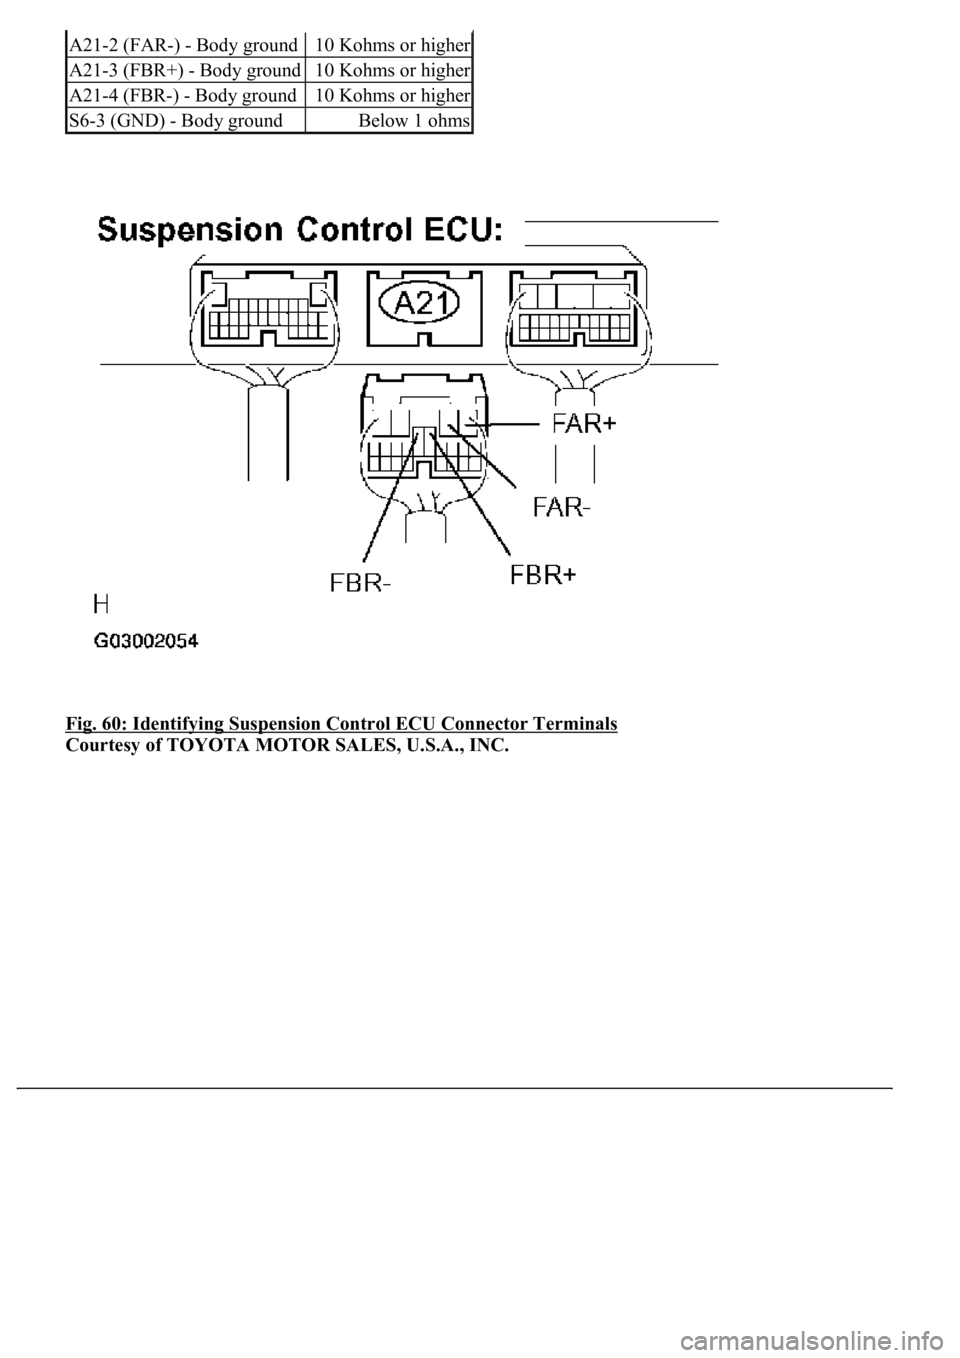
Fig. 60: Identifying Suspension Control ECU Connector Terminals
Courtesy of TOYOTA MOTOR SALES, U.S.A., INC.
A21-2 (FAR-) - Body ground10 Kohms or higher
A21-3 (FBR+) - Body ground10 Kohms or higher
A21-4 (FBR-) - Body ground10 Kohms or higher
S6-3 (GND) - Body groundBelow 1 ohms
Page 542 of 4500
Fig. 61: Identifying Absorber Control Actuator Front Connector Terminals
Courtesy of TOYOTA MOTOR SALES, U.S.A., INC.
TESTER CONNECTION STANDARD SPECIFIED CONDITION STANDARD (FRONT LH)
Tester ConnectionSpecified Condition
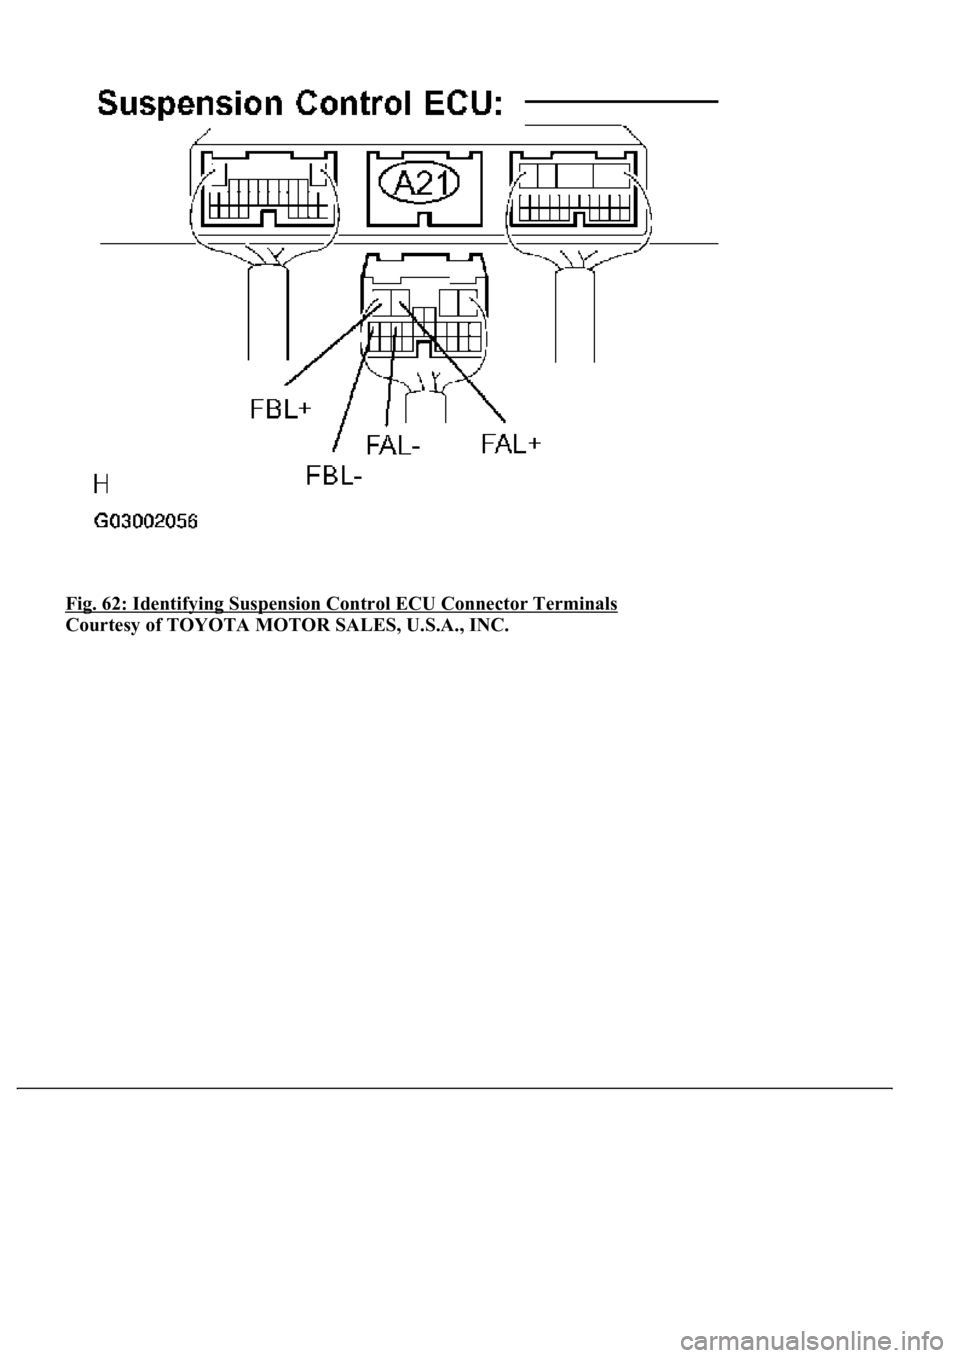
A21-5 (FAL+) - S5-2 (FAL+)Below 1 ohms
A21-6 (FBL+) - S5-1 (FBL+)Below 1 ohms
A21-14 (FAL-) - S5-5 (FAL-)Below 1 ohms
A21-16 (FBL-) - S5-4 (FBL-)Below 1 ohms
A21-5 (FAL+) - Body ground10 Kohms or higher
A21-6 (FBL+) - Body ground10 Kohms or higher
A21-14 (FAL-) - Body ground10 Kohms or higher
A21-16 (FBL-) - Body ground10 Kohms or higher
S5-3 (GND) - Body groundBelow 1 ohms
Page 543 of 4500
Fig. 62: Identifying Suspension Control ECU Connector Terminals
Courtesy of TOYOTA MOTOR SALES, U.S.A., INC.
Page 544 of 4500
Fig. 63: Identifying Absorber Control Actuator Front Connector Terminals
Courtesy of TOYOTA MOTOR SALES, U.S.A., INC.
TESTER CONNECTION STANDARD SPECIFIED CONDITION STANDARD (REAR RH)
Tester ConnectionSpecified Condition
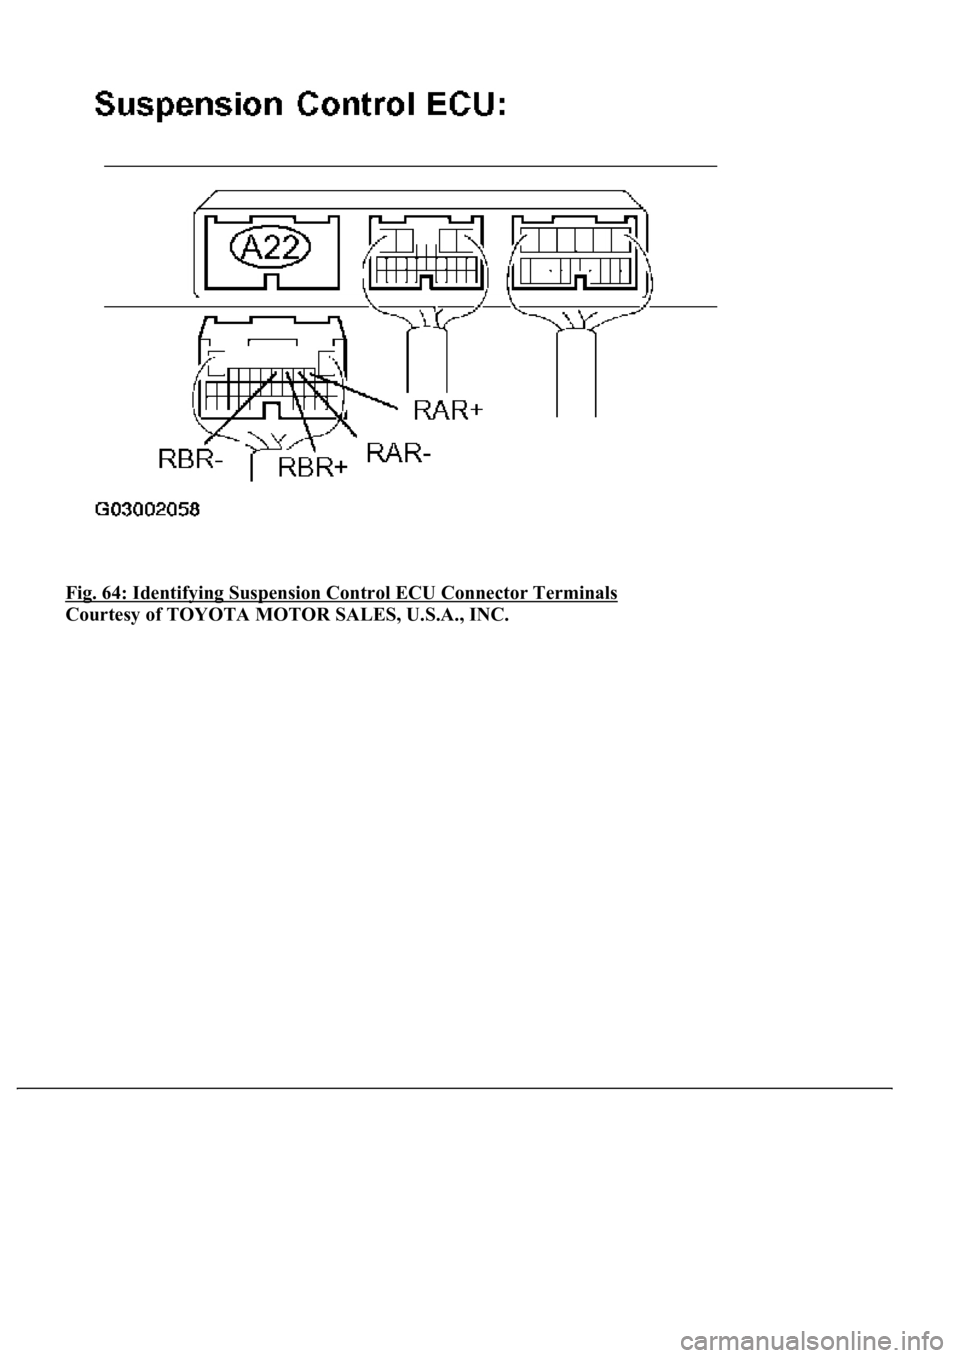
A22-2 (RAR+) - S33-2 (RAR+)Below 1 ohms
A22-3 (RAR-) - S33-5 (RAR-)Below 1 ohms
A22-4 (RBR+) - S33-1 (RBR+)Below 1 ohms
A22-5 (RBR-) - S33-4 (RBR-)Below 1 ohms
A22-2 (RAR+) - Body ground10 Kohms or higher
A22-3 (RAR-) - Body ground10 Kohms or higher
A22-4 (RBR+) - Body ground10 Kohms or higher
A22-5 (RBR-) - Body ground10 Kohms or higher
S33-3 (ERR) - Body groundBelow 1 ohms
Page 545 of 4500
Fig. 64: Identifying Suspension Control ECU Connector Terminals
Courtesy of TOYOTA MOTOR SALES, U.S.A., INC.
Page 546 of 4500
Fig. 65: Identifying Absorber Control Actuator Rear RH Connector Terminals
Courtesy of TOYOTA MOTOR SALES, U.S.A., INC.
TESTER CONNECTION STANDARD SPECIFIED CONDITION STANDARD (REAR LH)
Tester ConnectionSpecified Condition
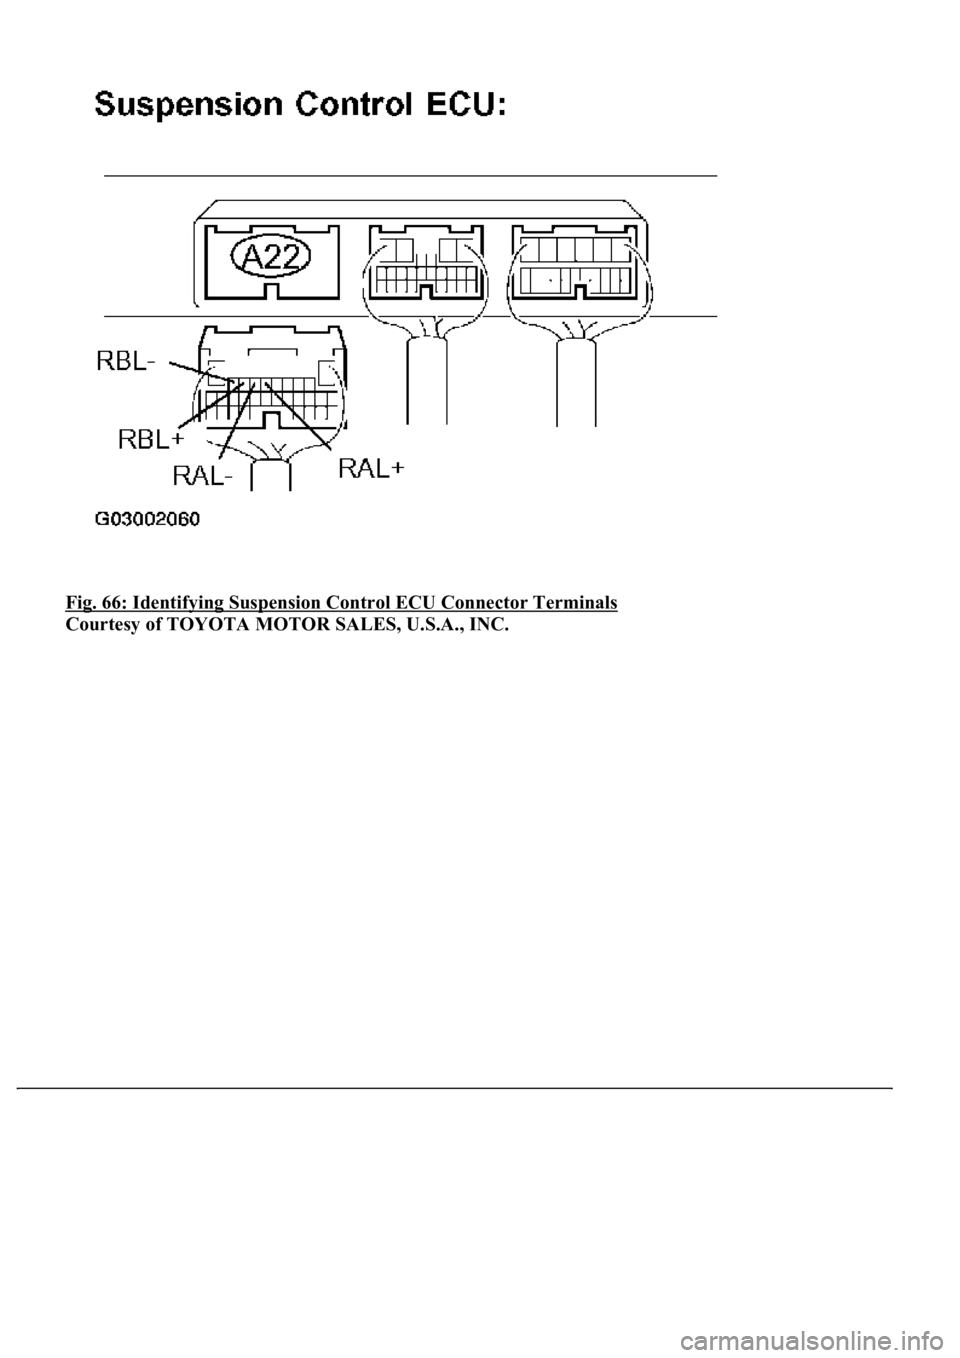
A22-6 (RAL+) - S32-2 (RAL+)Below 1 ohms
A22-7 (RAL-) S32-5 (RAL-)Below 1 ohms
A22-8 (RBL+) - S32-1 (RBL+)Below 1 ohms
A22-9 (RBL-) - S32-4 (RBL-)Below 1 ohms
A22-6 (RAL+) - Body ground10 Kohms or higher
A22-7 (RAL-) - Body ground10 Kohms or higher
A22-8 (RBL+) - Body ground10 Kohms or higher
A22-9 (RBL-) - Body ground10 Kohms or higher
S32-3 (ERL) - Body groundBelow 1 ohms
Page 547 of 4500
Fig. 66: Identifying Suspension Control ECU Connector Terminals
Courtesy of TOYOTA MOTOR SALES, U.S.A., INC.
Page 548 of 4500
Fig. 67: Identifying Absorber Control Actuator Rear LH Connector Terminals
Courtesy of TOYOTA MOTOR SALES, U.S.A., INC.
NG: REPAIR OR REPLACE HARNESS OR CONNECTOR
OK: REPLACE SUSPENSION CONTROL ECU (SEE REPLACEMENT
)
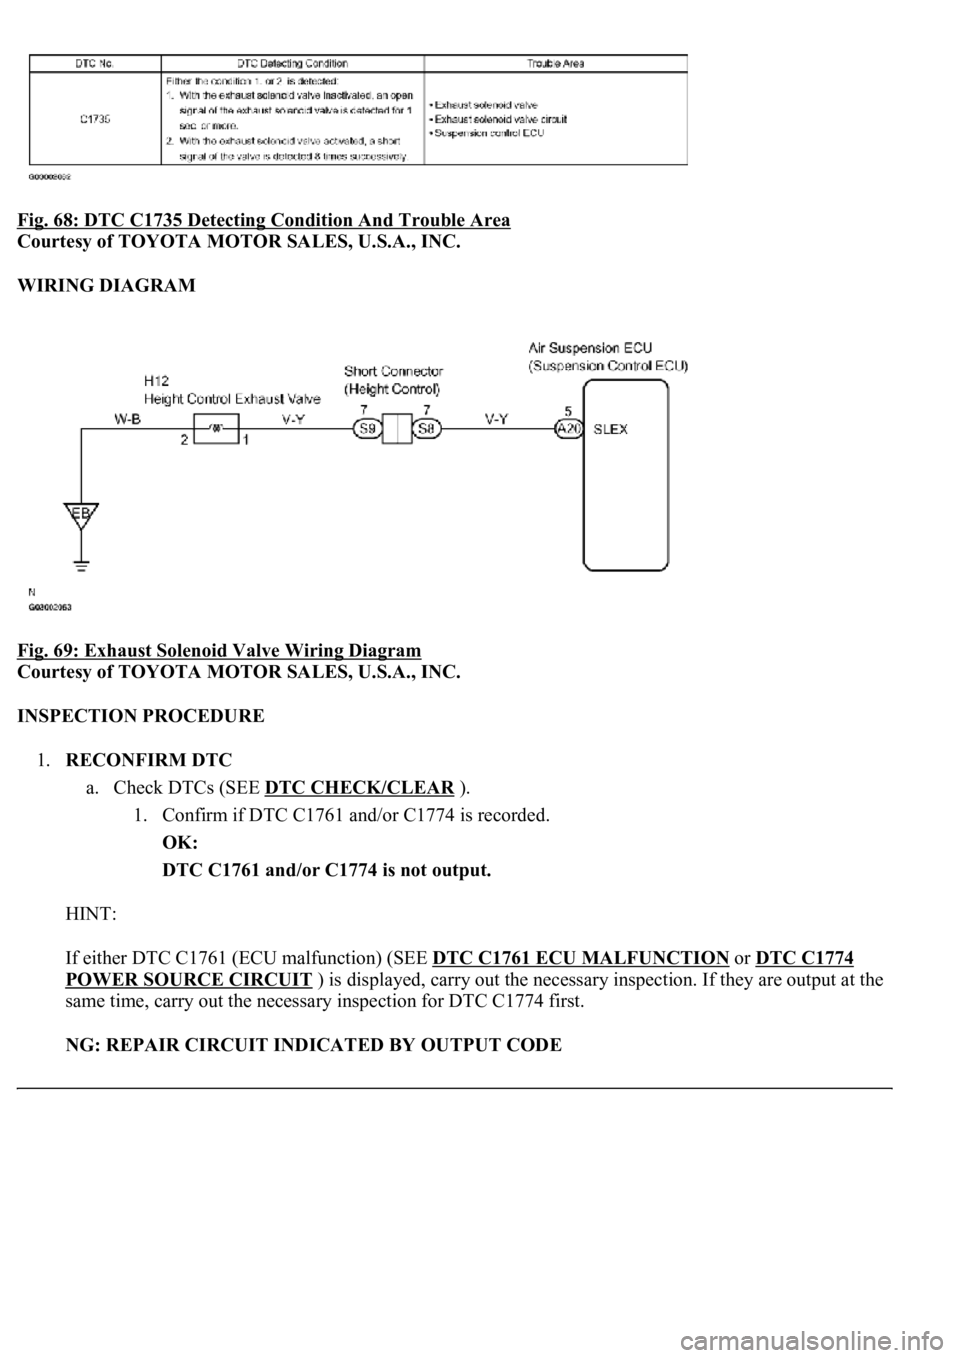
CIRCUIT DESCRIPTION
The exhaust solenoid discharges high pressure air from the system by opening the solenoid valve according to
the si
gnal from the suspension control ECU.
Page 549 of 4500
<0029004c004a001100030019001b001d0003002700370026000300260014001a001600180003002700480057004800460057004c0051004a00030026005200510047004c0057004c005200510003002400510047000300370055005200580045004f004800
030024005500480044[
Courtesy of TOYOTA MOTOR SALES, U.S.A., INC.
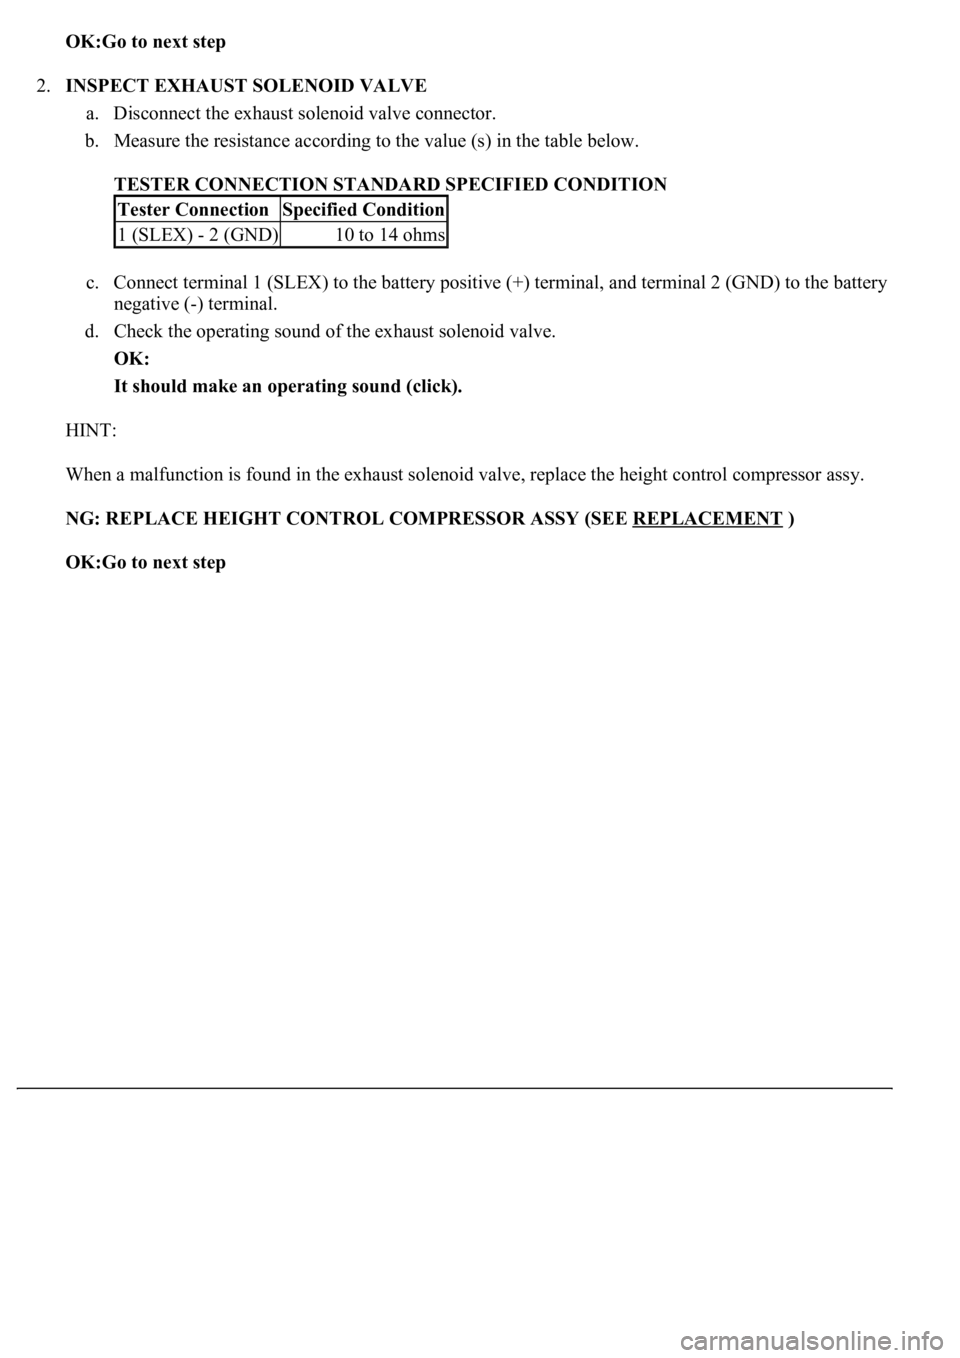
WIRING DIAGRAM
Fig. 69: Exhaust Solenoid Valve Wiring Diagram
Courtesy of TOYOTA MOTOR SALES, U.S.A., INC.
INSPECTION PROCEDURE
1.RECONFIRM DTC
a. Check DTCs (SEE DTC CHECK/CLEAR
).
1. Confirm if DTC C1761 and/or C1774 is recorded.
OK:
DTC C1761 and/or C1774 is not output.
HINT:
If either DTC C1761 (ECU malfunction) (SEE DTC C1761 ECU MALFUNCTION
or DTC C1774
POWER SOURCE CIRCUIT ) is displayed, carry out the necessary inspection. If they are output at the
same time, carry out the necessary inspection for DTC C1774 first.
NG: REPAIR CIRCUIT INDICATED BY OUTPUT CODE
Page 550 of 4500
OK:Go to next step
2.INSPECT EXHAUST SOLENOID VALVE
a. Disconnect the exhaust solenoid valve connector.
b. Measure the resistance according to the value (s) in the table below.
TESTER CONNECTION STANDARD SPECIFIED CONDITION
c. Connect terminal 1 (SLEX) to the battery positive (+) terminal, and terminal 2 (GND) to the battery
negative (-) terminal.
d. Check the operating sound of the exhaust solenoid valve.
OK:
It should make an operating sound (click).
HINT:
When a malfunction is found in the exhaust solenoid valve, replace the height control compressor assy.
NG: REPLACE HEIGHT CONTROL COMPRESSOR ASSY (SEE REPLACEMENT
)
OK:Go to next step
Tester ConnectionSpecified Condition
1 (SLEX) - 2 (GND)10 to 14 ohms
Trending: Door lock actuator, service interval, lock, battery replacement, wheel size, Door lock, brake
