LEXUS LS430 2003 Factory Manual PDF
LS430 2003
LEXUS
LEXUS
https://www.carmanualsonline.info/img/36/57050/w960_57050-0.png
LEXUS LS430 2003 Factory Manual PDF
Page 3360 of 4500
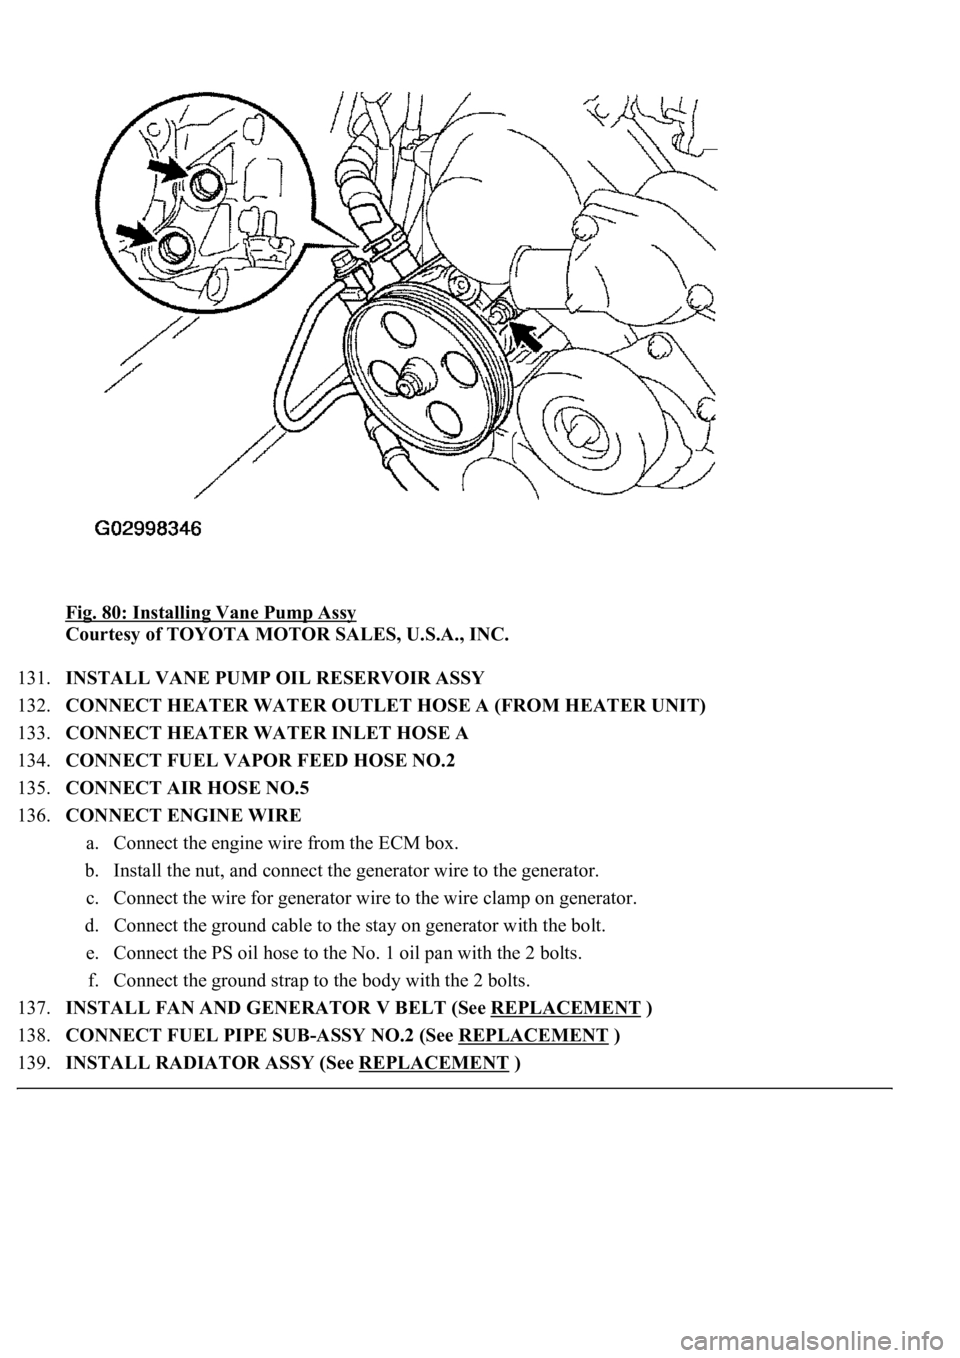
Fig. 80: Installing Vane Pump Assy
Courtesy of TOYOTA MOTOR SALES, U.S.A., INC.
131.INSTALL VANE PUMP OIL RESERVOIR ASSY
132.CONNECT HEATER WATER OUTLET HOSE A (FROM HEATER UNIT)
133.CONNECT HEATER WATER INLET HOSE A
134.CONNECT FUEL VAPOR FEED HOSE NO.2
135.CONNECT AIR HOSE NO.5
136.CONNECT ENGINE WIRE
a. Connect the engine wire from the ECM box.
b. Install the nut, and connect the generator wire to the generator.
c. Connect the wire for generator wire to the wire clamp on generator.
d. Connect the ground cable to the stay on generator with the bolt.
e. Connect the PS oil hose to the No. 1 oil pan with the 2 bolts.
f. Connect the ground strap to the body with the 2 bolts.
137.INSTALL FAN AND GENERATOR V BELT (See REPLACEMENT
)
138.CONNECT FUEL PIPE SUB-ASSY NO.2 (See REPLACEMENT
)
139.INSTALL RADIATOR ASSY (See REPLACEMENT
)
Page 3362 of 4500
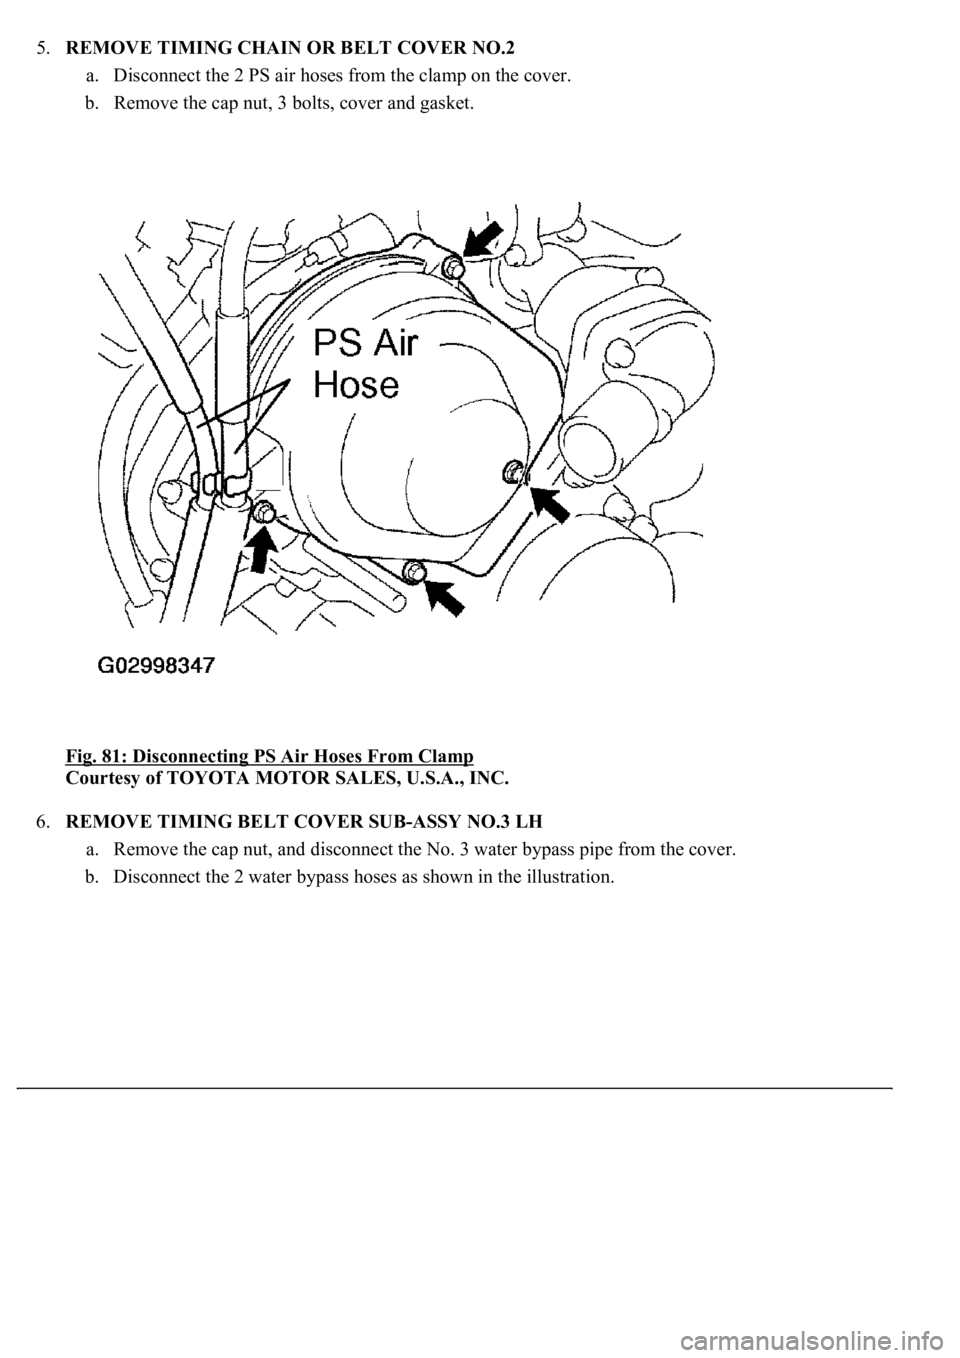
5.REMOVE TIMING CHAIN OR BELT COVER NO.2
a. Disconnect the 2 PS air hoses from the clamp on the cover.
b. Remove the cap nut, 3 bolts, cover and gasket.
Fig. 81: Disconnecting PS Air Hoses From Clamp
Courtesy of TOYOTA MOTOR SALES, U.S.A., INC.
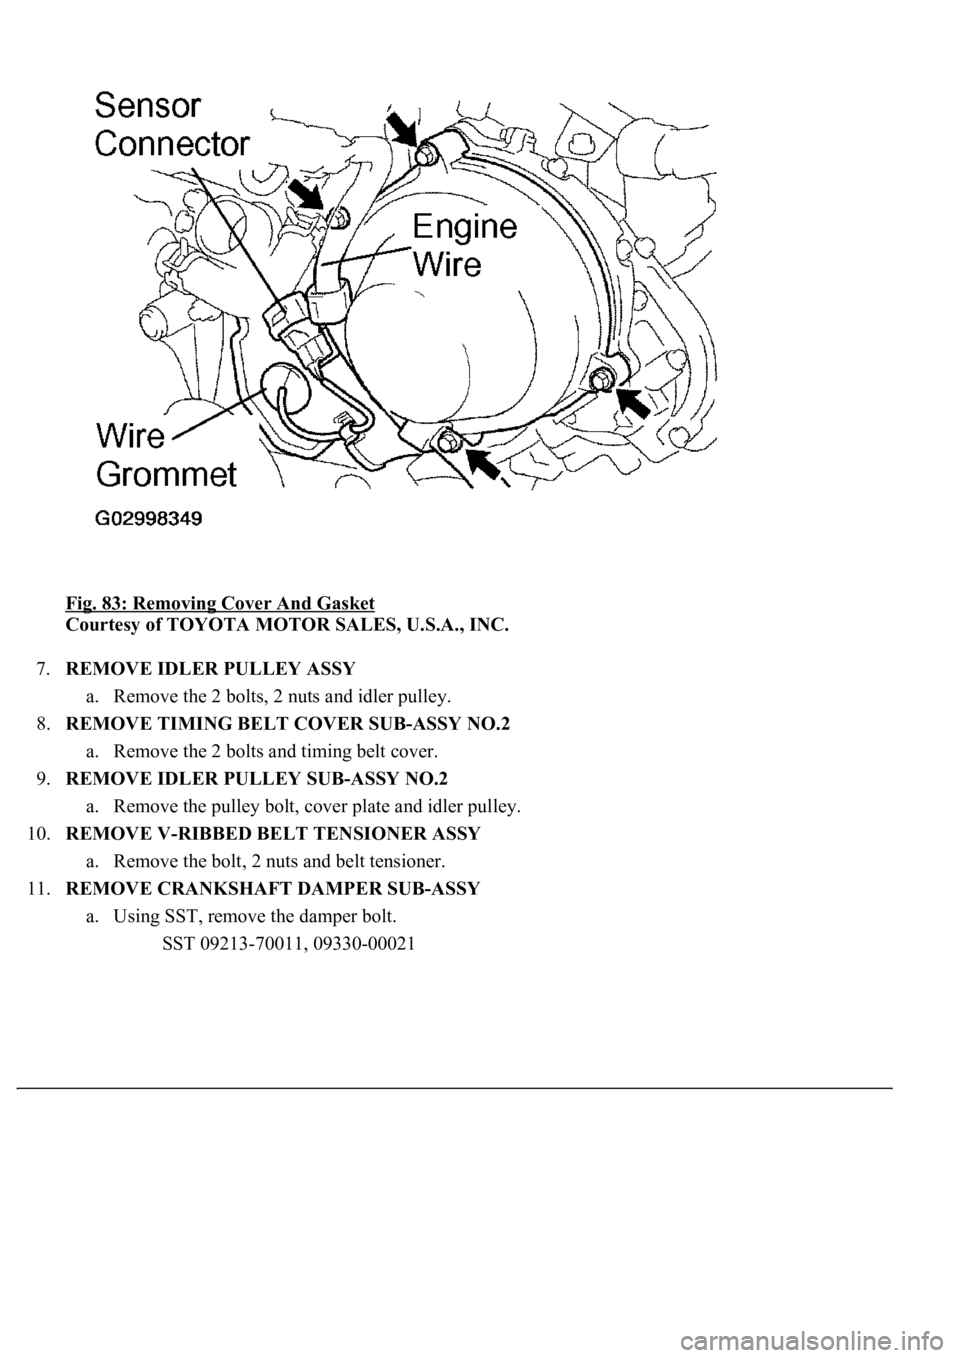
6.REMOVE TIMING BELT COVER SUB-ASSY NO.3 LH
a. Remove the cap nut, and disconnect the No. 3 water bypass pipe from the cover.
b. Disconnect the 2 water bypass hoses as shown in the illustration.
Page 3364 of 4500
Fig. 83: Removing Cover And Gasket
Courtesy of TOYOTA MOTOR SALES, U.S.A., INC.
7.REMOVE IDLER PULLEY ASSY
a. Remove the 2 bolts, 2 nuts and idler pulley.
8.REMOVE TIMING BELT COVER SUB-ASSY NO.2
a. Remove the 2 bolts and timing belt cover.
9.REMOVE IDLER PULLEY SUB-ASSY NO.2
a. Remove the pulley bolt, cover plate and idler pulley.
10.REMOVE V-RIBBED BELT TENSIONER ASSY
a. Remove the bolt, 2 nuts and belt tensioner.
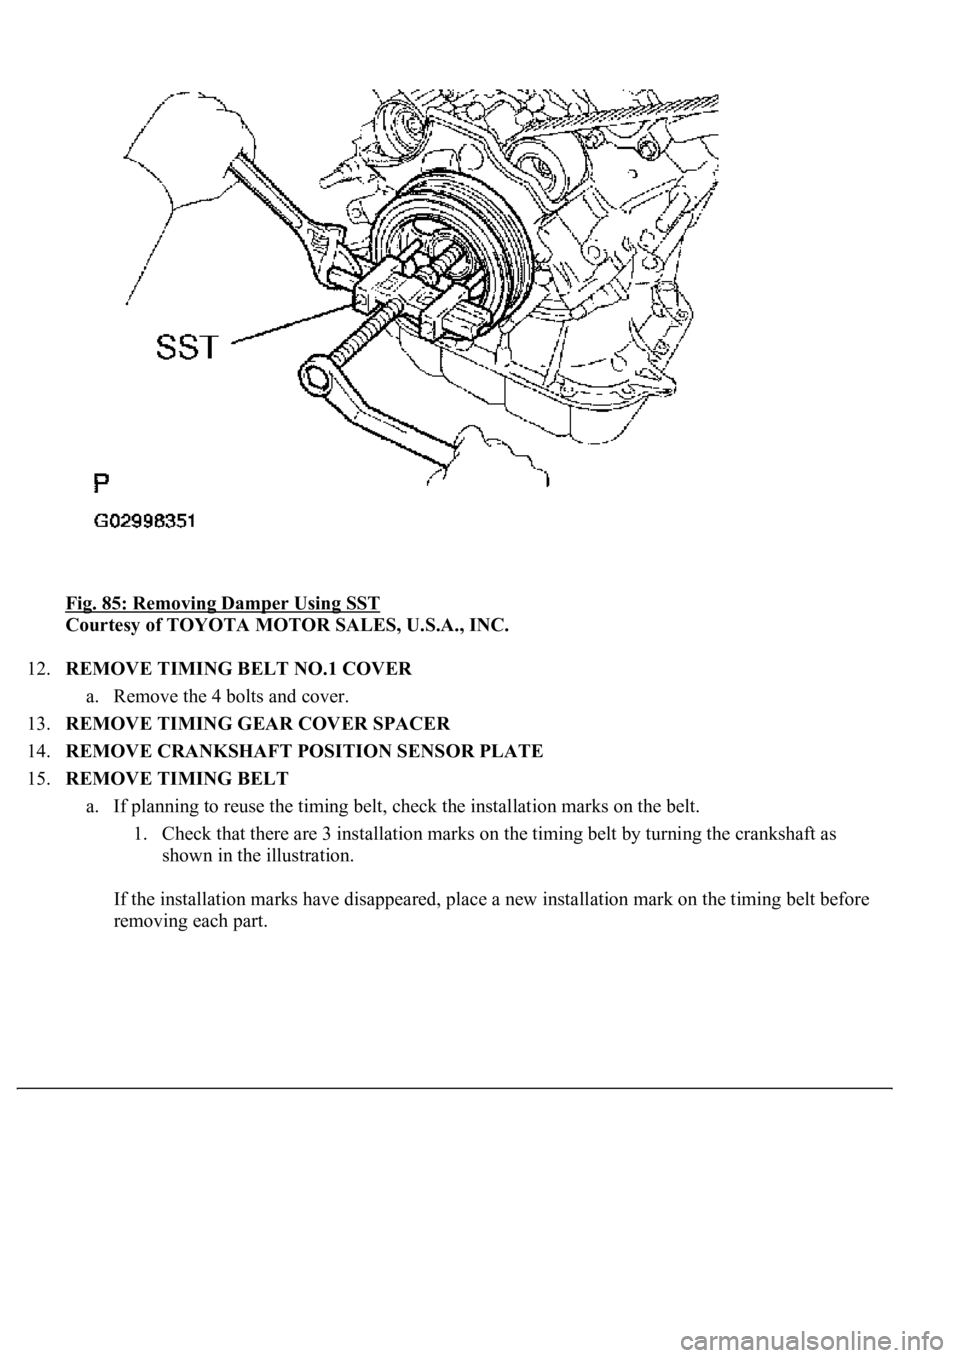
11.REMOVE CRANKSHAFT DAMPER SUB-ASSY
a. Using SST, remove the damper bolt.
SST 09213-70011, 09330-00021
Page 3366 of 4500
Fig. 85: Removing Damper Using SST
Courtesy of TOYOTA MOTOR SALES, U.S.A., INC.
12.REMOVE TIMING BELT NO.1 COVER
a. Remove the 4 bolts and cover.
13.REMOVE TIMING GEAR COVER SPACER
14.REMOVE CRANKSHAFT POSITION SENSOR PLATE
15.REMOVE TIMING BELT
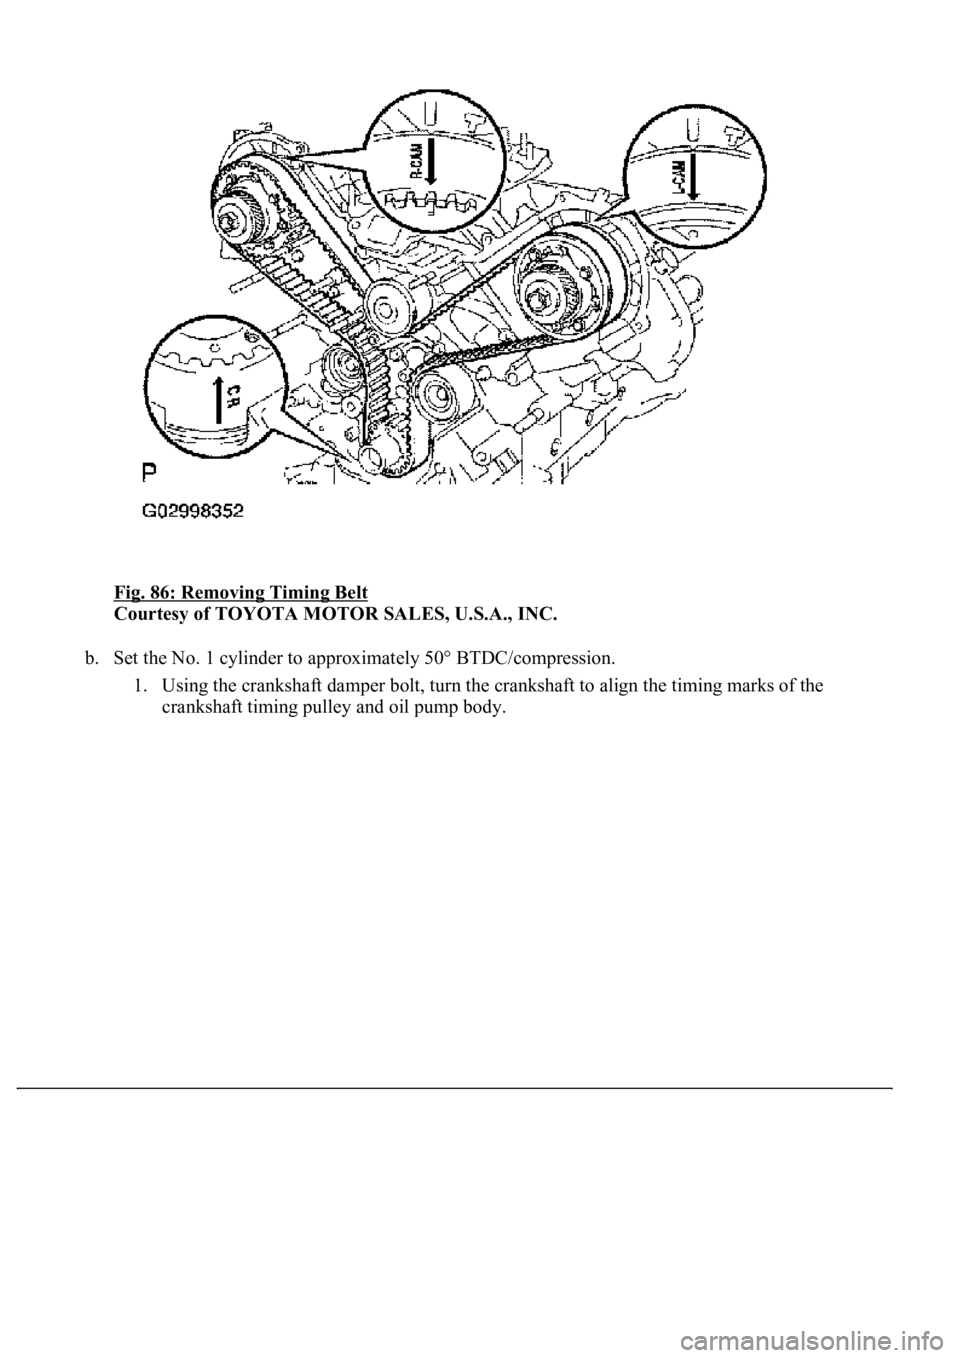
a. If planning to reuse the timing belt, check the installation marks on the belt.
1. Check that there are 3 installation marks on the timing belt by turning the crankshaft as
shown in the illustration.
If the installation marks have disappeared, place a new installation mark on the timing belt before
removing each part.
Page 3367 of 4500
Fig. 86: Removing Timing Belt
Courtesy of TOYOTA MOTOR SALES, U.S.A., INC.
b. Set the No. 1 cylinder to approximately 50° BTDC/compression.
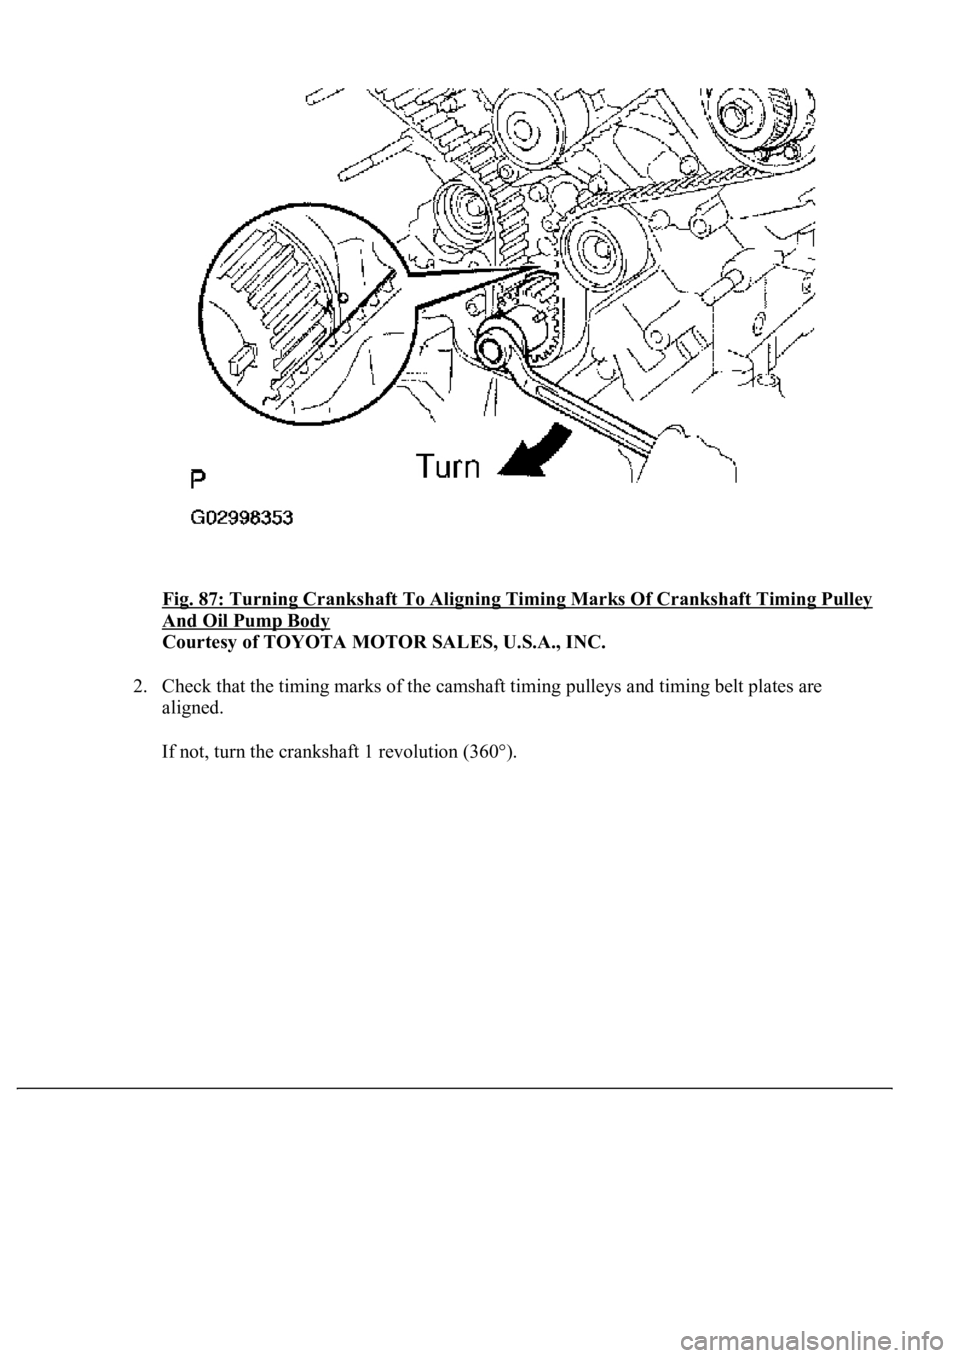
1. Using the crankshaft damper bolt, turn the crankshaft to align the timing marks of the
crankshaft timing pulley and oil pump body.
Page 3368 of 4500
Fig. 87: Turning Crankshaft To Aligning Timing Marks Of Crankshaft Timing Pulley
And Oil Pump Body
Courtesy of TOYOTA MOTOR SALES, U.S.A., INC.
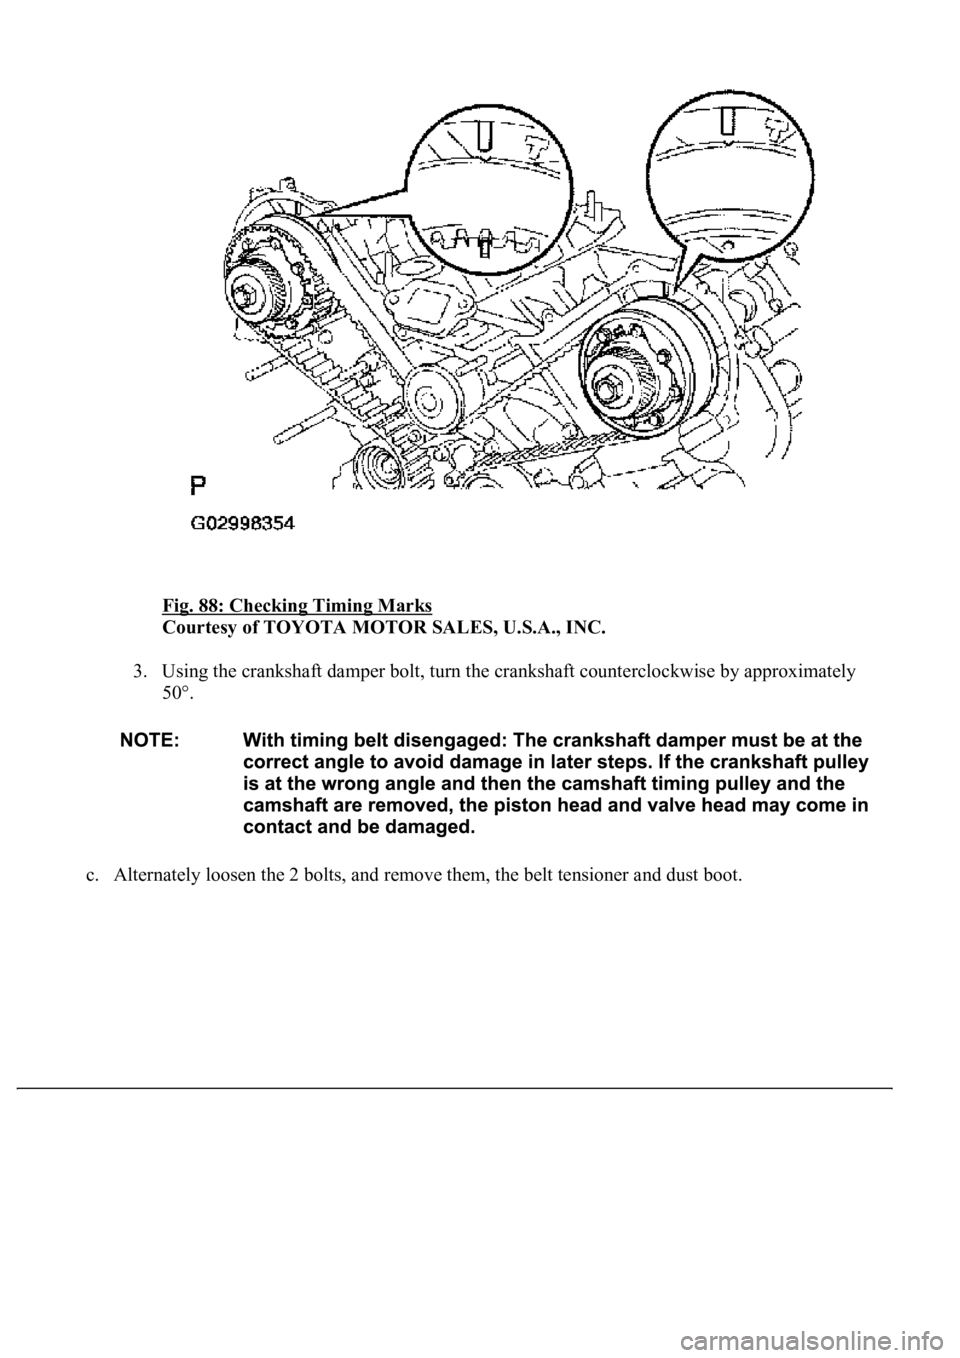
2. Check that the timing marks of the camshaft timing pulleys and timing belt plates are
aligned.
If not, turn the crankshaft 1 revolution (360°).
Page 3369 of 4500
Fig. 88: Checking Timing Marks
Courtesy of TOYOTA MOTOR SALES, U.S.A., INC.
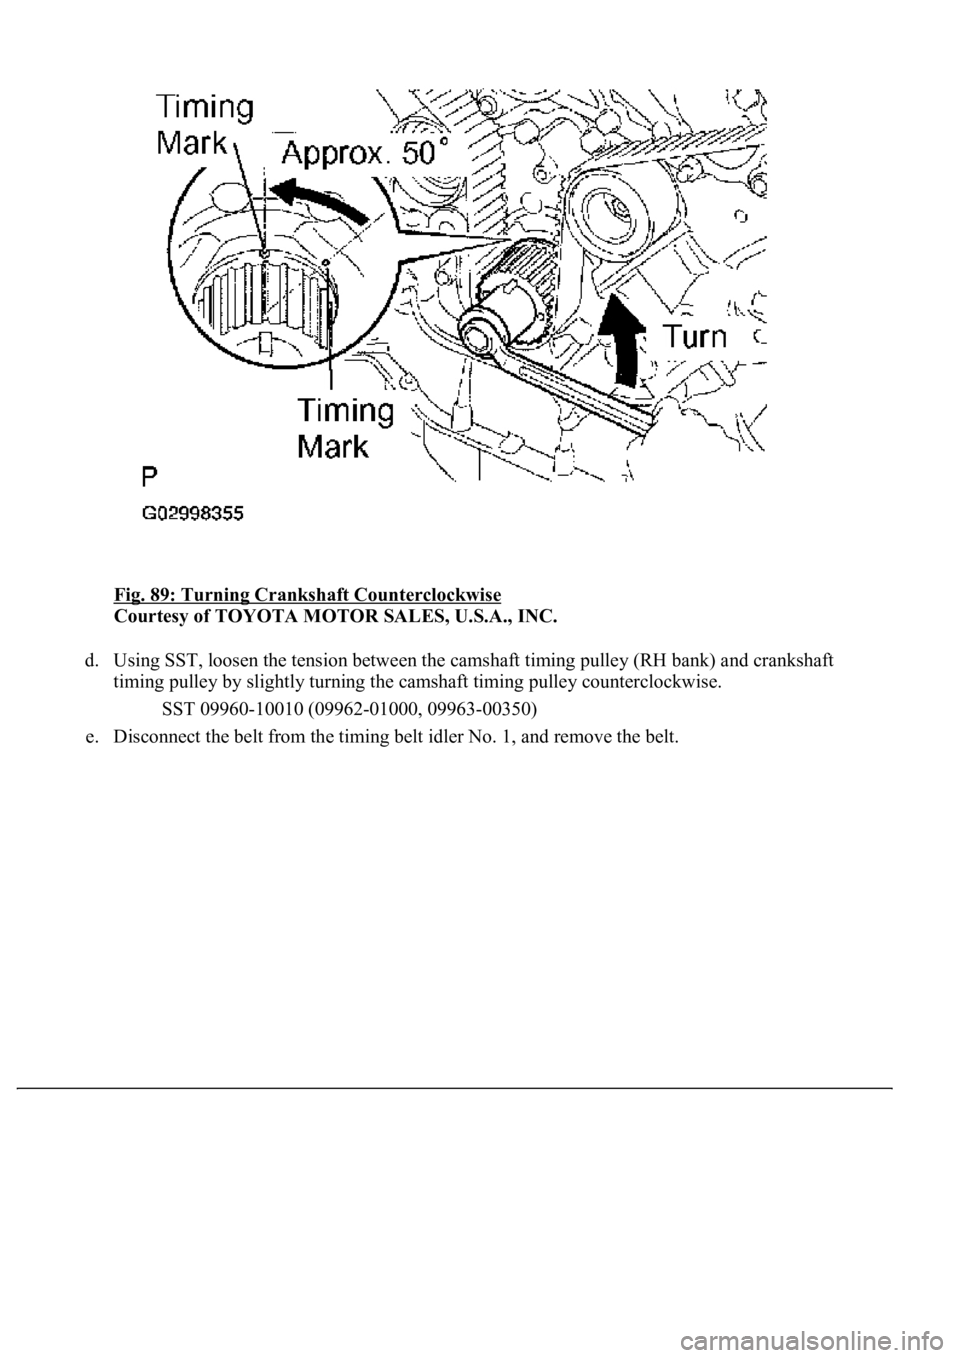
3. Using the crankshaft damper bolt, turn the crankshaft counterclockwise by approximately
50°.
c. Alternatel
y loosen the 2 bolts, and remove them, the belt tensioner and dust boot.
Page 3370 of 4500
Fig. 89: Turning Crankshaft Counterclockwise
Courtesy of TOYOTA MOTOR SALES, U.S.A., INC.
d. Using SST, loosen the tension between the camshaft timing pulley (RH bank) and crankshaft
timing pulley by slightly turning the camshaft timing pulley counterclockwise.
SST 09960-10010 (09962-01000, 09963-00350)
e. Disconnect the belt from the timing belt idler No. 1, and remove the belt.
Page 3371 of 4500
Fig. 90: Turning Camshaft Timing Pulley Counterclockwise Using SST
Courtesy of TOYOTA MOTOR SALES, U.S.A., INC.
16.INSPECT TIMING BELT
If there are any defects, as shown in the illustrations, check these points:
a. Premature parting
1. Check for proper installation.
2. Check the timing cover gasket for damage and proper installation.
b. If the belt teeth are cracked or damaged, check to see if either camshaft is locked.
Page 3372 of 4500
Fig. 91: Checking Timing Belt
Courtesy of TOYOTA MOTOR SALES, U.S.A., INC.
c. If there is noticeable wear or cracks on the belt face, check to see if there are nicks on the side of
the idler pulley lock and water pump.
d. If there is wear or damage on only one side of the belt, check the belt guide and the alignment of
each pulley.
e. If there is noticeable wear on the belt teeth, check the timing cover for damage, check that the
gasket has been installed correctly, and check for foreign material on the pulley teeth.
If necessary, replace the timing belt.
17.INSPECT TIMING BELT TENSIONER
a. Visually check the seal portion of the tensioner for oil leakage.
HINT:
If there is only the faint trace of oil on the push rod, the tensioner does not need to be replaced.
If leaka
ge is found, replace the tensioner.