cooling MAZDA 6 2002 Suplement User Guide
[x] Cancel search | Manufacturer: MAZDA, Model Year: 2002, Model line: 6, Model: MAZDA 6 2002Pages: 909, PDF Size: 17.16 MB
Page 78 of 909

OUTLINE
E–3
E
SPECIFICATIONSA6E360202000209Gasoline engine
Bold frames: New specifications
Diesel engine
Bold frames: New specifications
End Of Sie
ItemSpecification
New
Mazda6
(GG, GY)Current
Mazda6
(GG)New
Mazda6
(GG, GY)Current
Mazda6
(GG)New
Mazda6
(GG, GY)Current
Mazda6
(GG)
L8 LF L3
Cooling system Water-cooled
Coolant capacity
(approximate quantity)(L {US qt, lmp qt}) 7.5 {7.9, 6.6}
Water pump TypeCentrifugal,
V-ribbed belt-driven
ThermostatTypeWax,
Bottom-bypass
Opening temperature (°C {°F}) 80—84 {176—183}
Full-open temperature (°C {°F}) 97 {206}
Full-open lift (mm {in}) More than 8.0 {0.31}
RadiatorType Corrugated fin
Cap valve opening pressure
113—142
{1.15—1.44, 16.4—20.4}
(kPa {kgf/cm
2, psi})
Cooling fanType Electric
BladeOuter
diameter(mm {in}) 300 {11.8} 320 {12.6}
Number of
blade(sheet)Cooling fan No.1: 5
Cooling fan No.2: 7Cooling fan No.1: 7
Cooling fan No.2: 5
ItemSpecification
New Mazda6
(GG, GY)Current Mazda 323
(BJ)
MZR-CD (RF Turbo) RF Turbo
Cooling system Water-cooled
Coolant capacity
(approximate quantity)(L {US qt, lmp qt}) 9.0 {9.5, 7.9}
Water pump TypeCentrifugal,
Timing-belt driven
ThermostatType Wax, Bottom-bypass
Opening temperature (°C {°F}) 80—84 {176—183}
Full-open temperature (°C {°F}) 95 {203}
Full-open lift (mm {in}) More than 8.5 {0.33}
RadiatorType Corrugated fin
Cap valve opening pressure
94—122
{0.96—1.24, 13.7—17.6}
(kPa {kgf/cm
2, psi})
Cooling fanType Electric
BladeOuter
diameter(mm {in}) 320 {12.6} 300 {11.9}
Number of
blade(sheet)Cooling fan No.1: 7
Cooling fan No.2: 54
Page 79 of 909
E–4
COOLING SYSTEM
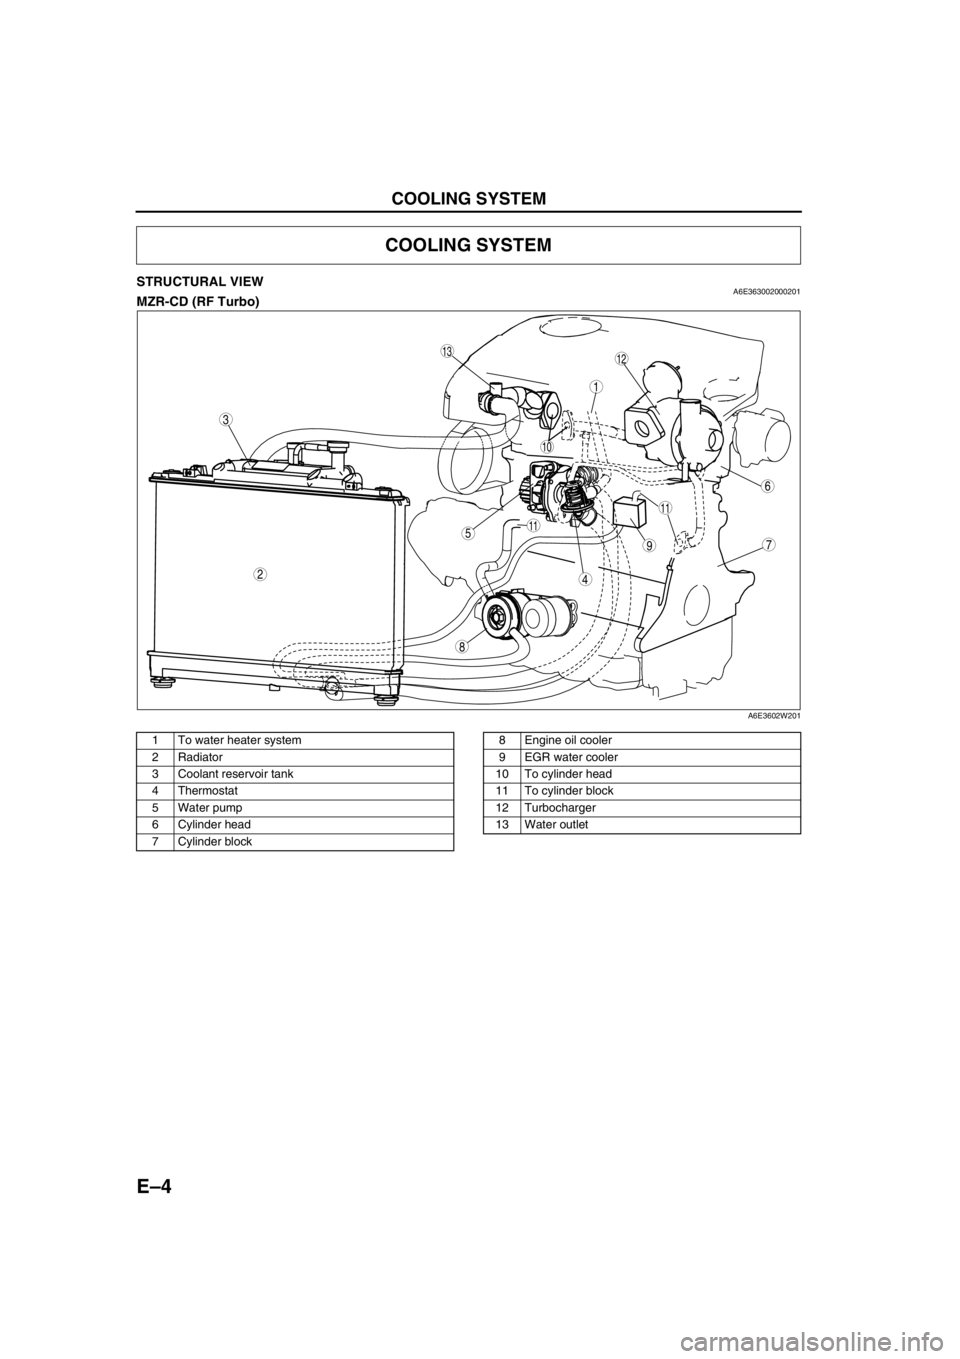
STRUCTURAL VIEWA6E363002000201MZR-CD (RF Turbo)
.
End Of Sie
COOLING SYSTEM
8
75
4
3
1
2
6
10
11
11
9
1312
A6E3602W201
1 To water heater system
2 Radiator
3 Coolant reservoir tank
4Thermostat
5 Water pump
6 Cylinder head
7 Cylinder block8 Engine oil cooler
9EGR water cooler
10 To cylinder head
11 To cylinder block
12 Turbocharger
13 Water outlet
Page 80 of 909
COOLING SYSTEM
E–5
E
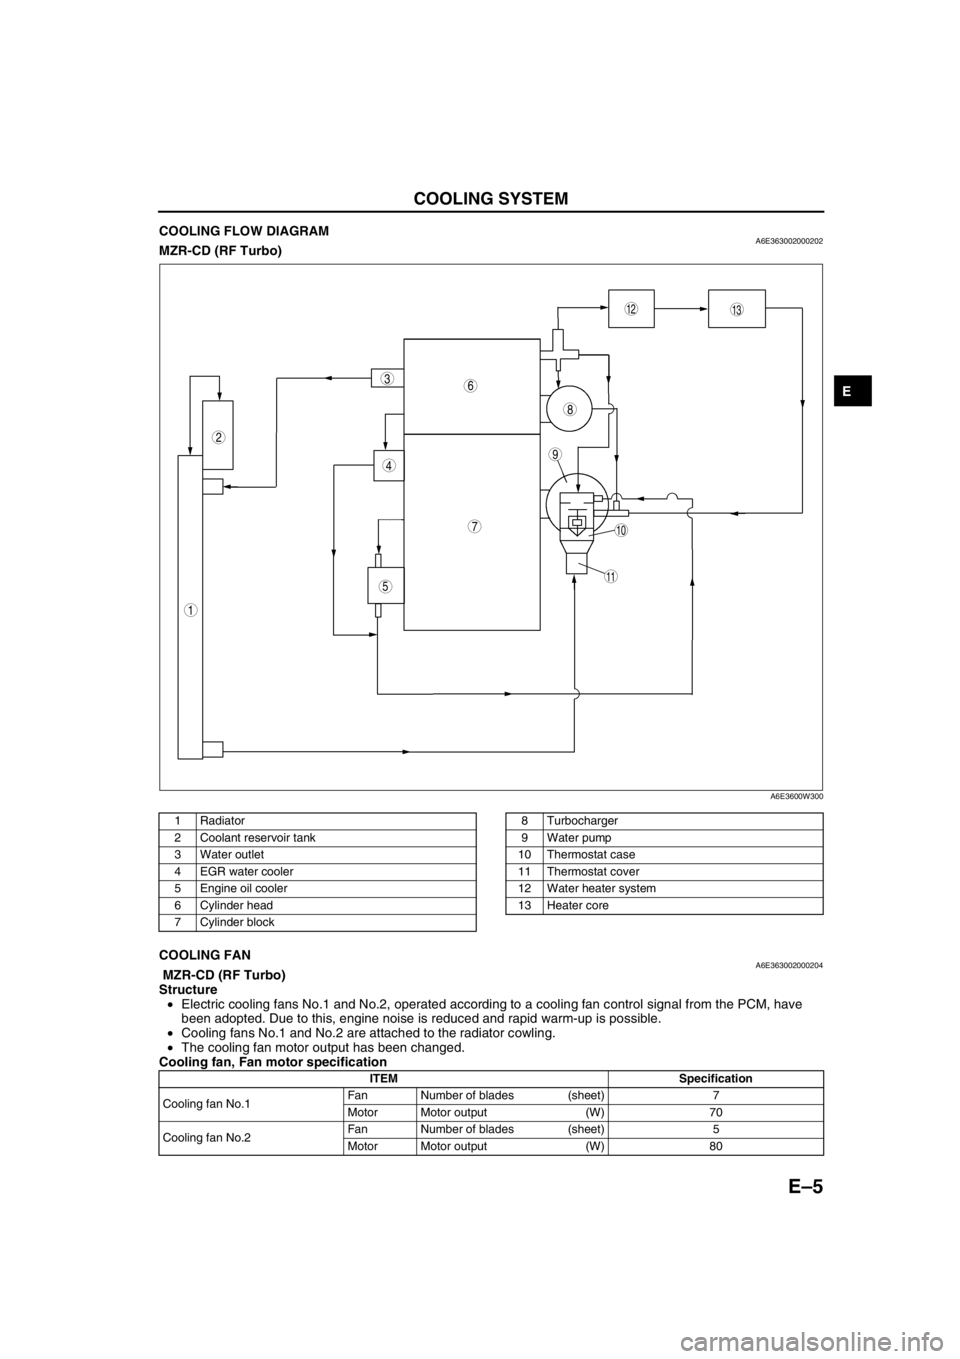
COOLING FLOW DIAGRAMA6E363002000202MZR-CD (RF Turbo)
.
End Of SieCOOLING FANA6E363002000204 MZR-CD (RF Turbo)
Structure
•Electric cooling fans No.1 and No.2, operated according to a cooling fan control signal from the PCM, have
been adopted. Due to this, engine noise is reduced and rapid warm-up is possible.
•Cooling fans No.1 and No.2 are attached to the radiator cowling.
•The cooling fan motor output has been changed.
Cooling fan, Fan motor specification
End Of Sie
9
8
7
5
4
3
1
2
10
13
11
12
6
A6E3600W300
1Radiator
2 Coolant reservoir tank
3 Water outlet
4EGR water cooler
5 Engine oil cooler
6 Cylinder head
7 Cylinder block8 Turbocharger
9 Water pump
10 Thermostat case
11 Thermostat cover
12 Water heater system
13 Heater core
ITEM Specification
Cooling fan No.1Fan Number of blades (sheet) 7
Motor Motor output (W) 70
Cooling fan No.2Fan Number of blades (sheet) 5
Motor Motor output (W) 80
Page 81 of 909
E–6
OUTLINE
SUPPLEMENTAL SERVICE INFORMATIONA6E360202000208•The following changes and/or additions have been made since publication of the Mazda6 Workshop Manual
(1730-1*-02C).
Radiator cap
•Inspection procedure has been added. (MZR-CD (RF Turbo) engine model)
Thermostat
•Removal/Installation procedure has been added. (MZR-CD (RF Turbo) engine model)
•Inspection procedure has been added. (MZR-CD (RF Turbo) engine model)
Water pump
•Removal/Installation procedure has been added. (MZR-CD (RF Turbo) engine model)
Fan motor
•Removal/Installation procedure has been added. (MZR-CD (RF Turbo) engine model)
•Inspection procedure has been added. (MZR-CD (RF Turbo) engine model)
End Of Sie
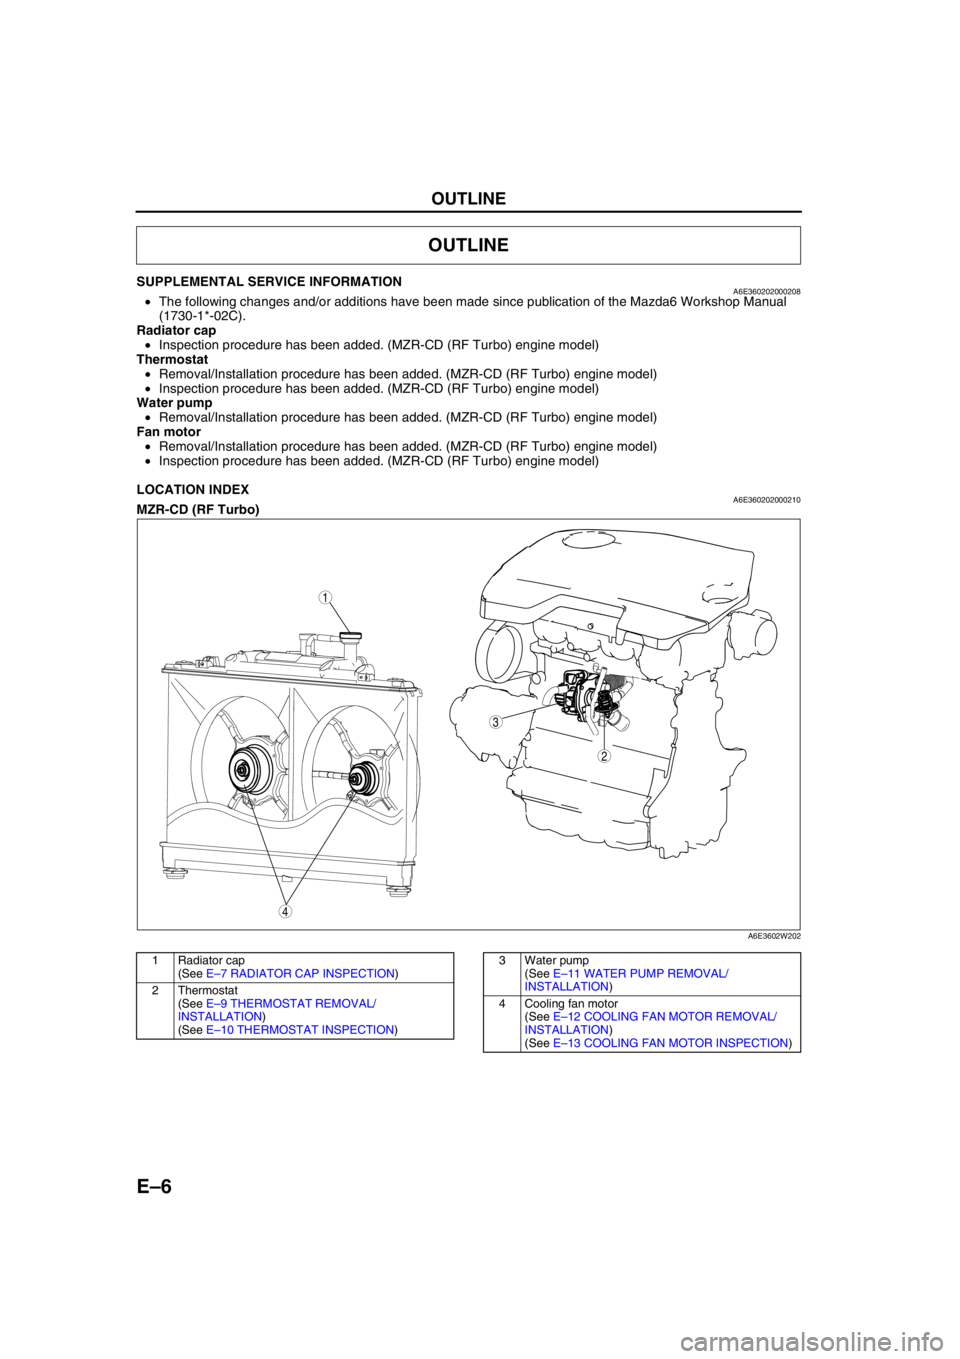
LOCATION INDEXA6E360202000210MZR-CD (RF Turbo)
.
End Of Sie
OUTLINE
4
3
1
2
A6E3602W202
1 Radiator cap
(See E–7 RADIATOR CAP INSPECTION)
2Thermostat
(See E–9 THERMOSTAT REMOVAL/
INSTALLATION)
(See E–10 THERMOSTAT INSPECTION)3 Water pump
(See E–11 WATER PUMP REMOVAL/
INSTALLATION)
4 Cooling fan motor
(See E–12 COOLING FAN MOTOR REMOVAL/
INSTALLATION)
(See E–13 COOLING FAN MOTOR INSPECTION)
Page 82 of 909
RADIATOR CAP
E–7
E
RADIATOR CAP INSPECTIONA6E361415201201MZR-CD (RF Turbo)
Warning
•Never remove the radiator cap while the engine is running, or when the engine and radiator are
hot. Scalding coolant and steam may shoot out and cause serious injury. It may also damage the
engine and cooling system.
•Turn off the engine and wait until it is cool. Even then, be very careful when removing the cap.
Wrap a thick cloth around it and slowly turn it counterclockwise to the first stop. Step back while
the pressure escapes.
•When you are sure all the pressure is gone, press down on the cap using the cloth, turn it, and
remove it.
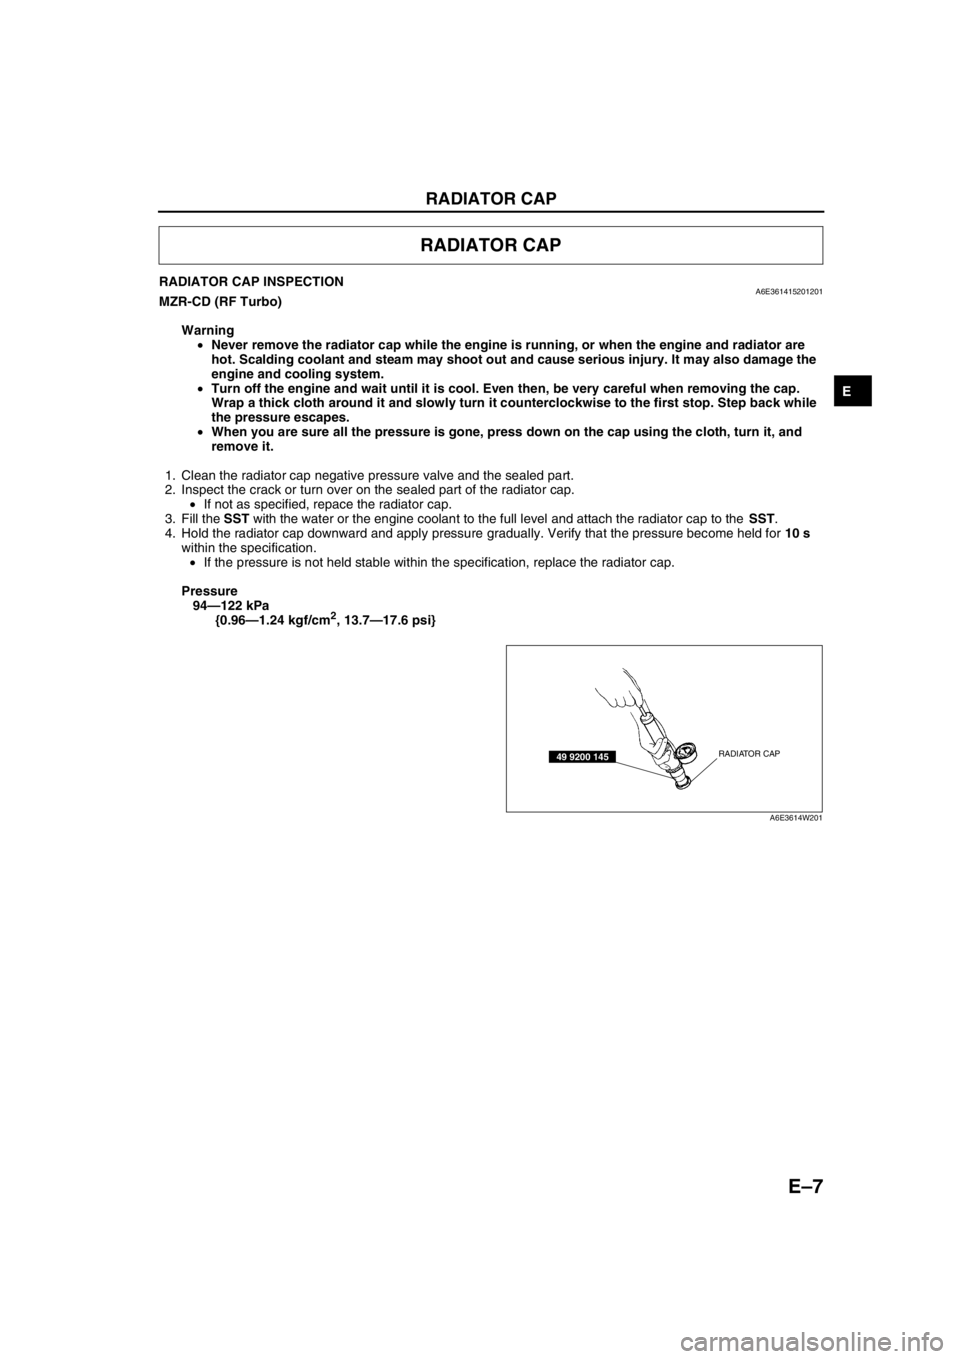
1. Clean the radiator cap negative pressure valve and the sealed part.
2. Inspect the crack or turn over on the sealed part of the radiator cap.
•If not as specified, repace the radiator cap.
3. Fill the SST with the water or the engine coolant to the full level and attach the radiator cap to the SST.
4. Hold the radiator cap downward and apply pressure gradually. Verify that the pressure become held for 10 s
within the specification.
•If the pressure is not held stable within the specification, replace the radiator cap.
Pressure
94—122 kPa
{0.96—1.24 kgf/cm
2, 13.7—17.6 psi}
End Of Sie
RADIATOR CAP
RADIATOR CAP49 9200 145
A6E3614W201
Page 83 of 909
E–8
ENGINE COOLANT
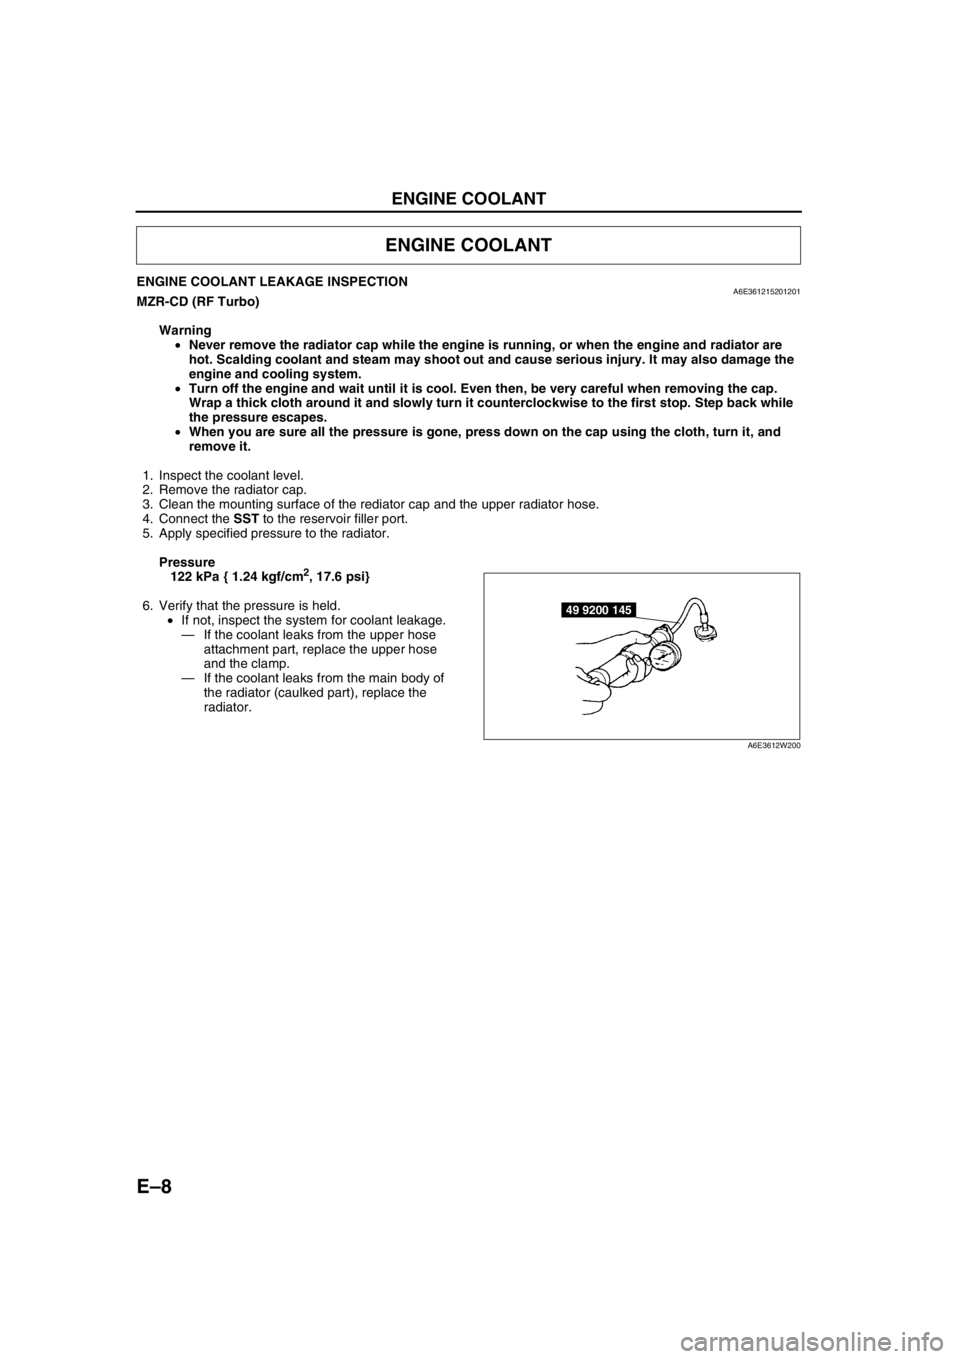
ENGINE COOLANT LEAKAGE INSPECTIONA6E361215201201MZR-CD (RF Turbo)
Warning
•Never remove the radiator cap while the engine is running, or when the engine and radiator are
hot. Scalding coolant and steam may shoot out and cause serious injury. It may also damage the
engine and cooling system.
•Turn off the engine and wait until it is cool. Even then, be very careful when removing the cap.
Wrap a thick cloth around it and slowly turn it counterclockwise to the first stop. Step back while
the pressure escapes.
•When you are sure all the pressure is gone, press down on the cap using the cloth, turn it, and
remove it.
1. Inspect the coolant level.
2. Remove the radiator cap.
3. Clean the mounting surface of the rediator cap and the upper radiator hose.
4. Connect the SST to the reservoir filler port.
5. Apply specified pressure to the radiator.
Pressure
122 kPa { 1.24 kgf/cm
2, 17.6 psi}
6. Verify that the pressure is held.
•If not, inspect the system for coolant leakage.
—If the coolant leaks from the upper hose
attachment part, replace the upper hose
and the clamp.
—If the coolant leaks from the main body of
the radiator (caulked part), replace the
radiator.
End Of Sie
ENGINE COOLANT
49 9200 145
A6E3612W200
Page 87 of 909

E–12
FAN MOTOR
COOLING FAN MOTOR REMOVAL/INSTALLATIONA6E362215025201MZR-CD (RF Turbo)
1. Remove the cooling fan component.
2. Remove in the order indicated in the table.
3. Install in the reverse order of removal.
4.
End Of Sie
FAN MOTOR
4
3
1
2
2.9—3.9 N·m
{29.5—39.8 kgf·cm,
25.6—33.9 in·lbf}
3.9—4.9 N·m
{39.7—50.0 kgf·cm,
34.7—43.4 in·lbf}
3.9—4.9 N·m
{39.7—50.0 kgf·cm,
34.7—43.4 in·lbf}
A6E3621W101
1 Cooling fan No.2
2 Cooling fan No.1
3 Cooling fan motor No.2
4 Cooling fan motor No.1
Page 88 of 909

FAN MOTOR
E–13
E
COOLING FAN MOTOR INSPECTIONA6E362215025202MZR-CD (RF Turbo)
1. Verify that the battery is fully charged.
•Charge if necessary. (See G–6 BATTERY RECHARGING.)
2. Connect battery positive voltage and an ammeter to the cooling fan motor connector.
3. Verify that the cooling fan motor operates smoothly at the standard current draw.
•If not as specified, replace the cooling fan motor.
End Of Sie
Item Current (A) [12V]
Cooling fan motor No.1 4.4—7.4
Cooling fan motor No.2 6.3—9.3
AB
A B
TERMINAL No.
COOLING FAN MOTOR
CONNECTOR
A6E3621W102
Page 93 of 909

OUTLINE
F1–5
F1
11 Knock sensor
12 CKP sensor
13 CMP sensor
14 Fuel injector No.1
15 Fuel injector No.2
16 Fuel injector No.3
17 Fuel injector No.4
18 IAC valve
19 Oxygen sensor heater (front)
20 Oxygen sensor heater (rear)
21 A/C relay22 Cooling fan relay
23 Cooling fan relay
24 Cooling fan relay
25 TR switch
26 Fuel pump relay
27 Coil
28 Security light
29 Ignition switch
30 Main relay
31 TR switch
32 Starter relay
Page 96 of 909
F1–8
OUTLINE
.
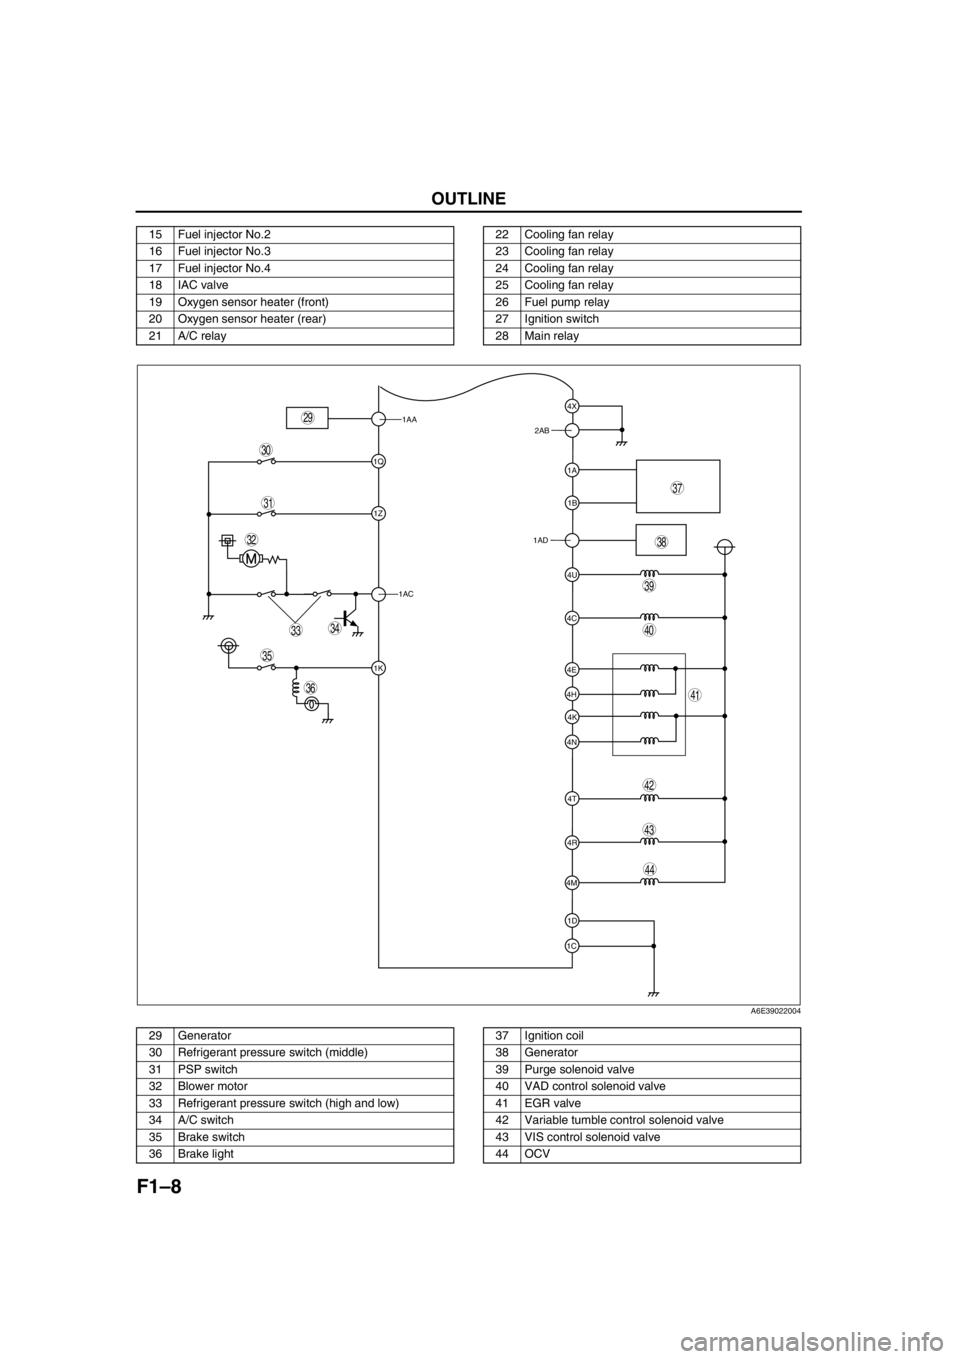
15 Fuel injector No.2
16 Fuel injector No.3
17 Fuel injector No.4
18 IAC valve
19 Oxygen sensor heater (front)
20 Oxygen sensor heater (rear)
21 A/C relay22 Cooling fan relay
23 Cooling fan relay
24 Cooling fan relay
25 Cooling fan relay
26 Fuel pump relay
27 Ignition switch
28 Main relay
1AA
1Q
1Z
1AC
1K
1C1D 4M4R 4N4K 4H4E
4T 4C4U 1AD1B 1A 2AB4X
39
38
37
35
36
33
31
32
40
44
43
41
42
34
29
30
A6E39022004
29 Generator
30 Refrigerant pressure switch (middle)
31 PSP switch
32 Blower motor
33 Refrigerant pressure switch (high and low)
34 A/C switch
35 Brake switch
36 Brake light37 Ignition coil
38 Generator
39 Purge solenoid valve
40 VAD control solenoid valve
41 EGR valve
42 Variable tumble control solenoid valve
43 VIS control solenoid valve
44 OCV