MERCEDES-BENZ GL SUV 2012 Owners Manual
Manufacturer: MERCEDES-BENZ, Model Year: 2012, Model line: GL SUV, Model: MERCEDES-BENZ GL SUV 2012Pages: 441, PDF Size: 10.66 MB
Page 381 of 441
C
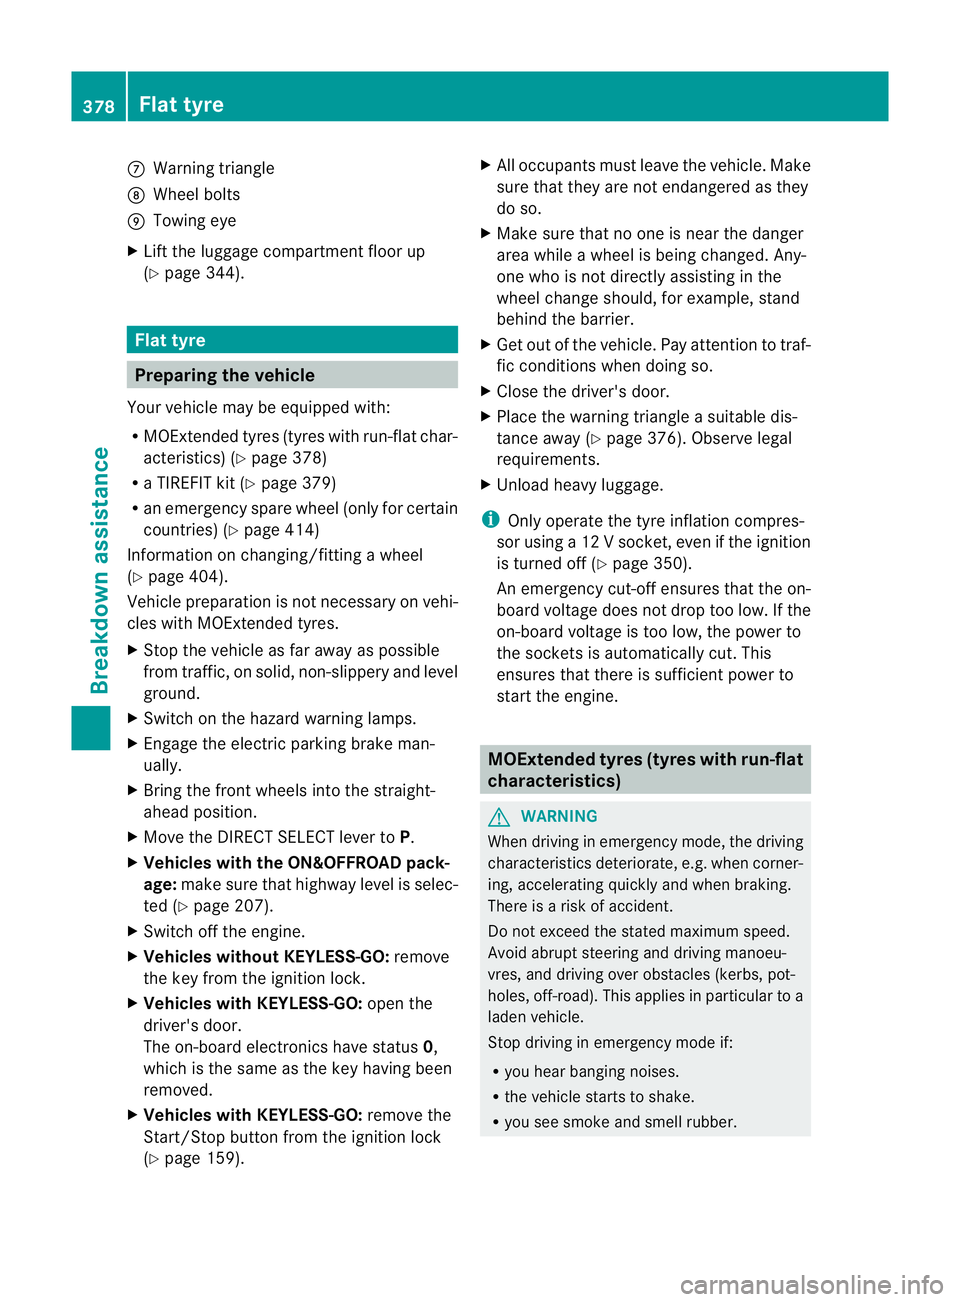
Warning triangle
D Wheel bolts
E Towing eye
X Lif tthe luggage compar tment floor up
(Y page 344). Flat ty
re Prep
aring the vehicle
Your vehicle may be equipped with:
R MOExtended tyres (tyres with run -flat char-
acteristics) (Y page 378)
R aT IREFIT kit (Y page 379)
R an emergency spare whee l(only for cer tain
countries) (Y page 414)
Information on changing/fitting awheel
(Y page 404).
Vehicle preparation is not necessar yonvehi-
cles with MOExtended tyres.
X Stop the vehicle as far away as possible
from traffic, on solid, non-slipper yand level
ground.
X Switch on the hazard warning lamps.
X Engag ethe electric parkin gbrake man-
ually.
X Bring th efront wheels into the straight-
ahead position.
X Move the DIRECT SELECT leve rtoP.
X Vehicle swith the ON&OFFROAD pack-
age: makesure that highway level is selec-
ted (Y page 207).
X Switch off the engine.
X Vehicles without KEYLESS-GO: remove
the key from the ignition lock.
X Vehicles with KEYLESS-GO: open the
driver' sdoor.
The on-boar delectronic shave status 0,
which is the same as the key having been
removed.
X Vehicles with KEYLESS-GO: remove the
Start/Stop button from the ignition lock
(Y page 159). X
All occupants must leave the vehicle. Make
sure that they are not endangered as they
do so.
X Make sure that no one is near the danger
area while awheel is being changed. Any-
one who is not directly assisting in the
wheel change should, for example, stand
behind the barrier.
X Get out of the vehicle. Pay attention to traf-
fic condition swhen doing so.
X Close the driver's door.
X Plac ethe warnin gtriangl easuitable dis-
tance away (Y page 376). Observe legal
requirements.
X Unload heavy luggage.
i Only operate the tyre inflation compres-
sor using a12Vs ocket,even if the ignition
is turned off (Y page 350).
An emergenc ycut-off ensures that the on-
board voltage does not drop too low. If the
on-board voltage is too low, the power to
the sockets is automatically cut. This
ensures that there is sufficient power to
start the engine. MOExtended tyres (tyres with run-flat
characteristics)
G
WARNING
When driving in emergenc ymode, the driving
characteristic sdeteriorate, e.g. when cor ner-
ing, accelerating quickly and when braking.
There is arisk of accident.
Do not exceed the stated maximum speed.
Avoid abrupt steering and drivin gmanoeu-
vres, and driving over obstacles (kerbs, pot-
holes ,off-road) .This applies in particular to a
laden vehicle.
Sto pdriving in emergency mod eif:
R you hear banging noises.
R the vehicl estart stos hake.
R you see smok eand smell rubber. 378
Flat tyreBreakdown assistance
Page 382 of 441
R
ESP ®
is intervening constantly.
R there are tears in the sidewall softhe tyre.
After driving in emergency mode, have the
whee lrims checked at aquali fied specialist
workshop with regar dtotheir furthe ruse. The
fault ytyre must be replaced.
With MOExtended tyres (tyres with run-flat
characteristics), you can continue to drive
your vehicle even if there is atotal loss of
pressure in one or mor etyres.
MOExtended tyres may only be used in con-
junction with an active tyre pressure loss
warning syste morwith an activ etyre pres-
sure monitor.
The maximum driving distance is approx-
imately 80 km when the vehicle is partially
laden, and approximatel y30kmwhen the
vehicle is fully laden.
In addition to the vehicle load, the drivin gdis-
tance possible depends upon:
R speed
R road condition
R outside temperature
The drivin gdistance possible in run-flat mode
may be reduced by extrem edriving condi-
tions/manoeuvres ,oritcan be increased
through amoderate style of driving.
The maximum permissible distance which
can be driven in run-flat mode is counted from
the moment the tyr epressure loss warning
appe arsint he multifunction display.
You must not exceed amaximum spee dof
80 km/h.
i When replacing one or all tyres, make
sure tha tyou only use tyres marked
"MOExtended". Make sure that you only
use the size of tyr especified for the vehicle.
i Vehicles with MOExtended tyres are not
equipped with aTIREFIT kit at th efactory.
It is therefore recommended that you addi-
tionally equip your vehicle with aTIREFIT kit
if yo ufit tyres that do not featur erun-flat
characteristics, e.g. winter tyres. ATIREFIT kit can be obtaine
dfrom aqualified spe-
cialist workshop. TIREFIT kit
Usin gthe TIREFIT kit TIREFIT is
atyre seal ant.
You can use TIREFIT to seal punctures of up
to 4m m, particularl ythose in the tyr etread.
Yo uc an use TIREFI Tatoutside temperatures
down to Ò20 †. G
WARNING
In the following situations, the tyre sealant is
unable to provide sufficient breakdown assis-
tance, as it is unable to seal the tyre properly:
R there are cuts or punctures in the tyre
larger than those mentioned above.
R the wheel rim is damaged.
R you have driven at very low tyre pressures
or on aflat tyre.
There is arisk of accident.
Do not drive any further. Contact aqualified
specialist workshop. G
WARNING
The tyre sealant is harmful and causes irrita-
tion. It must not come into contact with your
skin, eyes or clothing or be swallowed. Do not
inhale TIREFIT fumes. Keep tyre sealant away
from children. There is arisk of injury.
If you come into contact with the tyre sealant,
observe the following:
R Rinse off the tyre sealant from your skin
immediately with water.
R If the tyre sealant comes into contact with
your eyes, immediately rinse them thor-
oughly with clean water.
R If tyre sealant is swallowed, immediately
rinse your mouth out thoroughly and drink
plenty of water. Do not induce vomiting,
and seek medical attention immediately. Flat tyre
379Breakdown assistance
Z
Page 383 of 441
R
Immediately chang eout of clothing which
has come into contact with tyre sealant.
R If an allergic reaction occurs, seek medical
attention immediately.
! Do not operate the tyre inflation com-
pressor for longe rthan eight minutes at a
tim ew ithou tabreak. It may othe rwise
overheat.
The tyre inflation compressor can be oper-
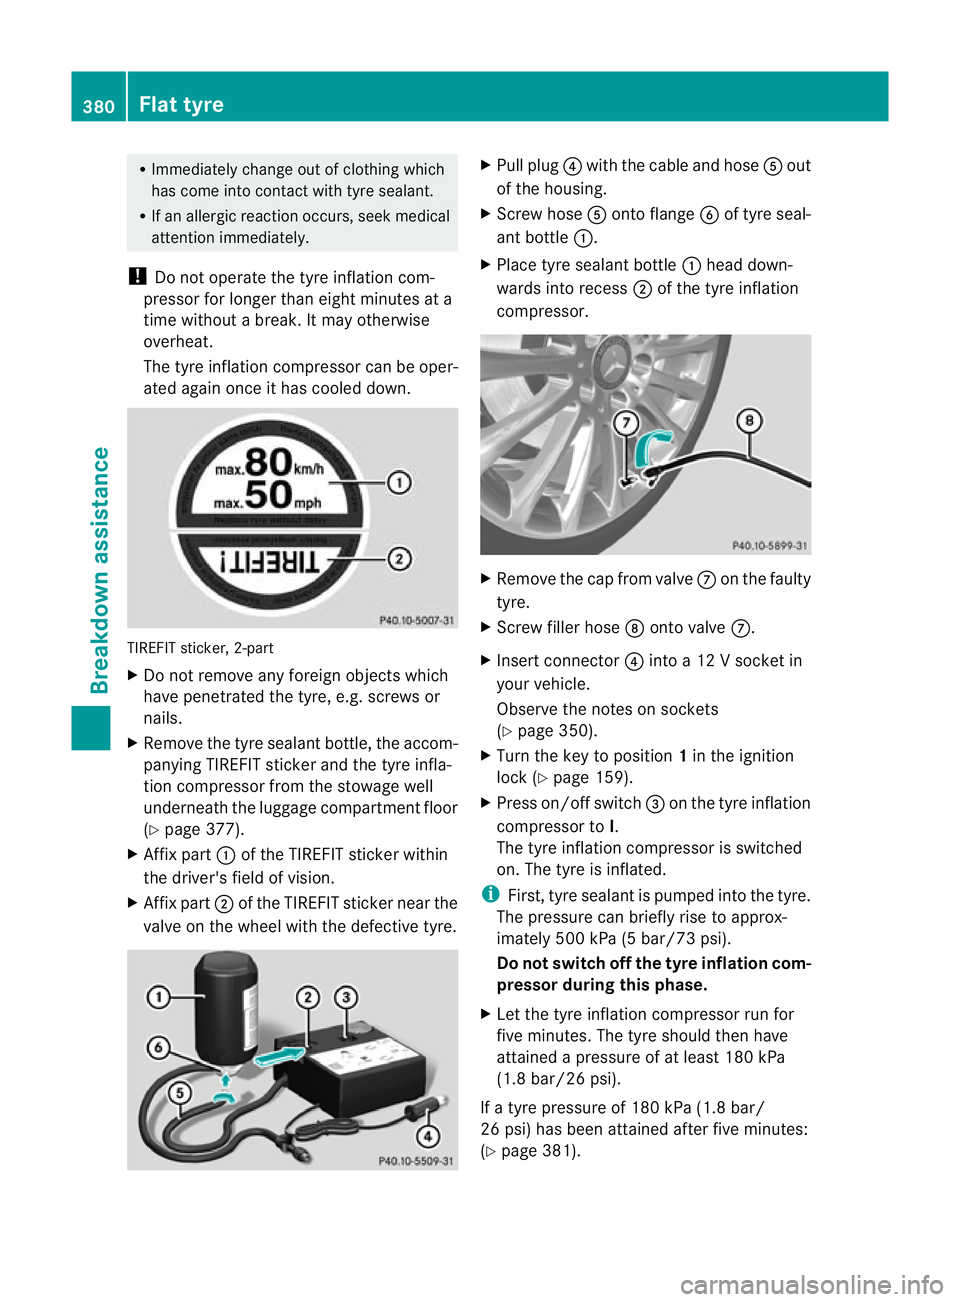
ated again onc eithas cooled down. TIREFIT sticker, 2-part
X
Do not remov eany foreig nobjects which
have penetrated the tyre, e.g. screws or
nails.
X Remov ethe tyr esealan tbottle, the accom-
panying TIREFIT sticker and the tyr einfla-
tion compressor from the stowage well
underneath the luggage compartment floor
(Y pag e377).
X Affix part :of the TIRE FITsticker within
the driver 'sfield of vision.
X Affix part ;of th eTIREFIT sticker near the
valve on th ewheel with the defective tyre. X
Pull plug ?with the cable and hose Aout
of the housing.
X Screw hose Aontoflange Bof tyre seal-
ant bottle :.
X Place tyre sealant bottle :head down-
wards int orecess ;of the tyr einflation
compressor. X
Remove the cap from valve Con the faulty
tyre.
X Screw filler hose Donto valve C.
X Insert connector ?into a12Vs ocket in
your vehicle.
Observ ethe notes on sockets
(Y page 35 0).
X Tur nthe key to position 1in the igni tion
lock (Y page 15 9).
X Press on/off switch =on the tyr einflation
compressor to I.
The tyre inflation compressor is switched
on. The tyre is inflated.
i First, tyre sealant is pumpe dintot he tyre.
The pressur ecan briefly rise to approx-
imately 500 kPa (5 bar/73 psi).
Do not switch off the tyr einfla tion com-
pressor during this phase.
X Let the tyre inflation compresso rrun for
five minutes. The tyre should then have
attained apressure of at leas t180 kPa
(1.8 bar/26 psi).
If at yre pressure of 180 kPa (1.8 bar/
26 psi) has been attained after five minutes:
(Y page 381). 380
Flat tyreBreakdown assistance
Page 384 of 441
If
at yre press ureof1 80 kPa (1.8 bar/
26 psi) ha snot been attaine dafter five
minutes :(Ypage 381).
i If the tyr esealant leaks out, allow it to dry.
It can then be removed like alayer of film.
If you get tyre sealant on you rclothing,
have it cleaned as soon as possible with
perchloroethylene.
Tyre pressur enot reached If
ap ressure of 180 kPa (1.8 ba r/26 ps i)has
not been achieved after five minutes:
X Switc hoff th etyre inflation compressor.
X Unscrew the filler hos efrom the valve of
the faulty tyre.
X Very slowly drive forwards or reverse
approximatel y10m.
X Pum pupt he tyreagain.
Af teram aximum of five minutes the tyre
pressure must be at least 180 kPa (1.8 bar/
26 psi). G
WARNING
If the required tyre pressure is not reached
after the specified time, the tyre is too badly
damaged. The tyre sealant cannot repair the
tyre in this instance. Damaged tyres and atyre
pressure that is too low can significantly
impair the vehicle's braking and driving char-
acteristics. There is arisk of accident.
Do not continue driving. Contact aqualified
specialist workshop.
Tyr epressure reached G
WARNING
At yre temporarily sealed with tyr esealant
impairs th edrivin gcharacteristic sand is not
suitable for higher speeds. There is arisk of
accident.
You should therefor eadapt your driving style
accordingly and driv ecarefully. Do not exceed
the specified maximum spee dwithatyre that
has been repaired using tyre sealant. !
After use, excess tyre seal antm ay run out
of the filler hose. This could cause stains.
Therefore, place the filler hos einthe plastic
bag whic hcontaine dthe TIREFIT kit. H
Environmenta
lnote
Have the used tyre sealant bottle disposed of
professionally, e.g. at aqualified specialist
workshop.
If at yrep ressure of 18 0kPa (1. 8bar/2 6psi)
has been attained after five minutes:
X Switc hoff th etyre inflation compressor.
X Unscrew the filler hos efrom th evalve of
the faulty tyre.
X Stow the tyre sealant bottle, the tyre infla-
tion compressor and the warning triangle.
X Pull away immediately.
The maximum spee dfor atyre sealed with
tyre sealant is 80 km/h. The upper part of
the TIREFI Tsticker must be affixed to the
instrument cluster in the driver's field of
vision.
X Stop after driving for approximately ten
minutes and check the tyre pressure with
the tyre inflation compressor.
The tyre pressure must now be at least
130 kPa (1.3 bar/19 psi). G
WARNING
If the required tyre pressure is not reached
after driving for ashort period, the tyr eistoo
badly damaged. The tyr esealant can not
re pair the tyr einthis instance. Damaged tyres
and atyre pressure that is too low can signif-
icantly impair the vehicle's braking and driv-
ing characteristics. There is arisk of accident.
Do not continue driving. Contact aqualified
specialist workshop.
X Correct the tyre pressure if it is still at least
130 kPa (1.3 bar/19 psi) (see the fuel filler
flap for values).
X To increase the tyre pressure: switch on
the tyre inflation compressor. Flat tyre
381Breakdown assistance Z
Page 385 of 441
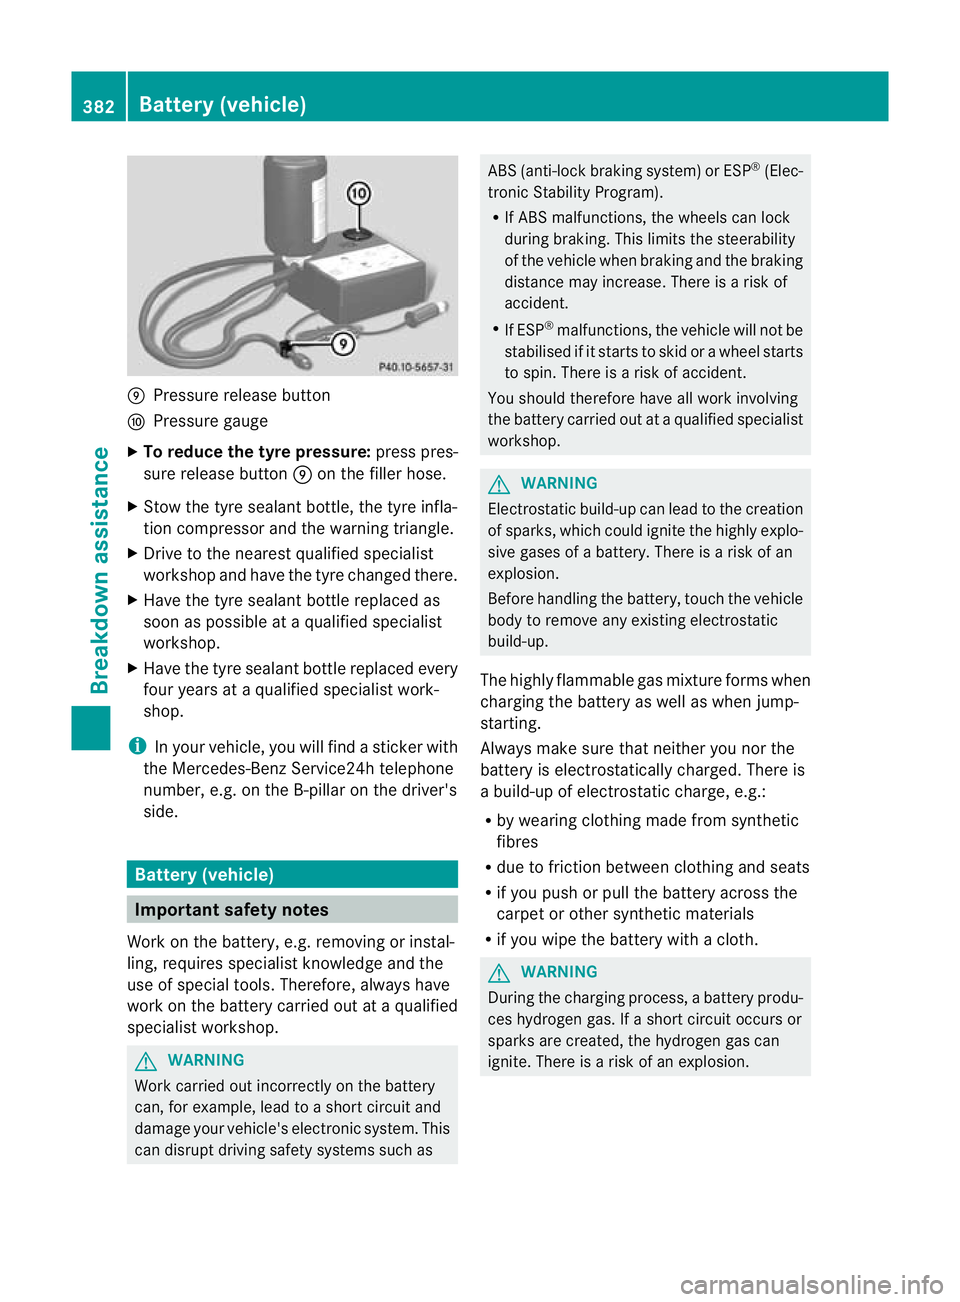
E
Pressur erelease button
F Pressur egauge
X To reduce the tyr epressure: press pres-
sure releas ebutton Eon the filler hose.
X Stow the tyre sealant bottle, the tyre infla-
tion compressor and the warning triangle.
X Drive to the nearest qualified specialist
worksho pand have the tyre changed there.
X Have the tyre sealant bottle replace das
soon as possible at aqualified specialist
workshop.
X Have the tyre sealant bottle replaced every
four years at aqualified specialist work-
shop.
i In your vehicle, you will find asticker with
the Mercedes-Benz Service24h telephone
number, e.g. on the B-pillar on the driver's
side. Battery (vehicle)
Important safety notes
Work on the battery, e.g. removin gorinstal-
ling ,requires specialist knowledge and the
use of special tools. Therefore, always have
work on the batter ycarried out at aqualified
specialist workshop. G
WARNING
Work carried out incorrectly on the battery
can, for example, lead to ashort circui tand
damage your vehicle's electronic system. This
can disrupt driving safety systems such as ABS (anti-lock braking system) or ESP
®
(Elec-
tronic Stability Program).
R If ABS malfunctions ,the wheels can lock
during braking. This limits the steerability
of the vehicle when brakin gand the braking
distance may increase. There is arisk of
accident.
R If ESP ®
malfunctions, the vehicle will not be
stabilised if it start stoskid or awheel star ts
to spin. There is arisk of accident.
You should therefore have all work involving
the batter ycarried out at aqualified specialist
workshop. G
WARNING
Electrostatic build-up can lead to the creation
of sparks, which could ignite the highly explo-
sive gases of abattery. There is arisk of an
explosion.
Befor ehandling the battery, touch the vehicle
body to remove any existing electrostatic
build-up.
The highly flammable gas mixture forms when
charging the battery as well as when jump-
starting.
Always make sure that neither you nor the
batter yiselectrostatically charged. There is
ab uild-up of electrostatic charge, e.g.:
R by wearing clothing made from synthetic
fibres
R due to friction betwee nclothin gand seats
R if you pus horpull the batter yacross the
carpe torother synthe ticm aterials
R if you wipe the batter ywithacloth. G
WARNING
Durin gthe charging process, abatter yprodu-
ces hydroge ngas. If ashort circui toccurs or
sparks are created, the hydroge ngas can
ignite. There is arisk of an explosion. 382
Battery (vehicl
e)Breakdown assistance
Page 386 of 441
R
Make sur ethat the positive terminal of a
con nected battery doe snot com einto con-
tact with vehicl eparts.
R Never place metal objects or tools on abat-
tery.
R It is important that you observe the descri-
bed order of the battery terminals when
connectin gand disconnectin gabattery.
R When jump-starting, make sure that the
battery poles with identical polarity are
connected.
R It is particularly important to observe the
described order when connectin gand dis-
connectin gthe jum pleads.
R Never connect or disconnect the battery
terminals while the engine is running. G
WARNING
Bat tery acid is caustic. There is arisk of injury.
Avoid contact with the skin, eyes or clothing.
Do not inhale any battery gases. Do not lean
over the battery. Keep children away from
batteries. Wash battery acid immediately with
water and seek medical attention. H
Environmental note Batteries contain pollutants.
It is illegal to dispose of them
with the household rubbish.
They must be collected sep-
arately and dispose
dofinan
environmen tally responsible
recycling system. Dispose of batteries in an
environmentally responsible
manner
.Take discharged
batteries to aqualified spe-
cialist workshop or to acol-
lection point for used batter-
ies.
! Hav ethe battery chec kedr egularly at a
qualified specialist workshop.
Observ ethe service intervals in the Service
Booklet or con tact aq ualified specialist
worksho pfor mor einformation. !
You should have all work involving the
battery carried out at aqualified specialist
workshop. In the exceptional case that it is
necessar yfor you to disconnect th ebattery
yourself, mak esure that:
R you switc hoff the engine and remove the
key. On vehicles with KEYLESS-GO,
ensure that the ig nition is switched off.
Chec kthat all the indicator lamps in the
instrumen tcluster are off. Otherwise,
electronic components, such as the
alternator, may be damaged.
R you first remov ethe negativ eterminal
clam pand then the positive terminal
clamp. Never swap the terminal clamps.
Otherwise, the vehicle's electronic sys-
tem may be damaged.
R the transmissio nislocke dinp osition P
after disconnectin gthe battery .The vehi-
cle is secured against rolling away. You
can then no longer mov ethe vehicle.
The battery and the cover of the positive
termi nalclamp must be fitted securely dur-
ing operation.
Comply with safety precautions and take pro-
tective measures when handling batteries. WARNING
Fire, naked flames and smoking
are prohibited when handling the
battery
.Avoi dc reating sparks. Battery aci
discaustic. Avoid con-
tact with the skin, eyes or clothing.
Wear suitable protective clothing,
in particular gloves, an apron and
af ace mask.
Immediately rinse acid splashes
off with clean water. Consult adoc-
tor if necessary. Wear eye protection. Ba
ttery (vehicle)
383Breakdown assistance Z
Page 387 of 441
Kee
pchildr en away. Obse
rve this Owner' sManual.
For safet yreasons ,Mercedes-Ben zrecom-
mends that you only use batteries which have
been tested and approved for your vehicle by
Mercedes-Benz. These batteries provide
inc reased impact protection to preven tvehi-
cle occupant sfrom suffering aci dburns
should the batter ybedamaged in the event
of an accident.
In order for the batter ytoachieve the maxi-
mum possibl eservic elife, it must always be
sufficiently charged.
The vehicle battery, like other batteries, can
discharge over time if you do not use the
vehicle. In such cases, have the batter ydis-
connected at aqualified specialist workshop.
You can also charge the batter ywith a
charger recommended by Mercedes-Benz.
For more information ,please contact aquali-
fied specialist workshop.
Have the batter ycharge checked mor efre-
quently if yo uuse the vehicle mainl yfor short
trips or if you leav eitstanding idle for a
lengthy period .Consult aqualified specialist
workshop if you wish to leave your vehicle
parked up for along period of time.
i When you par kthe vehicle, remove the
key if you do not requir eany electrical con-
sumers .The vehicle will then use ver ylittle
energy, thus conservin gbatter ypower.
i If the power supply has been interrupted,
e.g. if the batter ywas discharged ,you will
have to:
R set the cloc k.Informatio nonsetting the
cloc kcan be found in the separate oper-
ating instructions. On vehicles with COMAND Online and a
navigation system, the clock is set auto-
matically.
R reset the function for folding the exterior
mirror sin/out automati cally, by folding
the mirror sout onc e(Ypage 11 3). Charging the battery
G
WARNING
Durin gchargin gand jump-starting, explosive
gases can escap efrom th ebattery. There is a
risk of an explosion.
Particularly avoid fire, naked flames, creating
sparks and smoking. Ensure there is sufficient
ventilation while chargin gand jump-starting.
Do not lean over abattery. G
WARNING
Battery acid is caustic .There is arisk of injury.
Avoid contact with the skin, eyes or clothing.
Do not inhale any battery gases. Do not lean
over the battery. Keep children away from
batteries. Wash battery acid immediately with
water and seek medical attention. G
WARNING
Ad ischarged battery can freeze at tempera-
tures below freezin gpoint .When jump-start-
ing the vehicle or charging the battery ,gases
can escape from the battery. There is arisk of
an explosion.
Allow the frozen battery to thaw out before
charging it or jump-starting.
! Only use battery chargers with amaxi-
mum charging voltage of 14.8 V.
! Only charge the battery using the jump-
start connection point.
Never charge abattery still installed in the
vehicle unless abattery charger unit
approved by Mercedes-Ben zisbeing used. A
batter ycharger uni tspecially adapted for
Mercedes-Benz vehicles and tested and
approved by Mercedes-Benz is available as an 384
Battery (vehicle)Breakdown assistance
Page 388 of 441
accessory. It permits the chargin
gofthe bat-
tery in its installed position. Contac ta
Mercedes-Ben zService Centre for informa-
tion and availability. Charge the batter yin
accordance with the separate instructions for
the battery charger.
The jump-starting connection point is in the
engine compartmen t(Ypage 386).
Read the batter ycharger' soperating instruc-
tions befor echarging the battery.
X Open the bonnet (Y page 360).
X Connect the battery charger to the positive
terminal and earth point in the sam eorder
as when connecting th edonor battery in
the jump-startin gprocedure
(Y page 386). Battery (vehi
cle)
385Breakdown assistance Z
Page 389 of 441
Jum
p-starting G
WARNING
Battery acid is caustic. There is arisk of injury.
Avoid contact with the skin, eyes or clothing. Do not inhale any battery gases. Do not lean over
the battery. Keep children away from batteries. Wash battery acid immediately with water and
seek medical attention. G
WARNING
Durin gcharging and jump-starting, explosive gases can escap efrom th ebattery. There is arisk
of an explosion.
Particularly avoid fire, naked flames, creating sparks and smoking. Ensure there is sufficient
ventilation while charging and jump-starting. Do not lean over abattery. G
WARNING
During the charging process, abattery produces hydrogen gas. If ashort circui toccurs or sparks
are created, the hydroge ngas can ignite. There is arisk of an explosion.
R Make sure that the positive terminal of aconnecte dbattery does not come into contact with
vehicle parts.
R Never place metal objects or tools on abattery.
R It is important that you observe the described order of the battery terminals when connecting
and disconnecting abattery.
R When jump-starting, make sure that the battery poles with identical polarity are connected.
R It is particularly important to observe the described order when connecting and disconnecting
the jump leads.
R Never connect or disconnect the battery terminals while the engine is running. G
WARNING
Ad ischarged battery can freeze at temperatures below freezin gpoint .When jump-startin gthe
vehicle or charging the battery ,gases can escape from the battery. There is arisk of an explosion.
Allow the frozen battery to thaw out before charging it or jump-starting. G
WARNING
Non-combusted fuel can collect in the exhaust system and ignite. There is arisk of fire. Avoid
repeated and lengthy startin gattempts.
! Vehicles with apetrol engine: avoid repeated and lengthy starting attempts. Otherwise,
the non-combusted fuel may damage the catalytic converter. 386
Jump-sta
rtingBreak down assistance
Page 390 of 441
Do not us
earapid charging device to start the vehicle. If your vehicle' sbattery is discharg ed,
the engine can be jump-starte dfroma nothe rvehicle or fr omasecon dbattery using jump
leads. Observe the following points:
R the battery is not acce ssiblein allvehicles .Ifthe other vehicle' sbattery is not accessible,
jump-start the vehicle using asecond batter yorajump-star ting device.
R vehicles with apetrol engine: only jump-star tthe vehicle when the engin eand exhaust
system are cold.
R do not start the engine if the battery is frozen. Let the battery thaw first.
R jump-starting may only be performed from batteries with anominal voltage of 12 V.
R only use jum pleads that have asufficient cross-section and insulated terminal clamps.
R if the battery is fully discharged, leave the battery that is being used to jump-start connected
for afew minutes befor eattempting to start. Thi scharges the empty battery alittle.
R make sure that the two vehicles do not touch.
Make sure that:
R the jump leads are not damaged.
R non-insulated parts of the terminal clamps do not come into contact with other metal parts
while the jump leads are connected to the battery.
R the jump leads cannot come into contact with parts such as the V-belt pulle yorthe fan.
These parts mov ewhen the engin eisstarted and whil eitisr unning.
X Secure the vehicle by applying the electric parking brake.
X Shift the transmission to position P.
X Turn the key to position 0in the ignition lock and remove it (Y page 159). On vehicles with
KEYLESS-GO, make sure the ignition is switched off (Y page 159). All indicator lamps in the
instrumen tcluster must be off.
X Switch off all electrical consumer s(e.g. radio, blower, etc.).
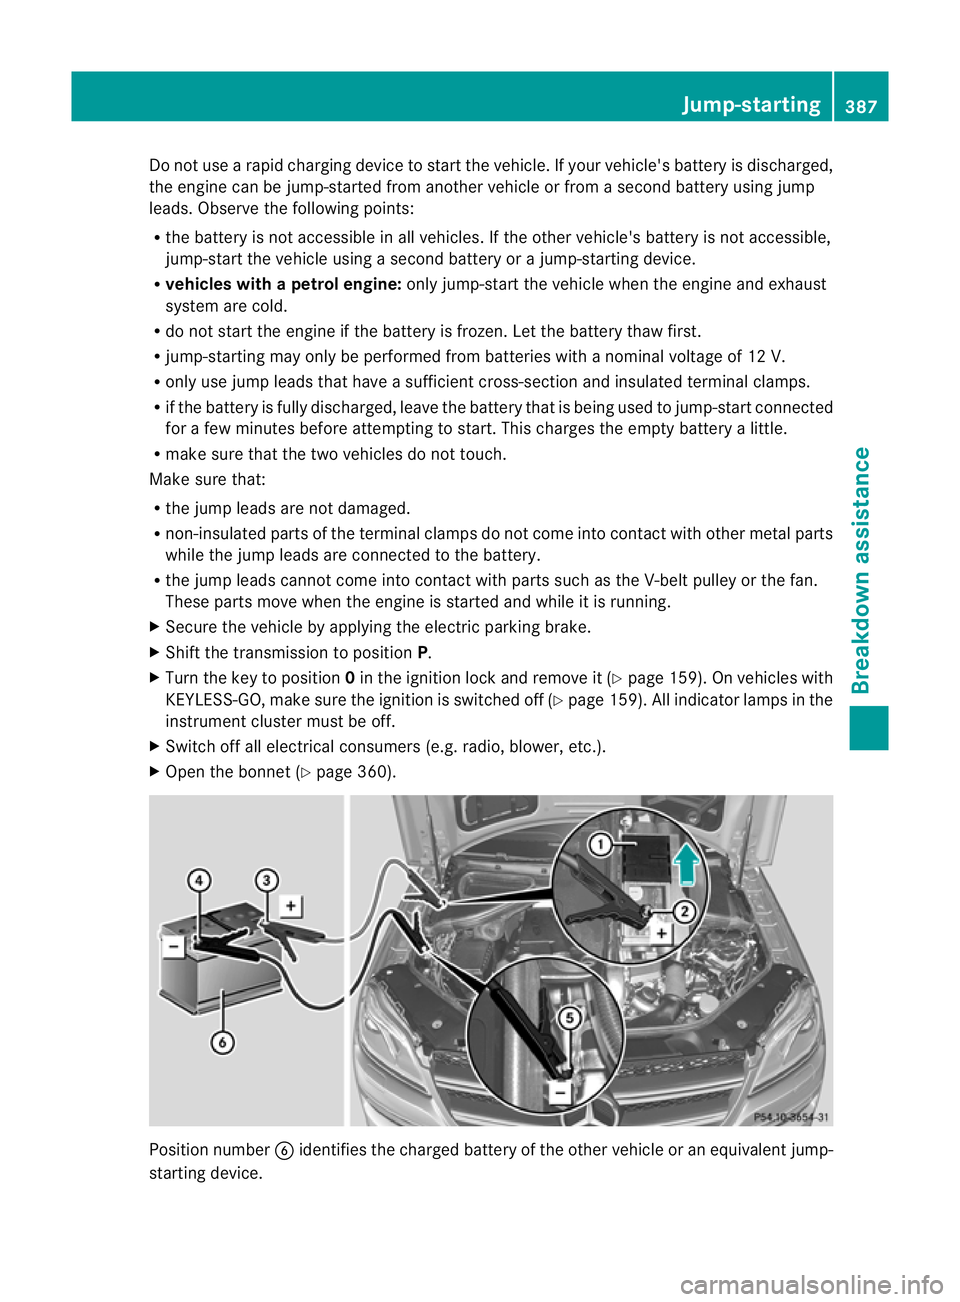
X Open the bonnet (Y page 360).Position number
Bidentifies the charged batter yofthe other vehicle or an equivalent jump-
startin gdevice. Jump-starting
387Breakdown assistance Z